light SKODA OCTAVIA 2013 3.G / (5E) Columbus Navigation System Manual
[x] Cancel search | Manufacturer: SKODA, Model Year: 2013, Model line: OCTAVIA, Model: SKODA OCTAVIA 2013 3.G / (5E)Pages: 90, PDF Size: 5.21 MB
Page 8 of 90
Touch screenFirst read and observe the introductory information given on page 5.
The unit is equipped with a so-called touch screen
11
» Fig. 1 on page 5which can
only be operated by the touch of a finger.
CAUTION
■ The screen can be operated by a slight touch of a finger. Do not apply pressure
to the screen - risk of damage!■
Do not use any objects to operate the screen - risk of damage!
■
Do not use solvents such as benzene or turpentine for cleaning, since they may
damage the screen surface.
Note
■ Use a soft cloth and, if necessary, methylated spirits, to remove fingerprints
from the screen. When doing so, ensure that you do not cause damage to other parts of the interior.■
It is not possible to operate the screen with your fingernails or while wearing
gloves.
■
Do not affix anything to the area of the unit below the screen. This could affect
the functioning of the sensors for the zoom effect.
■
To protect the screen, you can use a suitable screen protector for touchpads
that does not affect its functionality.
■
The brightness of the screen is adjusted automatically depending on the bright-
ness of the interior lighting. The automatic setting can be adjusted manual-
ly » page 20 .
Switching the unit on/off
First read and observe the introductory information given on page 5.
›
Press the knob to switch the device on or off.
When the device is switched on, the audio source and operating mode that were active before switching off the device will be restored.
If telephone mode was active before you switched off the unit and the ignition
and Bluetooth ®
function is not switched on, the screen displays the mes-
sage » page 42 . Switch on the ignition or the Bluetooth ®
function » page 22 .
If the vehicle key is pulled out of the ignition lock while the unit is switched on, the unit will switch off automatically. After switching on the ignition, the unit isturned on automatically.
If the device was switched off using the
knob, then the device will not switch
on automatically after switching on the ignition.
The unit will switch off automatically after the engine is switched off and the
door is opened if your vehicle is fitted with the KESSY system. If you open the
driver's door before switching off the engine, the device will also switch off.
When the ignition is switched off, the device switches off automatically after ap-
prox. half an hour (discharge protection of the vehicle battery).
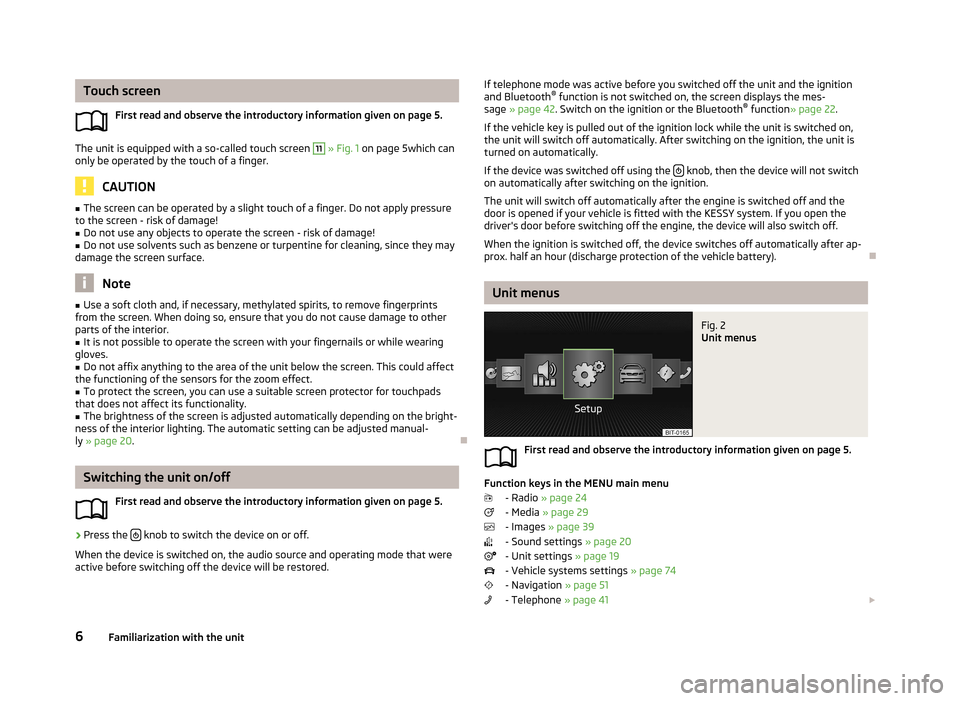
Unit menus
Fig. 2
Unit menus
First read and observe the introductory information given on page 5.
Function keys in the MENU main menu
- Radio » page 24
- Media » page 29
- Images » page 39
- Sound settings » page 20
- Unit settings » page 19
- Vehicle systems settings » page 74
- Navigation » page 51
- Telephone » page 41
6Familiarization with the unit
Page 10 of 90
Unit operation
Concerning the device screen operation
Introduction
This chapter contains information on the following subjects: Operation
8
Input screen with keyboard for searching
9
Input screen with keyboard for storing information
9
Input screen with numeric keypad
10
First and foremost, pay attention to the safety instructions » page 4 , Important
notes .
This chapter covers the instrument operation and the work with the touch screen and with various types of input keyboards.
Operation
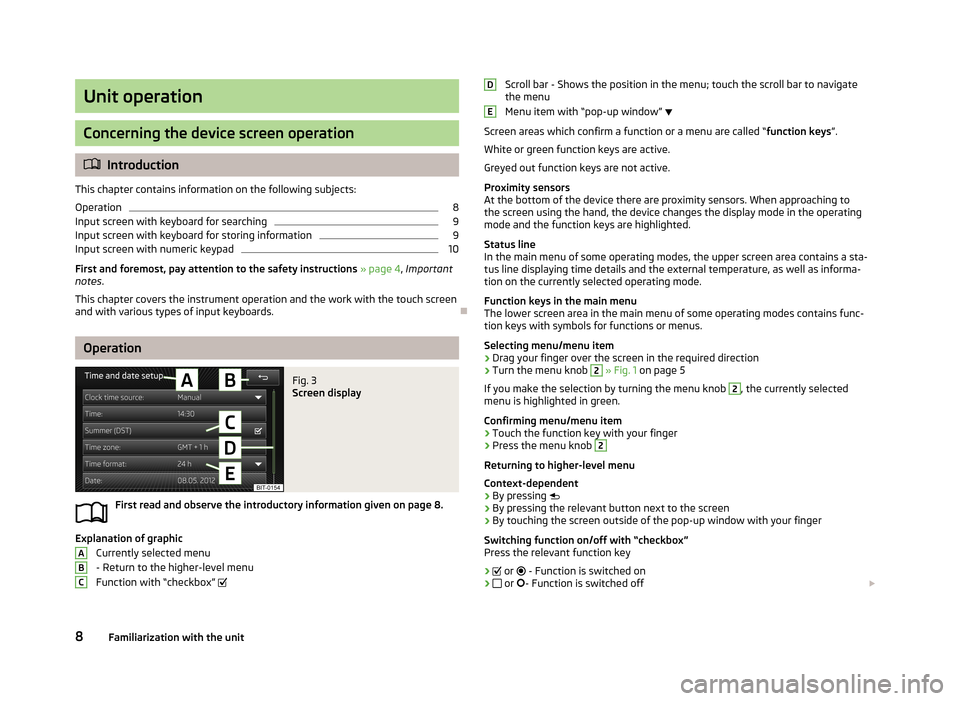
Fig. 3
Screen display
First read and observe the introductory information given on page 8.
Explanation of graphic
Currently selected menu
- Return to the higher-level menu
Function with “checkbox”
ABCScroll bar - Shows the position in the menu; touch the scroll bar to navigate
the menu
Menu item with “pop-up window”
Screen areas which confirm a function or a menu are called “ function keys”.
White or green function keys are active.
Greyed out function keys are not active.
Proximity sensors
At the bottom of the device there are proximity sensors. When approaching to
the screen using the hand, the device changes the display mode in the operating
mode and the function keys are highlighted.
Status line
In the main menu of some operating modes, the upper screen area contains a sta-
tus line displaying time details and the external temperature, as well as informa- tion on the currently selected operating mode.
Function keys in the main menu
The lower screen area in the main menu of some operating modes contains func-
tion keys with symbols for functions or menus.
Selecting menu/menu item
› Drag your finger over the screen in the required direction
› Turn the menu knob 2
» Fig. 1 on page 5
If you make the selection by turning the menu knob
2
, the currently selected
menu is highlighted in green.
Confirming menu/menu item
› Touch the function key with your finger
› Press the menu knob
2
Returning to higher-level menu
Context-dependent
› By pressing
› By pressing the relevant button next to the screen
› By touching the screen outside of the pop-up window with your finger
Switching function on/off with “checkbox” Press the relevant function key
›
or
- Function is switched on
›
or
- Function is switched off
DE8Familiarization with the unit
Page 14 of 90
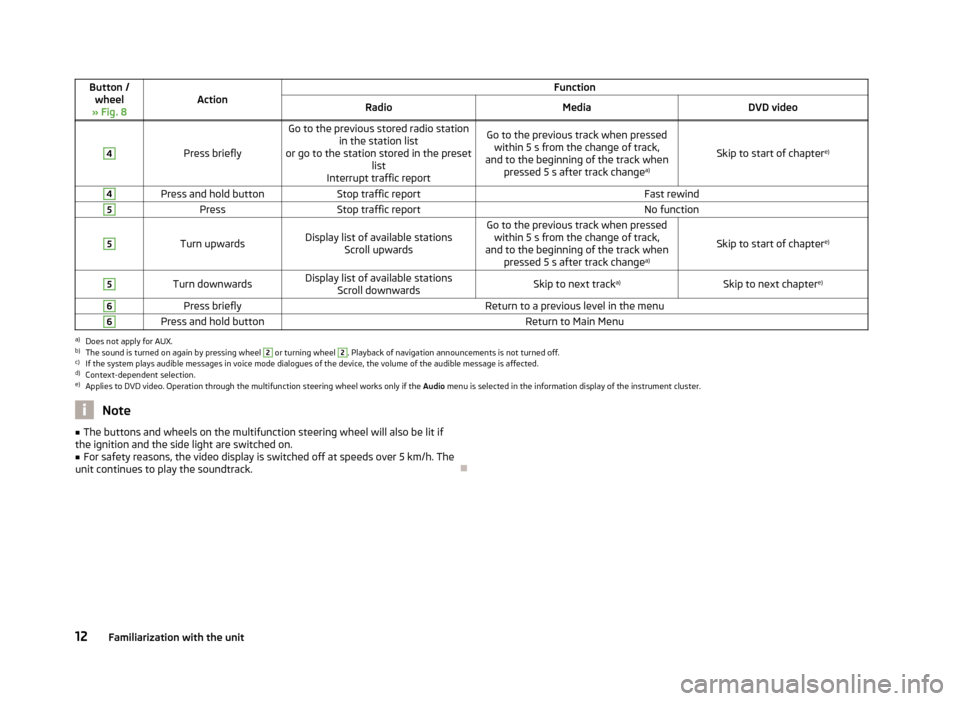
Button /wheel
» Fig. 8ActionFunctionRadioMediaDVD video4
Press briefly
Go to the previous stored radio station in the station list
or go to the station stored in the preset list
Interrupt traffic reportGo to the previous track when pressed within 5 s from the change of track,
and to the beginning of the track when pressed 5 s after track change a)
Skip to start of chaptere)
4Press and hold buttonStop traffic reportFast rewind5PressStop traffic reportNo function5
Turn upwardsDisplay list of available stations
Scroll upwardsGo to the previous track when pressedwithin 5 s from the change of track,
and to the beginning of the track when pressed 5 s after track change a)
Skip to start of chaptere)
5Turn downwardsDisplay list of available stations
Scroll downwardsSkip to next track a)Skip to next chapter e)6Press brieflyReturn to a previous level in the menu6Press and hold buttonReturn to Main Menua)
Does not apply for AUX.
b)
The sound is turned on again by pressing wheel
2
or turning wheel
2
. Playback of navigation announcements is not turned off.
c)
If the system plays audible messages in voice mode dialogues of the device, the volume of the audible message is affected.
d)
Context-dependent selection.
e)
Applies to DVD video. Operation through the multifunction steering wheel works only if the
Audio menu is selected in the information display of the instrument cluster.
Note■
The buttons and wheels on the multifunction steering wheel will also be lit if
the ignition and the side light are switched on.■
For safety reasons, the video display is switched off at speeds over 5 km/h. The
unit continues to play the soundtrack.
12Familiarization with the unit
Page 16 of 90
SymbolMeaningA phone is connected to the unitMissed calls (if there are several missed calls, the number ofcalls is shown next to the symbol)a)
This function is only supported by some telephones.
Call list
Only the call list can be displayed and used in the instrument cluster display.
The following message appears in the instrument cluster display if there are no
entries in the call list: No entries available.
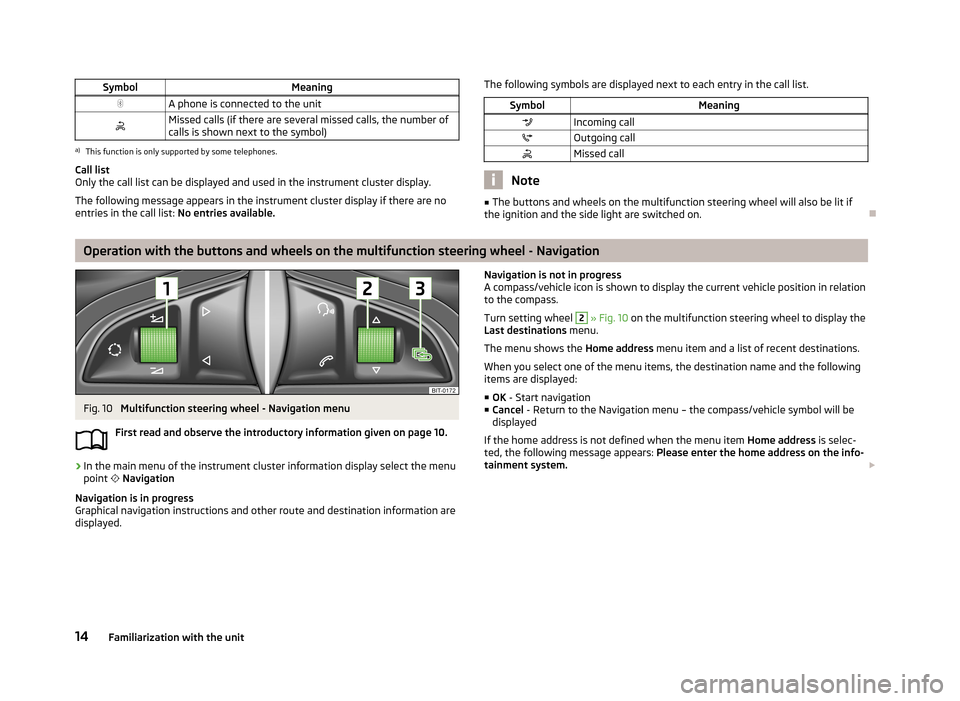
The following symbols are displayed next to each entry in the call list.SymbolMeaningIncoming callOutgoing callMissed call
Note
■
The buttons and wheels on the multifunction steering wheel will also be lit if
the ignition and the side light are switched on.
Operation with the buttons and wheels on the multifunction steering wheel - Navigation
Fig. 10
Multifunction steering wheel - Navigation menu
First read and observe the introductory information given on page 10.
›
In the main menu of the instrument cluster information display select the menu
point
Navigation
Navigation is in progress
Graphical navigation instructions and other route and destination information are
displayed.
Navigation is not in progress
A compass/vehicle icon is shown to display the current vehicle position in relation to the compass.
Turn setting wheel 2
» Fig. 10 on the multifunction steering wheel to display the
Last destinations menu.
The menu shows the Home address menu item and a list of recent destinations.
When you select one of the menu items, the destination name and the following
items are displayed:
■ OK - Start navigation
■ Cancel - Return to the Navigation menu – the compass/vehicle symbol will be
displayed
If the home address is not defined when the menu item Home address is selec-
ted, the following message appears: Please enter the home address on the info-
tainment system.
14Familiarization with the unit
Page 17 of 90
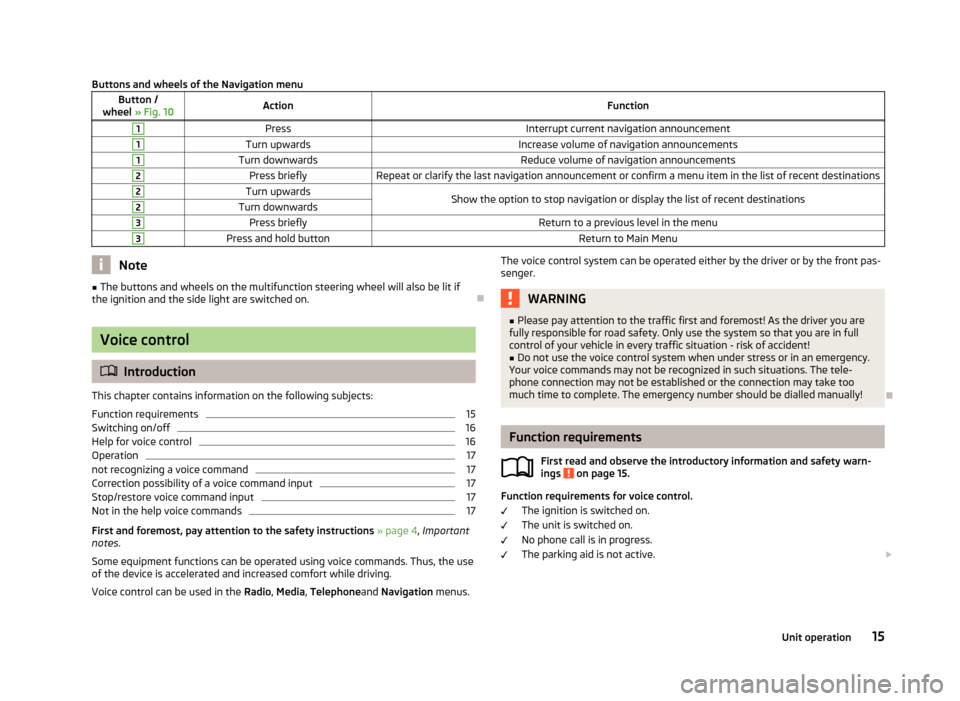
Buttons and wheels of the Navigation menuButton /
wheel » Fig. 10ActionFunction1PressInterrupt current navigation announcement1Turn upwardsIncrease volume of navigation announcements1Turn downwardsReduce volume of navigation announcements2Press brieflyRepeat or clarify the last navigation announcement or confirm a menu item in the list of recent destinations2Turn upwardsShow the option to stop navigation or display the list of recent destinations2Turn downwards3Press brieflyReturn to a previous level in the menu3Press and hold buttonReturn to Main MenuNote■
The buttons and wheels on the multifunction steering wheel will also be lit if
the ignition and the side light are switched on.
Voice control
Introduction
This chapter contains information on the following subjects:
Function requirements
15
Switching on/off
16
Help for voice control
16
Operation
17
not recognizing a voice command
17
Correction possibility of a voice command input
17
Stop/restore voice command input
17
Not in the help voice commands
17
First and foremost, pay attention to the safety instructions » page 4 , Important
notes .
Some equipment functions can be operated using voice commands. Thus, the use
of the device is accelerated and increased comfort while driving.
Voice control can be used in the Radio, Media , Telephone and Navigation menus.
The voice control system can be operated either by the driver or by the front pas-
senger.WARNING■ Please pay attention to the traffic first and foremost! As the driver you are
fully responsible for road safety. Only use the system so that you are in full
control of your vehicle in every traffic situation - risk of accident!■
Do not use the voice control system when under stress or in an emergency.
Your voice commands may not be recognized in such situations. The tele-
phone connection may not be established or the connection may take too
much time to complete. The emergency number should be dialled manually!
Function requirements
First read and observe the introductory information and safety warn-ings
on page 15.
Function requirements for voice control.
The ignition is switched on.
The unit is switched on.
No phone call is in progress.
The parking aid is not active.
15Unit operation
Page 19 of 90
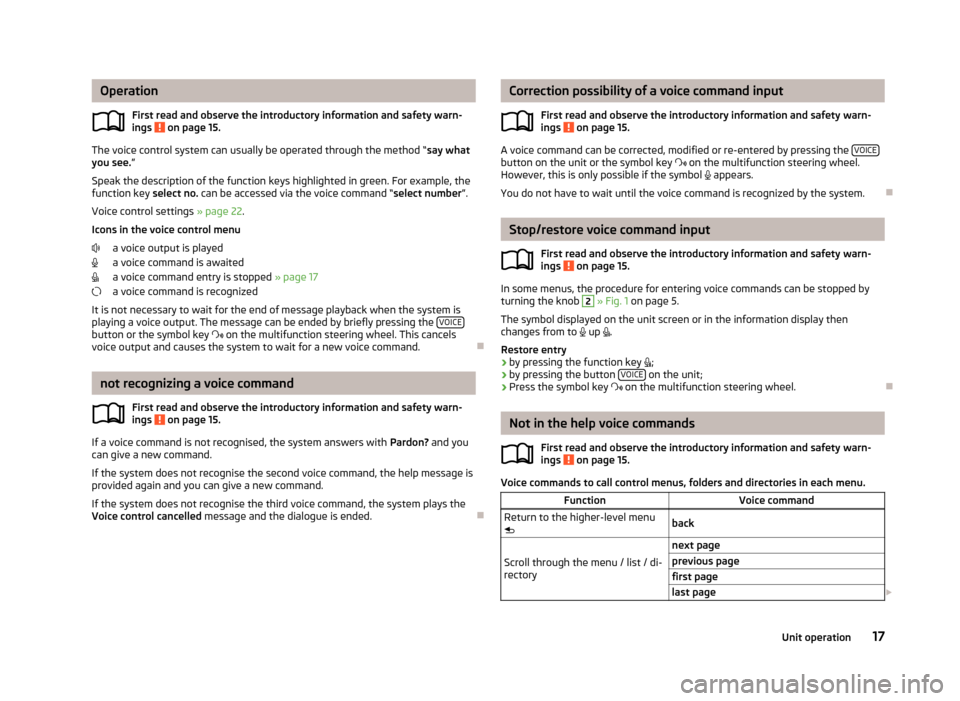
OperationFirst read and observe the introductory information and safety warn-
ings
on page 15.
The voice control system can usually be operated through the method “ say what
you see. ”
Speak the description of the function keys highlighted in green. For example, the function key select no. can be accessed via the voice command “ select number”.
Voice control settings » page 22.
Icons in the voice control menu
a voice output is played
a voice command is awaited
a voice command entry is stopped » page 17
a voice command is recognized
It is not necessary to wait for the end of message playback when the system is
playing a voice output. The message can be ended by briefly pressing the VOICE
button or the symbol key
on the multifunction steering wheel. This cancels
voice output and causes the system to wait for a new voice command.
not recognizing a voice command
First read and observe the introductory information and safety warn-
ings
on page 15.
If a voice command is not recognised, the system answers with Pardon? and you
can give a new command.
If the system does not recognise the second voice command, the help message is provided again and you can give a new command.
If the system does not recognise the third voice command, the system plays theVoice control cancelled message and the dialogue is ended.
Correction possibility of a voice command input
First read and observe the introductory information and safety warn-ings
on page 15.
A voice command can be corrected, modified or re-entered by pressing the VOICEbutton on the unit or the symbol key
on the multifunction steering wheel.
However, this is only possible if the symbol appears.
You do not have to wait until the voice command is recognized by the system.
Stop/restore voice command input
First read and observe the introductory information and safety warn-ings
on page 15.
In some menus, the procedure for entering voice commands can be stopped by
turning the knob
2
» Fig. 1 on page 5.
The symbol displayed on the unit screen or in the information display then
changes from to
up
.
Restore entry
› by pressing the function key
;
› by pressing the button
VOICE
on the unit;
› Press the symbol key
on the multifunction steering wheel.
Not in the help voice commands
First read and observe the introductory information and safety warn-
ings
on page 15.
Voice commands to call control menus, folders and directories in each menu.
FunctionVoice commandReturn to the higher-level menu
backScroll through the menu / list / di-
rectory
next pageprevious pagefirst pagelast page 17Unit operation
Page 22 of 90
■Gracenote database: ... - Multimedia database version
■ Media codec: ... - Media codec version
■ Update software - manual software upgrade
■ Copyright - Information on licences and copyrights are only available in English
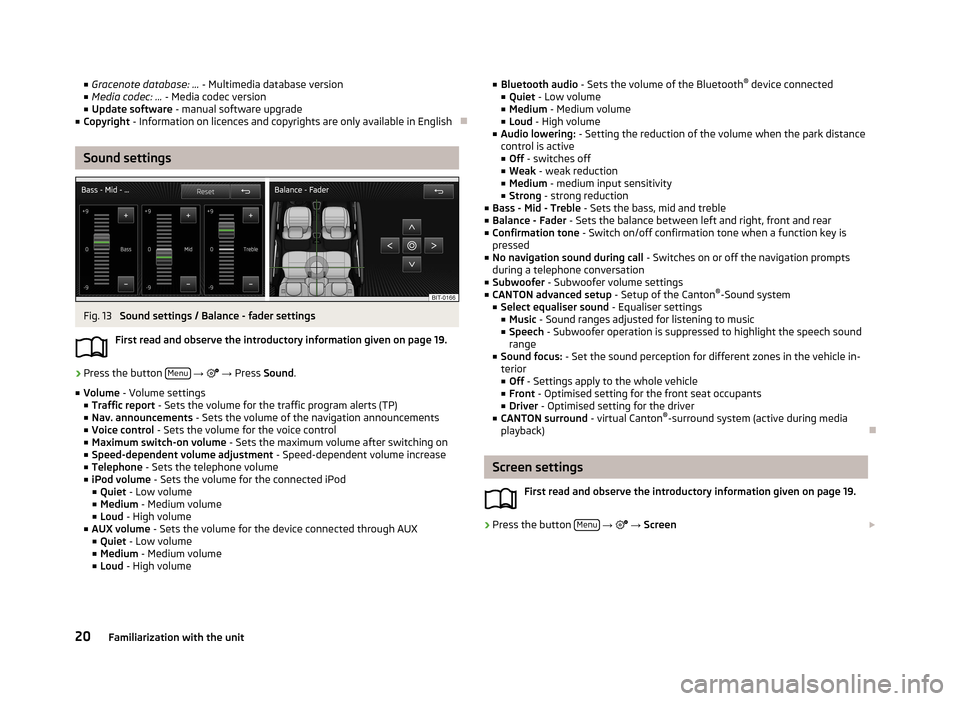
Sound settings
Fig. 13
Sound settings / Balance - fader settings
First read and observe the introductory information given on page 19.
›
Press the button Menu
→
→ Press Sound .
■ Volume - Volume settings
■ Traffic report - Sets the volume for the traffic program alerts (TP)
■ Nav. announcements - Sets the volume of the navigation announcements
■ Voice control - Sets the volume for the voice control
■ Maximum switch-on volume - Sets the maximum volume after switching on
■ Speed-dependent volume adjustment - Speed-dependent volume increase
■ Telephone - Sets the telephone volume
■ iPod volume - Sets the volume for the connected iPod
■ Quiet - Low volume
■ Medium - Medium volume
■ Loud - High volume
■ AUX volume - Sets the volume for the device connected through AUX
■ Quiet - Low volume
■ Medium - Medium volume
■ Loud - High volume
■
Bluetooth audio - Sets the volume of the Bluetooth ®
device connected
■ Quiet - Low volume
■ Medium - Medium volume
■ Loud - High volume
■ Audio lowering: - Setting the reduction of the volume when the park distance
control is active ■ Off - switches off
■ Weak - weak reduction
■ Medium - medium input sensitivity
■ Strong - strong reduction
■ Bass - Mid - Treble - Sets the bass, mid and treble
■ Balance - Fader - Sets the balance between left and right, front and rear
■ Confirmation tone - Switch on/off confirmation tone when a function key is
pressed
■ No navigation sound during call - Switches on or off the navigation prompts
during a telephone conversation
■ Subwoofer - Subwoofer volume settings
■ CANTON advanced setup - Setup of the Canton®
-Sound system
■ Select equaliser sound - Equaliser settings
■ Music - Sound ranges adjusted for listening to music
■ Speech - Subwoofer operation is suppressed to highlight the speech sound
range
■ Sound focus: - Set the sound perception for different zones in the vehicle in-
terior
■ Off - Settings apply to the whole vehicle
■ Front - Optimised setting for the front seat occupants
■ Driver - Optimised setting for the driver
■ CANTON surround - virtual Canton®
-surround system (active during media
playback)
Screen settings
First read and observe the introductory information given on page 19.
›
Press the button Menu
→
→ Screen
20Familiarization with the unit
Page 53 of 90
Navigation
Description of the navigation system
Preface to navigation
Introduction
This chapter contains information on the following subjects:
Main menu
51
Navigation data
52
First and foremost, pay attention to the safety instructions » page 4 , Important
notes .
The unit uses the GPS (Global Positioning System) satellite system for navigation.
The satellite signal allows you to determine your current vehicle position.
If the unit is outside the range of the GPS satellite signal (e.g. in dense vegeta-
tion, in tunnels, parking garages, etc.), the unit navigates only with restrictions
using on-vehicle sensors.
Navigation is done: › by graphical instructions in device display screen and in the display of the in-
strument cluster;
› by announcements.
The navigation unit can be operated: › using the buttons on the unit
» page 51;
› using the function keys in the unit screen
» page 51;
› using voice control
» page 17.
› via the display of the instrument cluster
» page 14 .
WARNING■
E.g. information about traffic lights, stop and right of way signs, parking and
stopping restrictions as well as lane constrictions or speed restrictions is not
detected for navigation by the device.■
Always adjust the driving speed to the road, traffic and weather conditions.
■
The nav. announcements provided may vary from the actual situations, e.g.
due to road works or out-of-date navigation data.
■
The volume should be adjusted to ensure that acoustic signals from outside,
e.g. sirens from vehicles which have the right of way, such as police, ambu-
lance and fire brigade vehicles, can be heard at all time.
CAUTION
In some countries, some unit features can no longer be selected when the vehicle
is running faster than a certain speed. These limitations comply with national le-
gal requirements.
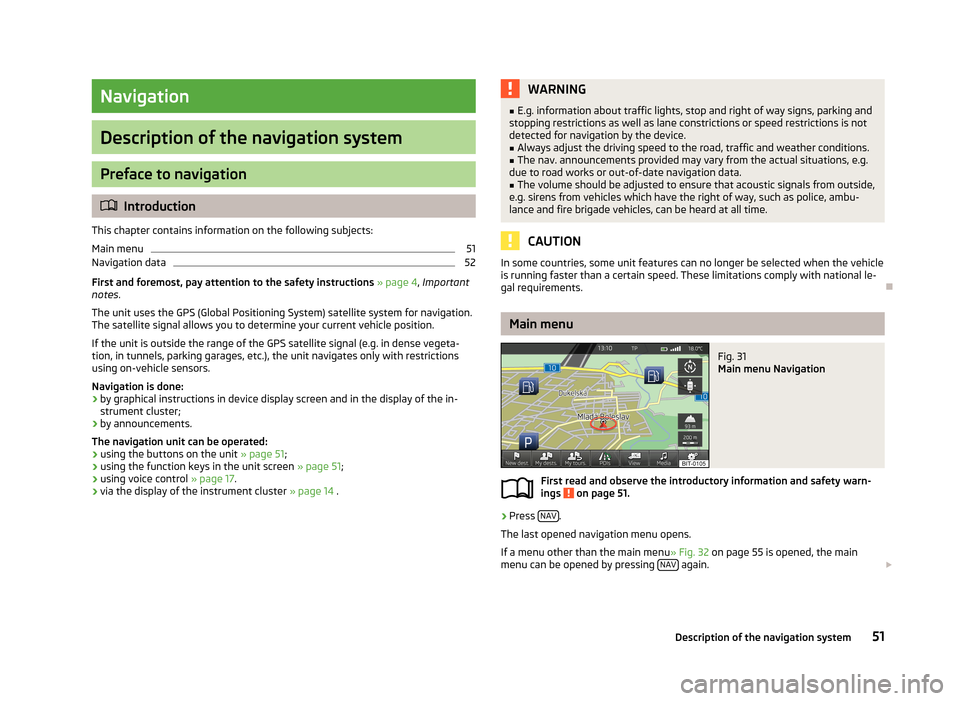
Main menu
Fig. 31
Main menu Navigation
First read and observe the introductory information and safety warn- ings on page 51.
›
Press NAV.
The last opened navigation menu opens.
If a menu other than the main menu » Fig. 32 on page 55 is opened, the main
menu can be opened by pressing NAV
again.
51Description of the navigation system
Page 55 of 90
Route optionsFirst read and observe the introductory information given on page 52.›
In the navigation main menu, press → Route options
■ Suggest 3 alternative routes - Switch on/off manual selection of the route type
(economical, fast, short) » page 68
■ Route: - Automatic selection of the preferred route type (manual route selec-
tion is switched off)
■ Economical - Calculate the most economical route with shortest travelling
time and distance travelled – displayed in green
■ Fast - Calculate the fastest route to the destination, even if a detour is neces-
sary - displayed in red
■ Short - Calculate the shortest route to the destination, even if a longer travel-
ling time is required - displayed in orange
■ Dynamic route - Switch on/off dynamic route calculation using TMC traffic re-
ports » page 70
■ Avoid motorways - switches on/off the use of motorways
■ Avoid ferries and motorail trains - Switch use of ferries and motorail trains
on/off
■ Avoid toll roads switches on/off the use of toll roads
■ Avoid tunnels - Switch use of tunnels on/off
■ Avoid routes requiring toll stickers - Switch use of routes requiring toll
stickers on/off
■ Show available toll stickers - select from the list of routes requiring toll stickers
for which a valid toll sticker is available
Map
First read and observe the introductory information given on page 52.
›
In the navigation main menu, press
→ Map
■ Day/night: - Select the background colour of the map
■ Day - light coloured background
■ Night - dark coloured background
■ Automatic - map with light or dark coloured background; the background
changes once you turn on the lights (does not apply to daytime running lights)
■ Autozoom - Switch on/off the automatic zoom in/out of the map display while
driving » page 55
■ Show traffic signs - Switch on/off the display of traffic signs
■ Select categories for POIs - Select POIs to be displayed in the map from a list of
available POIs (max. 10 POIs) » page 66
■ Show brands for POIs - Switch on/off the display company logos at the POIs
■ Show favourites - Switch on/off the display of favourites
■ Lane guidance - Switch on/off the display of a window with the recommended
lane for complicated intersections » page 69
Fuel options
First read and observe the introductory information given on page 52.
›
In the navigation main menu, press
Fuel options .
The following warning message is displayed when the fuel gauge pointer reaches the reserve marking: Warning: fuel tank almost empty. Would you like to find a
fuel station nearby?
■ Select preferred fuel station - Select your preferred fuel station brand (the se-
lected station brand will be displayed on the first positions of the list)
■ Fuel warning - Switch on/off the display of the warning message for low on fuel
with the following: ■ Cancel - Close the window with the warning
■ Find - Search for the nearest fuel station; when you select the fuel station,
the new route will be calculated from your current position
Navigation announcements
First read and observe the introductory information given on page 52.
›
In the navigation main menu, press
→ Nav. announcements
■ Volume - Set the volume of the navigation announcements
■ Nav. announcements: - Set the type of navigation announcements
■ Comprehensive - Full navigation announcements
■ Brief - Short navigation announcements
■ Congestion only - navigation announcements only when there is congestion
■ No voice guidance during call - Switch on/off navigation announcements during
a telephone call (if using a phone connected to the device » page 41)
53Description of the navigation system
Page 57 of 90
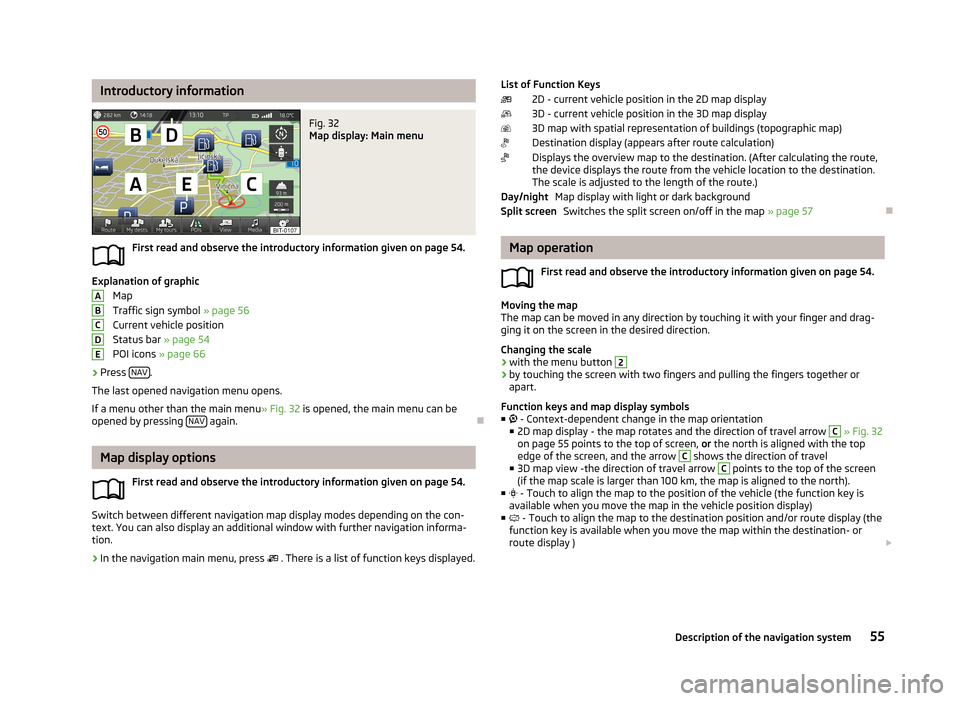
Introductory informationFig. 32
Map display: Main menu
First read and observe the introductory information given on page 54.
Explanation of graphicMap
Traffic sign symbol » page 56
Current vehicle position
Status bar » page 54
POI icons » page 66
›
Press NAV.
The last opened navigation menu opens.
If a menu other than the main menu » Fig. 32 is opened, the main menu can be
opened by pressing NAV
again.
Map display options
First read and observe the introductory information given on page 54.
Switch between different navigation map display modes depending on the con-
text. You can also display an additional window with further navigation informa-
tion.
›
In the navigation main menu, press . There is a list of function keys displayed.
ABCDEList of Function Keys
2D - current vehicle position in the 2D map display
3D - current vehicle position in the 3D map display 3D map with spatial representation of buildings (topographic map)
Destination display (appears after route calculation)
Displays the overview map to the destination. (After calculating the route,
the device displays the route from the vehicle location to the destination. The scale is adjusted to the length of the route.)
Map display with light or dark backgroundSwitches the split screen on/off in the map » page 57
Map operation
First read and observe the introductory information given on page 54.
Moving the map
The map can be moved in any direction by touching it with your finger and drag-
ging it on the screen in the desired direction.
Changing the scale
› with the menu button
2
›
by touching the screen with two fingers and pulling the fingers together or
apart.
Function keys and map display symbols
■ - Context-dependent change in the map orientation
■ 2D map display - the map rotates and the direction of travel arrow
C
» Fig. 32
on page 55 points to the top of screen, or the north is aligned with the top
edge of the screen, and the arrow
C
shows the direction of travel
■ 3D map view -the direction of travel arrow
C
points to the top of the screen
(if the map scale is larger than 100 km, the map is aligned to the north).
■ - Touch to align the map to the position of the vehicle (the function key is
available when you move the map in the vehicle position display)
■ - Touch to align the map to the destination position and/or route display (the
function key is available when you move the map within the destination- or
route display )
Day/nightSplit screen55Description of the navigation system