change time SKODA OCTAVIA 2013 3.G / (5E) Columbus Navigation System Manual
[x] Cancel search | Manufacturer: SKODA, Model Year: 2013, Model line: OCTAVIA, Model: SKODA OCTAVIA 2013 3.G / (5E)Pages: 90, PDF Size: 5.21 MB
Page 5 of 90
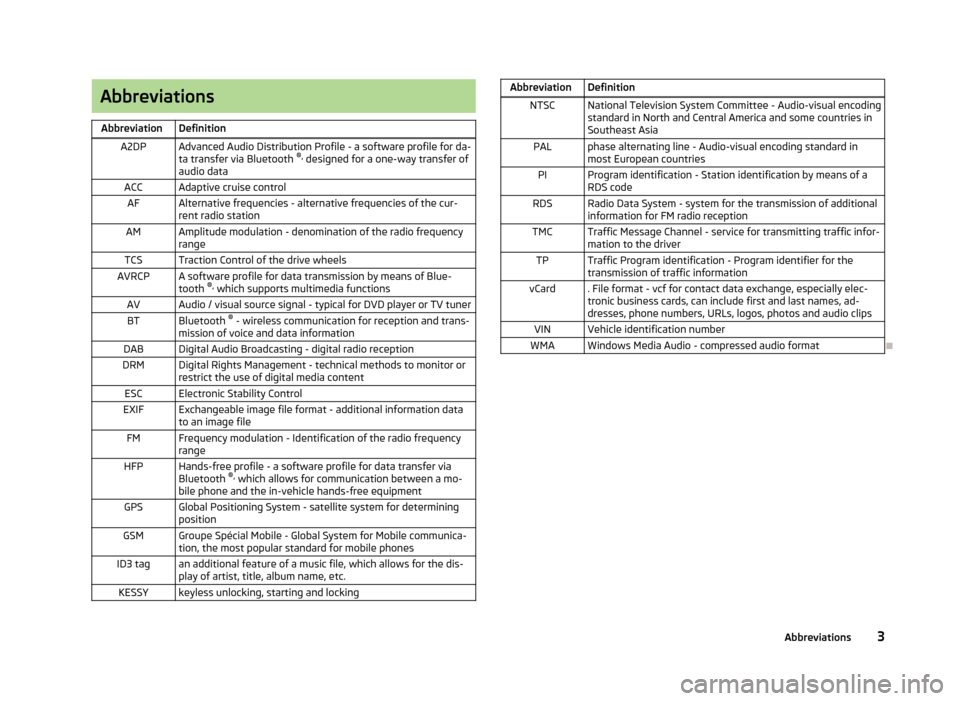
AbbreviationsAbbreviationDefinitionA2DPAdvanced Audio Distribution Profile - a software profile for da-ta transfer via Bluetooth ®,
designed for a one-way transfer of
audio dataACCAdaptive cruise controlAFAlternative frequencies - alternative frequencies of the cur-
rent radio stationAMAmplitude modulation - denomination of the radio frequency
rangeTCSTraction Control of the drive wheelsAVRCPA software profile for data transmission by means of Blue- tooth ®,
which supports multimedia functionsAVAudio / visual source signal - typical for DVD player or TV tunerBTBluetooth ®
- wireless communication for reception and trans-
mission of voice and data informationDABDigital Audio Broadcasting - digital radio receptionDRMDigital Rights Management - technical methods to monitor or
restrict the use of digital media contentESCElectronic Stability ControlEXIFExchangeable image file format - additional information data to an image fileFMFrequency modulation - Identification of the radio frequency rangeHFPHands-free profile - a software profile for data transfer via
Bluetooth ®,
which allows for communication between a mo-
bile phone and the in-vehicle hands-free equipmentGPSGlobal Positioning System - satellite system for determining
positionGSMGroupe Spécial Mobile - Global System for Mobile communica- tion, the most popular standard for mobile phonesID3 tagan additional feature of a music file, which allows for the dis-
play of artist, title, album name, etc.KESSYkeyless unlocking, starting and lockingAbbreviationDefinitionNTSCNational Television System Committee - Audio-visual encoding
standard in North and Central America and some countries in Southeast AsiaPALphase alternating line - Audio-visual encoding standard inmost European countriesPIProgram identification - Station identification by means of aRDS codeRDSRadio Data System - system for the transmission of additionalinformation for FM radio receptionTMCTraffic Message Channel - service for transmitting traffic infor- mation to the driverTPTraffic Program identification - Program identifier for the
transmission of traffic informationvCard. File format - vcf for contact data exchange, especially elec-
tronic business cards, can include first and last names, ad-
dresses, phone numbers, URLs, logos, photos and audio clipsVINVehicle identification numberWMAWindows Media Audio - compressed audio format
3Abbreviations
Page 6 of 90
Familiarization with the unit
Introductory information
Important notes
Introduction
This chapter contains information on the following subjects:
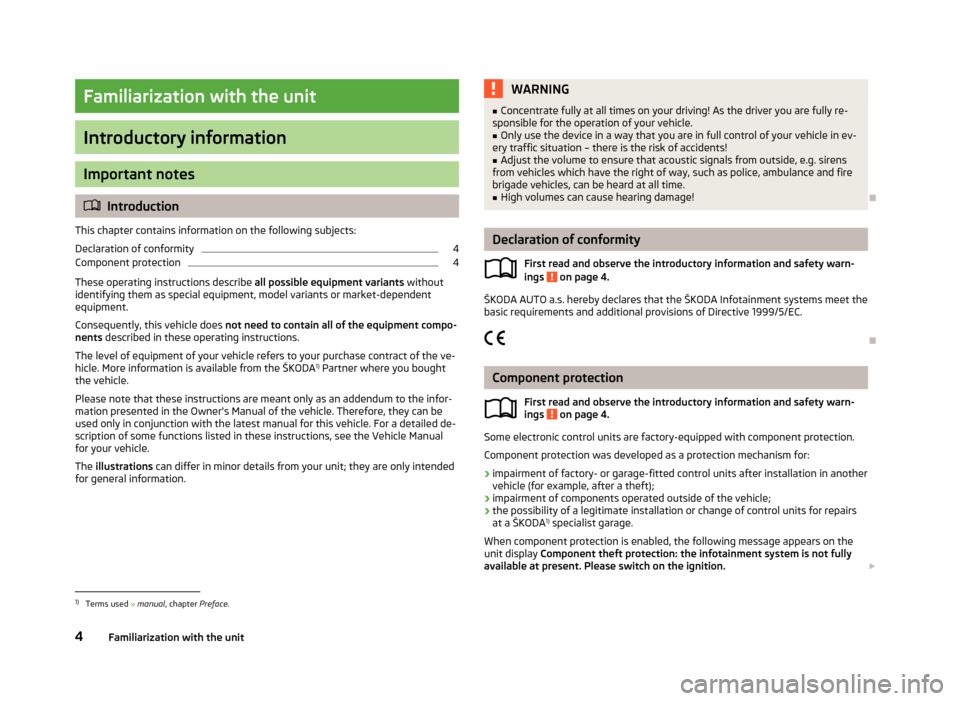
Declaration of conformity
4
Component protection
4
These operating instructions describe all possible equipment variants without
identifying them as special equipment, model variants or market-dependent
equipment.
Consequently, this vehicle does not need to contain all of the equipment compo-
nents described in these operating instructions.
The level of equipment of your vehicle refers to your purchase contract of the ve-
hicle. More information is available from the ŠKODA 1)
Partner where you bought
the vehicle.
Please note that these instructions are meant only as an addendum to the infor- mation presented in the Owner's Manual of the vehicle. Therefore, they can be
used only in conjunction with the latest manual for this vehicle. For a detailed de-
scription of some functions listed in these instructions, see the Vehicle Manual
for your vehicle.
The illustrations can differ in minor details from your unit; they are only intended
for general information.
WARNING■ Concentrate fully at all times on your driving! As the driver you are fully re-
sponsible for the operation of your vehicle.■
Only use the device in a way that you are in full control of your vehicle in ev-
ery traffic situation – there is the risk of accidents!
■
Adjust the volume to ensure that acoustic signals from outside, e.g. sirens
from vehicles which have the right of way, such as police, ambulance and fire
brigade vehicles, can be heard at all time.
■
High volumes can cause hearing damage!
Declaration of conformity
First read and observe the introductory information and safety warn-
ings
on page 4.
ŠKODA AUTO a.s. hereby declares that the ŠKODA Infotainment systems meet the
basic requirements and additional provisions of Directive 1999/5/EC.
Component protection First read and observe the introductory information and safety warn-
ings
on page 4.
Some electronic control units are factory-equipped with component protection.
Component protection was developed as a protection mechanism for:
› impairment of factory- or garage-fitted control units after installation in another
vehicle (for example, after a theft);
› impairment of components operated outside of the vehicle;
› the possibility of a legitimate installation or change of control units for repairs
at a ŠKODA 1)
specialist garage.
When component protection is enabled, the following message appears on the
unit display Component theft protection: the infotainment system is not fully
available at present. Please switch on the ignition.
1)
Terms used
» manual , chapter Preface.
4Familiarization with the unit
Page 10 of 90
Unit operation
Concerning the device screen operation
Introduction
This chapter contains information on the following subjects: Operation
8
Input screen with keyboard for searching
9
Input screen with keyboard for storing information
9
Input screen with numeric keypad
10
First and foremost, pay attention to the safety instructions » page 4 , Important
notes .
This chapter covers the instrument operation and the work with the touch screen and with various types of input keyboards.
Operation
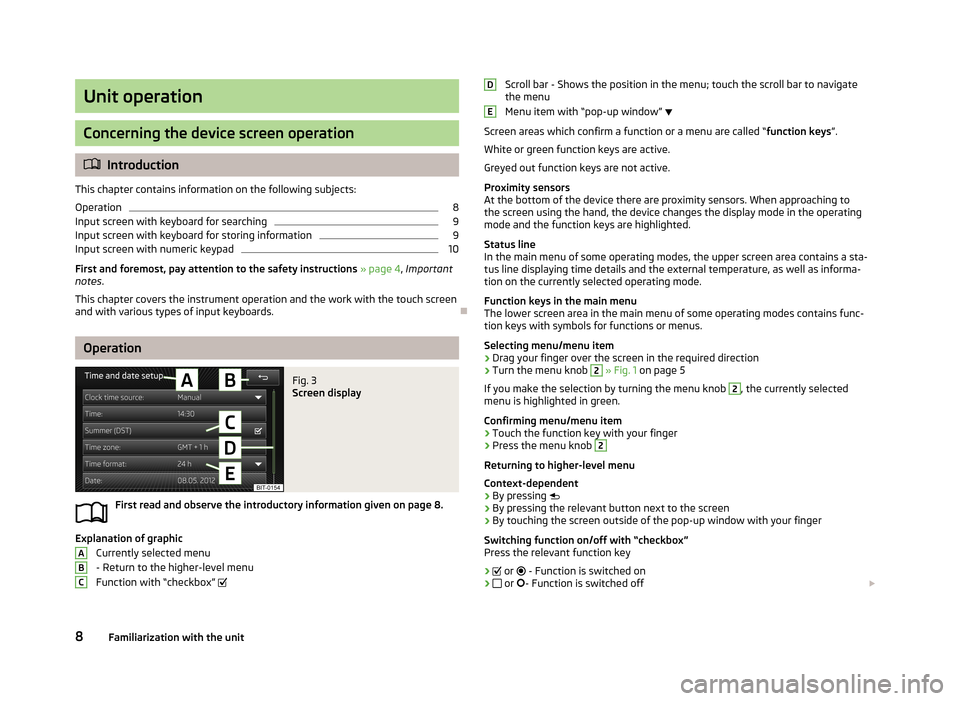
Fig. 3
Screen display
First read and observe the introductory information given on page 8.
Explanation of graphic
Currently selected menu
- Return to the higher-level menu
Function with “checkbox”
ABCScroll bar - Shows the position in the menu; touch the scroll bar to navigate
the menu
Menu item with “pop-up window”
Screen areas which confirm a function or a menu are called “ function keys”.
White or green function keys are active.
Greyed out function keys are not active.
Proximity sensors
At the bottom of the device there are proximity sensors. When approaching to
the screen using the hand, the device changes the display mode in the operating
mode and the function keys are highlighted.
Status line
In the main menu of some operating modes, the upper screen area contains a sta-
tus line displaying time details and the external temperature, as well as informa- tion on the currently selected operating mode.
Function keys in the main menu
The lower screen area in the main menu of some operating modes contains func-
tion keys with symbols for functions or menus.
Selecting menu/menu item
› Drag your finger over the screen in the required direction
› Turn the menu knob 2
» Fig. 1 on page 5
If you make the selection by turning the menu knob
2
, the currently selected
menu is highlighted in green.
Confirming menu/menu item
› Touch the function key with your finger
› Press the menu knob
2
Returning to higher-level menu
Context-dependent
› By pressing
› By pressing the relevant button next to the screen
› By touching the screen outside of the pop-up window with your finger
Switching function on/off with “checkbox” Press the relevant function key
›
or
- Function is switched on
›
or
- Function is switched off
DE8Familiarization with the unit
Page 31 of 90
Media
Operation
Introduction
This chapter contains information on the following subjects:
Main menu
29
Title / folder list
30
Track/folder database
30
Playback
31
Media settings
31
First and foremost, pay attention to the safety instructions » page 4 , Important
notes .
You can use the unit to play audio and video files in different formats » page 32,
connect different signal source types, or store audio files in the internal memory
of the Jukebox.
When the signal source has been connected, the device starts to automatically play audio files in alphabetical order.
Types of device operation » page 8 .
› On the device via the operating elements.
› Using the function keys on the device screen.
› Using the Maxi DOT display.
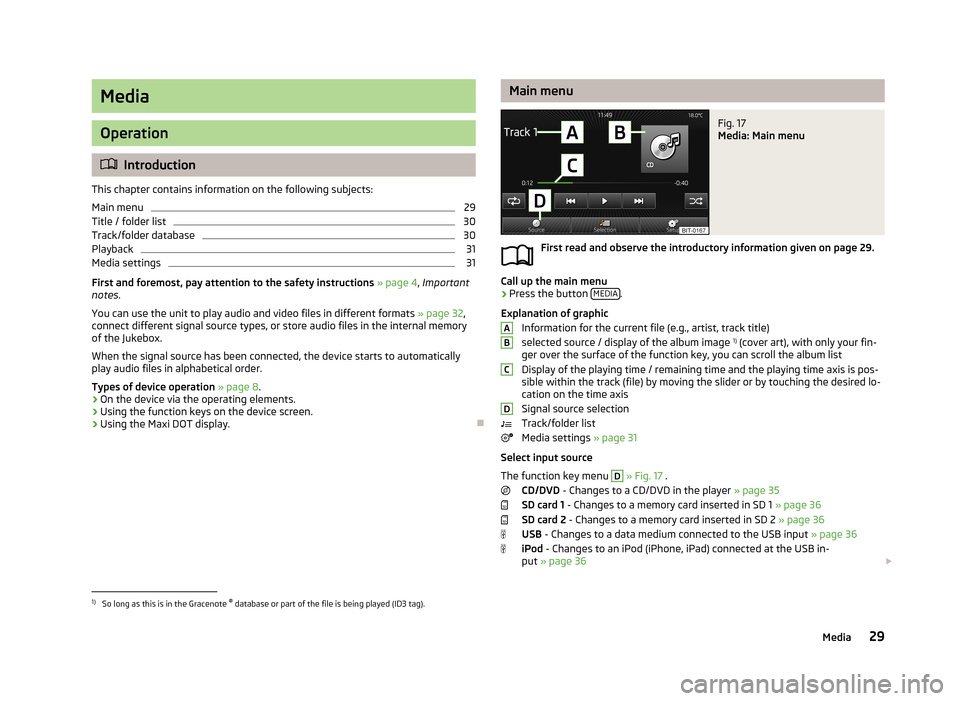
Main menuFig. 17
Media: Main menu
First read and observe the introductory information given on page 29.
Call up the main menu
›
Press the button
MEDIA.
Explanation of graphic Information for the current file (e.g., artist, track title)selected source / display of the album image 1)
(cover art), with only your fin-
ger over the surface of the function key, you can scroll the album list
Display of the playing time / remaining time and the playing time axis is pos- sible within the track (file) by moving the slider or by touching the desired lo-
cation on the time axis
Signal source selection
Track/folder list
Media settings » page 31
Select input source
The function key menu
D
» Fig. 17 .
CD/DVD - Changes to a CD/DVD in the player » page 35
SD card 1 - Changes to a memory card inserted in SD 1 » page 36
SD card 2 - Changes to a memory card inserted in SD 2 » page 36
USB - Changes to a data medium connected to the USB input » page 36
iPod - Changes to an iPod (iPhone, iPad) connected at the USB in-
put » page 36
ABCD1)
So long as this is in the Gracenote ®
database or part of the file is being played (ID3 tag).
29Media
Page 37 of 90
Bluetooth®
player
First read and observe the introductory information and safety warn- ings
on page 32.
The device makes a wireless connection (pairing) to the Bluetooth ®
player possi-
ble.
›
Follow the same instructions as for pairing the device with a tele- phone » page 44 .
CAUTION
Do not connect an Apple device to the device via Bluetooth ®
and USB at the
same time, as this may result in a malfunction.
Note
■ We recommend adjusting the volume on the portable player to the maximum
level.■
The volume can also be adjusted by setting the input sensitivity of the unit for
Bluetooth ®
player » page 20 , Sound settings .
■
The supported media functions are dependent on the type of Bluetooth ®
player
used.
CD/DVD
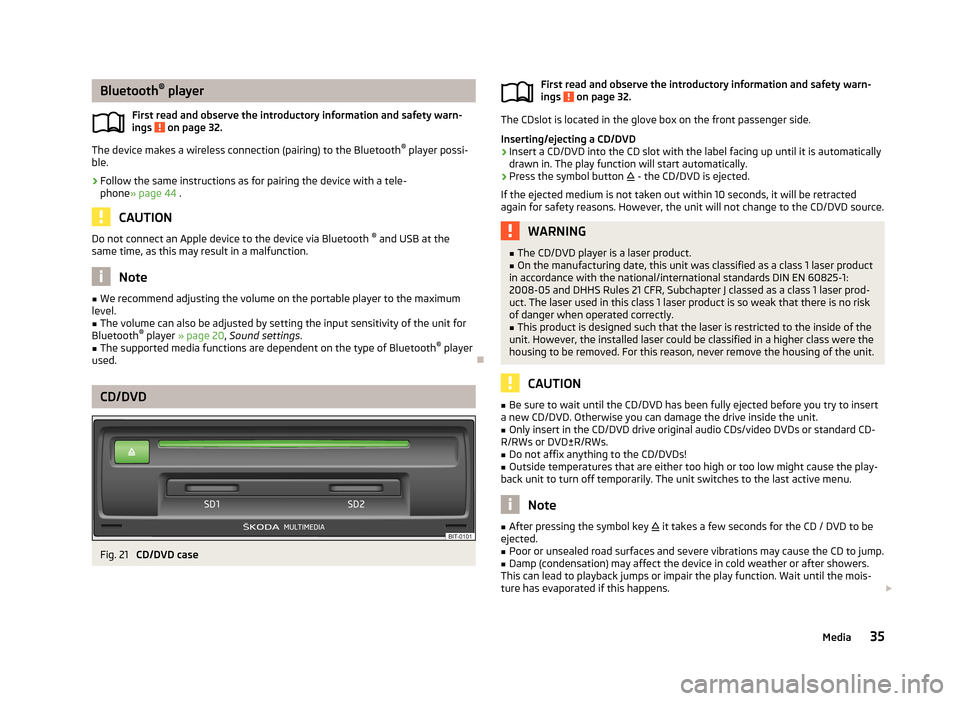
Fig. 21
CD/DVD case
First read and observe the introductory information and safety warn-
ings on page 32.
The CDslot is located in the glove box on the front passenger side.
Inserting/ejecting a CD/DVD
›
Insert a CD/DVD into the CD slot with the label facing up until it is automatically
drawn in. The play function will start automatically.
›
Press the symbol button - the CD/DVD is ejected.
If the ejected medium is not taken out within 10 seconds, it will be retracted
again for safety reasons. However, the unit will not change to the CD/DVD source.
WARNING■ The CD/DVD player is a laser product.■On the manufacturing date, this unit was classified as a class 1 laser product
in accordance with the national/international standards DIN EN 60825-1:
2008-05 and DHHS Rules 21 CFR, Subchapter J classed as a class 1 laser prod-
uct. The laser used in this class 1 laser product is so weak that there is no risk
of danger when operated correctly.■
This product is designed such that the laser is restricted to the inside of the
unit. However, the installed laser could be classified in a higher class were the
housing to be removed. For this reason, never remove the housing of the unit.
CAUTION
■ Be sure to wait until the CD/DVD has been fully ejected before you try to insert
a new CD/DVD. Otherwise you can damage the drive inside the unit.■
Only insert in the CD/DVD drive original audio CDs/video DVDs or standard CD-
R/RWs or DVD±R/RWs.
■
Do not affix anything to the CD/DVDs!
■
Outside temperatures that are either too high or too low might cause the play-
back unit to turn off temporarily. The unit switches to the last active menu.
Note
■ After pressing the symbol key it takes a few seconds for the CD / DVD to be
ejected.■
Poor or unsealed road surfaces and severe vibrations may cause the CD to jump.
■
Damp (condensation) may affect the device in cold weather or after showers.
This can lead to playback jumps or impair the play function. Wait until the mois-
ture has evaporated if this happens.
35Media
Page 42 of 90
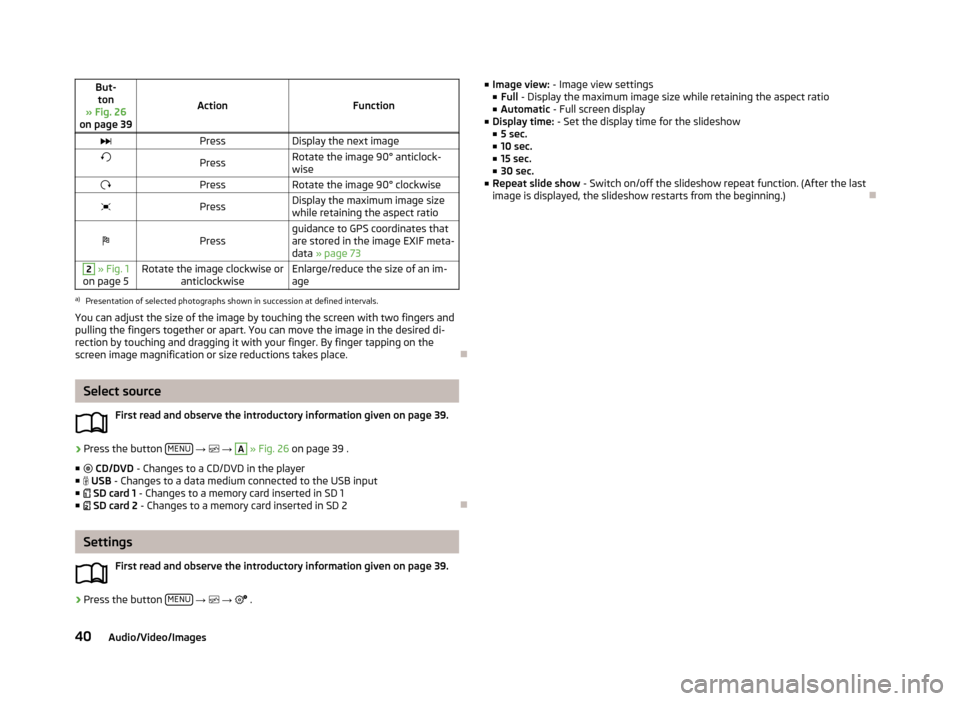
But-ton
» Fig. 26
on page 39
ActionFunction
PressDisplay the next imagePressRotate the image 90° anticlock-
wisePressRotate the image 90° clockwisePressDisplay the maximum image size
while retaining the aspect ratioPressguidance to GPS coordinates that
are stored in the image EXIF meta-
data » page 732 » Fig. 1
on page 5Rotate the image clockwise or anticlockwiseEnlarge/reduce the size of an im-
agea)
Presentation of selected photographs shown in succession at defined intervals.
You can adjust the size of the image by touching the screen with two fingers and
pulling the fingers together or apart. You can move the image in the desired di-
rection by touching and dragging it with your finger. By finger tapping on the
screen image magnification or size reductions takes place.
Select source
First read and observe the introductory information given on page 39.
›
Press the button MENU
→
→
A
» Fig. 26 on page 39 .
■ CD/DVD - Changes to a CD/DVD in the player
■ USB - Changes to a data medium connected to the USB input
■ SD card 1 - Changes to a memory card inserted in SD 1
■ SD card 2 - Changes to a memory card inserted in SD 2
Settings
First read and observe the introductory information given on page 39.
›
Press the button MENU
→
→
.
■
Image view: - Image view settings
■ Full - Display the maximum image size while retaining the aspect ratio
■ Automatic - Full screen display
■ Display time: - Set the display time for the slideshow
■ 5 sec.
■ 10 sec.
■ 15 sec.
■ 30 sec.
■ Repeat slide show - Switch on/off the slideshow repeat function. (After the last
image is displayed, the slideshow restarts from the beginning.)
40Audio/Video/Images
Page 54 of 90
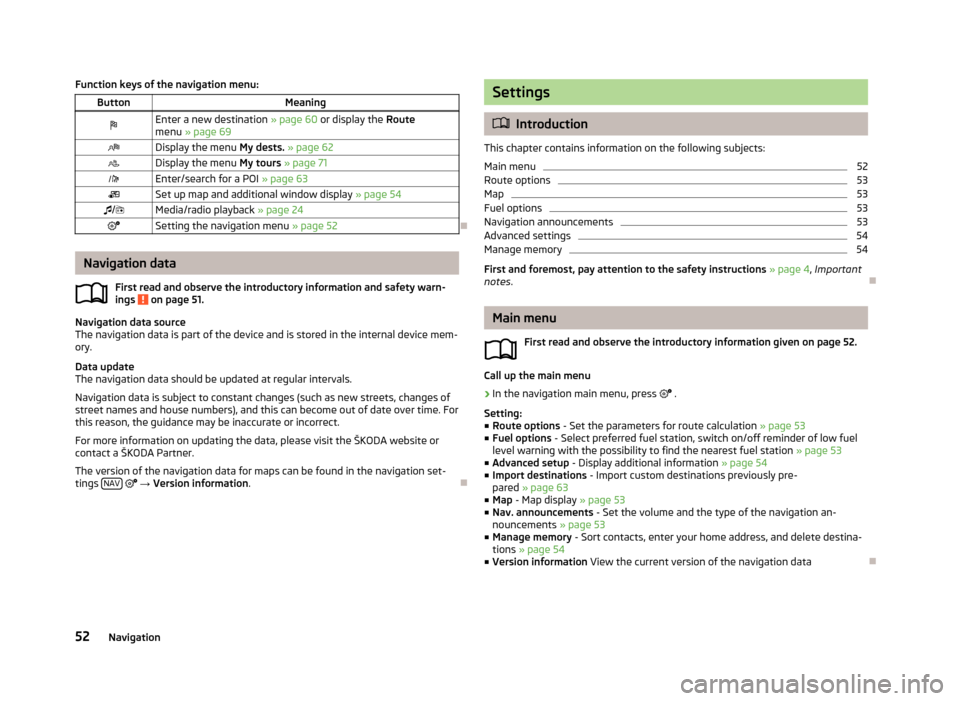
Function keys of the navigation menu:ButtonMeaningEnter a new destination » page 60 or display the Route
menu » page 69Display the menu My dests. » page 62Display the menu My tours » page 71Enter/search for a POI » page 63Set up map and additional window display » page 54/Media/radio playback » page 24Setting the navigation menu » page 52
Navigation data
First read and observe the introductory information and safety warn-
ings
on page 51.
Navigation data source
The navigation data is part of the device and is stored in the internal device mem- ory.
Data update
The navigation data should be updated at regular intervals.
Navigation data is subject to constant changes (such as new streets, changes ofstreet names and house numbers), and this can become out of date over time. For this reason, the guidance may be inaccurate or incorrect.
For more information on updating the data, please visit the ŠKODA website or
contact a ŠKODA Partner.
The version of the navigation data for maps can be found in the navigation set-
tings NAV
→ Version information .
Settings
Introduction
This chapter contains information on the following subjects:
Main menu
52
Route options
53
Map
53
Fuel options
53
Navigation announcements
53
Advanced settings
54
Manage memory
54
First and foremost, pay attention to the safety instructions » page 4 , Important
notes .
Main menu
First read and observe the introductory information given on page 52.
Call up the main menu
›
In the navigation main menu, press
.
Setting:
■ Route options - Set the parameters for route calculation » page 53
■ Fuel options - Select preferred fuel station, switch on/off reminder of low fuel
level warning with the possibility to find the nearest fuel station » page 53
■ Advanced setup - Display additional information » page 54
■ Import destinations - Import custom destinations previously pre-
pared » page 63
■ Map - Map display » page 53
■ Nav. announcements - Set the volume and the type of the navigation an-
nouncements » page 53
■ Manage memory - Sort contacts, enter your home address, and delete destina-
tions » page 54
■ Version information View the current version of the navigation data
52Navigation
Page 55 of 90
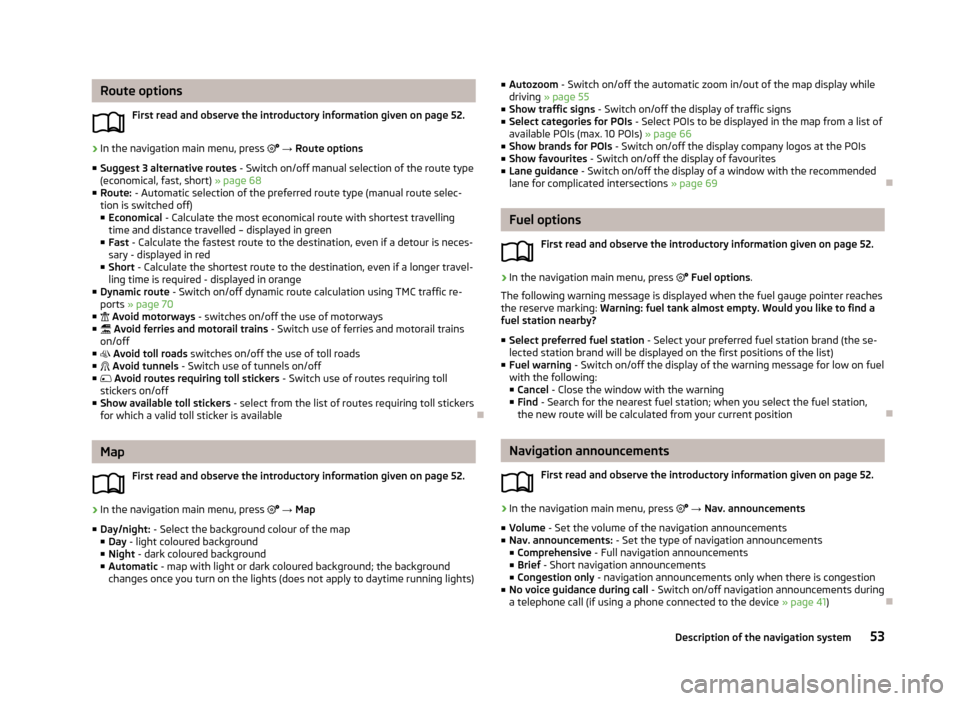
Route optionsFirst read and observe the introductory information given on page 52.›
In the navigation main menu, press → Route options
■ Suggest 3 alternative routes - Switch on/off manual selection of the route type
(economical, fast, short) » page 68
■ Route: - Automatic selection of the preferred route type (manual route selec-
tion is switched off)
■ Economical - Calculate the most economical route with shortest travelling
time and distance travelled – displayed in green
■ Fast - Calculate the fastest route to the destination, even if a detour is neces-
sary - displayed in red
■ Short - Calculate the shortest route to the destination, even if a longer travel-
ling time is required - displayed in orange
■ Dynamic route - Switch on/off dynamic route calculation using TMC traffic re-
ports » page 70
■ Avoid motorways - switches on/off the use of motorways
■ Avoid ferries and motorail trains - Switch use of ferries and motorail trains
on/off
■ Avoid toll roads switches on/off the use of toll roads
■ Avoid tunnels - Switch use of tunnels on/off
■ Avoid routes requiring toll stickers - Switch use of routes requiring toll
stickers on/off
■ Show available toll stickers - select from the list of routes requiring toll stickers
for which a valid toll sticker is available
Map
First read and observe the introductory information given on page 52.
›
In the navigation main menu, press
→ Map
■ Day/night: - Select the background colour of the map
■ Day - light coloured background
■ Night - dark coloured background
■ Automatic - map with light or dark coloured background; the background
changes once you turn on the lights (does not apply to daytime running lights)
■ Autozoom - Switch on/off the automatic zoom in/out of the map display while
driving » page 55
■ Show traffic signs - Switch on/off the display of traffic signs
■ Select categories for POIs - Select POIs to be displayed in the map from a list of
available POIs (max. 10 POIs) » page 66
■ Show brands for POIs - Switch on/off the display company logos at the POIs
■ Show favourites - Switch on/off the display of favourites
■ Lane guidance - Switch on/off the display of a window with the recommended
lane for complicated intersections » page 69
Fuel options
First read and observe the introductory information given on page 52.
›
In the navigation main menu, press
Fuel options .
The following warning message is displayed when the fuel gauge pointer reaches the reserve marking: Warning: fuel tank almost empty. Would you like to find a
fuel station nearby?
■ Select preferred fuel station - Select your preferred fuel station brand (the se-
lected station brand will be displayed on the first positions of the list)
■ Fuel warning - Switch on/off the display of the warning message for low on fuel
with the following: ■ Cancel - Close the window with the warning
■ Find - Search for the nearest fuel station; when you select the fuel station,
the new route will be calculated from your current position
Navigation announcements
First read and observe the introductory information given on page 52.
›
In the navigation main menu, press
→ Nav. announcements
■ Volume - Set the volume of the navigation announcements
■ Nav. announcements: - Set the type of navigation announcements
■ Comprehensive - Full navigation announcements
■ Brief - Short navigation announcements
■ Congestion only - navigation announcements only when there is congestion
■ No voice guidance during call - Switch on/off navigation announcements during
a telephone call (if using a phone connected to the device » page 41)
53Description of the navigation system
Page 59 of 90
Menus in the extra windowFirst read and observe the introductory information given on page 56.
Additional information is displayed in the extra window depending on the context
of the selected menu.
Switching on
›
In the navigation main menu, press NAV
or
›
in the Navigation main menu, press .
→ Split screen
The last opened split screen is displayed.
Switching off
›
In the navigation main menu, press NAV
or
›
in the additional window on
press
or
›
in the Navigation main menu, press .
→ Split screen
Menus in the split screen:
■ Audio - Playback operation of the currently selected audio source » page 57
■ Compass - Displays the current vehicle location in relation to the compass direc-
tions » page 58
■ Man. - Displays the next or following navigation instructions (manoeuvres), the
next POIs or an intersection detail » page 58;
■ Traffic signs - Displays traffic signs that are stored in the navigation data of the
maps or that are recognised by the front camera » page 58
■ GPS - Displays the geographical coordinates of the current vehicle loca-
tion » page 59
■ Map - Map display » page 59.
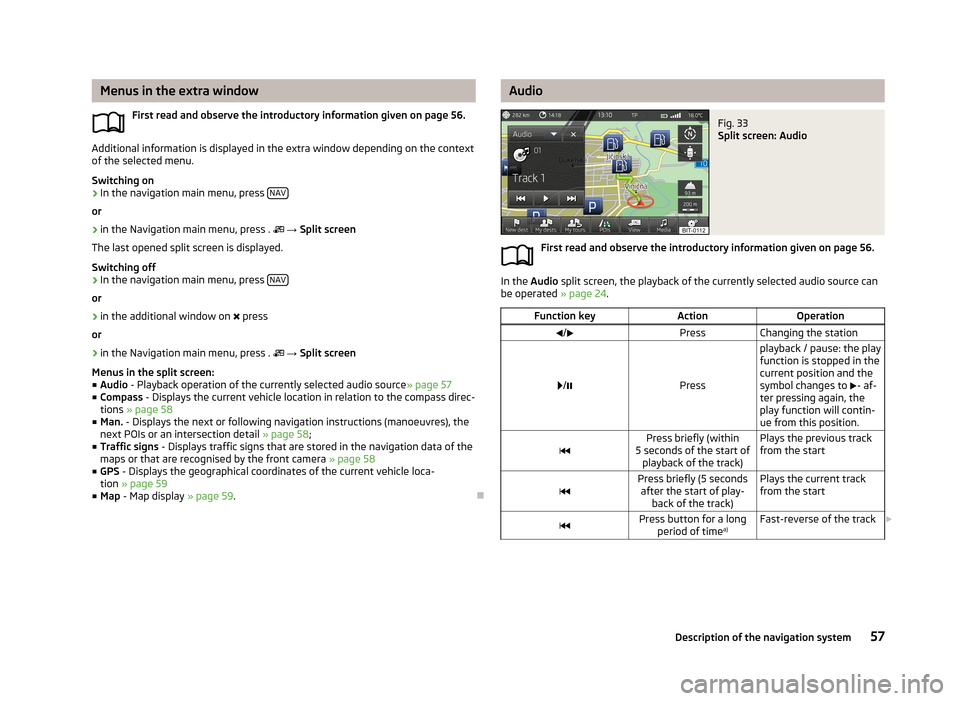
AudioFig. 33
Split screen: Audio
First read and observe the introductory information given on page 56.
In the Audio split screen, the playback of the currently selected audio source can
be operated » page 24.
Function keyActionOperation/PressChanging the station
/Press
playback / pause: the play
function is stopped in the
current position and the
symbol changes to - af-
ter pressing again, the
play function will contin-
ue from this position.Press briefly (within
5 seconds of the start of playback of the track)Plays the previous track
from the startPress briefly (5 seconds after the start of play- back of the track)Plays the current track
from the startPress button for a long period of time a)Fast-reverse of the track
57Description of the navigation system
Page 70 of 90
Route69Lane guidance69
First and foremost, pay attention to the safety instructions » page 4 , Important
notes .
Route calculation
First read and observe the introductory information given on page 67.
The route is calculated automatically according to the entered destination. The
calculation takes the settings of the route options » page 53 (route type, dynamic
route, etc.) into account.
The route is recalculated each time if you ignore driving recommendations or change the route. This process takes only a few seconds. Nav. announcements
can only then be re-transmitted.
If Demo mode is switched on » page 54, a prompt appears asking whether you
want the guidance to start in demo mode or normal mode.
Demo mode provides a travel simulation to the entered destination. It offers the
chance to travel the calculated route “virtually” on the device screen.
If an alternative route option is set, function keys are displayed, following the cal- culation, for the route types with information on the route length and the expec-ted travelling time.
Route Type
economically
quickly
short
Selecting the route type will start route guidance. After the route has been calculated, additional information specific to the selec-ted route is displayed on the function keys for the route types » page 53, e.g., use
of motorways
, Toll roads
and the like.
If the option for alternative routes is disabled, the route is calculated and route
guidance is started according to the preferred route » page 53.
It is possible to select a pre-calculated route before the calculation of the remain- ing routes is completed.
The unit tries to allow for continued guidance even if the navigation data is in-
complete or there is no data at all for the given area (e.g., one-way streets, road
types, etc.).
Interrupt and continue route guidance
If the ignition is switched off and on again and the key was left in the ignition (in
vehicles with the KESSY system, when the ignition was switched off):
› within 30 minutes - route guidance is continued, taking into account the calcu-
lated route
› Between 30 and 40 min - the screen switches to “standby” mode (energy-sav-
ing mode of the screen); the route guidance continues using the calculated route
› Between 40 min and 120 min - the unit screen displays the message
Continue
route guidance? ; after you confirm the message, the route guidance continues
using the calculated route;
› After 120 min - The route guidance is cancelled.
Switch ignition off and on again and remove the key temporarily (in vehicles with
the KESSY system, switch off the ignition and open the driver's door):
› Within 10 min - route guidance is continued, taking into account the calculated
route
› Between 10 min and 120 min - the screen switches to “standby mode” (energy-
saving mode of the screen); the unit screen displays the message Continue
route guidance? ; after you confirm the message, the route guidance continues
using the calculated route
› After 120 min - The route guidance is cancelled.
Explanation of graphic navigation instructions
First read and observe the introductory information given on page 67.
The graphical navigation instructions are displayed:› in the MAXI DOT display
» page 10;
› in the extra window of the device screen
» page 58.
68Navigation