roof SKODA OCTAVIA 2013 3.G / (5E) Columbus Navigation System Manual
[x] Cancel search | Manufacturer: SKODA, Model Year: 2013, Model line: OCTAVIA, Model: SKODA OCTAVIA 2013 3.G / (5E)Pages: 90, PDF Size: 5.21 MB
Page 18 of 90

Requirements for optimum voice command recognition.
› Only give voice commands when the symbol is displayed on the device screen
or in the information display.
› Speak with a normal tone of voice without intonation and excessive pauses.
› Avoid a bad pronunciation.
› Close doors, windows and the sliding roof, in order to prevent external distur-
bances affecting recognition of the voice commands.
› It is recommended to speak louder at higher speeds, so that the tone of your
voice is louder than the increased surrounding noise.
› During voice control, limit additional noise in the vehicle, e.g. passengers talking
at the same time.
CAUTION
For some languages, there is no voice control available. This device indicates this
fact through a text message that is displayed after setting the device languagescreen » page 19 .
Note
■
During voice control, no navigation announcements and traffic announcements
are played.■
Some voice commands must be spelled out when pronouncing depending on
the selected language of communication, such as the Source Selection “ SD” card
one .
Switching on/off
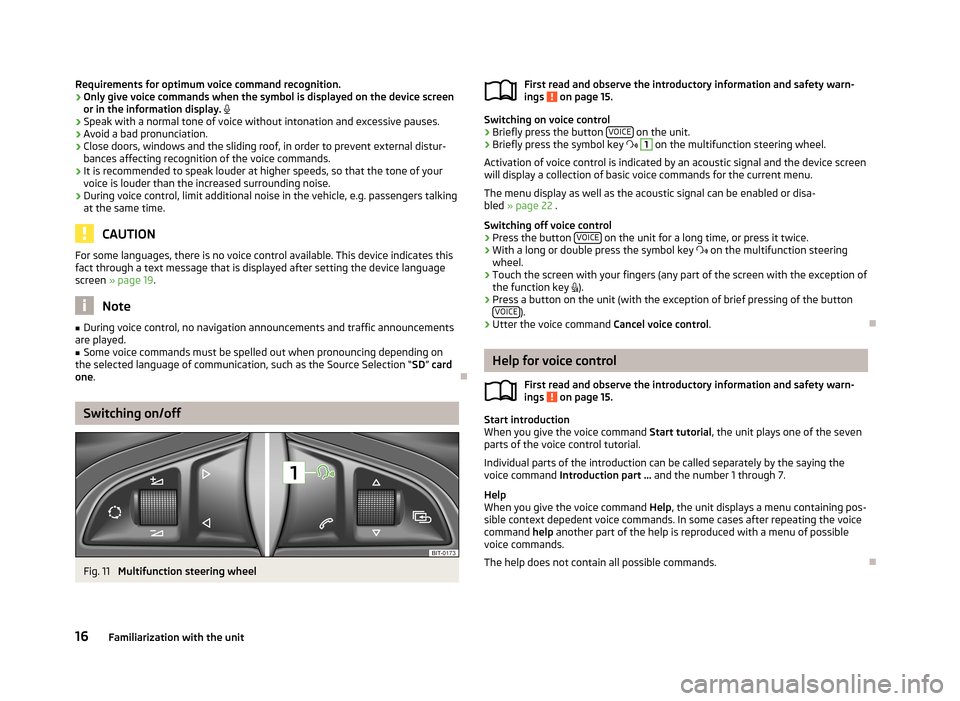
Fig. 11
Multifunction steering wheel
First read and observe the introductory information and safety warn-
ings on page 15.
Switching on voice control
› Briefly press the button
VOICE on the unit.
› Briefly press the symbol key
1
on the multifunction steering wheel.
Activation of voice control is indicated by an acoustic signal and the device screen
will display a collection of basic voice commands for the current menu.
The menu display as well as the acoustic signal can be enabled or disa-
bled » page 22 .
Switching off voice control › Press the button
VOICE
on the unit for a long time, or press it twice.
› With a long or double press the symbol key
on the multifunction steering
wheel.
› Touch the screen with your fingers (any part of the screen with the exception of
the function key
).
› Press a button on the unit (with the exception of brief pressing of the button
VOICE
).
› Utter the voice command
Cancel voice control.
Help for voice control
First read and observe the introductory information and safety warn-ings
on page 15.
Start introduction
When you give the voice command Start tutorial, the unit plays one of the seven
parts of the voice control tutorial.
Individual parts of the introduction can be called separately by the saying the voice command Introduction part ... and the number 1 through 7.
Help
When you give the voice command Help, the unit displays a menu containing pos-
sible context depedent voice commands. In some cases after repeating the voice command help another part of the help is reproduced with a menu of possible
voice commands.
The help does not contain all possible commands.
16Familiarization with the unit
Page 45 of 90

MessageImportanceNetwork search...The telephone searches for available
GSM networks.No networkThe telephone is not connected to the GSM network.
Rejected by network.
The mobile phone network operator
has rejected the connection (e.g. not
enough mobile phone credit, SIM card
blocked, roaming not available).To use the Bluetooth function, please
switch the ignition on.Switch on the ignition.Please switch on Bluetooth.Switch on the Bluetooth ®
function.No Bluetooth devices paired.Connect the telephone with the device.
Phonebox
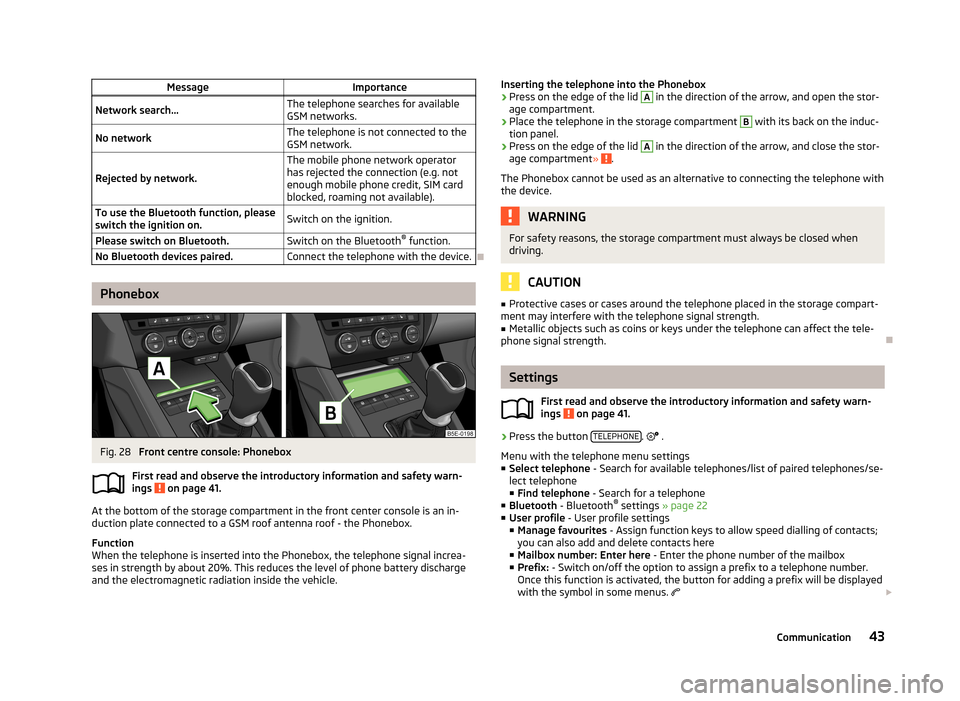
Fig. 28
Front centre console: Phonebox
First read and observe the introductory information and safety warn-
ings
on page 41.
At the bottom of the storage compartment in the front center console is an in-
duction plate connected to a GSM roof antenna roof - the Phonebox.
Function
When the telephone is inserted into the Phonebox, the telephone signal increa-
ses in strength by about 20%. This reduces the level of phone battery discharge and the electromagnetic radiation inside the vehicle.
Inserting the telephone into the Phonebox›Press on the edge of the lid A in the direction of the arrow, and open the stor-
age compartment.›
Place the telephone in the storage compartment
B
with its back on the induc-
tion panel.
›
Press on the edge of the lid
A
in the direction of the arrow, and close the stor-
age compartment » .
The Phonebox cannot be used as an alternative to connecting the telephone with the device.
WARNINGFor safety reasons, the storage compartment must always be closed whendriving.
CAUTION
■ Protective cases or cases around the telephone placed in the storage compart-
ment may interfere with the telephone signal strength.■
Metallic objects such as coins or keys under the telephone can affect the tele-
phone signal strength.
Settings
First read and observe the introductory information and safety warn-
ings
on page 41.
›
Press the button TELEPHONE.
.
Menu with the telephone menu settings
■ Select telephone - Search for available telephones/list of paired telephones/se-
lect telephone
■ Find telephone - Search for a telephone
■ Bluetooth - Bluetooth ®
settings » page 22
■ User profile - User profile settings
■ Manage favourites - Assign function keys to allow speed dialling of contacts;
you can also add and delete contacts here
■ Mailbox number: Enter here - Enter the phone number of the mailbox
■ Prefix: - Switch on/off the option to assign a prefix to a telephone number.
Once this function is activated, the button for adding a prefix will be displayed
with the symbol in some menus.
43Communication