Menu SKODA OCTAVIA 2013 3.G / (5E) Owner's Manual
[x] Cancel search | Manufacturer: SKODA, Model Year: 2013, Model line: OCTAVIA, Model: SKODA OCTAVIA 2013 3.G / (5E)Pages: 287, PDF Size: 18.55 MB
Page 12 of 287
Using the system
Cockpit
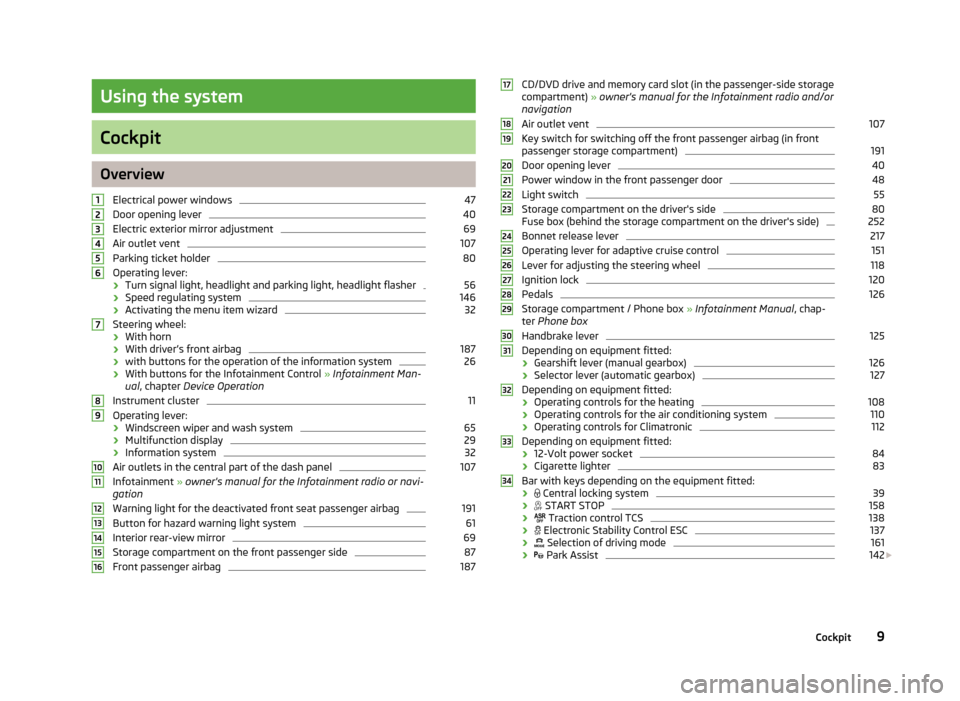
OverviewElectrical power windows
47
Door opening lever
40
Electric exterior mirror adjustment
69
Air outlet vent
107
Parking ticket holder
80
Operating lever:
› Turn signal light, headlight and parking light, headlight flasher
56
›
Speed regulating system
146
›Activating the menu item wizard
32
Steering wheel:
› With horn
› With driver’s front airbag
187
›
with buttons for the operation of the information system
26
›With buttons for the Infotainment Control
» Infotainment Man-
ual , chapter Device Operation
Instrument cluster
11
Operating lever:
› Windscreen wiper and wash system
65
›Multifunction display
29
›
Information system
32
Air outlets in the central part of the dash panel
107
Infotainment
» owner's manual for the Infotainment radio or navi-
gation
Warning light for the deactivated front seat passenger airbag
191
Button for hazard warning light system
61
Interior rear-view mirror
69
Storage compartment on the front passenger side
87
Front passenger airbag
18712345678910111213141516CD/DVD drive and memory card slot (in the passenger-side storage compartment) » owner's manual for the Infotainment radio and/or
navigation
Air outlet vent107
Key switch for switching off the front passenger airbag (in front passenger storage compartment)
191
Door opening lever
40
Power window in the front passenger door
48
Light switch
55
Storage compartment on the driver's side
80
Fuse box (behind the storage compartment on the driver's side)
252
Bonnet release lever
217
Operating lever for adaptive cruise control
151
Lever for adjusting the steering wheel
118
Ignition lock
120
Pedals
126
Storage compartment / Phone box » Infotainment Manual , chap-
ter Phone box
Handbrake lever
125
Depending on equipment fitted:
› Gearshift lever (manual gearbox)
126
›
Selector lever (automatic gearbox)
127
Depending on equipment fitted:
› Operating controls for the heating
108
›
Operating controls for the air conditioning system
110
›Operating controls for Climatronic
112
Depending on equipment fitted:
› 12-Volt power socket
84
›
Cigarette lighter
83
Bar with keys depending on the equipment fitted:
›
Central locking system
39
›
START STOP
158
›
Traction control TCS
138
›
Electronic Stability Control ESC
137
›
Selection of driving mode
161
›
Park Assist
142
1718192021222324252627282930313233349Cockpit
Page 30 of 287
Description of the operationButton /
wheel » Fig. 7OperationActionASelect dataBriefly push up or downSet data valuesBriefly push up or downOpen main menu in the MAXI DOT displayPress and hold buttonBShow dataPress brieflyConfirm dataPress brieflyCOpen main menu in the MAXI DOT displayPress and hold buttonto go back one level in the menu of the MAXI DOT displayPress brieflyDSelect dataTurn upwards or downwardsSet data valuesTurn upwards or downwardsShow dataPress brieflyConfirm dataPress briefly
Outside temperature
First read and observe the introductory information and safety warn-ings
on page 26.
The current outside temperature is shown in the display.
If the outside temperature drops below +4 °C while driving, the following symbol
(warning signal for ice on the road) appears before the temperature indicator
and an audible signal will sound.
If the outside temperature is less than +4 °C when the ignition is turned on, the
following symbol appears in the display and an acoustic signal sounds.
After pressing the switch
B
or the adjustment wheel
D
» Fig. 7 on page 26, the
function shown last is indicated.
WARNINGEven at temperatures around +4 °C, black ice may still be on the road surface!
Do not only rely upon the information given on the outside temperature dis-
play that there is no ice on the road.
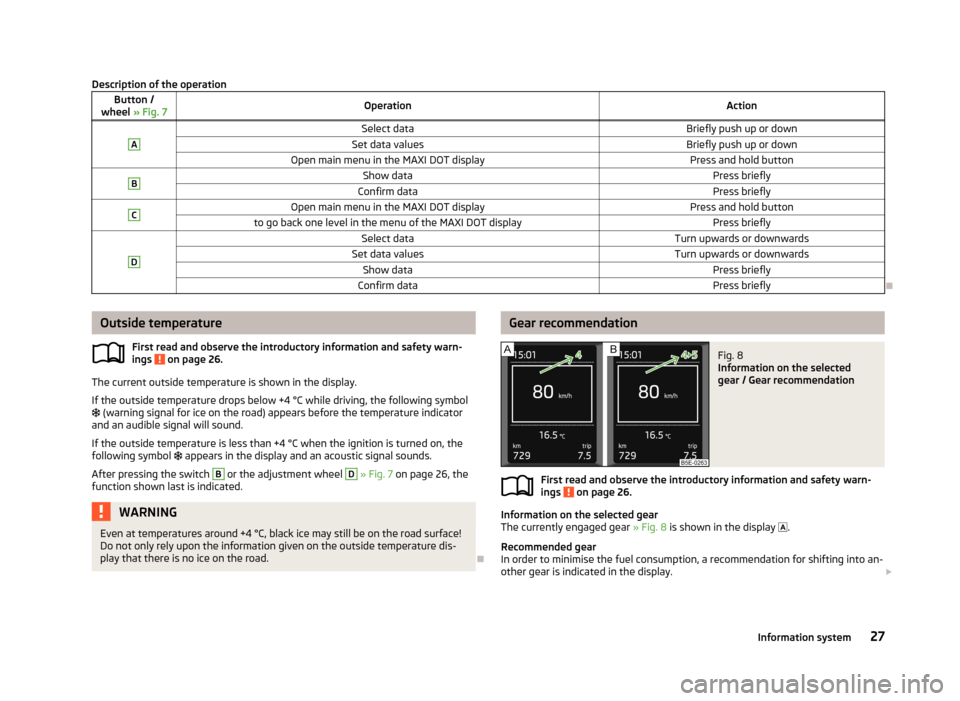
Gear recommendationFig. 8
Information on the selected
gear / Gear recommendation
First read and observe the introductory information and safety warn-
ings on page 26.
Information on the selected gear
The currently engaged gear » Fig. 8 is shown in the display
.
Recommended gear
In order to minimise the fuel consumption, a recommendation for shifting into an-
other gear is indicated in the display.
27Information system
Page 32 of 287
Driving data (Multifunction display)
Introduction
This chapter contains information on the following subjects:
Memory
29
Information overview
29
Warning at excessive speeds
31
The multifunction display only operates if the ignition is switched on.
After the ignition is switched on, the function that was last selected before
switching off the ignition is displayed.
Individual menu items can be shown or hidden in the Infotainment » Bedienung-
sanleitung Infotainment, chapter Vehicle settings (CAR button).
WARNINGConcentrate fully at all times on your driving! As the driver, you are fully re-
sponsible for the operation of your vehicle.
Note
In some national versions the displays appear in the Imperial system of measure-
ment.
Memory
First read and observe the introductory information and safety warn-
ings
on page 29.
The multifunction display is equipped with three automatic memories.
The display of the selected memory varies depending on vehicle equipment.
Since start (MAXI DOT display) or “1” (segment display)The memory collates the driving information from the moment the ignition isswitched on until it is switched off.
New data will also flow into the calculation of the current driving information if
the trip is continued within 2 hours after switching off the ignition.
If the trip is interrupted for more than 2 hours, the memory is automatically
erased.
Long-term (MAXI DOT display) or “2” (segment display)
The memory gathers driving information from any number of individual journeys
up to a total of 99 hours and 59 minutes driving or 9999 kilometres driven.
The memory is deleted when either of these limits is reached and the calculation
starts all over again.
Since refuel (MAXI DOT display) or “3” (segment display)
The memory gathers driving information since the last refuelling.
The memory is erased automatically the next time you fill up.
Select memory›
Select the corresponding element of the travel data » page 26, Using the infor-
mation system .
Confirm the element again to switch between the individual memories.
Resetting
›
Select the corresponding element of the travel data » page 26, Using the infor-
mation system .
›
Select the desired memory.
›
Press and hold button
B
or adjustment wheel
D
» Fig. 7 on page 26.
The following values of the selected memory are set to zero. › Average fuel consumption.
› Distance driven.
› Average speed.
› Driving time
Note
Disconnecting the vehicle battery will delete all memory data.
Information overview
First read and observe the introductory information and safety warn-
ings
on page 29.
The amount of information displayed may differ depending on the equipment.
29Information system
Page 34 of 287
Together with the consumption display, a list of three convenience consumers
with the highest consumption is also displayed.
For more information » page 133 and » Infotainment manual , chapter Vehicle set-
tings (press CAR) .
Refuelling amount 1)
After the consumption of about 10 litres of fuel from the fully refuelled tank, an amount of fuel is displayed in l. This amount can now be safely refilled.
Warning at excessive speeds
First read and observe the introductory information and safety warn-
ings
on page 29.
Adjust the speed limit while the vehicle is stationary
›
Select the menu item Warning at (MAXI DOT display) or
(segment display).
›
Activate the speed limit option by confirming this menu item.
›
Set the desired speed limit, e.g. 50 km/h.
›
Store the speed limit by confirming the set value, or wait several seconds; your
settings will be saved automatically.
This allows you to set the speed in 5 km/h intervals.
Adjusting the speed limit while the vehicle is moving
›
Select the menu item Warning at (MAXI DOT display) or
(segment display).
›
Drive at the desired speed, e.g. 50 km/h.
›
Confirm the current speed as the speed limit.
If you wish to adjust the set speed limit, you can do so in 5 km/h intervals (e.g. the
accepted speed of 47 km/h increases to 50 km/h or decreases to 45 km/h).
›
Store the speed limit, or wait several seconds; your settings will be saved auto-
matically.
Change or disable speed limit
›
Select the menu item Warning at (MAXI DOT display) or
(segment display).
›
By confirming the stored value, the speed limit is disabled.
›
By reconfirming, the option to change the speed limit is activated.
If the pre-set speed is exceeded, an acoustic signal appears as a warning tone
and a warning message appears in the display.
Speed ... exceeded.
SPEED TOO HIGH
The speed limit set mode is stored even after the ignition is switched off and on.
After a gap between driving exceeding 2 hours, the pre-set speed limit is deacti- vated.
MAXI DOT display
Introduction
This chapter contains information on the following subjects:
Main menu
32
Lap timer (Stop watch)
32
The MAXI DOT display provides you with information about the current operating
state of your vehicle. The MAXI DOT display also provides you with data (depend-
ing on the equipment installed in the vehicle) relating to the Infotainment, multi-
functional indicator, and similar.
WARNINGConcentrate fully at all times on your driving! As the driver, you are fully re- sponsible for the operation of your vehicle.
1)
Only valid for some countries.
31Information system
Page 35 of 287
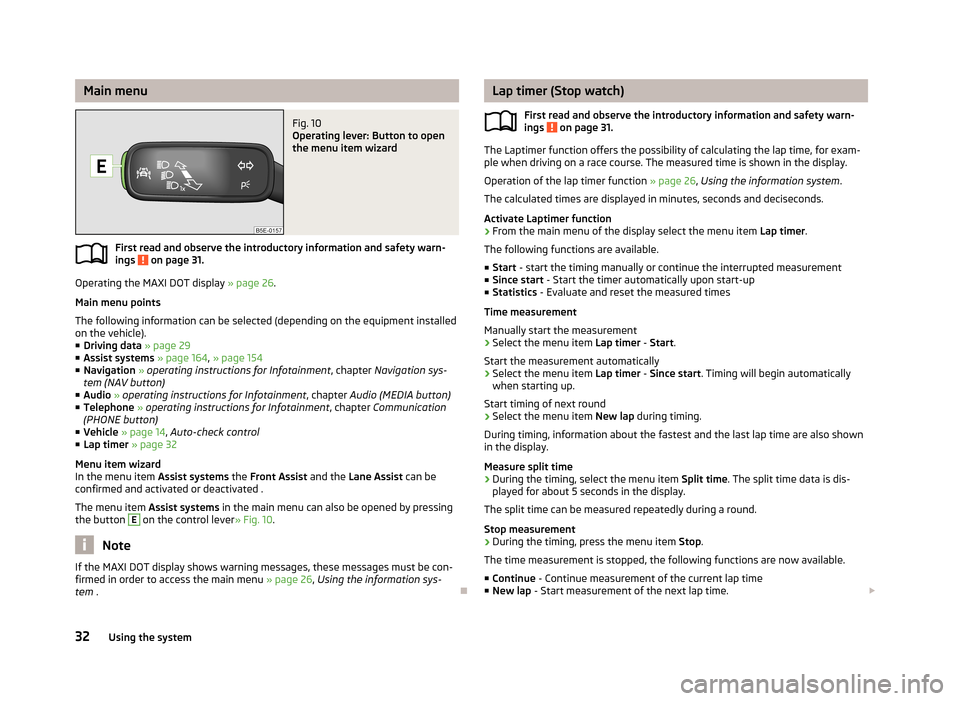
Main menuFig. 10
Operating lever: Button to open
the menu item wizard
First read and observe the introductory information and safety warn-
ings on page 31.
Operating the MAXI DOT display » page 26.
Main menu points
The following information can be selected (depending on the equipment installed on the vehicle).
■ Driving data » page 29
■ Assist systems » page 164 , » page 154
■ Navigation » operating instructions for Infotainment , chapter Navigation sys-
tem (NAV button)
■ Audio » operating instructions for Infotainment , chapter Audio (MEDIA button)
■ Telephone » operating instructions for Infotainment , chapter Communication
(PHONE button)
■ Vehicle » page 14 , Auto-check control
■ Lap timer » page 32
Menu item wizard
In the menu item Assist systems the Front Assist and the Lane Assist can be
confirmed and activated or deactivated .
The menu item Assist systems in the main menu can also be opened by pressing
the button
E
on the control lever » Fig. 10.
Note
If the MAXI DOT display shows warning messages, these messages must be con-
firmed in order to access the main menu » page 26, Using the information sys-
tem .
Lap timer (Stop watch)
First read and observe the introductory information and safety warn-ings
on page 31.
The Laptimer function offers the possibility of calculating the lap time, for exam-
ple when driving on a race course. The measured time is shown in the display.
Operation of the lap timer function » page 26, Using the information system .
The calculated times are displayed in minutes, seconds and deciseconds.
Activate Laptimer function › From the main menu of the display select the menu item
Lap timer.
The following functions are available. ■ Start - start the timing manually or continue the interrupted measurement
■ Since start - Start the timer automatically upon start-up
■ Statistics - Evaluate and reset the measured times
Time measurement
Manually start the measurement › Select the menu item
Lap timer - Start .
Start the measurement automatically
› Select the menu item
Lap timer - Since start . Timing will begin automatically
when starting up.
Start timing of next round
› Select the menu item
New lap during timing.
During timing, information about the fastest and the last lap time are also shown
in the display.
Measure split time
› During the timing, select the menu item
Split time. The split time data is dis-
played for about 5 seconds in the display.
The split time can be measured repeatedly during a round.
Stop measurement › During the timing, press the menu item
Stop.
The time measurement is stopped, the following functions are now available.
■ Continue - Continue measurement of the current lap time
■ New lap - Start measurement of the next lap time.
32Using the system
Page 36 of 287
■Abort lap - Cancel the timer (the aborted lap time is not stored)
■ Hang up - End timing (the aborted lap time is stored)
Evaluate recorded times
› Select the menu item
Lap timer - Statistics .
The following information is displayed. › Fastest:
- The fastest lap
› Slowest:
- The slowest lap
› Average:
- The average lap time
› Overall time:
- The total of all the lap times
Reset measured times
› Select the menu item
Lap timer - Statistics - Reset .WARNING■
Concentrate fully at all times on your driving! As the driver, you are fully re-
sponsible for the operation of your vehicle.■
Only use the Lap timer system when you are in any traffic situation where
you have full control over the vehicle.
Note
■ The system allows the measurement of up to 11 lap times.■The measurement of single lap time is stopped after 99 h, 59 min and 59 sec.
After this time has been reached, measuring the new lap starts automatically.■
The measured times cannot be reset individually.
■
If the measured times are not reset, then these are stored even after turning
off the ignition.
Service interval display
Introduction
This chapter contains information on the following subjects:
Service messages
33
Resetting Service Interval Display
34
The service due date is automatically displayed on the display and this informa- tion can be displayed manually at any time if necessary.
Note■ Information is retained in the Service Interval Display even after the vehicle bat-
tery is disconnected.■
If the instrument cluster is exchanged after a repair, the correct values must be
entered in the counter for the Service Interval Display. This work is carried out by a specialist garage.
■
In some national versions the displays appear in the Imperial system of meas-
urement.
■
For more information on the service intervals, see » page 198, Service intervals .
Service messages
First read and observe the introductory information given on page 33.
Messages before reaching the scheduled service dateBefore reaching the service date, the icon
appears in the display after the igni-
tion is switched on, as well as the following message for example.
Oil change in ... days
OIL CHANGE IN ... DAYS
or
Inspection in ... days
INSPECT_ IN ...DAYS
The kilometre indicator or the days indicator reduces in steps of 100 km or, where
applicable, days until the service due date is reached.
Messages upon reaching scheduled service date
Once the service interval is reached, the icon
appears in the display after the
ignition is switched on, as well as the following message for example.
Oil change now!
OIL CHANGE NOW
or Inspection now!
INSPECTION NOW
or
33Information system
Page 160 of 287
Advance warning
If Front Assist detects a risk of collision with a vehicle ahead, a symbol appears in
the display of the instrument cluster and an acoustic signal is heard » Fig. 142 - .
At the same time, the braking system is prepared for possible emergency braking.
The advance warning may occur when driving between 30 km/h and 210 km/h.
Apply the brakes or avoid the obstacle!
Acute alert
If the driver does not react to the advance warning, Front Assist briefly applies
the brake automatically via an active brake intervention to draw attention to the
potential danger of a collision again.
Automatic Braking
If the driver fails to respond to the acute warning, Front Assist starts to apply the
brakes automatically with increasing stopping power in several stages.
Front Assist can help to mitigate the consequences of a potential accident by
means of a speed reduction.
Brake Support
If the driver does not brake sufficiently in case of an imminent collision, Front As-
sist can increase the braking power, thereby reducing the consequences of a po-
tential accident.
The brake support only occurs as long as the brake pedal is being firmly pressed
down.
CAUTION
The automatic braking interventions by Front Assist can be terminated by press-
ing the clutch or the accelerator, or by moving the steering wheel.
Note
If an automatic brake intervention is triggered by Front Assist, the pressure in the
brake system increases and the brake pedal cannot be operated with the normal
pedal stroke.
Activating/deactivating
First read and observe the introductory information and safety warn-ings
on page 154.
Front Assist is automatically activated each time the ignition is switched on.
Front Assist should only be disabled in exceptional cases.
Activate / deactivate front assist
Front Assist can be activated or deactivated in the Infotainment » Infotainment
manual , chapter Vehicle settings (CAR button) or in the MAXI-DOTDis-
play » page 32 , Menu item wizard .
By disabling the system, the proximity warning system and the advance warning are also deactivated.
Activate/deactivate proximity warning
The proximity warning indicator can be activated/deactivated in the Infotain-
ment » Infotainment manual , chapter Vehicle settings (CAR button) .
The set proximity warning remains active even after stopping and starting the ig-
nition.
Activate/deactivate advance warning
The advance warning can be activated/deactivated in the Infotainment » Info-
tainment manual , chapter Vehicle settings (CAR button) .
The set advance warning remains active even after stopping and starting the ig- nition.
“City”Emergency braking
First read and observe the introductory information and safety warn-ings
on page 154.
The “City”Emergency braking function (From here on referred to only as the emer-
gency brake function) is a component of the Front Assist system.
The emergency brake function assists the driver when driving as follows. › Prepares the brakes for emergency braking prior to a detected danger.
› If the driver fails to respond to a detected danger, an automatic brake action oc-
curs with stopping power that increases in several stages.
The emergency brake function intervenes when driving between about 5 km/h
and 34 km / h.
157Assist systems
Page 164 of 287
Information messagesFirst read and observe the introductory information and safety warn-
ings
on page 158.
The messages and information are indicated in the instrument cluster display.
Start the engine manually!
START MANUALLY
The driver sees this message when the conditions for the automatic start proce-
dure are not met during the STOP phase. The engine must be started manual-
ly » page 121 .
Error: start-stop system
START STOP ERROR
Error in the START-STOP system. Seek help from a specialist garage.
Driving mode
Introduction
This chapter contains information on the following subjects:
Selecting driving mode
161
Normal Mode
162
Sportmode
162
Ecomode
162
Individualmode
163
Selecting the driving mode allows you to adjust a range of different driving pa-
rameters for the vehicle.
The set driving mode remains stored even after switching the ignition on and off.
WARNING■ Setting the driving mode while driving can distract you from other traffic –
risk of accident.■
Concentrate fully at all times on your driving! As the driver you are fully re-
sponsible for the operation of your vehicle.
■
Adjust the speed and driving style to the current visibility, weather, road and
traffic conditions.
Note
The driver can change some vehicle functions irrespective of the selected driving
mode. For instance, in the driving mode Eco, the driver can switch the automatic
transmission to the mode S.
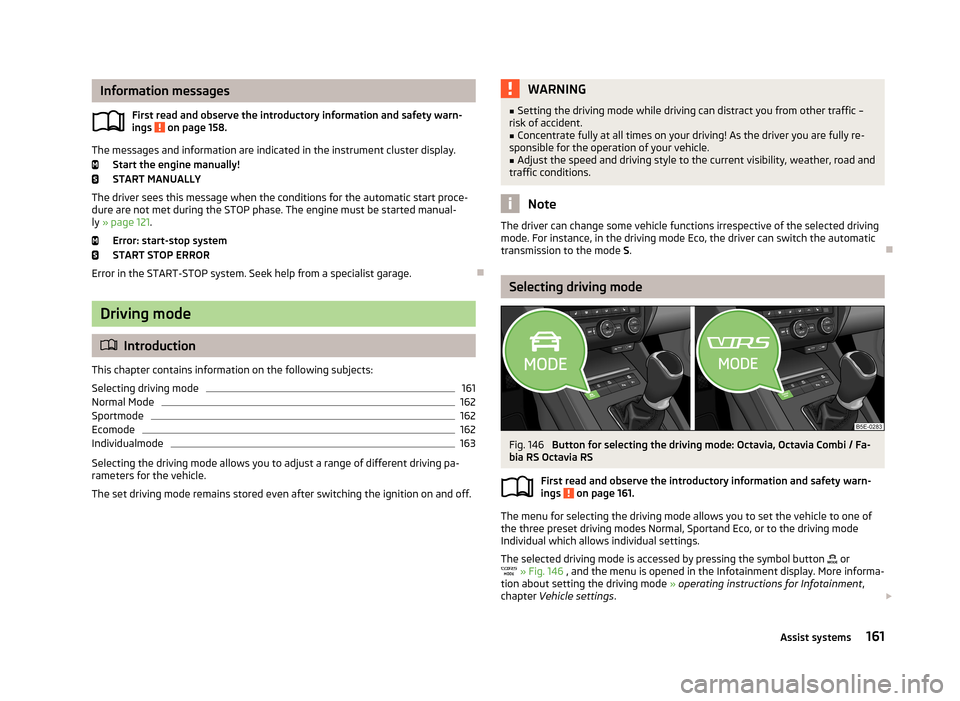
Selecting driving mode
Fig. 146
Button for selecting the driving mode: Octavia, Octavia Combi / Fa-
bia RS Octavia RS
First read and observe the introductory information and safety warn-ings
on page 161.
The menu for selecting the driving mode allows you to set the vehicle to one of
the three preset driving modes Normal, Sportand Eco, or to the driving mode
Individual which allows individual settings.
The selected driving mode is accessed by pressing the symbol button
or
» Fig. 146 , and the menu is opened in the Infotainment display. More informa-
tion about setting the driving mode » operating instructions for Infotainment ,
chapter Vehicle settings .
161Assist systems
Page 168 of 287
If the turn signal is switched on prior to driving over the boundary line (e.g. whenmaking a turn), no steering intervention takes place when the vehicle approaches
the boundary line. The system regards the situation as an intended lane change.
The system can intervene when the following basic conditions are present. The system is activated.
The vehicle is travelling at more than 65 km/h.
The boundary lines are clearly visible (appropriate longitudinal markings).
The boundary line of at least one side of the lane is detected. The driver's hands are on the steering wheel.The lane is more than 2.5 m in width.
Adaptive lane assist
Adaptive lane assist helps to keep the vehicle in the position between the boun- dary lines selected by the driver, by means of steering intervention.
If the system detects only one boundary line, it will help to maintain the selectedproximity from said boundary line.
If the proximity to the detected boundary line is changed, the system quickly
adapts and maintains the newly-selected position.
Adaptive lane assist can be activated/deactivated in the Infotainment » operating
instructions for Infotainment , chapter Vehicle settings (CAR button) .
Activating/deactivating
First read and observe the introductory information and safety warn-ings
on page 164.
The system can be activated or deactivated in the Infotainment » Infotainment
manual , chapter Vehicle settings (CAR button) or in the MAXI DOTdis-
play » page 32 , Menu item wizard .
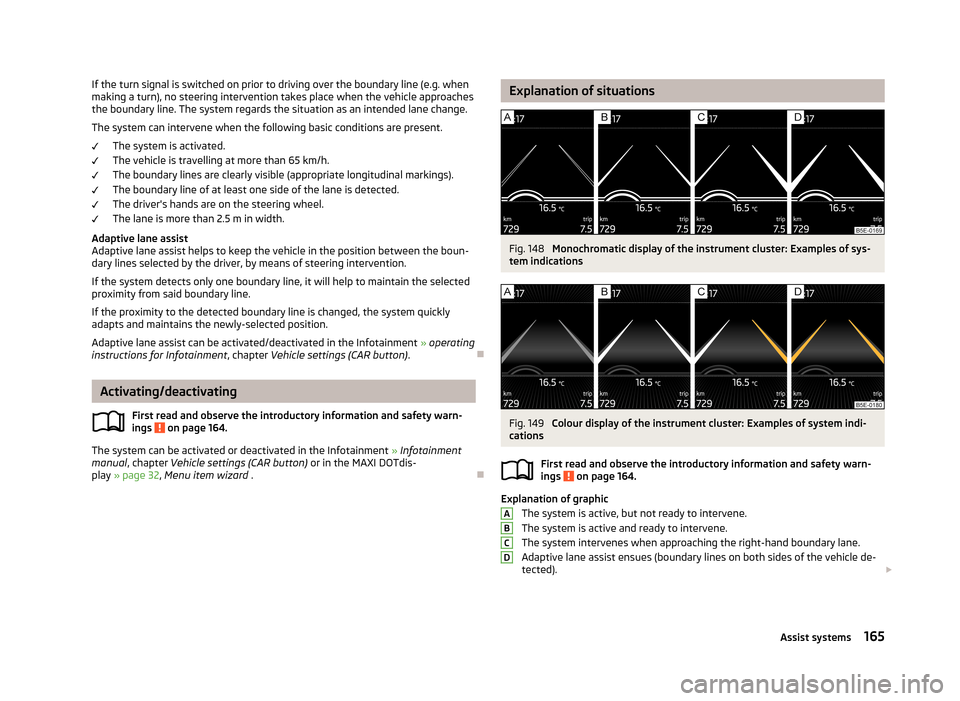
Explanation of situationsFig. 148
Monochromatic display of the instrument cluster: Examples of sys-
tem indications
Fig. 149
Colour display of the instrument cluster: Examples of system indi-
cations
First read and observe the introductory information and safety warn-
ings
on page 164.
Explanation of graphic
The system is active, but not ready to intervene.
The system is active and ready to intervene.
The system intervenes when approaching the right-hand boundary lane.
Adaptive lane assist ensues (boundary lines on both sides of the vehicle de-
tected).
ABCD165Assist systems
Page 170 of 287
The system works on the basis of the data captured by the camera and is only
able to show traffic signs which are in the camera's “viewing range” » Fig. 150.
Data from the camera can be supplemented by information from the Infotainment
Navigation. This is the reason why traffic signs with maximum speeds can also be shown on sections of roads which do not have any traffic signs.
The system may not be available or may only be available to a limited extent in the following situations.
› Poor visibility conditions, e.g. fog, heavy rain, thick snowfall.
› The camera is blinded by the sun.
› The camera is blinded by the oncoming traffic.
› The camera “viewing range” is obstructed by an obstacle.
› Travelling at high speed.
› The traffic signs are fully or partially obscured (e.g. by trees, snow, dirt or other
vehicles).
› The traffic signs are not standard (round with a red border).
› The traffic signs are damaged or bent.
› The traffic signs are attached to flashing neon signs.
› The traffic signs were changed (the navigation data are out of date).
Notifications and settings
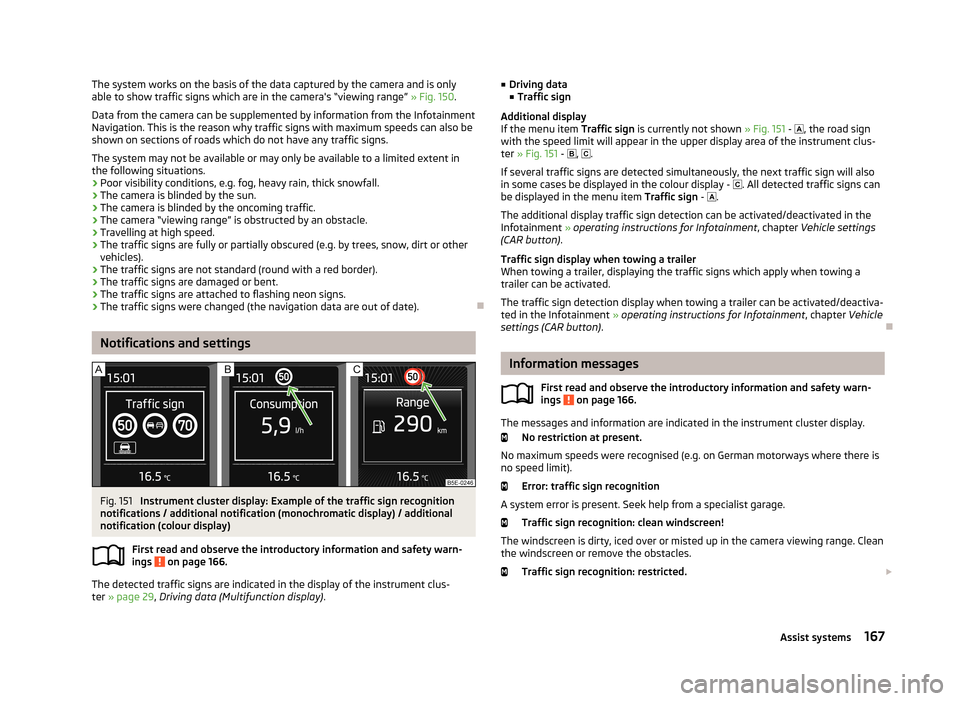
Fig. 151
Instrument cluster display: Example of the traffic sign recognition
notifications / additional notification (monochromatic display) / additional
notification (colour display)
First read and observe the introductory information and safety warn-ings
on page 166.
The detected traffic signs are indicated in the display of the instrument clus- ter » page 29 , Driving data (Multifunction display) .
■
Driving data
■ Traffic sign
Additional display
If the menu item Traffic sign is currently not shown » Fig. 151 - , the road sign
with the speed limit will appear in the upper display area of the instrument clus-
ter » Fig. 151 - , .
If several traffic signs are detected simultaneously, the next traffic sign will also
in some cases be displayed in the colour display - . All detected traffic signs can
be displayed in the menu item Traffic sign - .
The additional display traffic sign detection can be activated/deactivated in the
Infotainment » operating instructions for Infotainment , chapter Vehicle settings
(CAR button) .
Traffic sign display when towing a trailer
When towing a trailer, displaying the traffic signs which apply when towing a
trailer can be activated.
The traffic sign detection display when towing a trailer can be activated/deactiva-
ted in the Infotainment » operating instructions for Infotainment , chapter Vehicle
settings (CAR button) .
Information messages
First read and observe the introductory information and safety warn-
ings
on page 166.
The messages and information are indicated in the instrument cluster display.
No restriction at present.
No maximum speeds were recognised (e.g. on German motorways where there is
no speed limit).
Error: traffic sign recognition
A system error is present. Seek help from a specialist garage. Traffic sign recognition: clean windscreen!
The windscreen is dirty, iced over or misted up in the camera viewing range. Clean the windscreen or remove the obstacles.
Traffic sign recognition: restricted.
167Assist systems