AUX SKODA OCTAVIA 2014 3.G / (5E) Bolero Car Radio Manual
[x] Cancel search | Manufacturer: SKODA, Model Year: 2014, Model line: OCTAVIA, Model: SKODA OCTAVIA 2014 3.G / (5E)Pages: 54, PDF Size: 3.15 MB
Page 12 of 54
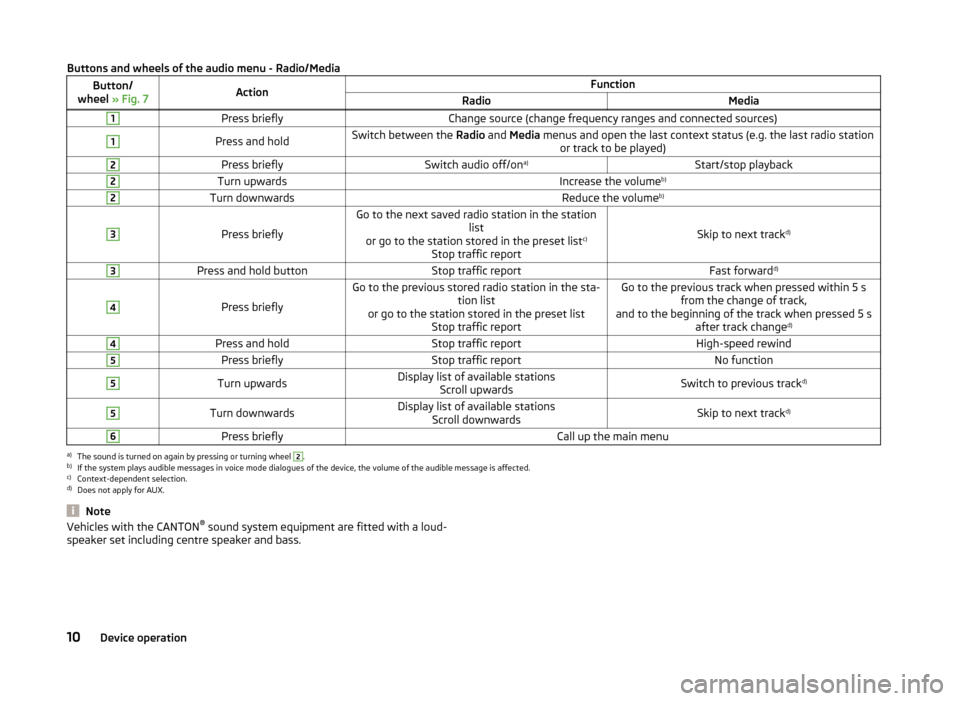
Buttons and wheels of the audio menu - Radio/MediaButton/
wheel » Fig. 7ActionFunctionRadioMedia1Press brieflyChange source (change frequency ranges and connected sources)1Press and holdSwitch between the Radio and Media menus and open the last context status (e.g. the last radio station
or track to be played)2Press brieflySwitch audio off/on a)Start/stop playback2Turn upwardsIncrease the volume b)2Turn downwardsReduce the volumeb)3
Press briefly
Go to the next saved radio station in the station
list
or go to the station stored in the preset list c)
Stop traffic report
Skip to next track d)
3Press and hold buttonStop traffic reportFast forward
d)4
Press briefly
Go to the previous stored radio station in the sta-
tion list
or go to the station stored in the preset list Stop traffic reportGo to the previous track when pressed within 5 sfrom the change of track,
and to the beginning of the track when pressed 5 s after track change d)4Press and holdStop traffic reportHigh-speed rewind5Press brieflyStop traffic reportNo function5Turn upwardsDisplay list of available stations
Scroll upwardsSwitch to previous track d)5Turn downwardsDisplay list of available stations
Scroll downwardsSkip to next track d)6Press brieflyCall up the main menua)
The sound is turned on again by pressing or turning wheel
2
.
b)
If the system plays audible messages in voice mode dialogues of the device, the volume of the audible message is affected.
c)
Context-dependent selection.
d)
Does not apply for AUX.
NoteVehicles with the CANTON ®
sound system equipment are fitted with a loud-
speaker set including centre speaker and bass.10Device operation
Page 18 of 54
Sound setupFig. 11
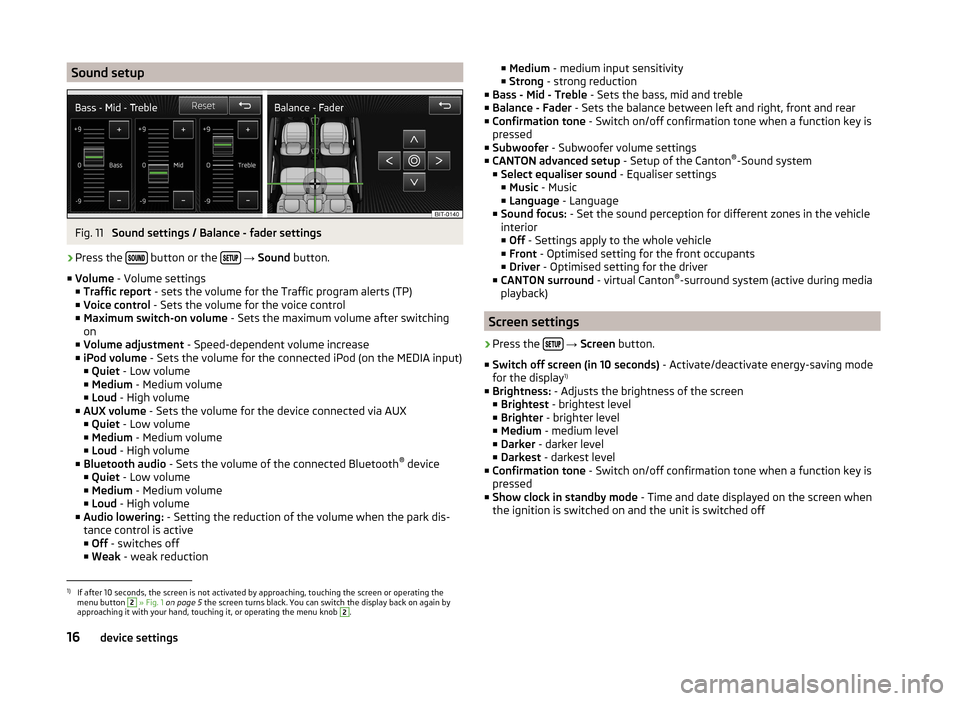
Sound settings / Balance - fader settings
›
Press the button or the
→ Sound button.
■ Volume - Volume settings
■ Traffic report - sets the volume for the Traffic program alerts (TP)
■ Voice control - Sets the volume for the voice control
■ Maximum switch-on volume - Sets the maximum volume after switching
on
■ Volume adjustment - Speed-dependent volume increase
■ iPod volume - Sets the volume for the connected iPod (on the MEDIA input)
■ Quiet - Low volume
■ Medium - Medium volume
■ Loud - High volume
■ AUX volume - Sets the volume for the device connected via AUX
■ Quiet - Low volume
■ Medium - Medium volume
■ Loud - High volume
■ Bluetooth audio - Sets the volume of the connected Bluetooth ®
device
■ Quiet - Low volume
■ Medium - Medium volume
■ Loud - High volume
■ Audio lowering: - Setting the reduction of the volume when the park dis-
tance control is active ■ Off - switches off
■ Weak - weak reduction
■
Medium - medium input sensitivity
■ Strong - strong reduction
■ Bass - Mid - Treble - Sets the bass, mid and treble
■ Balance - Fader - Sets the balance between left and right, front and rear
■ Confirmation tone - Switch on/off confirmation tone when a function key is
pressed
■ Subwoofer - Subwoofer volume settings
■ CANTON advanced setup - Setup of the Canton®
-Sound system
■ Select equaliser sound - Equaliser settings
■ Music - Music
■ Language - Language
■ Sound focus: - Set the sound perception for different zones in the vehicle
interior
■ Off - Settings apply to the whole vehicle
■ Front - Optimised setting for the front occupants
■ Driver - Optimised setting for the driver
■ CANTON surround - virtual Canton®
-surround system (active during media
playback)
Screen settings
›
Press the
→ Screen button.
■ Switch off screen (in 10 seconds) - Activate/deactivate energy-saving mode
for the display 1)
■ Brightness: - Adjusts the brightness of the screen
■ Brightest - brightest level
■ Brighter - brighter level
■ Medium - medium level
■ Darker - darker level
■ Darkest - darkest level
■ Confirmation tone - Switch on/off confirmation tone when a function key is
pressed
■ Show clock in standby mode - Time and date displayed on the screen when
the ignition is switched on and the unit is switched off
1)
If after 10 seconds, the screen is not activated by approaching, touching the screen or operating the
menu button
2
» Fig. 1 on page 5 the screen turns black. You can switch the display back on again by
approaching it with your hand, touching it, or operating the menu knob
2
.
16device settings
Page 26 of 54
Media
Operation
Introduction
This chapter contains information on the following subjects:
Main menu
24
Track/folder list
24
Playback
25
Media settings
25
First and foremost, pay attention to the safety instructions » page 4 , Impor-
tant notes .
The device allows you to play audio files in various formats » page 26 from
different data carriers and to connect different source types.
When the signal source has been connected, the device starts to automatically play audio files in alphabetical order.
Types of device operation » page 7 .
› On the device with the operating elements.
› Using the function keys on the unit screen
› Via the Maxi DOT display.
Main menu
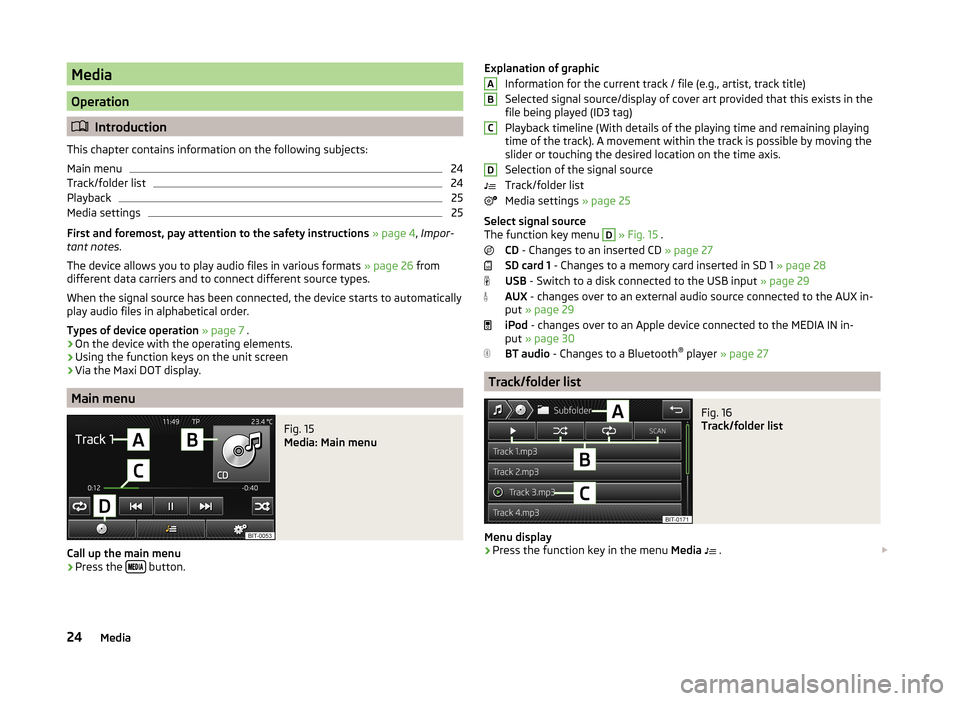
Fig. 15
Media: Main menu
Call up the main menu
›
Press the
button.
Explanation of graphic
Information for the current track / file (e.g., artist, track title)
Selected signal source/display of cover art provided that this exists in the
file being played (ID3 tag)
Playback timeline (With details of the playing time and remaining playing
time of the track). A movement within the track is possible by moving the
slider or touching the desired location on the time axis.
Selection of the signal source
Track/folder list
Media settings » page 25
Select signal source
The function key menu D
» Fig. 15 .
CD - Changes to an inserted CD » page 27
SD card 1 - Changes to a memory card inserted in SD 1 » page 28
USB - Switch to a disk connected to the USB input » page 29
AUX - changes over to an external audio source connected to the AUX in-
put » page 29
iPod - changes over to an Apple device connected to the MEDIA IN in-
put » page 30
BT audio - Changes to a Bluetooth ®
player » page 27
Track/folder list
Fig. 16
Track/folder list
Menu display
›
Press the function key in the menu Media
.
ABCD24Media
Page 27 of 54
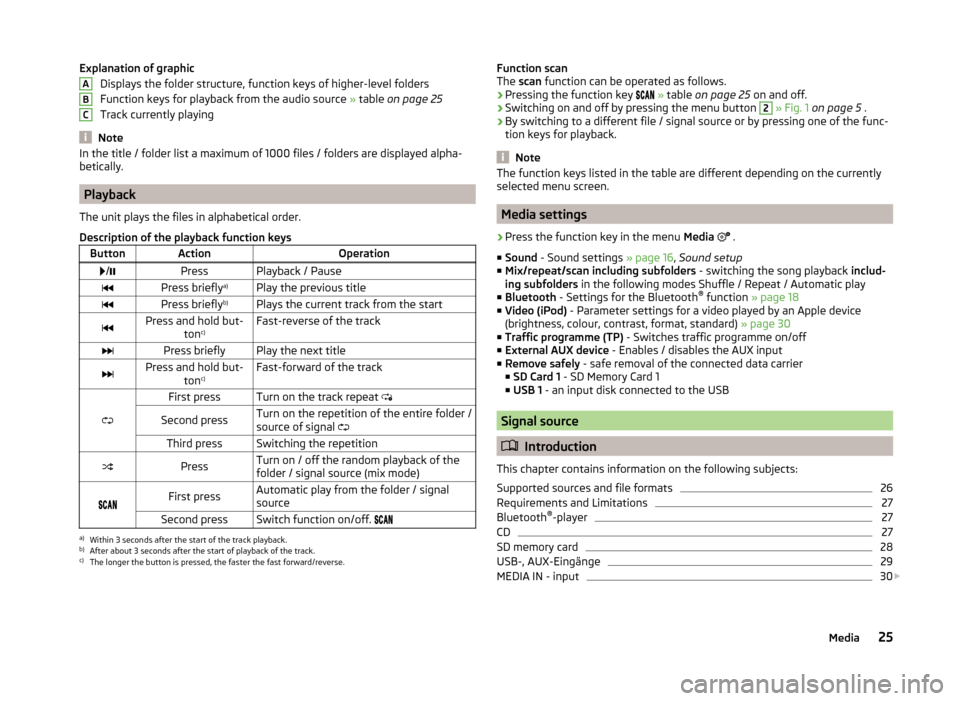
Explanation of graphicDisplays the folder structure, function keys of higher-level folders
Function keys for playback from the audio source » table on page 25
Track currently playing
Note
In the title / folder list a maximum of 1000 files / folders are displayed alpha-
betically.
Playback
The unit plays the files in alphabetical order.
Description of the playback function keys
ButtonActionOperation /PressPlayback / PausePress briefly a)Play the previous titlePress briefly b)Plays the current track from the startPress and hold but-
tonc)Fast-reverse of the trackPress brieflyPlay the next titlePress and hold but-
tonc)Fast-forward of the track
First pressTurn on the track repeat
Second pressTurn on the repetition of the entire folder /
source of signal Third pressSwitching the repetitionPressTurn on / off the random playback of the
folder / signal source (mix mode)
First pressAutomatic play from the folder / signal
sourceSecond pressSwitch function on/off. a)
Within 3 seconds after the start of the track playback.
b)
After about 3 seconds after the start of playback of the track.
c)
The longer the button is pressed, the faster the fast forward/reverse.
ABCFunction scan
The scan function can be operated as follows.
› Pressing the function key
» table on page 25 on and off.
› Switching on and off by pressing the menu button 2
» Fig. 1 on page 5 .
› By switching to a different file / signal source or by pressing one of the func-
tion keys for playback.
Note
The function keys listed in the table are different depending on the currently
selected menu screen.
Media settings
›
Press the function key in the menu Media
.
■ Sound - Sound settings » page 16, Sound setup
■ Mix/repeat/scan including subfolders - switching the song playback includ-
ing subfolders in the following modes Shuffle / Repeat / Automatic play
■ Bluetooth - Settings for the Bluetooth ®
function » page 18
■ Video (iPod) - Parameter settings for a video played by an Apple device
(brightness, colour, contrast, format, standard) » page 30
■ Traffic programme (TP) - Switches traffic programme on/off
■ External AUX device - Enables / disables the AUX input
■ Remove safely - safe removal of the connected data carrier
■ SD Card 1 - SD Memory Card 1
■ USB 1 - an input disk connected to the USB
Signal source
Introduction
This chapter contains information on the following subjects:
Supported sources and file formats
26
Requirements and Limitations
27
Bluetooth ®
-player
27
CD
27
SD memory card
28
USB-, AUX-Eingänge
29
MEDIA IN - input
30
25Media
Page 31 of 54
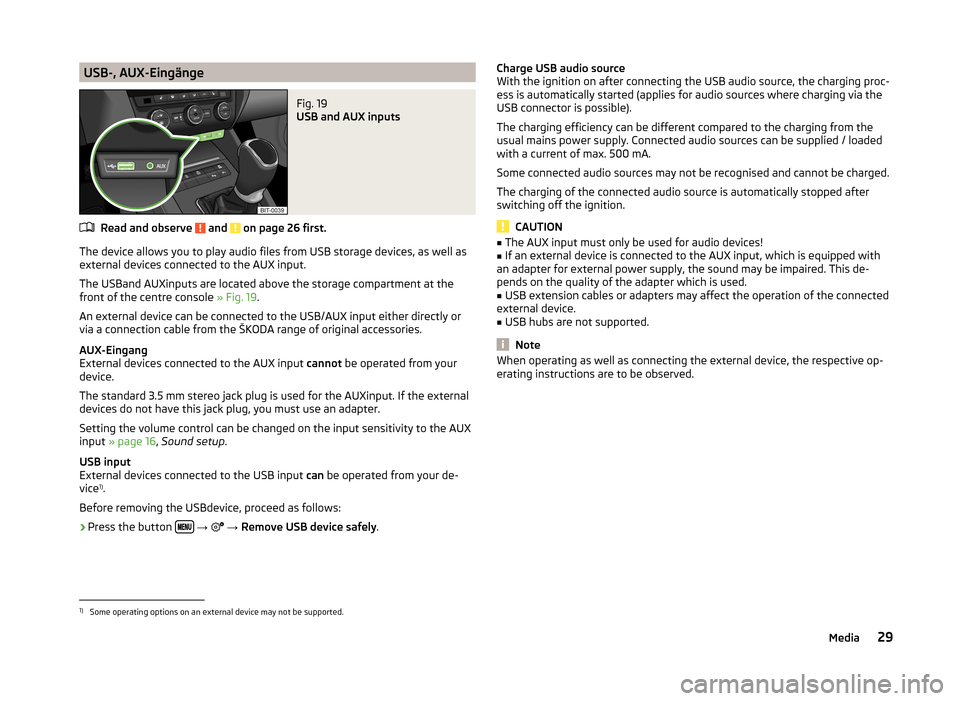
USB-, AUX-EingängeFig. 19
USB and AUX inputs
Read and observe and on page 26 first.
The device allows you to play audio files from USB storage devices, as well as
external devices connected to the AUX input.
The USBand AUXinputs are located above the storage compartment at the front of the centre console » Fig. 19.
An external device can be connected to the USB/AUX input either directly or
via a connection cable from the ŠKODA range of original accessories.
AUX-Eingang
External devices connected to the AUX input cannot be operated from your
device.
The standard 3.5 mm stereo jack plug is used for the AUXinput. If the external
devices do not have this jack plug, you must use an adapter.
Setting the volume control can be changed on the input sensitivity to the AUX
input » page 16 , Sound setup .
USB input
External devices connected to the USB input can be operated from your de-
vice 1)
.
Before removing the USBdevice, proceed as follows:
›
Press the button
→
→ Remove USB device safely .
Charge USB audio source
With the ignition on after connecting the USB audio source, the charging proc-
ess is automatically started (applies for audio sources where charging via the
USB connector is possible).
The charging efficiency can be different compared to the charging from the
usual mains power supply. Connected audio sources can be supplied / loaded
with a current of max. 500 mA.
Some connected audio sources may not be recognised and cannot be charged.
The charging of the connected audio source is automatically stopped after
switching off the ignition.
CAUTION
■ The AUX input must only be used for audio devices!■If an external device is connected to the AUX input, which is equipped with
an adapter for external power supply, the sound may be impaired. This de-
pends on the quality of the adapter which is used.■
USB extension cables or adapters may affect the operation of the connected
external device.
■
USB hubs are not supported.
Note
When operating as well as connecting the external device, the respective op-
erating instructions are to be observed.1)
Some operating options on an external device may not be supported.
29Media
Page 43 of 54
Vehicle systems
Vehicle settings
Introduction
This chapter contains information on the following subjects:
Selection of travel mode (Driving Mode Selection)
41
Vehicle data
42
Auxiliary heater and ventilation
43
ESC-and ASR systems
43
Tyre
43
Assistance systems
44
Parking and manoeuvring
44
Light
45
mirrors and wiper
45
Opening and closing
45
Seats
45
Multifunction display
46
Service
46
Restore factory settings
46
Climatronic settings
46
First and foremost, pay attention to the safety instructions » page 4 , Impor-
tant notes .
Settings relating to the vehicle systems can only be made when the ignition is
switched on.
Note
■ The individual systems are described in the » Vehicle Owner's Manual .■For safety reasons, if any system functions are disabled, then some func-
tions, such as parts of the ESC system, are automatically enabled again after
switching the ignition off and on.Selection of travel mode (Driving Mode Selection)Fig. 25
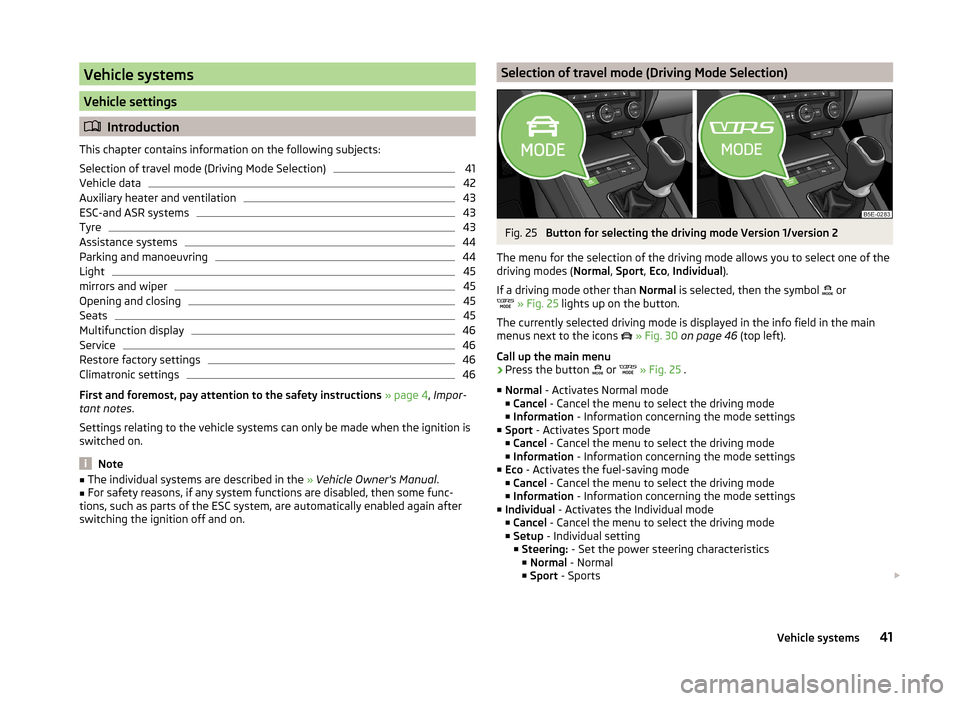
Button for selecting the driving mode Version 1/version 2
The menu for the selection of the driving mode allows you to select one of the
driving modes ( Normal, Sport , Eco , Individual ).
If a driving mode other than Normal is selected, then the symbol
or
» Fig. 25 lights up on the button.
The currently selected driving mode is displayed in the info field in the main
menus next to the icons
» Fig. 30 on page 46 (top left).
Call up the main menu
›
Press the button or
» Fig. 25 .
■ Normal - Activates Normal mode
■ Cancel - Cancel the menu to select the driving mode
■ Information - Information concerning the mode settings
■ Sport - Activates Sport mode
■ Cancel - Cancel the menu to select the driving mode
■ Information - Information concerning the mode settings
■ Eco - Activates the fuel-saving mode
■ Cancel - Cancel the menu to select the driving mode
■ Information - Information concerning the mode settings
■ Individual - Activates the Individual mode
■ Cancel - Cancel the menu to select the driving mode
■ Setup - Individual setting
■ Steering: - Set the power steering characteristics
■ Normal - Normal
■ Sport - Sports
41Vehicle systems
Page 45 of 54
■Convenience consumers - Displays up to three consumers which have the
largest share of fuel consumption and displays the fuel consumption to run
all convenience systems
■ Vehicle status - Displays vehicle status » Fig. 26 or tyre pressure monitoring
information
■ Vehicle status - Displays vehicle status information
■ - No message /
- warning messages relating to vehicle status or
number of messages (if there is only one message, one warning message
text is displayed)
■ - Display information about the status of the START-STOP system
■ TPMS - Function of the tire pressure monitor » Fig. 27
■ SET - Storage of the tire pressure values
Switching between the individual menus can be done by using the function
keys
.
Note
After pressing the button, the view from the menu last displayed is shown
.
Auxiliary heater and ventilation
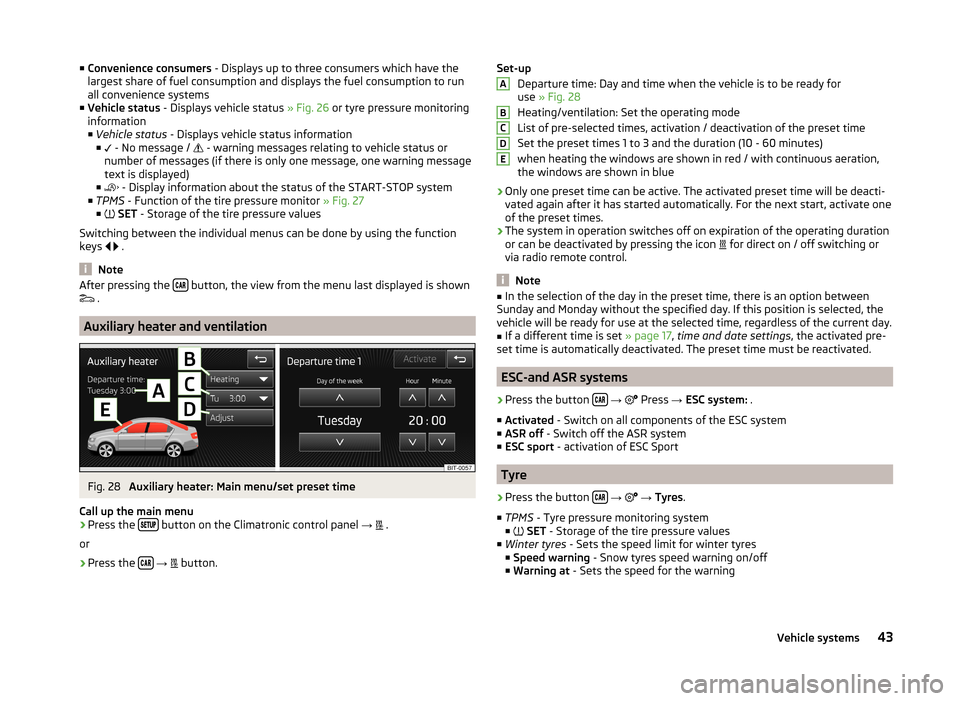
Fig. 28
Auxiliary heater: Main menu/set preset time
Call up the main menu
›
Press the button on the Climatronic control panel
→
.
or
›
Press the
→
button.
Set-up
Departure time: Day and time when the vehicle is to be ready for
use » Fig. 28
Heating/ventilation: Set the operating mode
List of pre-selected times, activation / deactivation of the preset time
Set the preset times 1 to 3 and the duration (10 - 60 minutes) when heating the windows are shown in red / with continuous aeration,
the windows are shown in blue
› Only one preset time can be active. The activated preset time will be deacti-
vated again after it has started automatically. For the next start, activate one
of the preset times.
› The system in operation switches off on expiration of the operating duration
or can be deactivated by pressing the icon for direct on / off switching or
via radio remote control.
Note
■ In the selection of the day in the preset time, there is an option between
Sunday and Monday without the specified day. If this position is selected, the
vehicle will be ready for use at the selected time, regardless of the current day.■
If a different time is set » page 17, time and date settings , the activated pre-
set time is automatically deactivated. The preset time must be reactivated.
ESC-and ASR systems
›
Press the button
→
Press
→ ESC system: .
■ Activated - Switch on all components of the ESC system
■ ASR off - Switch off the ASR system
■ ESC sport - activation of ESC Sport
Tyre
›
Press the button
→
→ Tyres .
■ TPMS - Tyre pressure monitoring system
■
SET - Storage of the tire pressure values
■ Winter tyres - Sets the speed limit for winter tyres
■ Speed warning - Snow tyres speed warning on/off
■ Warning at - Sets the speed for the warning
ABCDE43Vehicle systems
Page 48 of 54
■Store seat position - Store the driver's seat position and exterior mirror posi-
tion in the remote control key when locking the vehicle ■ Vehicle key activated - Activate/deactivate storing the driver's seat posi-
tion and exterior mirror position when locking the vehicle
Multifunction display
›
Press the button
→
→ Multifunction display .
In this menu it is possible to hide/show the appearance of the menu items in
the instrument cluster multifunction display and reset the driving data.
■ Current consumption - Display of current fuel consumption on/off
■ Average consumption - Display of average fuel consumption on/off
■ Refuel quantity - Display of refuel quantity on/off
■ Convenience consumers - Display of fuel consumption of convenience con-
sumers on/off
■ Eco tips - Display of tips for economical driving on/off
■ Travelling time - Display of travelling time on/off
■ Distance - Display of distance travelled on/off
■ Average speed - Display of average speed on/off
■ Digital speed display - Display of current speed on/off
■ Speed warning - Winter tyres warning on/off
■ Oil temperature - Oil temperature on/off
■ Reset Since start driving data - Reset the single-trip memory in the device
screen and in the display of the instrument cluster
■ Reset Long-term driving data - Reset the long-term memory in the device
screen and in the display of the instrument cluster
Service
›
Press the button
→
→ Service .
■ Vehicle no.: - Display of the vehicle identification number
■ Inspection: --- / --- - Number of km/days remaining until the next service
event
■ Oil change service: --- / --- - Number of km/days until the next oil change
Restore factory settings
›
Press the button
→
→ Factory settings .
In this menu you have the possibility to reset the menu items in the settings of the vehicle systems to factory settings.
■ All settings - Restoration of the settings all menu items
■ Driver assistance - Restoration of the driver assistance menus
■ Parking and manoeuvring - Restoration of the Parking and manoeuvring
menu items
■ Light - Restoration of the light menus
■ Mirrors and wipers - Restoration of the Mirrors and wipers menu
■ Opening and closing - Restoration of the Opening/closing menu items
■ Multifunction display - Restoration of the Multifunction display menus
If one of the above menu items is selected, the system will ask you whether
you really want to restore the settings.
■ Cancel - Return to higher-level menu
■ Reset - Restore the settings
Climatronic settings
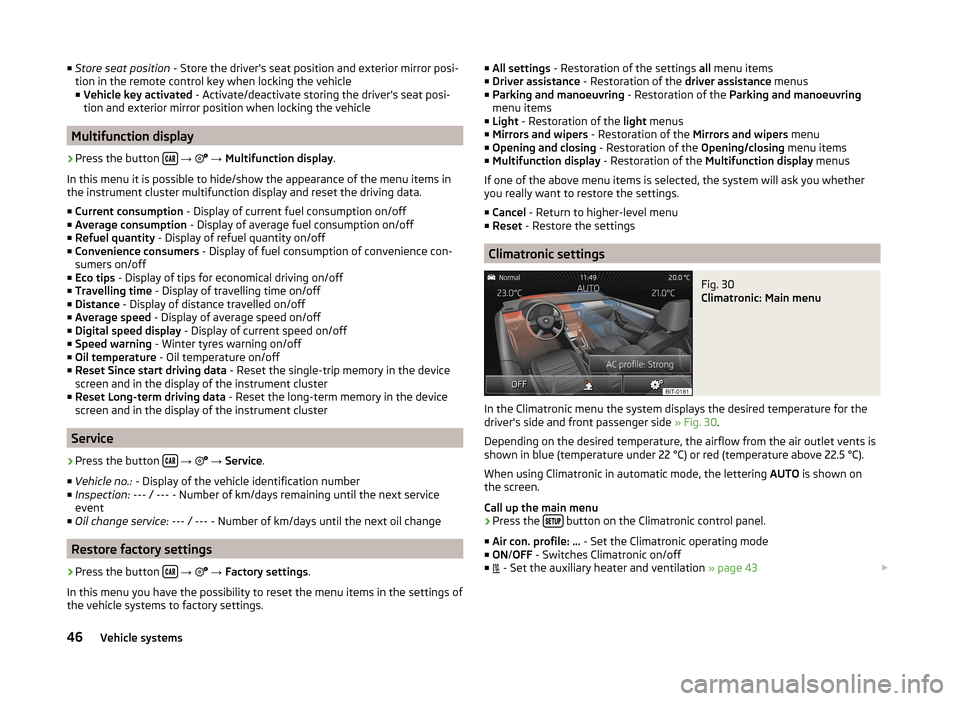
Fig. 30
Climatronic: Main menu
In the Climatronic menu the system displays the desired temperature for the
driver's side and front passenger side » Fig. 30.
Depending on the desired temperature, the airflow from the air outlet vents is
shown in blue (temperature under 22 °C) or red (temperature above 22.5 °C).
When using Climatronic in automatic mode, the lettering AUTO is shown on
the screen.
Call up the main menu
›
Press the button on the Climatronic control panel.
■ Air con. profile: ... - Set the Climatronic operating mode
■ ON /OFF - Switches Climatronic on/off
■ - Set the auxiliary heater and ventilation
» page 43
46Vehicle systems
Page 50 of 54
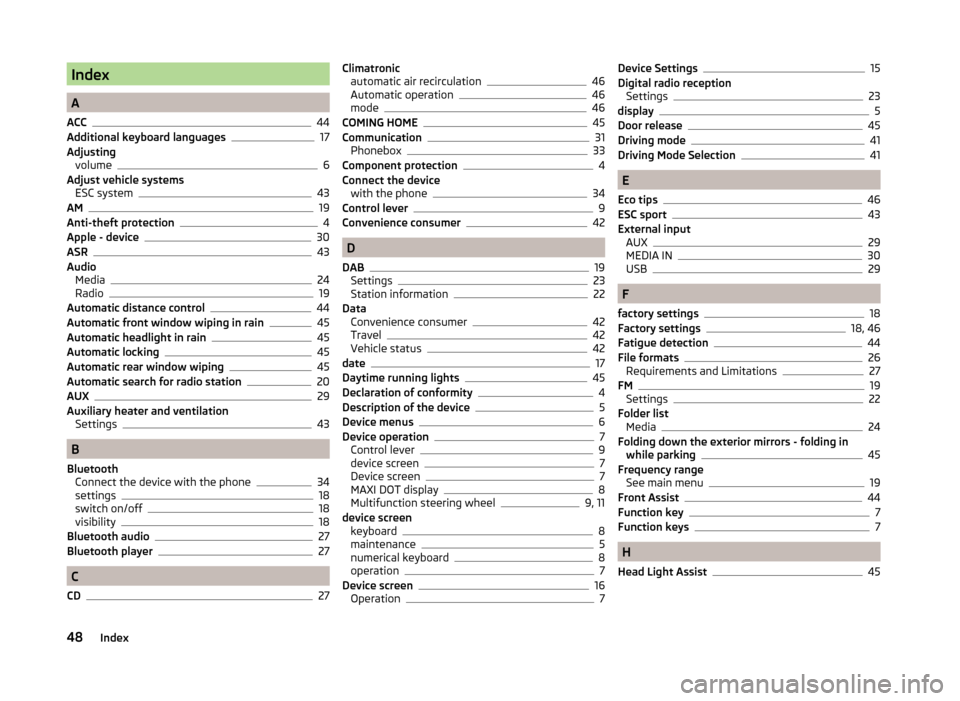
Index
A
ACC
44
Additional keyboard languages17
Adjusting volume
6
Adjust vehicle systems ESC system
43
AM19
Anti-theft protection4
Apple - device30
ASR43
Audio Media
24
Radio19
Automatic distance control44
Automatic front window wiping in rain45
Automatic headlight in rain45
Automatic locking45
Automatic rear window wiping45
Automatic search for radio station20
AUX29
Auxiliary heater and ventilation Settings
43
B
Bluetooth Connect the device with the phone
34
settings18
switch on/off18
visibility18
Bluetooth audio27
Bluetooth player27
C
CD
27
Climatronic automatic air recirculation46
Automatic operation46
mode46
COMING HOME45
Communication31
Phonebox33
Component protection4
Connect the device with the phone
34
Control lever9
Convenience consumer42
D
DAB
19
Settings23
Station information22
Data Convenience consumer
42
Travel42
Vehicle status42
date17
Daytime running lights45
Declaration of conformity4
Description of the device5
Device menus6
Device operation7
Control lever9
device screen7
Device screen7
MAXI DOT display8
Multifunction steering wheel9, 11
device screen keyboard
8
maintenance5
numerical keyboard8
operation7
Device screen16
Operation7
Device Settings15
Digital radio reception Settings
23
display5
Door release45
Driving mode41
Driving Mode Selection41
E
Eco tips
46
ESC sport43
External input AUX
29
MEDIA IN30
USB29
F
factory settings
18
Factory settings18, 46
Fatigue detection44
File formats26
Requirements and Limitations27
FM19
Settings22
Folder list Media
24
Folding down the exterior mirrors - folding in while parking
45
Frequency range See main menu
19
Front Assist44
Function key7
Function keys7
H
Head Light Assist
45
48Index
Page 51 of 54
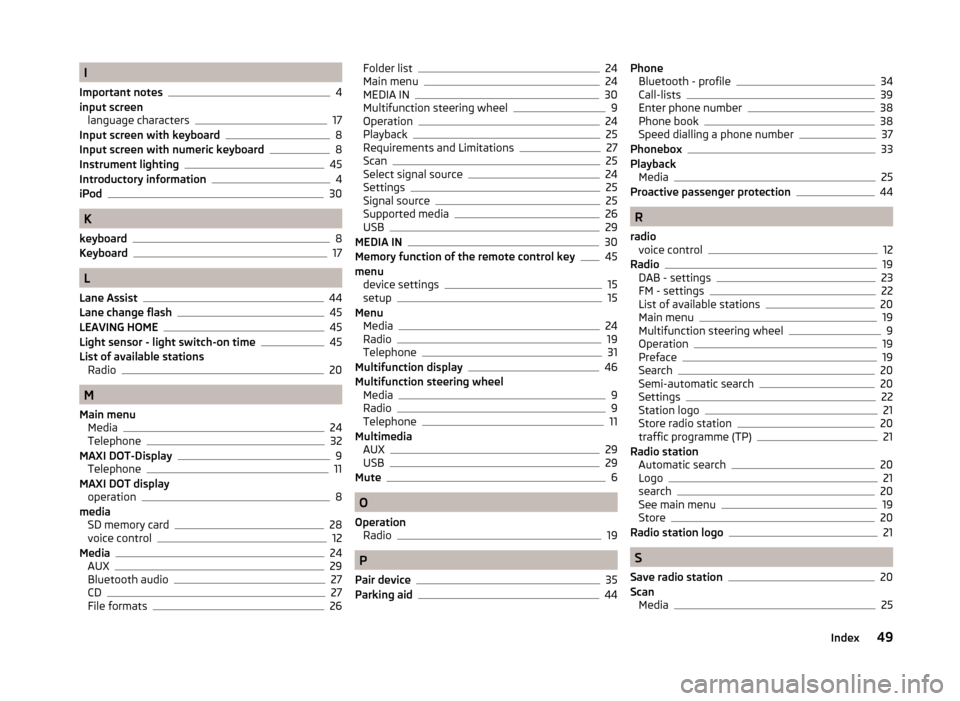
I
Important notes
4
input screen language characters
17
Input screen with keyboard8
Input screen with numeric keyboard8
Instrument lighting45
Introductory information4
iPod30
K
keyboard
8
Keyboard17
L
Lane Assist
44
Lane change flash45
LEAVING HOME45
Light sensor - light switch-on time45
List of available stations Radio
20
M
Main menu Media
24
Telephone32
MAXI DOT-Display
9
Telephone11
MAXI DOT display operation
8
media SD memory card
28
voice control12
Media24
AUX29
Bluetooth audio27
CD27
File formats26
Folder list24
Main menu24
MEDIA IN30
Multifunction steering wheel9
Operation24
Playback25
Requirements and Limitations27
Scan25
Select signal source24
Settings25
Signal source25
Supported media26
USB29
MEDIA IN30
Memory function of the remote control key45
menu device settings
15
setup15
Menu Media
24
Radio19
Telephone31
Multifunction display46
Multifunction steering wheel Media
9
Radio9
Telephone11
Multimedia AUX
29
USB29
Mute6
O
Operation Radio
19
P
Pair device
35
Parking aid44
Phone Bluetooth - profile34
Call-lists39
Enter phone number38
Phone book38
Speed dialling a phone number37
Phonebox33
Playback Media
25
Proactive passenger protection44
R
radio voice control
12
Radio19
DAB - settings23
FM - settings22
List of available stations20
Main menu19
Multifunction steering wheel9
Operation19
Preface19
Search20
Semi-automatic search20
Settings22
Station logo21
Store radio station20
traffic programme (TP)21
Radio station Automatic search
20
Logo21
search20
See main menu19
Store20
Radio station logo21
S
Save radio station
20
Scan Media
25
49Index