ESP SKODA OCTAVIA 2014 3.G / (5E) Columbus Infotinment Navigation System Manual
[x] Cancel search | Manufacturer: SKODA, Model Year: 2014, Model line: OCTAVIA, Model: SKODA OCTAVIA 2014 3.G / (5E)Pages: 83, PDF Size: 5.16 MB
Page 5 of 83
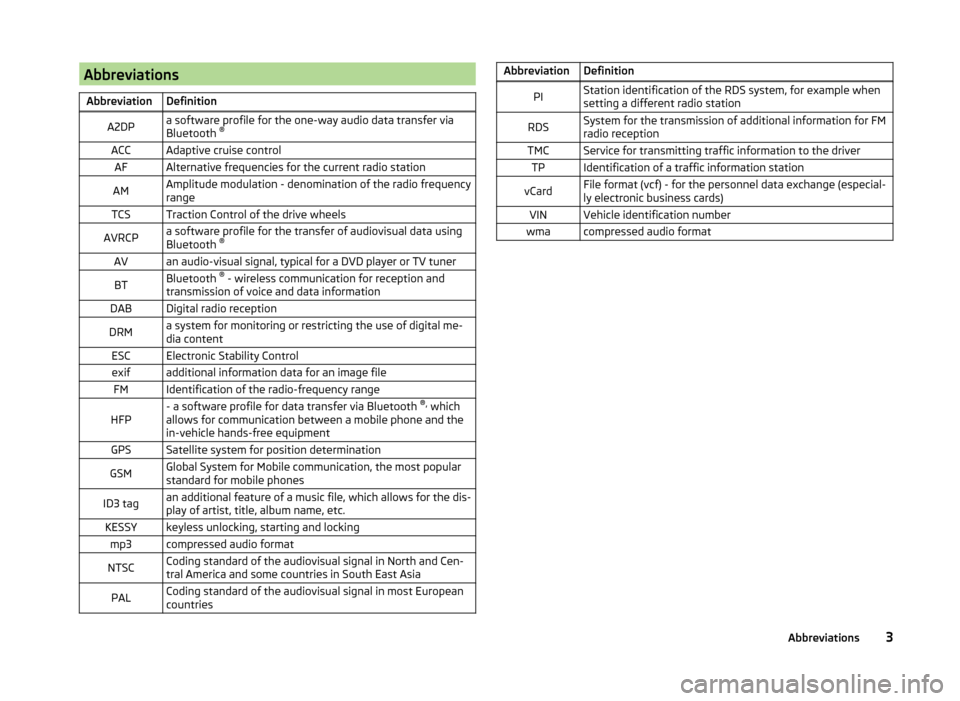
AbbreviationsAbbreviationDefinitionA2DPa software profile for the one-way audio data transfer via
Bluetooth ®ACCAdaptive cruise controlAFAlternative frequencies for the current radio stationAMAmplitude modulation - denomination of the radio frequency
rangeTCSTraction Control of the drive wheelsAVRCPa software profile for the transfer of audiovisual data using
Bluetooth ®AVan audio-visual signal, typical for a DVD player or TV tunerBTBluetooth ®
- wireless communication for reception and
transmission of voice and data informationDABDigital radio receptionDRMa system for monitoring or restricting the use of digital me-
dia contentESCElectronic Stability Controlexifadditional information data for an image fileFMIdentification of the radio-frequency rangeHFP- a software profile for data transfer via Bluetooth ®,
which
allows for communication between a mobile phone and the
in-vehicle hands-free equipmentGPSSatellite system for position determinationGSMGlobal System for Mobile communication, the most popular
standard for mobile phonesID3 tagan additional feature of a music file, which allows for the dis-
play of artist, title, album name, etc.KESSYkeyless unlocking, starting and lockingmp3compressed audio formatNTSCCoding standard of the audiovisual signal in North and Cen-
tral America and some countries in South East AsiaPALCoding standard of the audiovisual signal in most European
countriesAbbreviationDefinitionPIStation identification of the RDS system, for example when
setting a different radio stationRDSSystem for the transmission of additional information for FM
radio receptionTMCService for transmitting traffic information to the driverTPIdentification of a traffic information stationvCardFile format (vcf) - for the personnel data exchange (especial-
ly electronic business cards)VINVehicle identification numberwmacompressed audio format3Abbreviations
Page 6 of 83
Familiarization with the unit
Introductory information
Important notes
Introduction
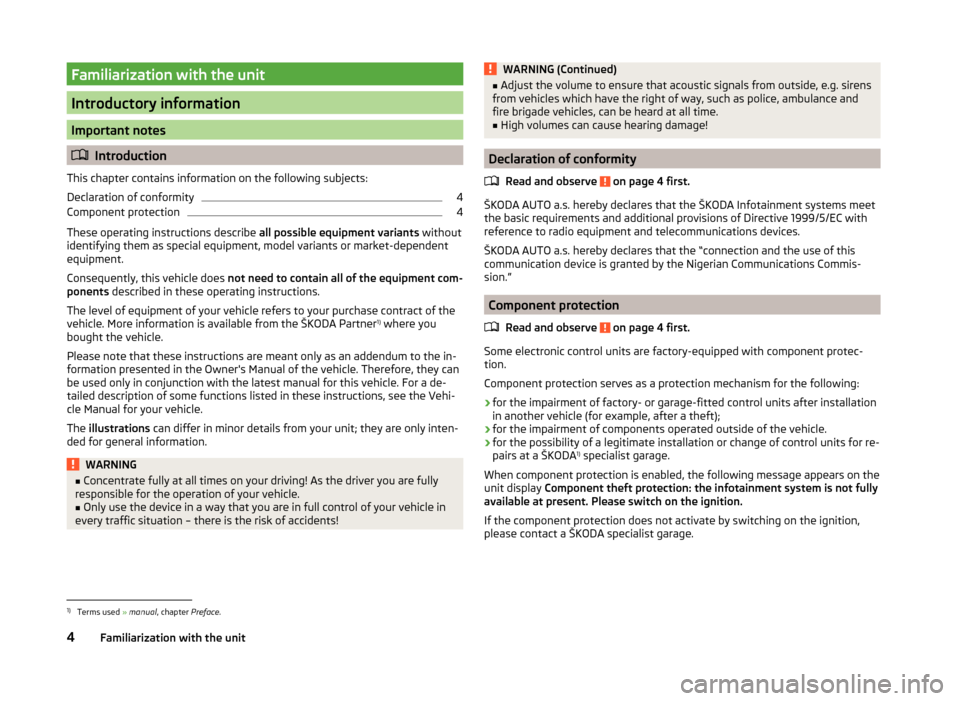
This chapter contains information on the following subjects:
Declaration of conformity
4
Component protection
4
These operating instructions describe all possible equipment variants without
identifying them as special equipment, model variants or market-dependent
equipment.
Consequently, this vehicle does not need to contain all of the equipment com-
ponents described in these operating instructions.
The level of equipment of your vehicle refers to your purchase contract of the
vehicle. More information is available from the ŠKODA Partner 1)
where you
bought the vehicle.
Please note that these instructions are meant only as an addendum to the in-
formation presented in the Owner's Manual of the vehicle. Therefore, they can
be used only in conjunction with the latest manual for this vehicle. For a de- tailed description of some functions listed in these instructions, see the Vehi-
cle Manual for your vehicle.
The illustrations can differ in minor details from your unit; they are only inten-
ded for general information.
WARNING■ Concentrate fully at all times on your driving! As the driver you are fully
responsible for the operation of your vehicle.■
Only use the device in a way that you are in full control of your vehicle in
every traffic situation – there is the risk of accidents!
WARNING (Continued)■ Adjust the volume to ensure that acoustic signals from outside, e.g. sirens
from vehicles which have the right of way, such as police, ambulance and
fire brigade vehicles, can be heard at all time.■
High volumes can cause hearing damage!
Declaration of conformity
Read and observe
on page 4 first.
ŠKODA AUTO a.s. hereby declares that the ŠKODA Infotainment systems meet
the basic requirements and additional provisions of Directive 1999/5/EC with
reference to radio equipment and telecommunications devices.
ŠKODA AUTO a.s. hereby declares that the “connection and the use of this
communication device is granted by the Nigerian Communications Commis-
sion.”
Component protection
Read and observe
on page 4 first.
Some electronic control units are factory-equipped with component protec-
tion.
Component protection serves as a protection mechanism for the following:
› for the impairment of factory- or garage-fitted control units after installation
in another vehicle (for example, after a theft);
› for the impairment of components operated outside of the vehicle.
› for the possibility of a legitimate installation or change of control units for re-
pairs at a ŠKODA 1)
specialist garage.
When component protection is enabled, the following message appears on the
unit display Component theft protection: the infotainment system is not fully
available at present. Please switch on the ignition.
If the component protection does not activate by switching on the ignition,
please contact a ŠKODA specialist garage.
1)
Terms used » manual , chapter Preface.
4Familiarization with the unit
Page 16 of 83
WARNING■Please pay attention to the traffic first and foremost! As the driver you
are fully responsible for road safety. Only use the system so that you are in
full control of your vehicle in every traffic situation - risk of accident!■
Do not use the voice control system when under stress or in an emergen-
cy. Your voice commands may not be recognized in such situations. The tel-
ephone connection may not be established or the connection may take too
much time to complete. The emergency number should be dialled manually!
Function requirements
Read and observe
on page 14 first.
Function requirements for voice control. The ignition is switched on.
The unit is switched on.
No phone call is in progress.
The parking aid is not active.
Requirements for optimum voice command recognition.
› Only give voice commands when the symbol is displayed on the device
screen or in the information display.
› Speak with a normal tone of voice without intonation and excessive pauses.
› Avoid a bad pronunciation.
› Close doors, windows and the sliding roof, in order to prevent external dis-
turbances affecting recognition of the voice commands.
› It is recommended to speak louder at higher speeds, so that the tone of your
voice is louder than the increased surrounding noise.
› During voice control, limit additional noise in the vehicle, e.g. passengers
talking at the same time.
CAUTION
For some languages, there is no voice control available. This device indicates
this fact through a text message that is displayed after setting the device lan-
guage screen » page 17.Note■
During voice control, no navigation announcements and traffic announce-
ments are played.■
Some voice commands must be spelled out when pronouncing depending on
the selected language of communication, such as the Source Selection “ SD”
card one .
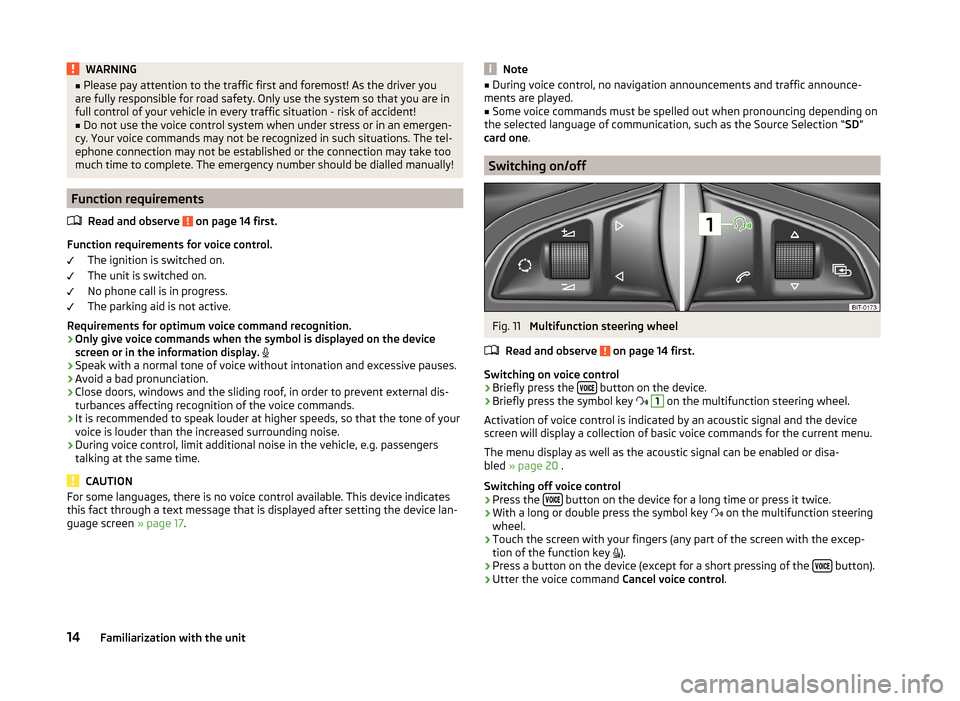
Switching on/off
Fig. 11
Multifunction steering wheel
Read and observe
on page 14 first.
Switching on voice control › Briefly press the
button on the device.
› Briefly press the symbol key
1
on the multifunction steering wheel.
Activation of voice control is indicated by an acoustic signal and the device
screen will display a collection of basic voice commands for the current menu.
The menu display as well as the acoustic signal can be enabled or disa-
bled » page 20 .
Switching off voice control › Press the
button on the device for a long time or press it twice.
› With a long or double press the symbol key
on the multifunction steering
wheel.
› Touch the screen with your fingers (any part of the screen with the excep-
tion of the function key ).
› Press a button on the device (except for a short pressing of the
button).
› Utter the voice command
Cancel voice control.
14Familiarization with the unit
Page 27 of 83
■RDS Regional: - Switch on/off the automatic tracking of related regional
stations
■ Fixed - Maintains the selected regional station continuously. When the
signal is lost, another regional station must be set manually.
■ Automatic - Auto-selects the station with the best reception at the mo-
ment. If you lose reception the region, the unit will automatically set an-
other available region.
■ Auto-save station logos - Auto save the station logo according to the PI
code of the radio station » page 23
Advanced Settings (DAB)
›
Select the DAB band in the Radio menu, and press the function key
→
Activate Advanced settings .
■ Advanced setup
■ DAB traffic announcements - Switch on/off DAB announcements
■ Other DAB announcements - Switch on/off other announcements (e.g.,
warnings, regional weather, sports reports, financial news)
■ DAB - DAB station tracking - Switch on/off automatic DAB station tracking
in other station groups
■ Automatic DAB - FM switching - Switch on/off auto-switching from DAB to
the FM frequency band if the DAB signal is lost
■ L-Band - Switch on/off the automatic DAB station search in L-band
■ Auto-save station logos - Automatic association of the logo with station
detected » page 23
DAB programme tracking
If a DAB station is a member of several sender groups, when the signal is poor,
the same station is searched in a different sender group.
Auto-change DAB -FM
If the DAB signal is poor, the unit will try to find a corresponding FM station for
the DAB station you are currently listening to.
For auto-change to work, the DAB and FM stations must send a sender ID.
› While the station is being received on the FM band, (
) is displayed after the
station name. The () marker disappears when the relevant DAB station can
be received again
).
› If a DAB station is also not available in the FM band due to poor reception,
the device will be switched to mute.
› If you do not want automatic station change (e.g. when driving through tun-
nels, when reception may be lost temporarily), you can deactivate this func-
tion.
L-band
For the DAB radio reception in different countries, different frequency ranges
are used. In some countries the DAB radio reception only in the so-called L-
band.
› If you have any problems with the DAB wireless reception it is necessary to
ensure that the DAB Automatic tuning in L-band is on.
› If no L-band DAB radio reception is possible in the country then it is better to
leave this menu item turned off. The channel scan is therefore faster.25Radio
Page 31 of 83
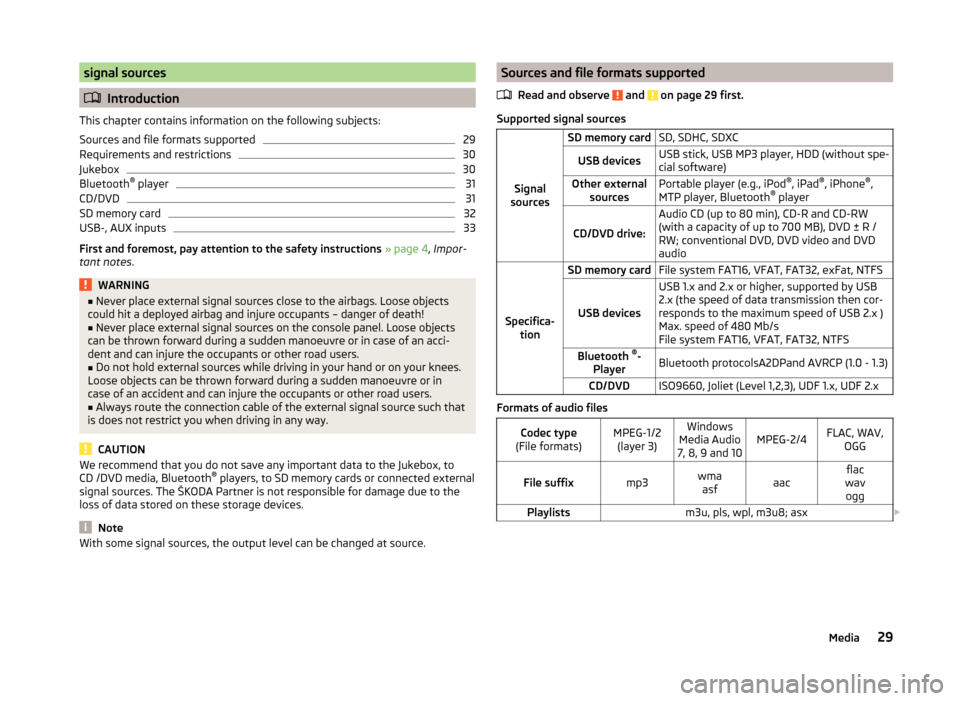
signal sources
Introduction
This chapter contains information on the following subjects:
Sources and file formats supported
29
Requirements and restrictions
30
Jukebox
30
Bluetooth ®
player
31
CD/DVD
31
SD memory card
32
USB-, AUX inputs
33
First and foremost, pay attention to the safety instructions » page 4 , Impor-
tant notes .
WARNING■
Never place external signal sources close to the airbags. Loose objects
could hit a deployed airbag and injure occupants – danger of death!■
Never place external signal sources on the console panel. Loose objects
can be thrown forward during a sudden manoeuvre or in case of an acci-
dent and can injure the occupants or other road users.
■
Do not hold external sources while driving in your hand or on your knees.
Loose objects can be thrown forward during a sudden manoeuvre or in
case of an accident and can injure the occupants or other road users.
■
Always route the connection cable of the external signal source such that
is does not restrict you when driving in any way.
CAUTION
We recommend that you do not save any important data to the Jukebox, to
CD /DVD media, Bluetooth ®
players, to SD memory cards or connected external
signal sources. The ŠKODA Partner is not responsible for damage due to the
loss of data stored on these storage devices.
Note
With some signal sources, the output level can be changed at source.Sources and file formats supported
Read and observe
and on page 29 first.
Supported signal sourcesSignal
sources
SD memory cardSD, SDHC, SDXCUSB devicesUSB stick, USB MP3 player, HDD (without spe-
cial software)Other external sourcesPortable player (e.g., iPod ®
, iPad ®
, iPhone ®
,
MTP player, Bluetooth ®
player
CD/DVD drive:
Audio CD (up to 80 min), CD-R and CD-RW
(with a capacity of up to 700 MB), DVD ± R /
RW; conventional DVD, DVD video and DVD
audio
Specifica- tion
SD memory cardFile system FAT16, VFAT, FAT32, exFat, NTFS
USB devices
USB 1.x and 2.x or higher, supported by USB
2.x (the speed of data transmission then cor-
responds to the maximum speed of USB 2.x )
Max. speed of 480 Mb/s
File system FAT16, VFAT, FAT32, NTFSBluetooth ®
-
PlayerBluetooth protocolsA2DPand AVRCP (1.0 - 1.3)CD/DVDISO9660, Joliet (Level 1,2,3), UDF 1.x, UDF 2.x
Formats of audio files
Codec type
(File formats)MPEG-1/2 (layer 3)Windows
Media Audio
7, 8, 9 and 10MPEG-2/4FLAC, WAV, OGGFile suffixmp3wmaasfaacflac
wav oggPlaylistsm3u, pls, wpl, m3u8; asx 29Media
Page 32 of 83
File
propertiesBitratemax. 320 kb/sSampling ratemax. 48 kHzAlbum covers
(Pictures on the al- bum covers)Image resolution up to 500 x 500 pixels (200 kb) (jpg,
jpeg, png, bmp, gif), depending on the availability of al-
bum covers are (images on the record covers) are dis-
played of the respective media or from the Gracenote ®
database a)
.a)
Gracenote ®
is a database stored in the unit containing information and album covers.
Video file formats
Codec type
(File formats)MPEG-1/2ISO-MPEG4; DivX 3, 4
and 5; XvidISO-MPEG4 H.264
(MPEG4 AVC)Windows
Media Video 9
File suffix
mpg
mpeg ps
aviavi
divx
mp4 m4vmp4m4vmovwmvFile
properties
Bitratemax. 2000 kb/sResolutionmax. 720 x 576 pixelFrame ratemax. 25 fps (or 30 fps when using b-
frames)
CAUTION
■ At the time of publication, the device has been tested with most products
and media available in the various markets up to a size of max. 32 GB. Howev-
er, it is possible that some external devices, media or files are unreadable or
unplayable.■
The GPT Standards (GUID Partition Table) method structured signal sources
are not supported by the device.
Requirements and restrictions
Read and observe
and on page 29 first.
›The name of the artist, the album and the title of the file being played can be
displayed if the information is available as an ID3 tag. If no ID3 tag is availa-
ble, only the folder name is displayed.
› For a good playback, we recommend using compressed MP3 files with a bit
rate of at least 160 kb / s.
› The remaining playback time indicated does not correspond to the actual re-
maining playback time for audio files with variable bitrates.
› Files that are protected by Digital Rights Management (DRM) technology can-
not be played back by the device.
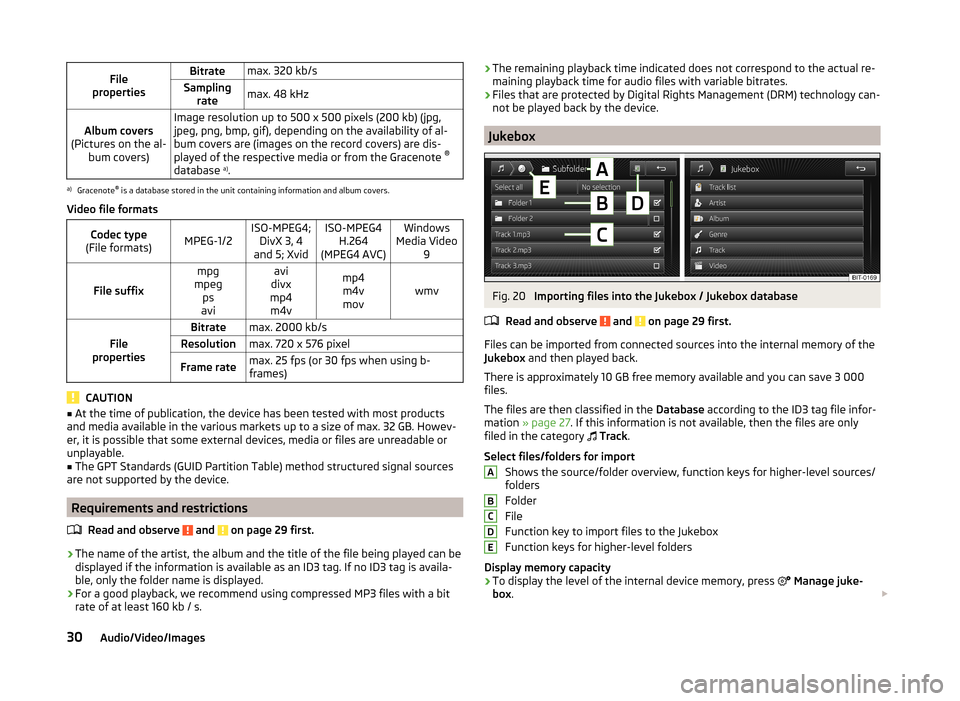
Jukebox
Fig. 20
Importing files into the Jukebox / Jukebox database
Read and observe
and on page 29 first.
Files can be imported from connected sources into the internal memory of the
Jukebox and then played back.
There is approximately 10 GB free memory available and you can save 3 000
files.
The files are then classified in the Database according to the ID3 tag file infor-
mation » page 27 . If this information is not available, then the files are only
filed in the category
Track .
Select files/folders for import Shows the source/folder overview, function keys for higher-level sources/
folders
Folder
File
Function key to import files to the Jukebox
Function keys for higher-level folders
Display memory capacity
› To display the level of the internal device memory, press
Manage juke-
box .
ABCDE30Audio/Video/Images
Page 36 of 83

NoteThe operation of the external device and its connection with other devices can
be seen in the operating instructions of the respective manufacturer.
DVD video
Introduction
This chapter contains information on the following subjects:
Main menu
34
video playback
34
Operation of DVD video
34
DVD video menu
35
Settings
35
First and foremost, pay attention to the safety instructions » page 4 , Impor-
tant notes .
Main menu
Fig. 24
DVD video: Main menu
The DVD video main menu is displayed when you select a source that contains
playable video files.
Explanation of graphic Select the video source
Display of the playing time / remaining time and the playing time axis is
possible within the video by moving the slider or by touching the desired
location on the time axis
Information for the selected video file (e.g., video title, chapter)
Video display area
ABCDOpen the DVD menu
Video settings
CAUTION
■ For safety reasons, the video display is switched off at speeds over 5 km/h
and the following message is displayed: The vehicle is in motion. The display
has been switched off for your safety. The unit continues to play the sound-
track.■
The regional code of the player corresponds to the location of sale. If the fol-
lowing is displayed: Does not play. The DVD's country code does not match
the system settings. Number of changes by the dealer possible: .... , consult a
ŠKODA Service partner.
video playback
›
Video playback starts automatically once the medium is inserted in the CD/
DVD slot.
or
›
Press the button
→
→
A
» Fig. 24 on page 34 .
■
CD/DVD - Select the DVD inserted
Supported media and formats › DVD video
› DVD audio
› DVD A/V
Operation of DVD video
But-
ton
» Fig. 24 on
page 34
ActionFunction
/PressPlay / PausePress briefly (within 3 seconds
of the start of the video play- back)Play the previous videoPress briefly (3 seconds after
the start of the video playback)Play the current video from the
startPress and hold button a)Fast video reverse
34Audio/Video/Images
Page 46 of 83
Select assigned contact telephone number›Press the desired function key to speed dial the telephone number of a con-
tact C
» Fig. 27 on page 38 .
Change assigned telephone number of a contact
›
Press the desired function key for the speed dial
C
» Fig. 27 on page 38 for
longer.
The unit displays the telephone book.
›
If necessary, enter one of the contact numbers for the desired telephone
contact.
The telephone number of a contact is assigned to the selected function key for
speed dialling.
You can also make the change in the Telephone menu » page 39 .
Remove a telephone number contact
›
Press the symbol button
→ User profile → Manage Favourites .
›
Press the function key for the speed dial. By confirming the menu item De-
lete the telephone number of a contact on the selected function key is re-
moved for quick dialling.
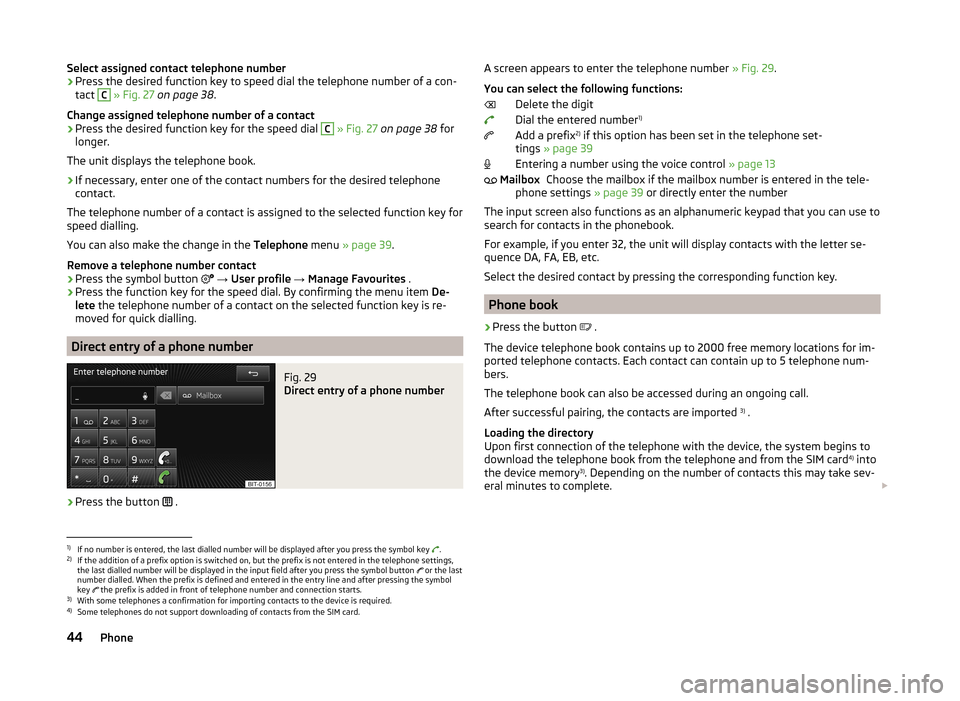
Direct entry of a phone number
Fig. 29
Direct entry of a phone number
›
Press the button .
A screen appears to enter the telephone number
» Fig. 29.
You can select the following functions: Delete the digit
Dial the entered number 1)
Add a prefix 2)
if this option has been set in the telephone set-
tings » page 39
Entering a number using the voice control » page 13
Choose the mailbox if the mailbox number is entered in the tele-
phone settings » page 39 or directly enter the number
The input screen also functions as an alphanumeric keypad that you can use to
search for contacts in the phonebook.
For example, if you enter 32, the unit will display contacts with the letter se-
quence DA, FA, EB, etc.
Select the desired contact by pressing the corresponding function key.
Phone book
›
Press the button .
The device telephone book contains up to 2000 free memory locations for im-
ported telephone contacts. Each contact can contain up to 5 telephone num-
bers.
The telephone book can also be accessed during an ongoing call.
After successful pairing, the contacts are imported 3)
.
Loading the directory
Upon first connection of the telephone with the device, the system begins to
download the telephone book from the telephone and from the SIM card 4)
into
the device memory 3)
. Depending on the number of contacts this may take sev-
eral minutes to complete.
Mailbox1)
If no number is entered, the last dialled number will be displayed after you press the symbol key .
2)
If the addition of a prefix option is switched on, but the prefix is not entered in the telephone settings,
the last dialled number will be displayed in the input field after you press the symbol button or the last
number dialled. When the prefix is defined and entered in the entry line and after pressing the symbol
key the prefix is added in front of telephone number and connection starts.
3)
With some telephones a confirmation for importing contacts to the device is required.
4)
Some telephones do not support downloading of contacts from the SIM card.
44Phone
Page 66 of 83
›Traffic programme TP in the FM frequency range
» page 23.
› Traffic programme in the DAB frequency range
› TMC traffic information with a dynamic adjustment for the current route
The following conditions are required for the correct TMC function: The vehicle is within reception range of the FM RDS-TMC.
Adequate and uninterrupted signal reception of a traffic information sta-
tion 1)
.
Current navigation data in the device.
Operation
TMC (Traffic Message Channel) is a digital data service emitted by the radio
station for continuous transmission of traffic information.
›
Press to display a list of traffic reports
Traffic report …/….
Touch one of the traffic report entries to display traffic report de-
tails » page 64 .
If a TMC traffic radio station is available for current location, the TMC traffic re-
ports are updated continuously in the background. The station you are listen-
ing to does not have to be a TMC station.
The reception of TMC traffic reports is always switched on and cannot be
turned off.
The accuracy of the dynamic route guidance depends on the transmitted traf-
fic reports. The radio stations broadcasting this information are responsible for
the content.
TMC traffic reports can only be evaluated and saved by the radio navigation
system when navigation data are available for the driven area.
Switching dynamic route on/off
›
In the Navigation main menu, press
→ Route Options → Dynamic route .
When the Dynamic route » page 48 function is switched on, the traffic reports
influence the dynamic route guidance by means of TMC messages.
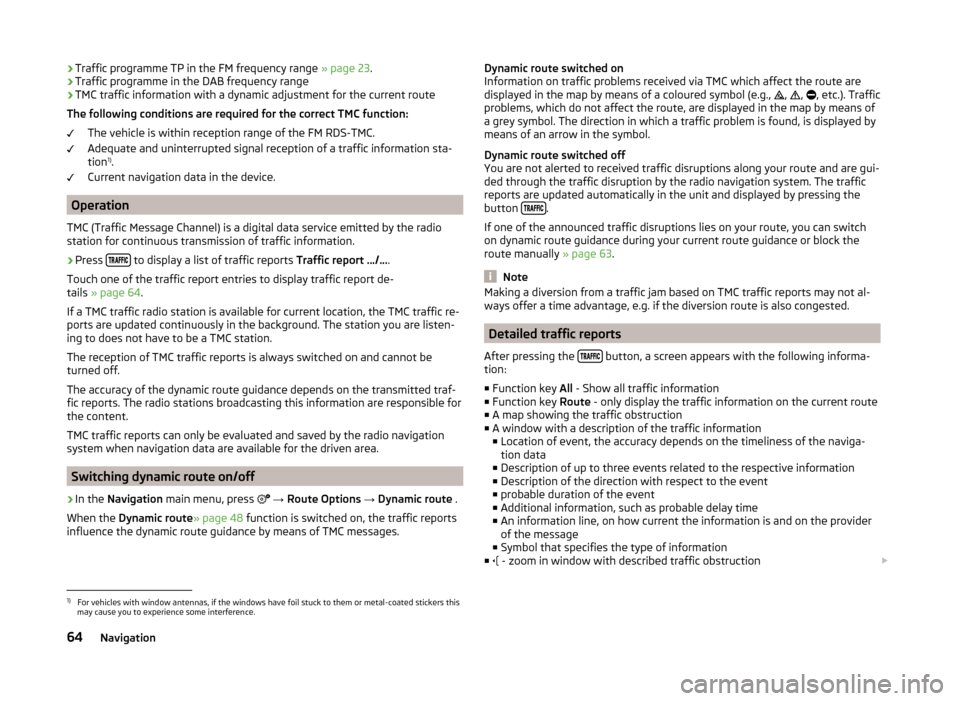
Dynamic route switched on
Information on traffic problems received via TMC which affect the route are displayed in the map by means of a coloured symbol (e.g.,
,
,
, etc.). Traffic
problems, which do not affect the route, are displayed in the map by means of
a grey symbol. The direction in which a traffic problem is found, is displayed by
means of an arrow in the symbol.
Dynamic route switched off
You are not alerted to received traffic disruptions along your route and are gui-
ded through the traffic disruption by the radio navigation system. The traffic
reports are updated automatically in the unit and displayed by pressing the
button
.
If one of the announced traffic disruptions lies on your route, you can switch on dynamic route guidance during your current route guidance or block the
route manually » page 63.
Note
Making a diversion from a traffic jam based on TMC traffic reports may not al-
ways offer a time advantage, e.g. if the diversion route is also congested.
Detailed traffic reports
After pressing the
button, a screen appears with the following informa-
tion:
■ Function key All - Show all traffic information
■ Function key Route - only display the traffic information on the current route
■ A map showing the traffic obstruction
■ A window with a description of the traffic information
■ Location of event, the accuracy depends on the timeliness of the naviga-
tion data
■ Description of up to three events related to the respective information
■ Description of the direction with respect to the event
■ probable duration of the event
■ Additional information, such as probable delay time
■ An information line, on how current the information is and on the provider
of the message
■ Symbol that specifies the type of information
■ - zoom in window with described traffic obstruction
1)
For vehicles with window antennas, if the windows have foil stuck to them or metal-coated stickers this
may cause you to experience some interference.
64Navigation
Page 71 of 83
■Engine: - Set the engine (drive) characteristics
■ Normal - Normal
■ Sport - Sports
■ Eco - Economical
■ ACC: - Set the vehicle acceleration when adaptive cruise control is activa-
ted
■ Normal - Normal
■ Sport - Sports
■ Eco - Economical
■ Dynamic cornering light: - Set the characteristics of the adaptive head-
lights
■ Normal - Normal
■ Sport - Sports
■ Eco - Economical
■ Air conditioning: - Sets the Climatronic characteristics
■ Normal - Normal
■ Eco - Economical
■ Reset mode - Setting for all menu items in the Individual mode to Normal
■ Cancel - Keep the current settings
■ Reset - Set all menu items to Normal
Note
If you do not operate the unit for longer than approx. 10 seconds in the "Select
driving mode" menu, it will switch to the last selected menu or switch itself off.
Vehicle data
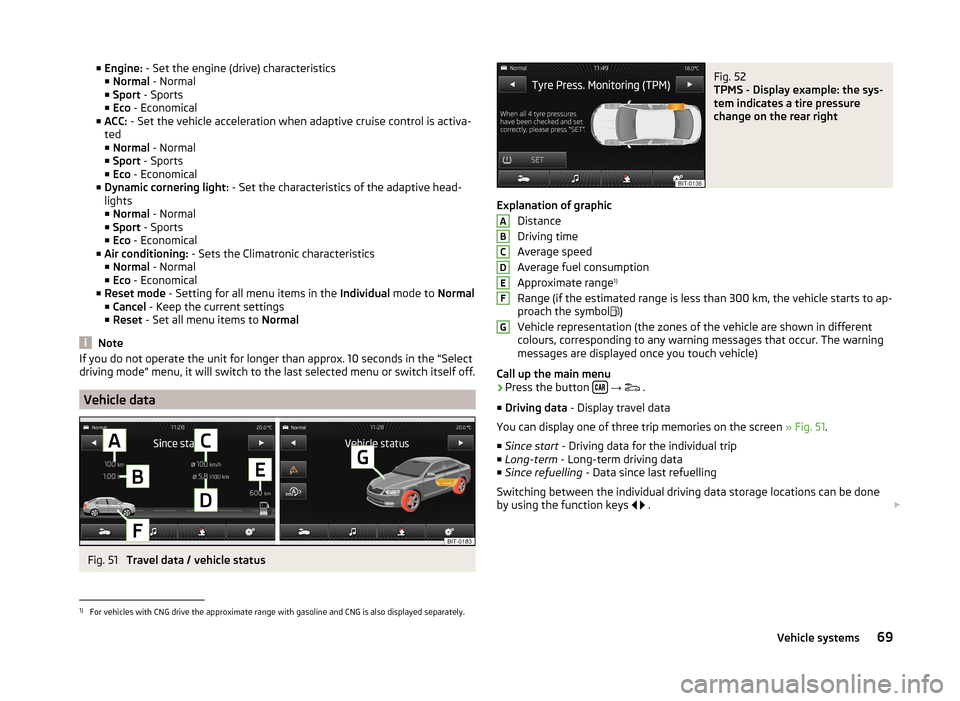
Fig. 51
Travel data / vehicle status
Fig. 52
TPMS - Display example: the sys-
tem indicates a tire pressure
change on the rear right
Explanation of graphic
Distance
Driving time
Average speed
Average fuel consumption
Approximate range 1)
Range (if the estimated range is less than 300 km, the vehicle starts to ap-
proach the symbol )
Vehicle representation (the zones of the vehicle are shown in different
colours, corresponding to any warning messages that occur. The warning
messages are displayed once you touch vehicle)
Call up the main menu
›
Press the button
→
.
■ Driving data - Display travel data
You can display one of three trip memories on the screen » Fig. 51.
■ Since start - Driving data for the individual trip
■ Long-term - Long-term driving data
■ Since refuelling - Data since last refuelling
Switching between the individual driving data storage locations can be done
by using the function keys
.
ABCDEFG1)
For vehicles with CNG drive the approximate range with gasoline and CNG is also displayed separately.
69Vehicle systems