USB port SKODA OCTAVIA 2014 3.G / (5E) Columbus Infotinment Navigation System Manual
[x] Cancel search | Manufacturer: SKODA, Model Year: 2014, Model line: OCTAVIA, Model: SKODA OCTAVIA 2014 3.G / (5E)Pages: 83, PDF Size: 5.16 MB
Page 20 of 83
■Media Codec: ... - Media codec version
■ Update software - Manual software update (for more information see the
ŠKODA Website www.infotainment.skoda-auto.com )
■ Copyright - Information on licences and copyrights are only available in Eng-
lish
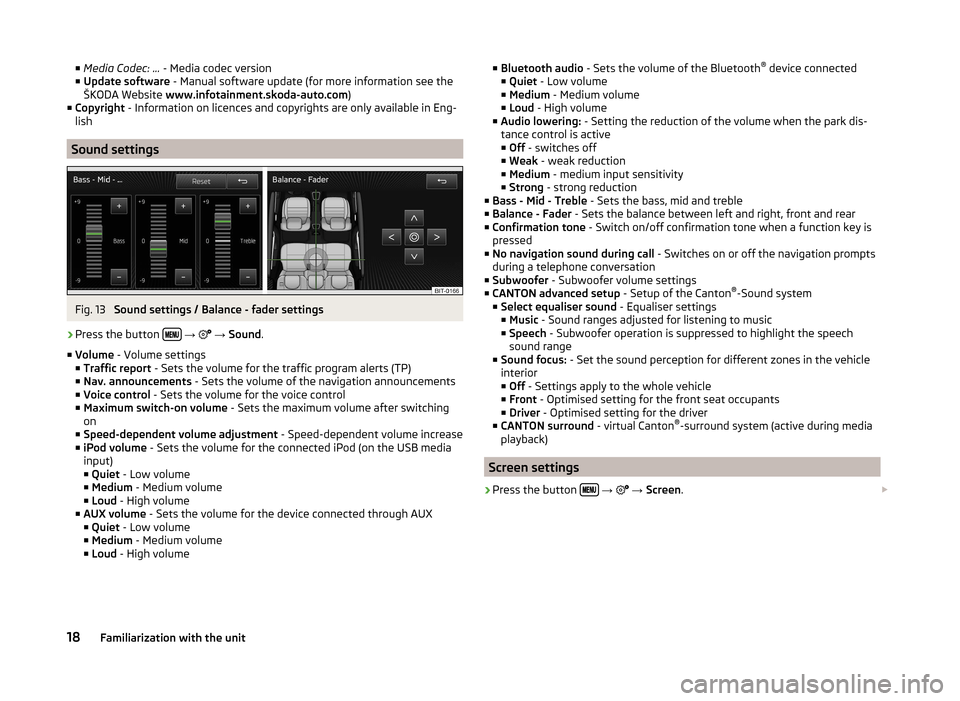
Sound settings
Fig. 13
Sound settings / Balance - fader settings
›
Press the button
→
→ Sound .
■ Volume - Volume settings
■ Traffic report - Sets the volume for the traffic program alerts (TP)
■ Nav. announcements - Sets the volume of the navigation announcements
■ Voice control - Sets the volume for the voice control
■ Maximum switch-on volume - Sets the maximum volume after switching
on
■ Speed-dependent volume adjustment - Speed-dependent volume increase
■ iPod volume - Sets the volume for the connected iPod (on the USB media
input)
■ Quiet - Low volume
■ Medium - Medium volume
■ Loud - High volume
■ AUX volume - Sets the volume for the device connected through AUX
■ Quiet - Low volume
■ Medium - Medium volume
■ Loud - High volume
■
Bluetooth audio - Sets the volume of the Bluetooth ®
device connected
■ Quiet - Low volume
■ Medium - Medium volume
■ Loud - High volume
■ Audio lowering: - Setting the reduction of the volume when the park dis-
tance control is active ■ Off - switches off
■ Weak - weak reduction
■ Medium - medium input sensitivity
■ Strong - strong reduction
■ Bass - Mid - Treble - Sets the bass, mid and treble
■ Balance - Fader - Sets the balance between left and right, front and rear
■ Confirmation tone - Switch on/off confirmation tone when a function key is
pressed
■ No navigation sound during call - Switches on or off the navigation prompts
during a telephone conversation
■ Subwoofer - Subwoofer volume settings
■ CANTON advanced setup - Setup of the Canton®
-Sound system
■ Select equaliser sound - Equaliser settings
■ Music - Sound ranges adjusted for listening to music
■ Speech - Subwoofer operation is suppressed to highlight the speech
sound range
■ Sound focus: - Set the sound perception for different zones in the vehicle
interior
■ Off - Settings apply to the whole vehicle
■ Front - Optimised setting for the front seat occupants
■ Driver - Optimised setting for the driver
■ CANTON surround - virtual Canton®
-surround system (active during media
playback)
Screen settings
›
Press the button
→
→ Screen .
18Familiarization with the unit
Page 25 of 83
You can switch between memory groups of individual preset buttons using the
function keys C.
Search available stations (Scan)
Read and observe
on page 21 first.
This function plays all the receivable stations in succession for a few seconds
each.
Switching on
›
Press the menu knob
2
» Fig. 1 on page 5 .
or
›
In the radio menu, press the function key
→ Scan .
Switching off
›
Press the menu knob
2
.
or
›
press any function key in the device screen.
After switching off the function, the device plays the station at which the
function was cancelled.
Station logos
Read and observe
on page 21 first.
The present buttons
B
» Fig. 14 on page 21 can be linked to logos (images) of
the radio stations.
Store station logos automatically (FM / DAB)
›
Before you store the radio station to a station button function key press in
the Radio menu the function key
→ Activate Advanced settings .
›
Activate the menu item Auto-save station logos » page 24 , Advanced Set-
tings (FM) and » page 25 , Advanced Settings (DAB) .
When you save the station to a station button, the station is assigned a logo
from the device memory if the logo is available in the memory.
Storing station logos manually
A logo can be assigned manually for the previously stored stations.
›
The function key
Press
→ Station logos .
A menu with preset buttons for radio stations is displayed.›
Press the preset button for the station, which a logo is to be assigned to.
A menu of media (CD, SD card, USB) is displayed.
›
In the the relevant madia select the image you want to have.
By selection of the image it is assiagned to the relevant station button.
Note
■ The following image formats are supported: jpg, gif, png, bmp.■We recommend a resolution of up to 500 x 500 pixels.
Traffic programme
Read and observe
on page 21 first.
Switching on/off
›
In the radio menu, press the function key
.
›
Enable or disable the menu item
Traffic programme (TP)
Traffic news
During a traffic announcement, the following menu is displayed.
›
Cancel - interruption of the current traffic report. The TP function remains
activated.
›
Deactivate - Exit the current traffic report and turn off TP function.
Note
Some radio stations misleadingly identify themselves as traffic programs. It is
therefore not an error with the unit that there is no traffic news with these
stations.■
During playback in the media menu the traffic information from the last se-
lected radio station is received.
■
Should this radio station not transmit traffic reports or the signal is not avail-
able, then the device automatically searches for a TP station.
23Radio
Page 29 of 83
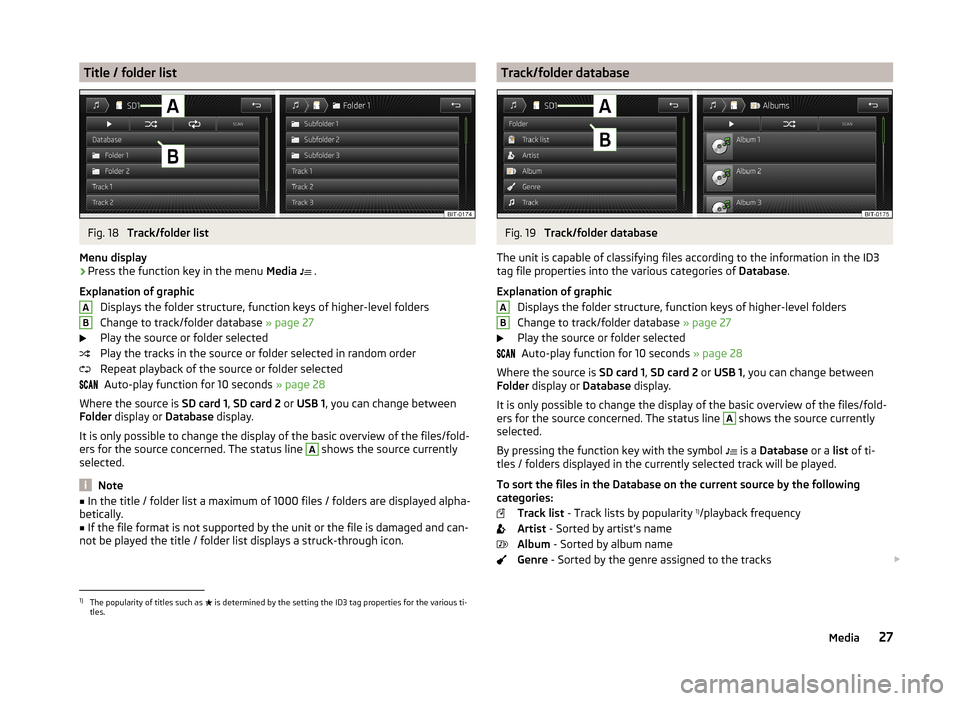
Title / folder listFig. 18
Track/folder list
Menu display
›
Press the function key in the menu Media
.
Explanation of graphic Displays the folder structure, function keys of higher-level folders
Change to track/folder database » page 27
Play the source or folder selected
Play the tracks in the source or folder selected in random order
Repeat playback of the source or folder selected Auto-play function for 10 seconds » page 28
Where the source is SD card 1, SD card 2 or USB 1 , you can change between
Folder display or Database display.
It is only possible to change the display of the basic overview of the files/fold-
ers for the source concerned. The status line
A
shows the source currently
selected.
Note
■ In the title / folder list a maximum of 1000 files / folders are displayed alpha-
betically.■
If the file format is not supported by the unit or the file is damaged and can-
not be played the title / folder list displays a struck-through icon.
ABTrack/folder databaseFig. 19
Track/folder database
The unit is capable of classifying files according to the information in the ID3
tag file properties into the various categories of Database.
Explanation of graphic Displays the folder structure, function keys of higher-level folders
Change to track/folder database » page 27
Play the source or folder selected Auto-play function for 10 seconds » page 28
Where the source is SD card 1, SD card 2 or USB 1 , you can change between
Folder display or Database display.
It is only possible to change the display of the basic overview of the files/fold-
ers for the source concerned. The status line
A
shows the source currently
selected.
By pressing the function key with the symbol is a
Database or a list of ti-
tles / folders displayed in the currently selected track will be played.
To sort the files in the Database on the current source by the following
categories:
Track list - Track lists by popularity 1)
/playback frequency
Artist - Sorted by artist's name
Album - Sorted by album name
Genre - Sorted by the genre assigned to the tracks
AB1)
The popularity of titles such as
is determined by the setting the ID3 tag properties for the various ti-
tles.
27Media
Page 30 of 83
Track - Sorted by the track title
Video - Files containing a video recording
Note
■
In the title / folder database a maximum of 1000 files / folders can be dis-
played alphabetically.■
If the file format is not supported by the unit or the file is damaged and can-
not be played the title / folder database displays a struck-through icon.
Playback
The device plays the files in alphabetical order.
Description of the playback keys
ButtonActionFunction /PressPlay / PausePress briefly a)Play the previous titlePress briefly b)Plays the current track from the startPress and hold but-
tonc)Fast-reverse of the trackPress brieflyPlay the next titlePress and hold but-
tonc)Fast-forward of the track
First pressTurn on the track repeat
Second pressTurn on the repetition of the entire folder /
source of signal Third pressSwitch off the repetitionPressTurn on / off the random playback of the
folder / source (mix mode)First pressAutomatic play from the folder / sourceSecond pressTurn off the function a)
Within about 3 seconds after the start of the track playback.
b)
After about 5 seconds after the start of playback of the track.
c)
The longer the button is pressed, the faster the fast forward/reverse.
Scan function
The Scan function can also be started/stopped in the main Media menu by
pressing button
2
» Fig. 1 on page 5 .
The
scanning feature can also be cancelled by switching to another file / signal
source or a function key is pressed for playback.
Note
The function keys listed in the table are different depending on the currently
selected menu screen.
Media settings
›
Press the button in the menu Media
.
■ Sound - Sound settings » page 18, Sound settings
■ Manage jukebox - Save/delete supported audio/video files in the internal
unit memory » page 30
■ Mix/repeat/scan including subfolders - switching the song playback in the
following modes (Shuffle / Repeat / Automatic play) including subfolders in
the current folder
■ Bluetooth - Settings for the Bluetooth ®
function » page 20
■ Video setup (files) - Set the parameters of the video being played back from
a file
■ Format: - Set the screen width/height ratio
■ Automatic - adjust the picture to the screen size
■ 16:9
■ 4:3
■ 14:9
■ 47:20
■ Video (DVD) settings - Set the parameters of the video being played back
from a DVD source » page 31
■ Traffic programme (TP) - Switches traffic programme on/off
■ External AUX device - Activate/deactivate the input of the external AUX au-
dio source
■ Reset codec to system settings - Codec default settings
■ Remove safely - safe removal of the source connected
■ Select device
■ SD card 1
■ SD card 2
■ USB 1
28Audio/Video/Images
Page 31 of 83
signal sources
Introduction
This chapter contains information on the following subjects:
Sources and file formats supported
29
Requirements and restrictions
30
Jukebox
30
Bluetooth ®
player
31
CD/DVD
31
SD memory card
32
USB-, AUX inputs
33
First and foremost, pay attention to the safety instructions » page 4 , Impor-
tant notes .
WARNING■
Never place external signal sources close to the airbags. Loose objects
could hit a deployed airbag and injure occupants – danger of death!■
Never place external signal sources on the console panel. Loose objects
can be thrown forward during a sudden manoeuvre or in case of an acci-
dent and can injure the occupants or other road users.
■
Do not hold external sources while driving in your hand or on your knees.
Loose objects can be thrown forward during a sudden manoeuvre or in
case of an accident and can injure the occupants or other road users.
■
Always route the connection cable of the external signal source such that
is does not restrict you when driving in any way.
CAUTION
We recommend that you do not save any important data to the Jukebox, to
CD /DVD media, Bluetooth ®
players, to SD memory cards or connected external
signal sources. The ŠKODA Partner is not responsible for damage due to the
loss of data stored on these storage devices.
Note
With some signal sources, the output level can be changed at source.Sources and file formats supported
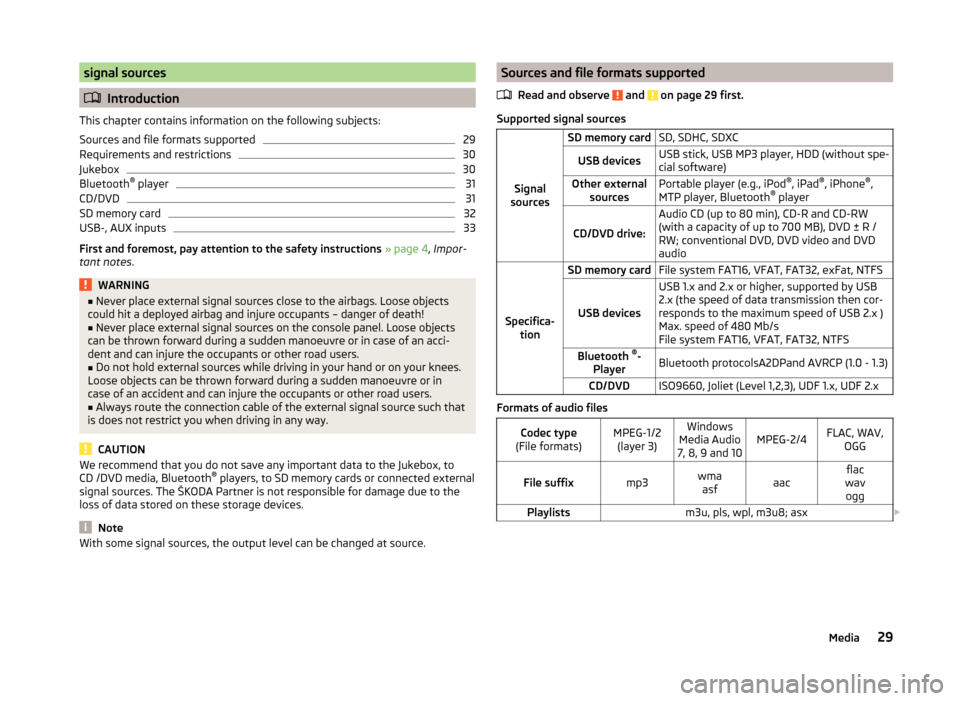
Read and observe
and on page 29 first.
Supported signal sourcesSignal
sources
SD memory cardSD, SDHC, SDXCUSB devicesUSB stick, USB MP3 player, HDD (without spe-
cial software)Other external sourcesPortable player (e.g., iPod ®
, iPad ®
, iPhone ®
,
MTP player, Bluetooth ®
player
CD/DVD drive:
Audio CD (up to 80 min), CD-R and CD-RW
(with a capacity of up to 700 MB), DVD ± R /
RW; conventional DVD, DVD video and DVD
audio
Specifica- tion
SD memory cardFile system FAT16, VFAT, FAT32, exFat, NTFS
USB devices
USB 1.x and 2.x or higher, supported by USB
2.x (the speed of data transmission then cor-
responds to the maximum speed of USB 2.x )
Max. speed of 480 Mb/s
File system FAT16, VFAT, FAT32, NTFSBluetooth ®
-
PlayerBluetooth protocolsA2DPand AVRCP (1.0 - 1.3)CD/DVDISO9660, Joliet (Level 1,2,3), UDF 1.x, UDF 2.x
Formats of audio files
Codec type
(File formats)MPEG-1/2 (layer 3)Windows
Media Audio
7, 8, 9 and 10MPEG-2/4FLAC, WAV, OGGFile suffixmp3wmaasfaacflac
wav oggPlaylistsm3u, pls, wpl, m3u8; asx 29Media
Page 33 of 83
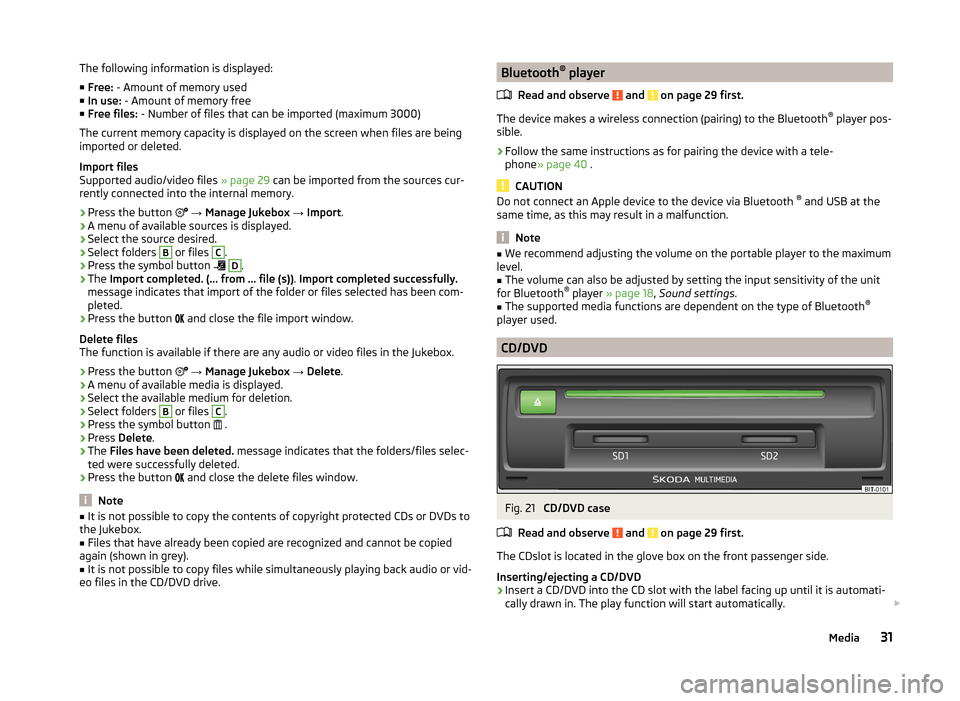
The following information is displayed:
■ Free: - Amount of memory used
■ In use: - Amount of memory free
■ Free files: - Number of files that can be imported (maximum 3000)
The current memory capacity is displayed on the screen when files are being imported or deleted.
Import files
Supported audio/video files » page 29 can be imported from the sources cur-
rently connected into the internal memory.
› Press the button
→ Manage Jukebox → Import .
› A menu of available sources is displayed.
› Select the source desired.
› Select folders B
or files
C
.
› Press the symbol button
D
.
› The
Import completed. (... from ... file (s)) . Import completed successfully.
message indicates that import of the folder or files selected has been com-
pleted.
› Press the button
and close the file import window.
Delete files
The function is available if there are any audio or video files in the Jukebox.
› Press the button
→ Manage Jukebox → Delete .
› A menu of available media is displayed.
› Select the available medium for deletion.
› Select folders
B
or files
C
.
› Press the symbol button
.
› Press
Delete .
› The
Files have been deleted. message indicates that the folders/files selec-
ted were successfully deleted.
› Press the button
and close the delete files window.
Note
■
It is not possible to copy the contents of copyright protected CDs or DVDs to
the Jukebox.■
Files that have already been copied are recognized and cannot be copied
again (shown in grey).
■
It is not possible to copy files while simultaneously playing back audio or vid-
eo files in the CD/DVD drive.
Bluetooth ®
player
Read and observe
and on page 29 first.
The device makes a wireless connection (pairing) to the Bluetooth ®
player pos-
sible.
›
Follow the same instructions as for pairing the device with a tele-
phone » page 40 .
CAUTION
Do not connect an Apple device to the device via Bluetooth ®
and USB at the
same time, as this may result in a malfunction.
Note
■ We recommend adjusting the volume on the portable player to the maximum
level.■
The volume can also be adjusted by setting the input sensitivity of the unit
for Bluetooth ®
player » page 18 , Sound settings .
■
The supported media functions are dependent on the type of Bluetooth ®
player used.
CD/DVD
Fig. 21
CD/DVD case
Read and observe
and on page 29 first.
The CDslot is located in the glove box on the front passenger side.
Inserting/ejecting a CD/DVD
›
Insert a CD/DVD into the CD slot with the label facing up until it is automati-
cally drawn in. The play function will start automatically.
31Media
Page 35 of 83
CAUTION■Only use standard sizeSD cards. When using smaller SD cards with the adapt-
er the SD memory card can fall out of the adapter while driving due to vehicle
vibrations.■
We recommend using SD memory cards of class 4 and higher. This guaran-
tees the fastest possible access to the audio files.
■
Always store the SD cards in suitable cases to protect them from dirt, dust
and other forms of damage.
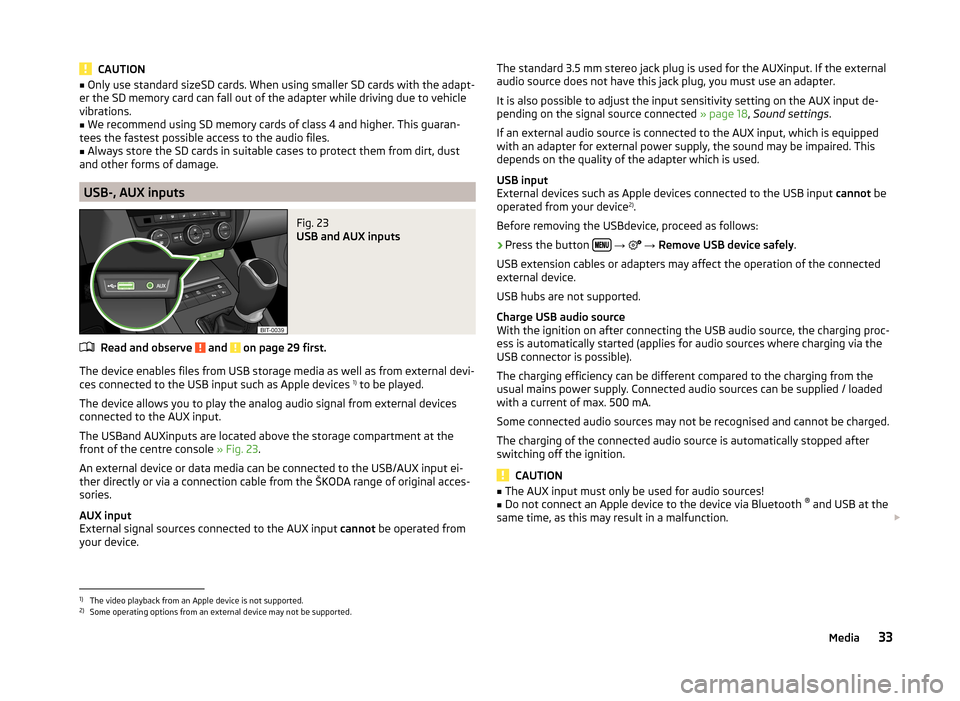
USB-, AUX inputs
Fig. 23
USB and AUX inputs
Read and observe and on page 29 first.
The device enables files from USB storage media as well as from external devi-
ces connected to the USB input such as Apple devices 1)
to be played.
The device allows you to play the analog audio signal from external devices
connected to the AUX input.
The USBand AUXinputs are located above the storage compartment at the
front of the centre console » Fig. 23.
An external device or data media can be connected to the USB/AUX input ei-
ther directly or via a connection cable from the ŠKODA range of original acces-
sories.
AUX input
External signal sources connected to the AUX input cannot be operated from
your device.
The standard 3.5 mm stereo jack plug is used for the AUXinput. If the external
audio source does not have this jack plug, you must use an adapter.
It is also possible to adjust the input sensitivity setting on the AUX input de- pending on the signal source connected » page 18, Sound settings .
If an external audio source is connected to the AUX input, which is equipped
with an adapter for external power supply, the sound may be impaired. This
depends on the quality of the adapter which is used.
USB input
External devices such as Apple devices connected to the USB input cannot be
operated from your device 2)
.
Before removing the USBdevice, proceed as follows:›
Press the button
→
→ Remove USB device safely .
USB extension cables or adapters may affect the operation of the connected
external device.
USB hubs are not supported.
Charge USB audio source
With the ignition on after connecting the USB audio source, the charging proc-
ess is automatically started (applies for audio sources where charging via the
USB connector is possible).
The charging efficiency can be different compared to the charging from the
usual mains power supply. Connected audio sources can be supplied / loaded
with a current of max. 500 mA.
Some connected audio sources may not be recognised and cannot be charged.
The charging of the connected audio source is automatically stopped after
switching off the ignition.
CAUTION
■ The AUX input must only be used for audio sources!■Do not connect an Apple device to the device via Bluetooth ®
and USB at the
same time, as this may result in a malfunction.
1)
The video playback from an Apple device is not supported.
2)
Some operating options from an external device may not be supported.
33Media
Page 38 of 83
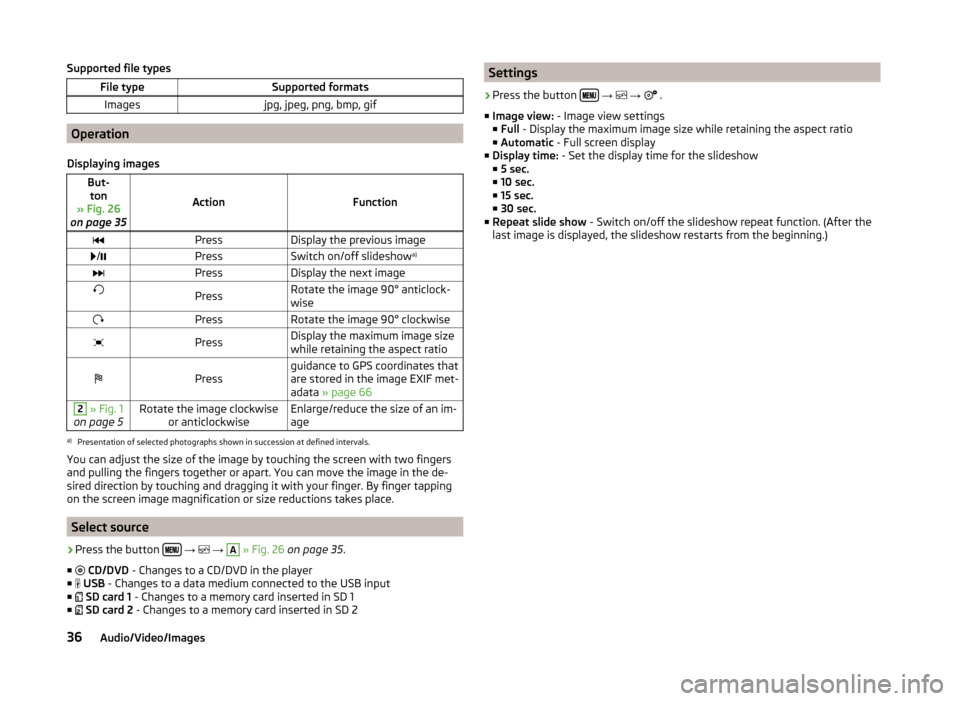
Supported file typesFile typeSupported formatsImagesjpg, jpeg, png, bmp, gif
Operation
Displaying images
But- ton
» Fig. 26
on page 35
ActionFunction
PressDisplay the previous image /PressSwitch on/off slideshow a)PressDisplay the next imagePressRotate the image 90° anticlock-
wisePressRotate the image 90° clockwisePressDisplay the maximum image size
while retaining the aspect ratioPressguidance to GPS coordinates that
are stored in the image EXIF met-
adata » page 662 » Fig. 1
on page 5Rotate the image clockwise or anticlockwiseEnlarge/reduce the size of an im-
agea)
Presentation of selected photographs shown in succession at defined intervals.
You can adjust the size of the image by touching the screen with two fingers
and pulling the fingers together or apart. You can move the image in the de-
sired direction by touching and dragging it with your finger. By finger tapping
on the screen image magnification or size reductions takes place.
Select source
›
Press the button
→
→
A
» Fig. 26 on page 35 .
■
CD/DVD - Changes to a CD/DVD in the player
■
USB - Changes to a data medium connected to the USB input
■
SD card 1 - Changes to a memory card inserted in SD 1
■
SD card 2 - Changes to a memory card inserted in SD 2
Settings›
Press the button
→
→
.
■ Image view: - Image view settings
■ Full - Display the maximum image size while retaining the aspect ratio
■ Automatic - Full screen display
■ Display time: - Set the display time for the slideshow
■ 5 sec.
■ 10 sec.
■ 15 sec.
■ 30 sec.
■ Repeat slide show - Switch on/off the slideshow repeat function. (After the
last image is displayed, the slideshow restarts from the beginning.)
36Audio/Video/Images
Page 60 of 83
If the preferred route type has been set, then touching the Home address will
start the calculation and route guidance, or after the calculation, you need to
select the route type before the route guidance starts.
If the home address has not been entered, an input window is displayed with
the following message:
Please select as your home address: your current position or a new address.
The following function keys are displayed:
› Position
- Entry of the home address through taking the current position of
the vehicle;
› Address
- Enter the home address in writing.
Description of the adjustment or deletion process of the home address:
The home address is also available in the main navigation menu, by pressing
the symbol key
→ Manage memory → Define home address .
Own destination (vCard)
You can import custom destinations in vCard format from an SD memory card,
a CD/DVD or a USB storage device into the device.
›
In the Navigation main menu, press
→ Import destinations .
A list of possible data import sources is displayed » page 26.
After selecting the source and confirming the menu item Import all vCards
from this folder the importing the data stored in vCard format into the device
memory begins.
POI
Introduction
This chapter contains information on the following subjects:
Input a new POI
58
Search area for POIs
59
Find and select a POI
59
Quick select a POI
59
Search selection near the location, destination, stopover and along the
route
59
Search near the entered address or near the point entered on the map
60First and foremost, pay attention to the safety instructions » page 4 , Impor-
tant notes .
Input a new POI
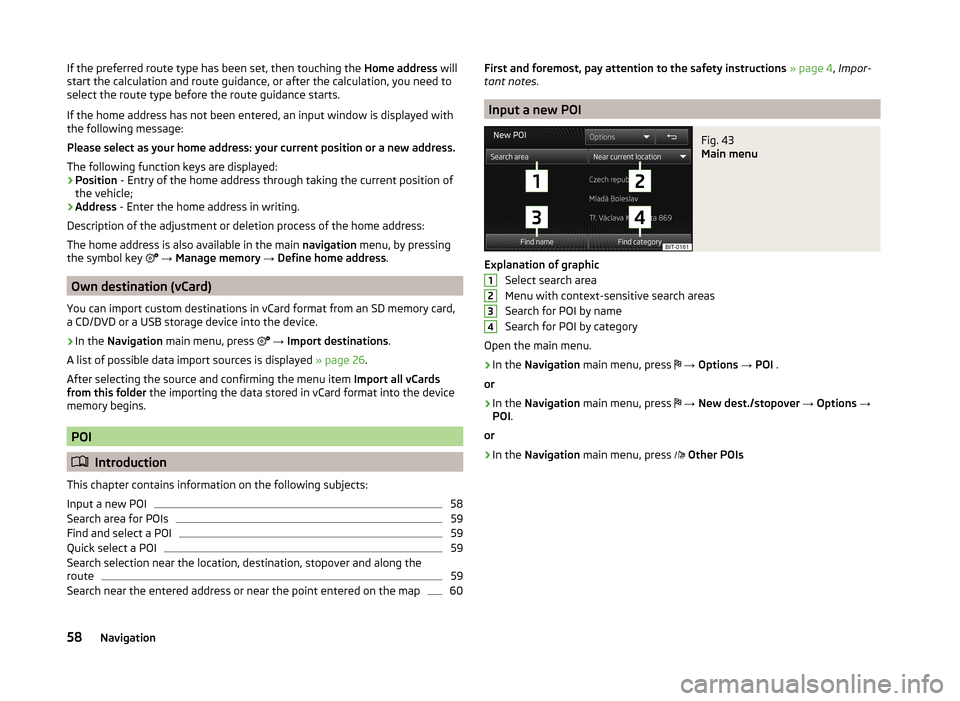
Fig. 43
Main menu
Explanation of graphic
Select search area
Menu with context-sensitive search areas
Search for POI by name
Search for POI by category
Open the main menu.
›
In the Navigation main menu, press
→ Options → POI .
or
›
In the Navigation main menu, press
→ New dest./stopover → Options →
POI .
or
›
In the Navigation main menu, press
Other POIs
123458Navigation
Page 78 of 83
External inputAUX33
USB33
Extra window52
Audio52
Compass53
Geographical coordinates54
GPS54
Manoeuvre53
Map54
Menus52
Navigation announcement53
Switching on/off52
Traffic53
Traffic signs53
F
Factory settings
20 , 73
File formats29
Requirements and restrictions30
FM21
Settings24
Folders List Media
27
Folding down the exterior mirrors - folding in while parking
72
Frequency range See main menu
21
Front Assist71
Fuel options49
Function key7
Function keys7
G
Graphical navigation instructions
53
H
Head Light Assist
72
Home address49, 57
I
Images
21, 35
Display36
Main menu35
Operation36
Select source36
Settings36
Important notes4
Important notice Touch screen
5
Import destinations58
Information display Manoeuvre
53
Navigation announcement53
In map56
Input destination55
Possibilities55
Input screen Language characters
19
Input screen with keyboard Search
8
Storing8
Input screen with numeric keypad8
Instrument lighting72
Introductory information4
J
Jukebox
30
K
Keyboard
8 , 19
L
Lane Assist
71
Lane change flash72
Lane guidance63
LEAVING HOME72
Light sensor - light switch-on time72
List of available stations Radio22
M
Main menu DVD video
34
Images35
Media26
Navigation47
Telephone38
Unit settings17
Manage memory49
Manoeuvre explanation of graphic navigation instructions
62
Nav. announcements62
Map49
Display50
Display options50
Introductory information50
Lane guidance63
Main menu50
Operation51
Map display options50
MAXI DOT Navigation
12
MAXI DOT display operation
9
media source
29
Media26
AUX33
Bluetooth audio31
CD/DVD31
DVD video34
File formats29
Folder list27
Folder List27
Jukebox30
Main menu26
Multifunction steering wheel9
76Index