pairing phone SKODA OCTAVIA 2014 3.G / (5E) Columbus Infotinment Navigation System Manual
[x] Cancel search | Manufacturer: SKODA, Model Year: 2014, Model line: OCTAVIA, Model: SKODA OCTAVIA 2014 3.G / (5E)Pages: 83, PDF Size: 5.16 MB
Page 33 of 83
The following information is displayed:
■ Free: - Amount of memory used
■ In use: - Amount of memory free
■ Free files: - Number of files that can be imported (maximum 3000)
The current memory capacity is displayed on the screen when files are being imported or deleted.
Import files
Supported audio/video files » page 29 can be imported from the sources cur-
rently connected into the internal memory.
› Press the button
→ Manage Jukebox → Import .
› A menu of available sources is displayed.
› Select the source desired.
› Select folders B
or files
C
.
› Press the symbol button
D
.
› The
Import completed. (... from ... file (s)) . Import completed successfully.
message indicates that import of the folder or files selected has been com-
pleted.
› Press the button
and close the file import window.
Delete files
The function is available if there are any audio or video files in the Jukebox.
› Press the button
→ Manage Jukebox → Delete .
› A menu of available media is displayed.
› Select the available medium for deletion.
› Select folders
B
or files
C
.
› Press the symbol button
.
› Press
Delete .
› The
Files have been deleted. message indicates that the folders/files selec-
ted were successfully deleted.
› Press the button
and close the delete files window.
Note
■
It is not possible to copy the contents of copyright protected CDs or DVDs to
the Jukebox.■
Files that have already been copied are recognized and cannot be copied
again (shown in grey).
■
It is not possible to copy files while simultaneously playing back audio or vid-
eo files in the CD/DVD drive.
Bluetooth ®
player
Read and observe
and on page 29 first.
The device makes a wireless connection (pairing) to the Bluetooth ®
player pos-
sible.
›
Follow the same instructions as for pairing the device with a tele-
phone » page 40 .
CAUTION
Do not connect an Apple device to the device via Bluetooth ®
and USB at the
same time, as this may result in a malfunction.
Note
■ We recommend adjusting the volume on the portable player to the maximum
level.■
The volume can also be adjusted by setting the input sensitivity of the unit
for Bluetooth ®
player » page 18 , Sound settings .
■
The supported media functions are dependent on the type of Bluetooth ®
player used.
CD/DVD
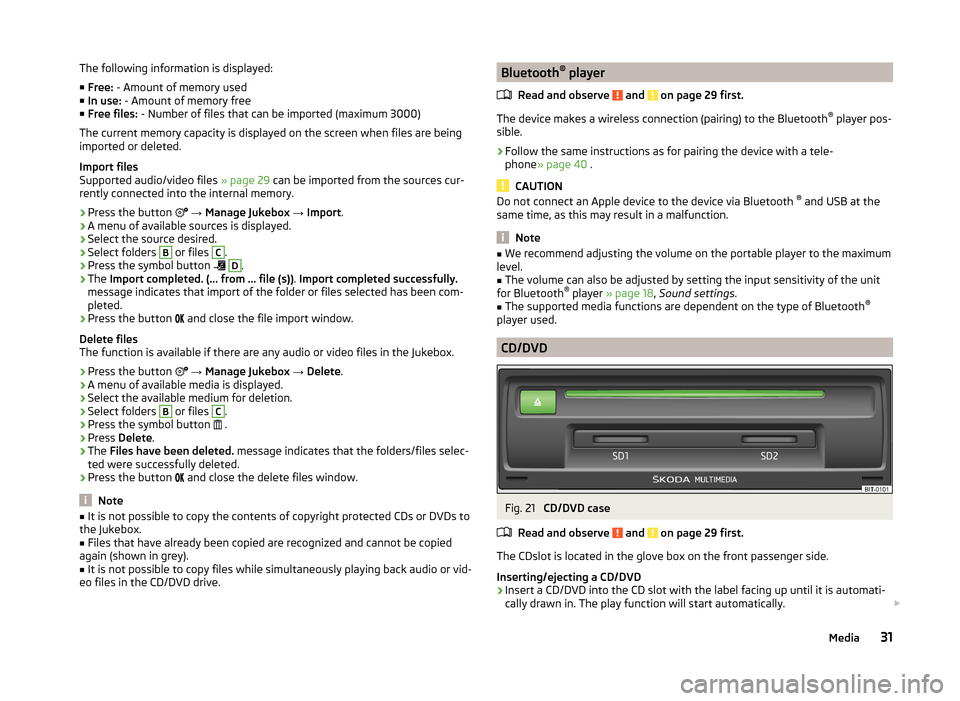
Fig. 21
CD/DVD case
Read and observe
and on page 29 first.
The CDslot is located in the glove box on the front passenger side.
Inserting/ejecting a CD/DVD
›
Insert a CD/DVD into the CD slot with the label facing up until it is automati-
cally drawn in. The play function will start automatically.
31Media
Page 42 of 83
■Import contacts - Start the update of the phone book; the number of im-
ported contacts and number of contacts stored in the phone is displayed
■ Delete other user profiles - Delete up to three previous user profiles (con-
tacts, order of calls, call lists, speed dial buttons assigned to contacts)
■ Reminder: remember your mobile phone - Switch on/off the reminder for a
connected telephone; the reminder is output when the ignition is switched
off and the ignition key is removed (or the ignition is turned off and the driv-
er's door opened in the case of vehicles with the KESSY system)
■ Select ring tone - Selects the ring tone if the connected telephone does not
support the in-band ringing function 1)
■ Show pictures for contacts - Switch on/off the display of the image assigned
to the contact in the telephone 2)
Connect to the device to the mobile telephone
Introduction
This chapter contains information on the following subjects:
Conditions for successful pairing
40
Connect device with your telephone
41
Pair the mobile telephone withe the device
41
Connection to another paired telephone
42
Switching on/off the Bluetooth ®
profile
42
Delete the mobile telephone from the list of paired devices
43
Disconnection
43
First and foremost, pay attention to the safety instructions » page 4 , Impor-
tant notes .
The device is displayed in the telephone to be connected to as SKODA_BT_.
... is replaced with the last four symbols of the VIN vehicle identification num-
ber of your vehicle.
You can change the name of the device » page 20.
WARNINGThe device may require confirmation of certain features in the telephone
when pairing. Therefore do not carry out the pairing process while driving -
there is danger of accidents!
Note
■ The maximum number of phones registered is 20. When the maximum num-
ber of paired telephones has been reached, the next one will cause the paired
telephone that has not been used for the longest to be automatically deleted.■
In some countries the connection via the Bluetooth ®
function, may be limi-
ted. Further information can be obtained from local authorities.
■
The range of the Bluetooth ®
connection to the system is restricted to the ve-
hicle interior. This depends on local conditions and of interference with other
devices.
■
When pairing from the mobile telephone, follow the instructions in the own-
er's manual of the telephone.
Conditions for successful pairing
Read and observe
on page 40 first.
To connect a telephone with the device, the two devices must be paired.
Prerequisites for successful pairing: The ignition is switched on.
The Bluetooth ®
function of the device » page 20 and the mobile telephone
is switched on.
The visibility of the mobile phone is switched on » page 20.
The visibility of the mobile phone is switched on.
The telephone that is to be connected to must have an active connection
to another telephone.
The phone is within range of the Bluetooth ®
signal.
The phone is supported by the device.
The pairing can be initiated from the device or from the mobile telephone.
1)
The in-band ringing function makes it possible to use the ring tone of your telephone as the ring tone.
2)
This function is only supported by some telephones.
40Phone
Page 43 of 83
NoteAvailable updates for Bluetooth ®
devices as well as information about the
phone support can be obtained from the ŠKODA website www.infotain-
ment.skoda-auto.com .
Connect device with your telephone
Read and observe
on page 40 first.
A telephone is paired with the device
After switching on the ignition, the device attempts to automatically connect to the last connected telephone.
During the connection setup and depending on the telephone type the device
screen displays may show ... Would you like to connect? and a menu will ap-
pear with the following function keys.
› Connect
- pairing confirmation
› Cancel
- stops the coupling process
If the connection cannot be established, the device will then attempt to con-
nect to other previously paired telephones one by one.
If there is also no connection, then a telephone search is to be started.
No telephone is paired with the device
After switching on the ignition, on the device screen the message Please
search for and connect a mobile telephone. appears and a menu with the fol-
lowing function keys.
›
Find telephone - search for available telephones with activated Bluetooth
® function and visibility
›
- Opening of the settings menu
» page 39, Settings
After completion of the search press the Results function key, a list of availa-
ble telephones will be displayed (the function key is also available during the
search).
Select the telephone you want from the list.
If the search fails, check that the conditions for successful pairing are
met » page 40 , Conditions for successful pairing and repeat the whole process.
Pairing confirmation
Depending on the telephone's Bluetooth ®
, conformation is in one of the fol-
lowing ways.
› Confirm the 6-digit PIN code 1)
displayed on the device screen and the tele-
phone display within 30 seconds on both the device and the telephone.
› If required select the option in the telephone for automatically connecting
the telephone to the device.
Or
› Confirm the connection request in the telephone.
› Enter the 4 digit PIN code shown on the unit display into the telephone with-
in 30 seconds
› If required select the option in the telephone for automatically connecting
the telephone to the device.
Connection
After successful connection the device will display the message ... user is con-
nected and then the main menu telephone » Fig. 27 on page 38 .
Note
If the telephone supports the Bluetooth ®
profile A2DP or AVRCP, your tele-
phone display may prompt you to pair the telephone as a Bluetooth ®
player.
Pair the mobile telephone withe the device
Read and observe
on page 40 first.
When pairing from the telephone, follow the instructions in the owner's man-ual of the telephone.
›
Have the telephone search for available Bluetooth ®
devices.
›
Select the device in the list of Bluetooth ®
devices 2)
.
The following message is shown in the device screen during pairing ... Would
you like to connect?, and the following function keys are displayed.
Cancel - stops the coupling process
Connect - confirmation of the coupling process
1)
For devices with Bluetooth ®
v2.1 and later the telephone quick pairing procedure (SSP Secure Simple
Pairing) is used for pairing. This pairing method does not require the user to enter a PIN.
2)
Fpr the name of the device refer to the Bluetooth ®
settings » page 20 .
41Communication
Page 44 of 83
Depending on the telephone's Bluetooth ®
, conformation is in one of the fol-
lowing ways.›
Confirm the 6-digit PIN code 1)
displayed on the device screen and the tele-
phone display within 30 seconds on both the device and the telephone.
›
If required select the option in the telephone for automatically connecting
the telephone to the device.
Or
›
Enter the 4 - 16 digit PIN code into the device.
›
Enter the PIN code shown on the device display into the telephone within 30
seconds.
›
If required acknowledge the confirmation request with the telephone.
If no other device is connected to the telephone and after successful connec-
tion the following message is shown in the device screen ... user is connected
and then the main menu telephone » Fig. 27 on page 38 .
If the device is connected to another telephone then only the pairing to the
new telephone takes place and the original telephone remains connected.
Connection to another paired telephone
Read and observe
on page 40 first.
If you want to connect the device to another paired telephone, the current
connection does not have to be terminated. The connection to the existing tel-
ephone is automatically terminated by connecting to another telephone.
›
In the main menu press the Telephone function key
B
» Fig. 27 on
page 38 .
It displays a list of previously paired telephones.
›
Select the paired telephone to be connected with the device.
The following message is shown in the device screen ... Replace this connec-
tion with ... ?, and the following function keys are displayed.
› Cancel
- stops the menu for telephone change
› Replace
- connection to the selected telephone
After successful connection the device will display the message ... user is con-
nected and then the main menu » Fig. 27 on page 38 .
If the desired telephone is not in the list of previously paired telephones then
the telephone is to be paired with the device » page 41.
Switching on/off the Bluetooth ®
profile
Read and observe
on page 40 first.
›
Press the button
→ Bluetooth → paired devices .
A list of paired devices is displayed.
Pressing the function key on the connected Bluetooth ®
device opens a menu
with possible connection profiles supported with the selected device.
Pressing the function key with the name and symbol of the connection profile causes a context-dependent message to be displayed in the device screen ... …
Disconnect the profile - are you sure? and a menu with the function keys is
displayed.
›
Disconnect - Pressing the function key turns off the selected profile.
Or
›
Replace - If the device is already connected to another telephone then
pressing the function key will replace the existing profile with the new pro- file.
The following message is shown in the device screen ... Connection with ... will
be made ... and the selected Bluetooth ®
Profile is turned on.
In each menu pressing the function key Cancel will cancel the profile change.
Possible profile symbols:
SymbolMeaningDevices that support the functionality of the hands-free
system (Bluetooth ®
profile HFP) a)Devices that are connected to the device via Bluetooth ®
profile HFP a)
1)
For devices with Bluetooth ®
v2.1 and later the device quick pairing procedure (SSP Secure Simple Pair-
ing) is used for pairing. This connection method does not require the user to enter a PIN.
42Phone
Page 46 of 83
Select assigned contact telephone number›Press the desired function key to speed dial the telephone number of a con-
tact C
» Fig. 27 on page 38 .
Change assigned telephone number of a contact
›
Press the desired function key for the speed dial
C
» Fig. 27 on page 38 for
longer.
The unit displays the telephone book.
›
If necessary, enter one of the contact numbers for the desired telephone
contact.
The telephone number of a contact is assigned to the selected function key for
speed dialling.
You can also make the change in the Telephone menu » page 39 .
Remove a telephone number contact
›
Press the symbol button
→ User profile → Manage Favourites .
›
Press the function key for the speed dial. By confirming the menu item De-
lete the telephone number of a contact on the selected function key is re-
moved for quick dialling.
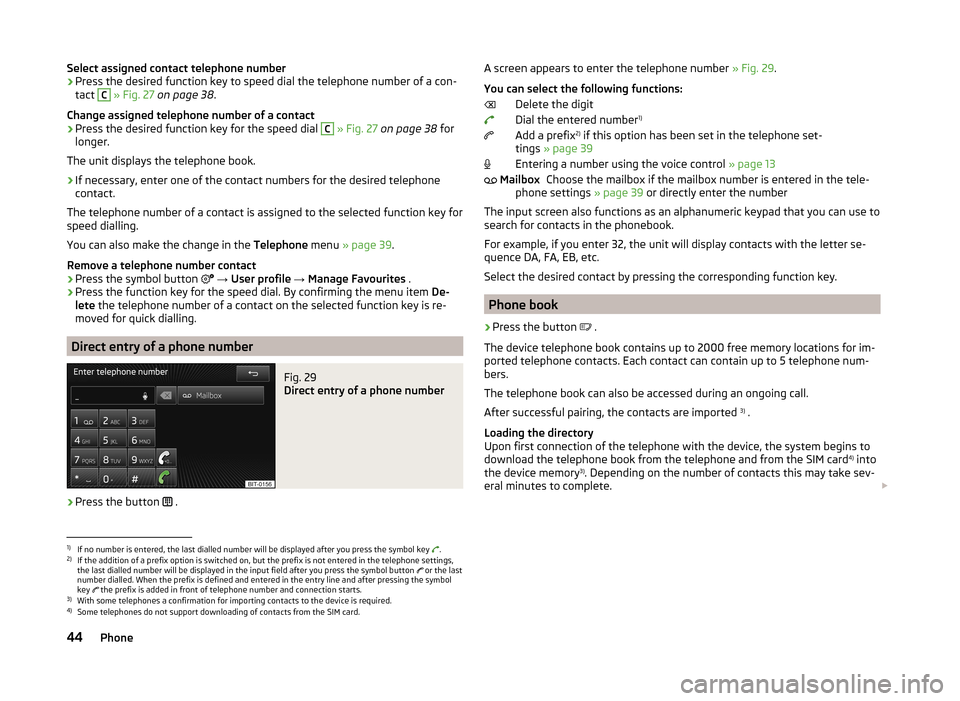
Direct entry of a phone number
Fig. 29
Direct entry of a phone number
›
Press the button .
A screen appears to enter the telephone number
» Fig. 29.
You can select the following functions: Delete the digit
Dial the entered number 1)
Add a prefix 2)
if this option has been set in the telephone set-
tings » page 39
Entering a number using the voice control » page 13
Choose the mailbox if the mailbox number is entered in the tele-
phone settings » page 39 or directly enter the number
The input screen also functions as an alphanumeric keypad that you can use to
search for contacts in the phonebook.
For example, if you enter 32, the unit will display contacts with the letter se-
quence DA, FA, EB, etc.
Select the desired contact by pressing the corresponding function key.
Phone book
›
Press the button .
The device telephone book contains up to 2000 free memory locations for im-
ported telephone contacts. Each contact can contain up to 5 telephone num-
bers.
The telephone book can also be accessed during an ongoing call.
After successful pairing, the contacts are imported 3)
.
Loading the directory
Upon first connection of the telephone with the device, the system begins to
download the telephone book from the telephone and from the SIM card 4)
into
the device memory 3)
. Depending on the number of contacts this may take sev-
eral minutes to complete.
Mailbox1)
If no number is entered, the last dialled number will be displayed after you press the symbol key .
2)
If the addition of a prefix option is switched on, but the prefix is not entered in the telephone settings,
the last dialled number will be displayed in the input field after you press the symbol button or the last
number dialled. When the prefix is defined and entered in the entry line and after pressing the symbol
key the prefix is added in front of telephone number and connection starts.
3)
With some telephones a confirmation for importing contacts to the device is required.
4)
Some telephones do not support downloading of contacts from the SIM card.
44Phone
Page 77 of 83
Index
A
ACC
71
Additional keyboard languages19
Address55
Adjusting Volume
6
Adjust vehicle systems ESC system
70
Advanced settings49
AM21
Anti-theft protection4
Apple devices33
ASR70
Audio21
Media26
Radio21
Automatic distance control71
Automatic front window wiping in rain72
Automatic headlight in rain72
Automatic locking72
Automatic rear window wiping72
Automatic scan22
AUX33
Auxiliary heater and ventilation Settings
70
B
Bluetooth Connect telephone to the device
40
Settings20
Switch on/off20
Visibility20
Bluetooth audio31
Bluetooth player31
C
CD
31
Climatronic automatic air recirculation
73
Automatic operation73
mode73
COMING HOME72
Communication37
Phonebox39
Component protection4
Control lever9
Convenience consumer69
D
DAB
21
Settings25
Station information24
Data Convenience consumer
69
Travel69
Vehicle status69
Date19
Daytime running lights72
Declaration of conformity4
Description of the unit5
Destination details66
Destination entry Home address
51
Destination management66
Destination details66
Stopover66
Device operation Control lever
9
MAXI DOT display9
Multifunction steering wheel11, 12
Device pairing41
Device screen Important notice5
Maintenance5
Operation7
Digital radio reception Settings
25
Display5, 7
Display in instrument cluster Telefon
11
Display in the instrument cluster9
Door release72
Driving mode68
Driving Mode Selection68
DVD31
DVD video34
Main menu34
Menu35
Operation34
Settings35
DVD video menu35
DVD video playback34
Dynamic route Switch on/off
64
E
Eco tips
73
Edit tour65
Enter destination Address
55
From the list57
Home address57
Map56
Own destination58
POI58
Enter into map56
ESC sport70
Explanation of graphic navigation instructions62
75Index
Page 80 of 83
Emergencies61
Other destinations61
proactive passenger protection71
R
Radio
21
Automatic scan22
DAB - settings25
FM - settings24
List of available stations22
Main menu21
Multifunction steering wheel9
Operation21
Preface21
Radio station store22
Search22
Settings24
Station logo23
Traffic programme (TP)23
Voice control13
Radio station Automatic scan
22
Logo23
Search22
Store22
Radio station logo23
Radio station search22
Radio station store22
Route63
Route calculation62
Route guidance61
Route info.63
Route list63
Route options48
S
Saved destinations
57
Scan Media
28
Screen5, 18
SD memory card32
Search area59
Select in the map56
Seats Settings
72
Select frequency range See main menu
21
Select input source Media
26
Selection of travel mode68
Select radio channel See main menu
21
Select source Images
36
Select video source34
Semi-automatic station scan22
Settings Additional keyboard languages
19
Bluetooth20
DAB25
Driving mode68
DVD video35
FM24
Images36
Keyboard19
Language17
Manage favourites43
Media28
Menus17
Navigation48
Radio24
Restore factory settings20
Screen18
Sound18
Telephone39
Time and date19
Unit17
Units19
User profile43
Voice control20
Volume6
Setting vehicle systems Auxiliary heater and ventilation
70
Parking and manoeuvring71
Restore factory settings73
Setup17
Set vehicle systems Assistance systems
71
Tyre70
Sound18
Source29
Speed limit for snow tyres70
START-STOP69
Station See main menu
21
Status line7
Stopover65, 66
Switching off Volume
6
Switching the unit off6
Switching the unit on6
Synchronous adjustment of both mirrors72
T
Telephone
37
Bluetooth profile40
Conference46
Connect to the device40
Disconnection43
Fast connection42
Functions43
Main menu38
Multifunction steering wheel11
On screen messages38
Pairing41
Select telephone42
Settings39
Telephone conference46
78Index