window SKODA OCTAVIA 2015 3.G / (5E) Blues Infotinment Syst
[x] Cancel search | Manufacturer: SKODA, Model Year: 2015, Model line: OCTAVIA, Model: SKODA OCTAVIA 2015 3.G / (5E)Pages: 31, PDF Size: 1.51 MB
Page 7 of 31

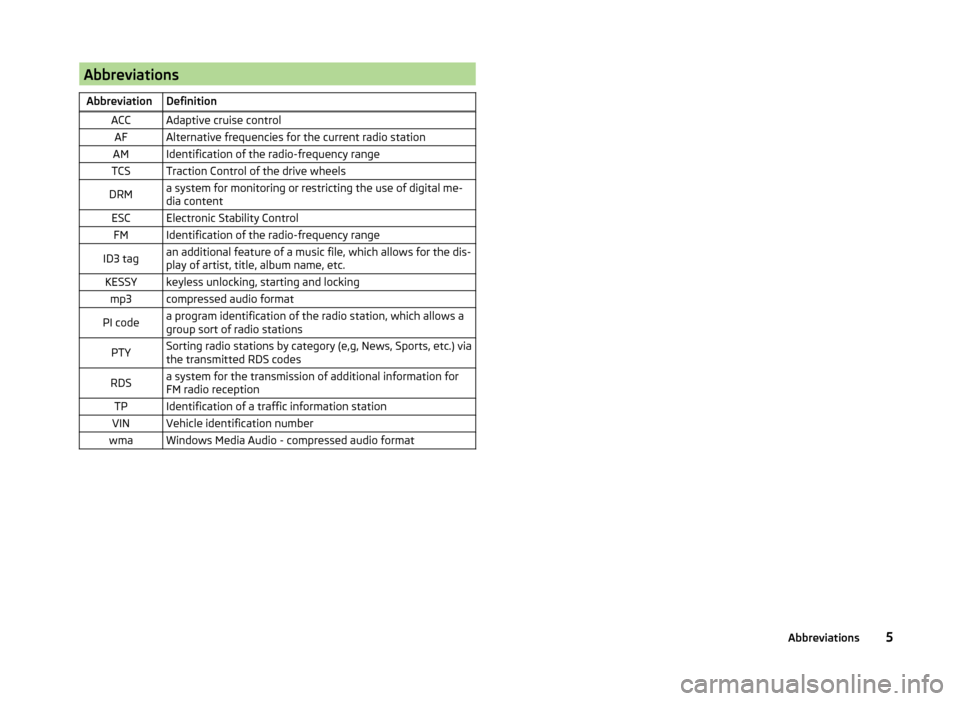
AbbreviationsAbbreviationDefinitionACCAdaptive cruise controlAFAlternative frequencies for the current radio stationAMIdentification of the radio-frequency rangeTCSTraction Control of the drive wheelsDRMa system for monitoring or restricting the use of digital me-
dia contentESCElectronic Stability ControlFMIdentification of the radio-frequency rangeID3 tagan additional feature of a music file, which allows for the dis-
play of artist, title, album name, etc.KESSYkeyless unlocking, starting and lockingmp3compressed audio formatPI codea program identification of the radio station, which allows a
group sort of radio stationsPTYSorting radio stations by category (e,g, News, Sports, etc.) via
the transmitted RDS codesRDSa system for the transmission of additional information for
FM radio receptionTPIdentification of a traffic information stationVINVehicle identification numberwmaWindows Media Audio - compressed audio format5Abbreviations
Page 17 of 31

Charge USB audio source
With the device on after connecting the USB audio source, the charging proc-
ess is automatically started (applies for audio sources where charging via the
USB connector is possible).
Some connected audio sources may not be recognised and cannot be charged.
CAUTION
USB extension cords, or reducers may impair the function of the connected au-
dio source.
Note
We recommend that you use extension cords from ŠKODA Original Accesso-
ries.
AUX - input
Fig. 7
AUX input
Read and observe and on page 13 first.
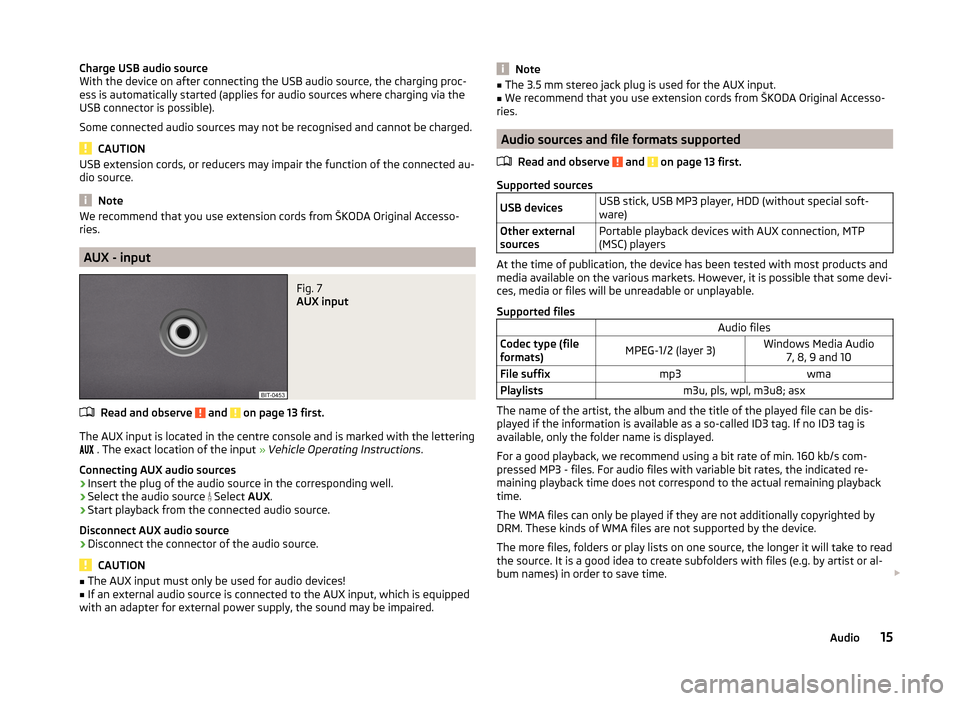
The AUX input is located in the centre console and is marked with the lettering
. The exact location of the input » Vehicle Operating Instructions .
Connecting AUX audio sources
›
Insert the plug of the audio source in the corresponding well.
›
Select the audio source
Select AUX.
›
Start playback from the connected audio source.
Disconnect AUX audio source
›
Disconnect the connector of the audio source.
CAUTION
■ The AUX input must only be used for audio devices!■If an external audio source is connected to the AUX input, which is equipped
with an adapter for external power supply, the sound may be impaired.Note■ The 3.5 mm stereo jack plug is used for the AUX input.■We recommend that you use extension cords from ŠKODA Original Accesso-
ries.
Audio sources and file formats supported
Read and observe
and on page 13 first.
Supported sources
USB devicesUSB stick, USB MP3 player, HDD (without special soft-
ware)Other external
sourcesPortable playback devices with AUX connection, MTP
(MSC) players
At the time of publication, the device has been tested with most products and
media available on the various markets. However, it is possible that some devi-
ces, media or files will be unreadable or unplayable.
Supported files
Audio filesCodec type (file
formats)MPEG-1/2 (layer 3)Windows Media Audio 7, 8, 9 and 10File suffixmp3wmaPlaylistsm3u, pls, wpl, m3u8; asx
The name of the artist, the album and the title of the played file can be dis-
played if the information is available as a so-called ID3 tag. If no ID3 tag is
available, only the folder name is displayed.
For a good playback, we recommend using a bit rate of min. 160 kb/s com-
pressed MP3 - files. For audio files with variable bit rates, the indicated re-
maining playback time does not correspond to the actual remaining playback
time.
The WMA files can only be played if they are not additionally copyrighted by
DRM. These kinds of WMA files are not supported by the device.
The more files, folders or play lists on one source, the longer it will take to read the source. It is a good idea to create subfolders with files (e.g. by artist or al-
bum names) in order to save time.
15Audio
Page 22 of 31

■Mirrors - Adjusts the mirrors
■ Synchronous mirror adjustment - Activates/deactivates synchronous mir-
ror adjustment
■ Lowering in reverse - Activates/deactivates the lowering of the front pas-
senger mirror when reversing
■ Fold in while parking - Activation / deactivation of the full collapse of the
mirror housing when the vehicle is locked
■ Wipers - Adjusts the windscreen wipers
■ Automatic wiping in rain - Activates/deactivates automatic windscreen
wiping in rain
■ Automatic rear wiper - Activates/deactivates automatic rear window wip-
ing
Opening and closing
›
Press the button CAR
→ Opening/closing .
■ Windows - Sets the window operation
■ Convenience opening - Sets the convenience opening
■ Off - Deactivates convenience opening
■ All windows - All windows
■ Driver - Driver's window only
■ Central locking - Settings for opening and closing of doors
■ Door unlocking - Sets the door unlocking
■ All - All doors
■ Single door - Driver's or passenger's door (when unlocking via the sensor
in the passenger door handle)
■ Driver side - Doors on the driver or passenger side (when unlocking via
the sensor in the passenger door handle)
■ Automatic locking - Activate/deactivate automatic locking when starting
off
■ Alarm system confirmation - Activates/deactivates acoustic signals when
unlocking/locking a vehicle with an anti-theft alarm system
Seats
›
Press the button CAR
→ Seats .
■ Store driver's seat position on key - Activate/deactivate storing the driver's
seat position and exterior mirror position when locking the vehicle
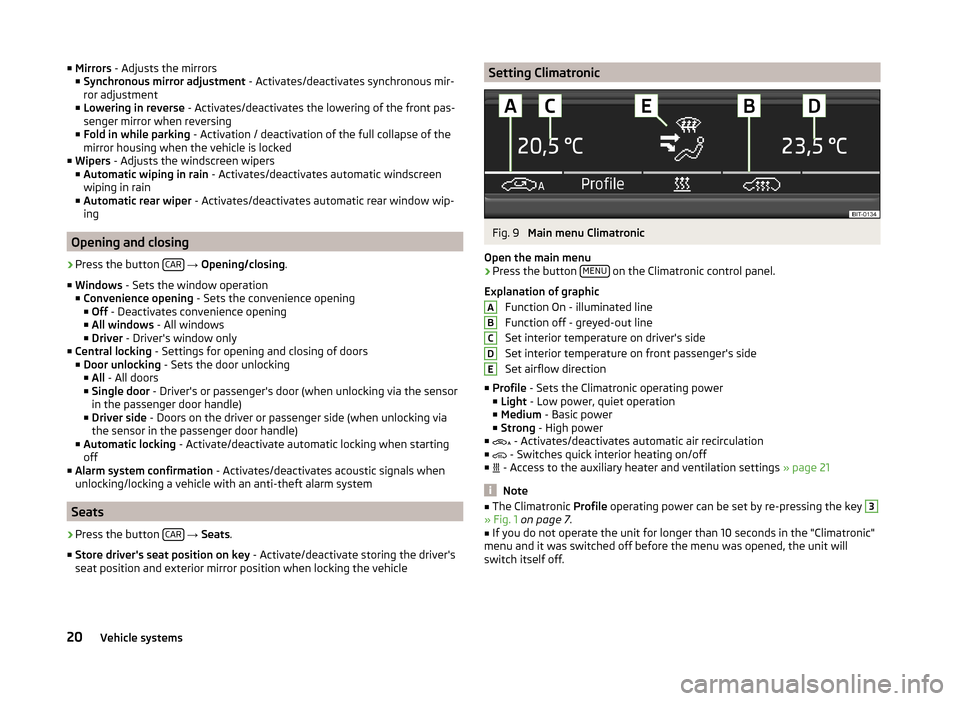
Setting ClimatronicFig. 9
Main menu Climatronic
Open the main menu
›
Press the button MENU on the Climatronic control panel.
Explanation of graphic Function On - illuminated line
Function off - greyed-out line
Set interior temperature on driver's side
Set interior temperature on front passenger's side
Set airflow direction
■ Profile - Sets the Climatronic operating power
■ Light - Low power, quiet operation
■ Medium - Basic power
■ Strong - High power
■ - Activates/deactivates automatic air recirculation
■ - Switches quick interior heating on/off
■ - Access to the auxiliary heater and ventilation settings
» page 21
Note
■
The Climatronic Profile operating power can be set by re-pressing the key 3» Fig. 1 on page 7 .■
If you do not operate the unit for longer than 10 seconds in the "Climatronic"
menu and it was switched off before the menu was opened, the unit will
switch itself off.
ABCDE20Vehicle systems
Page 26 of 31

SettingsDevice8
Device system10
Media10
Radio9
Sound9
Volume7
Setup8
Sound Settings
9
Speed limit for winter tyres19
START-STOP21
Storing the tyre pressure values21
Switching the device off7
Switching the device on7
Synchronous adjustment of both mirrors19
System Settings
10
T
Tilting the mirror surface - lowering in reverse
19
Time10
TP11, 13
Traffic programme13
Travel light - travel mode19
Tyre pressure - settings21
Tyre pressure monitoring21
U
Units
10
Unlocking doors20
USB14
V
Vehicle identification number
22
Vehicle settings18
Auxiliary heating and ventilation21
Climatronic20
Details of the multifunction display21
Driving assistants18
Light19
Opening and closing20
Resetting to factory settings22
Seats20
Service22
Speed limit for winter tyres19
Traction control (ASR)19
Vehicle Status21
Visibility19
Vehicle systems18
Version10
Versions data10
VIN number22
Volume7
Volume setting7
W
Window convenience operation
20
24Index