interior lights SKODA OCTAVIA 2015 3.G / (5E) Owner's Manual
[x] Cancel search | Manufacturer: SKODA, Model Year: 2015, Model line: OCTAVIA, Model: SKODA OCTAVIA 2015 3.G / (5E)Pages: 268, PDF Size: 37.54 MB
Page 4 of 268
Table of Contents
On-board literature4
Notes
5
Structure and more information about the
Owner's Manual
6
Abbreviations
Safety
Passive Safety
8
General information
8
Correct and safe seated position
8
Seat belts
11
Using seat belts
11
Inertia reel and belt pretensioners
13
Airbag system
14
Description of the airbag system
14
Airbag overview
15
Deactivating airbags
19
Transporting children safely
20
Child seat
20
Fastening elements
23
Using the system
Cockpit
27
Overview
26
Instruments and warning lights
28
Instrument cluster
28
Warning lights
31
Information system
40
Driver information system
40
Driving data (Multifunction display)
41
MAXI DOT display
44Service interval display49SmartGate50
Unlocking and opening
53
Unlocking and locking
53
Anti-theft alarm system
58
Luggage compartment lid
59
Electric boot lid
60
Window operations
61
Panorama sliding/tilting roof
64
Lights and visibility
67
Lights
67
Interior lights
74
Visibility
76
Windscreen wipers and washers
77
Rear mirror
79
Seats and head restraints
81
Seats and head restraints
81
Seat features
85
Transporting and practical equipment
89
Useful equipment
89
Multimedia holder
99
Luggage compartment and transport of
cargo
100
Variable loading floor in the luggage
compartment (Estate)
107
Net partition
109
Roof rack
110
Heating and ventilation
112
Heating, manual air conditioning system,
Climatronic
112
Auxiliary heating (auxiliary heating and
ventilation)
117Driving
Starting-off and Driving120
Starting and stopping the engine using the
key
120
Starting and stopping the engine at the push
of the button
122
START-STOPsystem
124
Brakes and parking
126
Manual shifting of gears and pedals
128
Automatic gearbox
129
Running-in and economical driving
132
Avoiding damage to your vehicle
134
Assist systems
135
General information
135
Braking and stabilisation systems
135
OFF ROAD-mode
138
Parking aid (ParkPilot)
140
Rear View Camera
143
Park Assist
144
Cruise Control System
148
Adaptive Cruise Control (ACC)
150
Front Assist
155
Selection of the driving mode (Driving Mode
Selection)
157
Proactive passenger protection (Crew Protect
Assist)
160
Lane Departure Warning (Lane Assist)
160
Traffic sign recognition
162
Fatigue detection
164
Tyre pressure monitoring
165
Hitch and trailer
167
Hitch
167
Trailer
1722Table of Contents
Page 17 of 268
System descriptionRead and observe
on page 14 first.
The inflation of the airbag is carried out in a fraction of a second.
When the airbags are deployed they fill with gas and inflate.
A grey white or red, non-harmful gas is released when the airbag is inflated.
This is perfectly normal and is not an indication of a fire in the vehicle.
Depending on the vehicle equipment, the airbag system consists of the
following parts. ▶ Front airbag for the driver and the front passenger » page 15.
▶ Driver’s knee airbag » page 17.
▶ Side airbags » page 17.
▶ Head airbags » page 18.
▶ Airbag warning light in the instrument cluster » page 35.
▶ Key switch for the front passenger airbag » page 19.
▶ Warning light for the front passenger airbag in the middle of the dash panel
» page 19 .
Airbag deployment
Read and observe
on page 14 first.
The airbag system is only functional when the ignition is switched on.
Triggering conditions
It is not possible to generally determine which deployment conditions apply to
the airbag system in every situation. An important role is played by factors
such as the type of object that the vehicle hits (hard/soft), the impact angle, vehicle speed, etc.
A decisive factor for the deployment of the airbags is the deceleration which
occurs. If the vehicle deceleration which occurs and is measured during the
collision remains below the prescribed reference values specified in the control
unit, the airbags are not deployed although the vehicle may well suffer severe
damage to the bodywork as a consequence of the accident.
The following airbags will be deployed in the event of a severe frontal
collision.
▶ Driver’s front airbag.
▶ Front passenger airbag.
▶ Driver’s knee airbag.
The following airbags will be deployed in the event of a severe side collision.
▶ Front side airbag on the side of the accident.
▶ Rear side airbag on the side of the accident.
▶ Head airbags on the side of the accident.
When an airbag is deployed, the following occurs.
▶ The interior light comes on (if the automatic operation of the interior light is
switched on - switch
).
▶ The hazard warning lights are switched on.
▶ All the doors are unlocked.
▶ The fuel supply to the engine is interrupted.
When there is no air bag deployment?
With minor frontal and side collisions, rear collision, overturning of the vehicle
or vehicle roll-over there is no airbag deployment.
Airbag overview
Introduction
This chapter contains information on the following subjects:
Front airbags
15
Driver’s knee airbag
17
Side airbags
17
Head airbags
18
Front airbags
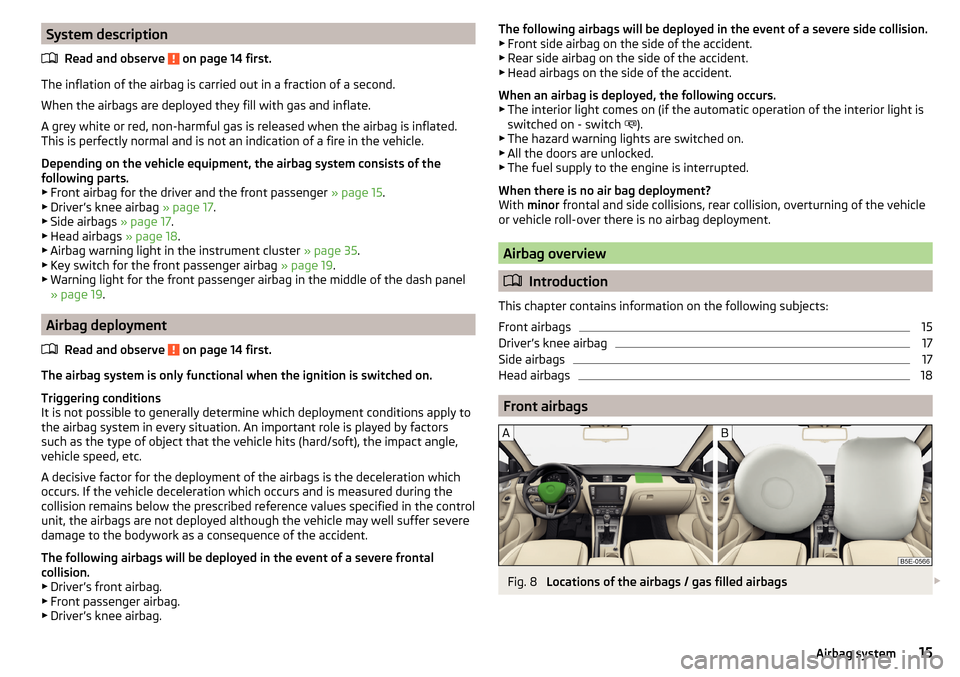
Fig. 8
Locations of the airbags / gas filled airbags
15Airbag system
Page 55 of 268
Unlocking and opening
Unlocking and locking
Introduction
This chapter contains information on the following subjects:
Locking/unlocking using the key via the lock cylinder
54
Unlocking/locking with the remote control key
54
Unlocking / locking - KESSY
55
Locking and unlocking the vehicle with the central locking button
55
Safe securing system
56
Individual settings
56
Opening/closing a door
57
Child safety lock
57
Malfunctions
57
Your car is equipped with a central locking system.
The central locking system allows you to lock and unlock all doors, the fuel fill-
er flap and the boot lid at the same time. The functions of the central locking
system can be individually adjusted » page 56.
After unlocking, depending on vehicle equipment and setting the following is
valid for the central locking. ▶ The turn signal lights flash twice as confirmation that the vehicle has been
unlocked.
▶ An double audible signal sounds additionally on vehicles which are fitted
with the anti-theft alarm system.
▶ The doors, the boot lid and the fuel filler flap are unlocked.
▶ The interior lamp illuminates.
▶ The SafeLock system is switched off.
▶ The indicator light in the driver door stops flashing.
▶ The exterior mirrors are set into the driving position.
▶ The anti-theft alarm system is deactivated.
After locking, depending on vehicle equipment and setting the following is
valid for the central locking. ▶ The turn signal lights flash once as confirmation that the vehicle has been
locked.
▶ An audible signal sounds additionally on vehicles which are fitted with the
anti-theft alarm system.
▶ The doors, the boot lid and the fuel filler flap are locked.
▶ The interior lamp goes out.
▶ The SafeLock system is switched on.
▶ The warning light in the driver door begins flashing.
▶ The exterior mirrors are folded back into the park position.
▶ The anti-theft alarm system is activated.
If the doors or the luggage compartment lid remain open after the vehicle has
been locked, the turn signal lights do not flash until they have been closed.
Protection against unwanted vehicle unlocking
If the vehicle is unlocked and a door or the boot lid not opened within the next
45 seconds, the vehicle will lock again automatically and the safe securing sys-
tem or anti-theft alarm system will be switched back on.WARNING■ Never leave the key in the vehicle when you exit the vehicle. Unauthor-
ized persons, such as children, for example, could lock the car, turn on the
ignition or start the engine - there is a danger of injury and accidents!■
When leaving the vehicle, never leave persons who are not completely in-
dependent, such as children, unattended in the vehicle. These individuals
might not be able to leave the vehicle on their own or to help themselves.
Can be fatal at very high or very low temperatures!
CAUTION
■ Each key contains electronic components; therefore it must be protected
against moisture and severe shocks.■
Keep the groove of the keys absolutely clean. Impurities (textile fibres, dust,
etc.) have a negative effect on the functionality of the locking cylinder and ig-
nition lock.
■
If the driver's door has been opened, the vehicle cannot be locked.
53Unlocking and opening
Page 72 of 268
Automatic driving lamp controlFig. 56
Light switch: AUTO position
Read and observe on page 67 first.
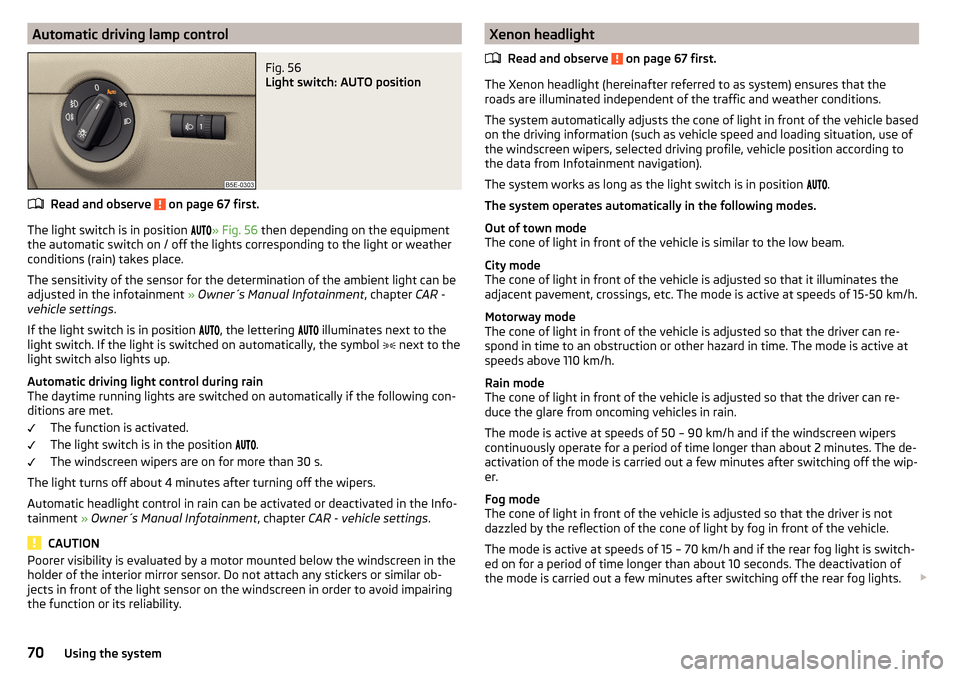
The light switch is in position » Fig. 56
then depending on the equipment
the automatic switch on / off the lights corresponding to the light or weather
conditions (rain) takes place.
The sensitivity of the sensor for the determination of the ambient light can be
adjusted in the infotainment » Owner´s Manual Infotainment , chapter CAR -
vehicle settings .
If the light switch is in position , the lettering
illuminates next to the
light switch. If the light is switched on automatically, the symbol next to the
light switch also lights up.
Automatic driving light control during rain
The daytime running lights are switched on automatically if the following con-
ditions are met.
The function is activated.
The light switch is in the position .
The windscreen wipers are on for more than 30 s.
The light turns off about 4 minutes after turning off the wipers.
Automatic headlight control in rain can be activated or deactivated in the Info-
tainment » Owner´s Manual Infotainment , chapter CAR - vehicle settings .
CAUTION
Poorer visibility is evaluated by a motor mounted below the windscreen in the
holder of the interior mirror sensor. Do not attach any stickers or similar ob-
jects in front of the light sensor on the windscreen in order to avoid impairing
the function or its reliability.Xenon headlight
Read and observe
on page 67 first.
The Xenon headlight (hereinafter referred to as system) ensures that the
roads are illuminated independent of the traffic and weather conditions.
The system automatically adjusts the cone of light in front of the vehicle based
on the driving information (such as vehicle speed and loading situation, use of
the windscreen wipers, selected driving profile, vehicle position according to
the data from Infotainment navigation).
The system works as long as the light switch is in position
.
The system operates automatically in the following modes.
Out of town mode
The cone of light in front of the vehicle is similar to the low beam.
City mode
The cone of light in front of the vehicle is adjusted so that it illuminates the
adjacent pavement, crossings, etc. The mode is active at speeds of 15-50 km/h.
Motorway mode
The cone of light in front of the vehicle is adjusted so that the driver can re-
spond in time to an obstruction or other hazard in time. The mode is active at
speeds above 110 km/h.
Rain mode
The cone of light in front of the vehicle is adjusted so that the driver can re-
duce the glare from oncoming vehicles in rain.
The mode is active at speeds of 50 – 90 km/h and if the windscreen wipers
continuously operate for a period of time longer than about 2 minutes. The de-
activation of the mode is carried out a few minutes after switching off the wip-
er.
Fog mode
The cone of light in front of the vehicle is adjusted so that the driver is not
dazzled by the reflection of the cone of light by fog in front of the vehicle.
The mode is active at speeds of 15 – 70 km/h and if the rear fog light is switch-
ed on for a period of time longer than about 10 seconds. The deactivation of
the mode is carried out a few minutes after switching off the rear fog lights.
70Using the system
Page 75 of 268
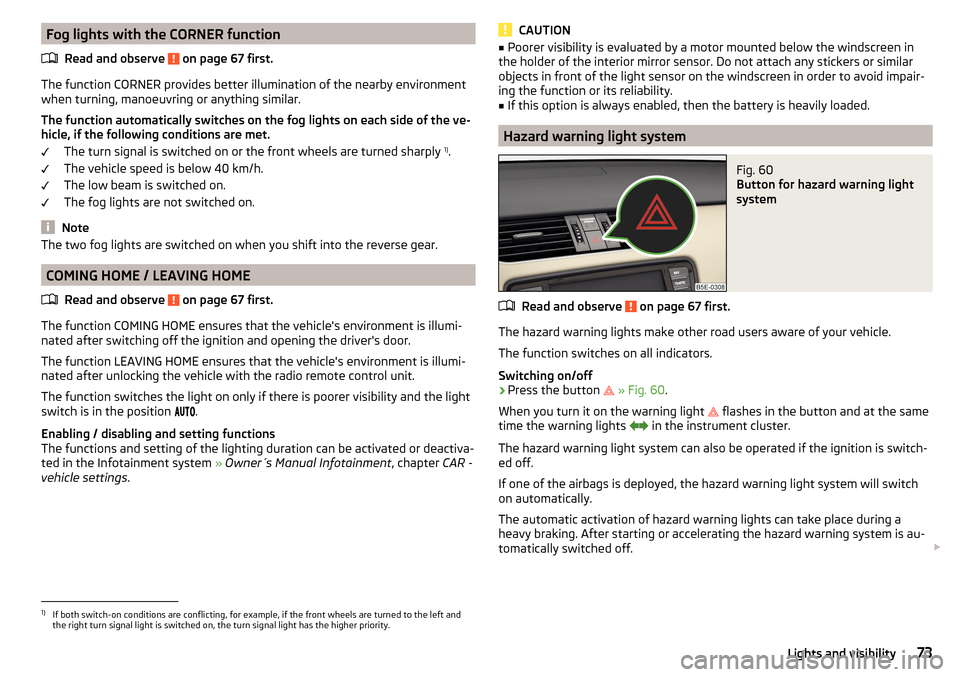
Fog lights with the CORNER functionRead and observe
on page 67 first.
The function CORNER provides better illumination of the nearby environment
when turning, manoeuvring or anything similar.
The function automatically switches on the fog lights on each side of the ve- hicle, if the following conditions are met.
The turn signal is switched on or the front wheels are turned sharply 1)
.
The vehicle speed is below 40 km/h.
The low beam is switched on.
The fog lights are not switched on.
Note
The two fog lights are switched on when you shift into the reverse gear.
COMING HOME / LEAVING HOME
Read and observe
on page 67 first.
The function COMING HOME ensures that the vehicle's environment is illumi-
nated after switching off the ignition and opening the driver's door.
The function LEAVING HOME ensures that the vehicle's environment is illumi-
nated after unlocking the vehicle with the radio remote control unit.
The function switches the light on only if there is poorer visibility and the light
switch is in the position .
Enabling / disabling and setting functions
The functions and setting of the lighting duration can be activated or deactiva-
ted in the Infotainment system » Owner´s Manual Infotainment , chapter CAR -
vehicle settings .
CAUTION■
Poorer visibility is evaluated by a motor mounted below the windscreen in
the holder of the interior mirror sensor. Do not attach any stickers or similar
objects in front of the light sensor on the windscreen in order to avoid impair-
ing the function or its reliability.■
If this option is always enabled, then the battery is heavily loaded.
Hazard warning light system
Fig. 60
Button for hazard warning light
system
Read and observe on page 67 first.
The hazard warning lights make other road users aware of your vehicle.
The function switches on all indicators.
Switching on/off
›
Press the button
» Fig. 60 .
When you turn it on the warning light
flashes in the button and at the same
time the warning lights
in the instrument cluster.
The hazard warning light system can also be operated if the ignition is switch-
ed off.
If one of the airbags is deployed, the hazard warning light system will switch
on automatically.
The automatic activation of hazard warning lights can take place during a
heavy braking. After starting or accelerating the hazard warning system is au-
tomatically switched off.
1)
If both switch-on conditions are conflicting, for example, if the front wheels are turned to the left and
the right turn signal light is switched on, the turn signal light has the higher priority.
73Lights and visibility
Page 76 of 268
When the hazard warning system is on and the indicator light is switched on
(e.g. when turning), the hazard warning lights are switched off temporarily and
only the turn signal flashes on the relevant side of the vehicle.
Parking lights
Read and observe
on page 67 first.
The side light is provided for lighting of the parked vehicle.
Switching on the side light
on one side
›
Switch off the ignition.
›
Press the control lever to position
A
or
B
as far as the stop » Fig. 55 on
page 69 .
The parking lights on the right or left side of the vehicle are turned on.
Switching on the side light on both sides
›
With the ignition switched on turn the light switch to position .
›
Switch off the ignition.
›
Lock the vehicle.
After pulling out the ignition key and opening the driver's door, an audible
warning sounds.
After a few seconds or after closing the driver's door, the audible alarm is
turned off, but the parking lights will remain switched on.
CAUTION
■ Turning on the parking light means the battery is heavily loaded.■The parking light cannot be turned off automatic due to the low battery
charge level.■
If the two-sided parking lights are switched on when the ignition is off, then
there is no automatic switching off of the parking light.
Driving abroad
Read and observe
on page 67 first.
When driving in countries with opposing traffic system (traffic on the
left/right), your headlights may dazzle oncoming traffic. In order to avoid this,
the headlights must be adjusted at a specialist garage.
You can adjust the Xenon headlights yourself by setting the travel mode in In- fotainment » Owner´s Manual Infotainment , chapter CAR - vehicle settings .
Interior lights
Introduction
This chapter contains information on the following subjects:
Front interior light
74
Rear interior lights
75
Front door warning light
75
Entry space lighting
75
The inner lighting also works if the ignition is switched off.
With the ignition off, the light turns off automatically after about 10 minutes.
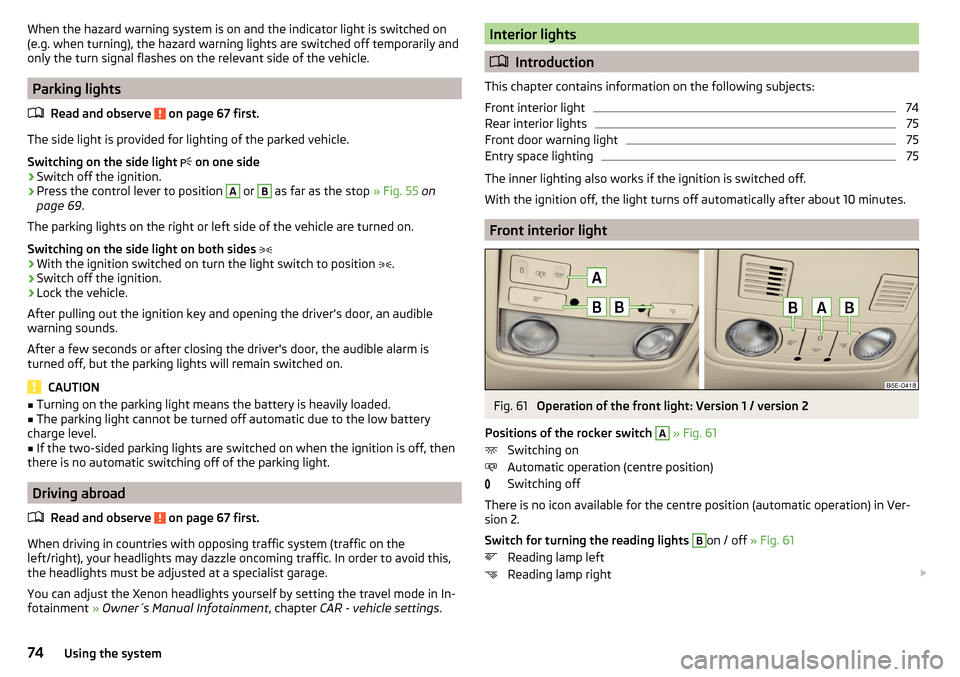
Front interior light
Fig. 61
Operation of the front light: Version 1 / version 2
Positions of the rocker switch
A
» Fig. 61
Switching on
Automatic operation (centre position)
Switching off
There is no icon available for the centre position (automatic operation) in Ver-
sion 2.
Switch for turning the reading lights
B
on / off » Fig. 61
Reading lamp left
Reading lamp right
74Using the system
Page 77 of 268
Automatic operation of the lamp – position
The system is turned on when any of the following is present.
▶ The vehicle is unlocked.
▶ One of the doors is opened.
▶ The ignition key is removed.
The system is turned off when any of the following is present.
▶ The vehicle is locked.
▶ The ignition is switched on.
▶ About 30 seconds after all the doors have been closed.
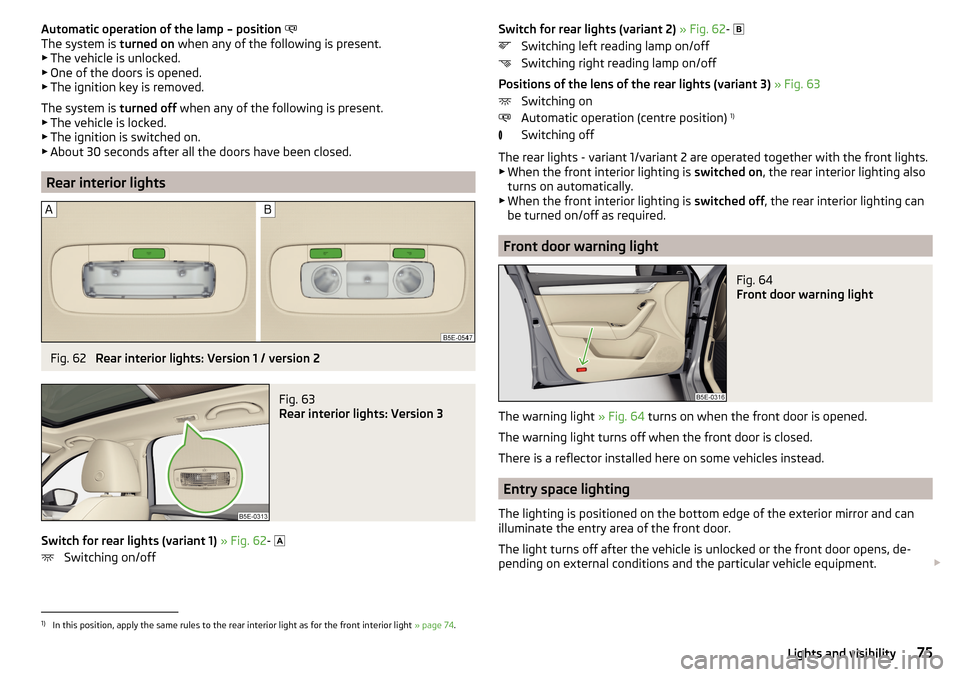
Rear interior lights
Fig. 62
Rear interior lights: Version 1 / version 2
Fig. 63
Rear interior lights: Version 3
Switch for rear lights (variant 1) » Fig. 62 -
Switching on/off
Switch for rear lights (variant 2) » Fig. 62 -
Switching left reading lamp on/off
Switching right reading lamp on/off
Positions of the lens of the rear lights (variant 3) » Fig. 63
Switching on
Automatic operation (centre position) 1)
Switching off
The rear lights - variant 1/variant 2 are operated together with the front lights.
▶ When the front interior lighting is switched on, the rear interior lighting also
turns on automatically.
▶ When the front interior lighting is switched off, the rear interior lighting can
be turned on/off as required.
Front door warning light
Fig. 64
Front door warning light
The warning light » Fig. 64 turns on when the front door is opened.
The warning light turns off when the front door is closed.
There is a reflector installed here on some vehicles instead.
Entry space lighting
The lighting is positioned on the bottom edge of the exterior mirror and can
illuminate the entry area of the front door.
The light turns off after the vehicle is unlocked or the front door opens, de-
pending on external conditions and the particular vehicle equipment.
1)
In this position, apply the same rules to the rear interior light as for the front interior light
» page 74.
75Lights and visibility
Page 81 of 268
The headlight washer system works under the following conditions.The ignition is switched on.
The low beam is switched on.
The outside temperature is about -12° C to +39° C.
To ensure the correct functioning of the system, even in winter, this needs to be regularly cleared of snow and ice, e.g. free with a de-icing spray.
Rear mirror
Introduction
This chapter contains information on the following subjects:
Interior mirror dimming
79
Exterior mirrors
80WARNING■ Convex (curved outward) or aspheric exterior mirrors increase the field of
vision. They do, however, make objects appear smaller in the mirror. These
mirrors are therefore only of limited use for estimating distances to the fol-
lowing vehicles.■
Whenever possible use the interior mirror for estimating the distances to
the following vehicles.
WARNINGThe mirrors with automatic dimming contain an electrolyte liquid which can
escape if mirror glass is broken.■
The leaking electrolytic fluid can irritate the skin, eyes and breath appara-
tus.
■
If your eyes or skin come into contact with the electrolytic fluid, immedi-
ately wash the affected area for a few minutes long with a lot of water. If
necessary get medical assistance.
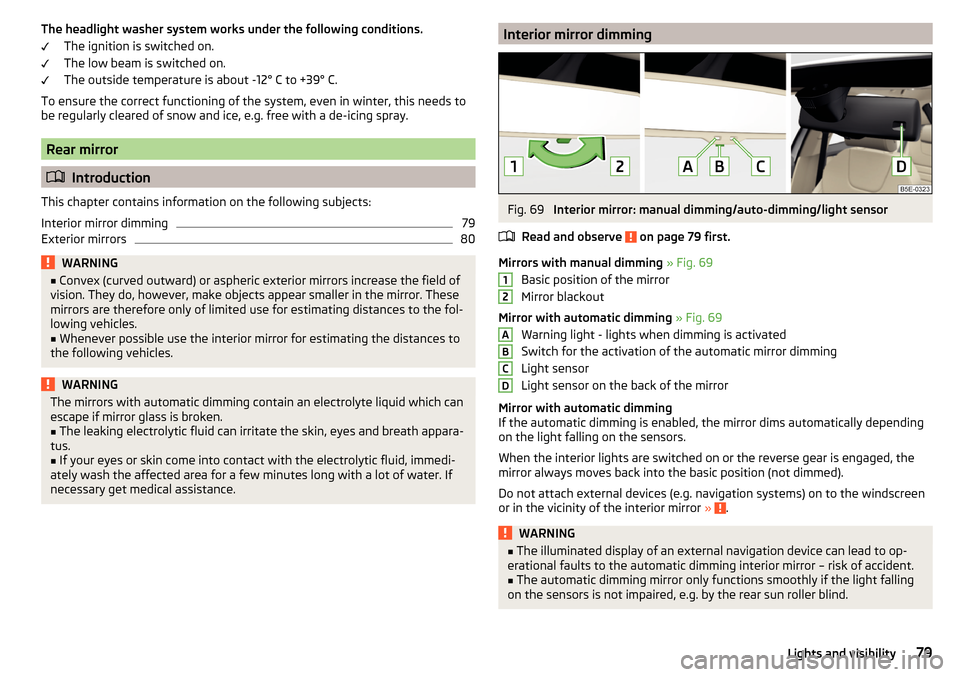
Interior mirror dimmingFig. 69
Interior mirror: manual dimming/auto-dimming/light sensor
Read and observe
on page 79 first.
Mirrors with manual dimming » Fig. 69
Basic position of the mirror
Mirror blackout
Mirror with automatic dimming » Fig. 69
Warning light - lights when dimming is activated
Switch for the activation of the automatic mirror dimming
Light sensor
Light sensor on the back of the mirror
Mirror with automatic dimming
If the automatic dimming is enabled, the mirror dims automatically depending
on the light falling on the sensors.
When the interior lights are switched on or the reverse gear is engaged, the
mirror always moves back into the basic position (not dimmed).
Do not attach external devices (e.g. navigation systems) on to the windscreen
or in the vicinity of the interior mirror »
.
WARNING■
The illuminated display of an external navigation device can lead to op-
erational faults to the automatic dimming interior mirror – risk of accident.■
The automatic dimming mirror only functions smoothly if the light falling
on the sensors is not impaired, e.g. by the rear sun roller blind.
12ABCD79Lights and visibility
Page 116 of 268
Information on the cooling system
The cooling system operates only if the following conditions are met
» page 112 .
The warning light below the button
» Fig. 136 illuminates after activation,
even if not all of the conditions for the function of the cooling system have
been met. The lighting up of the indicator light in the button signals the opera-
tional readiness of the cooling system.
When the air distribution control is turned to position
the cooling system is
activated.
Note
During operation of the manual air conditioning, an increase in engine idle
speed may occur under certain circumstances in order to ensure sufficient
heating comfort.
Climatronic (automatic air conditioning)
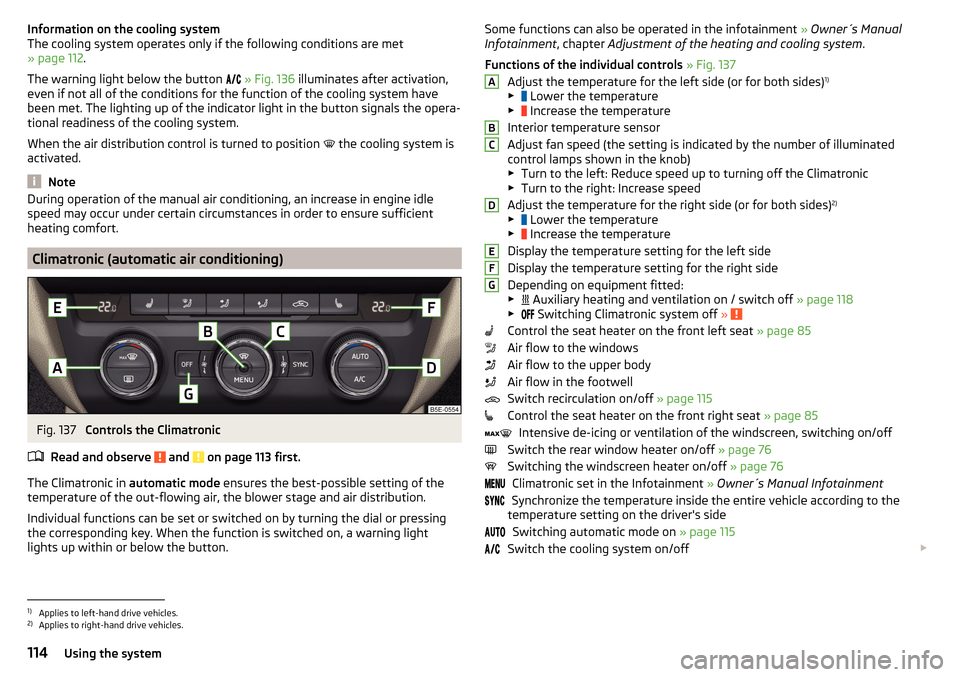
Fig. 137
Controls the Climatronic
Read and observe
and on page 113 first.
The Climatronic in automatic mode ensures the best-possible setting of the
temperature of the out-flowing air, the blower stage and air distribution.
Individual functions can be set or switched on by turning the dial or pressing
the corresponding key. When the function is switched on, a warning light
lights up within or below the button.
Some functions can also be operated in the infotainment » Owner´s Manual
Infotainment , chapter Adjustment of the heating and cooling system .
Functions of the individual controls » Fig. 137
Adjust the temperature for the left side (or for both sides) 1)
▶ Lower the temperature
▶ Increase the temperature
Interior temperature sensor
Adjust fan speed (the setting is indicated by the number of illuminated
control lamps shown in the knob) ▶ Turn to the left: Reduce speed up to turning off the Climatronic
▶ Turn to the right: Increase speed
Adjust the temperature for the right side (or for both sides) 2)
▶ Lower the temperature
▶ Increase the temperature
Display the temperature setting for the left side
Display the temperature setting for the right side
Depending on equipment fitted:
▶ Auxiliary heating and ventilation on / switch off
» page 118
▶ Switching Climatronic system off
»
Control the seat heater on the front left seat » page 85
Air flow to the windows
Air flow to the upper body
Air flow in the footwell
Switch recirculation on/off » page 115
Control the seat heater on the front right seat » page 85
Intensive de-icing or ventilation of the windscreen, switching on/off
Switch the rear window heater on/off » page 76
Switching the windscreen heater on/off » page 76
Climatronic set in the Infotainment » Owner´s Manual Infotainment
Synchronize the temperature inside the entire vehicle according to the
temperature setting on the driver's side
Switching automatic mode on » page 115
Switch the cooling system on/off
ABCDEFG1)
Applies to left-hand drive vehicles.
2)
Applies to right-hand drive vehicles.
114Using the system
Page 117 of 268
Setting temperature
The temperature can be adjusted on the Climatronic control unit or in the Info-
tainment » Owner´s Manual Infotainment , chapter Setting the heating and the
cooling system .
The temperature can be set between +16 °C and +29.5 °C. The temperature is
regulated automatically within this range.
Illuminates in the temperature display
then the Climatronic works with max-
imum cooling (temperature setting below +16 °C).
Illuminates in the temperature display
then the Climatronic works with maxi-
mum heating (temperature setting above +29.5 °C).
There is no automatic temperature control in the two end positions.WARNING■ Do not switch off the Climatronic system for longer than necessary.■Switch on the Climatronic system as soon as the windows mist up.
CAUTION
Do not cover the interior temperature sensor B » Fig. 137 as this could impair
the functioning of the Climatronic.
Note
■ During operation of the Climatronic, an increase in engine idle speed can oc-
cur under certain circumstances in order to ensure adequate heating comfort.■
When
is switched on, the air flow to the windows
is switched on. The
air flow to the windows will remain switched on after turning
off.
■
Holding the button
will turn on
automatically.
Climatronic - automatic operation
Read and observe
and on page 113 first.
The automatic mode is used in order to maintain a constant temperature and
to demist the windows in the interior of the car.
Automatic mode can be switched off by pressing one of the buttons for the air
distribution or by increasing/decreasing the blower speed. The temperature
regulation is continued.
Operating modes
Automatic mode works in three modes - moderate, medium, and intensive.
Setting the individual operating modes » Owner´s Manual Infotainment , chap-
ter Setting the heating and the cooling system .
After the automatic mode is switched on, Climatronic works in the last selec-
ted mode.
The currently selected mode is displayed in the Infotainment display.
Note
Climatronic is set to the medium setting at the factory.
Air distribution control
Read and observe
and on page 113 first.
The recirculation mode prevents contaminated outside air getting into the In-
terior of the vehicle.
In recirculated air mode air is sucked out of the interior of the vehicle and then
fed back into the interior.
Switching on/off
›
Press the button.
When the recirculation mode is activated, the warning light below the button
lights up.
Heating and manual air conditioning system
If the air distribution control is set to position when the recirculation modes
is switched on, the recirculated-air mode is switched off. Recirculated air mode
can be switched on again from this setting by repeatedly pressing the symbol
button .
When the is switched on and the temperature regulator is turned to the
left, the recirculated-air mode is switched on.
Climatronic
Climatronic may have an air quality sensor for the detection of the pollutant
concentration in the sucked-in air.
If a considerable increase in concentration of pollutants is recognised by the
air quality sensor, the recirculated air mode will be switched on automatically.
When the pollutant concentration decreases to the normal level, the recircula-
ted air mode is automatically switched off.
115Heating and ventilation