ignition SKODA OCTAVIA 2016 3.G / (5E) Repair Manual
[x] Cancel search | Manufacturer: SKODA, Model Year: 2016, Model line: OCTAVIA, Model: SKODA OCTAVIA 2016 3.G / (5E)Pages: 324, PDF Size: 48.85 MB
Page 210 of 324
OperationFig. 248
Installation location of the camera / scanned area behind the ve-
hicle
Read and observe
and on page 207 first.
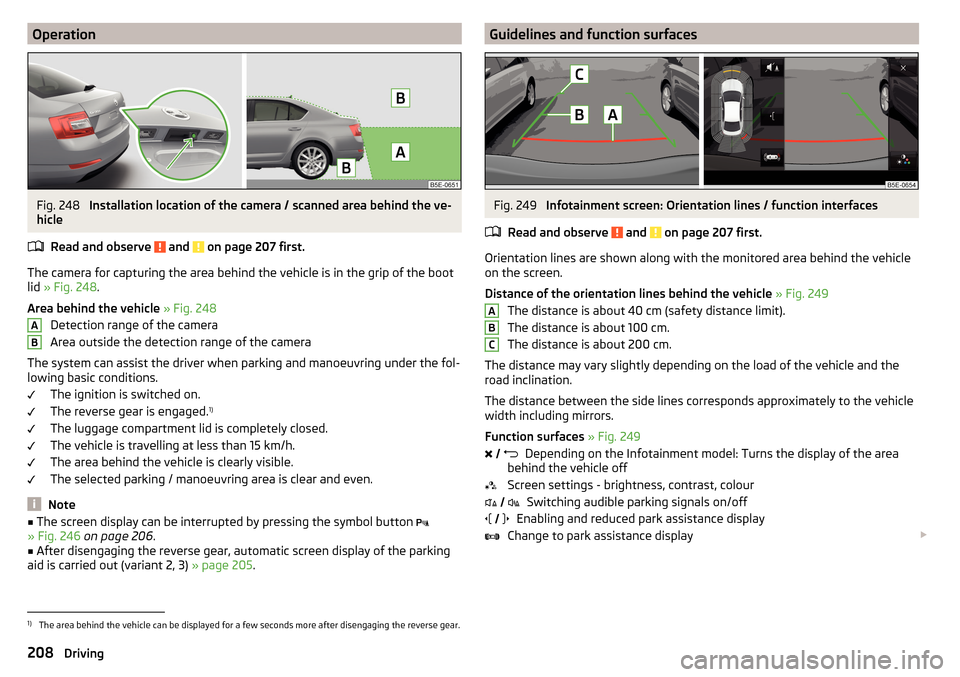
The camera for capturing the area behind the vehicle is in the grip of the bootlid » Fig. 248 .
Area behind the vehicle » Fig. 248
Detection range of the camera
Area outside the detection range of the camera
The system can assist the driver when parking and manoeuvring under the fol-
lowing basic conditions.
The ignition is switched on.
The reverse gear is engaged. 1)
The luggage compartment lid is completely closed.
The vehicle is travelling at less than 15 km/h.
The area behind the vehicle is clearly visible.
The selected parking / manoeuvring area is clear and even.
Note
■ The screen display can be interrupted by pressing the symbol button
» Fig. 246 on page 206 .■
After disengaging the reverse gear, automatic screen display of the parking
aid is carried out (variant 2, 3) » page 205.
ABGuidelines and function surfacesFig. 249
Infotainment screen: Orientation lines / function interfaces
Read and observe
and on page 207 first.
Orientation lines are shown along with the monitored area behind the vehicle
on the screen.
Distance of the orientation lines behind the vehicle » Fig. 249
The distance is about 40 cm (safety distance limit).
The distance is about 100 cm.
The distance is about 200 cm.
The distance may vary slightly depending on the load of the vehicle and the
road inclination.
The distance between the side lines corresponds approximately to the vehicle
width including mirrors.
Function surfaces » Fig. 249
Depending on the Infotainment model: Turns the display of the area
behind the vehicle off
Screen settings - brightness, contrast, colour Switching audible parking signals on/off
Enabling and reduced park assistance display
Change to park assistance display
ABC
1)
The area behind the vehicle can be displayed for a few seconds more after disengaging the reverse gear.
208Driving
Page 222 of 324
Warning and automatic brakingFig. 261
Display in the instrument cluster: Warning or emer-
gency braking at low speed
Read and observe and on page 219 first.
Emergency braking at low speed
If there is a risk of a collision in a vehicle speed range of about 5 km/h to 30
km/h, the system triggers an automatic braking.
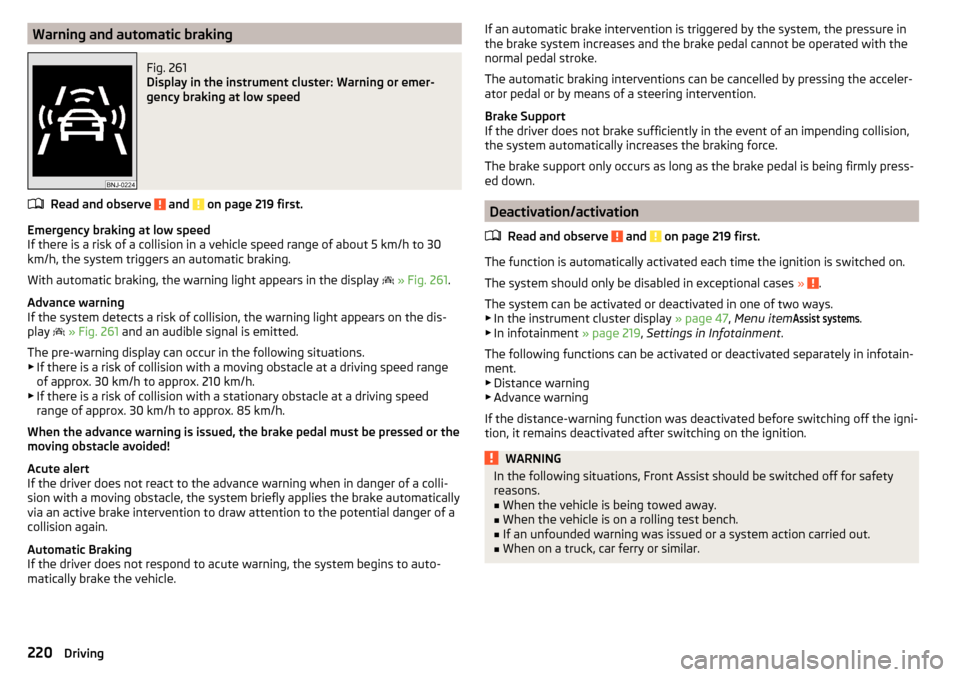
With automatic braking, the warning light appears in the display
» Fig. 261 .
Advance warning
If the system detects a risk of collision, the warning light appears on the dis-
play
» Fig. 261 and an audible signal is emitted.
The pre-warning display can occur in the following situations. ▶ If there is a risk of collision with a moving obstacle at a driving speed range
of approx. 30 km/h to approx. 210 km/h.
▶ If there is a risk of collision with a stationary obstacle at a driving speed
range of approx. 30 km/h to approx. 85 km/h.
When the advance warning is issued, the brake pedal must be pressed or the
moving obstacle avoided!
Acute alert
If the driver does not react to the advance warning when in danger of a colli-
sion with a moving obstacle, the system briefly applies the brake automatically
via an active brake intervention to draw attention to the potential danger of a
collision again.
Automatic Braking
If the driver does not respond to acute warning, the system begins to auto-
matically brake the vehicle.
If an automatic brake intervention is triggered by the system, the pressure in
the brake system increases and the brake pedal cannot be operated with the
normal pedal stroke.
The automatic braking interventions can be cancelled by pressing the acceler-
ator pedal or by means of a steering intervention.
Brake Support
If the driver does not brake sufficiently in the event of an impending collision,
the system automatically increases the braking force.
The brake support only occurs as long as the brake pedal is being firmly press-
ed down.
Deactivation/activation
Read and observe
and on page 219 first.
The function is automatically activated each time the ignition is switched on.
The system should only be disabled in exceptional cases »
.
The system can be activated or deactivated in one of two ways. ▶ In the instrument cluster display » page 47, Menu item
Assist systems
.
▶ In infotainment » page 219, Settings in Infotainment .
The following functions can be activated or deactivated separately in infotain-
ment. ▶ Distance warning
▶ Advance warning
If the distance-warning function was deactivated before switching off the igni-
tion, it remains deactivated after switching on the ignition.
WARNINGIn the following situations, Front Assist should be switched off for safety
reasons.■
When the vehicle is being towed away.
■
When the vehicle is on a rolling test bench.
■
If an unfounded warning was issued or a system action carried out.
■
When on a truck, car ferry or similar.
220Driving
Page 226 of 324
WARNINGThe general information relating to the use of assistance systems must be
observed » page 199, in section Introduction .
Note
■
The system component service life is monitored electronically. Further infor-
mation » page 35 , Safety systems .■
If the front passenger front airbag is deactivated, the belt tensioning func-
tion for the front passenger seat is switched off.
Operation
Read and observe
on page 224 first.
In critical driving situations (e.g. during emergency braking or a sudden changein direction), the following steps can be taken separately or combined in order
to reduce the risk of serious injury.
▶ The front passenger's and driver's seatbelts, if worn, are automatically ten-
sioned closely over the body.
▶ Opened door windows in the front doors are closed automatically up to a gap
of about 5 cm from the edge.
▶ The sliding/tilting roof is closed.
Once the critical driving situation has passed, the tension on the seatbelts will
be released again.
The system operates at two levels of protection.
The first level of protection
The system already intervenes in situations that may occur during dynamic
driving. As a result, this primarily helps to keep the driver and the passenger in
the correct seated position.
The first protection level can be deactivated in one of the following ways. ▶ in the menu
Infotainment
→
→
Driver assistance
.
▶ Deactivation of TCS » page 201.
▶ By selecting the driving mode
Sport
» page 223 .
Provided that the driving mode
Sport
is not selected, the system is activated
over the two levels of protection after switching the ignition off and on again.
The second level of protection
The system intervenes only if the situation is evaluated as critical, such as
when panic braking at high speeds.
This level of protection cannot be deactivated.
Lane Departure Warning (Lane Assist)
Introduction
Fig. 264
Sensor for Lane Assist
This chapter contains information on the following subjects:
Settings in Infotainment
225
Operation
225
Activation / deactivation
226
Malfunctions
226
The lane departure warning (hereinafter known as system) helps to keep the
vehicle between the boundary lines of a lane.
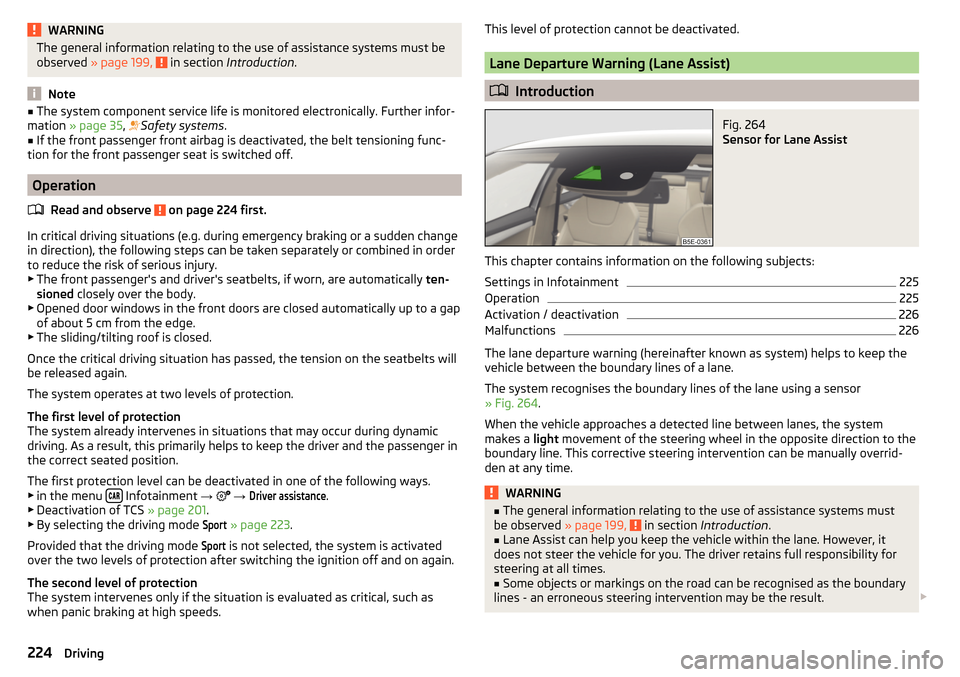
The system recognises the boundary lines of the lane using a sensor
» Fig. 264 .
When the vehicle approaches a detected line between lanes, the system
makes a light movement of the steering wheel in the opposite direction to the
boundary line. This corrective steering intervention can be manually overrid-
den at any time.
WARNING■ The general information relating to the use of assistance systems must
be observed » page 199, in section Introduction .■
Lane Assist can help you keep the vehicle within the lane. However, it
does not steer the vehicle for you. The driver retains full responsibility for
steering at all times.
■
Some objects or markings on the road can be recognised as the boundary
lines - an erroneous steering intervention may be the result.
224Driving
Page 228 of 324
The driver's hands are on the steering wheel.
The lane is more than 2.5 m in width.
If the turn signal is switched on (e.g. when turning), no steering intervention
takes place when the vehicle approaches the boundary line. The system re-
gards the situation as an intended lane change.
Warning lights in the instrument cluster The system is active, but not ready to intervene.
The system is active and ready to intervene or is currently intervening.
Adaptive lane assist
Adaptive tracking helps to keep the vehicle in the position between the boun-
dary lines selected by the driver, by means of steering intervention.
If the position within the lane is changed, the system quickly adapts and holds
the newly-selected position.
Steering wheel vibrations
In the following situations, it may occasionally be the case that due to the
steering wheel vibrations, the system indicates that a driver steering interven-
tion is required. ▶ The system is not able to keep the vehicle by a within the lane due to a
steering intervention.
▶ During an intense system-related steering intervention, the system suddenly
cannot recognize the boundary lines.WARNINGThe system function may be restricted if, for example there is danger due
to ruts on a downhill road or in a crosswind.
Activation / deactivation
Read and observe
and on page 224 first.
The activation/deactivation of the system can be carried out in one of two
ways. ▶ In the instrument cluster display » page 47, Menu item
Assist systems
.
▶ In infotainment » page 225, Settings in Infotainment .
Adaptive tracking can also be enabled or disabled In Infotainment.
After switching off and switching on the ignition, the system setting is re-
tained.
Malfunctions
Read and observe
and on page 224 first.
If, for some unknown reason, the system is not available, an appropriate mes-
sage appears in the display of the instrument cluster.
Sensor covered / dirty
If the windscreen is dirty, iced or misted up in the sensor area, a message ap-
pears indicating that there is no sensor view. Clean the windscreen or remove
the obstacles from the sensor area.
System unavailable
If the system is currently unavailable, a message concerning the unavailability
appears. Try to re-activate the machine. If the system still is not available, seek
the assistance of a specialist garage.
System fault
In the case of a system fault, an error message appears. Seek help from a spe-
cialist garage.
Request to take over steering
If the system detects that there are no hands are on the steering wheel, this
will not work properly. You will be prompted to take over steering. Place your
hands on the steering wheel.
Traffic sign recognition
Introduction
This chapter contains information on the following subjects:
Settings in Infotainment
227
Operation
227
Additional display
228
Malfunctions and information messages
228
The road sign recognition system (hereinafter referred to as system) shows
certain road signs (e.g. Mandatory speed limits) on the instrument cluster dis-
play.
226Driving
Page 230 of 324
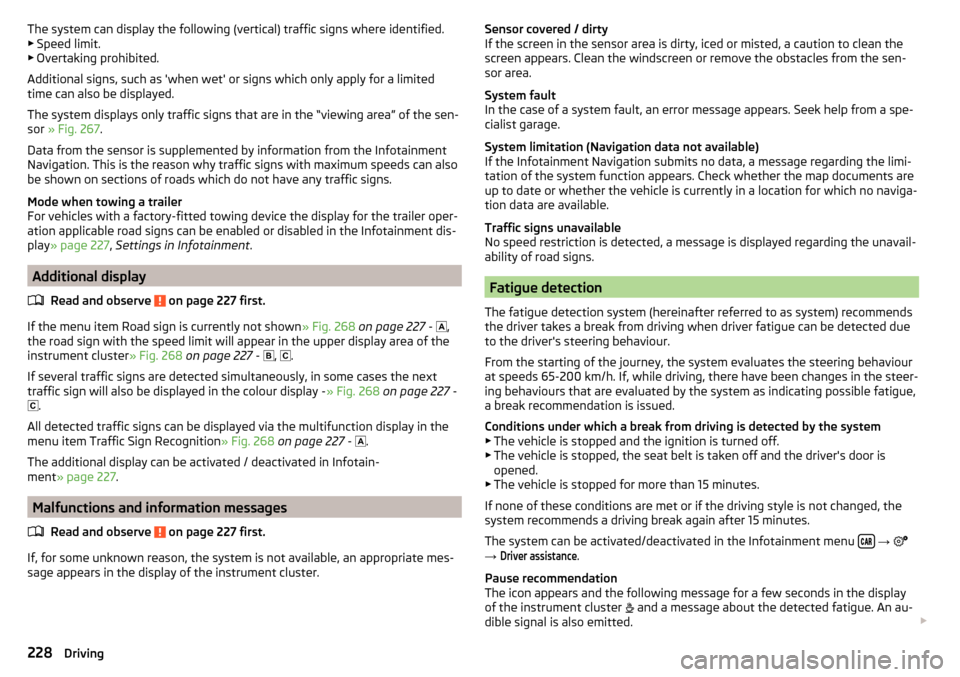
The system can display the following (vertical) traffic signs where identified.▶ Speed limit.
▶ Overtaking prohibited.
Additional signs, such as 'when wet' or signs which only apply for a limited
time can also be displayed.
The system displays only traffic signs that are in the “viewing area” of the sen-
sor » Fig. 267 .
Data from the sensor is supplemented by information from the Infotainment
Navigation. This is the reason why traffic signs with maximum speeds can also
be shown on sections of roads which do not have any traffic signs.
Mode when towing a trailer
For vehicles with a factory-fitted towing device the display for the trailer oper-
ation applicable road signs can be enabled or disabled in the Infotainment dis-
play » page 227 , Settings in Infotainment .
Additional display
Read and observe
on page 227 first.
If the menu item Road sign is currently not shown » Fig. 268 on page 227 -
,
the road sign with the speed limit will appear in the upper display area of the
instrument cluster » Fig. 268 on page 227 -
,
.
If several traffic signs are detected simultaneously, in some cases the next
traffic sign will also be displayed in the colour display - » Fig. 268 on page 227 -
.
All detected traffic signs can be displayed via the multifunction display in the
menu item Traffic Sign Recognition » Fig. 268 on page 227 -
.
The additional display can be activated / deactivated in Infotain-
ment » page 227 .
Malfunctions and information messages
Read and observe
on page 227 first.
If, for some unknown reason, the system is not available, an appropriate mes-
sage appears in the display of the instrument cluster.
Sensor covered / dirty
If the screen in the sensor area is dirty, iced or misted, a caution to clean the
screen appears. Clean the windscreen or remove the obstacles from the sen-
sor area.
System fault
In the case of a system fault, an error message appears. Seek help from a spe-
cialist garage.
System limitation (Navigation data not available)
If the Infotainment Navigation submits no data, a message regarding the limi- tation of the system function appears. Check whether the map documents are
up to date or whether the vehicle is currently in a location for which no naviga-
tion data are available.
Traffic signs unavailable
No speed restriction is detected, a message is displayed regarding the unavail-
ability of road signs.
Fatigue detection
The fatigue detection system (hereinafter referred to as system) recommends
the driver takes a break from driving when driver fatigue can be detected due
to the driver's steering behaviour.
From the starting of the journey, the system evaluates the steering behaviour
at speeds 65-200 km/h. If, while driving, there have been changes in the steer-
ing behaviours that are evaluated by the system as indicating possible fatigue,
a break recommendation is issued.
Conditions under which a break from driving is detected by the system ▶ The vehicle is stopped and the ignition is turned off.
▶ The vehicle is stopped, the seat belt is taken off and the driver's door is
opened.
▶ The vehicle is stopped for more than 15 minutes.
If none of these conditions are met or if the driving style is not changed, the
system recommends a driving break again after 15 minutes.
The system can be activated/deactivated in the Infotainment menu
→
→
Driver assistance
.
Pause recommendation
The icon appears and the following message for a few seconds in the display
of the instrument cluster and a message about the detected fatigue. An au-
dible signal is also emitted.
228Driving
Page 231 of 324
WARNING■The general information relating to the use of assistance systems must
be observed » page 199, in section Introduction .■
For the driving ability is always the driver's responsibility. Never drive if
you feel tired.
■
The system may not detect all cases where a break is needed.
■
Therefore, take regular, sufficient breaks during long trips.
■
There will be no system warning during the so-called micro-sleep.
Note
■ In some situations, the system may evaluate the driving incorrectly and thus
mistakenly recommend a break (e.g. sporty driving, adverse weather condi-
tions or poor road conditions).■
The system is designed primarily for use on motorways.
Tyre pressure monitoring
Introduction
This chapter contains information on the following subjects:
Storing the tyre pressure values and Infotainment display
229
The tyre pressure monitoring function (hereinafter referred to as the system)
monitors the tyre pressure while driving.
If the tyre inflation pressure changes, the warning light
lights up in the in-
strument cluster and an audible signal sounds » page 35.
The system can only function properly if the tyres have the prescribed inflation
pressure and these pressure values are stored in the system.
The tyre pressure values are always stored in the system if one of the fol-
lowing events occurs.
▶ Change of tyre inflation pressure.
▶ Change one or more wheels.
▶ Change in position of a wheel on the vehicle.
▶ The warning light
lights up in the instrument cluster.
WARNING■
The general information relating to the use of assistance systems must
be observed » page 199, in section Introduction .■
Having the correct tyre inflation pressure is always the driver's responsi-
bility. Tyre inflation pressure must be checked regularly » page 261.
■
The system cannot warn in case of very rapid tyre inflation pressure loss,
e.g. in case of sudden tyre damage.
■
Before storing the pressure values, the tyres must be inflated to the
specified inflation pressure » page 261. If incorrect pressure values are
saved, the system may also not issue a warning even if the tyre inflation
pressure is too low.
CAUTION
To ensure proper system function, the tire pressure values must be stored ev-
ery 10 000 km or 1x a year.
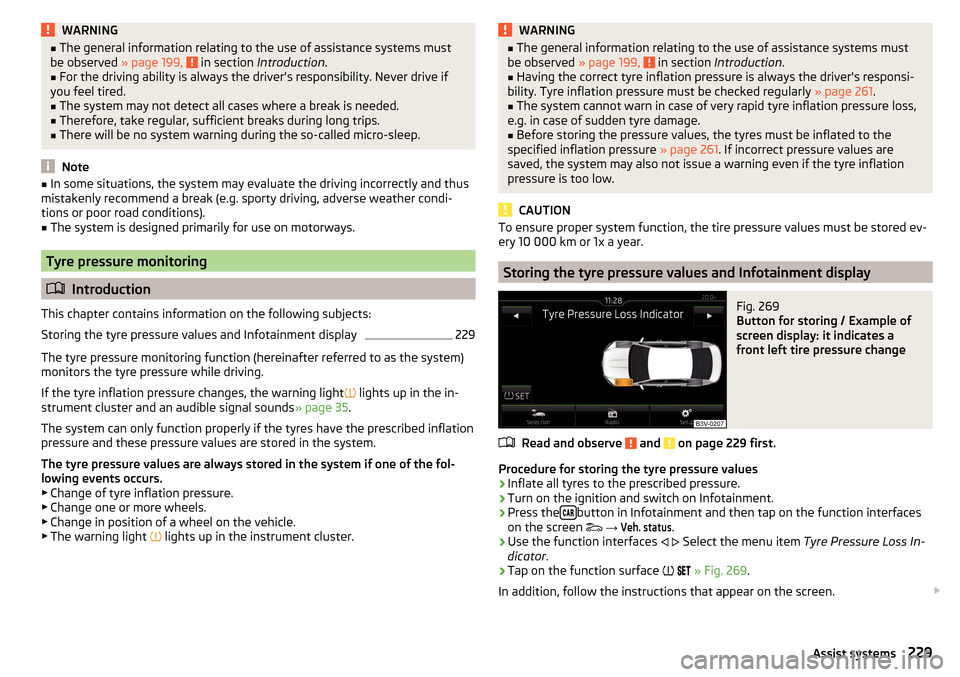
Storing the tyre pressure values and Infotainment display
Fig. 269
Button for storing / Example of
screen display: it indicates a
front left tire pressure change
Read and observe and on page 229 first.
Procedure for storing the tyre pressure values
›
Inflate all tyres to the prescribed pressure.
›
Turn on the ignition and switch on Infotainment.
›
Press the button in Infotainment and then tap on the function interfaces
on the screen
→
Veh. status
.
›
Use the function interfaces
Select the menu item
Tyre Pressure Loss In-
dicator .
›
Tap on the function surface
» Fig. 269 .
In addition, follow the instructions that appear on the screen.
229Assist systems
Page 237 of 324
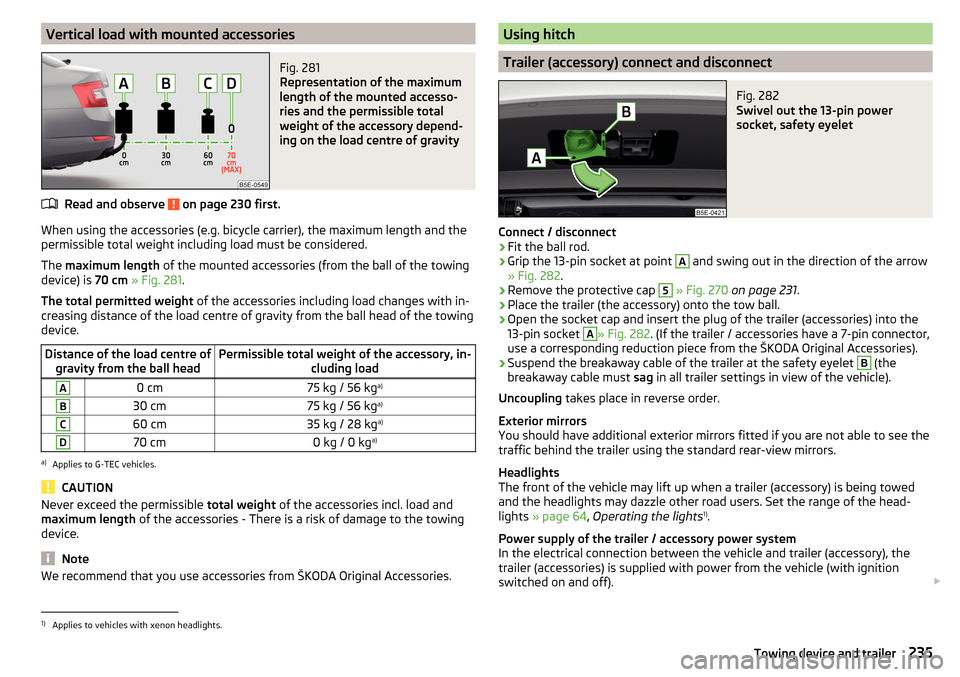
Vertical load with mounted accessoriesFig. 281
Representation of the maximum
length of the mounted accesso-
ries and the permissible total
weight of the accessory depend-
ing on the load centre of gravity
Read and observe on page 230 first.
When using the accessories (e.g. bicycle carrier), the maximum length and the
permissible total weight including load must be considered.
The maximum length of the mounted accessories (from the ball of the towing
device) is 70 cm » Fig. 281 .
The total permitted weight of the accessories including load changes with in-
creasing distance of the load centre of gravity from the ball head of the towing
device.
Distance of the load centre of gravity from the ball headPermissible total weight of the accessory, in- cluding loadA0 cm75 kg / 56 kga)B30 cm75 kg / 56 kg a)C60 cm35 kg / 28 kg a)D70 cm0 kg / 0 kga)a)
Applies to G-TEC vehicles.
CAUTION
Never exceed the permissible
total weight of the accessories incl. load and
maximum length of the accessories - There is a risk of damage to the towing
device.
Note
We recommend that you use accessories from ŠKODA Original Accessories.Using hitch
Trailer (accessory) connect and disconnect
Fig. 282
Swivel out the 13-pin power
socket, safety eyelet
Connect / disconnect
›
Fit the ball rod.
›
Grip the 13-pin socket at point
A
and swing out in the direction of the arrow
» Fig. 282 .
›
Remove the protective cap
5
» Fig. 270 on page 231 .
›
Place the trailer (the accessory) onto the tow ball.
›
Open the socket cap and insert the plug of the trailer (accessories) into the
13-pin socket
A
» Fig. 282 . (If the trailer / accessories have a 7-pin connector,
use a corresponding reduction piece from the ŠKODA Original Accessories).
›
Suspend the breakaway cable of the trailer at the safety eyelet
B
(the
breakaway cable must sag in all trailer settings in view of the vehicle).
Uncoupling takes place in reverse order.
Exterior mirrors
You should have additional exterior mirrors fitted if you are not able to see the
traffic behind the trailer using the standard rear-view mirrors.
Headlights
The front of the vehicle may lift up when a trailer (accessory) is being towed
and the headlights may dazzle other road users. Set the range of the head-
lights » page 64 , Operating the lights 1)
.
Power supply of the trailer / accessory power system
In the electrical connection between the vehicle and trailer (accessory), the
trailer (accessories) is supplied with power from the vehicle (with ignition
switched on and off).
1)
Applies to vehicles with xenon headlights.
235Towing device and trailer
Page 251 of 324
CAUTION■Never drive until the fuel tank is completely empty! Irregular supply of fuel
can cause misfiring, which can result in damage to parts of the engine and the
exhaust system.■
Immediately remove any fuel that has spilled onto the vehicle's paintwork –
risk of paint damage.
■
If you would like to operate your vehicle in a country other than the one for
which it was intended, please talk to a ŠKODA Partner. They will tell you
whether the fuel specified by the manufacturer is offered in that country
and/or whether the manufacturer will sanction operating the vehicle with an-
other fuel.
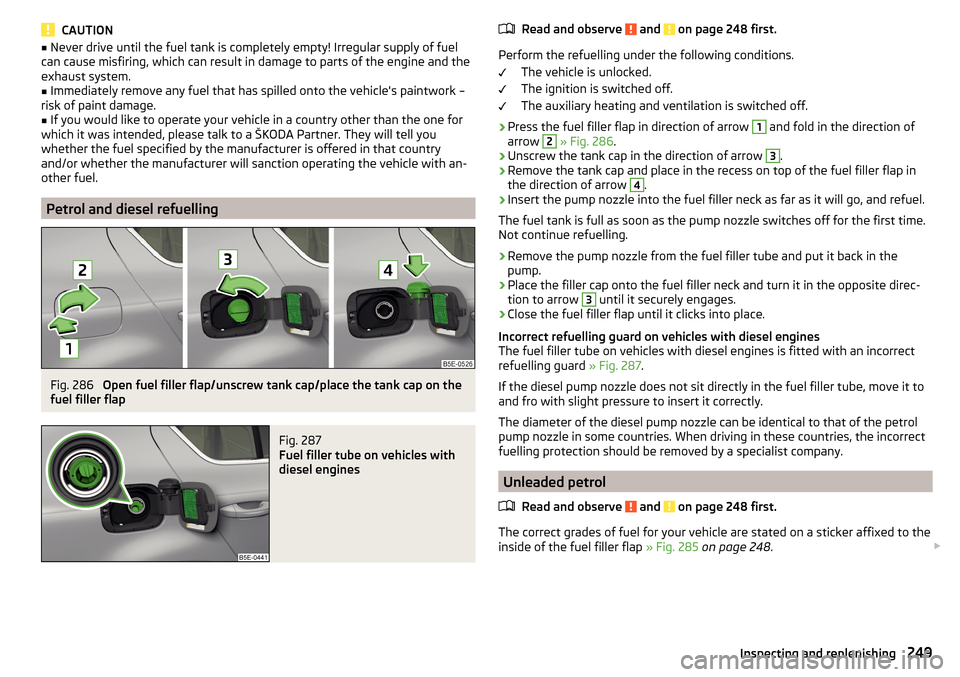
Petrol and diesel refuelling
Fig. 286
Open fuel filler flap/unscrew tank cap/place the tank cap on the
fuel filler flap
Fig. 287
Fuel filler tube on vehicles with
diesel engines
Read and observe and on page 248 first.
Perform the refuelling under the following conditions.
The vehicle is unlocked.
The ignition is switched off.
The auxiliary heating and ventilation is switched off.
›
Press the fuel filler flap in direction of arrow
1
and fold in the direction of
arrow
2
» Fig. 286 .
›
Unscrew the tank cap in the direction of arrow
3
.
›
Remove the tank cap and place in the recess on top of the fuel filler flap in
the direction of arrow
4
.
›
Insert the pump nozzle into the fuel filler neck as far as it will go, and refuel.
The fuel tank is full as soon as the pump nozzle switches off for the first time.
Not continue refuelling.
›
Remove the pump nozzle from the fuel filler tube and put it back in the
pump.
›
Place the filler cap onto the fuel filler neck and turn it in the opposite direc-
tion to arrow
3
until it securely engages.
›
Close the fuel filler flap until it clicks into place.
Incorrect refuelling guard on vehicles with diesel engines
The fuel filler tube on vehicles with diesel engines is fitted with an incorrect
refuelling guard » Fig. 287.
If the diesel pump nozzle does not sit directly in the fuel filler tube, move it to
and fro with slight pressure to insert it correctly.
The diameter of the diesel pump nozzle can be identical to that of the petrol
pump nozzle in some countries. When driving in these countries, the incorrect
fuelling protection should be removed by a specialist company.
Unleaded petrol
Read and observe
and on page 248 first.
The correct grades of fuel for your vehicle are stated on a sticker affixed to theinside of the fuel filler flap » Fig. 285 on page 248 .
249Inspecting and replenishing
Page 252 of 324
The vehicle can only operate with unleaded petrol that meets standard EN
228 1)
, and contains maximum 10% bioethanol (E10).
Prescribed fuel 95 / min. 92 and 93 RON / ROZ
We recommend using petrol 95 ROZ.
Optionally, the petrol 92 or. 93 ROZ can be used (slight power loss, a slightly
increased fuel consumption).
In an emergency petrol 91 ROZ can be used (slight power loss, slightly in-
creased fuel consumption) »
.
Specified petrol is unleaded, min. 95 RON / ROZ
Use min. 95 ROZ petrol.
In an emergency , 91 . 92 or 93 ROZ petrol can be used (slight loss of power,
slightly increased fuel consumption) »
.
Prescribed petrol 98/(95) RON / ROZ
We recommend using petrol 98 ROZ.
Optionally, petrol 95 ROZ can be used (slight power loss, a slightly increased
fuel consumption).
In an emergency , 91 . 92 or 93 ROZ petrol can be used (slight loss of power,
slightly increased fuel consumption) »
.
CAUTION
The following instructions must be observed, otherwise there is a risk of dam-
age to the engine and to the exhaust system.■
When petrol with a lower than the prescribed octane is used, only continue
driving at mid-range engine speeds and with minimal strain on the engine. Re-
fuel using petrol of the prescribed octane number as soon as possible.
■
Lower than 91 octane petrol should not be used, even in an emergency!
■
If a fuel other than unleaded fuel which complies to the above mentioned
standards (e.g. leaded petrol) is put in the tank by mistake, do not start the en-
gine or switch on the ignition.
CAUTIONPetrol additions (additives)■Unleaded petrol complying with the EN 228 standard 1 )
meets all the condi-
tions for problem-free engine operation. We therefore do not recommend mix-
ing fuel additives into the petrol - risk of engine damage or damage to the ex-
haust system.■
The following additives may not be used - risk of engine damage or damage
to the exhaust system! ■ Additives with metal components (metallic additives), in particular with
manganese and iron content.
■ Fuels with metallic content (e.g. LRP - lead replacement petrol).
Note
■Unleaded petrol that has a higher octane number than that required by the
engine can be used without limitations.■
The use of petrol with an octane rating higher than 95 ROZ in does not result
in either a noticeable increase in power nor lower fuel consumption in vehicles
for which unleaded petrol 95/min 92 or 93 ROZ is specified.
■
On vehicles using the prescribed unleaded petrol of min. 95 ROZ, the use of
petrol with a higher octane number than 95 ROZ can lead to an increase in
power and reduction in fuel consumption.
Diesel fuel
Read and observe
and on page 248 first.
The correct grades of fuel for your vehicle are stated on a sticker affixed to theinside of the fuel filler flap » Fig. 285 on page 248 .
The vehicle can only be operated using diesel fuel that complies with the
standard EN 5902)
and contains a maximum 7% biodiesel (B7)3)
.
Operating under different weather conditions
Use only diesel in accordance with the current or expected weather conditions.
Ask the petrol station personnel whether the diesel fuel offered corresponds
to these conditions.
1)
In Germany also DIN 51626-1 or E10 for unleaded petrol with octane number 91 or 95 or DIN 51626-2 or E5
for unleaded petrol with octane number 95 and 98.
2)
In Germany DIN 51628, in Austria ÖNORM C 1590, in Russia GOST R 52368-2005 / EN 590: 2004, in India IS 1460 / Bharat IV or in an emergency IS 1460 / Bharat III.
3)
In Germany according to the DIN 52638 standard, in Austria ÖNORM C 1590, in France EN 590.
250General Maintenance
Page 253 of 324
CAUTIONThe following instructions must be observed, otherwise there is a risk of dam-
age to the engine and to the exhaust system.■
If a different fuel other than diesel fuel, which complies to the above men-
tioned standards (e.g. petrol) is used, do not start the engine or switch on the
ignition!
■
The biofuel RME must not be used!
CAUTION
Diesel fuel additives■The diesel fuel in accordance with the prescribed standards meets all the
conditions for a smooth running engine. Therefore, we recommend that you do
not add any fuel additives to the diesel - - there is a risk of engine damage or
damage to the exhaust system.
Refuel CNG (compressed natural gas)
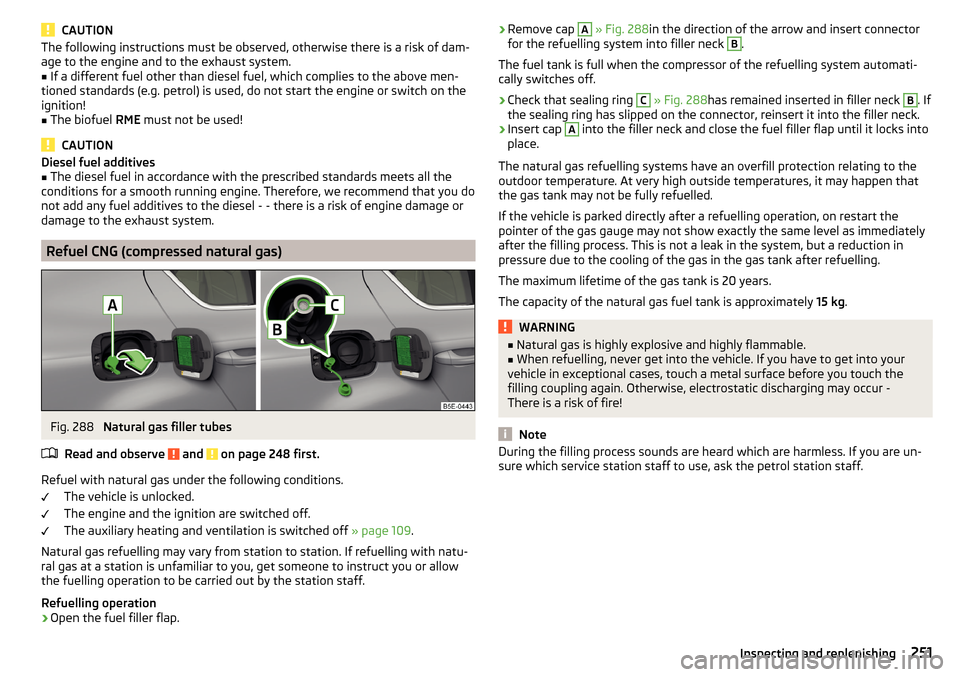
Fig. 288
Natural gas filler tubes
Read and observe
and on page 248 first.
Refuel with natural gas under the following conditions. The vehicle is unlocked.
The engine and the ignition are switched off.
The auxiliary heating and ventilation is switched off » page 109.
Natural gas refuelling may vary from station to station. If refuelling with natu-
ral gas at a station is unfamiliar to you, get someone to instruct you or allow
the fuelling operation to be carried out by the station staff.
Refuelling operation
›
Open the fuel filler flap.
› Remove cap A
» Fig. 288 in the direction of the arrow and insert connector
for the refuelling system into filler neck B.
The fuel tank is full when the compressor of the refuelling system automati-
cally switches off.›
Check that sealing ring
C
» Fig. 288 has remained inserted in filler neck
B
. If
the sealing ring has slipped on the connector, reinsert it into the filler neck.
›
Insert cap
A
into the filler neck and close the fuel filler flap until it locks into
place.
The natural gas refuelling systems have an overfill protection relating to the
outdoor temperature. At very high outside temperatures, it may happen that
the gas tank may not be fully refuelled.
If the vehicle is parked directly after a refuelling operation, on restart the
pointer of the gas gauge may not show exactly the same level as immediately
after the filling process. This is not a leak in the system, but a reduction in
pressure due to the cooling of the gas in the gas tank after refuelling.
The maximum lifetime of the gas tank is 20 years.
The capacity of the natural gas fuel tank is approximately 15 kg.
WARNING■
Natural gas is highly explosive and highly flammable.■When refuelling, never get into the vehicle. If you have to get into your
vehicle in exceptional cases, touch a metal surface before you touch the
filling coupling again. Otherwise, electrostatic discharging may occur -
There is a risk of fire!
Note
During the filling process sounds are heard which are harmless. If you are un-
sure which service station staff to use, ask the petrol station staff.251Inspecting and replenishing