Indicator SKODA OCTAVIA 2016 3.G / (5E) Owner's Manual
[x] Cancel search | Manufacturer: SKODA, Model Year: 2016, Model line: OCTAVIA, Model: SKODA OCTAVIA 2016 3.G / (5E)Pages: 324, PDF Size: 48.85 MB
Page 20 of 324
Airbag system
Description of the airbag system
Introduction
This chapter contains information on the following subjects:
System description
18
Airbag deployment
19
Safety instructions
19
The airbag system provides, as a supplement to the seat belts, additional oc-
cupant protection during severe frontal and side-on collisions.
The airbag will only provide optimum protection in conjunction with wearing
the seat belt, the airbag is not a substitute for the seat belts .
The functional status of the airbag system is indicated by the indicator light
in the instrument cluster » page 35.
System description
Fig. 7
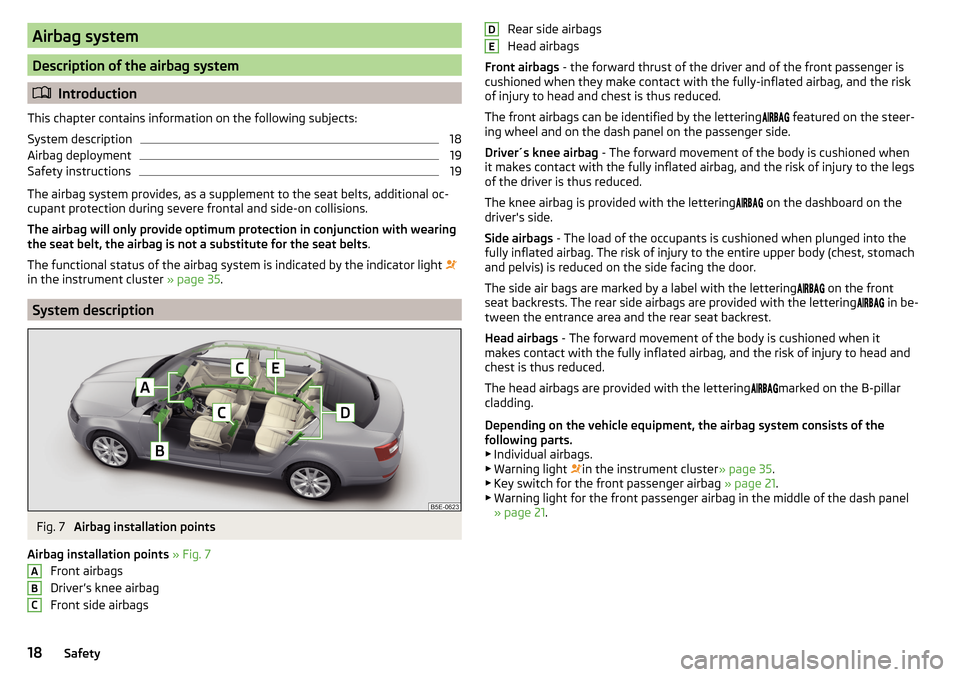
Airbag installation points
Airbag installation points » Fig. 7
Front airbags
Driver’s knee airbag
Front side airbags
ABCRear side airbags
Head airbags
Front airbags - the forward thrust of the driver and of the front passenger is
cushioned when they make contact with the fully-inflated airbag, and the risk
of injury to head and chest is thus reduced.
The front airbags can be identified by the lettering
featured on the steer-
ing wheel and on the dash panel on the passenger side.
Driver´s knee airbag - The forward movement of the body is cushioned when
it makes contact with the fully inflated airbag, and the risk of injury to the legs
of the driver is thus reduced.
The knee airbag is provided with the lettering on the dashboard on the
driver's side.
Side airbags - The load of the occupants is cushioned when plunged into the
fully inflated airbag. The risk of injury to the entire upper body (chest, stomach
and pelvis) is reduced on the side facing the door.
The side air bags are marked by a label with the lettering on the front
seat backrests. The rear side airbags are provided with the lettering in be-
tween the entrance area and the rear seat backrest.
Head airbags - The forward movement of the body is cushioned when it
makes contact with the fully inflated airbag, and the risk of injury to head and
chest is thus reduced.
The head airbags are provided with the lettering marked on the B-pillar
cladding.
Depending on the vehicle equipment, the airbag system consists of the
following parts. ▶ Individual airbags.
▶ Warning light in the instrument cluster
» page 35.
▶ Key switch for the front passenger airbag » page 21.
▶ Warning light for the front passenger airbag in the middle of the dash panel
» page 21 .DE18Safety
Page 23 of 324
Airbag deactivation
Introduction
This chapter contains information on the following subjects:
Deactivating airbags
21
Deactivating the front passenger airbag
21
Deactivating airbags
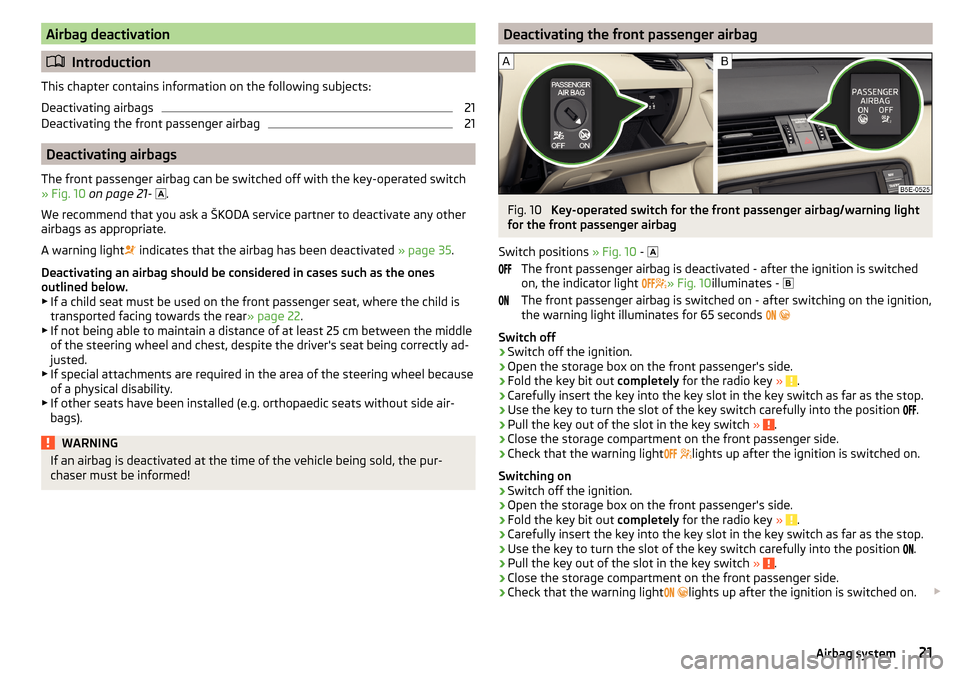
The front passenger airbag can be switched off with the key-operated switch
» Fig. 10 on page 21 -
.
We recommend that you ask a ŠKODA service partner to deactivate any other
airbags as appropriate.
A warning light indicates that the airbag has been deactivated
» page 35.
Deactivating an airbag should be considered in cases such as the ones
outlined below. ▶ If a child seat must be used on the front passenger seat, where the child is
transported facing towards the rear » page 22.
▶ If not being able to maintain a distance of at least 25 cm between the middle
of the steering wheel and chest, despite the driver's seat being correctly ad-
justed.
▶ If special attachments are required in the area of the steering wheel because
of a physical disability.
▶ If other seats have been installed (e.g. orthopaedic seats without side air-
bags).
WARNINGIf an airbag is deactivated at the time of the vehicle being sold, the pur-
chaser must be informed!Deactivating the front passenger airbagFig. 10
Key-operated switch for the front passenger airbag/warning light
for the front passenger airbag
Switch positions » Fig. 10 -
The front passenger airbag is deactivated - after the ignition is switched
on, the indicator light » Fig. 10
illuminates -
The front passenger airbag is switched on - after switching on the ignition,
the warning light illuminates for 65 seconds
Switch off
›
Switch off the ignition.
›
Open the storage box on the front passenger's side.
›
Fold the key bit out completely for the radio key » .
›
Carefully insert the key into the key slot in the key switch as far as the stop.
›
Use the key to turn the slot of the key switch carefully into the position
.
›
Pull the key out of the slot in the key switch
» .
›
Close the storage compartment on the front passenger side.
›
Check that the warning light
lights up after the ignition is switched on.
Switching on
›
Switch off the ignition.
›
Open the storage box on the front passenger's side.
›
Fold the key bit out completely for the radio key » .
›
Carefully insert the key into the key slot in the key switch as far as the stop.
›
Use the key to turn the slot of the key switch carefully into the position
.
›
Pull the key out of the slot in the key switch
» .
›
Close the storage compartment on the front passenger side.
›
Check that the warning light
lights up after the ignition is switched on.
21Airbag system
Page 36 of 324
Steering column lock not unlocked (System KESSY) flashes
Move the steering wheel!MOVE STEERING WHEEL
▶ Move the steering wheel slightly back and forth, thereby facilitating unlock-
ing the steering lock.
▶ If the steering does also not unlock then, the help of a specialist garage is
required.
Disconnecting the vehicle battery
If the vehicle's battery has been disconnected and reconnected, the warning
light
comes on after switching on the ignition.
The warning light should go out after driving a short distance.
If, after the motor is restarted and a short drive, the indicator light does not go
out, there is a system error.
▶ You can drive on, exercising appropriate caution. Seek assistance from a spe-
cialist garage immediately.
Stability control (ESC) / Traction control (TCS)
Read and observe
on page 33 first.
If your vehicle is equipped with the ESC system, the TCS is part of the ESC sys-
tem.
flashes – the ESC or TCS is currently active.
System fault
lights up – there is an ESC or TCS fault.
▶ You can drive on, exercising appropriate caution. Seek assistance from a spe-
cialist garage immediately.
If the warning light comes on after starting the engine, the TCS may be
switched off for technical reasons. ▶ Switch the ignition off and on again.
If the warning light does not illuminate after you switch the engine back on,
the ASR is fully functional again.
Disconnecting the vehicle battery
If the vehicle's battery has been disconnected and reconnected, the indicator
light comes on after switching on the ignition.
The warning light should go out after driving a short distance.
If, after a short drive, the indicator light does not go out, there is a system er-
ror.
▶ You can drive on, exercising appropriate caution. Seek assistance from a spe-
cialist garage immediately.
For more information on the ESC system » page 200 or TCS system
» page 201 .
Traction control (TCS) disabled
Read and observe
on page 33 first.
illuminates – the TCS system is disabled.
Note
On vehicles without the ESC system, the warning light
does not illuminate
upon deactivation of the TCS system, but a message is only displayed on the
display of the instrument cluster.
Anti-lock braking system (ABS)
Read and observe
on page 33 first.
lights up – there is an ABS fault.
The vehicle will only be braked by the normal brake system without the ABS.
▶ You can drive on, exercising appropriate caution. Seek assistance from a spe-
cialist garage immediately.
WARNING■ If warning light illuminates simultaneously with warning light
» page 33 , Braking system , do not continue your journey! Seek help
from a specialist garage.■
A fault to the ABS system or the braking system can increase the vehi-
cle's braking distance – risk of accident!
Rear fog light
Read and observe
on page 33 first.
lights up – the rear fog light is switched on.
34Using the system
Page 38 of 324
▶Correct the tyre pressure if necessary or replace the affected wheel
» page 266 or use the repair kit » page 270.
▶ Save the tyre pressure values in the system » page 229.
System fault
flashes for approximately 1 minute and remains lit – there may be a fault in
the tyre pressure monitoring system.
▶ Stop the vehicle, turn the ignition off and start the engine again.
If the warning light
flashes after starting the engine again, there is a system
error.
▶ You can drive on, exercising appropriate caution. Seek assistance from a spe-
cialist garage immediately.
Disconnecting the vehicle battery
If the vehicle's battery has been disconnected and reconnected, the indicator
light comes on after switching on the ignition.
The warning light should go out after driving a short distance.
If, after a short drive, the indicator light does not go out, there is a system er-
ror.
▶ You can drive on, exercising appropriate caution. Seek assistance from a spe-
cialist garage immediately.
Other incidents
The illumination of the warning light can have the following reasons.
▶ The vehicle is loaded on one side. Distribute the load evenly.
▶ The wheels of one axle are loaded more heavily (e.g. when towing a trailer or
when driving uphill or downhill).
▶ Snow chains are mounted.
▶ A wheel has been changed.
CAUTION
Under certain circumstances (e.g. sporty style of driving, wintry or unpaved
roads) the warning light in the instrument cluster can be delayed or does
not light up at all.
Brake linings
Read and observe
on page 33 first.
illuminates - the brake pads are worn.
▶
You can drive on, exercising appropriate caution. Seek assistance from a spe-
cialist garage immediately.
Low fuel - petrol / diesel
Read and observe
on page 33 first.
illuminates – the fuel level in the fuel tank is at the reserve level (approxi-
mately 6 litres).
An audible signal sounds as a warning. ▶ Please refuel » page 249.
Note
The text in the display goes out after refuelling and driving a short distance.
Lane assist (Lane Assist)
Read and observe
on page 33 first.
The warning lights
indicates the state of the Lane Assist system.
More information about the Lane Assist System » page 224.
Turn signal system
Read and observe
on page 33 first.
flashes – the left turn signal is turned on.
flashes – the right turn signal is turned on.
If there is a fault in the turn signal system, the warning light flashes at twice
its normal rate (does not apply when towing).
Switching off the hazard warning light system is switched on will cause all of
the turn signal lights as well as both warning lights to flash.
Trailer turn signal lights
Read and observe
on page 33 first.
flashes – the trailer turn signal lights are switched on.
If a trailer is hitched and the warning light is not flashing, one of the trailer
turn signal lights has failed.
36Using the system
Page 41 of 324
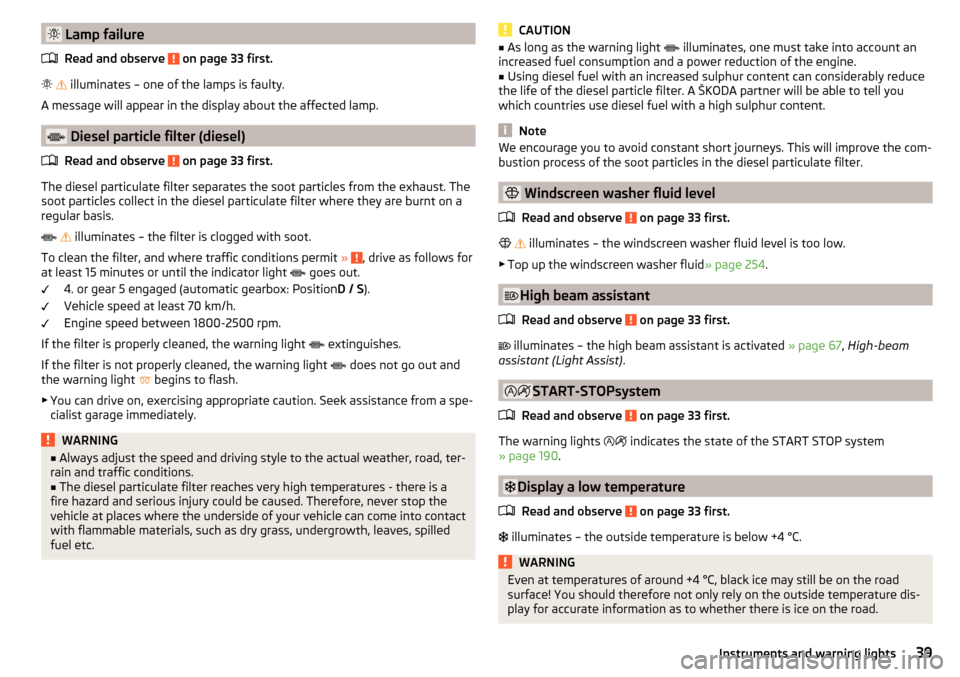
Lamp failureRead and observe
on page 33 first.
illuminates – one of the lamps is faulty.
A message will appear in the display about the affected lamp.
Diesel particle filter (diesel)
Read and observe
on page 33 first.
The diesel particulate filter separates the soot particles from the exhaust. The
soot particles collect in the diesel particulate filter where they are burnt on a
regular basis.
illuminates – the filter is clogged with soot.
To clean the filter, and where traffic conditions permit »
, drive as follows for
at least 15 minutes or until the indicator light goes out.
4. or gear 5 engaged (automatic gearbox: Position D / S).
Vehicle speed at least 70 km/h.
Engine speed between 1800-2500 rpm.
If the filter is properly cleaned, the warning light extinguishes.
If the filter is not properly cleaned, the warning light does not go out and
the warning light begins to flash.
▶ You can drive on, exercising appropriate caution. Seek assistance from a spe-
cialist garage immediately.
WARNING■ Always adjust the speed and driving style to the actual weather, road, ter-
rain and traffic conditions.■
The diesel particulate filter reaches very high temperatures - there is a
fire hazard and serious injury could be caused. Therefore, never stop the
vehicle at places where the underside of your vehicle can come into contact
with flammable materials, such as dry grass, undergrowth, leaves, spilled
fuel etc.
CAUTION■ As long as the warning light illuminates, one must take into account an
increased fuel consumption and a power reduction of the engine.■
Using diesel fuel with an increased sulphur content can considerably reduce
the life of the diesel particle filter. A ŠKODA partner will be able to tell you
which countries use diesel fuel with a high sulphur content.
Note
We encourage you to avoid constant short journeys. This will improve the com-
bustion process of the soot particles in the diesel particulate filter.
Windscreen washer fluid level
Read and observe
on page 33 first.
illuminates – the windscreen washer fluid level is too low.
▶ Top up the windscreen washer fluid » page 254.
High beam assistant
Read and observe
on page 33 first.
illuminates – the high beam assistant is activated » page 67, High-beam
assistant (Light Assist) .
START-STOPsystem
Read and observe
on page 33 first.
The warning lights
indicates the state of the START STOP system
» page 190 .
Display a low temperature
Read and observe
on page 33 first.
illuminates – the outside temperature is below +4 °C.
WARNINGEven at temperatures of around +4 °C, black ice may still be on the road
surface! You should therefore not only rely on the outside temperature dis-
play for accurate information as to whether there is ice on the road.39Instruments and warning lights
Page 48 of 324
Long-term ( ) And “2” ( )
The memory gathers driving data from any number of individual journeys up to
a total of 99 hours and 59 minutes driving time or 9 999 kilometres driven.
The indicator is automatically set back to zero if one of the indicated values is
exceeded.Since refuel
(
) or “3” (
)
The driving data is stored in the memory since the last fuel refuelling.
The memory is erased automatically the next time you fill up.
›
To choose the memory bank , confirm the selected indication again and se-
lect the desired memory.
›
To delete the memory bank of the chosen selection, hold down the button
confirming the selection.
The following driving data is stored in different memory banks.
▶ Average fuel consumption.
▶ Distance driven.
▶ Average speed.
▶ Driving time.
Note
Disconnecting the vehicle battery will delete all memory data.
MAXI DOT display
Introduction
This chapter contains information on the following subjects:
Menu item
Navigation46
Menu item
Audio46
Menu item
Telephone47
Menu item
Assist systems47
Menu item
Lap timer
(Stop watch)
47
The MAXI DOT display is a user interface which, depending on the equipment
configuration, provides information about Infotainment, the multifunction dis-
play, the assistance systems etc.
The menus with details can be operated and displayed using the buttons on
the operating lever or the multifunction steering wheel » page 43.
Main menu items (depending on vehicle equipment)
■Driving data
» page 44
■
Assist systems
» page 47
■
Navigation
» page 46
■
Audio
» page 46
■
Telephone
» page 47 ;
■
Vehicle
» page 42
■
Lap timer
» page 47
Note
■
If warning messages are displayed, these messages must first be confirmed
to access the main menu.■
The display language can be set in Infotainment » page 123, Setting the In-
fotainment language and » page 130 , Setting the Infotainment language .
Menu item
Navigation
The following information is displayed in the
Navigation
menu item.
▶ Driving recommendations
▶ Compass
▶ Last destinations
Menu item
Audio
The following information is displayed in the
Audio
menu item.
Radio
▶ Station currently being played (name/frequency).
▶ The selected frequency range (e.g. FM) optionally with the number of the sta-
tion button (e.g. FM 3), if the station is stored in the memory list.
▶ List of available stations (if more than 5 stations can be received).
▶ TP traffic announcements.
Media
▶ Name of the track being played, if necessary, further information regarding
title (e.g. artist, album name), if this information is stored as a so called ID3
tag on the audio source.
46Using the system
Page 67 of 324
Note■If, with a dipped beam, the ignition is turned off, then the dipped beam will
automatically switch off 1)
and the parking lights will come on. The parking
lights are switched off when the ignition key is removed (for vehicles with the
KESSY system, after opening the driver's door).■
If there is a fault in the light switch, the low beam comes on automatically.
Daytime running lights(DAY LIGHT)
Read and observe
on page 64 first.
The daytime running lights (hereinafter only referred to as "function") lightsthe front and rear vehicle area (only valid for some countries).
The lights are switched on automatically if the following conditions are met. The light switch is in the position or
.
The ignition is switched on.
The function is activated.
Activating/deactivating function on vehicles with Infotainment
The function can be deactivated/activated in the Infotainment menu
→
→
Light
.
Deactivating on vehicles without Infotainment
›
Turn off the ignition, pull the indicator / main beam lever towards the steer- ing wheel, push down and hold in this position.
›
Switch on the ignition and hold the lever in the above position until an audi-
ble signal sounds (about 3 s).
Activating on vehicles without Infotainment
›
Turn off the ignition, pull the indicator / main beam lever towards the steer- ing wheel, push down and hold in this position.
›
Switch on the ignition and hold the lever in the above position until an audi-
ble signal sounds (about 3 s).
WARNINGAlways switch on the low beam when visibility is poor.Turn signal and main beamFig. 47
Operating lever: Turn signal and
main beam operation
Read and observe on page 64 first.
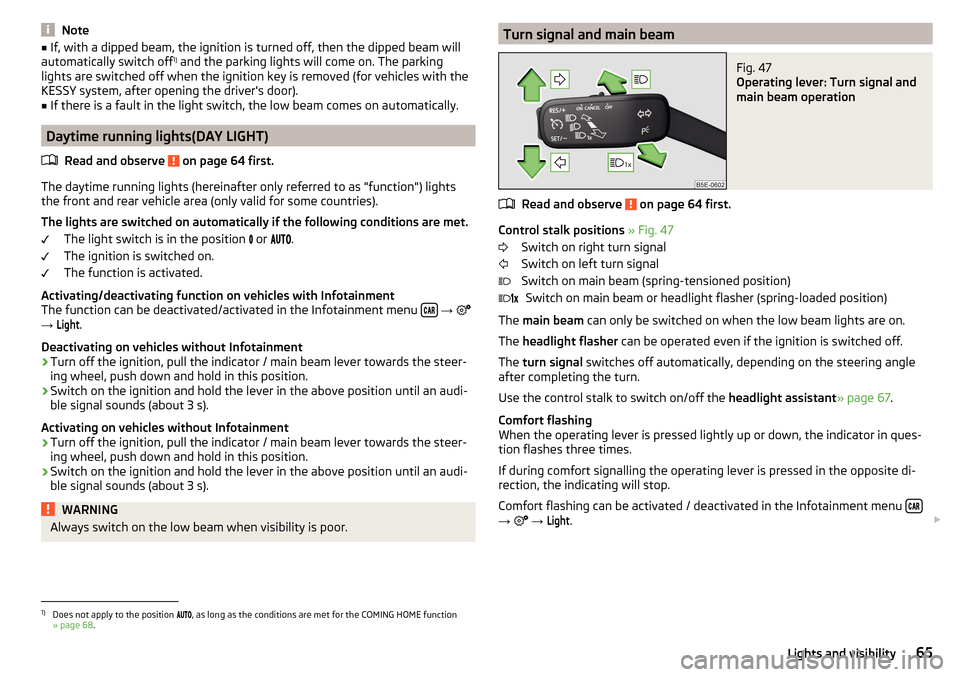
Control stalk positions » Fig. 47
Switch on right turn signal
Switch on left turn signal
Switch on main beam (spring-tensioned position) Switch on main beam or headlight flasher (spring-loaded position)
The main beam can only be switched on when the low beam lights are on.
The headlight flasher can be operated even if the ignition is switched off.
The turn signal switches off automatically, depending on the steering angle
after completing the turn.
Use the control stalk to switch on/off the headlight assistant» page 67.
Comfort flashing
When the operating lever is pressed lightly up or down, the indicator in ques-
tion flashes three times.
If during comfort signalling the operating lever is pressed in the opposite di-
rection, the indicating will stop.
Comfort flashing can be activated / deactivated in the Infotainment menu
→
→
Light
.
1)
Does not apply to the position , as long as the conditions are met for the COMING HOME function
» page 68 .
65Lights and visibility
Page 69 of 324

High-beam assistant (Light Assist)Fig. 49
Sensor window for the high-beam assistant / system on / off
Read and observe
on page 64 first.
The system automatically switches the high beam on/off in accordance with
the existing traffic (other vehicles) and environmental conditions (e.g. driving
through a lit village).
The high beam on/off is controlled by a sensor or a camera » Fig. 49.
Activating / Deactivating the system takes place in the Infotainment menu
→
→
Light
→
Light Assist
.
Conditions for the system function The system is activated.
The light switch is in the position .
The vehicle speed is over 60 km/h or for some countries more than 40
km/h.
The windscreen is clean in the sensor area.
Switching on and off
›
To turn on the system, push the control stalk into the sprung position
A
» Fig. 49 , the warning light
illuminates in the display of the instrument
cluster.
›
To turn off the automatically switched on main beam, push the control stalk
into the sprung position
B
, the » Fig. 49 warning light
expires.
›
To
manually switch on the main beam, push the control stalk into the sprung
position
A
» Fig. 49 , the warning light
expires.
The headlight switches off automatically when the speed falls below 30 km/h.
If there is a fault, the error message will appear in the instrument cluster dis-
play. Seek help from a specialist garage.WARNINGThe system is used only for support, thus the driver is not released from his
obligation to manually adjust the main or low beam according to the given
ambient conditions (e.g. in unfavourable lighting and weather conditions,
as when passing poorly lit road users, if necessary, when the visual range
of the sensor is limited by an obstacle).
CAUTION
Do not cover the sensor - the system can be affected.
Fog lights/rear fog light
Fig. 50
Light switch – switch on front
and rear fog light
Read and observe on page 64 first.
Switching on the fog lights / rear fog lights is possible if the following condi-
tions apply.
The lights switch is in position
,
or
» Fig. 50 .
›
Toswitch on thefog lights ,turn the light switch to position
1
; the warning
light
illuminates in the instrument cluster.
›
To turn on therear fog light , pull the light switch to position
2
, the indicator
light
will light up in the instrument cluster.
If the vehicle is not fitted with fog lights,therear fog light is switched on by
pulling out the light switch to the only possible setting.
The fog lights/rear fog light are switched offin the reverse order.
67Lights and visibility
Page 70 of 324
NoteWhile driving with an accessory connected to the trailer socket (e.g. trailer,
bike carrier) only the equipment is illuminated by the fog light. The towing de-
vice must be installed at the factory or from the ŠKODA original accessories.
Fog lights with CORNER function
Read and observe
on page 64 first.
The CORNER function automatically switches on the fog lights on the respec-tive side of the vehicle (e.g. when cornering), if the following conditions are
met.
The turn signal is switched on or the front wheels are turned sharply 1)
.
The vehicle speed is below 40 km/h.
The low beam is switched on.
The fog lights are not switched on.
The two fog lights are switched on when you shift into the reverse gear.
COMING HOME / LEAVING HOME
Read and observe
on page 64 first.
The function COMING HOME ensures that the vehicle's environment is illumi-
nated after switching off the ignition and opening the driver's door.
The function LEAVING HOME ensures that the vehicle's environment is illumi-
nated after unlocking the vehicle with the radio remote control unit.
The function switches the light on only if there is poorer visibility and the light
switch is in the position .
The two functions can be activated/deactivated and set in the Infotainment
menu
→
→
Light
.
CAUTION
■
Poorer visibility is evaluated by a sensor mounted below the windscreen in
the holder of the rear-view mirror. Do not cover the sensor - the system can be
affected.■
If this option is always enabled, then the battery is heavily loaded.
Hazard warning light systemFig. 51
Button for hazard warning light
system
Read and observe on page 64 first.
›
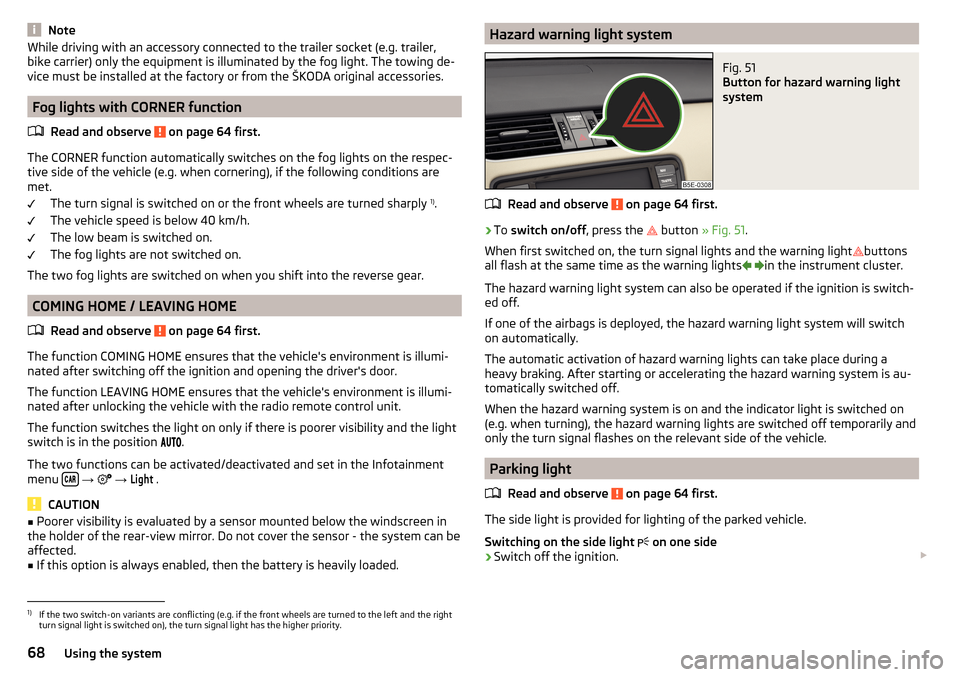
To switch on/off , press the
button
» Fig. 51 .
When first switched on, the turn signal lights and the warning light buttons
all flash at the same time as the warning lights
in the instrument cluster.
The hazard warning light system can also be operated if the ignition is switch-
ed off.
If one of the airbags is deployed, the hazard warning light system will switch
on automatically.
The automatic activation of hazard warning lights can take place during a
heavy braking. After starting or accelerating the hazard warning system is au-
tomatically switched off.
When the hazard warning system is on and the indicator light is switched on
(e.g. when turning), the hazard warning lights are switched off temporarily and
only the turn signal flashes on the relevant side of the vehicle.
Parking light
Read and observe
on page 64 first.
The side light is provided for lighting of the parked vehicle.
Switching on the side light on one side
›
Switch off the ignition.
1)
If the two switch-on variants are conflicting (e.g. if the front wheels are turned to the left and the right
turn signal light is switched on), the turn signal light has the higher priority.
68Using the system
Page 195 of 324
ParkingRead and observe
on page 192 first.
When stopping and parking, look for a place with a suitable surface » .
Only carry out the activities while parking in the specified order.
›
Bring the vehicle to a stop and depress the brake pedal.
›
Firmly apply the handbrake.
›
On vehicles with automatic transmission place the selector lever in the P po-
sition.
›
Switch off the engine.
›
For vehicles with Manual transmission , select 1st gear or Reverse gear R .
›
Release the brake pedal.
WARNING■
The parts of the exhaust system can become very hot. Therefore, never
stop the vehicle in places where the underside of your vehicle could come
into contact with flammable materials (e.g. dry grass, leaves, spilled fuel or
the like). - Risk of fire and serious injury can occur!■
When leaving the vehicle never leave people unattended in the car who
could, for example, lock the vehicle or release the brake - There is a risk of
an accident and an injury!
Manual shifting of gears and pedals
Introduction
This chapter contains information on the following subjects:
Manual gear changing
193
Pedals
194
CAUTION
When stopping on a slope, never try to hold the vehicle using the clutch and
the accelerator pedal – There is risk of damage to the clutch.Manual gear changingFig. 234
The shift pattern
Read and observe on page 193 first.
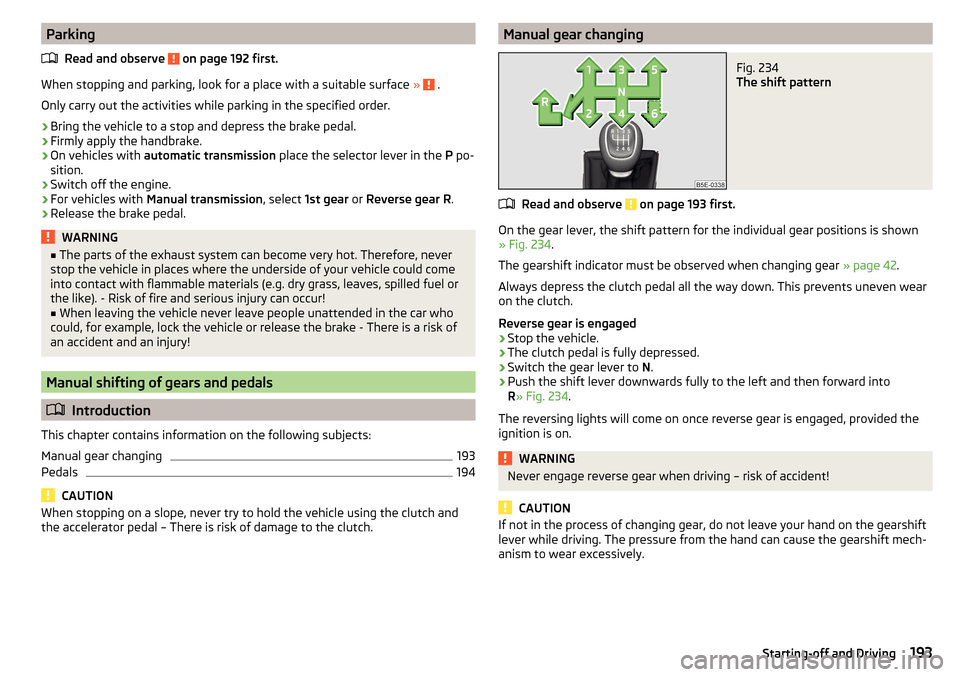
On the gear lever, the shift pattern for the individual gear positions is shown
» Fig. 234 .
The gearshift indicator must be observed when changing gear » page 42.
Always depress the clutch pedal all the way down. This prevents uneven wear
on the clutch.
Reverse gear is engaged
›
Stop the vehicle.
›
The clutch pedal is fully depressed.
›
Switch the gear lever to N.
›
Push the shift lever downwards fully to the left and then forward into
R » Fig. 234 .
The reversing lights will come on once reverse gear is engaged, provided the
ignition is on.
WARNINGNever engage reverse gear when driving – risk of accident!
CAUTION
If not in the process of changing gear, do not leave your hand on the gearshift
lever while driving. The pressure from the hand can cause the gearshift mech-
anism to wear excessively.193Starting-off and Driving