refuelling SKODA OCTAVIA 2016 3.G / (5E) Owner's Manual
[x] Cancel search | Manufacturer: SKODA, Model Year: 2016, Model line: OCTAVIA, Model: SKODA OCTAVIA 2016 3.G / (5E)Pages: 324, PDF Size: 48.85 MB
Page 33 of 324
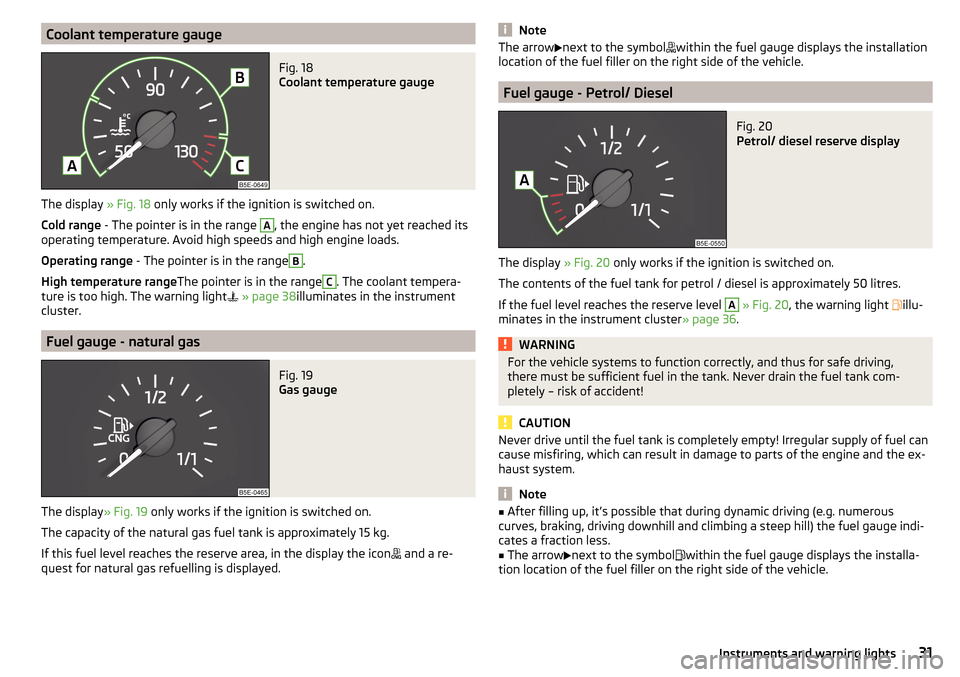
Coolant temperature gaugeFig. 18
Coolant temperature gauge
The display » Fig. 18 only works if the ignition is switched on.
Cold range - The pointer is in the range
A
, the engine has not yet reached its
operating temperature. Avoid high speeds and high engine loads.
Operating range - The pointer is in the range
B
.
High temperature range The pointer is in the range
C
. The coolant tempera-
ture is too high. The warning light
» page 38 illuminates in the instrument
cluster.
Fuel gauge - natural gas
Fig. 19
Gas gauge
The display » Fig. 19 only works if the ignition is switched on.
The capacity of the natural gas fuel tank is approximately 15 kg.
If this fuel level reaches the reserve area, in the display the icon and a re-
quest for natural gas refuelling is displayed.
NoteThe arrow next to the symbol within the fuel gauge displays the installation
location of the fuel filler on the right side of the vehicle.
Fuel gauge - Petrol/ Diesel
Fig. 20
Petrol/ diesel reserve display
The display » Fig. 20 only works if the ignition is switched on.
The contents of the fuel tank for petrol / diesel is approximately 50 litres.
If the fuel level reaches the reserve level
A
» Fig. 20 , the warning light
illu-
minates in the instrument cluster » page 36.
WARNINGFor the vehicle systems to function correctly, and thus for safe driving,
there must be sufficient fuel in the tank. Never drain the fuel tank com-
pletely – risk of accident!
CAUTION
Never drive until the fuel tank is completely empty! Irregular supply of fuel can
cause misfiring, which can result in damage to parts of the engine and the ex-
haust system.
Note
■ After filling up, it’s possible that during dynamic driving (e.g. numerous
curves, braking, driving downhill and climbing a steep hill) the fuel gauge indi-
cates a fraction less.■
The arrow
next to the symbol
within the fuel gauge displays the installa-
tion location of the fuel filler on the right side of the vehicle.
31Instruments and warning lights
Page 38 of 324
▶Correct the tyre pressure if necessary or replace the affected wheel
» page 266 or use the repair kit » page 270.
▶ Save the tyre pressure values in the system » page 229.
System fault
flashes for approximately 1 minute and remains lit – there may be a fault in
the tyre pressure monitoring system.
▶ Stop the vehicle, turn the ignition off and start the engine again.
If the warning light
flashes after starting the engine again, there is a system
error.
▶ You can drive on, exercising appropriate caution. Seek assistance from a spe-
cialist garage immediately.
Disconnecting the vehicle battery
If the vehicle's battery has been disconnected and reconnected, the indicator
light comes on after switching on the ignition.
The warning light should go out after driving a short distance.
If, after a short drive, the indicator light does not go out, there is a system er-
ror.
▶ You can drive on, exercising appropriate caution. Seek assistance from a spe-
cialist garage immediately.
Other incidents
The illumination of the warning light can have the following reasons.
▶ The vehicle is loaded on one side. Distribute the load evenly.
▶ The wheels of one axle are loaded more heavily (e.g. when towing a trailer or
when driving uphill or downhill).
▶ Snow chains are mounted.
▶ A wheel has been changed.
CAUTION
Under certain circumstances (e.g. sporty style of driving, wintry or unpaved
roads) the warning light in the instrument cluster can be delayed or does
not light up at all.
Brake linings
Read and observe
on page 33 first.
illuminates - the brake pads are worn.
▶
You can drive on, exercising appropriate caution. Seek assistance from a spe-
cialist garage immediately.
Low fuel - petrol / diesel
Read and observe
on page 33 first.
illuminates – the fuel level in the fuel tank is at the reserve level (approxi-
mately 6 litres).
An audible signal sounds as a warning. ▶ Please refuel » page 249.
Note
The text in the display goes out after refuelling and driving a short distance.
Lane assist (Lane Assist)
Read and observe
on page 33 first.
The warning lights
indicates the state of the Lane Assist system.
More information about the Lane Assist System » page 224.
Turn signal system
Read and observe
on page 33 first.
flashes – the left turn signal is turned on.
flashes – the right turn signal is turned on.
If there is a fault in the turn signal system, the warning light flashes at twice
its normal rate (does not apply when towing).
Switching off the hazard warning light system is switched on will cause all of
the turn signal lights as well as both warning lights to flash.
Trailer turn signal lights
Read and observe
on page 33 first.
flashes – the trailer turn signal lights are switched on.
If a trailer is hitched and the warning light is not flashing, one of the trailer
turn signal lights has failed.
36Using the system
Page 47 of 324
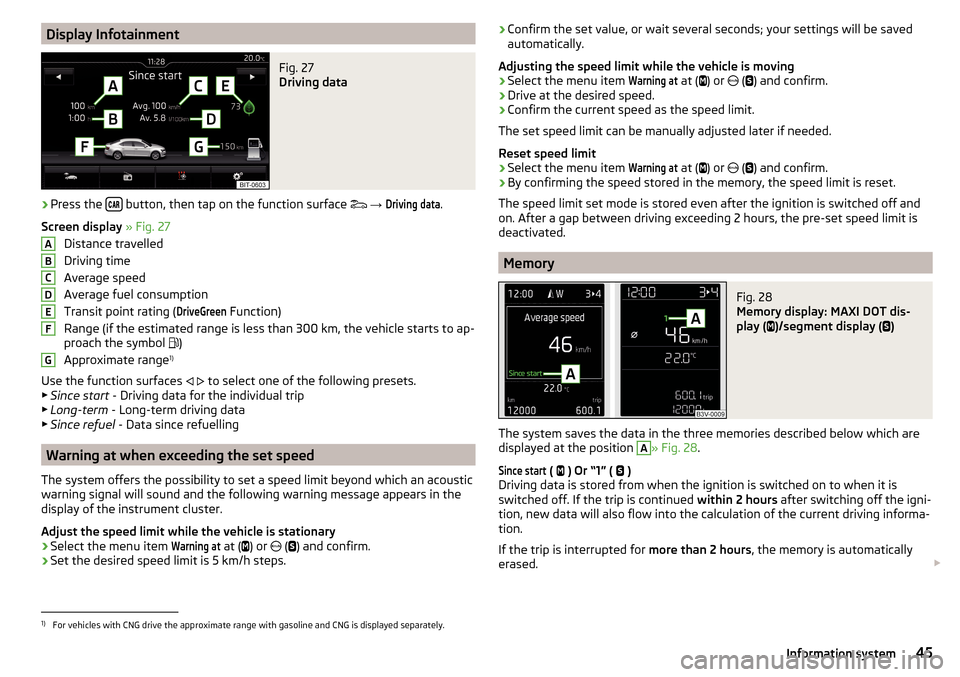
Display InfotainmentFig. 27
Driving data
›
Press the button, then tap on the function surface
→
Driving data
.
Screen display » Fig. 27
Distance travelled
Driving time
Average speed
Average fuel consumption
Transit point rating (
DriveGreen
Function)
Range (if the estimated range is less than 300 km, the vehicle starts to ap-
proach the symbol )
Approximate range 1)
Use the function surfaces
to select one of the following presets.
▶ Since start - Driving data for the individual trip
▶ Long-term - Long-term driving data
▶ Since refuel - Data since refuelling
Warning at when exceeding the set speed
The system offers the possibility to set a speed limit beyond which an acoustic
warning signal will sound and the following warning message appears in the
display of the instrument cluster.
Adjust the speed limit while the vehicle is stationary
›
Select the menu item
Warning at
at ( ) or
(
) and confirm.
›
Set the desired speed limit is 5 km/h steps.
ABCDEFG› Confirm the set value, or wait several seconds; your settings will be saved
automatically.
Adjusting the speed limit while the vehicle is moving›
Select the menu item
Warning at
at (
) or
(
) and confirm.
›
Drive at the desired speed.
›
Confirm the current speed as the speed limit.
The set speed limit can be manually adjusted later if needed.
Reset speed limit
›
Select the menu item
Warning at
at (
) or
(
) and confirm.
›
By confirming the speed stored in the memory, the speed limit is reset.
The speed limit set mode is stored even after the ignition is switched off and
on. After a gap between driving exceeding 2 hours, the pre-set speed limit is
deactivated.
Memory
Fig. 28
Memory display: MAXI DOT dis-
play (
)/segment display (
)
The system saves the data in the three memories described below which are
displayed at the position
A
» Fig. 28 .
Since start
(
) Or “1” (
)
Driving data is stored from when the ignition is switched on to when it is
switched off. If the trip is continued within 2 hours after switching off the igni-
tion, new data will also flow into the calculation of the current driving informa-
tion.
If the trip is interrupted for more than 2 hours, the memory is automatically
erased.
1)
For vehicles with CNG drive the approximate range with gasoline and CNG is displayed separately.
45Information system
Page 48 of 324
Long-term ( ) And “2” ( )
The memory gathers driving data from any number of individual journeys up to
a total of 99 hours and 59 minutes driving time or 9 999 kilometres driven.
The indicator is automatically set back to zero if one of the indicated values is
exceeded.Since refuel
(
) or “3” (
)
The driving data is stored in the memory since the last fuel refuelling.
The memory is erased automatically the next time you fill up.
›
To choose the memory bank , confirm the selected indication again and se-
lect the desired memory.
›
To delete the memory bank of the chosen selection, hold down the button
confirming the selection.
The following driving data is stored in different memory banks.
▶ Average fuel consumption.
▶ Distance driven.
▶ Average speed.
▶ Driving time.
Note
Disconnecting the vehicle battery will delete all memory data.
MAXI DOT display
Introduction
This chapter contains information on the following subjects:
Menu item
Navigation46
Menu item
Audio46
Menu item
Telephone47
Menu item
Assist systems47
Menu item
Lap timer
(Stop watch)
47
The MAXI DOT display is a user interface which, depending on the equipment
configuration, provides information about Infotainment, the multifunction dis-
play, the assistance systems etc.
The menus with details can be operated and displayed using the buttons on
the operating lever or the multifunction steering wheel » page 43.
Main menu items (depending on vehicle equipment)
■Driving data
» page 44
■
Assist systems
» page 47
■
Navigation
» page 46
■
Audio
» page 46
■
Telephone
» page 47 ;
■
Vehicle
» page 42
■
Lap timer
» page 47
Note
■
If warning messages are displayed, these messages must first be confirmed
to access the main menu.■
The display language can be set in Infotainment » page 123, Setting the In-
fotainment language and » page 130 , Setting the Infotainment language .
Menu item
Navigation
The following information is displayed in the
Navigation
menu item.
▶ Driving recommendations
▶ Compass
▶ Last destinations
Menu item
Audio
The following information is displayed in the
Audio
menu item.
Radio
▶ Station currently being played (name/frequency).
▶ The selected frequency range (e.g. FM) optionally with the number of the sta-
tion button (e.g. FM 3), if the station is stored in the memory list.
▶ List of available stations (if more than 5 stations can be received).
▶ TP traffic announcements.
Media
▶ Name of the track being played, if necessary, further information regarding
title (e.g. artist, album name), if this information is stored as a so called ID3
tag on the audio source.
46Using the system
Page 111 of 324
WARNING■The auxiliary heating must never be operated in closed rooms (e.g. garag-
es) – risk of poisoning!■
The auxiliary heating must not be allowed to run during refuelling – risk
of fire.
■
The exhaust pipe of the auxiliary heating is located on the underside of
the vehicle. If you want to use the auxiliary heating, do not park the vehicle
in places where the exhaust fumes can come into contact with flammable
materials such as dry grass, undergrowth, leaves, spilled fuel etc. - There is
a risk of fire.
CAUTION
The air inlet in front of the windscreen must be free (e.g. of ice, snow or
leaves) to ensure that the auxiliary heating operates properly.
Note
■ The auxiliary heating only switches the blower on, if it has achieved a coolant
temperature of approx. 50 °C.■
In the engine compartment, water vapour may form during the operation of
the heater.
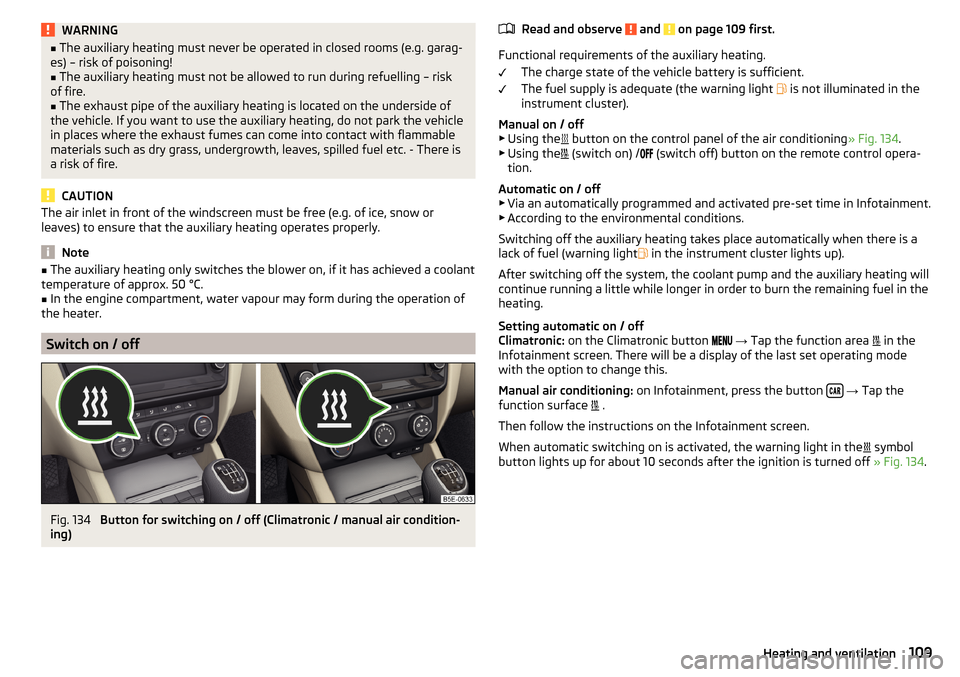
Switch on / off
Fig. 134
Button for switching on / off (Climatronic / manual air condition-
ing)
Read and observe and on page 109 first.
Functional requirements of the auxiliary heating.
The charge state of the vehicle battery is sufficient.
The fuel supply is adequate (the warning light
is not illuminated in the
instrument cluster).
Manual on / off ▶ Using the
button on the control panel of the air conditioning » Fig. 134.
▶ Using the
(switch on) /
(switch off) button on the remote control opera-
tion.
Automatic on / off ▶ Via an automatically programmed and activated pre-set time in Infotainment.
▶ According to the environmental conditions.
Switching off the auxiliary heating takes place automatically when there is a
lack of fuel (warning light in the instrument cluster lights up).
After switching off the system, the coolant pump and the auxiliary heating will
continue running a little while longer in order to burn the remaining fuel in the
heating.
Setting automatic on / off
Climatronic: on the Climatronic button
→ Tap the function area
in the
Infotainment screen. There will be a display of the last set operating mode
with the option to change this.
Manual air conditioning: on Infotainment, press the button
→ Tap the
function surface .
Then follow the instructions on the Infotainment screen.
When automatic switching on is activated, the warning light in the symbol
button lights up for about 10 seconds after the ignition is turned off » Fig. 134.
109Heating and ventilation
Page 250 of 324
■Ensure that no part of the leather is soaked through during cleaning and
that no water gets into the seams - There is risk of damaging the leather!
■ Do not clean the roof panelling with a brush – risk of damage to the surface
of the panelling. ■ Do not use leather cleaners, floor wax, shoe cream, stain remover or similar
agents on Alcantara ®
seat upholstery.
■ Some clothing fabrics (e.g. dark denim) do not have sufficient colour fast-
ness - this could lead to clearly visible discolouration on the upholstery. This
is not a defect in the fabric. ■ Sharp objects on garments (e.g. zips, rivets, sharp- edged belts) can dam-
age the upholstery fabrics in the vehicle. Such damage will not be recognised
as a justified complaint.■
Plastic parts
■ Do not attach scents or air fresheners to the dash panel – risk of damage to
the dash panel.
■
Windows
■ Do not attach any stickers to the filaments or glass antenna - there is risk
of damage.
■
Covers on electrically heated seats ■ Do not clean either with water or with other liquids - There is a risk of dam-
age to the heating system. ■ Do not dry by switching on the heating.
■
Seat belts
■ After cleaning the belts, allow them to dry before retracting them.
Note
During vehicle use, some minor changes may become visible on the leather
and Alcantara ®
(due to e.g. folds, discolouration).Inspecting and replenishing
Fuel
Introduction
Fig. 285
Stickers showing the prescribed
fuel
This chapter contains information on the following subjects:
Petrol and diesel refuelling
249
Unleaded petrol
249
Diesel fuel
250
Refuel CNG (compressed natural gas)
251
CNG
252
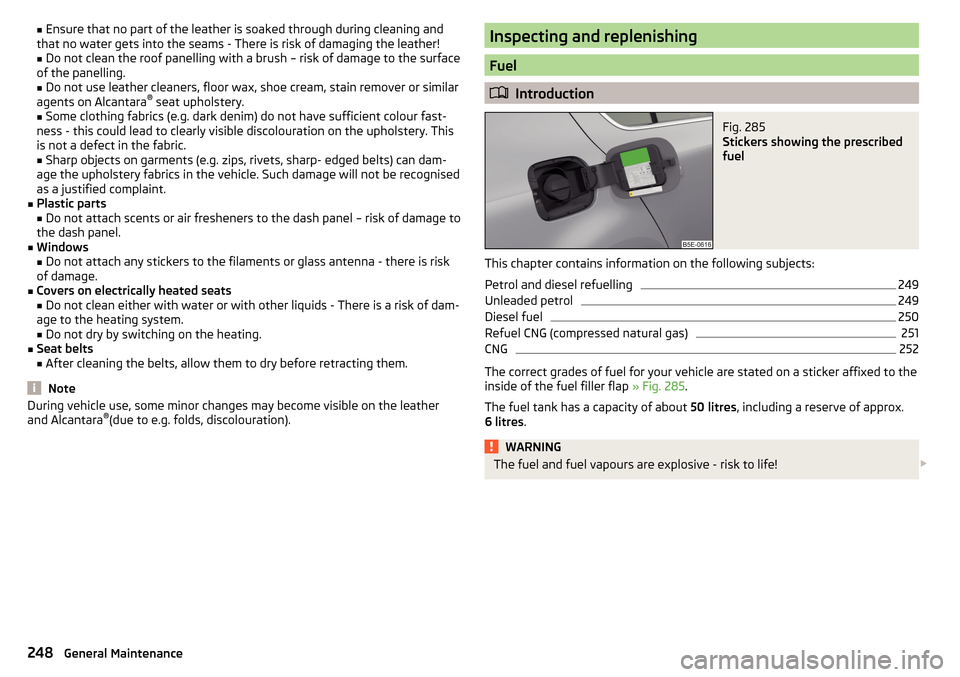
The correct grades of fuel for your vehicle are stated on a sticker affixed to the
inside of the fuel filler flap » Fig. 285.
The fuel tank has a capacity of about 50 litres, including a reserve of approx.
6 litres .
WARNINGThe fuel and fuel vapours are explosive - risk to life! 248General Maintenance
Page 251 of 324
CAUTION■Never drive until the fuel tank is completely empty! Irregular supply of fuel
can cause misfiring, which can result in damage to parts of the engine and the
exhaust system.■
Immediately remove any fuel that has spilled onto the vehicle's paintwork –
risk of paint damage.
■
If you would like to operate your vehicle in a country other than the one for
which it was intended, please talk to a ŠKODA Partner. They will tell you
whether the fuel specified by the manufacturer is offered in that country
and/or whether the manufacturer will sanction operating the vehicle with an-
other fuel.
Petrol and diesel refuelling
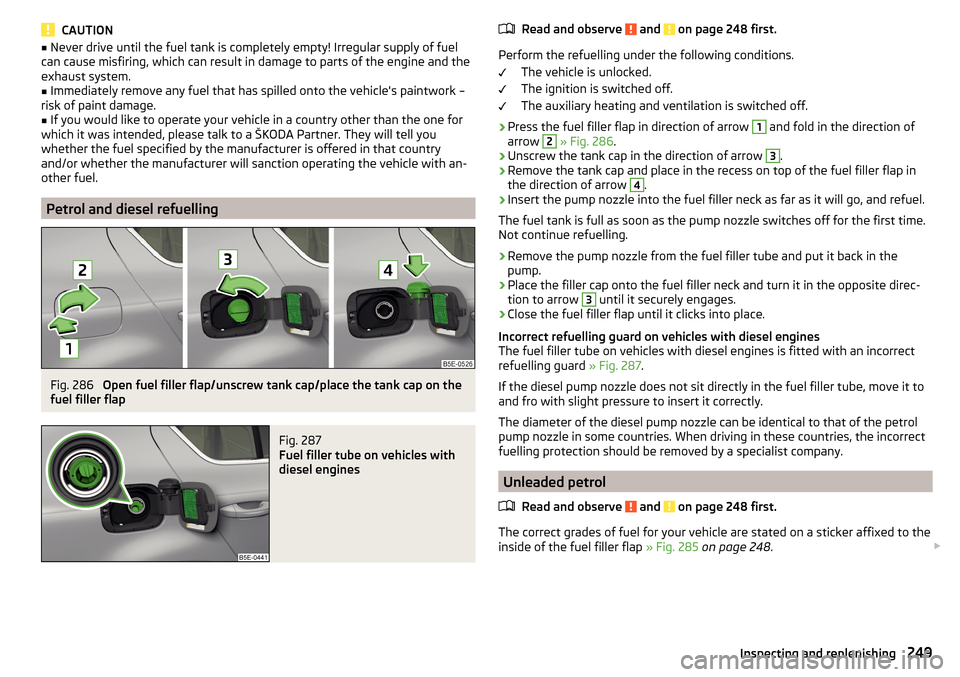
Fig. 286
Open fuel filler flap/unscrew tank cap/place the tank cap on the
fuel filler flap
Fig. 287
Fuel filler tube on vehicles with
diesel engines
Read and observe and on page 248 first.
Perform the refuelling under the following conditions.
The vehicle is unlocked.
The ignition is switched off.
The auxiliary heating and ventilation is switched off.
›
Press the fuel filler flap in direction of arrow
1
and fold in the direction of
arrow
2
» Fig. 286 .
›
Unscrew the tank cap in the direction of arrow
3
.
›
Remove the tank cap and place in the recess on top of the fuel filler flap in
the direction of arrow
4
.
›
Insert the pump nozzle into the fuel filler neck as far as it will go, and refuel.
The fuel tank is full as soon as the pump nozzle switches off for the first time.
Not continue refuelling.
›
Remove the pump nozzle from the fuel filler tube and put it back in the
pump.
›
Place the filler cap onto the fuel filler neck and turn it in the opposite direc-
tion to arrow
3
until it securely engages.
›
Close the fuel filler flap until it clicks into place.
Incorrect refuelling guard on vehicles with diesel engines
The fuel filler tube on vehicles with diesel engines is fitted with an incorrect
refuelling guard » Fig. 287.
If the diesel pump nozzle does not sit directly in the fuel filler tube, move it to
and fro with slight pressure to insert it correctly.
The diameter of the diesel pump nozzle can be identical to that of the petrol
pump nozzle in some countries. When driving in these countries, the incorrect
fuelling protection should be removed by a specialist company.
Unleaded petrol
Read and observe
and on page 248 first.
The correct grades of fuel for your vehicle are stated on a sticker affixed to theinside of the fuel filler flap » Fig. 285 on page 248 .
249Inspecting and replenishing
Page 253 of 324
CAUTIONThe following instructions must be observed, otherwise there is a risk of dam-
age to the engine and to the exhaust system.■
If a different fuel other than diesel fuel, which complies to the above men-
tioned standards (e.g. petrol) is used, do not start the engine or switch on the
ignition!
■
The biofuel RME must not be used!
CAUTION
Diesel fuel additives■The diesel fuel in accordance with the prescribed standards meets all the
conditions for a smooth running engine. Therefore, we recommend that you do
not add any fuel additives to the diesel - - there is a risk of engine damage or
damage to the exhaust system.
Refuel CNG (compressed natural gas)
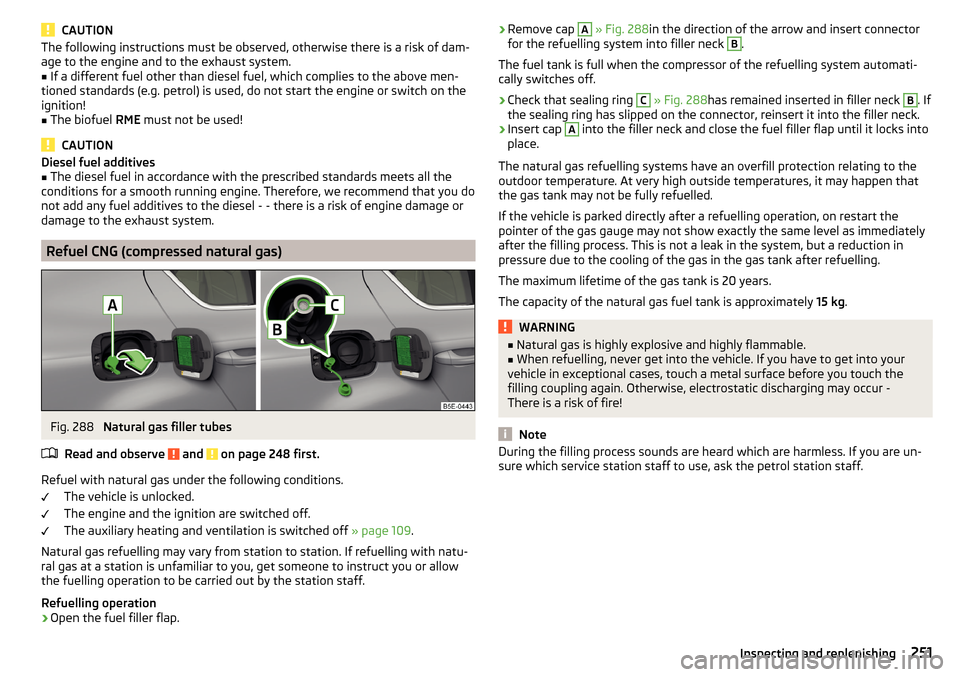
Fig. 288
Natural gas filler tubes
Read and observe
and on page 248 first.
Refuel with natural gas under the following conditions. The vehicle is unlocked.
The engine and the ignition are switched off.
The auxiliary heating and ventilation is switched off » page 109.
Natural gas refuelling may vary from station to station. If refuelling with natu-
ral gas at a station is unfamiliar to you, get someone to instruct you or allow
the fuelling operation to be carried out by the station staff.
Refuelling operation
›
Open the fuel filler flap.
› Remove cap A
» Fig. 288 in the direction of the arrow and insert connector
for the refuelling system into filler neck B.
The fuel tank is full when the compressor of the refuelling system automati-
cally switches off.›
Check that sealing ring
C
» Fig. 288 has remained inserted in filler neck
B
. If
the sealing ring has slipped on the connector, reinsert it into the filler neck.
›
Insert cap
A
into the filler neck and close the fuel filler flap until it locks into
place.
The natural gas refuelling systems have an overfill protection relating to the
outdoor temperature. At very high outside temperatures, it may happen that
the gas tank may not be fully refuelled.
If the vehicle is parked directly after a refuelling operation, on restart the
pointer of the gas gauge may not show exactly the same level as immediately
after the filling process. This is not a leak in the system, but a reduction in
pressure due to the cooling of the gas in the gas tank after refuelling.
The maximum lifetime of the gas tank is 20 years.
The capacity of the natural gas fuel tank is approximately 15 kg.
WARNING■
Natural gas is highly explosive and highly flammable.■When refuelling, never get into the vehicle. If you have to get into your
vehicle in exceptional cases, touch a metal surface before you touch the
filling coupling again. Otherwise, electrostatic discharging may occur -
There is a risk of fire!
Note
During the filling process sounds are heard which are harmless. If you are un-
sure which service station staff to use, ask the petrol station staff.251Inspecting and replenishing
Page 254 of 324
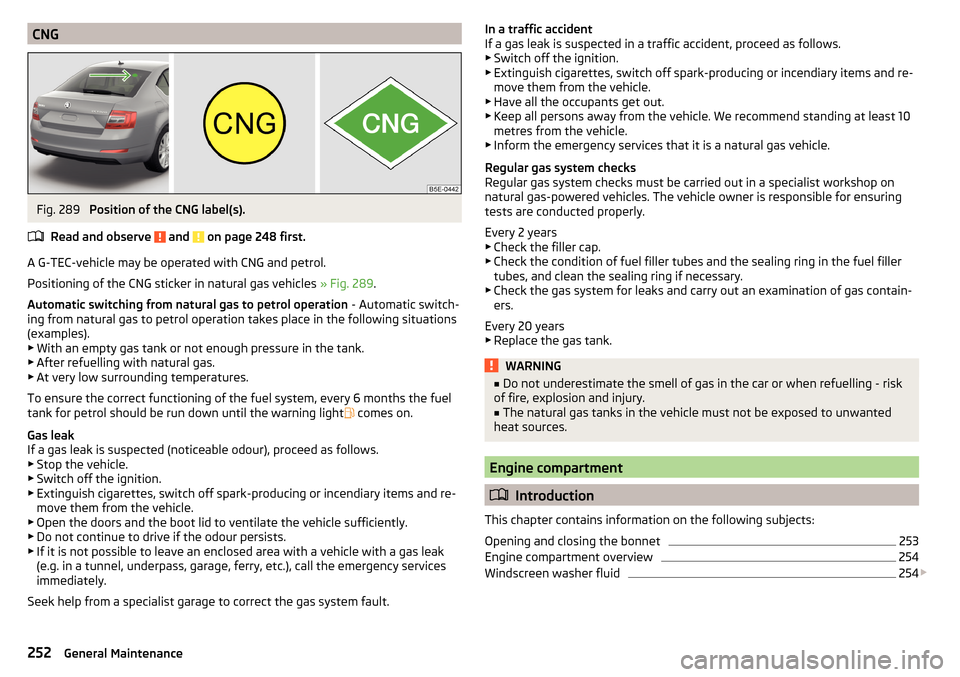
CNGFig. 289
Position of the CNG label(s).
Read and observe
and on page 248 first.
A G-TEC-vehicle may be operated with CNG and petrol.
Positioning of the CNG sticker in natural gas vehicles » Fig. 289.
Automatic switching from natural gas to petrol operation - Automatic switch-
ing from natural gas to petrol operation takes place in the following situations
(examples). ▶ With an empty gas tank or not enough pressure in the tank.
▶ After refuelling with natural gas.
▶ At very low surrounding temperatures.
To ensure the correct functioning of the fuel system, every 6 months the fuel tank for petrol should be run down until the warning light comes on.
Gas leak
If a gas leak is suspected (noticeable odour), proceed as follows. ▶ Stop the vehicle.
▶ Switch off the ignition.
▶ Extinguish cigarettes, switch off spark-producing or incendiary items and re-
move them from the vehicle.
▶ Open the doors and the boot lid to ventilate the vehicle sufficiently.
▶ Do not continue to drive if the odour persists.
▶ If it is not possible to leave an enclosed area with a vehicle with a gas leak
(e.g. in a tunnel, underpass, garage, ferry, etc.), call the emergency services
immediately.
Seek help from a specialist garage to correct the gas system fault.
In a traffic accident
If a gas leak is suspected in a traffic accident, proceed as follows.
▶ Switch off the ignition.
▶ Extinguish cigarettes, switch off spark-producing or incendiary items and re-
move them from the vehicle.
▶ Have all the occupants get out.
▶ Keep all persons away from the vehicle. We recommend standing at least 10
metres from the vehicle.
▶ Inform the emergency services that it is a natural gas vehicle.
Regular gas system checks
Regular gas system checks must be carried out in a specialist workshop on
natural gas-powered vehicles. The vehicle owner is responsible for ensuring
tests are conducted properly.
Every 2 years ▶ Check the filler cap.
▶ Check the condition of fuel filler tubes and the sealing ring in the fuel filler
tubes, and clean the sealing ring if necessary.
▶ Check the gas system for leaks and carry out an examination of gas contain-
ers.
Every 20 years ▶ Replace the gas tank.WARNING■ Do not underestimate the smell of gas in the car or when refuelling - risk
of fire, explosion and injury.■
The natural gas tanks in the vehicle must not be exposed to unwanted
heat sources.
Engine compartment
Introduction
This chapter contains information on the following subjects:
Opening and closing the bonnet
253
Engine compartment overview
254
Windscreen washer fluid
254
252General Maintenance
Page 307 of 324
Engine oil255
Check256
Oil changing255
Refilling256
Specification255
Warning light38
Enter destination Address
172
Destination on the map173
Environment monitoring system Settings in Infotainment
219
EPC35
Equalizer122
ESC ESC Sport
200
Operation200
Warning light34
External device data transfer123
External module CD / DVD
139
SD card140
SIM card154
Video DVD145
F
Factory settings
124 , 131
Fastening elements94
Fatigue detection228
Favourite174, 179
file formats media
142, 143
Requirements and Restrictions142, 143
File formats DVD video
146
Pictures145
Films245
Finish route guidance181
Fire extinguisher265
First aid kit265
Flagged destination174
Flashing65
Floor covering in the luggage compartment96
Flooring in the luggage compartment96
Floor mats194
See Floor mats194
FM133
Set125, 131
Fog lights Warning light
37
Fog lights/rear fog light67
Fog lights with CORNER function68
Force limiter Electric boot lid
57
Sliding/tilting roof62
Window60
Front assist Warning light
40
Front Assist219
Deactivation/activation220
Distance warning219
Malfunctions221
Operation219
Radar sensor199
Settings in Infotainment219
Warning and automatic braking220
Warning light40
Front seats76
fuel Gas gauge
31
Gasoline / Diesel gauge31
Fuel248
Diesel250
refer to Fuel248
Refuel CNG251
Refuelling249
Unleaded petrol249
Warning light36
Fuel consumption291
Fuel filter Information messages40
Fuel options129
Fuel reserve Petrol diesel
36
Function surfaces116
Fuses278
in the engine compartment281
in the switchboard279, 280
Plastic clip281
G
Gas station
173
Gearbox Information messages
37
Gear change Gear recommendation
42
Information on the selected gear42
Gear changing lever
193
Genuine parts241
Glasses compartment87
GPS169
Graphical driving recommendations180
Guarantee5
H
Handbrake
192
Warning light33
Hazard warning light system68
HBA202
Headrests80
Heating104, 105
Air distribution control107
Mirrors74
Seats81
Windscreen and rear window71
HHC202
High-beam assistant67
305Index