bulb SKODA OCTAVIA TOUR 2009 1.G / (1U) Owner's Manual
[x] Cancel search | Manufacturer: SKODA, Model Year: 2009, Model line: OCTAVIA TOUR, Model: SKODA OCTAVIA TOUR 2009 1.G / (1U)Pages: 226, PDF Size: 13.11 MB
Page 5 of 226
Contents
4Driving Tips
. . . . . . . . . . . . . . . . . . . . . . . . . . . . . .
Intelligent Technology
. . . . . . . . . . . . . . . . . . . . . . . .
Electronic stability programme (ESP)* . . . . . . . . . .
Brakes . . . . . . . . . . . . . . . . . . . . . . . . . . . . . . . . . . . . . . .
Brake booster . . . . . . . . . . . . . . . . . . . . . . . . . . . . . . . .
Antilock brake system (ABS)* . . . . . . . . . . . . . . . . . .
Brake Assist* . . . . . . . . . . . . . . . . . . . . . . . . . . . . . . . . .
Driving and the Environment
. . . . . . . . . . . . . . . . .
The first 1 500 kilometres and then afterwards . .
Catalytic converter . . . . . . . . . . . . . . . . . . . . . . . . . . . .
Driving in an economical and environmentally
conscious manner . . . . . . . . . . . . . . . . . . . . . . . . . . . .
Environmental compatibility . . . . . . . . . . . . . . . . . . .
Motoring abroad . . . . . . . . . . . . . . . . . . . . . . . . . . . . .
Avoiding damage to your vehicle . . . . . . . . . . . . . .
To w i n g a t r a i l e r
. . . . . . . . . . . . . . . . . . . . . . . . . . . . . . . .
Towing a trailer . . . . . . . . . . . . . . . . . . . . . . . . . . . . . . .
Detachable towing device* . . . . . . . . . . . . . . . . . . . .
General Maintenance
. . . . . . . . . . . . . . .
Taking care of your ve hicle and cleaning the
vehicle
. . . . . . . . . . . . . . . . . . . . . . . . . . . . . . . . . . . . . . . . .
General . . . . . . . . . . . . . . . . . . . . . . . . . . . . . . . . . . . . . .
Care of the exterior of vehicle . . . . . . . . . . . . . . . . . .
Care of the interior of vehicle . . . . . . . . . . . . . . . . . .
Fuel
. . . . . . . . . . . . . . . . . . . . . . . . . . . . . . . . . . . . . . . . . . . .
Petrol . . . . . . . . . . . . . . . . . . . . . . . . . . . . . . . . . . . . . . . .
Diesel . . . . . . . . . . . . . . . . . . . . . . . . . . . . . . . . . . . . . . .
Refuelling . . . . . . . . . . . . . . . . . . . . . . . . . . . . . . . . . . . .
Emergency release of fuel filler flap . . . . . . . . . . . .
Inspecting and replenishing
. . . . . . . . . . . . . . . . . .
Engine compartment . . . . . . . . . . . . . . . . . . . . . . . . .
Engine oil . . . . . . . . . . . . . . . . . . . . . . . . . . . . . . . . . . . .
Cooling system . . . . . . . . . . . . . . . . . . . . . . . . . . . . . . .
Brake fluid . . . . . . . . . . . . . . . . . . . . . . . . . . . . . . . . . . . Battery . . . . . . . . . . . . . . . . . . . . . . . . . . . . . . . . . . . . . . .
Windshield washer system . . . . . . . . . . . . . . . . . . . .
Wheels and Tyres
. . . . . . . . . . . . . . . . . . . . . . . . . . . . . .
Wheels . . . . . . . . . . . . . . . . . . . . . . . . . . . . . . . . . . . . . .
Accessories, changes and replacement of partsAccessories and replacement parts . . . . . . . . . . . . .
Technical changes . . . . . . . . . . . . . . . . . . . . . . . . . . . .Breakdown assistance
. . . . . . . . . . . . . .
Breakdown assistance
. . . . . . . . . . . . . . . . . . . . . . . .
First-aid box*, Warning triangle* and bulb set . . .
Fire extinguisher* . . . . . . . . . . . . . . . . . . . . . . . . . . . . .
Vehicle tool kit . . . . . . . . . . . . . . . . . . . . . . . . . . . . . . . .
Spray for repairing a tyre* . . . . . . . . . . . . . . . . . . . . .
Tyre repair kit* . . . . . . . . . . . . . . . . . . . . . . . . . . . . . . . .
Spare wheel . . . . . . . . . . . . . . . . . . . . . . . . . . . . . . . . . .
Changing a wheel . . . . . . . . . . . . . . . . . . . . . . . . . . . . .
Jump-starting . . . . . . . . . . . . . . . . . . . . . . . . . . . . . . . .
Tow-starting and towing vehicle . . . . . . . . . . . . . . .
Fuses and light bulbs
. . . . . . . . . . . . . . . . . . . . . . . . . .
Electric fuses . . . . . . . . . . . . . . . . . . . . . . . . . . . . . . . . .
Bulbs . . . . . . . . . . . . . . . . . . . . . . . . . . . . . . . . . . . . . . . .
Technical Data
. . . . . . . . . . . . . . . . . . . . . . . . . .
Technical Data
. . . . . . . . . . . . . . . . . . . . . . . . . . . . . . . . .
General information . . . . . . . . . . . . . . . . . . . . . . . . . .
Used abbreviations . . . . . . . . . . . . . . . . . . . . . . . . . . .
Performances . . . . . . . . . . . . . . . . . . . . . . . . . . . . . . . .
Weight . . . . . . . . . . . . . . . . . . . . . . . . . . . . . . . . . . . . . . .
Identification details . . . . . . . . . . . . . . . . . . . . . . . . . .
Fuel consumption according to the regulations
(99/100/EU) . . . . . . . . . . . . . . . . . . . . . . . . . . . . . . . . . .
Dimensions . . . . . . . . . . . . . . . . . . . . . . . . . . . . . . . . . .
1.4 ltr./55 kW - EU4 . . . . . . . . . . . . . . . . . . . . . . . . . . .
1.6 ltr./75 kW - EU4/EU2 DDK . . . . . . . . . . . . . . . . . .
1.8 ltr./110 kW - EU4/EU3D . . . . . . . . . . . . . . . . . . . . 1.9 ltr./66 kW TDI - EU3 . . . . . . . . . . . . . . . . . . . . . . . .
1.9 ltr./74 kW TDI PD - EU4 . . . . . . . . . . . . . . . . . . . .
Vehicles of the Octavia Combi group N1 . . . . . . . .
Vehicles of the Octavia Combi group - Vehicles for
reconstruction . . . . . . . . . . . . . . . . . . . . . . . . . . . . . . . .
Index
. . . . . . . . . . . . . . . . . . . . . . . . . . . . . . . . . . . . . . . .
133
133
133
135
136
137
137
139
139
140
140
143
144
144
145
145
147
149
149
149
149
154
157
157
157
158
159
161
161
164
167
169 170
174
175
175
181
181
181
183
183
183
183
184
184
184
185
185
190
191
194
194
197
203
203
203
203
203
203
203
204
205
206
208
210212
214
216
216
217
s2ig.book Page 4 Monday, November 10, 2008 11:20 AM
Page 27 of 226
Instruments and Indicator/Warning Lights
26If several operational faults of priority 1 exist, the symbols appear one after the
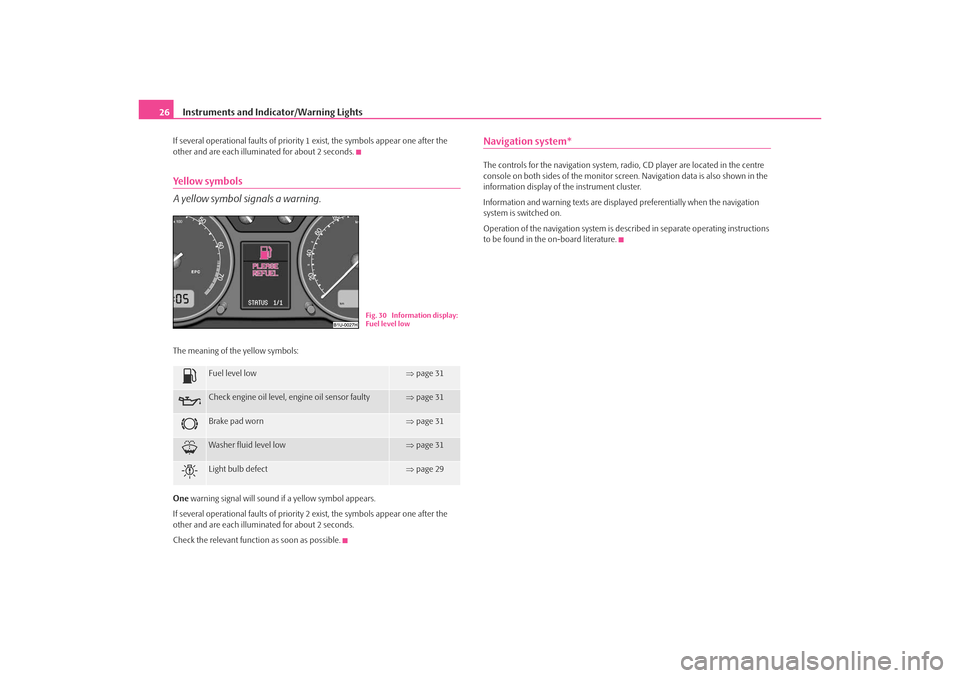
other and are each illuminated for about 2 seconds.Yellow symbols
A yellow symbol signals a warning.The meaning of the yellow symbols:
One warning signal will sound if a yellow symbol appears.
If several operational faults of priority 2 exist, the symbols appear one after the
other and are each illuminated for about 2 seconds.
Check the relevant function as soon as possible.
Navigation system*The controls for the navigation system, radi o, CD player are located in the centre
console on both sides of the monitor screen. Navigation data is also shown in the
information display of the instrument cluster.
Information and warning texts are displayed preferentially when the navigation
system is switched on.
Operation of the navigation system is described in separate operating instructions
to be found in the on-board literature.
Fuel level low
⇒ page 31
Check engine oil level, engine oil sensor faulty
⇒page 31
Brake pad worn
⇒page 31
Washer fluid level low
⇒page 31
Light bulb defect
⇒page 29
Fig. 30 Information display:
Fuel level low
s2ig.book Page 26 Monday, November 10, 2008 11:20 AM
Page 28 of 226
Instruments and Indicator/Warning Lights27
Using the system
Safety
Driving Tips
General Maintenance
Breakdown assistance
Technical Data
Warning lightsOverview
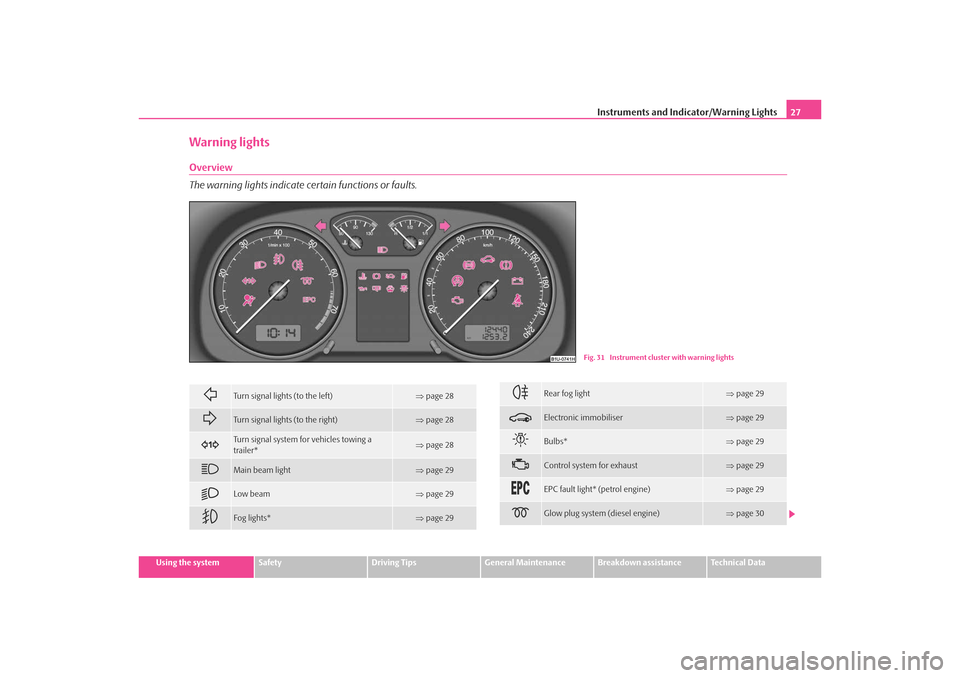
The warning lights indicate certain functions or faults.
Fig. 31 Instrument cluster with warning lights
Turn signal lights (to the left)
⇒page 28
Turn signal lights (to the right)
⇒page 28
Turn signal system fo r vehicles towing a
trailer*
⇒ page 28
Main beam light
⇒page 29
Low beam
⇒page 29
Fog lights*
⇒page 29
Rear fog light
⇒page 29
Electronic immobiliser
⇒page 29
Bulbs*
⇒page 29
Control system for exhaust
⇒page 29
EPC fault light* (petrol engine)
⇒page 29
Glow plug system (diesel engine)
⇒page 30
s2ig.book Page 27 Monday, November 10, 2008 11:20 AM
Page 30 of 226
Instruments and Indicator/Warning Lights29
Using the system
Safety
Driving Tips
General Maintenance
Breakdown assistance
Technical Data
Main beam
The indicator light
comes on when the main beam is selected or also when the
headlight flasher is operated.
Further information about the main beam ⇒page 52.
Low beam
The warning light
comes on when low beam is selected ⇒page 49.
Fog lights
*
The warning light
comes on when the fog lights are operating.
Rear fog light
The warning light
comes on when the rear fog lights are operating ⇒page 50.
Electronic immobiliser
Data is compared between the ignition ke y and the control unit when switching on
the ignition. The indicator light
will light up for a few seconds when ignition key
authorisation is confirmed.
The warning light will start flashing conti nuously if a non-authorised ignition key
(for example the wrong ignition key) has been used. The engine cannot be started
⇒ page 36.
It is only possible to start the engine of the vehicle with a Genuine Škoda key with
the matching code.
The following text will be displayed in the information display*:
IMMOBIL. ACTIVATED
Light bulbs
The warning light
comes on if a light bulb is damaged:
•
brakes applied (brake light),
•
when switching on lighting (l ow beam and/or rear light).
A peep sounds as an additional warning signal.
Control system for exhaust
The warning light
comes on after the ignition has been switched on.
If the warning light does not go out after starting the engine or it lights up or flashes
when driving, a fault exists in an exhaus t relevant component. The engine manage-
ment system selects an emergency programme which enables you to drive to the
nearest specialist garage by adopting a gentle style of driving.
The following text will be displayed in the information display*:
EMISSIONS WORKSHOP!
EPC fault light
(petrol engine)
The
(Electronic Power Control) warning light comes on for a few seconds when
the ignition is switched on.
If the warning light
does not go out or lights up after starting the engine, a fault
exists in the engine control. The engine management system selects an emergency
programme which enables you to drive to the nearest specialist garage by adopting
a gentle style of driving.
The following text will be displayed in the information display*:
ENGINE WORKSHOP!
s2ig.book Page 29 Monday, November 10, 2008 11:20 AM
Page 52 of 226
Lights and Visibility51
Using the system
Safety
Driving Tips
General Maintenance
Breakdown assistance
Technical Data
Headlamp range adjustment
Once the low beam is switched on you can then adapt the range of
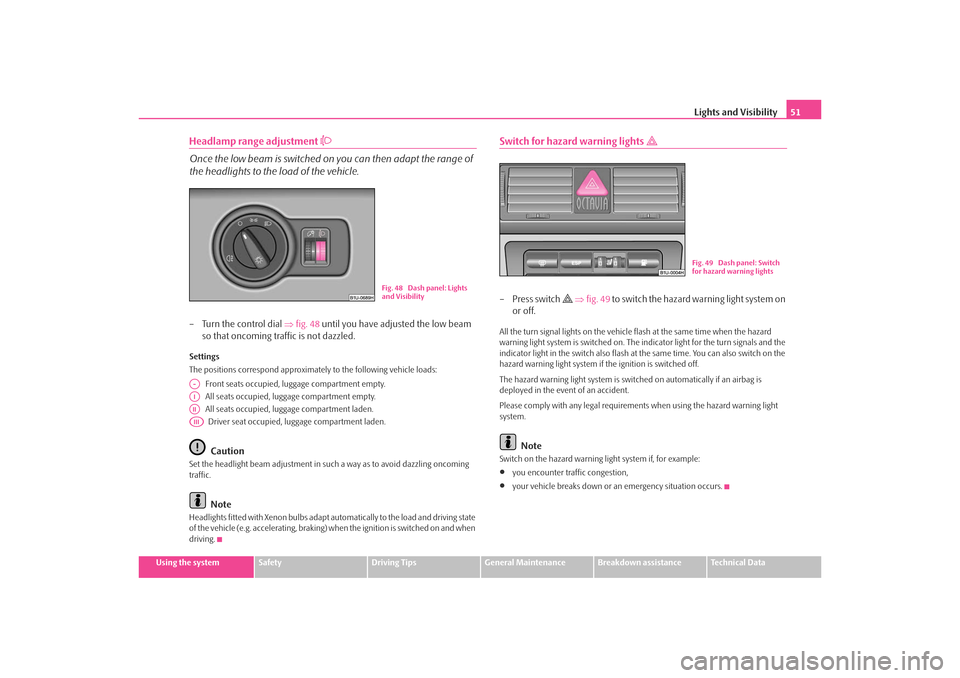
the headlights to the load of the vehicle.– Turn the control dial ⇒fig. 48 until you have adjusted the low beam
so that oncoming traffic is not dazzled.Settings
The positions correspond approximat ely to the following vehicle loads:
Front seats occupied, luggage compartment empty.
All seats occupied, lugg age compartment empty.
All seats occupied, lugg age compartment laden.
Driver seat occupied, lu ggage compartment laden.
Caution
Set the headlight beam adjustment in such a way as to avoid dazzling oncoming
traffic.
Note
Headlights fitted with Xenon bulbs adapt au tomatically to the load and driving state
of the vehicle (e.g. accelerating, braking) when the ignition is switched on and when
driving.
Switch for hazard warning lights
–Press switch
⇒ fig. 49 to switc h the haz ard wa rning lig ht system on
or off.
All the turn signal lights on the vehicle flash at the same time when the hazard
warning light system is switched on. The indicator light for the turn signals and the
indicator light in the switch also flash at the same time. You can also switch on the
hazard warning light system if the ignition is switched off.
The hazard warning light system is switched on automatically if an airbag is
deployed in the event of an accident.
Please comply with any legal requirements when using the hazard warning light
system.
Note
Switch on the hazard warning light system if, for example:•
you encounter traffic congestion,
•
your vehicle breaks down or an emergency situation occurs.
Fig. 48 Dash panel: Lights
and Visibility
A-AIAIIAIII
Fig. 49 Dash panel: Switch
for hazard warning lights
s2ig.book Page 51 Monday, November 10, 2008 11:20 AM
Page 53 of 226
Lights and Visibility
52The turn signal
and main beam lever
The parking lights and headlight flasher are also switched on and off
using the turn signal and main beam lever.The turn signal and main beam lever perform the following functions:
Right
and left
turn signal light
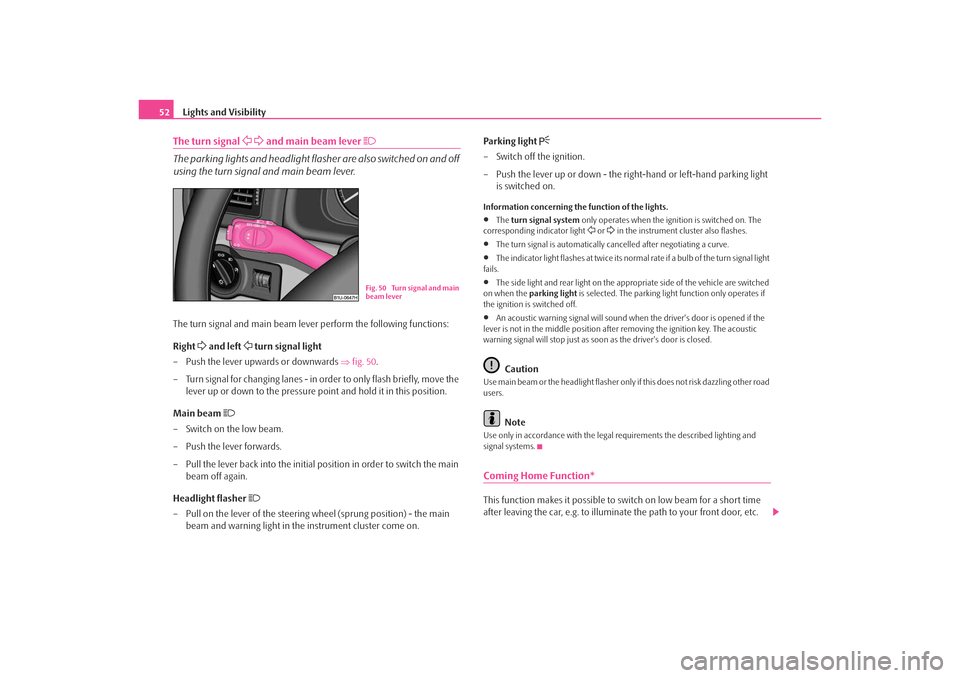
– Push the lever upwards or downwards ⇒fig. 50 .
– Turn signal for changing lanes - in or der to only flash briefly, move the
lever up or down to the pressure point and hold it in this position.
Main beam
– Switch on the low beam.
– Push the lever forwards.
– Pull the lever back into the initial position in order to switch the main beam off again.
Headlight flasher
– Pull on the lever of the steering wheel (sprung position) - the main
beam and warning light in the instrument cluster come on. Parking light
– Switch off the ignition.
– Push the lever up or down - the ri
ght-hand or left-hand parking light
is switched on.Information concerning the function of the lights.•
The turn signal system only operates when the ignition is switched on. The
corresponding indicator light
or in the instrument cluster also flashes.
•
The turn signal is automatically cancelled after negotiating a curve.
•
The indicator light flashes at twice its normal rate if a bulb of the turn signal light
fails.
•
The side light and rear light on the appr opriate side of the vehicle are switched
on when the parking light is selected. The parking light function only operates if
the ignition is switched off.
•
An acoustic warning signal will sound when the driver's door is opened if the
lever is not in the middle position after removing the ignition key. The acoustic
warning signal will stop just as s oon as the driver's door is closed.Caution
Use main beam or the headlight flasher only if this does not risk dazzling other road
users.
Note
Use only in accordance with the legal requirements the described lighting and
signal systems.Coming Home Function*This function makes it possible to sw itch on low beam for a short time
after leaving the car, e.g. to illumina te the path to your front door, etc.
Fig. 50 Turn signal and main
beam lever
s2ig.book Page 52 Monday, November 10, 2008 11:20 AM
Page 54 of 226

Lights and Visibility53
Using the system
Safety
Driving Tips
General Maintenance
Breakdown assistance
Technical Data
Selecting function
– Switch off the light.
– Switch off the ignition.
– Operate the headlight flasher once.
– Open and close the driver door.If the door remains open, the ligh t remains on for about 3 minutes.
If the door remains closed, the li ght stays on for about 30 seconds.Interior lightingFront interior lighting and lighting of storage compartment on front passenger sideSwitching the interior light on
– Press the switch to the left, the symbol
⇒ fig. 51 appears.
Switching the interior light off
– Press the switch into the middle position O. – On the version without reading lights press the switch to the right,
the symbol O appears.
Door contact switching mechanism (on the front and rear* door)
– Press the switch to the right, the symbol
appears.
– On the version without reading lights press the switch into the middle position
.
Reading lights*
– Press on one of the switches in order to switch the right or left reading light on or off.
Lighting of storage compartment on the front passenger side*
– When opening the flap of the storage compartment on the front passenger side the lighting in the storage compartment comes on.
– The light switches on automatically when the parking light is switched on and goes out when the flap is closed.
On vehicles with central locking, the interior light is switched on for about 20
seconds when the vehicle is unlocked, when a door is opened or after withdrawing
the ignition key (if the switch of the relevant interior light is in the door contact posi-
tion).
The interior lighting goes off after about 60 minutes when a door has been left open
in order to avoid discharging the battery of the vehicle.
Note
We recommend having these bulbs re placed by a specialist garage.
Fig. 51 Detail of the head-
liner: front interior lighting
AAAA
AA
AA
AA
AB
s2ig.book Page 53 Monday, November 10, 2008 11:20 AM
Page 55 of 226
Lights and Visibility
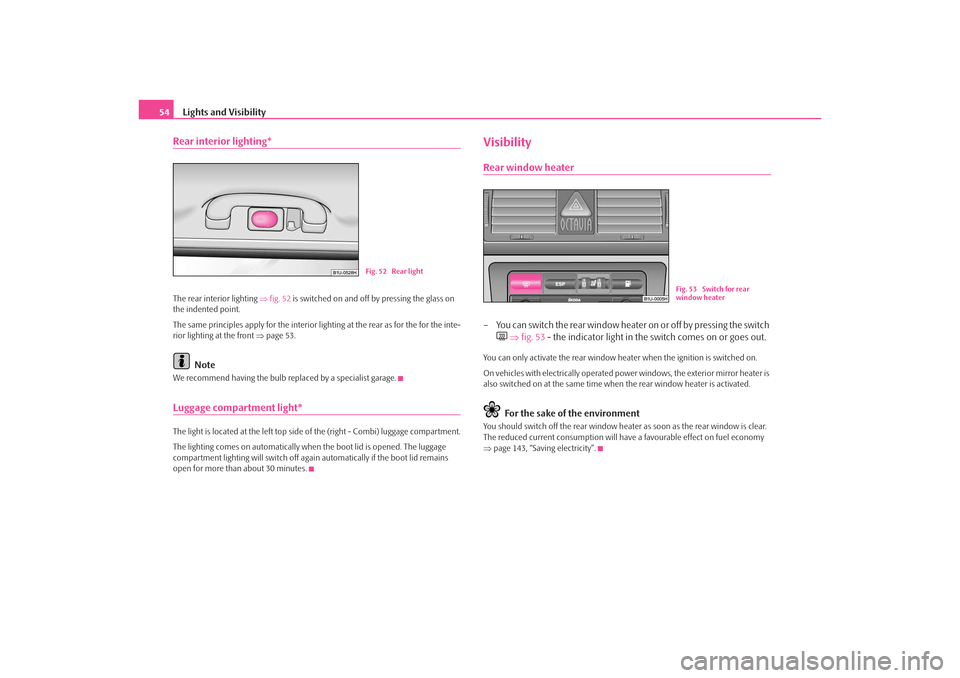
54Rear interior lighting*The rear interior lighting ⇒fig. 52 is switched on and off by pressing the glass on
the indented point.
The same principles apply for the interior lighting at the rear as for the for the inte-
rior lighting at the front ⇒page 53.
Note
We recommend having the bulb re placed by a specialist garage.Luggage compartment light*The light is located at the left top side of the (right - Combi) luggage compartment.
The lighting comes on automatically when the boot lid is opened. The luggage
compartment lighting will switch off agai n automatically if the boot lid remains
open for more than about 30 minutes.
VisibilityRear window heater– You can switch the rear window heater on or off by pressing the switch
⇒ fig. 53 - the indicator light in the switch comes on or goes out.
You can only activate the rear window he ater when the ignition is switched on.
On vehicles with electrically operated power windows, the exterior mirror heater is
also switched on at the same time when the rear window heater is activated.
For the sake of the environment
You should switch off the rear window heater as soon as the rear window is clear.
The reduced current consumption will have a favourable effect on fuel economy
⇒ page 143, “Saving electricity”.
Fig. 52 Rear light
Fig. 53 Switch for rear
window heater
s2ig.book Page 54 Monday, November 10, 2008 11:20 AM
Page 172 of 226
Inspecting and replenishing171
Using the system
Safety
Driving Tips
General Maintenance
Breakdown assistance
Technical Data
WARNING
•
The battery acid is strongly corros ive and must, therefore, be handled
with the greatest of care. Always we ar protective gloves, eye and skin
protection when handling batteries. Corrosive fumes in the air irritate the
air passages and lead to conjunctivitis and inflammation of the air passages
in the lungs. Battery acid corrodes dental enamel and creates deep wounds
after contact with the skin which take a long time to heal. Repeated contact
with diluted acids causes skin diseases (inflammations, ulcers, slin cracks).
Acids coming into contact with water are diluted accompanied by significant
development of heat.
•
Do not tilt the battery otherwise battery electrolyte may flow out of the
battery vent openings. Prot ect the eyes with safety glasses or a shield! There
is the danger of suffering blindness! If any battery electrol yte gets into your
eye, rinse out your eye immediately with clear water for several minutes.
Contact a doctor without delay.
•
Splashes of acid on your skin or clothes should be neutralised as soon as
possible using soap suds and then rinsed with plenty of water. Contact a
doctor immediately if you swallow battery electrolyte.
•
Keep batteries out of the reach of children.
•
Hydrogen is released when you char ge a battery and a highly explosive
gas mixture is produced. An explosion can be caused through sparkling over
during unclamping or loosening of the cable plug while the ignition is on.
•
Bridging of the poles will create a short circuit (e.g. through metal
objects, cables). Possible consequences of a short circuit: Melting of lead
struts, explosion and burning of the battery, jets of acid spurting out.
•
It is prohibited to work with a naked flame and light, to smoke or to carry
out any activities which produce sparks. Avoid creating sparks when
working with cables and electrical device s. Strong sparking represents a risk
of injury.
•
Before carrying out any work on the electrical system, switch off the
engine, the ignition as well as all electrical components and disconnect the
negative cable (-) on the battery. If you wish to replace a bulb it is sufficient
to switch off the appropriate light.
•
Never charge a frozen or thawed battery - risk of explosion and caustic
burns! Replace a frozen battery.
•
Never use a battery which is damaged - risk of explosion! Immediately
replace a damaged battery.Caution
•
You must only disconnect the battery if the ignition is switched off, otherwise
the electrical system (electronic components) of the vehicle may be damaged.
When disconnecting the battery from the el ectrical system of the vehicle, first
disconnect the negative terminal (-) of the battery. Then disconnect the positive
terminal (+).
•
When reconnecting the battery, first conne ct the positive terminal (+) and only
then the negative terminal (-) of the batt ery. You must on no account connect the
cables wrongly - risk of a cable fire.
•
Ensure that battery acid does not come into contact with the vehicle body
otherwise damage could occur to the paintwork.
•
Do not place the battery in direct dayl ight in order to protect the battery
housing from the effects of ultra-violet light.For the sake of the environment
A removed battery is a special type of waste which is harmful to the environment -
contact your specialist garage regarding disposing of the battery.
Note
Please also refer to the guidelines ⇒page 173, “Disconnecting and reconnecting
the battery”, also after connecting the battery.
WARNING (continued)
s2ig.book Page 171 Monday, November 10, 2008 11:20 AM
Page 184 of 226
Breakdown assistance183
Using the system
Safety
Driving Tips
General Maintenance
Breakdown assistance
Technical Data
Breakdown assistanceBreakdown assistanceFirst-aid box*, Warning triangle* and bulb setA space for stowing the first-aid box and the bulb set is located in a well of the
plastic part under the floor covering of the luggage compartment behind the spare
wheel.
A space for the warning triangle is located in the luggage compartment.
Note
•
Pay attention to the use-by-date of the contents of the first-aid box.
•
If you equip your vehi cle additionally with a warning triangle or with a first-aid
box, you can purchase these from the range of Škoda Original Accessories.
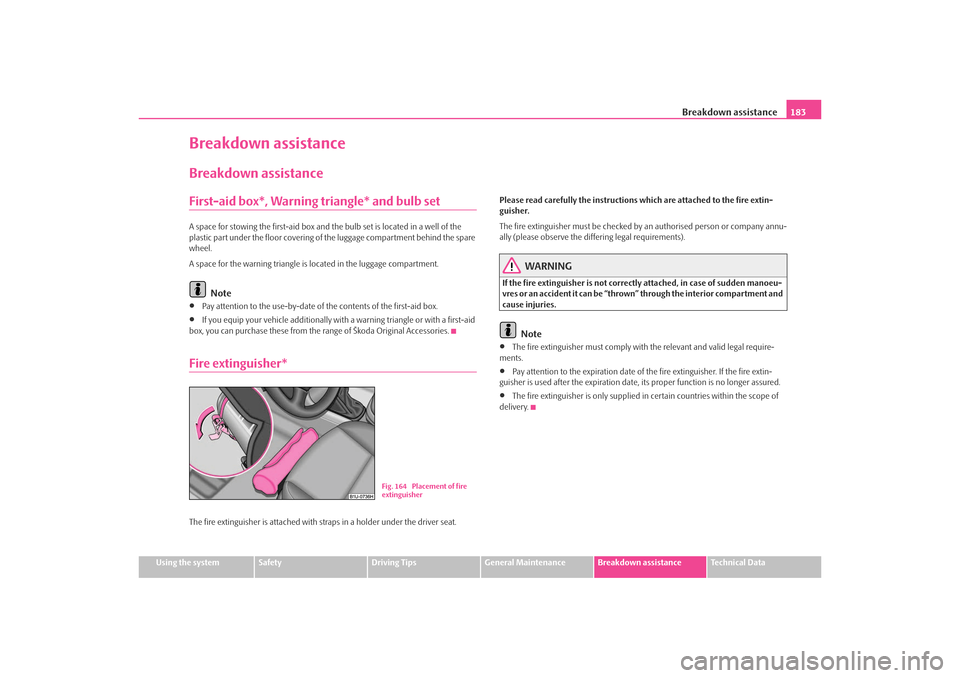
Fire extinguisher*The fire extinguisher is attached with straps in a holder under the driver seat. Please read carefully the
instructions which are atta ched to the fire extin-
guisher.
The fire extinguisher must be checked by an authorised person or company annu-
ally (please observe the differing legal requirements).
WARNING
If the fire extinguisher is not correctly attached, in case of sudden manoeu-
vres or an accident it can be “thrown” through the interior compartment and
cause injuries.
Note
•
The fire extinguisher must comply with the relevant and valid legal require-
ments.
•
Pay attention to the expiration date of the fire extinguisher. If the fire extin-
guisher is used after the expiration date, its proper function is no longer assured.
•
The fire extinguisher is only supplied in certain countries within the scope of
delivery.
Fig. 164 Placement of fire
extinguisher
s2ig.book Page 183 Monday, November 10, 2008 11:20 AM