window SKODA OCTAVIA TOUR 2009 1.G / (1U) Owner's Manual
[x] Cancel search | Manufacturer: SKODA, Model Year: 2009, Model line: OCTAVIA TOUR, Model: SKODA OCTAVIA TOUR 2009 1.G / (1U)Pages: 226, PDF Size: 13.11 MB
Page 4 of 226
Contents3
ContentsLayout of this Owner's Manual
(explanations)
. . . . . . . . . . . . . . . . . . . . . . . . . .
Using the system
. . . . . . . . . . . . . . . . . . . . . .
Cockpit
. . . . . . . . . . . . . . . . . . . . . . . . . . . . . . . . . . . . . . . .
Overview . . . . . . . . . . . . . . . . . . . . . . . . . . . . . . . . . . . .
The brief instruction
. . . . . . . . . . . . . . . . . . . . . . . . . .
Basic functions and important information . . . . .
Instruments and Indicator/Warning Lights
. . .
General view of the instrument cluster . . . . . . . . .
Engine revolutions counter . . . . . . . . . . . . . . . . . . . .
Coolant temperature gauge . . . . . . . . . . . . . . . . . . .
Fuel gauge . . . . . . . . . . . . . . . . . . . . . . . . . . . . . . . . . . .
Speedometer . . . . . . . . . . . . . . . . . . . . . . . . . . . . . . . .
Counter for distance driven . . . . . . . . . . . . . . . . . . .
Service Interval Display . . . . . . . . . . . . . . . . . . . . . . .
Digital clock . . . . . . . . . . . . . . . . . . . . . . . . . . . . . . . . . .
Multi-functional indicator (onboard computer)*
Information display* . . . . . . . . . . . . . . . . . . . . . . . . . .
Auto Check Control . . . . . . . . . . . . . . . . . . . . . . . . . . .
Warning lights . . . . . . . . . . . . . . . . . . . . . . . . . . . . . . . .
Unlocking and locking
. . . . . . . . . . . . . . . . . . . . . . . .
Key . . . . . . . . . . . . . . . . . . . . . . . . . . . . . . . . . . . . . . . . . .
Changing the battery of the radio remote control
Electronic immobiliser . . . . . . . . . . . . . . . . . . . . . . . .
Locking . . . . . . . . . . . . . . . . . . . . . . . . . . . . . . . . . . . . . .
Child safety lock . . . . . . . . . . . . . . . . . . . . . . . . . . . . . .
Central locking system* . . . . . . . . . . . . . . . . . . . . . . .
Remote control* . . . . . . . . . . . . . . . . . . . . . . . . . . . . . .
Synchonisation of the remote control . . . . . . . . . .
Anti-theft alarm system* . . . . . . . . . . . . . . . . . . . . . . Power windows* . . . . . . . . . . . . . . . . . . . . . . . . . . . . .
Electric sliding/tilting roof* . . . . . . . . . . . . . . . . . . . .
Lights and Visibility
. . . . . . . . . . . . . . . . . . . . . . . . . . .
Lights . . . . . . . . . . . . . . . . . . . . . . . . . . . . . . . . . . . . . . . .
Interior lighting . . . . . . . . . . . . . . . . . . . . . . . . . . . . . . .
Visibility . . . . . . . . . . . . . . . . . . . . . . . . . . . . . . . . . . . . .
Windshield wiper and wash system . . . . . . . . . . . .
Rear-view mirror . . . . . . . . . . . . . . . . . . . . . . . . . . . . .
Seats and Storage
. . . . . . . . . . . . . . . . . . . . . . . . . . . . .
Front seats . . . . . . . . . . . . . . . . . . . . . . . . . . . . . . . . . . .
Adjusting front seats electrically* . . . . . . . . . . . . . .
Head restraints . . . . . . . . . . . . . . . . . . . . . . . . . . . . . . .
Rear seats . . . . . . . . . . . . . . . . . . . . . . . . . . . . . . . . . . . .
Pedals . . . . . . . . . . . . . . . . . . . . . . . . . . . . . . . . . . . . . . .
luggage compartment . . . . . . . . . . . . . . . . . . . . . . . .
Net partition (Combi)* . . . . . . . . . . . . . . . . . . . . . . . .
The roof rack* . . . . . . . . . . . . . . . . . . . . . . . . . . . . . . . .
Note holder . . . . . . . . . . . . . . . . . . . . . . . . . . . . . . . . . .
Ashtray* . . . . . . . . . . . . . . . . . . . . . . . . . . . . . . . . . . . . .
Cigarette lighter*, power sockets . . . . . . . . . . . . . . .
Storage compartments . . . . . . . . . . . . . . . . . . . . . . . .
Heating and air conditioning system
. . . . . . . . .
Air outlet vents . . . . . . . . . . . . . . . . . . . . . . . . . . . . . . .
Heating . . . . . . . . . . . . . . . . . . . . . . . . . . . . . . . . . . . . . .
Air conditioning system* . . . . . . . . . . . . . . . . . . . . . .
Climatronic* (automatic air conditioning) . . . . . .
Starting-off and Driving
. . . . . . . . . . . . . . . . . . . . . . .
Setting steering wheel position . . . . . . . . . . . . . . . .
Ignition lock . . . . . . . . . . . . . . . . . . . . . . . . . . . . . . . . . .
Starting the engine . . . . . . . . . . . . . . . . . . . . . . . . . . .
Switching off the engine . . . . . . . . . . . . . . . . . . . . . . .
Shifting . . . . . . . . . . . . . . . . . . . . . . . . . . . . . . . . . . . . . .
Handbrake . . . . . . . . . . . . . . . . . . . . . . . . . . . . . . . . . . . Rear parking aid* . . . . . . . . . . . . . . . . . . . . . . . . . . . . .
Cruise control system (CCS)* . . . . . . . . . . . . . . . . . .
Communication
. . . . . . . . . . . . . . . . . . . . . . . . . . . . . .
Multifunction steering wheel* . . . . . . . . . . . . . . . . .
Mobile phone, handsfree-system* . . . . . . . . . . . . .
Mobile phones and two-way radio systems . . . . .
Safety
. . . . . . . . . . . . . . . . . . . . . . . . . . . . . . . . . . . . . .
Passive Safety
. . . . . . . . . . . . . . . . . . . . . . . . . . . . . . . . .
Basic information . . . . . . . . . . . . . . . . . . . . . . . . . . . .
Correct seated position . . . . . . . . . . . . . . . . . . . . . . .
Seat belts
. . . . . . . . . . . . . . . . . . . . . . . . . . . . . . . . . . . . . .
Why seat belts? . . . . . . . . . . . . . . . . . . . . . . . . . . . . . .
The physical principle of a frontal collision . . . . .
Important safety information regarding the use of
seat belts . . . . . . . . . . . . . . . . . . . . . . . . . . . . . . . . . . . .
How are seat belts correctly fastened? . . . . . . . . .
Belt tensioners . . . . . . . . . . . . . . . . . . . . . . . . . . . . . . .
Airbag system
. . . . . . . . . . . . . . . . . . . . . . . . . . . . . . . . .
Description of the airbag system . . . . . . . . . . . . . . .
Front airbag . . . . . . . . . . . . . . . . . . . . . . . . . . . . . . . . . .
Side airbags* . . . . . . . . . . . . . . . . . . . . . . . . . . . . . . . . .
Deactivating an airbag . . . . . . . . . . . . . . . . . . . . . . . .
Transporting children safely
. . . . . . . . . . . . . . . . . .
What you should know about transporting
children! . . . . . . . . . . . . . . . . . . . . . . . . . . . . . . . . . . . . .
Child seat . . . . . . . . . . . . . . . . . . . . . . . . . . . . . . . . . . . .
Attaching a child seat using the “ISOFIX” system
6
7
9
9
10
10
16
16
16
16
17
17
18
18
19
19
23
25
27
35
35
36
36
37
37
38
41
42
43 44
46
49
49
53
54
55
58
60
60
61
64
65
67
68
73
75
77
77
78
79
83
83
83
85
89
94
94
95
95
97
97
9898
99
102
102
103
104
105
105
105
106
110
110
111
111
112
115
117
117
118
121
122
125
125
128
131
s2ig.book Page 3 Monday, November 10, 2008 11:20 AM
Page 10 of 226
Cockpit9
Using the system
Safety
Driving Tips
General Maintenance
Breakdown assistance
Technical Data
CockpitOverviewThis general view is designed to help you to quickly become familiar
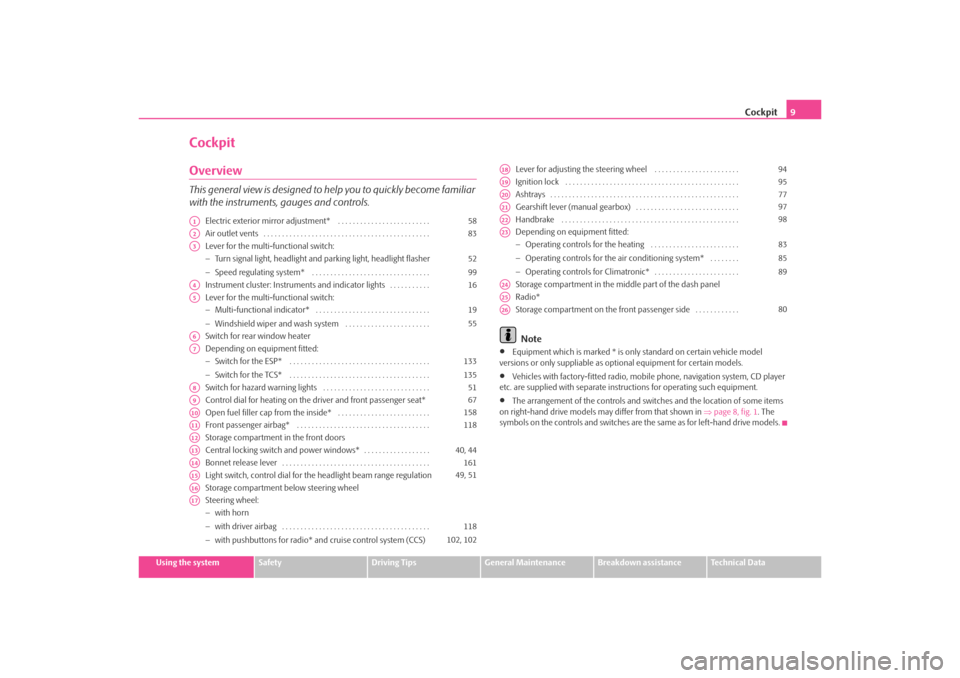
with the instruments, gauges and controls.
Electric exterior mirror adjustment* . . . . . . . . . . . . . . . . . . . . . . . . .
Air outlet vents . . . . . . . . . . . . . . . . . . . . . . . . . . . . . . . . . . . . . . . . . . . . .
Lever for the multi-functional switch:
−Turn signal light, headlight and parking light, headlight flasher
− Speed regulating system* . . . . . . . . . . . . . . . . . . . . . . . . . . . . . . . .
Instrument cluster: Instrum ents and indicator lights . . . . . . . . . . .
Lever for the multi-functional switch:
− Multi-functional indicator* . . . . . . . . . . . . . . . . . . . . . . . . . . . . . . .
− Windshield wiper and wash system . . . . . . . . . . . . . . . . . . . . . . .
Switch for rear window heater
Depending on equipment fitted:
− Switch for the ESP* . . . . . . . . . . . . . . . . . . . . . . . . . . . . . . . . . . . . . .
− Switch for the TCS* . . . . . . . . . . . . . . . . . . . . . . . . . . . . . . . . . . . . . .
Switch for hazard warning lights . . . . . . . . . . . . . . . . . . . . . . . . . . . . .
Control dial for heating on the driver and front passenger seat*
Open fuel filler cap from the inside* . . . . . . . . . . . . . . . . . . . . . . . . .
Front passenger airbag* . . . . . . . . . . . . . . . . . . . . . . . . . . . . . . . . . . . .
Storage compartment in the front doors
Central locking switch and power windows* . . . . . . . . . . . . . . . . . .
Bonnet release lever . . . . . . . . . . . . . . . . . . . . . . . . . . . . . . . . . . . . . . . .
Light switch, control dial for the headlight beam range regulation
Storage compartment below steering wheel
Steering wheel:
− with horn
− with driver airbag . . . . . . . . . . . . . . . . . . . . . . . . . . . . . . . . . . . . . . . .
− with pushbuttons for radio* an d cruise control system (CCS) Lever for adjusting the steering wheel . . . . . . . . . . . . . . . . . . . . . . .
Ignition lock . . . . . . . . . . . . . . . . . . . . . . . . . . . . . . . . . . . . . . . . . . . . . . .
Ashtrays . . . . . . . . . . . . . . . . . . . . . . . . . . . . . . . . . . . . . . . . . . . . . . . . . . .
Gearshift lever (manual gearbox) . . . . . . . . . . . . . . . . . . . . . . . . . . . .
Handbrake . . . . . . . . . . . . . . . . . . . . . . . . . . . . . . . . . . . . . . . . . . . . . . . .
Depending on equipment fitted:
−
Operating controls for the heating . . . . . . . . . . . . . . . . . . . . . . . .
− Operating controls for the air conditioning system* . . . . . . . .
− Operating controls for Climatronic* . . . . . . . . . . . . . . . . . . . . . . .
Storage compartment in the middle part of the dash panel
Radio*
Storage compartment on the front passenger side . . . . . . . . . . . .
Note
•
Equipment which is marked * is only standard on certain vehicle model
versions or only suppliable as op tional equipment for certain models.
•
Vehicles with factory-fitted radio, mobile phone, navigation system, CD player
etc. are supplied with separate instru ctions for operating such equipment.
•
The arrangement of the controls and swit ches and the location of some items
on right-hand drive models may differ from that shown in ⇒page 8, fig. 1 . The
symbols on the controls and switches are the same as for left-hand drive models.
A1
58
A2
83
A3
52
99
A4
16
A5
19
55
A6A7
133
135
A8
51
A9
67
A10
158
A11
118
A12A13
40, 44
A14
161
A15
49, 51
A16A17
118
102, 102
A18
94
A19
95
A20
77
A21
97
A22
98
A23
83
85
89
A24A25A26
80
s2ig.book Page 9 Monday, November 10, 2008 11:20 AM
Page 14 of 226
The brief instruction13
Using the system
Safety
Driving Tips
General Maintenance
Breakdown assistance
Technical Data
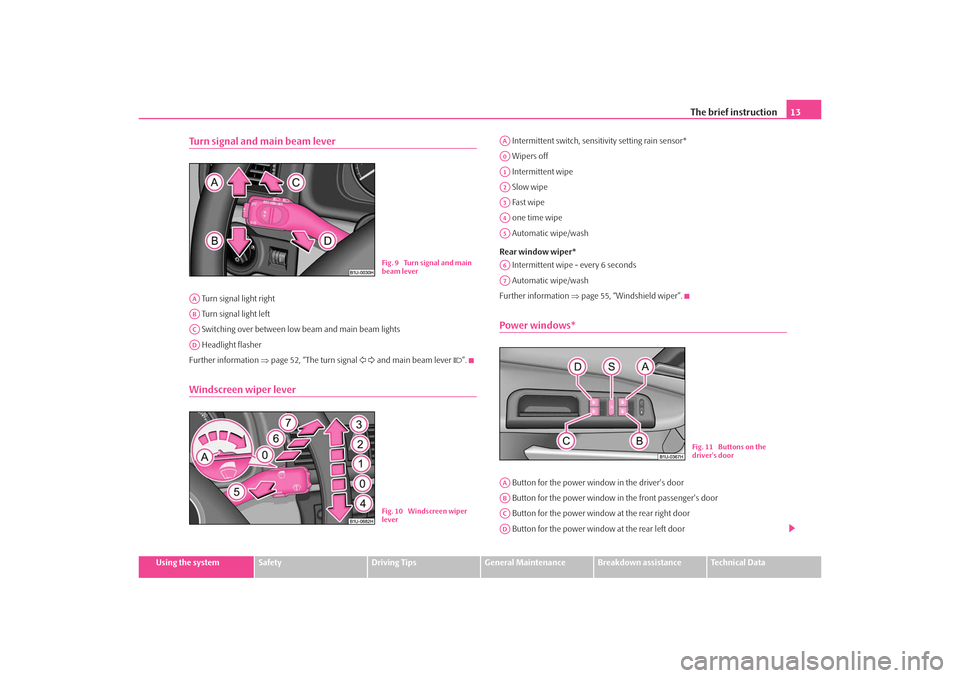
Turn signal and main beam lever Turn signal light right
Turn signal light left
Switching over between low beam and main beam lights
Headlight flasher
Further information ⇒page 52, “The turn signal and main beam lever ”.Windscreen wiper lever
Intermittent switch, sensitivity setting rain sensor*
Wipers off
Intermittent wipe
Slow wipe
Fast wipe
one time wipe
Automatic wipe/wash
Rear window wiper* Intermittent wipe - every 6 seconds
Automatic wipe/wash
Further information ⇒page 55, “Windshield wiper”.Power windows* Button for the power window in the driver's door
Button for the power window in the front passenger's door
Button for the power window at the rear right door
Button for the power window at the rear left door
Fig. 9 Turn signal and main
beam lever
AAABACAD
Fig. 10 Windscreen wiper
lever
AAA0A1A2A3A4A5A6A7
Fig. 11 Buttons on the
driver's door
AAABACAD
s2ig.book Page 13 Monday, November 10, 2008 11:20 AM
Page 21 of 226
Instruments and Indicator/Warning Lights
20The multi-functional indicator offers you a range of useful information.
Note
In certain national versions the displays appear in the Imperial system of
measures.MemoryThe multi-functional indicator is eq uipped with two automatic memories.
The data of the single-trip memory (memory 1) is shown if a 1 appears in the
display. A 2 shown in the display means that da ta relates to the total distance
memory (memory 2).
Switching of the memory takes place when the button ⇒fig. 21 .
Single-trip memory (memory 1)
The single-trip memory collates the driving information from the moment the igni-
tion is switched on until it is switched off. New data will also flow into the calcula-
tion of the current driving information if the trip is continued within 2 hours after
switching off the ignition. The memory will be is automatically erased, on the other
hand, if the trip is interrupted for more than 2 hours. Total-trip memory (memory 2)
The total distance driven memory gathers
data from any number of individual jour-
neys up to a total of 99 hours and 59 minutes driving or 9.999 kilometres driven.
The memory is deleted when either of these limits is reached and the calculation
starts from anew.
The total-trip memory will not, contrary to the single-trip memory, be deleted after
a period of interruption of driving of 2 hours.
Note
All information in the memory is erased if the battery of the vehicle is
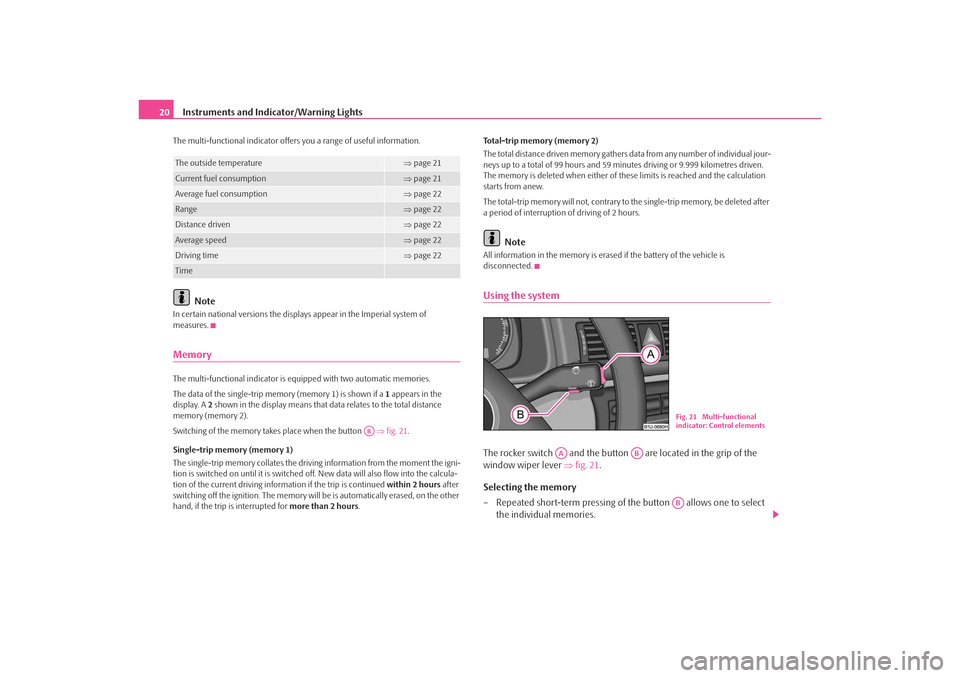
disconnected.Using the systemThe rocker switch and the button are located in the grip of the
window wiper lever ⇒fig. 21 .
Selecting the memory
– Repeated short-term pressing of th e button allows one to select
the individual memories.
The outside temperature
⇒ page 21
Current fuel consumption
⇒page 21
Average fuel consumption
⇒page 22
Range
⇒page 22
Distance driven
⇒page 22
Average speed
⇒page 22
Driving time
⇒page 22
Time
AB
Fig. 21 Multi-functional
indicator: Control elements
AA
AB
AB
s2ig.book Page 20 Monday, November 10, 2008 11:20 AM
Page 36 of 226
Unlocking and locking35
Using the system
Safety
Driving Tips
General Maintenance
Breakdown assistance
Technical Data
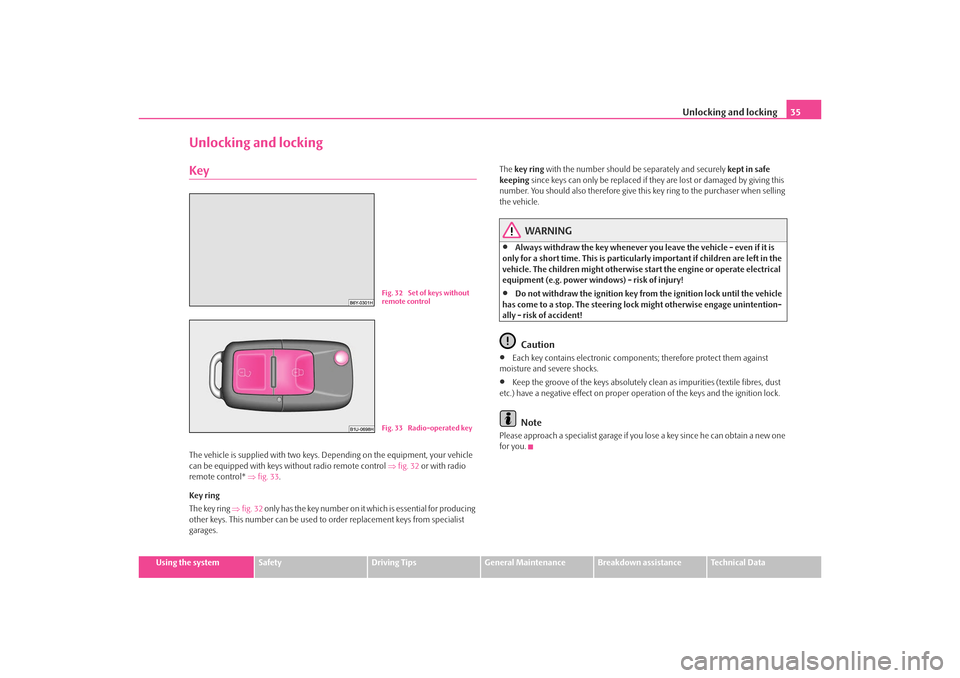
Unlocking and lockingKeyThe vehicle is supplied with two keys. Depending on the equipment, your vehicle
can be equipped with keys without radio remote control ⇒fig. 32 or with radio
remote control* ⇒fig. 33 .
Key ring
The key ring ⇒fig. 32 only has the key number on it which is essential for producing
other keys. This number can be used to order replacement keys from specialist
garages. The
key ring with the number should be separately and securely kept in safe
keeping since keys can only be replaced if th ey are lost or damaged by giving this
number. You should also therefore give this key ring to the purchaser when selling
the vehicle.
WARNING
•
Always withdraw the key whenever you leave the ve hicle - even if it is
only for a short time. This is particularly important if children are left in the
vehicle. The children migh t otherwise start the engine or operate electrical
equipment (e.g. power windows) - risk of injury!
•
Do not withdraw the ignition key from the ignition lock until the vehicle
has come to a stop. The steering lock might otherwise engage unintention-
ally - risk of accident!Caution
•
Each key contains electronic components; therefore protect them against
moisture and severe shocks.
•
Keep the groove of the keys absolutely clean as impurities (textile fibres, dust
etc.) have a negative effect on proper op eration of the keys and the ignition lock.Note
Please approach a specialist garage if you lose a key since he can obtain a new one
for you.
Fig. 32 Set of keys without
remote controlFig. 33 Radio-operated key
s2ig.book Page 35 Monday, November 10, 2008 11:20 AM
Page 39 of 226
Unlocking and locking
38Central locking system*DescriptionUnlocking or locking the vehicle causes all doors to be unlocked or locked at the
same time by the central locking system. The boot lid is unlocked when opening. It
can be opened by pressing the hand grip above the licence plate ⇒page 41, fig. 39 .
Operation of the central locking system is possible:•
from the outside using the vehicle key ⇒page 39,
•
using the button for the central locking system ⇒page 40,
•
by using the remote control ⇒page 42.
•
with the securing knobs in the doors ⇒page 40, fig. 38 - only for vehicles which
are not fitted with electrically operated power windows (only for locking).
Warning light and securing knobs in the doors
All the securing knob s move upwards when unlocking.
The driver door must be closed when locking. Other doors can also be closed after
locking.
All the securing knobs move downwards when locking. If this is not the case, the
relevant door must be opened once again and properly closed.
The warning light flashes in the driver door, next to the securing knob, to confirm
that the vehicle has been correctly locked. The warning light will not flash if the safe
securing system is deactivated ⇒page 38.
This is not the case, however, for vehicles with an anti-theft alarm system* since the
indicator light is showing that the system is active.
Convenience operation of windows
One can open and close the electrically powered windows when unlocking and
locking the vehicle ⇒page 45, “Window convenience operation”.
Opening a single door*
This function allows one to just unlock the driver's door. The other doors remain
locked and are only unlocked when the command is repeated. If you wish, you can have a specialist garage
activate the function of the single door
opening mode.
WARNING
Locking the doors prevents involuntary opening in an exceptional situation
(an accident). Locked doors prevent unwanted entry into the vehicle from
outside, for example at road crossings. Locked doors do, however, make it
more difficult for rescuers to get into the vehicle in an emergency - danger
to life!
Note
•
In the event of an accident in which the airbags are deployed, the locked doors
are automatically unlocked in order to enable rescuers to gain access to the vehicle.
•
Only the front doors can be unlocked and locked using the key if the central
locking system fails. You can lock or unlo ck manually the other doors and the boot
lid.
•
Emergency locking of the door ⇒page 40.
•
After locking the vehicle via the central locking system, optically check if all the
doors have been locked - posi tion of the securing knobs.
Safe securingThe central locking system is equipped with a safe securing system. Locking the
vehicle from the outside causes the door lock s to be automatically blocked. It is not
possible to open the doors with the door ha ndle either from the inside or from the
outside. This acts as an effective deterrent for attempts to break into your vehicle.
You can deactivate the safe securing system. This is done by locking the vehicle with
the key or radio-operated key twice within 2 seconds.
The warning light in the driver door will not flash if the safe securing system is deac-
tivated.
This is not the case, however, for vehicles with an anti-theft alarm system* since the
indicator light is showing that the system is active.
s2ig.book Page 38 Monday, November 10, 2008 11:20 AM
Page 40 of 226
Unlocking and locking39
Using the system
Safety
Driving Tips
General Maintenance
Breakdown assistance
Technical Data
The safe securing system is again activa
ted the next time the vehicle is unlocked
and locked again.
The doors can be opened from the inside if the vehicle is locked and the safe
securing system is deactivated:
•
The door is unlocked by actuating the door-opening lever.
•
The door opens upon actuating the door-opening lever again.
WARNING
If the vehicle is locked from the outside and the safe securing system is acti-
vated, there must not be any person and animals in the vehicle as it is then
not possible to open either a door or a window from the inside. The locked
doors make it more difficult for rescuers to get into the vehicle in an emer-
gency - hazard!
Note
The anti-theft alarm system* is also activated with the deactivated safe securing
system when locking the vehicle. The interior monitor* is however not activated.Unlocking the vehicle using the key
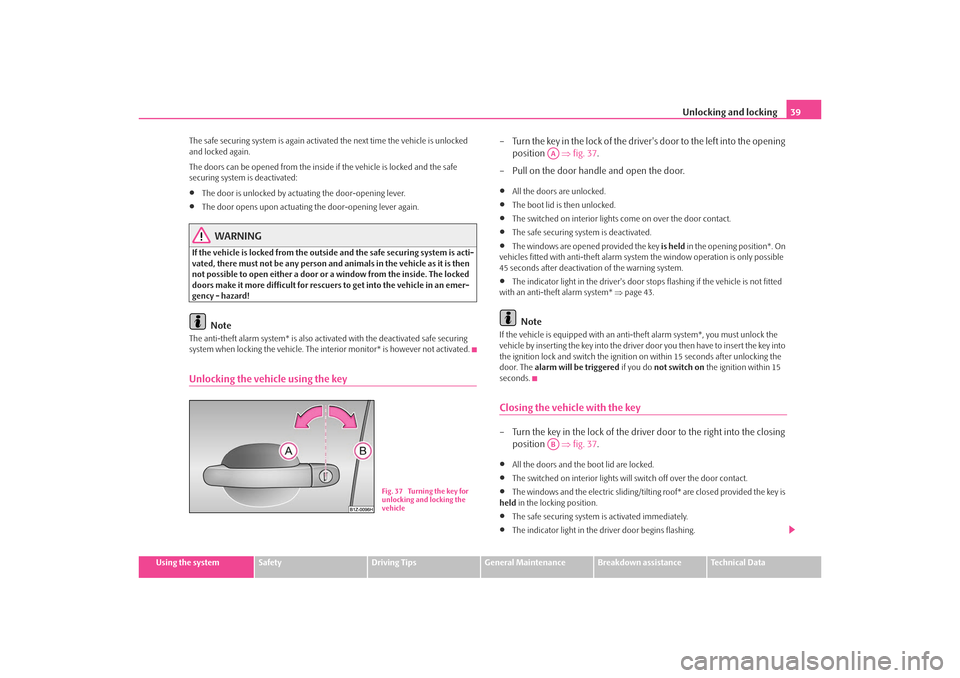
– Turn the key in the lock of the driver 's door to the left into the opening
position ⇒fig. 37 .
– Pull on the door handle and open the door.•
All the doors are unlocked.
•
The boot lid is then unlocked.
•
The switched on interior lights come on over the door contact.
•
The safe securing system is deactivated.
•
The windows are opened provided the key is held in the opening position*. On
vehicles fitted with anti-the ft alarm system the window operation is only possible
45 seconds after deactivation of the warning system.
•
The indicator light in the driver's door stops flashing if the vehicle is not fitted
with an anti-theft alarm system* ⇒page 43.Note
If the vehicle is equipped with an anti-theft alarm system*, you must unlock the
vehicle by inserting the key into the driver door you then have to insert the key into
the ignition lock and switch the ignition on within 15 seconds after unlocking the
door. The alarm will be triggered if you do not switch on the ignition within 15
seconds.Closing the vehicle with the key– Turn the key in the lock of the driver door to the right into the closing
position ⇒fig. 37 .•
All the doors and the boot lid are locked.
•
The switched on interior lights will switch off over the door contact.
•
The windows and the electric sliding/tiltin g roof* are closed provided the key is
held in the locking position.
•
The safe securing system is activated immediately.
•
The indicator light in the driver door begins flashing.
Fig. 37 Turning the key for
unlocking and locking the
vehicle
AAAB
s2ig.book Page 39 Monday, November 10, 2008 11:20 AM
Page 42 of 226
Unlocking and locking41
Using the system
Safety
Driving Tips
General Maintenance
Breakdown assistance
Technical Data
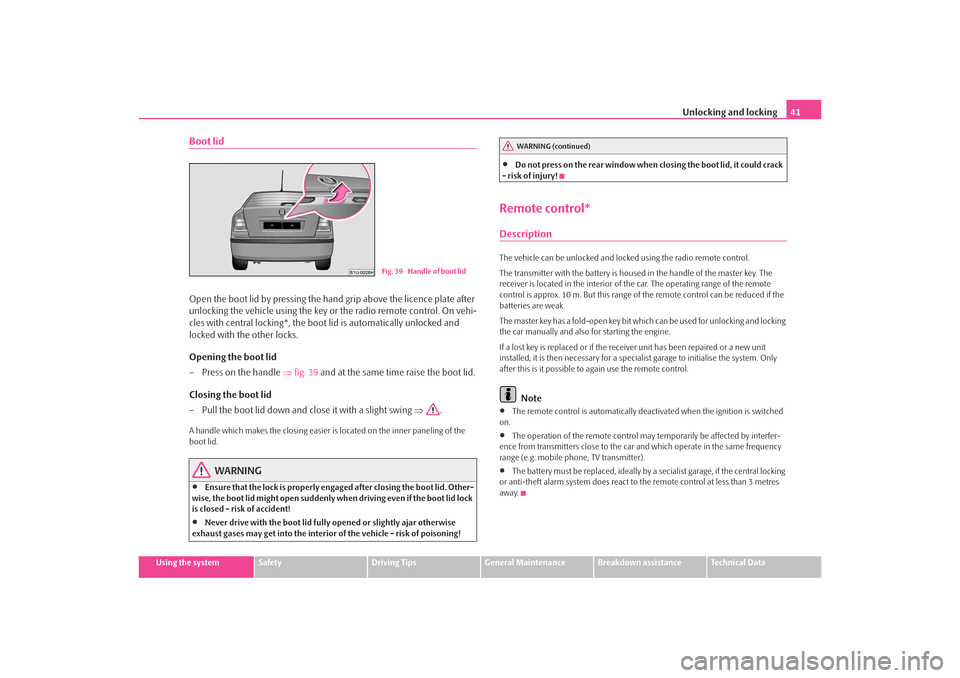
Boot lidOpen the boot lid by pressing the ha nd grip above the licence plate after
unlocking the vehicle using the key or the radio remote control. On vehi-
cles with central locking*, the boot lid is automatically unlocked and
locked with the other locks.
Opening the boot lid
– Press on the handle ⇒fig. 39 and at the same time raise the boot lid.
Closing the boot lid
– Pull the boot lid down and close it with a slight swing ⇒.A handle which makes the clos ing easier is located on the inner paneling of the
boot lid.
WARNING
•
Ensure that the lock is properly enga ged after closing the boot lid. Other-
wise, the boot lid might open suddenly wh en driving even if the boot lid lock
is closed - risk of accident!
•
Never drive with the boot lid fully opened or slightly ajar otherwise
exhaust gases may get into the interior of the vehicle - risk of poisoning!
•
Do not press on the rear window when closing the boot lid, it could crack
- risk of injury!
Remote control*DescriptionThe vehicle can be unlocked and locked using the radio remote control.
The transmitter with the battery is housed in the handle of the master key. The
receiver is located in the interior of th e car. The operating range of the remote
control is approx. 10 m. But this range of the remote control can be reduced if the
batteries are weak.
The master key has a fold-open key bit whic h can be used for unlocking and locking
the car manually and also for starting the engine.
If a lost key is replaced or if the receiv er unit has been repaired or a new unit
installed, it is then necessary for a specialist garage to initialise the system. Only
after this is it possible to again use the remote control.
Note
•
The remote control is automatically deac tivated when the ignition is switched
on.
•
The operation of the remote control may temporarily be affected by interfer-
ence from transmitters close to the car and which operate in the same frequency
range (e.g. mobile phone, TV transmitter).
•
The battery must be replaced, ideally by a secialist garage, if the central locking
or anti-theft alarm system does react to the remote control at less than 3 metres
away.
Fig. 39 Handle of boot lid
WARNING (continued)
s2ig.book Page 41 Monday, November 10, 2008 11:20 AM
Page 43 of 226

Unlocking and locking
42Unlocking and locking carUnlocking the vehicle
– Press button for about 1 second.
Locking the vehicle
– Press button for about 1 second.
Deactivating safe securing system
– Press button twice in 2 seconds. Further information ⇒page 38.
Folding out of the key
– Press button .
Folding up of the key
– Press button and collapse the key bit in the housing.The turn signal lights flash twice as confirmation that the vehicle has been
unlocked. The vehicle will lock again auto matically if you unlock the vehicle using
button but do not open a door or the boot lid within the next 30 seconds. This
function is intended to prevent the car being unlocked unintentionally. The safe securing system along with the anti-theft alarm system are, however,
deactivated during these 30 seconds.
In addition, when the car is
unlocked, the power seats and exterior mirrors* move
into the position assigned to this key. The stored setting of driver seat and exterior
mirrors is retrieved.
The turn signal lights flash once to co nfirm that the vehicle has been correctly
locked. If the turn signal lights do not fl ash, check the doors, bonnet and boot lid
again to ensure that they are closed. If th e doors, the bonnet or the boot lid remain
open when the anti-theft alarm system is activated, the turn signal lights do not
flash until after they have been closed.
When the vehicle is unlocked or locked, the interior lights in the door contact are
automatically switched on or off.
WARNING
If the vehicle is locked from the outsid e and the safe securing system is acti-
vated, there must not be any person in the vehicle as it is then not possible
to open either a door or a window from the inside. The locked doors make it
more difficult for rescuers to get into the vehicle in an emergency - hazard!
Note
•
Operate the radio remote control only when the doors and boot lid are closed
and you have visual co ntact with the vehicle.
•
Once in the car, you must not press the lock button
of the radio remote
control before inserting the key into the ignition lock in order to avoid the car being
inadvertently locked and, in addition, the anti-theft alarm system* being switched
on. Should this happen, press the unlock button
of the radio remote control.
Synchonisation of the remote controlIf the vehicle cannot be unlocked by actuatin g the remote control system then it is
possible that the code in the key and the control unit in the vehicle are no longer
synchronised. This can occur when the buttons on the radio-operated key are actu-
Fig. 40 Folding key with
radio remote control
A1A2A2A3A3
A1
s2ig.book Page 42 Monday, November 10, 2008 11:20 AM
Page 44 of 226
Unlocking and locking43
Using the system
Safety
Driving Tips
General Maintenance
Breakdown assistance
Technical Data
ated a number of times outside of the operative range of the equipment or the
battery on the remote control was replaced.
This means it is necessary to synchronise the code as follows:
•
Press any button on the remote control.
•
pressing of the button means that the door will unlock with the key within 1
minute.
Anti-theft alarm system*DescriptionThe anti-theft alarm system increases the le vel of protection against people seeking
to break into the vehicle. The system tri ggers audible and visual warning signals if
an attempt is made to break into the vehicle.
Optical and acoustic signals alert if an al arm has been triggered (the turn signal
lights flash and the signal horn honks).
How is the alarm system activated?
The anti-theft alarm system is activated automatically when the vehicle is locked
with the key on the closed driver's door or by using the radio remote control. It is
activated 30 seconds after closing the door.
How is the alarm system deactivated?
The anti-theft alarm system is deactivated if the vehicle is unlocked by only using
the radio remote control. The vehicle is au tomatically locked again if the vehicle is
not opened within 30 seconds after reac tivating the anti-theft alarm system.
Once you unlock the vehicle by inserting the key into the driver door you then have
to insert the key into the ignition lock an d switch the ignition on within 15 seconds
after unlocking the door in order to deac tivate the anti-theft alarm system. The
alarm will be triggered if you do not switch on the ignition within 15 seconds.
When is the alarm triggered?
The following security areas of the locked vehicle are monitored:•
Bonnet,
•
Boot lid,
•
Doors,
•
Ignition lock,
•
Vehicle interior
4),
•
A drop in voltage of the on-board power supply.
An alarm is immediately triggered if either of the two battery terminals is discon-
nected while the anti-theft alarm system is activated.
Deactivation of interior monitor
The process of switching off and switching on the interior monitoring system is the
same as for switching off and switching on the safe securing system ⇒page 38.
This function makes it possible for example to leave animals in the vehicle.
How is the alarm switched off?
You switch the alarm off if you unlock the car with the radio remote control in the
key or if you switch the ignition on.Note
•
The working life of the alarm siren is 5 years. More detailed information is avail-
able by a specialist garage.
•
Before leaving the car, check that all the doors, windows and the electric
sliding/tilting roof* are properly closed in order to ensure that the anti-theft alarm
system is fully operational.
•
Coding of the radio remote control and the receptor part precludes the use of
the radio remote control from other vehicles.
4)The alarm will be triggered through movement of occupants within the interior of the vehicle
or an attempt to steal the radio. The rear part of the interior of the vehicle is not fully moni-
tored under certain circumstances.
s2ig.book Page 43 Monday, November 10, 2008 11:20 AM