interior lights SKODA OCTAVIA TOUR 2009 1.G / (1U) Owner's Manual
[x] Cancel search | Manufacturer: SKODA, Model Year: 2009, Model line: OCTAVIA TOUR, Model: SKODA OCTAVIA TOUR 2009 1.G / (1U)Pages: 226, PDF Size: 13.11 MB
Page 4 of 226
Contents3
ContentsLayout of this Owner's Manual
(explanations)
. . . . . . . . . . . . . . . . . . . . . . . . . .
Using the system
. . . . . . . . . . . . . . . . . . . . . .
Cockpit
. . . . . . . . . . . . . . . . . . . . . . . . . . . . . . . . . . . . . . . .
Overview . . . . . . . . . . . . . . . . . . . . . . . . . . . . . . . . . . . .
The brief instruction
. . . . . . . . . . . . . . . . . . . . . . . . . .
Basic functions and important information . . . . .
Instruments and Indicator/Warning Lights
. . .
General view of the instrument cluster . . . . . . . . .
Engine revolutions counter . . . . . . . . . . . . . . . . . . . .
Coolant temperature gauge . . . . . . . . . . . . . . . . . . .
Fuel gauge . . . . . . . . . . . . . . . . . . . . . . . . . . . . . . . . . . .
Speedometer . . . . . . . . . . . . . . . . . . . . . . . . . . . . . . . .
Counter for distance driven . . . . . . . . . . . . . . . . . . .
Service Interval Display . . . . . . . . . . . . . . . . . . . . . . .
Digital clock . . . . . . . . . . . . . . . . . . . . . . . . . . . . . . . . . .
Multi-functional indicator (onboard computer)*
Information display* . . . . . . . . . . . . . . . . . . . . . . . . . .
Auto Check Control . . . . . . . . . . . . . . . . . . . . . . . . . . .
Warning lights . . . . . . . . . . . . . . . . . . . . . . . . . . . . . . . .
Unlocking and locking
. . . . . . . . . . . . . . . . . . . . . . . .
Key . . . . . . . . . . . . . . . . . . . . . . . . . . . . . . . . . . . . . . . . . .
Changing the battery of the radio remote control
Electronic immobiliser . . . . . . . . . . . . . . . . . . . . . . . .
Locking . . . . . . . . . . . . . . . . . . . . . . . . . . . . . . . . . . . . . .
Child safety lock . . . . . . . . . . . . . . . . . . . . . . . . . . . . . .
Central locking system* . . . . . . . . . . . . . . . . . . . . . . .
Remote control* . . . . . . . . . . . . . . . . . . . . . . . . . . . . . .
Synchonisation of the remote control . . . . . . . . . .
Anti-theft alarm system* . . . . . . . . . . . . . . . . . . . . . . Power windows* . . . . . . . . . . . . . . . . . . . . . . . . . . . . .
Electric sliding/tilting roof* . . . . . . . . . . . . . . . . . . . .
Lights and Visibility
. . . . . . . . . . . . . . . . . . . . . . . . . . .
Lights . . . . . . . . . . . . . . . . . . . . . . . . . . . . . . . . . . . . . . . .
Interior lighting . . . . . . . . . . . . . . . . . . . . . . . . . . . . . . .
Visibility . . . . . . . . . . . . . . . . . . . . . . . . . . . . . . . . . . . . .
Windshield wiper and wash system . . . . . . . . . . . .
Rear-view mirror . . . . . . . . . . . . . . . . . . . . . . . . . . . . .
Seats and Storage
. . . . . . . . . . . . . . . . . . . . . . . . . . . . .
Front seats . . . . . . . . . . . . . . . . . . . . . . . . . . . . . . . . . . .
Adjusting front seats electrically* . . . . . . . . . . . . . .
Head restraints . . . . . . . . . . . . . . . . . . . . . . . . . . . . . . .
Rear seats . . . . . . . . . . . . . . . . . . . . . . . . . . . . . . . . . . . .
Pedals . . . . . . . . . . . . . . . . . . . . . . . . . . . . . . . . . . . . . . .
luggage compartment . . . . . . . . . . . . . . . . . . . . . . . .
Net partition (Combi)* . . . . . . . . . . . . . . . . . . . . . . . .
The roof rack* . . . . . . . . . . . . . . . . . . . . . . . . . . . . . . . .
Note holder . . . . . . . . . . . . . . . . . . . . . . . . . . . . . . . . . .
Ashtray* . . . . . . . . . . . . . . . . . . . . . . . . . . . . . . . . . . . . .
Cigarette lighter*, power sockets . . . . . . . . . . . . . . .
Storage compartments . . . . . . . . . . . . . . . . . . . . . . . .
Heating and air conditioning system
. . . . . . . . .
Air outlet vents . . . . . . . . . . . . . . . . . . . . . . . . . . . . . . .
Heating . . . . . . . . . . . . . . . . . . . . . . . . . . . . . . . . . . . . . .
Air conditioning system* . . . . . . . . . . . . . . . . . . . . . .
Climatronic* (automatic air conditioning) . . . . . .
Starting-off and Driving
. . . . . . . . . . . . . . . . . . . . . . .
Setting steering wheel position . . . . . . . . . . . . . . . .
Ignition lock . . . . . . . . . . . . . . . . . . . . . . . . . . . . . . . . . .
Starting the engine . . . . . . . . . . . . . . . . . . . . . . . . . . .
Switching off the engine . . . . . . . . . . . . . . . . . . . . . . .
Shifting . . . . . . . . . . . . . . . . . . . . . . . . . . . . . . . . . . . . . .
Handbrake . . . . . . . . . . . . . . . . . . . . . . . . . . . . . . . . . . . Rear parking aid* . . . . . . . . . . . . . . . . . . . . . . . . . . . . .
Cruise control system (CCS)* . . . . . . . . . . . . . . . . . .
Communication
. . . . . . . . . . . . . . . . . . . . . . . . . . . . . .
Multifunction steering wheel* . . . . . . . . . . . . . . . . .
Mobile phone, handsfree-system* . . . . . . . . . . . . .
Mobile phones and two-way radio systems . . . . .
Safety
. . . . . . . . . . . . . . . . . . . . . . . . . . . . . . . . . . . . . .
Passive Safety
. . . . . . . . . . . . . . . . . . . . . . . . . . . . . . . . .
Basic information . . . . . . . . . . . . . . . . . . . . . . . . . . . .
Correct seated position . . . . . . . . . . . . . . . . . . . . . . .
Seat belts
. . . . . . . . . . . . . . . . . . . . . . . . . . . . . . . . . . . . . .
Why seat belts? . . . . . . . . . . . . . . . . . . . . . . . . . . . . . .
The physical principle of a frontal collision . . . . .
Important safety information regarding the use of
seat belts . . . . . . . . . . . . . . . . . . . . . . . . . . . . . . . . . . . .
How are seat belts correctly fastened? . . . . . . . . .
Belt tensioners . . . . . . . . . . . . . . . . . . . . . . . . . . . . . . .
Airbag system
. . . . . . . . . . . . . . . . . . . . . . . . . . . . . . . . .
Description of the airbag system . . . . . . . . . . . . . . .
Front airbag . . . . . . . . . . . . . . . . . . . . . . . . . . . . . . . . . .
Side airbags* . . . . . . . . . . . . . . . . . . . . . . . . . . . . . . . . .
Deactivating an airbag . . . . . . . . . . . . . . . . . . . . . . . .
Transporting children safely
. . . . . . . . . . . . . . . . . .
What you should know about transporting
children! . . . . . . . . . . . . . . . . . . . . . . . . . . . . . . . . . . . . .
Child seat . . . . . . . . . . . . . . . . . . . . . . . . . . . . . . . . . . . .
Attaching a child seat using the “ISOFIX” system
6
7
9
9
10
10
16
16
16
16
17
17
18
18
19
19
23
25
27
35
35
36
36
37
37
38
41
42
43 44
46
49
49
53
54
55
58
60
60
61
64
65
67
68
73
75
77
77
78
79
83
83
83
85
89
94
94
95
95
97
97
9898
99
102
102
103
104
105
105
105
106
110
110
111
111
112
115
117
117
118
121
122
125
125
128
131
s2ig.book Page 3 Monday, November 10, 2008 11:20 AM
Page 31 of 226
Instruments and Indicator/Warning Lights
30Glow plug system
(diesel engine)
The warning light
lights up for a cold engine when switching on the ignition
(pre-heat position) 2 ⇒ page 95. Start the engine just as soon as the indicator light
goes out.
The glow plug indicator light will come on for about 1 second if the engine is at a
normal operating temperature or if the outside temperature is above +5°C. This
means that you can start the engine right away.
There is a fault in the glow plug system if the warning light
does not come on
at all or lights up continuously . Contact a specialist garage as soon as possible to
obtain assistance.
If the warning light
begins to flash while driving, a fault exists in the engine
control. The engine management system selects an emergency programme which
enables you to drive to the nearest specialist garage by adopting a gentle style of
driving.
The following text will be displayed in the information display*:
ENGINE WORKSHOP!
Airbag system
Monitoring the airbag system
The warning light
comes on for a few seconds when the ignition is switched on.
There is a fault in the system if the warn ing light does not go out or comes on or
flashes while driving ⇒. This also applies if the warning light does not come on
when the ignition is switched on.
The following text will be displayed in the information display*:
AIRBAG FAULT
The functionality of the airbag system is also monitored electronically, when one
airbag has been switched off
Front airbag or side pass enger airbag deactivated us ing the diagnostic equip-
ment:
•
The warning light
lights up for 3 seconds after switching on the ignition and
then flashes again for 12 seconds.
Front passenger airbags switched off using the switch for front passenger
airbags* in storage compartment on the front passenger side:
•
The warning light
comes on for 3 seconds after the ignition has been
switched on.
•
The deactivation of the airb ag is indicated by the lighting up of the indicator
light
in the interior lighting ⇒page 123.
WARNING
Have the airbag system ch ecked immediately by a specialist garage if a fault
exists. Otherwise, there is a risk of th e airbag not being activated in the event
of an accident.
Note
Further information about switching off airbags ⇒page 122.Coolant temperature/ Coolant quantity
The warning light comes on for a few seconds
2) when the ignition is switched
on.
The coolant temperature is too high or the coolant level too low if the warning light
does not go out or flashes while driving.
3 peeps sound as an additional warning signal.
In this case stop and switch the engine off and check the coolant level; top up the
coolant as necessary.
Do not continue your journey if for some reason it is not possible under the
conditions prevailing to top up with coolant. Keep the engine switched off and 2)The warning light on vehicles fitted with information display does not come on after
switching the ignition on, but only if the coola nt temperature is too high or the coolant level
is too low.
s2ig.book Page 30 Monday, November 10, 2008 11:20 AM
Page 40 of 226
Unlocking and locking39
Using the system
Safety
Driving Tips
General Maintenance
Breakdown assistance
Technical Data
The safe securing system is again activa
ted the next time the vehicle is unlocked
and locked again.
The doors can be opened from the inside if the vehicle is locked and the safe
securing system is deactivated:
•
The door is unlocked by actuating the door-opening lever.
•
The door opens upon actuating the door-opening lever again.
WARNING
If the vehicle is locked from the outside and the safe securing system is acti-
vated, there must not be any person and animals in the vehicle as it is then
not possible to open either a door or a window from the inside. The locked
doors make it more difficult for rescuers to get into the vehicle in an emer-
gency - hazard!
Note
The anti-theft alarm system* is also activated with the deactivated safe securing
system when locking the vehicle. The interior monitor* is however not activated.Unlocking the vehicle using the key
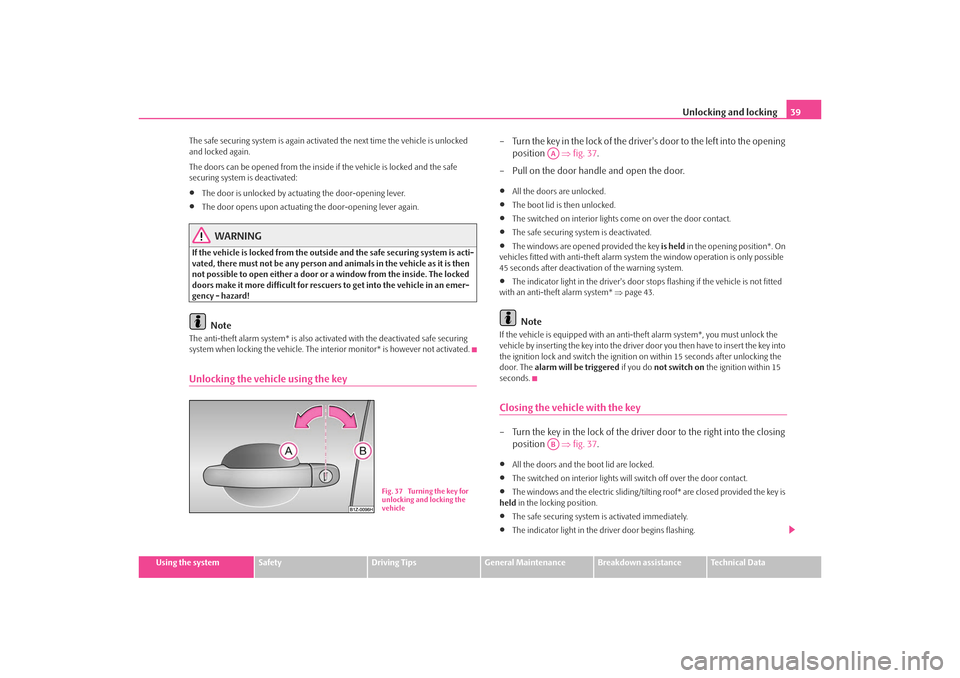
– Turn the key in the lock of the driver 's door to the left into the opening
position ⇒fig. 37 .
– Pull on the door handle and open the door.•
All the doors are unlocked.
•
The boot lid is then unlocked.
•
The switched on interior lights come on over the door contact.
•
The safe securing system is deactivated.
•
The windows are opened provided the key is held in the opening position*. On
vehicles fitted with anti-the ft alarm system the window operation is only possible
45 seconds after deactivation of the warning system.
•
The indicator light in the driver's door stops flashing if the vehicle is not fitted
with an anti-theft alarm system* ⇒page 43.Note
If the vehicle is equipped with an anti-theft alarm system*, you must unlock the
vehicle by inserting the key into the driver door you then have to insert the key into
the ignition lock and switch the ignition on within 15 seconds after unlocking the
door. The alarm will be triggered if you do not switch on the ignition within 15
seconds.Closing the vehicle with the key– Turn the key in the lock of the driver door to the right into the closing
position ⇒fig. 37 .•
All the doors and the boot lid are locked.
•
The switched on interior lights will switch off over the door contact.
•
The windows and the electric sliding/tiltin g roof* are closed provided the key is
held in the locking position.
•
The safe securing system is activated immediately.
•
The indicator light in the driver door begins flashing.
Fig. 37 Turning the key for
unlocking and locking the
vehicle
AAAB
s2ig.book Page 39 Monday, November 10, 2008 11:20 AM
Page 43 of 226

Unlocking and locking
42Unlocking and locking carUnlocking the vehicle
– Press button for about 1 second.
Locking the vehicle
– Press button for about 1 second.
Deactivating safe securing system
– Press button twice in 2 seconds. Further information ⇒page 38.
Folding out of the key
– Press button .
Folding up of the key
– Press button and collapse the key bit in the housing.The turn signal lights flash twice as confirmation that the vehicle has been
unlocked. The vehicle will lock again auto matically if you unlock the vehicle using
button but do not open a door or the boot lid within the next 30 seconds. This
function is intended to prevent the car being unlocked unintentionally. The safe securing system along with the anti-theft alarm system are, however,
deactivated during these 30 seconds.
In addition, when the car is
unlocked, the power seats and exterior mirrors* move
into the position assigned to this key. The stored setting of driver seat and exterior
mirrors is retrieved.
The turn signal lights flash once to co nfirm that the vehicle has been correctly
locked. If the turn signal lights do not fl ash, check the doors, bonnet and boot lid
again to ensure that they are closed. If th e doors, the bonnet or the boot lid remain
open when the anti-theft alarm system is activated, the turn signal lights do not
flash until after they have been closed.
When the vehicle is unlocked or locked, the interior lights in the door contact are
automatically switched on or off.
WARNING
If the vehicle is locked from the outsid e and the safe securing system is acti-
vated, there must not be any person in the vehicle as it is then not possible
to open either a door or a window from the inside. The locked doors make it
more difficult for rescuers to get into the vehicle in an emergency - hazard!
Note
•
Operate the radio remote control only when the doors and boot lid are closed
and you have visual co ntact with the vehicle.
•
Once in the car, you must not press the lock button
of the radio remote
control before inserting the key into the ignition lock in order to avoid the car being
inadvertently locked and, in addition, the anti-theft alarm system* being switched
on. Should this happen, press the unlock button
of the radio remote control.
Synchonisation of the remote controlIf the vehicle cannot be unlocked by actuatin g the remote control system then it is
possible that the code in the key and the control unit in the vehicle are no longer
synchronised. This can occur when the buttons on the radio-operated key are actu-
Fig. 40 Folding key with
radio remote control
A1A2A2A3A3
A1
s2ig.book Page 42 Monday, November 10, 2008 11:20 AM
Page 44 of 226
Unlocking and locking43
Using the system
Safety
Driving Tips
General Maintenance
Breakdown assistance
Technical Data
ated a number of times outside of the operative range of the equipment or the
battery on the remote control was replaced.
This means it is necessary to synchronise the code as follows:
•
Press any button on the remote control.
•
pressing of the button means that the door will unlock with the key within 1
minute.
Anti-theft alarm system*DescriptionThe anti-theft alarm system increases the le vel of protection against people seeking
to break into the vehicle. The system tri ggers audible and visual warning signals if
an attempt is made to break into the vehicle.
Optical and acoustic signals alert if an al arm has been triggered (the turn signal
lights flash and the signal horn honks).
How is the alarm system activated?
The anti-theft alarm system is activated automatically when the vehicle is locked
with the key on the closed driver's door or by using the radio remote control. It is
activated 30 seconds after closing the door.
How is the alarm system deactivated?
The anti-theft alarm system is deactivated if the vehicle is unlocked by only using
the radio remote control. The vehicle is au tomatically locked again if the vehicle is
not opened within 30 seconds after reac tivating the anti-theft alarm system.
Once you unlock the vehicle by inserting the key into the driver door you then have
to insert the key into the ignition lock an d switch the ignition on within 15 seconds
after unlocking the door in order to deac tivate the anti-theft alarm system. The
alarm will be triggered if you do not switch on the ignition within 15 seconds.
When is the alarm triggered?
The following security areas of the locked vehicle are monitored:•
Bonnet,
•
Boot lid,
•
Doors,
•
Ignition lock,
•
Vehicle interior
4),
•
A drop in voltage of the on-board power supply.
An alarm is immediately triggered if either of the two battery terminals is discon-
nected while the anti-theft alarm system is activated.
Deactivation of interior monitor
The process of switching off and switching on the interior monitoring system is the
same as for switching off and switching on the safe securing system ⇒page 38.
This function makes it possible for example to leave animals in the vehicle.
How is the alarm switched off?
You switch the alarm off if you unlock the car with the radio remote control in the
key or if you switch the ignition on.Note
•
The working life of the alarm siren is 5 years. More detailed information is avail-
able by a specialist garage.
•
Before leaving the car, check that all the doors, windows and the electric
sliding/tilting roof* are properly closed in order to ensure that the anti-theft alarm
system is fully operational.
•
Coding of the radio remote control and the receptor part precludes the use of
the radio remote control from other vehicles.
4)The alarm will be triggered through movement of occupants within the interior of the vehicle
or an attempt to steal the radio. The rear part of the interior of the vehicle is not fully moni-
tored under certain circumstances.
s2ig.book Page 43 Monday, November 10, 2008 11:20 AM
Page 50 of 226
Lights and Visibility49
Using the system
Safety
Driving Tips
General Maintenance
Breakdown assistance
Technical Data
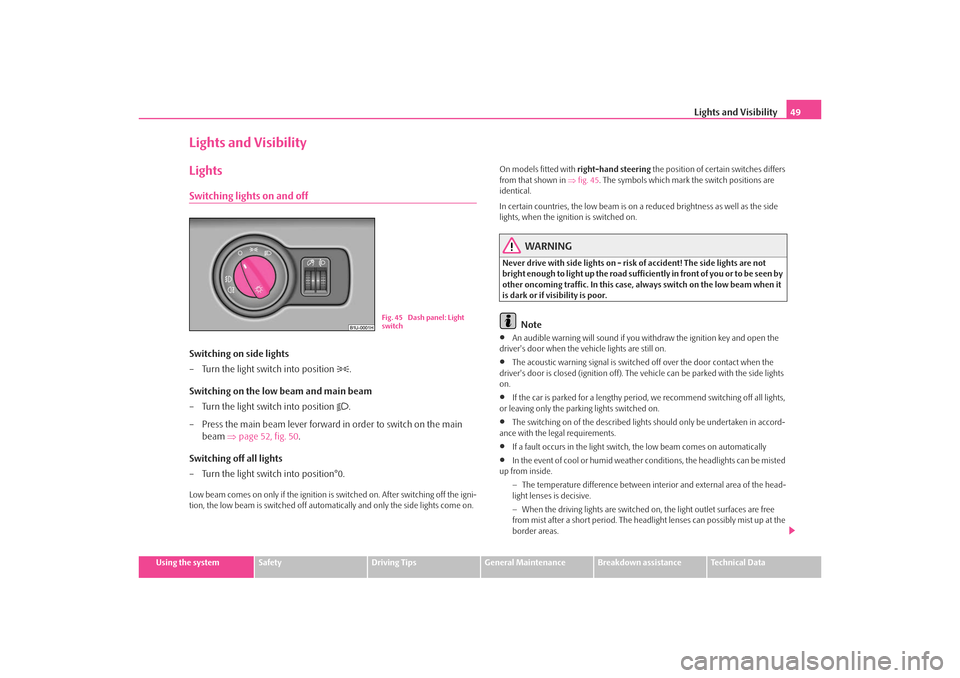
Lights and VisibilityLightsSwitching lights on and offSwitching on side lights
– Turn the light switch into position
.
Switching on the low beam and main beam
– Turn the light switch into position
.
– Press the main beam lever forward in order to switch on the main beam ⇒page 52, fig. 50 .
Switching off all lights
– Turn the light switch into position°0.
Low beam comes on only if the ignition is switched on. After switching off the igni-
tion, the low beam is switched off automatically and only the side lights come on. On models fitted with
right-hand steering the position of certain switches differs
from that shown in ⇒fig. 45 . The symbols which mark the switch positions are
identical.
In certain countries, the low beam is on a reduced brightness as well as the side
lights, when the ignition is switched on.
WARNING
Never drive with side lights on - risk of accident! The side lights are not
bright enough to light up the road suffic iently in front of you or to be seen by
other oncoming traffic. In this case, always switch on the low beam when it
is dark or if visibility is poor.
Note
•
An audible warning will sound if you wi thdraw the ignition key and open the
driver's door when the vehicle lights are still on.
•
The acoustic warning signal is switched off over the door contact when the
driver's door is closed (ignition off). The vehicle can be parked with the side lights
on.
•
If the car is parked for a lengthy period , we recommend switching off all lights,
or leaving only the parking lights switched on.
•
The switching on of the described lights should only be undertaken in accord-
ance with the legal requirements.
•
If a fault occurs in the light switch , the low beam comes on automatically
•
In the event of cool or humid weather co nditions, the headlights can be misted
up from inside.
−The temperature difference between interior and external area of the head-
light lenses is decisive.
− When the driving lights are switched on , the light outlet surfaces are free
from mist after a short period. The headlight lenses can possibly mist up at the
border areas.
Fig. 45 Dash panel: Light
switch
s2ig.book Page 49 Monday, November 10, 2008 11:20 AM
Page 54 of 226

Lights and Visibility53
Using the system
Safety
Driving Tips
General Maintenance
Breakdown assistance
Technical Data
Selecting function
– Switch off the light.
– Switch off the ignition.
– Operate the headlight flasher once.
– Open and close the driver door.If the door remains open, the ligh t remains on for about 3 minutes.
If the door remains closed, the li ght stays on for about 30 seconds.Interior lightingFront interior lighting and lighting of storage compartment on front passenger sideSwitching the interior light on
– Press the switch to the left, the symbol
⇒ fig. 51 appears.
Switching the interior light off
– Press the switch into the middle position O. – On the version without reading lights press the switch to the right,
the symbol O appears.
Door contact switching mechanism (on the front and rear* door)
– Press the switch to the right, the symbol
appears.
– On the version without reading lights press the switch into the middle position
.
Reading lights*
– Press on one of the switches in order to switch the right or left reading light on or off.
Lighting of storage compartment on the front passenger side*
– When opening the flap of the storage compartment on the front passenger side the lighting in the storage compartment comes on.
– The light switches on automatically when the parking light is switched on and goes out when the flap is closed.
On vehicles with central locking, the interior light is switched on for about 20
seconds when the vehicle is unlocked, when a door is opened or after withdrawing
the ignition key (if the switch of the relevant interior light is in the door contact posi-
tion).
The interior lighting goes off after about 60 minutes when a door has been left open
in order to avoid discharging the battery of the vehicle.
Note
We recommend having these bulbs re placed by a specialist garage.
Fig. 51 Detail of the head-
liner: front interior lighting
AAAA
AA
AA
AA
AB
s2ig.book Page 53 Monday, November 10, 2008 11:20 AM
Page 55 of 226
Lights and Visibility
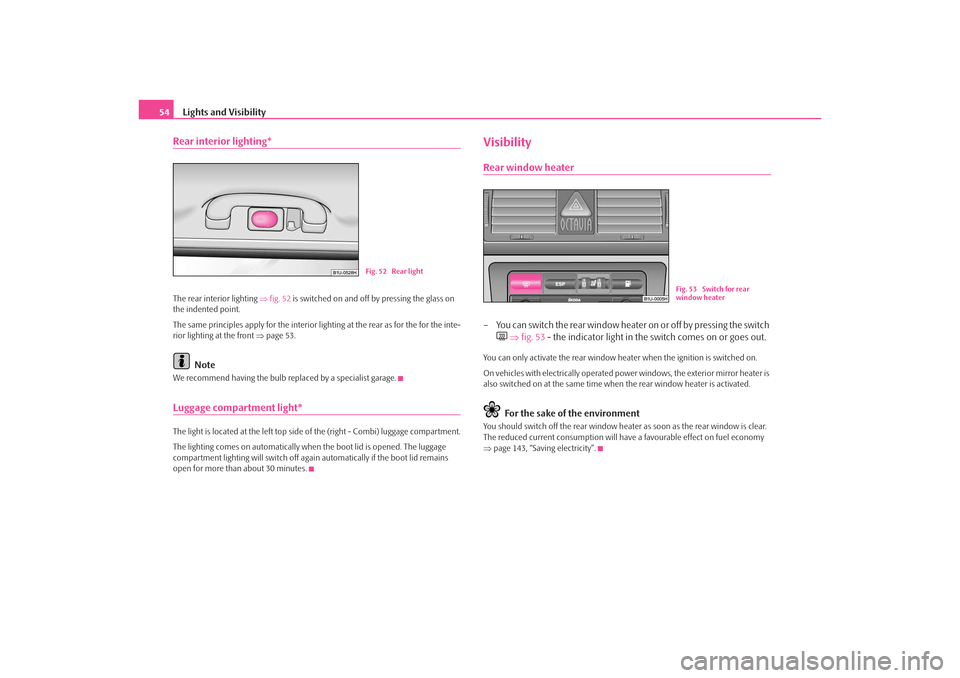
54Rear interior lighting*The rear interior lighting ⇒fig. 52 is switched on and off by pressing the glass on
the indented point.
The same principles apply for the interior lighting at the rear as for the for the inte-
rior lighting at the front ⇒page 53.
Note
We recommend having the bulb re placed by a specialist garage.Luggage compartment light*The light is located at the left top side of the (right - Combi) luggage compartment.
The lighting comes on automatically when the boot lid is opened. The luggage
compartment lighting will switch off agai n automatically if the boot lid remains
open for more than about 30 minutes.
VisibilityRear window heater– You can switch the rear window heater on or off by pressing the switch
⇒ fig. 53 - the indicator light in the switch comes on or goes out.
You can only activate the rear window he ater when the ignition is switched on.
On vehicles with electrically operated power windows, the exterior mirror heater is
also switched on at the same time when the rear window heater is activated.
For the sake of the environment
You should switch off the rear window heater as soon as the rear window is clear.
The reduced current consumption will have a favourable effect on fuel economy
⇒ page 143, “Saving electricity”.
Fig. 52 Rear light
Fig. 53 Switch for rear
window heater
s2ig.book Page 54 Monday, November 10, 2008 11:20 AM
Page 56 of 226
Lights and Visibility55
Using the system
Safety
Driving Tips
General Maintenance
Breakdown assistance
Technical Data
Sun visorsThe sun visors can be pulled out of the fixtures and swiveled towards the side
window. The visor above the interior mirror* can only be folded down. ⇒fig. 54 .
Sun visors with lighting*
After folding down the visor, the lighting for the vanity mirror is switched on.
Windshield wiper and wash systemWindshield wiper
You can operate the windscreen wipers and automatic wipe/wash
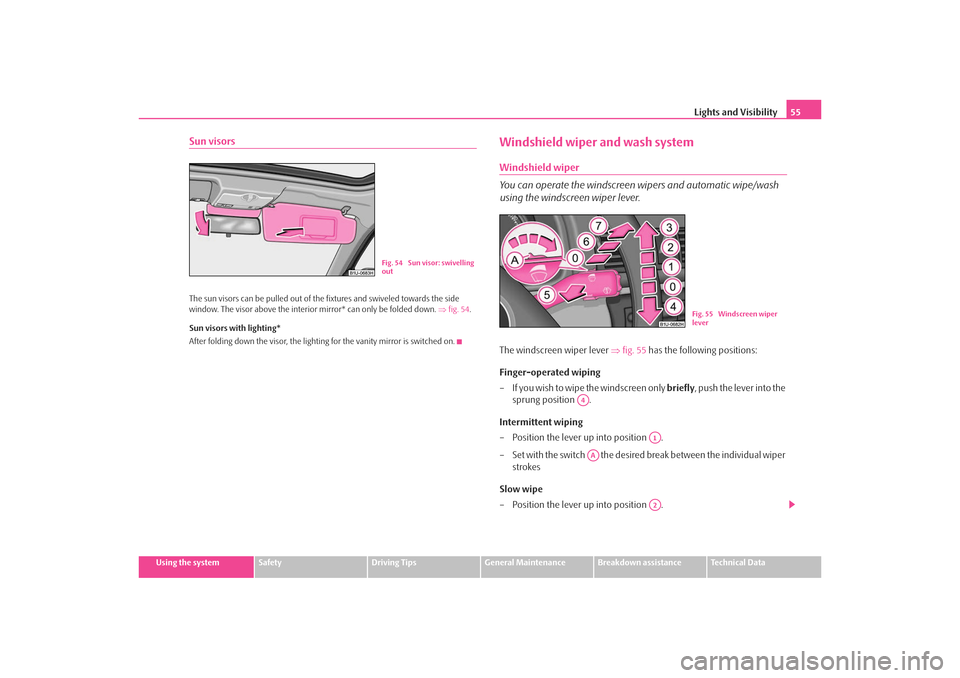
using the windscreen wiper lever.The windscreen wiper lever ⇒fig. 55 has the following positions:
Finger-operated wiping
– If you wish to wipe the windscreen only briefly, push the lever into the
sprung position .
Intermittent wiping
– Position the lever up into position .
– Set with the switch the desired break between the individual wiper strokes
Slow wipe
– Position the lever up into position .
Fig. 54 Sun visor: swivelling
out
Fig. 55 Windscreen wiper
lever
A4
A1
AA
A2
s2ig.book Page 55 Monday, November 10, 2008 11:20 AM
Page 59 of 226
Lights and Visibility
58
Taking off the wiper blade
– Fold the window wiper arm away ⇒page 57, fig. 57 .
– Hold the window wiper arm at the top end with one hand.
– Take hold of the wiper blade in the middle with the other hand and take off the wiper blade by mo ving in direction of arrow .
Attaching a wiper blade
– Interlock the wiper blade into the window wiper arm - see arrow .
– Check whether the wiper blade is correctly attached.The same remarks apply here as for ⇒page 57, “Replacing wiper blades for the
windscreen wipers”.Rear-view mirrorManual dimming interior rear-view mirrorAdjust the rear mirror before commencing to drive so that there is a clear
view to the rear.
Basic setting
– Pull the lever on the bottom edge of the mirror forward.
Dimming mirror
– Pull the lever on the bottom edge of the mirror back.
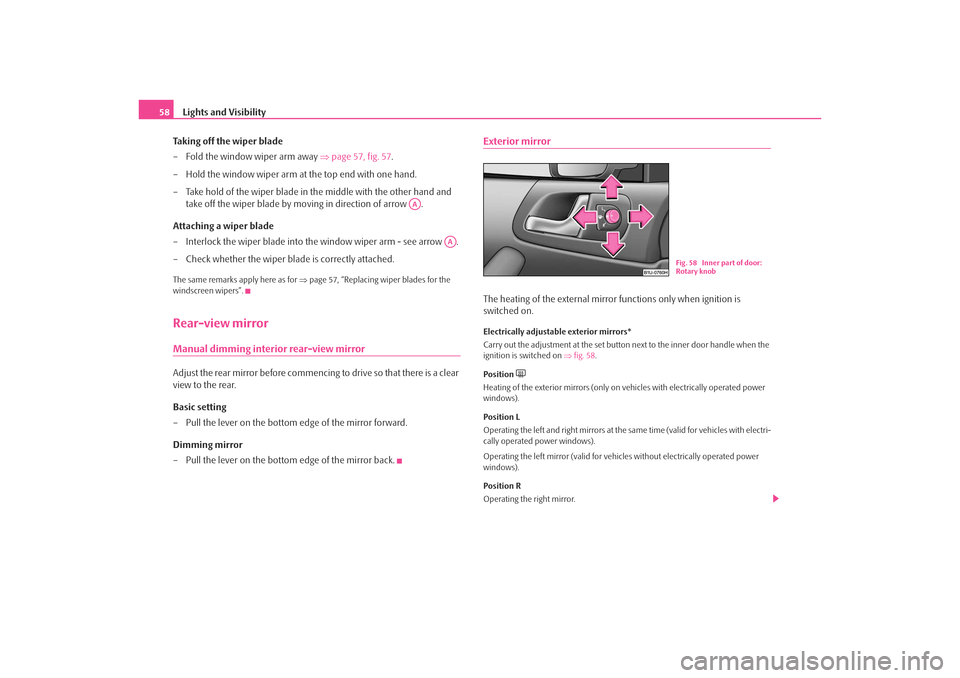
Exterior mirrorThe heating of the external mirror functions only when ignition is
switched on.Electrically adjustable exterior mirrors*
Carry out the adjustment at the set button next to the inner door handle when the
ignition is switched on ⇒fig. 58 .
Position
Heating of the exterior mirrors (only on ve hicles with electrically operated power
windows).
Position L
Operating the left and right mirrors at the same time (valid for vehicles with electri-
cally operated power windows).
Operating the left mirror (valid for vehicles without electrically operated power
windows).
Position R
Operating the right mirror.
AA
AA
Fig. 58 Inner part of door:
Rotary knob
s2ig.book Page 58 Monday, November 10, 2008 11:20 AM