engine coolant SKODA OCTAVIA TOUR 2009 1.G / (1U) User Guide
[x] Cancel search | Manufacturer: SKODA, Model Year: 2009, Model line: OCTAVIA TOUR, Model: SKODA OCTAVIA TOUR 2009 1.G / (1U)Pages: 224, PDF Size: 13.53 MB
Page 96 of 224
Starting-off and Driving
95
Using the system
Safety
Driving Tips
General Maintenance
Breakdown assistance
Technical Data
•
Let go of the key as soon as the engine starts otherwise there may be damage
to the starter. The engine running noises may louder at
first be louder for
a short time after
starting the cold engine until oil pressure
can be built up in the hydraulic valve
clearance compensation. This is quite normal and is not an operating problem. If the engine does not start ... You can use the battery of anothe
r vehicle as a jump-start aid
⇒page 188.
It is only possible to tow-start vehicl
es fitted with a manual gearbox. The tow-
starting distance must not be more than 50 metres
⇒page 191.
WARNING
•
Never run the engine in non ventilat
ed or enclosed areas. The exhaust
gases of the engine contain besides
the odorless and colourless carbon
monoxide a poisonous gas - hazard! Carbon monoxide can cause uncon- sciousness and death.•
Never leave your vehicle unattended with the engine running.Caution
•
The starter may only be operated (ignition key position ), if the engine is not
running. If the starter is immediately oper
ated after switching off the engine, the
starter or the engine can be damaged.•
Avoid high engine revolutions, full throttle and high engine loads as long as the
engine has not yet reached its normal oper
ating temperature - risk of damaging the
engine!•
Vehicles which are fitted wi
th an exhaust gas catalyti
c converter should not be
tow-started over a distance of more than 50 metres.
For the sake of the environment
Never warm up the engine when the vehi
cle is standing. Drive off right away.
Through this the engine reaches its operating temperature more rapidly and the pollutant emissions are lower.
Petrol enginesThese engines are fitted with a starter system which selects the correct fuel-air mixture for every external air temperature.•
Do
not depress
accelerator before and when starting engine.
•
Interrupt the attempt at starting after
10 seconds if the engine does not start
right awayand wait for about 30 se
conds before repeating the attempt.
•
It is possible that the fuse on the electric
al fuel pump is defect if the engine still
does not start. Check the fuse and replace it if necessary
⇒page 192.
•
Contact the nearest specialist garage to obtain professional assistance.
It may be necessary, if the engine is
very hot
, to slightly depress the accelerator
after the engine has started.Diesel enginesGlow plug system Diesel engines are equipped with a glow
plug system, the preglow period being
controlled automatically in
line with the coolant temperature and outside temper-
ature. The preglow indicator light
comes on after the ignition has been switched on.
You should not switch on any major electrical components during the heating period otherwise the vehicle battery will be drained unnecessarily.•
You should start the engine immediately after the glow plug warning light
has gone out.•
The glow plug warning light will come on for about one second if the engine is
at a normal operating temperature or if the outside temperature is above +5°C. This means that you can start the engine
right away
.
•
Interrupt the attempt at starting after
10 seconds if the engine does not start
right awayand wait for about 30 se
conds before repeating the attempt.
•
It is possible that the fuse on the diesel preglow system is defect if the engine
still does not start. Check the fuse and replace it if necessary
⇒page 192.
•
Contact the nearest specialist garage to obtain professional assistance.
A3
s2g8.b.book Page 95 Tuesday, April 7, 2009 8:53 AM
Page 97 of 224
Starting-off and Driving
96
Starting the engine after the fuel tank has run dry It may take longer than normal to start the
engine after refuelling
if the fuel tank has
run completely dry - up to one minute. This is because the fuel system must first of all be filled while the attempting to start the engine.Switching off the engine– The engine can be swit
ched off by turning the ignition key from posi-
tion into
⇒
page 94, fig. 105
.
WARNING
•
Never switch off the engine before the
vehicle is stationary - risk of acci-
dent!•
The brake booster only operates when the engine is running. Greater
physical effort for braking is required
when engine is switched off. Because
if you do not stop as normal, this can cause an accident and severe injuries.
Caution
you should not switch the engine off right
away at the end of your journey after the
engine has been operated fo
r a lengthy period at high
loads but should be allowed
it to run at idling speed for about 2 minutes
. This prevents any accumulation of heat
when the engine is switched off.
Note
•
The radiator fan may continue running fo
r a further 10 minutes or so after the
engine and the ignition have been switched
off. The coolant fan may, however, also
switch on again after some time if the coolant temperature rises because of an accumulation of heat in the engine or
if the engine is warm and the engine
compartment is additionally
heated by strong sunlight.
•
This is why particular care is required when carrying out any work in the engine
compartment
⇒page 160, “Working in the engine compartment”.
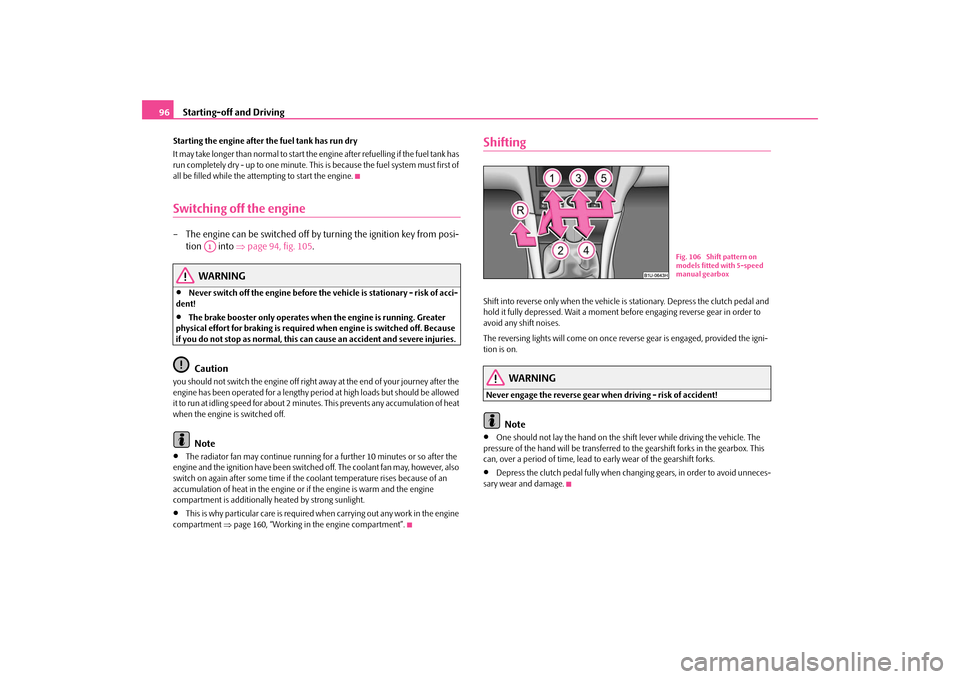
ShiftingShift into reverse only when the vehicle is
stationary. Depress the clutch pedal and
hold it fully depressed. Wa
it a moment before engaging reverse gear in order to
avoid any shift noises. The reversing lights will come on once reverse gear is engaged, provided the igni- tion is on.
WARNING
Never engage the reverse gear when driving - risk of accident!
Note
•
One should not lay the hand on the shift lever while driving the vehicle. The
pressure of the hand will be transferred to
the gearshift forks in the gearbox. This
can, over a period of time, lead to
early wear of the gearshift forks.
•
Depress the clutch pedal fully when chan
ging gears, in order to avoid unneces-
sary wear and damage.
A1
Fig. 106 Shift pattern on models fitted with 5-speed manual gearbox
s2g8.b.book Page 96 Tuesday, April 7, 2009 8:53 AM
Page 146 of 224
Towing a trailer
145
Using the system
Safety
Driving Tips
General Maintenance
Breakdown assistance
Technical Data
should be attached to folding arms. Adjust
the mirrors so that they provide you with
an adequate field of view to the rear. Headlights Before starting off with a hitched trailer, also check the setting of the headlights. Alter the setting as necessary with th
e aid of the headlight beam adjuster
⇒ page 51. Detachable ball head The ball rod is detachable on vehicles which feature a factory-fitted towing device. It is stowed together with separate fitting instructions in the spare wheel well in the luggage compartment of the vehicle. Further information on the towing device
⇒page 146.
Note
•
We recommend that you also have yo
ur vehicle inspected between service
intervals if you tow a trailer frequently.•
The handbrake on the towing vehicle
must be put on when coupling and
decoupling the trailer.Driving Tips Particular caution is required when towing a trailer.– Do not, as far as possible, drive
with your vehicle unladen and the
trailer laden.
– Do not make full use of the legal maximum speeds. This applies in
particular to downhill sections.
– Apply the brakes in good time.– Keep a check on the coolant temper
ature gauge if the outside temper-
ature is high.
Distribution of weight The distribution of the weight is very poor
if your vehicle is
unladen and the trailer
is laden. Maintain a particularly low speed if you cannot avoid driving with this combination. Driving speed Do not drive faster than 80 km/hour for safety reasons. This also applies for coun- tries in which higher speeds are allowed. The fact that the driving stability of the vehicle + trailer combination reduces with increasing speed means that the legally allowed speed should not be used when there are unfavourable road, weather or wind
conditions, particul
arly near accident
black spots. You must always reduce your speed immedi
ately as soon as you detect even just
the
slightest swaying
of the trailer. On no account attempt to stop the trailer from
“swaying” by
accelerating.
Apply the brakes in good time! If the trailer is fitted with a
trailer brake
, apply the
brakes gently at first and then brake firmly
. This will avoid brake jolts resulting from
the trailer wheels locking. Shift down gears
in good time before negotiating a down-
hill section to allow the engine to also act as a brake. Engine overheating Please keep a check on the coolant temperature gauge if you have to negotiate a lengthy slope in a low gear at a high engine speed when the outside temperature is very high
⇒page 16.
If the needle of the coolant temperature gauge moves into the right-hand area or even the red area of the scale, reduce yo
ur speed immediately. Stop and switch off
the engine if the warning light
in the instrument cluste
r begins flashing. Wait a
few minutes and check the level of coolant in the coolant expansion bottle ⇒ page 165, “Inspecting the coolant level”. Please refer to the following guidelines
⇒page 30, “Coolant temperature/ Coolant
quantity
”.
The coolant temperature can be reduced by switching on the heating.Any increase in the cooling effect of the coolant fan through shifting down a gear and increasing the engine speed is not possible since the fan speed is independent
s2g8.b.book Page 145 Tuesday, April 7, 2009 8:53 AM
Page 161 of 224
Inspecting and replenishing
160
– Take the bonnet support out of its holder and set it in the opening
designed for it
⇒
page 159, fig. 150
.
Closing the bonnet – Lift the bonnet slightly and unhook the bonnet support. Press the
bonnet support into the hold
er designed to hold it.
– Allow the bonnet to drop from a height of about 30 cm into the lock -
bonnet
do not press down on it
!
WARNING
•
Never open the bonnet if you see that steam or coolant is flowing out of
the engine compartment - risk of scaldi
ng! Wait long enough until the steam
or coolant has stopped escaping.•
For safety reasons, the bonnet must always be properly closed when
driving. One should therefore check that
the lock has in fact engaged prop-
erly after closing the bonnet.•
Stop your vehicle i
mmediately while driving if yo
u notice that the lock is
not properly engaged and close the bonn
et properly - risk of an accident!
Working in the engine compartment Particular care is required when ca
rrying out any work in the engine
compartment!There is a risk of injuries, scalding,
accidents and fire wh
en working in the
engine compartment, e.g. inspecting an
d replenishing oil and other fluids. For
this reason, it is essential to comply with the warning instructions stated below and with the general applicable
rules of safety. The engine compart-
ment of your car is a hazardous area
⇒
.
WARNING
•
Never open the bonnet if you see that steam or coolant is flowing out of
the engine compartment - risk of scaldi
ng! Wait long enough until the steam
or coolant has stopped escaping.•
Switch off the engine and pull out the ignition key.
•
Apply the handbrake firmly.
•
On vehicles fitted with a manual gearbox, move the gearshift lever into
Neutral.•
Allow the engine to cool down.
•
Keep children clear of the engine compartment.
•
Never spill oil and other fluids over the hot engine. Such fluids (e.g. the
antifreeze contained in the coolant) may ignite!•
Avoid short circuits in the electrical system - particularly on the battery.
•
Never place your hand into the radiator
fan as long as the engine is still
warm. The fan might suddenly start running!•
Never open the cap of the coolant expa
nsion bottle as long as the engine
is still warm. The cooling system is pressurized!•
Cover over the cap of the coolant expansion reservoir with a large cloth
when opening it as protection for your face, hands and arms from hot steam or hot coolant.•
Do not let objects, such as e.g cleaning cloth or tools lie in the engine
compartment.•
If you wish to work under the vehicl
e, you must secure the vehicle from
rolling away and support it
with suitable supporting blocks; the lifting jack*
is not sufficient for this - risk of injury!•
In cases where it be necessary to carry out inspection work when the
engine is running there is an additional risk from rotating parts (e.g. the V- ribbed belt, alternator, radiator fan) and from the high-voltage ignition system. Please observe in addition the following:
− Never touch the electrical cabl
es of the ignition system.
− Absolutely avoid any jewellery, loose items of clothing or long hair from getting into the rotating part
s of the engine - Hazard! Therefore
s2g8.b.book Page 160 Tuesday, April 7, 2009 8:53 AM
Page 162 of 224
Inspecting and replenishing
161
Using the system
Safety
Driving Tips
General Maintenance
Breakdown assistance
Technical Data
remove any jewellery beforehand, tie up your hair and wear tight fitting clothing.
•
Please also comply with the warnin
g instructions stated below when
carrying out any essential work on the
fuel system or on
the electrical
system:
− Always separate the car batter
y from the electrical system.
− Do not smoke. − Never carry out any work close to naked flames. − Always keep a working fire extinguisher at hand.Caution
When replenishing fluids in the engine, al
ways ensure that the fluids are on no
account mixed up. This may result in ma
jor operating problems and also vehicle
damage!
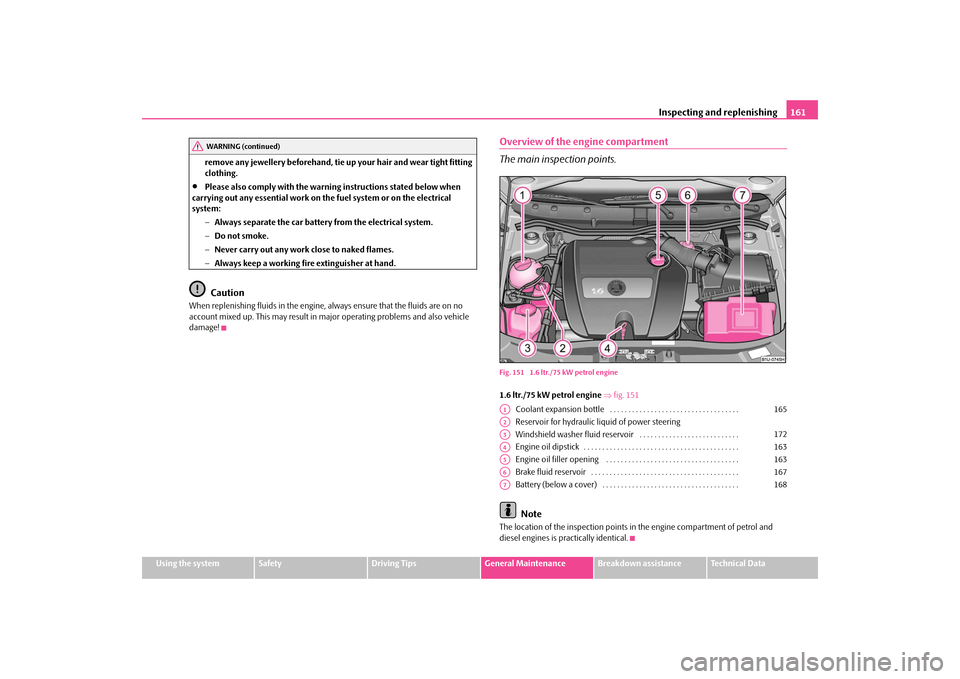
Overview of the engine compartment The main inspection points.Fig. 151 1.6 ltr./75 kW petrol engine1.6 ltr./75 kW petrol engine
⇒fig. 151
Coolant expansion bottle . . . . . . . . . . . . . . . . . . . . . . . . . . . . . . . . . . . Reservoir for hydraulic liquid of power steering Windshield washer fluid reservoir . . . . . . . . . . . . . . . . . . . . . . . . . . . Engine oil dipstick . . . . . . . . . . . . . . . . . . . . . . . . . . . . . . . . . . . . . . . . . . Engine oil filler opening . . . . . . . . . . . . . . . . . . . . . . . . . . . . . . . . . . . . Brake fluid reservoir . . . . . . . . . . . . . . . . . . . . . . . . . . . . . . . . . . . . . . . . Battery (below a cover) . . . . . . . . . . . . . . . . . . . . . . . . . . . . . . . . . . . . . Note
The location of the inspection points in
the engine compartment of petrol and
diesel engines is practically identical.
WARNING (continued)
A1
165
A2A3
172
A4
163
A5
163
A6
167
A7
168
s2g8.b.book Page 161 Tuesday, April 7, 2009 8:53 AM
Page 166 of 224
Inspecting and replenishing
165
Using the system
Safety
Driving Tips
General Maintenance
Breakdown assistance
Technical Data
Check hydraulic oil The hydraulic system of the power steering is filled with the hydraulic oil designated in the catalogue as G 002 000. Perform the inspection of the hydraulic oil level when the engine is cold and not running. The hydraulic oil level must be between the “MIN” and “MAX” markings ⇒ page 164, fig. 153
. If the level drops below the mark
ing “MIN”, it is necessary that
the power steering is checked by a specialist
garage. It is not sufficient to solely refill
with hydraulic oil.
Note
If the engine is not running (when towing) or
if the V-ribbed belt is torn, the power
steering does not operate. The vehicle is fully steerable however. There is however increased force required to turn the steering wheel.Cooling systemCoolant The job of the coolant is to cool the engine.The cooling system does not require an
y maintenance under normal operating
conditions. The coolant consists of water
with a concentration of coolant additive
of 40 %. This mixture not only provides
antifreeze protection down to -25°C but
also protects the cooling and heating system from corrosion. It also prevents the formation of scale and significantly increases the boiling point of the coolant. You must therefore not reduce the concentr
ation of antifreeze agent in the coolant
by adding water, also not during the summ
er months or in countries with a warm
climate.
The concentration of coolant additive in the coolant must be at least
40%. You can increase the amount of antifreeze
in the coolant if a higher concentration
of antifreeze is necessary for climatic
reasons but only up to 60% (antifreeze
protection down to approx. -40°C). The an
tifreeze protection tails off above that
concentration.
Vehicles exported to countries with a co
ld climate (e.g. Sweden, Norway, Finland)
are already factory-filled with a coolant which offers antifreeze protection down to about -35°C. In these countries the concentr
ation of coolant additive should be at
least 50 %. Coolant The cooling system is factory-filled with
coolant (purple in colour), which complies
with the specification TL-VW 774 G. We recommend that you use the same c
oolant additive - G12 PLUS-PLUS (purple
in colour) for topping up the system. Please contact a specialist garage if you have any questions regarding the coolant or if you wish to fill up with a different coolant. A specialist garage can also supply
you with the correct coolant additives.
Caution
•
Other coolant additives may cause operational problems which, in partic-
ular, involves significantly reducing the anticorrosion effect.•
Any faults or problems resulting from corrosion may cause a loss of
coolant and, as a consequence of th
is, result in major engine damage.
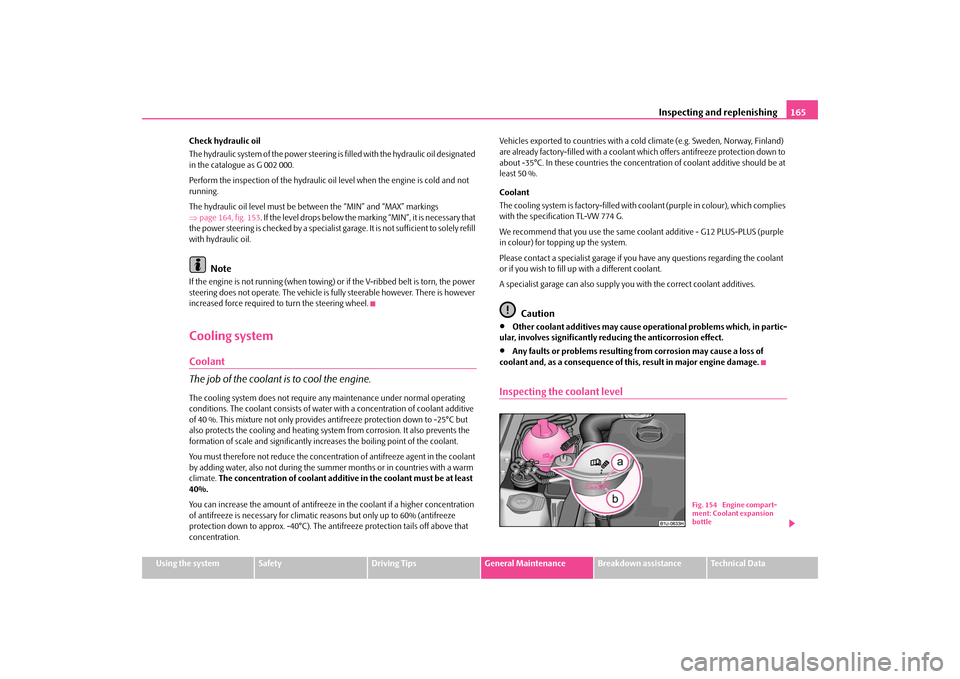
Inspecting the coolant level
Fig. 154 Engine compart- ment: Coolant expansion bottle
s2g8.b.book Page 165 Tuesday, April 7, 2009 8:53 AM
Page 167 of 224
Inspecting and replenishing
166
The coolant expansion bottle is loca
ted in the engine compartment on
the right. – Switch the engine off. – Open the bonnet
⇒
in “Working in the engine compartment” on
page 160.
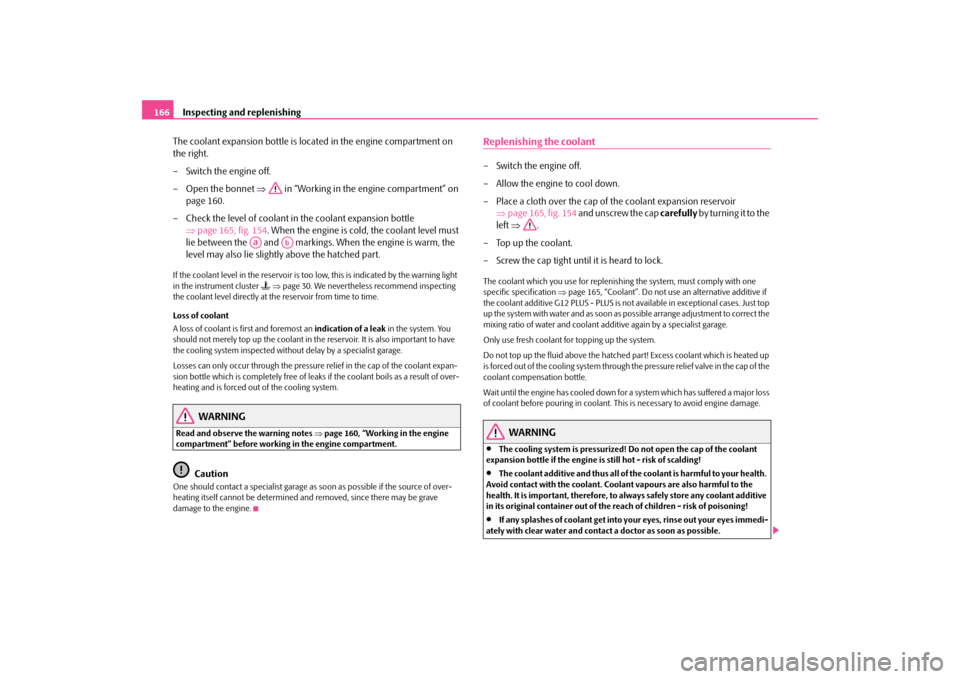
– Check the level of coolant in the coolant expansion bottle
⇒
page 165, fig. 154
. When the engine is cold, the coolant level must
lie between the and markings. When the engine is warm, the level may also lie slightly above the hatched part.
If the coolant level in the reservoir is too low, this is indicated by the warning light in the instrument cluster
⇒page 30. We nevertheless recommend inspecting
the coolant level directly at th
e reservoir from time to time.
Loss of coolant A loss of coolant is first and foremost an
indication of a leak
in the system. You
should not merely top up the coolant in the reservoir. It is also important to have the cooling system inspected without delay by a specialist garage. Losses can only occur through the pressure
relief in the cap of the coolant expan-
sion bottle which is completely free of leak
s if the coolant boils as a result of over-
heating and is forced out of the cooling system.
WARNING
Read and observe the warning notes
⇒page 160, “Working in the engine
compartment” before working in the engine compartment.
Caution
One should contact a specialist garage as soon as possible if the source of over-heating itself cannot be
determined and removed, since there may be grave
damage to the engine.
Replenishing the coolant– Switch the engine off. – Allow the engine to cool down. – Place a cloth over the cap of the coolant expansion reservoir
⇒
page 165, fig. 154
and unscrew the cap
carefully
by turning it to the
left
⇒
.
– Top up the coolant. – Screw the cap tight until it is heard to lock.The coolant which you use for replenishing the system, must comply with one specific specification
⇒page 165, “Coolant”. Do not use an alternative additive if
the coolant additive G12 PLUS - PLUS is not av
ailable in exceptional cases. Just top
up the system with water and as soon as possible arrange adjustment to correct the mixing ratio of water and coolant additive again by a specialist garage. Only use fresh coolant for topping up the system.Do not top up the fluid above the hatched
part! Excess coolant which is heated up
is forced out of the cooling system through the pressure relief valve in the cap of the coolant compensation bottle. Wait until the engine has cooled down for a system which has suffered a major loss of coolant before pouring in coolant. This is necessary to avoid engine damage.
WARNING
•
The cooling system is pressurized! Do not open the cap of the coolant
expansion bottle if the engine is
still hot - risk of scalding!
•
The coolant additive and thus all of the coolant is harmful to your health.
Avoid contact with the coolant. Coolant vapours are also harmful to the health. It is important, therefore, to always safely store any coolant additive in its original container out of the reach of children - risk of poisoning!•
If any splashes of coolant get into yo
ur eyes, rinse out
your eyes immedi-
ately with clear water and contact a doctor as soon as possible.
Aa
Ab
s2g8.b.book Page 166 Tuesday, April 7, 2009 8:53 AM
Page 168 of 224
Inspecting and replenishing
167
Using the system
Safety
Driving Tips
General Maintenance
Breakdown assistance
Technical Data
•
You should also consult a doctor without delay if you have inadvertently
swallowed coolant.
Caution
Do not continue your journey if for some reason it is not possible under the conditions prevailing to top up with coolant. Switch the engine off
and obtain
professional assistance from a specialist garage, otherwise it could lead to severe engine damage.
For the sake of the environment
Do not re-use coolant if it is necessary to
drain the coolant in the system. It should
be collected and disposed of in comp
liance with environmental protection
regulations.Radiator fan The radiator fan may switch on suddenly.The radiator fan is driven by an electr
ic motor and controlled according to the
coolant temperature. The radiator fan may continue running fo
r up to 10 minutes after the engine has
been switched off - even if
the ignition is also off. It
may also switch on suddenly
after a certain time, if•
the coolant temperature has risen beca
use of an accumulation of heat or
•
the warm engine compartment is heated
up additionally by
strong sunlight.
WARNING
You must therefore be aware when work
ing in the engine compartment that
the fan may switch on suddenly - risk of injury!
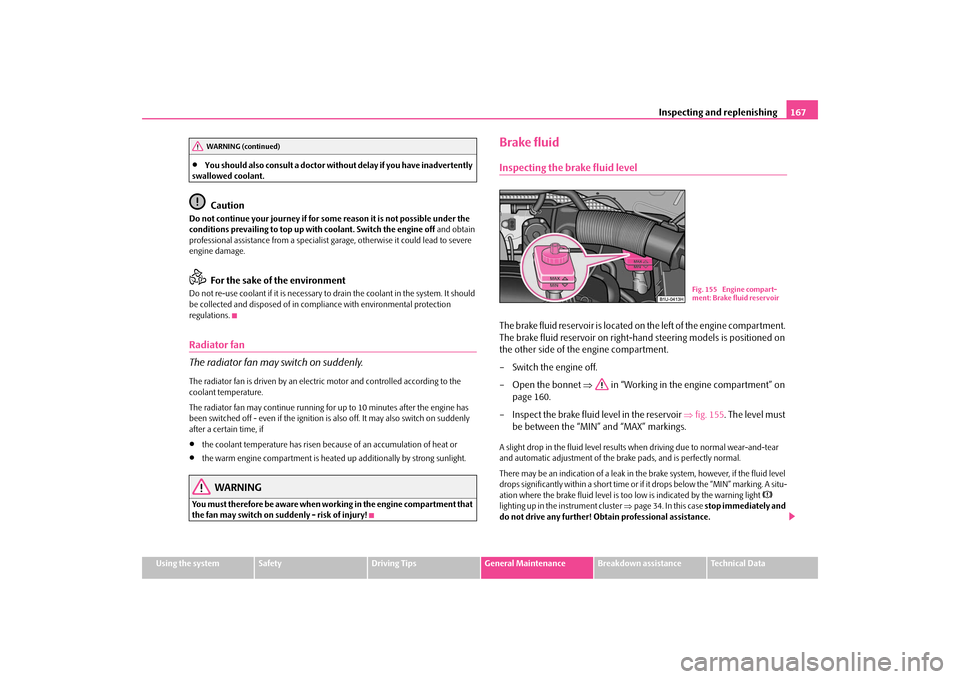
Brake fluidInspecting the brake fluid levelThe brake fluid reservoir is located on the left of the engine compartment. The brake fluid reservoir on right-hand steering models is positioned on the other side of the engine compartment. – Switch the engine off.– Open the bonnet
⇒
in “Working in the engine compartment” on
page 160.
– Inspect the brake fluid level in the reservoir
⇒
fig. 155
. The level must
be between the “MIN” and “MAX” markings.
A slight drop in the fluid level results when driving due to normal wear-and-tear and automatic adjustment of the br
ake pads, and is perfectly normal.
There may be an indication of a leak in the brake system, however, if the fluid level drops significantly within a short time or if it drops below the “MIN” marking. A situ- ation where the brake fluid level is too low is indicated by the warning light
lighting up in the instrument cluster
⇒page 34. In this case
stop immediately and
do not drive any further! Obtain professional assistance.
WARNING (continued)
Fig. 155 Engine compart- ment: Brake fluid reservoir
s2g8.b.book Page 167 Tuesday, April 7, 2009 8:53 AM
Page 195 of 224
Fuses and light bulbs
194
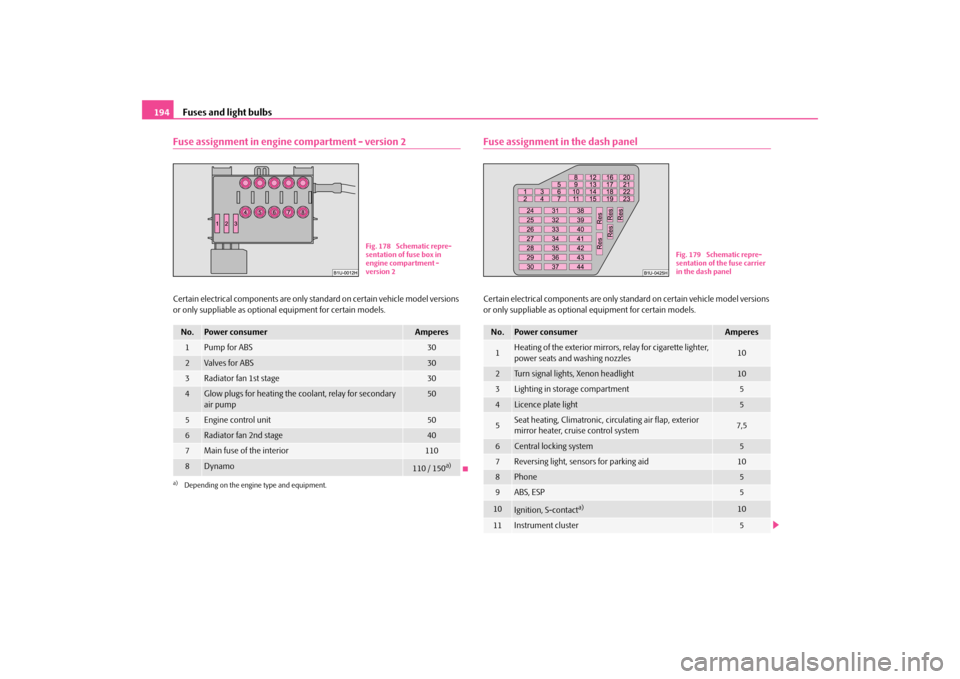
Fuse assignment in engine compartment - version 2Certain electrical components are only st
andard on certain vehicle model versions
or only suppliable as optional
equipment for certain models.
Fuse assignment in the dash panelCertain electrical components are only standard on certain vehicle model versions or only suppliable as optional
equipment for certain models.
No.
Power consumer
Amperes
1
Pump for ABS
30
2
Valves for ABS
30
3
Radiator fan 1st stage
30
4
Glow plugs for heating the coolant, relay for secondary air pump
50
5
Engine control unit
50
6
Radiator fan 2nd stage
40
7
Main fuse of the interior
110
8
Dynamo
110 / 150
a)
a)Depending on the engine type and equipment.
Fig. 178 Schematic repre- sentation of fuse box in engine compartment - version 2
No.
Power consumer
Amperes
1
Heating of the exterior mirrors, relay for cigarette lighter, power seats and washing nozzles
10
2
Turn signal lights, Xenon headlight
10
3
Lighting in storage compartment
5
4
Licence plate light
5
5
Seat heating, Climatronic, circulating air flap, exterior mirror heater, cruise control system
7,5
6
Central locking system
5
7
Reversing light, sensors for parking aid
10
8
Phone
5
9
ABS, ESP
5
10
Ignition, S-contact
a)
10
11
Instrument cluster
5
Fig. 179 Schematic repre- sentation of the fuse carrier in the dash panel
s2g8.b.book Page 194 Tuesday, April 7, 2009 8:53 AM
Page 217 of 224
Index
216
Child seat . . . . . . . . . . . . . . . . . . . . . . . . . . . . . . . . . . . 126
Classification into groups . . . . . . . . . . . . . . . . . 126ISOFIX system . . . . . . . . . . . . . . . . . . . . . . . . . . . . 129Use of child safety seats . . . . . . . . . . . . . . . . . . 126
Children and safety . . . . . . . . . . . . . . . . . . . . . . . . . . 123Chrome parts . . . . . . . . . . . . . . . . . . . . . . . . . . . . . . . 149 Cigarette lighter . . . . . . . . . . . . . . . . . . . . . . . . . . . . . . 78 Cleaning . . . . . . . . . . . . . . . . . . . . . . . . . . . . . . . . . . . . 147Climatronic
Defrosting windows . . . . . . . . . . . . . . . . . . . . . . . 91Recirculated air mode . . . . . . . . . . . . . . . . . . . . . 91Setting temperature . . . . . . . . . . . . . . . . . . . . . . . 92
Climatronic (automatic air conditioning) . . . . . . . 89 Clock . . . . . . . . . . . . . . . . . . . . . . . . . . . . . . . . . . . . . . . . 19Clothes hooks . . . . . . . . . . . . . . . . . . . . . . . . . . . . . . . . 82 Cockpit
General view . . . . . . . . . . . . . . . . . . . . . . . . . . . . . . . 9
Compartments . . . . . . . . . . . . . . . . . . . . . . . . . . . . . . . 79Computer . . . . . . . . . . . . . . . . . . . . . . . . . . . . . . . . . . . . 19 Convenience operation . . . . . . . . . . . . . . . . . . . . . . . 45 Converting/masking over headlights . . . . . . . . . . 142Coolant . . . . . . . . . . . . . . . . . . . . . . . . . . . . . . . . . . . . . 165
replenishing . . . . . . . . . . . . . . . . . . . . . . . . . . . . . 166Warning light . . . . . . . . . . . . . . . . . . . . . . . . . . . . . 30
Coolant level
Warning light . . . . . . . . . . . . . . . . . . . . . . . . . . . . . 30
Coolant quantity
Warning light . . . . . . . . . . . . . . . . . . . . . . . . . . . . . 30
Coolant temperature gauge . . . . . . . . . . . . . . . . . . . 16 Coolant temperature/coolant level
Warning light . . . . . . . . . . . . . . . . . . . . . . . . . . . . . 30
Correct seated position . . . . . . . . . . . . . . . . . . . . . . 104
Counter for distance driven . . . . . . . . . . . . . . . . . . . . 18 Cruise control system . . . . . . . . . . . . . . . . . . . . . . . . . . 98Cup holder
front . . . . . . . . . . . . . . . . . . . . . . . . . . . . . . . . . . . . . . 76
DDeactivating
an airbag . . . . . . . . . . . . . . . . . . . . . . . . . . . . . . . . 120
Deactivating an airbag . . . . . . . . . . . . . . . . . . . . . . . 120 Defrosting rear window . . . . . . . . . . . . . . . . . . . . . . . . 55De-icing the windows . . . . . . . . . . . . . . . . . . . . . . . 150 Detachable towing device . . . . . . . . . . . . . . . . . . . 146 Diesel . . . . . . . . . . . . . . . . . . . . . . . . . . . . . . . . . . . . . . 155Diesel engines
Starting the engine . . . . . . . . . . . . . . . . . . . . . . . . . 95
Digital clock . . . . . . . . . . . . . . . . . . . . . . . . . . . . . . . . . . 19 Direction indicators . . . . . . . . . . . . . . . . . . . . . . . . . . . 52
Warning light . . . . . . . . . . . . . . . . . . . . . . . . . . . . . . 28
Display . . . . . . . . . . . . . . . . . . . . . . . . . . . . . . . . . . . . . . . 23 Distance driven . . . . . . . . . . . . . . . . . . . . . . . . . . . . . . . 18 Door
Child safety lock . . . . . . . . . . . . . . . . . . . . . . . . . . . 37
Driving economically . . . . . . . . . . . . . . . . . . . . . . . . 138EEDL . . . . . . . . . . . . . . . . . . . . . . . . . . . . . . . . . . . . . . . . 132 Electric sliding/tilting roof . . . . . . . . . . . . . . . . . . . . . . 46 Electrically adjustable exterior mirror . . . . . . . . . . . 58Electronic Differential Lock . . . . . . . . . . . . . . . . . . . 132Electronic immobiliser . . . . . . . . . . . . . . . . . . . . . 29, 36
Warning light . . . . . . . . . . . . . . . . . . . . . . . . . . . . . . 29
Electronic stability programme . . . . . . . . . . . . . . . . 131 Electronic stability programme (ESP)
Warning light . . . . . . . . . . . . . . . . . . . . . . . . . . . . . 33
Emergency wheel . . . . . . . . . . . . . . . . . . . . . . . . . . . . 183 Engine
starting . . . . . . . . . . . . . . . . . . . . . . . . . . . . . . . . . . . 94switching off . . . . . . . . . . . . . . . . . . . . . . . . . . . . . . 96
Engine compartment
Safety information . . . . . . . . . . . . . . . . . . . . . . . . 160
Engine electronics
Warning light . . . . . . . . . . . . . . . . . . . . . . . . . . . . . 29
Engine oil . . . . . . . . . . . . . . . . . . . . . . . . . . . . . . . . . . . 162
Changing . . . . . . . . . . . . . . . . . . . . . . . . . . . . . . . . 164changing . . . . . . . . . . . . . . . . . . . . . . . . . . . . . . . . 164check . . . . . . . . . . . . . . . . . . . . . . . . . . . . . . . . . . . . 163replenishing . . . . . . . . . . . . . . . . . . . . . . . . . . . . . 163Warning light . . . . . . . . . . . . . . . . . . . . . . . . . . . . . 31
Engine revolutions counter . . . . . . . . . . . . . . . . . . . . 16Environment . . . . . . . . . . . . . . . . . . . . . . . . . . . . . . . . 138 Environmental compatibility . . . . . . . . . . . . . 138, 142 ESP . . . . . . . . . . . . . . . . . . . . . . . . . . . . . . . . . . . . . . . . . 131
Warning light . . . . . . . . . . . . . . . . . . . . . . . . . . . . . 33
Exhaust gas
Warning light . . . . . . . . . . . . . . . . . . . . . . . . . . . . . 29
Exhaust gas inspection
Warning light . . . . . . . . . . . . . . . . . . . . . . . . . . . . . 29
Explanations . . . . . . . . . . . . . . . . . . . . . . . . . . . . . . . . . . . 6Exterior mirror . . . . . . . . . . . . . . . . . . . . . . . . . . . . . . . . 58 Exterior mirror heater . . . . . . . . . . . . . . . . . . . . . . . . . 58FFirst-aid box . . . . . . . . . . . . . . . . . . . . . . . . . . . . . . . . . 181
s2g8.b.book Page 216 Tuesday, April 7, 2009 8:53 AM