gearbox SKODA OCTAVIA TOUR 2010 1.G / (1U) Columbus Navigation System Manual
[x] Cancel search | Manufacturer: SKODA, Model Year: 2010, Model line: OCTAVIA TOUR, Model: SKODA OCTAVIA TOUR 2010 1.G / (1U)Pages: 207, PDF Size: 12.63 MB
Page 7 of 207
Layout of this Owner's Manual (explanations)
6
Layout of this Owner's Manual (explanations)The Owner's Manual has been systematically designed, in order to make it easy for you
to find and absorb the information you require.Chapters, table of contents and subject indexThe text of the Owner's manual is divided into relatively short sections which are
combined into easy-to-read chapters. The chapter you are reading at any particular
moment is highlighted at the bottom right of the page.
The Table of contents is arranged according to the chapters and the detailed Subject
index at the end of the Owner's Manual helps you to rapidly find the information you
are looking for.SectionsThe majority of Sections apply to all models.
Since there is a wide range of different equipment and options available it is clearly
unavoidable, despite dividing the contents into sections, that mention may be made
of equipment whic h is not fitted to your vehicle.Brief information and instructionsEach section has a Heading.
This is followed by Brief information (in large italic lettering), which tells you the
subject which is dealt with in this section.
Most of the illustrations are accompanied by an Instruction (in relatively large letters)
which explains to you in a straightforw ard way the action you have to take. Work steps
which have to be carried out are illustrated with a hyphen.Direction indicationsAll direction indications such as “left”, “right”, “front”, “rear” relate to the direction of
travel of the vehicle.Explanation of symbols* Equipment which is marked in such a way is only standard on certain vehicle model
versions or only suppliable as opti onal equipment for certain models. End of a section.
The section is continued on the next page.NotesAll four kinds of notes, which are used in th e text, are always stated at the end of the
respective section.
WARNING
The most important notes are marked with the heading WARNING. These
WARNING notes draw your attention to a serious risk of accident or injury.
While reading the text you will frequent ly encounter a double arrow followed
by a small warning symbol. This symbol is intended to draw your attention to a
WARNING note at the end of the section to which you must pay careful atten-
tion.
Caution
A Caution note draws your attention to the possib ility of damage to your vehicle (e.g.
damage to gearbox), or points ou t general risks of an accident.
For the sake of the environment
An Environmental note draws your attention to environmental protection aspects.
This is where you will, for example, find tips aimed at reducing your fuel consumption.
Note
A normal Note draws your attention in a general way to important information.
s2rc.book Page 6 Thursday, April 22, 2010 10:58 AM
Page 10 of 207
Cockpit9
Using the system
Safety
Driving Tips
General Maintenance
Breakdown assistance
Technical Data
CockpitOverviewThis overview will help you to quic kly familiarise yourself with the
displays and the control elements.
Electric exterior mirror adjustment* . . . . . . . . . . . . . . . . . . . . . . . . . . . . .
Air outlet vents . . . . . . . . . . . . . . . . . . . . . . . . . . . . . . . . . . . . . . . . . . . . . . . .
Lever for the multi-functional switch:
Turn signal light, headlight and parking light, headlight flasher . .
Speed regulating system* . . . . . . . . . . . . . . . . . . . . . . . . . . . . . . . . . . . .
Instrument cluster: Instruments and indicator lights . . . . . . . . . . . . . .
Lever for the multi-functional switch:
Multi-functional indicator* . . . . . . . . . . . . . . . . . . . . . . . . . . . . . . . . . . .
Windshield wiper and wash system . . . . . . . . . . . . . . . . . . . . . . . . . . .
Switch for rear window heater
Depending on equipment fitted:
Switch for the ESP* . . . . . . . . . . . . . . . . . . . . . . . . . . . . . . . . . . . . . . . . . .
Switch for the TCS* . . . . . . . . . . . . . . . . . . . . . . . . . . . . . . . . . . . . . . . . . .
Switch for hazard warning lights . . . . . . . . . . . . . . . . . . . . . . . . . . . . . . . . .
Control dial for heating on the driver and front passenger seat* . . .
Front passenger airbag* . . . . . . . . . . . . . . . . . . . . . . . . . . . . . . . . . . . . . . . .
Storage compartment in the front door
Central locking switch and power windows* . . . . . . . . . . . . . . . . . . . . .
Bonnet release lever . . . . . . . . . . . . . . . . . . . . . . . . . . . . . . . . . . . . . . . . . . .
Light switch, headlamp beam adjustment . . . . . . . . . . . . . . . . . . . . . . . .
Storage compartment below steering wheel
Steering wheel:
with horn
with driver airbag . . . . . . . . . . . . . . . . . . . . . . . . . . . . . . . . . . . . . . . . . . .
Lever for adjusting the steering wheel . . . . . . . . . . . . . . . . . . . . . . . . . . .
Ignition lock . . . . . . . . . . . . . . . . . . . . . . . . . . . . . . . . . . . . . . . . . . . . . . . . . . . Ashtrays . . . . . . . . . . . . . . . . . . . . . . . . . . . . . . . . . . . . . . . . . . . . . . . . . . . . . . .
Gearshift lever (manual gearbox) . . . . . . . . . . . . . . . . . . . . . . . . . . . . . . . .
Handbrake . . . . . . . . . . . . . . . . . . . . . . . . . . . . . . . . . . . . . . . . . . . . . . . . . . . . .
Depending on equipment fitted:
Operating controls for the heating . . . . . . . . . . . . . . . . . . . . . . . . . . . .
Operating controls for the air conditio ning system* . . . . . . . . . . . .
Operating controls for Climatronic* . . . . . . . . . . . . . . . . . . . . . . . . . . .
Storage compartment in the middle part of the dash panel
Radio*
Storage compartment on the front passenger side . . . . . . . . . . . . . . . .
Note
Equipment which is marked * is only stan dard on certain vehicle model versions
or only suppliable as optional equipment for certain models.
Vehicles with factory-fitted radio, mobile phone etc, are supplied with separate
instructions for operating such equipment.
The arrangement of the control elements on right-hand drive models may differ to
some extent from that shown in page 8, fig. 1 . However the symbols correspond to
the individual control elements.
A1
54
A2
77
A3
4992
A4
16
A5
1952
A6A7
123125
A8
48
A9
62
A10
109
A11A12
37, 41
A13
147
A14
46, 48
A15A16
109
A17
87
A18
87
A19
72
A20
90
A21
90
A22
777982
A23A24A25
74
s2rc.book Page 9 Thursday, April 22, 2010 10:58 AM
Page 89 of 207
Starting-off and Driving
88
Petrol engines
- ignition switched off, engine off, the steering can be locked.
- ignition switched on
- start engine
Diesel engines - interruption of fuel supply, ignition swit ched off, engine off, the steering can be
locked.
- heating glow plugs on, ignition switched on
You should not switch on any major elec trical components during the heating
period otherwise the vehicle battery will be drained unnecessarily.
- start engine
Applies to all models:
Position
To lock the steering , with the ignition key withdrawn, turn the steering wheel until the
steering locking pin is heard to engage. Yo u should always lock the steering as a
general rule if you leave your vehicle. This acts as a deterrent against possible theft of
your vehicle .
Position
Move the steering wheel back and forward a little if the ignition key cannot, or cannot
easily be turned into this position, in order to release the steering lock.
Position
The engine is started in this position. At th e same time switched on low beam or main
beam or other electrical components wi th major power consumption are briefly
switched off. The ignition key moves back into position when one releases the key.
The ignition key must be turned back into position each time before starting the
engine again. The starter repeat lock in th e ignition lock prevents the starter being
engaged when the engine is r unning and thus getting damaged.
WARNING
When driving, the ignition key must always be in the position (ignition
switched on) without the engine running. This position is indicated by the
warning lights coming on. If this is not the case, it could result in unexpected
locking of the steering wh eel - risk of accident!
Do not withdraw the ignition key from the lock until the vehicle has come to
a stop. The steering lock can engage immediately - risk of accident!
Always withdraw the ignition key if you are going to leave the vehicle, even
for a short time. This is particularly important if children are left in the vehicle.
The children might otherwise start the engi ne or switch on electrical equipment
(e.g. power windows) - risk of accident or injury!
Starting the engineGeneral
You can only start the engine only using an original ignition key.
Place the gearshift lever into neutral and put on the handbrake firmly before
starting the engine.
The clutch pedal should be fully depressed when starting the engine - the starter
then only has to crank the engine.
Let go of the key as soon as the engine starts otherwise there may be damage to
the starter.
The engine running noises may louder at first be louder for a short time after starting
the cold engine until oil pressure can be built up in the hydraulic valve clearance
compensation. This is quite normal and is not an operating problem.
If the engine does not start ...
You can use the battery of anothe r vehicle as a jump-start aid page 173.
It is only possible to tow-start vehicles fi tted with a manual gearbox. The tow-starting
distance must not be more than 50 metres page 175.
A1A2A3A1A2A3
A1A2A3
A2
A1
A2
s2rc.book Page 88 Thursd ay, April 22, 2010 10:58 AM
Page 91 of 207

Starting-off and Driving
90WARNING
Never switch off the engine before the ve hicle is stationary - risk of accident!
The brake booster only operates when the engine is running. Greater phys-
ical effort for braking is required when en gine is switched off. Because if you do
not stop as normal, this can cause an accident and severe injuries.Caution
you should not switch the engine off right away at the end of your journey after the
engine has been operated for a lengthy period at high loads but should be allowed it
to run at idling speed for about 2 minutes. This prevents any accumulation of heat
when the engine is switched off.
Note
The radiator fan may continue running fo r a further 10 minutes or so after the
engine and the ignition have been switched off. The coolant fan may, however, also
switch on again after some time if the co olant temperature rises because of an accu-
mulation of heat in the engine or if the engine is warm and the engine compartment is
additionally heated by strong sunlight.
This is why particular care is required when carrying out any work in the engine
compartment page 148, “Working in the engine compartment”.
Shifting
Shift into reverse only when the vehicle is stationary. Depress the clutch pedal and
hold it fully depressed. Wait a moment before engaging reverse gear in order to avoid
any shift noises.
The reversing lights will come on once reverse gear is engaged, provided the ignition
is on.
WARNING
Never engage the reverse gear when driving - risk of accident!
Note
One should not lay the hand on the shift lever while driving the vehicle. The pres-
sure of the hand will be transferred to the gearshift forks in the gearbox. This can, over
a period of time, lead to earl y wear of the gearshift forks.
Depress the clutch pedal fully when changi ng gears, in order to avoid unnecessary
wear and damage.
HandbrakeApplying the handbrake– Pull the handbrake lever up fully.
Fig. 101 Shift pattern on models
fitted with 5-speed manual
gearbox
Fig. 102 Centre console: Hand-
brake
s2rc.book Page 90 Thursd ay, April 22, 2010 10:58 AM
Page 93 of 207

Starting-off and Driving
92WARNING
The parking aid is not a substitute for the driver paying proper attention and
it is always the driver's responsibility to take care when parking the vehicle or
carrying out similar manoeuvres.
You should therefore satisfy yourself, before reversing, that there is no
small obstacle, such as a rock, thin post, trailer drawbar etc., behind your
vehicle. Such an obstacle might not be within the range detected by the
sensors.Note
The parking aid does not operate if you are towing a trailer (applies to models
which feature a factory-fitted towing device*).
If a warning signal sounds for about 3 seconds after switching the ignition on and
engaging reverse gear, and there is no obstac le close to your vehicle, this indicates a
system fault. Have the fault rectified by a specialist workshop.
The sensors must be kept clean and free of ice to enable the parking aid to operate
properly.
Cruise control system (CCS)*IntroductionThe cruise control system (CCS) maintains a constant speed, more than 30 km/h (20
mph), once it has been set, without you havi ng to depress the accelerator pedal. This
is only possible within the range which is permitted by the power output and braking
power of the engine. The cruise control system makes it possible - particularly on long
journeys - for you to rest your “accelerator foot”.
WARNING
For safety reasons, the cruise control system must not be used in dense
traffic or on unfavourable road surfaces (such as icy roads, slippery roads,
loose gravel) - ri sk of accident!
In order to prevent unintentional use of the cruise control system, always
switch off the system after use.Note
Mode ls fi tted with a manual gea rbox: Alwa ys depress the clutch pedal if you switch
on the cruise control system when the gearbox is in Neutral! Otherwise the engine can
rev up unintentionally.
The cruise control system is not able to maintain a constant speed when driving on
steep downhill sections. The weight of the vehicle increases the speed at which it
travels. One should shift down in good time to a lower gear or slow the vehicle down
by applying the foot brake.
Storing a speedThe cruise control system is operated by means of the slide switch and rocker
button in the left lever of the multi-functional switch.
– Switch on the cruise control system by sliding the switch fig. 104 into the ON
position.
– After the desired speed has been reached, briefly press the rocker button in the SET position.
WARNING (continued)
Fig. 104 Operating lever: Rocker
button and switch of the cruise
control system
AA
AB
AA
AB
s2rc.book Page 92 Thursd ay, April 22, 2010 10:58 AM
Page 129 of 207

Driving and the Environment
128
Driving and the EnvironmentThe first 1 500 kilometres and then afterwardsA new engine
The engine has to be run in du ring the first 1 500 kilometres.Up to 1 000 kilometres– Do not drive faster than 3/4 of the maximum speed of the gear in use, that is 3/4 of
the maximum permissi ble engine speed.
– Do not use full throttle.
– Avoid high engine revolutions.
– Do not tow a trailer.From 1 000 up to 1 500 kilometres– Increase the power output of the engine gradually up to the full speed of the gear
engaged, that is up to the maxi mum permissible engine revolutions.
During the first operating hours the engine ha s higher internal friction than later until
all of the moving parts have harmonized. Th e driving style which you adopt during the
first approx.1 500 kilometres plays a decisive part in the success of running in your
vehicle.
You should not drive at unnecessarily high engine revolutions even after the
running-in period is complete . The maximum permissible en gine speed is marked by
the beginning of the red zone on the scale of the revolutions counter. Shift up into the
next higher gear on a vehi cle fitted with manual gearbox before the red zone is
reached. Extremely high engine revolutions are automatically governed, by the way.
For a vehicle fitted with a manual gearbox the converse situation also applies: Do not
drive at engine revolutions which are too low. Shift down as soon as the engine is no
longer running smoothly.
Caution
All the speed and engine revolution figures apply only when the engine is at its normal
operating temperature. Never rev up an engine which is cold, neither when the vehicle
is stationary nor when driving in individual gears.
For the sake of the environment
Not driving at unnecessari ly high engine revolutions and shifting to a higher gear as
early as possible are ways to minimise fu el consumption and operating noise levels
and protects the environment.New tyresNew tyres have to be “run in” since they do not offer optimal grip at first. You should
take account of this fact for the first 500 kilometres and drive particularly carefully.New brake padsAllow for the fact that new brake pads do no t achieve their full braking efficiency until
approximately 200 kilometres. New brake pads must be first “run in” before they
develop their optimal friction force. You ca n, however, compensate for this slightly
reduced braking force by increasing the pressure on the brake pedal.
This guideline also applies to any new brake pads installed at a future date.
During the running-in pe riod, you should avoid excessive stresses on the brakes. This
includes, for example, violent braking, part icularly from very high speeds, and also
when crossing mountain passes.
s2rc.book Page 128 Thursday, April 22, 2010 10:58 AM
Page 131 of 207

Driving and the Environment
130
guidelines given in this chapter in order to make best use of these characteristics and
to maintain their effectiveness.
The optimal engine speed should be obtained when accelerating, in order to avoid a
high fuel consumption and resonance of the vehicle.Looking ahead when driving
A vehicle's highest fuel consumption occurs it accelerates.Avoid accelerating and brakin g unnecessarily. If you drive with forsight you will not
need to brake so often and will also then not have to accelerate so much. Let your
vehicle coast to a stop, for example, if this is possible, when you see that the next set of
traffic lights is at red.Shifting gears and saving energy
Shifting up early saves on fuel.Manual gearbox– Drive no more than about one length of your vehicle in first gear.
– Always shift up into the next higher gear at approx. 2 000 to 2 500 revs.
An effective way of achieving good fuel economy is to shift up early. You will consume
more fuel if you drive at unnecessaril y high revolutions in any given gear. The
fig. 136 shows the ratio of fuel consumption to the speed of your vehicle in the
relevant gears. Fuel consumptio n in 1st gear is the highest and in 5th gear is the lowest.
Note
Also use the information supplied by the multi-functional indicator* page 19.Avoiding full throttle
Driving more slowly means saving fuel.Sensitive use of the accelerator will not only significantly reduce fuel consumption but
also positively influence environmenta l pollution and wear of your vehicle.
You should avoid exploiting the top speed of your vehicle wherever possible. Fuel
consumption, pollutant emissions and vehicle noises increase disproportionally at
high speeds.
The fig. 137 shows the ratio of fuel consumption to the speed of your vehicle. You
will cut your fuel consumption by half if you only make use three-quarters of the
possible top speed of your vehicle.
Fig. 136 Fuel consumption in
litres/100 km. and speed in
km/h.
Fig. 137 Fuel consumption in
litres/100 km. and speed in
km/h.
s2rc.book Page 130 Thursday, April 22, 2010 10:58 AM
Page 176 of 207

Breakdown assistance175
Using the system
Safety
Driving Tips
General Maintenance
Breakdown assistance
Technical Data
Driving style
Towing another vehicle requires a certain am
ount of practice. Both drivers should be
familiar with the particular points about to wing a vehicle. Unskilled drivers should not
attempt to tow in another vehicle or to be towed in.
One should be constantly vigi lant not to allow impermissibly high towing forces or
jerky loadings. There is always a risk of excessive stresses and damage resulting at the
points to which you attach the tow rope or tow bar when you attempt to tow a vehicle
which is not standing on a paved road.
Caution
If the gearbox of your vehicle no longer contains any oil because of a defect, your
vehicle must only be towed in with the driven wheels raised clear of the ground, or on
a special vehicle transporter or trailer.
Note
Please comply with any national legal provisions particularly regarding the
switched on signal systems, when towi ng in or tow-starting another vehicle.
The tow rope must not be twisted as it ma y in certain circumstances result in the
front towing eye being unscrewed out of your vehicle.
Front towing eye
The front towing eye is welded on behind the bumper on the right fig. 167 . The tow
rope or the tow bar must only be attached to this eye. The grille is secured with plastic
lugs at the points of the arrows. Remove the grille as follows:
– Grasp the grille on the ribs in the upper area. Press it in the direction of arrow and take it out in the direction or arrow fig. 167 .
– Install again by positioning first of all the lugs of the grille in the guides on the vehicle and press in the grille. The protective grille must engage firmly.Rear towing eyeThe rear towing eye is located below the rear bumper on the right fig. 168 .Tow-starting a vehicleIf the engine does not start, we generally do not recommend to tow-start your vehicle.
One should attempt to start the engine using jump start cables page 173 or call on
the services of the SERVICE mobile.If your vehicle has to be towed:– Engage 2nd or 3rd gear with the vehicle stationary.
– Depress the clutch pedal fu lly and keep it depressed.
– Switch on the ignition.
– Wait until both vehicles are moving then release the clutch pedal slowly.
Fig. 167 Front bumper: protec-
tive grille of towing eye
A1
A2
Fig. 168 Rear towing eye
s2rc.book Page 175 Thursday, April 22, 2010 10:58 AM
Page 177 of 207
Breakdown assistance
176
– Depress the clutch pedal fully when the engine fires and take the vehicle out of
gear.
WARNING
There is high risk of having an accident when tow-starting a vehicle, when for
example the towed vehicle ru ns into the towing vehicle.
Caution
Vehicles which are fitted with a catalytic converter should not be tow-started over a
distance of more than 50 metres. Unburnt fu el may get into the catalytic converter and
damage it.Towing in a vehicle fitted with a manual gearboxPlease refer to the additional instructions page 174.
The vehicle can be towed in with a tow bar or a tow rope or with the front or rear
wheels raised. The maximum towing speed is 50 km/h.s2rc.book Page 176 Thursday, April 22, 2010 10:58 AM
Page 188 of 207
Technical Data187
Using the system
Safety
Driving Tips
General Maintenance
Breakdown assistance
Technical Data
Te c h n i c a l D a t aTechnical DataGeneral informationThe details given in the official vehicle regi stration documents always take precedence
over the details in the Owner's Manual. Please refer to the official vehicle registration
documents or consult a specialist garage concerning the engine with which your
vehicle is equipped.Used abbreviationsPerformancesThe listed performance values were determined without performance-reducing
equipment, e.g. air conditioning system.
WeightThe loading capacity is reduced in line with the range of the special equipment. The
unloaden weight contains a fuel tank topped up to 90%. A driver with a weight of 75
kg is also includ ed in the value.Identification detailsVehicle data sticker
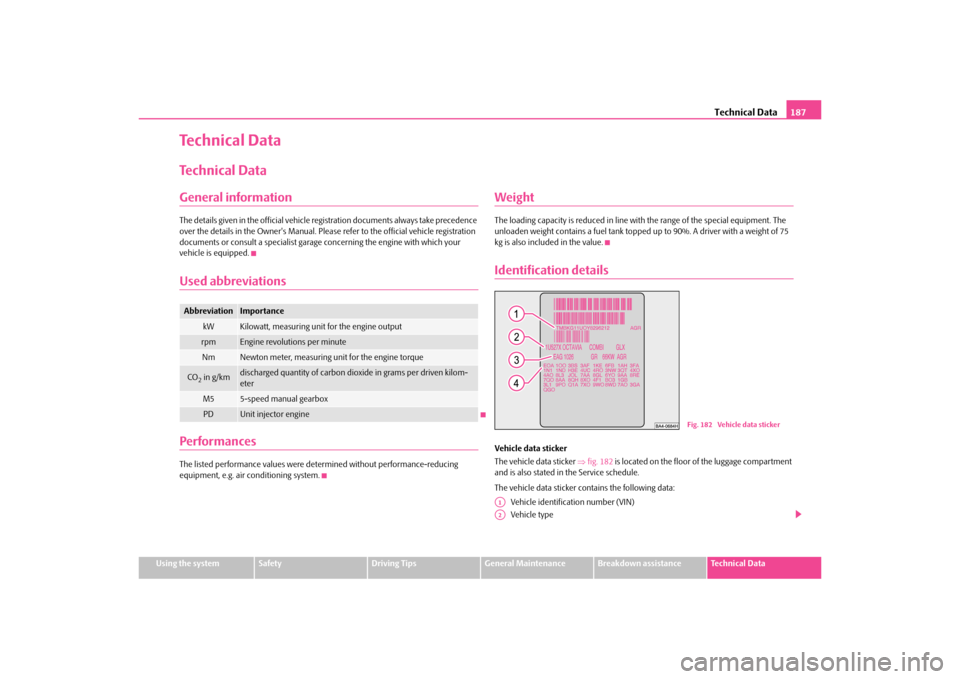
The vehicle data sticker fig. 182 is located on the floor of the luggage compartment
and is also stated in the Service schedule.
The vehicle data sticker co ntains the following data:
Vehicle identification number (VIN)
Vehicle type
Abbreviation
Importance
kW
Kilowatt, measuring unit for the engine output
rpm
Engine revolutions per minute
Nm
Newton meter, measuring unit for the engine torque
CO2 in g/km
discharged quantity of carbon dioxide in grams per driven kilom-
eter
M5
5-speed manual gearbox
PD
Unit injector engine
Fig. 182 Vehicle data sticker
A1A2
s2rc.book Page 187 Thursday, April 22, 2010 10:58 AM