inflation pressure SKODA OCTAVIA TOUR 2010 2.G / (1Z) Owner's Manual
[x] Cancel search | Manufacturer: SKODA, Model Year: 2010, Model line: OCTAVIA TOUR, Model: SKODA OCTAVIA TOUR 2010 2.G / (1Z)Pages: 199, PDF Size: 12.09 MB
Page 5 of 199

Contents
4
Driving Tips
. . . . . . . . . . . . . . . . . . . . . . . . . . . . . .
Intelligent Technology
. . . . . . . . . . . . . . . . . . . . . . . .
Electronic stability programme (ESP)* . . . . . . . . . .
Brakes . . . . . . . . . . . . . . . . . . . . . . . . . . . . . . . . . . . . . . .
Brake booster . . . . . . . . . . . . . . . . . . . . . . . . . . . . . . . .
Antilock brake system (ABS) . . . . . . . . . . . . . . . . . . .
Brake Assist* . . . . . . . . . . . . . . . . . . . . . . . . . . . . . . . . .
Electromechanical power steering . . . . . . . . . . . . .
Tyre inflation pressure-control system* . . . . . . . . .
Driving and the Environment
. . . . . . . . . . . . . . . . .
The first 1 500 kilometres and then afterwards . .
Catalytic converter . . . . . . . . . . . . . . . . . . . . . . . . . . . .
Driving in an economical and environmentally
conscious manner . . . . . . . . . . . . . . . . . . . . . . . . . . . .
Environmental compatibility . . . . . . . . . . . . . . . . . . .
Motoring abroad . . . . . . . . . . . . . . . . . . . . . . . . . . . . .
Avoiding damage to your vehicle . . . . . . . . . . . . . .
Driving through bodies of water on roads . . . . . . .
Towing a trailer
. . . . . . . . . . . . . . . . . . . . . . . . . . . . . . . .
Towing a trailer . . . . . . . . . . . . . . . . . . . . . . . . . . . . . . .
General Maintenance
. . . . . . . . . . . . . . .
Taking care of your ve hicle and cleaning the
vehicle
. . . . . . . . . . . . . . . . . . . . . . . . . . . . . . . . . . . . . . . . .
General . . . . . . . . . . . . . . . . . . . . . . . . . . . . . . . . . . . . . .
Care of the exterior of vehicle . . . . . . . . . . . . . . . . . .
Care of the interior of vehicle . . . . . . . . . . . . . . . . . .
Fuel
. . . . . . . . . . . . . . . . . . . . . . . . . . . . . . . . . . . . . . . . . . . .
Petrol . . . . . . . . . . . . . . . . . . . . . . . . . . . . . . . . . . . . . . . .
Diesel . . . . . . . . . . . . . . . . . . . . . . . . . . . . . . . . . . . . . . .
Refuelling . . . . . . . . . . . . . . . . . . . . . . . . . . . . . . . . . . . .
Inspecting and replenishing
. . . . . . . . . . . . . . . . . .
Engine compartment . . . . . . . . . . . . . . . . . . . . . . . . .
Engine oil . . . . . . . . . . . . . . . . . . . . . . . . . . . . . . . . . . . .
Cooling system . . . . . . . . . . . . . . . . . . . . . . . . . . . . . . .
Brake fluid . . . . . . . . . . . . . . . . . . . . . . . . . . . . . . . . . . . Battery . . . . . . . . . . . . . . . . . . . . . . . . . . . . . . . . . . . . . . .
Windshield washer system . . . . . . . . . . . . . . . . . . . . .
Wheels and Tyres
. . . . . . . . . . . . . . . . . . . . . . . . . . . . . .
Wheels . . . . . . . . . . . . . . . . . . . . . . . . . . . . . . . . . . . . . . .
Accessories, changing and replacing parts
. . .
Accessories and replacement parts . . . . . . . . . . . . .
Technical changes . . . . . . . . . . . . . . . . . . . . . . . . . . . . .
Vehicles of category N1 . . . . . . . . . . . . . . . . . . . . . . . .
Breakdown assistance
. . . . . . . . . . . . . .
Breakdown assistance
. . . . . . . . . . . . . . . . . . . . . . . . .
First-aid box* and Warning triangle* (Octavia) . . .
First-aid box* and warning triangle* (Estate car) .
Fire extinguisher* . . . . . . . . . . . . . . . . . . . . . . . . . . . . .
Vehicle tool kit . . . . . . . . . . . . . . . . . . . . . . . . . . . . . . . .
Spare wheel* . . . . . . . . . . . . . . . . . . . . . . . . . . . . . . . . .
Tyre repair kit* . . . . . . . . . . . . . . . . . . . . . . . . . . . . . . . .
Changing a wheel . . . . . . . . . . . . . . . . . . . . . . . . . . . . .
Jump-starting . . . . . . . . . . . . . . . . . . . . . . . . . . . . . . . . .
Tow-starting and towing vehicle . . . . . . . . . . . . . . . .
Fuses and light bulbs
. . . . . . . . . . . . . . . . . . . . . . . . . .
Electric fuses . . . . . . . . . . . . . . . . . . . . . . . . . . . . . . . . . .
Bulbs . . . . . . . . . . . . . . . . . . . . . . . . . . . . . . . . . . . . . . . . .
Technical Data
. . . . . . . . . . . . . . . . . . . . . . . . . .
Technical Data
. . . . . . . . . . . . . . . . . . . . . . . . . . . . . . . . .
General information . . . . . . . . . . . . . . . . . . . . . . . . . . .
Used abbreviations . . . . . . . . . . . . . . . . . . . . . . . . . . . .
Performances . . . . . . . . . . . . . . . . . . . . . . . . . . . . . . . . .
Weight . . . . . . . . . . . . . . . . . . . . . . . . . . . . . . . . . . . . . . .
Identification details . . . . . . . . . . . . . . . . . . . . . . . . . . .
Fuel consumption based on ECE regulations and EC
guidelines . . . . . . . . . . . . . . . . . . . . . . . . . . . . . . . . . . . .
Dimensions . . . . . . . . . . . . . . . . . . . . . . . . . . . . . . . . . .
Engine oil specifications . . . . . . . . . . . . . . . . . . . . . . .
1.4 ltr./59 kW - EU5 . . . . . . . . . . . . . . . . . . . . . . . . . . . . 1.6 ltr./75 kW - EU4, EU2 . . . . . . . . . . . . . . . . . . . . . .
2.0 l/81 kW TDI CR EU4 . . . . . . . . . . . . . . . . . . . . . . .
Index
. . . . . . . . . . . . . . . . . . . . . . . . . . . . . . . . . . . . . . . .
111111111113114115115116116118118119119122123123124125125129129129129133136136137137139139141143145
146150151151157157157157159159159159159159160160161165167169169172179179179179179179179180180180182
184186189
s2bs.2.book Page 4 Monday, September 27, 2010 9:53 AM
Page 10 of 199
Cockpit9
Using the system
Safety
Driving Tips
General Maintenance
Breakdown assistance
Technical Data
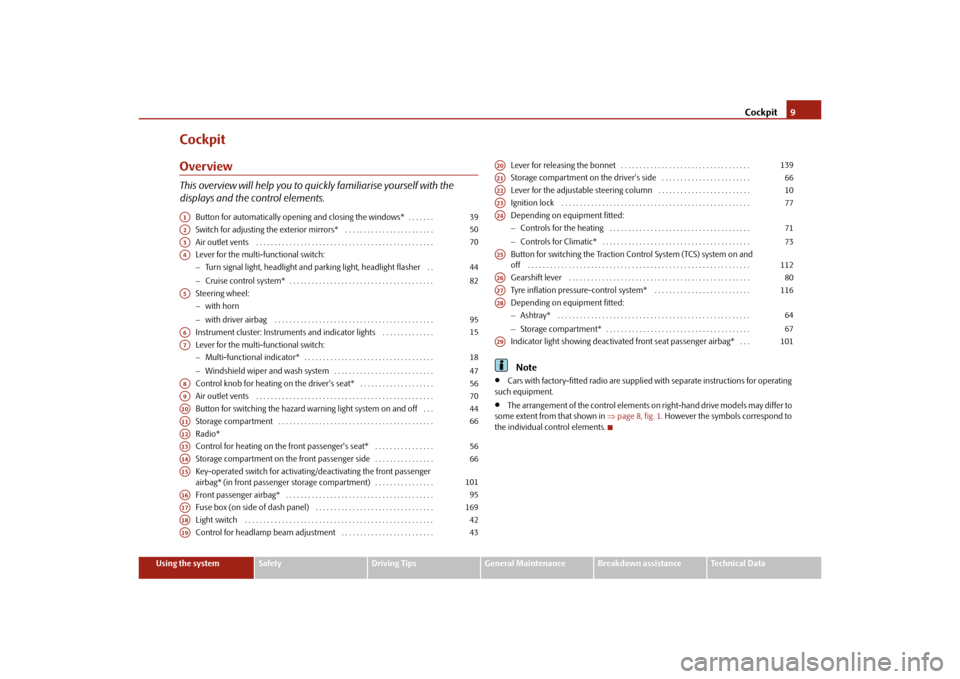
CockpitOverviewThis overview will help you to quic kly familiarise yourself with the
displays and the control elements.
Button for automatically opening and closing the windows* . . . . . . .
Switch for adjusting the exterior mirrors* . . . . . . . . . . . . . . . . . . . . . . . .
Air outlet vents . . . . . . . . . . . . . . . . . . . . . . . . . . . . . . . . . . . . . . . . . . . . . . . .
Lever for the multi-functional switch:
Turn signal light, headlight and parking light, headlight flasher . .
Cruise control system* . . . . . . . . . . . . . . . . . . . . . . . . . . . . . . . . . . . . . . .
Steering wheel:
with horn
with driver airbag . . . . . . . . . . . . . . . . . . . . . . . . . . . . . . . . . . . . . . . . . . .
Instrument cluster: Instruments and indicator lights . . . . . . . . . . . . . .
Lever for the multi-functional switch:
Multi-functional indicator* . . . . . . . . . . . . . . . . . . . . . . . . . . . . . . . . . . .
Windshield wiper and wash system . . . . . . . . . . . . . . . . . . . . . . . . . . .
Control knob for heating on the driver's seat* . . . . . . . . . . . . . . . . . . . .
Air outlet vents . . . . . . . . . . . . . . . . . . . . . . . . . . . . . . . . . . . . . . . . . . . . . . . .
Button for switching the hazard warning light system on and off . . .
Storage compartment . . . . . . . . . . . . . . . . . . . . . . . . . . . . . . . . . . . . . . . . . .
Radio*
Control for heating on the front passenger's seat* . . . . . . . . . . . . . . . .
Storage compartment on the front passenger side . . . . . . . . . . . . . . . .
Key-operated switch for activating/deactivating the front passenger
airbag* (in front passenger storage compartment) . . . . . . . . . . . . . . . .
Front passenger airbag* . . . . . . . . . . . . . . . . . . . . . . . . . . . . . . . . . . . . . . . .
Fuse box (on side of dash panel) . . . . . . . . . . . . . . . . . . . . . . . . . . . . . . . .
Light switch . . . . . . . . . . . . . . . . . . . . . . . . . . . . . . . . . . . . . . . . . . . . . . . . . . .
Control for headlamp beam adjustment . . . . . . . . . . . . . . . . . . . . . . . . . Lever for releasing the bonnet . . . . . . . . . . . . . . . . . . . . . . . . . . . . . . . . . . .
Storage compartment on the driver's side . . . . . . . . . . . . . . . . . . . . . . . .
Lever for the adjustable steering column . . . . . . . . . . . . . . . . . . . . . . . . .
Ignition lock . . . . . . . . . . . . . . . . . . . . . . . . . . . . . . . . . . . . . . . . . . . . . . . . . . .
Depending on equipment fitted:
Controls for the heating . . . . . . . . . . . . . . . . . . . . . . . . . . . . . . . . . . . . . .
Controls for Climatic* . . . . . . . . . . . . . . . . . . . . . . . . . . . . . . . . . . . . . . . .
Button for switching the Traction Control System (TCS) system on and
off . . . . . . . . . . . . . . . . . . . . . . . . . . . . . . . . . . . . . . . . . . . . . . . . . . . . . . . . . . . .
Gearshift lever . . . . . . . . . . . . . . . . . . . . . . . . . . . . . . . . . . . . . . . . . . . . . . . . .
Tyre inflation pressure-control system* . . . . . . . . . . . . . . . . . . . . . . . . . .
Depending on equipment fitted:
Ashtray* . . . . . . . . . . . . . . . . . . . . . . . . . . . . . . . . . . . . . . . . . . . . . . . . . . . .
Storage compartment* . . . . . . . . . . . . . . . . . . . . . . . . . . . . . . . . . . . . . . .
Indicator light showing deactivated front seat passenger airbag* . . .
Note
Cars with factory-fitted radio are supplied with separate instructions for operating
such equipment.
The arrangement of the control elements on right-hand drive models may differ to
some extent from that shown in page 8, fig. 1 . However the symbols correspond to
the individual control elements.
A1
39
A2
50
A3
70
A4
4482
A5
95
A6
15
A7
1847
A8
56
A9
70
A10
44
A11
66
A12A13
56
A14
66
A15
101
A16
95
A17
169
A18
42
A19
43
A20
139
A21
66
A22
10
A23
77
A24
7173
A25
112
A26
80
A27
116
A28
6467
A29
101
s2bs.2.book Page 9 Monday, September 27, 2010 9:53 AM
Page 28 of 199
Instruments and Indicator/Warning Lights27
Using the system
Safety
Driving Tips
General Maintenance
Breakdown assistance
Technical Data
Škoda Service Partner. Further information on the EDL
page 112, “Electronic Differ-
ential Lock (EDL)*”.
Note
If the battery has been disconnected and reconnected, the warning light
comes on
after switching on the ignition. The warning light must go out after driving a short
distance.
Tyre inflation pressure*
The warning light
lights up, if there is a substantia l drop in inflation pressure in one
of the tyres. Reduce the speed and check or correct as soon as possible the inflation
pressure in the tyres page 151.
If the warning light flashes, there is a system fault. Visit the nearest specialist garage and
have the fault rectified.
Further information about tyre pressure-control system page 116.
WARNING
When the warning light
lights up, immediately reduce the speed and
avoid sudden steering and brake manoeuvr es. Please stop the vehicle without
delay at the nearest possible stop and in spect the tyres and their inflation pres-
sures.
Under certain circumstances (e.g. sporty style of driving, wintry or unpaved
roads) the warning light
can be delayed or does not light up at all.
Note
If the battery has been disconnected, the warning light
comes on after switching on
the ignition. The warning light must go out after driving a short distance.
Antilock brake system (ABS)
The warning light
shows the functionality of the ABS. The warning light comes on for a few seconds
after the ignition has been switched on
or when starting the engine. The warning light goes out after an automatic check
sequence has been completed.
A fault in the ABS
The system is not functioning properly if the ABS warning light
does not go out
within a few seconds after switching on the igni tion, does not light up at all or lights up
while driving. The vehicle will only be br aked by the normal brake system. Visit a
specialist garage as quickly as possible and adjust your style of driving appropriately as
you will not know how great the damage is.
Further information about ABS page 115, “Antilock brake system (ABS)”.
A fault in the entire brake system
If the ABS warning light
comes on together with the brake system warning light
(handbrake must be released), there is a fault not only in the ABS but also in another
part of the brake system .
WARNING
If the brake system warning light
comes on together with the ABS
warning light
stop the vehicle immediately an d check the brake fluid level in
the reservoir page 145, “Brake fluid”. If the fluid level has dropped below the
MIN marking, do not drive any further - risk of accident! Obtain professional
assistance.
Pay attention to the following instructions before checking the brake fluid
level and opening the bonnet page 140, “Working in the engine compart-
ment”.
If the brake fluid is at the correct leve l, the ABS control function has failed.
The rear wheels may then block very rapi dly when braking. In certain circum-
stances, this can result in the rear end of the car breaking away - risk of skid-
ding! Drive carefully to the nearest specialist garage and have the fault
rectified.
Bonnet
The warning light
comes on if the bonnet is unlocked. If the bonnet unlocks while
driving, the warning light lights up
and as a warning an audible signal sounds.
s2bs.2.book Page 27 Monday, September 27, 2010 9:53 AM
Page 86 of 199
Passive Safety85
Using the system
Safety
Driving Tips
General Maintenance
Breakdown assistance
Technical Data
SafetyPassive SafetyBasic informationDriving the safe way
Passive safety measures reduce the risk of injury in accident situations.In this section you will find important info rmation, tips and notes on the subject of
passive safety in your vehicle. We have combined everything here which you should
be familiar with, for example, regarding seat belts, airbags, child seats and safety of
children. It is therefore important, in partic ular, to comply with the notes and warnings
in this section for your own interest and in the interest of those travelling with you.
WARNING
This chapter contains important information on how to use the vehicle for
the driver and his occupants. You will find further information on safety, which
concerns you and those travelling with you, in the following chapters of this
Owner's Manual.
The complete on-board literature should always be in the vehicle. This
applies in particular, if you rent out or sell the vehicle.
Safety equipment
The safety equipment is part of the occupant protection and it can
reduce the risk of injuries in accident situations.“Do not put at risk” your safety and the safety of those travelling with you . In the event
of an accident, the safety equipment can redu ce the risk of injuries. The following list
contains part of the safety equipment in your vehicle:
Three-point seat belts for all the seats,
belt force limiter for front seats and outer rear seats*,
belt tensioner for front seats,
seat belt height adjuster for front seats,
front airbag for the driver and the front seat passenger*,
side airbags*,
head airbags*,
anchoring points for child seat using the “ISOFIX” system,
anchoring points for child seat using the “Top Tether” system,
head restraint adjustable for height,
adjustable steering column.
The specified safety equipment works togeth er, in order to optimally protect you and
those travelling with you in accident situat ions. The safety equipment does not protect
you or the people travelling with you, if you or your occupants adopt an incorrect
seated position or the equipment is not correctly adjusted or used.
For this reason you will be provided with information on why this equipment is very
important, how it protects you and the occupants, what should be observed when
using the equipment and how you and the peop le travelling with you can make full use
of the existing safety equipment. This Owner's Manual contains important warning
notes, which you and those travelling with you should pay attention to in order to
reduce a risk of injury.
Safety concerns everybody!
Before setting off
The driver is always fully responsibl e for his occupants and for the oper-
ating safety of the vehicle.For your own safety and the safety of the pe ople travelling with you, please pay atten-
tion to the following points before setting off:
Ensure that the lighting and the turn signal system are functioning properly.
Inspect the tyre inflation pressure.
s2bs.2.book Page 85 Monday, September 27, 2010 9:53 AM
Page 117 of 199

Intelligent Technology
116
Electromechanical power steeringThe power steering enables you to steer the vehicle with le ss physical force.
With the electromechanical power steering , the steering assist is automatically
adapted to the speed and to the steering angle.
It is still possible to fully steer the vehicle if the power steering fails or if the engine is
not running (vehicle being towed in). The only difference is that greater physical effort
is required.
If there is a fault in the power steering, the warning light
or lights up in the instru-
ment cluster page 24.
WARNING
Contact your specialist garage if the power steering is defective.Tyre inflation pressure-control system*The tyre inflation pressure-control system compares with the aid of the ABS sensors
the speed and also the rolling circumference of the individual wheels. If the rolling
circumference of a wheel is changed, the warning light
lights up in the instrument
cluster page 27 and an audible signal sounds. The rolling circumference of the tyre
can change if:
the tyre inflation pressure is too low,
the structure of the tyre is damaged,
the vehicle is loaded on one side,
the wheels of an axle are loaded heavily (e.g. when towing a trailer or when driving
uphill or downhill),
snow chains are mounted,
the temporary spare wheel is mounted,
one wheel per axle was changed.
Basic setting of tyre inflation pressure-control system
After changing the tyre inflation pressures, after changing one or several wheels, the
position of a wheel on the vehicle (e.g. ex changing the wheels between the axles) or
when the warning light lights up while drivin g, a basic setting of the system must be
carried out as follows.
Inflate all tyres to the specified inflation pressure page 151.
Switch on the ignition.
Press button fig. 113 for more than 2 seconds. While pressing the button,
the warning light
lights up. At the same time the memory of the system is erased
and the new calibration is started, which is confirmed with an audible signal and then
the warning light goes out.
If the warning light
does not go out after the basic setting, there is a fault in the
system. Have the vehicle inspected by your nearest specialist garage.
Warning light
lights up
I f t h e t y re i n f l a t i o n p re s s u re o f a t l e a s t o n e wheel is insufficiently inflated in comparison
to the stored basic va lue, the warning light
lights up.
Warning light
flashes
If the warning light flashes, there is a system fault. Have the vehicle inspected by your
nearest specialist garage.
WARNING
When the warning light
lights up, immediately reduce the speed and
avoid sudden steering and brake manoeuvr es. Please stop the vehicle without
delay at the nearest possible stop and in spect the tyres and their inflation pres-
sures.
Fig. 113 Button for setting the tyre
inflation pressure control value
s2bs.2.book Page 116 Monday, September 27, 2010 9:53 AM
Page 118 of 199

Intelligent Technology117
Using the system
Safety
Driving Tips
General Maintenance
Breakdown assistance
Technical Data
The driver is responsible for the correct tyre inflation pressure. For this
reason, the tyre inflation pressu res must be checked regularly.
Under certain circumstances (e.g. sporty style of driving, wintry or unpaved
roads) the warning light
can be delayed or does not light up at all.
The tyre inflation pressure-control system does not take away the respon-
sability from the driver for the correct tyre inflation pressure.Note
The tyre inflation pressure-control system:
does not replace the regular tyre inflatio n pressure control, because the system
cannot detect an even pressure loss,
cannot warn in case of very rapid tyre inflation pressure loss, e.g. in case of sudden
tyre damage. In this case carefully bring the vehicle to a standstill without sudden
steering movements and without sharp braking.
In order to ensure a proper functioning of the tyre inflation pressure-control
system, it is necessary to carry out the basic setting again every 10 000 km or 1x a
year.WARNING (continued)
s2bs.2.book Page 117 Monday, September 27, 2010 9:53 AM
Page 123 of 199

Driving and the Environment
122
Checking tyre inflation pressures
Tyres which are correctly inflated save fuel.Always ensure that your tyres are inflated to the correct pressure at all times. The rolling
resistance will be increased if the inflation pressure is too low. This will not only
increase fuel consumption but also tyre we ar and the driving behaviour will worsen.
Always check the inflation pr essure of the tyres when cold.
Do not drive with winter tyres all year round for this costs about 10 % more fuel.
Winter tyres are also louder.No unnecessary ballast
Transporting ballast costs fuel.The fact that every kilogram of extra weight increases your fuel consumption means
that it is worth taking a look in the lu ggage compartment to avoid transporting any
unnecessary ballast.
It is particularly in town traffic, when one is accelerating quite often, that the vehicle
weight will have a significant effect upon the fuel consumption. A rule of thumb here
is that an increase in weight of 100 kilogr ams will cause an increase in fuel consump-
tion of about 1 litre/100 kilometres.
You may frequently also leave a roof rack fitted on just out of convenience, although
you no longer need it. The increased aerodyna mic drag of your vehicle causes it to use
about 10 % more fuel than normal at a speed of 100 - 120 km/h, even when you are
not carrying a load on the roof.Saving electricity
Generating electricity costs fuel.– Switch off electrical components as soon as you no longer need them.
When the engine is running, the alternator generates and supplies electrical power.
The greater the load on the alternator as a result of having a large number of electrical
components switched on, the more fuel will be consumed for operating the
alternator.
Keeping a log of your fuel consumptionIf you really wish to keep a close check on your fuel consumption, it is best to enter
the figures in a logbook. This does not take much time but is a very worthwhile exer-
cise. It enables you to detect any change (p ositive and negative) at an early stage and
to take any appropriate action.
If you find that your fuel consumption is too high, you should reflect on how, where
and in what conditions you have driven the vehicle since you last refuelled.Environmental compatibilityEnvironmental protection has played a major role in the design, selection of materials
and manufacture of your new Škoda. Particular emphasis has been paid to a number
of aspects, including:
Design measures
Joints designed to be easily detached.
Simplified disassembly due to the modular structure system.
Improved purity of differ ent classes of materials.
Identification of all plastic parts in accordance with VDA Recommendation°260.
Reduced fuel consumption and exhaust emission CO
2.
Minimum fuel leakage during accidents.
Reduced noise.
Choice of materials
Extensive use of recyclable material.
Air conditioning filled wi th CFC-free refrigerant.
No cadmium.
No asbestos.
Reduction in the “vaporisation” of plastics.
Manufacture
Solvent-free cavity protection.
s2bs.2.book Page 122 Monday, September 27, 2010 9:53 AM
Page 126 of 199

Towing a trailer125
Using the system
Safety
Driving Tips
General Maintenance
Breakdown assistance
Technical Data
Towing a trailerTo w i n g a t r a i l e rTechnical requirementsYour vehicle is designed primarily for tr ansporting persons and luggage. It can,
however, also be used for towing a traile r - provided certain technical equipment is
fitted.
If your vehicle has already been supplied with a factory-fitted towing device then
everything that is necessary for towing a trai ler in technical terms, and in terms of the
law, has already been taken into account.
Your vehicle is fitted with a 13-pin power socket for the electrical connection between
the vehicle and trailer. If the trailer which you wish to tow has a 7-pin connector, you
can use a suitable adapter
6) from Škoda original accessories.
This work must be carried out in accordance with the manufacturer's specifications if
a towing device is retrofitted.
Authorised Škoda Service Partners can provid e information about retrofitting a towing
device and for any necessary modifications to the cooling system.
WARNING
We recommend that you have the towing device from Škoda original accesso-
ries installed by an authorised Škoda Service Partner. He is familiar with all the
relevant details relating to retrofitting such equipment. There is a risk of an
accident if the towing device is not properly fitted!General MaintenanceTrailer load
The permissible trailer load must on no account be exceeded. You can negotiate appropriately steeper inclin
es and descents if you do not make full
use of the permissible trailer load.
The trailer loads specified only apply for altitudes up to 1 000 metres above mean sea
level. The fact that the engine power outp ut drops with increasing height due to a
lowering of air pressure and thus the abil ity to climb, means that the towed weight
must be reduced by 10 % for every further increase of 1 000 metres in height above
sea level. The towed weight is the weight of the (laden) vehicle and the (laden) trailer
together. One should take this into account before driving up to higher altitudes.
The trailer and drawbar load information on the type plate of the towing device
are merely test data for the towing device The data relating to your vehicle, which
is often less than this test data, can be found in your vehicle registration docu-
ments.
Distribution of the load
Distribute the load in the trailer in such a way that any heavy items are located as close
as possible to the axle. Secure th e items to prevent them slipping.
Tyre inflation pressure
Select the tyre inflation pressure on yo ur vehicle for that of “fully laden”, page 151.
The inflation pressure of the tyres fitted to the trailer adjust in accordance with the
manufacturer's recommendation.
Exterior mirrors
You have to have additional exterior mirrors fitted if you are not able to see the traffic
behind the trailer with the standard rear-view mirrors. Both exterior mirrors should be
attached to folding arms. Adjust the mirrors so that they provide you with an adequate
field of view to the rear.
Headlights
Before starting off with a hitched trailer, al so check the setting of the headlights. Alter
the setting as necessary with the aid of the headlight beam adjuster page 43.
Detachable ball head
The ball rod is detachable on vehicles whic h feature a factory-fitted towing device.6)In some countries the adapter is supplied with the towing device.
s2bs.2.book Page 125 Monday, September 27, 2010 9:53 AM
Page 139 of 199

Fuel
138
– Unscrew the fuel filler cap anti-clockwise and place the fuel filler cap from above
on the fuel filler flap page 137, fig. 119 - right.Closing fuel filler cap– Screw on the fuel filler cap by turning it to the right until it is heard to click.
– Lock the fuel filler cap on the fuel filler tube by turning the vehicle key to the right
and withdraw the key.
– Close the fuel filler flap until it locks.
The correct grade of fuel for your vehicle as well as the tyre size and inflation pressures
are stated on a sticker affixed to the inside of the fuel filler flap. Further information on
fuel page 136.
The fuel tank has a capa city of about 55 litres.
WARNING
Pay attention to any legal requirements if you do carry a spare canister in the
vehicle. We do not recommend carrying any fuel canisters in your vehicle for
safety reasons. The canister can be damaged in the event of an accident and fuel
may leak out.
Caution
Remove any fuel which has spilled onto th e paintwork of your vehicle immediately
- risk of paint damage!
Vehicles fitted with catalytic converter should never be allowed to let the fuel tank
to run completely empty. An irregular supply of fuel to the engine can result in misfiring
and unburnt fuel may get into the exhaust sy stem, which may result in overheating and
damage to the catalytic converter.
Make sure that the valve is not pressed into the filler tube when inserting the pump
nozzle into the filler tube. Otherwise you are unintentiona lly filling up the volume,
which in case of heat can cause an expansion of the fuel. This can lead to an overflow
of fuel or damage to parts of the fuel reservoir.
The fuel tank is full just as soon as th e pump nozzle switches off for the first time,
provided the nozzle has been operated prop erly. Do not continue refuelling - other-
wise the expansion volume is filled up.
s2bs.2.book Page 138 Monday, September 27, 2010 9:53 AM
Page 152 of 199
Wheels and Tyres151
Using the system
Safety
Driving Tips
General Maintenance
Breakdown assistance
Technical Data
Wheels and TyresWheelsGeneral information
New tyres do not offer optimal grip at first and should therefore be run in for about
500 km at a moderate speed and an appropri ately cautious style of driving. You will
also profit from longer tyre life.
The tread depth of new tyres may differ because of design features and the config-
uration of the tread (depending on the type of tyre and the manufacturer).
Drive over curbs on the side of the road and other such obstacles slowly and,
where possible, at a right angle in order to avoid damage to tyres and wheel trims.
Inspect your tyres from time to time for damage (punctures, cuts, splits and
bulges). Remove foreign bodies from the tyre profile.
Damage to tyres and wheels is frequently not visible. Unusual vi brations or pulling
of the vehicle to one side coul d be a sign of tyre damage. Please reduce your speed
immediately and stop if you su spect that a wheel is damaged. Inspect the tyres for
signs of damage (bulges, splits, etc.) If no vi sible damage is present, please drive at an
appropriately slow speed and carefully to the nearest specialist garage in order to have
your vehicle inspected.
Also protect your tyres from contact with oil, grease and fuel.
Immediately replace any dust caps of the valves which have got lost.
Mark wheels before removing them so that their previous direction of running can
be maintained when mounted them again.
Always store wheels or tyres which been removed in a cool, dry and, where
possible, dark place. Tyres which are not fixed to a wheel trim should be stored upright.
Unidirectional tyres*
The direction of rotation of the tyres is mark ed by arrows on the wall of the tyre. This
indicates the direction of rotation of the tyre, and it is essential that the tyres are fitted
on to run in this direction. Only then are the tyres able to provide the optimal proper-
ties in terms of grip, low nois e, wear-and-tear and aquaplaning.
Further information concerning th e use of unidirectional tyres page 155.
WARNING
New tyres during the first 500 km do not offer optimal grip and should
therefore be run appropriately - risk of accident!
Never drive with damaged tyres - risk of accident!Note
Please observe the various differing legal requirements regarding tyres.Ty re l i feThe life of your tyres very much depends on the following points:
Tyre pressure
The working life of tyres will be shortened considerably if the tyres are insufficiently or
over-inflated and this will have an adverse effect on the handling of your vehicle.
Correctly inflated tyres are of particular importance when travelling at high speeds. It
is therefore good to check the pressure at least once a month and also before setting
off on a long trip. Please do not forget the spare wheel when checking the tyres.
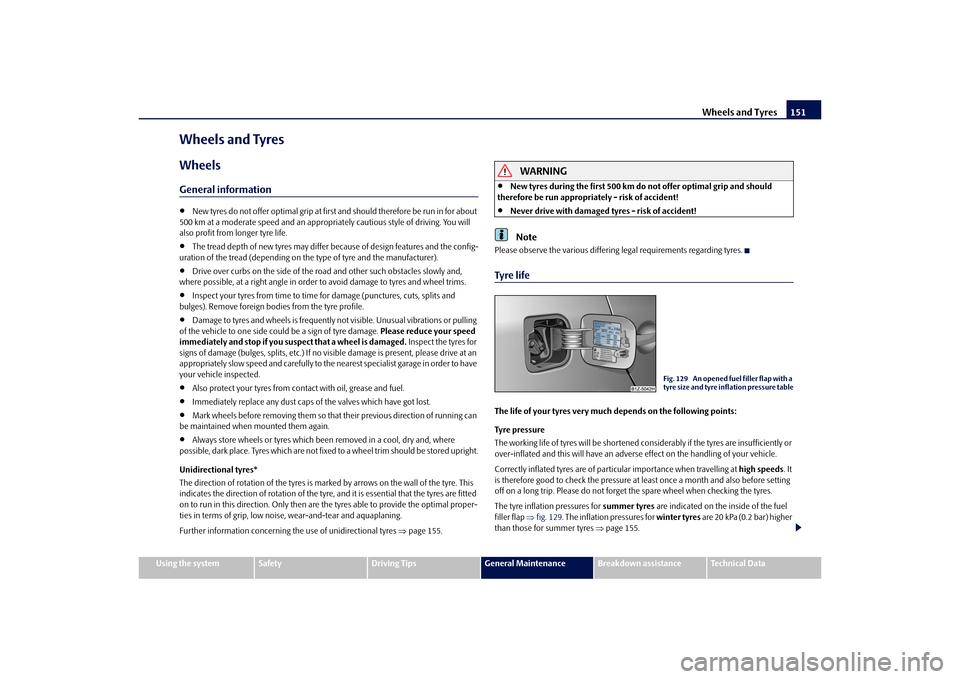
The tyre inflation pressures for summer tyres are indicated on the inside of the fuel
filler flap fig. 129 . The inflation pressures for winter tyres are 20 kPa (0.2 bar) higher
than those for summer tyres page 155.
Fig. 129 An opened fuel filler flap with a
tyre size and tyre inflation pressure table
s2bs.2.book Page 151 Monday, September 27, 2010 9:53 AM