ESP SKODA RAPID 2013 1.G User Guide
[x] Cancel search | Manufacturer: SKODA, Model Year: 2013, Model line: RAPID, Model: SKODA RAPID 2013 1.GPages: 226, PDF Size: 15.16 MB
Page 47 of 226
The CORNER function is switched on automatically if the following conditions
are met.
The turn signal is switched on or the front wheels are turned sharply to the
right or left 1)
.
The engine is running.
The vehicle is stopped or moves at a speed of no more than 40 km/h. The low beam is switched on.
The daytime running lights are not switched on.
The fog lights are not switched on.
The CORNER light is mainly intended to be used for illuminating the nearby envi-
ronment at a broad angle in front of and beside the vehicle. It lights up and goes
out gradually.
Note
The two fog lights are switched on when you shift into the reverse gear.
Rear fog light
First read and observe the introductory information and safety warn-
ings
on page 41.
Switching on/off
›
Turn the light switch to position
or
» Fig. 23 on page 43 .
›
Pull the light switch to position
2
.
The rear fog light is switched off in the reverse order.
If the vehicle is not fitted with fog lights » page 43, the rear fog light is switched
on by turning the light switch to the position
and is pulled out directly to the
position
2
. This switch can only be put into one position.
The warning light
lights up in the instrument cluster when the rear fog light is
switched on » page 14.
Only the rear fog light on the trailer lights up if the vehicle has a factory-fitted
towing device or a towing device from ŠKODA original accessories and it is driven
with a trailer.
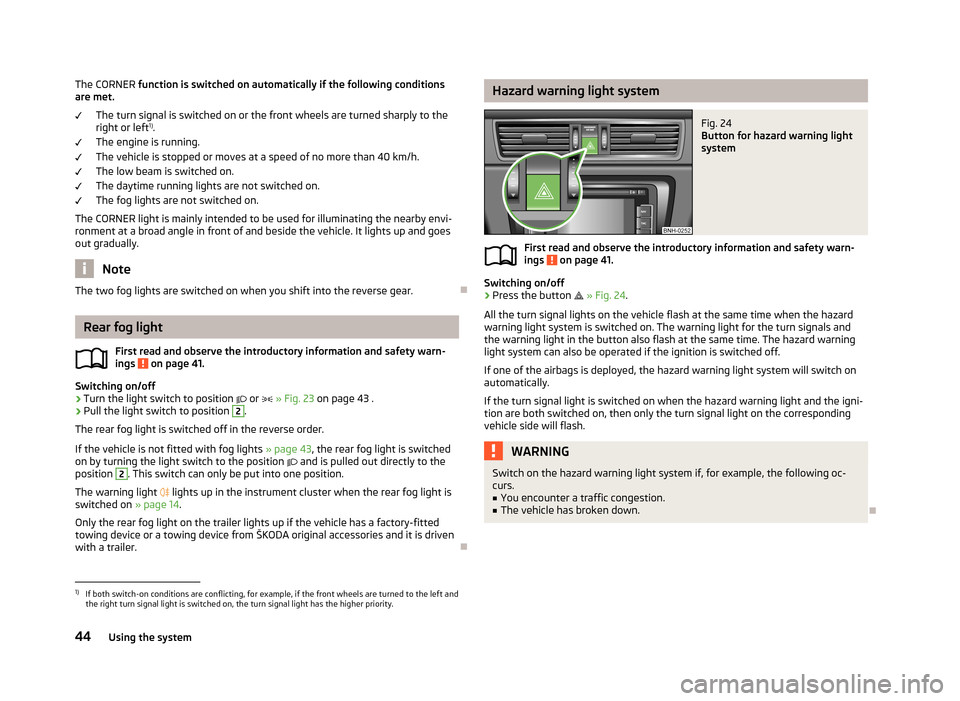
Hazard warning light systemFig. 24
Button for hazard warning light
system
First read and observe the introductory information and safety warn-
ings on page 41.
Switching on/off
›
Press the button
» Fig. 24 .
All the turn signal lights on the vehicle flash at the same time when the hazard
warning light system is switched on. The warning light for the turn signals and
the warning light in the button also flash at the same time. The hazard warning
light system can also be operated if the ignition is switched off.
If one of the airbags is deployed, the hazard warning light system will switch on
automatically.
If the turn signal light is switched on when the hazard warning light and the igni- tion are both switched on, then only the turn signal light on the corresponding
vehicle side will flash.
WARNINGSwitch on the hazard warning light system if, for example, the following oc-
curs.■
You encounter a traffic congestion.
■
The vehicle has broken down.
1)
If both switch-on conditions are conflicting, for example, if the front wheels are turned to the left and
the right turn signal light is switched on, the turn signal light has the higher priority.
44Using the system
Page 57 of 226
›To re-insert the head restraint, push it far enough down into the seat backrest
until the locking button audibly clicks into place.WARNING■ The head restraints must be correctly adjusted in order to offer effective
protection for the occupants in the event of an accident.■
Never drive with the head restraints removed - risk of injury.
■
If the rear seats are occupied, the rear head restraint must not be in the
lower position.
Note
For the sport seats, the head restraints are integrated into the front seat backr-
ests. These headrests cannot be adjusted by height or removed.
Seat features
Introduction
This chapter contains information on the following subjects:
Front seat heating
54
Front armrest
55
Rear armrest
55
Rear seat backrests
55
Front seat heating
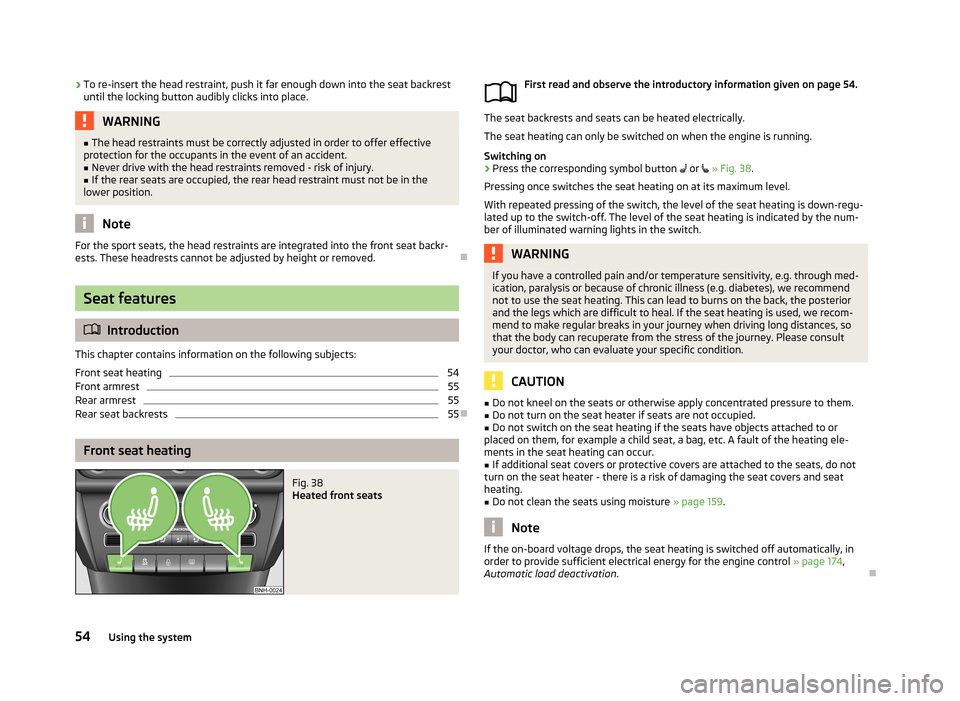
Fig. 38
Heated front seats
First read and observe the introductory information given on page 54.
The seat backrests and seats can be heated electrically. The seat heating can only be switched on when the engine is running.
Switching on
›
Press the corresponding symbol button or » Fig. 38 .
Pressing once switches the seat heating on at its maximum level.
With repeated pressing of the switch, the level of the seat heating is down-regu- lated up to the switch-off. The level of the seat heating is indicated by the num-
ber of illuminated warning lights in the switch.
WARNINGIf you have a controlled pain and/or temperature sensitivity, e.g. through med-
ication, paralysis or because of chronic illness (e.g. diabetes), we recommend
not to use the seat heating. This can lead to burns on the back, the posterior
and the legs which are difficult to heal. If the seat heating is used, we recom-
mend to make regular breaks in your journey when driving long distances, so
that the body can recuperate from the stress of the journey. Please consult
your doctor, who can evaluate your specific condition.
CAUTION
■ Do not kneel on the seats or otherwise apply concentrated pressure to them.■Do not turn on the seat heater if seats are not occupied.■
Do not switch on the seat heating if the seats have objects attached to or
placed on them, for example a child seat, a bag, etc. A fault of the heating ele-
ments in the seat heating can occur.
■
If additional seat covers or protective covers are attached to the seats, do not
turn on the seat heater - there is a risk of damaging the seat covers and seat
heating.
■
Do not clean the seats using moisture » page 159.
Note
If the on-board voltage drops, the seat heating is switched off automatically, in
order to provide sufficient electrical energy for the engine control » page 174,
Automatic load deactivation .
54Using the system
Page 58 of 226
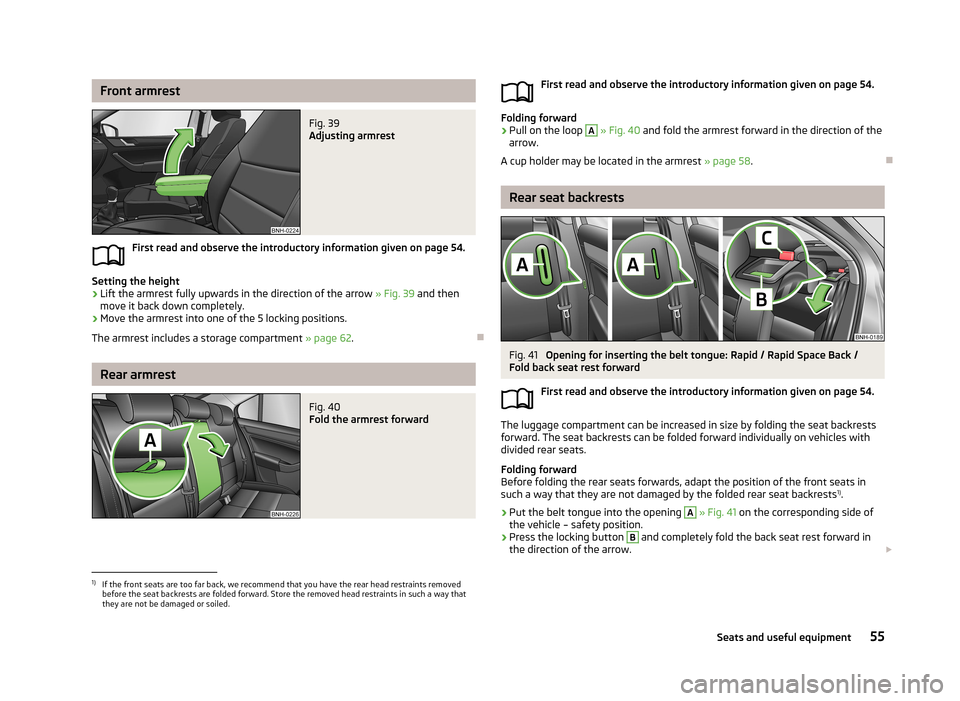
Front armrestFig. 39
Adjusting armrest
First read and observe the introductory information given on page 54.
Setting the height
›
Lift the armrest fully upwards in the direction of the arrow » Fig. 39 and then
move it back down completely.
›
Move the armrest into one of the 5 locking positions.
The armrest includes a storage compartment » page 62.
Rear armrest
Fig. 40
Fold the armrest forwardFirst read and observe the introductory information given on page 54.
Folding forward
›
Pull on the loop
A
» Fig. 40 and fold the armrest forward in the direction of the
arrow.
A cup holder may be located in the armrest » page 58.
Rear seat backrests
Fig. 41
Opening for inserting the belt tongue: Rapid / Rapid Space Back /
Fold back seat rest forward
First read and observe the introductory information given on page 54.
The luggage compartment can be increased in size by folding the seat backrests
forward. The seat backrests can be folded forward individually on vehicles with
divided rear seats.
Folding forward
Before folding the rear seats forwards, adapt the position of the front seats in
such a way that they are not damaged by the folded rear seat backrests 1)
.
›
Put the belt tongue into the opening
A
» Fig. 41 on the corresponding side of
the vehicle – safety position.
›
Press the locking button
B
and completely fold the back seat rest forward in
the direction of the arrow.
1)
If the front seats are too far back, we recommend that you have the rear head restraints removed
before the seat backrests are folded forward. Store the removed head restraints in such a way that
they are not be damaged or soiled.
55Seats and useful equipment
Page 68 of 226
In the event of an accident, even small and light objects gain so much kinetic en-
ergy that they can cause severe injuries.
The magnitude of the kinetic energy is dependent on the speed at which the ve-
hicle is travelling and the weight of the object.
Example: In the event of a frontal collision at a speed of 50 km/h, an object with a
weight of 4.5 kg produces an energy, which corresponds to 20 times its own
weight. This means that it results in a weight of approx. 90 kg “ ”.
Luggage compartment light
The light comes on automatically when the boot lid is opened. If the lid remains open for more than 10 minutes, the boot light switches off automatically.WARNING■ Store the objects in the boot and attach them to the lashing eyes.■Loose objects can be thrown forward during a sudden manoeuvre or in case
of an accident and can injure the occupants or other road users.■
Loose objects could hit a deployed airbag and injure occupants – danger of
death!
■
Please note that transporting heavy objects alters the handling properties
of the vehicle due to the displacement of the centre of gravity – risk of acci-
dent! The speed and style of driving must be adjusted accordingly.
■
If the items of luggage or objects are attached to the lashing eyes with un-
suitable or damaged lashing straps, injuries can occur in the event of braking manoeuvres or accidents. To prevent items of luggage from moving around,
always use suitable lashing straps that are firmly attached to the lashing eyes.
■
The transported items must be stowed in such a way that no objects are
able to slip forward on sudden driving or braking manoeuvres – risk of injury!
■
When transporting objects in the luggage compartment that has been en-
larged by folding the rear seats forward, ensure the safety of the passengers
transported on the other rear seats » page 128, Correct seated position for
the passengers in the rear seats .
■
If the rear seat next to the folded forward seat is occupied, ensure maxi-
mum safety, e.g. by placing the goods to be transported in such a way that the
seat is prevented from folding back in case of a rear collision.
■
Do not drive with the luggage compartment lid open or unlatched, other-
wise exhaust gases may get into the interior of the vehicle – risk of poisoning!
■
Do not exceed the permissible axle loads and permissible gross weight of
the vehicle – risk of accident!
■
Do not transport people in the boot!
CAUTIONPlease ensure that the heating elements for the rear window heater are not dam-
aged as a result of abrasive objects.
Note
Tyre pressure must be adjusted to the load » page 176, Service life of tyres .
Class N1 vehicles
First read and observe the introductory information and safety warn-
ings
on page 64.
In class N1 vehicles that are not fitted with a protective grille, a lashing set that
complies with the EN 12195 standard (1-4) must be used for fastening the load.
Proper functioning of the electrical installation is essential for safe vehicle opera- tion. It is important to ensure that the electrical installation is not damaged dur-ing the adjustment process or when the storage area is being loaded and unloa-
ded.
Fastening elements
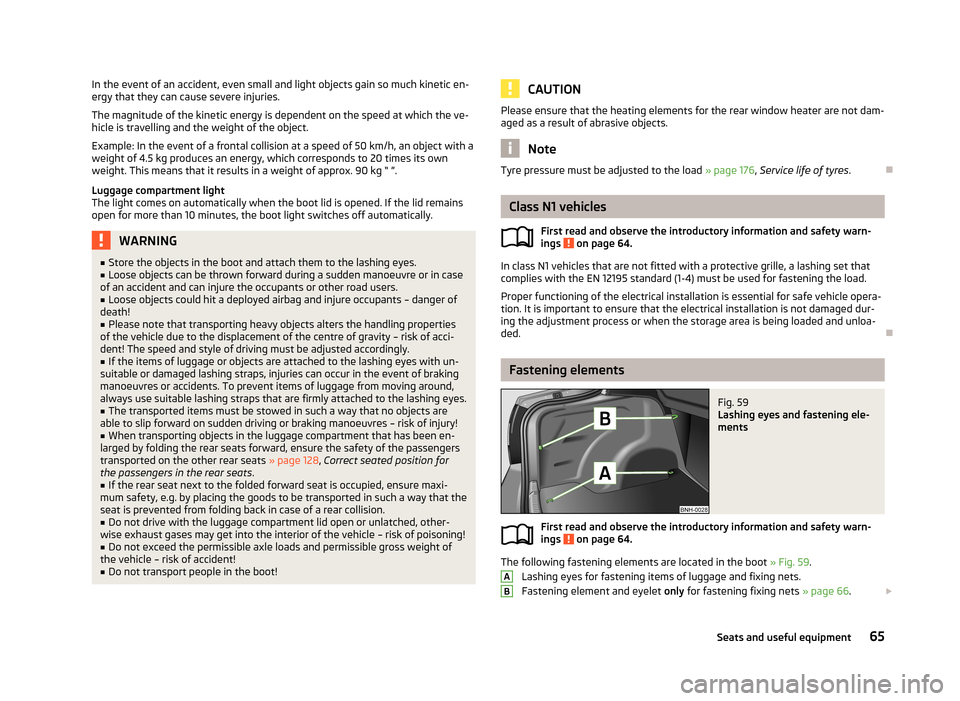
Fig. 59
Lashing eyes and fastening ele-
ments
First read and observe the introductory information and safety warn- ings on page 64.
The following fastening elements are located in the boot » Fig. 59.
Lashing eyes for fastening items of luggage and fixing nets.
Fastening element and eyelet only for fastening fixing nets » page 66.
AB65Seats and useful equipment
Page 82 of 226
We recommend that you leave the air outlet vents 3 » Fig. 77 on page 76 in the
open position in all operating modes.
Note
If the air distribution is positioned only towards the windows, the total amount of
air is used to defrost the windows and thus no air will be fed to the footwell. This
can lead to restriction of the heating comfort.
Recirculated air mode
First read and observe the introductory information given on page 77.
Recirculated air mode prevents polluted air outside the vehicle from getting into
the vehicle, e.g. when driving through a tunnel or in a traffic jam.
Switching on/off
›
Press the symbol button
.
The indicator light in the button lights up.
›
Press the symbol button
again.
The indicator light in the button goes out.
Recirculated air mode is switched off automatically if the air distribution control
C
» Fig. 78 on page 78 is turned to position
. Recirculated air mode can be
switched on again from this position by repeatedly pressing the symbol button
.
WARNINGNever leave recirculated air mode switched on over a longer period of time, as
“stale air” can cause driver and passenger fatigue, reduce attention levels and also cause the windows to mist up. Increased risk of accident. Switch off recir-
culated air mode as soon as the windows start to mist up.
Air conditioning system (manual air conditioning
system)
Introduction
This chapter contains information on the following subjects: Control elements
80
Adjusting
81
Recirculated air mode
81
The cooling system only operates if the following conditions are met. The cooling system is switched on » page 80, Control elements .
The engine is running.
The outside temperature is above approx. +2 °C.
The blower switch is switched on (positions 1-4).
If the desired interior temperature can also be achieved without activating the cooling system, fresh air mode should be selected.
The cooling system is switched off at excessive coolant temperatures in order to guarantee a cooling effect when the engine is under a high load.
CAUTION
■ Under certain circumstances, air at a temperature of about 5 °C can flow out of
the vents when the cooling system is switched on.■
Lengthy and uneven distribution of the air flow out of the vents (especially
around the feet) and large differences in temperature, for example, when getting
out of the vehicle, can cause susceptible individuals to catch a cold.
Note
We recommend that you have the air conditioning system cleaned by a specialist
garage once every year.79Heating and air-conditioning
Page 86 of 226
Air flow to the windows
Air flow to the upper body
Air flow in the footwell
Switch recirculation on/off » page 83
Switching the cooling system on/off » page 83
Note
Do not stick anything onto or cover the interior temperature sensor 11 » Fig. 80
as this could impair the functioning of the Climatronic.
automatic mode
First read and observe the introductory information given on page 82.
The automatic mode is used in order to maintain a constant temperature and to
demist the windows in the interior of the car.
Recommended setting for all periods of the year
›
Set the desired temperature, we recommend 22 °C.
›
Press the button
.
The display shows
(pos.
4
» Fig. 80 on page 82).
›
Set the air outlet vents 3 and 4 » Fig. 77 on page 76 so that the air flow is direc-
ted slightly upwards.
Automatic mode can be switched off by pressing one of the buttons for the air
distribution or by increasing/decreasing the blower speed. The temperature is
nevertheless regulated.
Switching the cooling system on/off
First read and observe the introductory information given on page 82.
›
Press the button
.
The symbol
(pos.
8
» Fig. 80 on page 82) appears in the display.
›
Press button
once more.
The
symbol in the display goes out.
After the cooling system is switched off, only the ventilation function remains ac-
tive, whereby the lowest temperature that can be reached is the outside temper- ature.
Setting the temperature
First read and observe the introductory information given on page 82.
Setting temperature
›
Switch on the ignition.
›
Turn the control dial
1
» Fig. 80 on page 82 to the left or to the right to in-
crease or decrease the temperature.
The set temperature value appears in the display (pos.
2
» Fig. 80 on page 82).
Switching between Celsius and Fahrenheit
›
Press and hold the
and
buttons simultaneously.
The information appears in the display in the desired temperature measuring unit
(pos.
3
» Fig. 80 on page 82).
The interior temperature can be set between +18 °C and +29 ℃. The interior tem-
perature is regulated automatically within this range.
If you select the temperature below +18 ℃, “LO” appears in the display.
If you select a temperature higher than +29 ℃, “HI” appears in the display.
In both limit positions the Climatronic operates at maximum cooling or heating
capacity, respectively. The temperature is not automatically regulated in this case.
CAUTION
Lengthy and uneven distribution of the air flow out of the vents (especially
around the feet) and large differences in temperature, for example, when getting
out of the vehicle, can cause susceptible individuals to catch a cold.
recirculated air mode
First read and observe the introductory information given on page 82.
Recirculated air mode prevents polluted air outside the vehicle from getting into
the vehicle, e.g. when driving through a tunnel or in a traffic jam.
83Heating and air-conditioning
Page 87 of 226
Switching on/off›Press the symbol button .
The symbol (pos. 7
» Fig. 80 on page 82) appears in the display.
›
Press the symbol button again.
The symbol in the display goes out.
WARNINGNever leave recirculated air mode switched on over a longer period of time, as
“stale air” can cause driver and passenger fatigue, reduce attention levels and
also cause the windows to mist up. Increased risk of accident. Switch off recir-
culated air mode as soon as the windows start to mist up.
Note
If recirculated air mode is switched on for around 15 minutes, the symbol will
begin to flash in the display as a sign that recirculated air mode has been switch-
ed on for a long time. If the recirculated air mode is not switched off, the symbol
flashes for around 5 minutes.
Controlling blower
First read and observe the introductory information given on page 82.
The Climatronic system controls the blower stages automatically in line with the
interior temperature. However, the blower level can be manually adjusted to suit
your particular needs.
›
Turn the control dial
10
» Fig. 80 on page 82 to the left or to the right to in-
crease or decrease the blower speed.
If the blower is switched off, the Climatronic system is switched off.
The set blower speed is shown by displaying the corresponding number of seg-
ments in icon
9
in the display.
WARNING■ “Stale air” may result in fatigue in the driver and occupants, reduce attention
levels and also cause the windows to mist up. The risk of having an accident
increases.■
Do not switch off the Climatronic system for longer than necessary.
■
Switch on the Climatronic system as soon as the windows mist up.
Defrosting windscreen
First read and observe the introductory information given on page 82.
Switching on/off
›
Press the symbol button
» Fig. 80 on page 82.
The symbol
(pos.
5
» Fig. 80 on page 82) appears in the display.
›
Press the symbol button
again or press the
button.
The
symbol in the display goes out.
More air flows out of the air outlet vents 1 and 2 » Fig. 77 on page 76. The temper-
ature control is controlled automatically.
84Using the system
Page 96 of 226
NoteThe device being connected must support the Bluetooth®
A2DP profile; refer to
the operating instructions for the relevant device being connected.
Operating the radio and navigation system on the multifunction steering wheel - Version 1
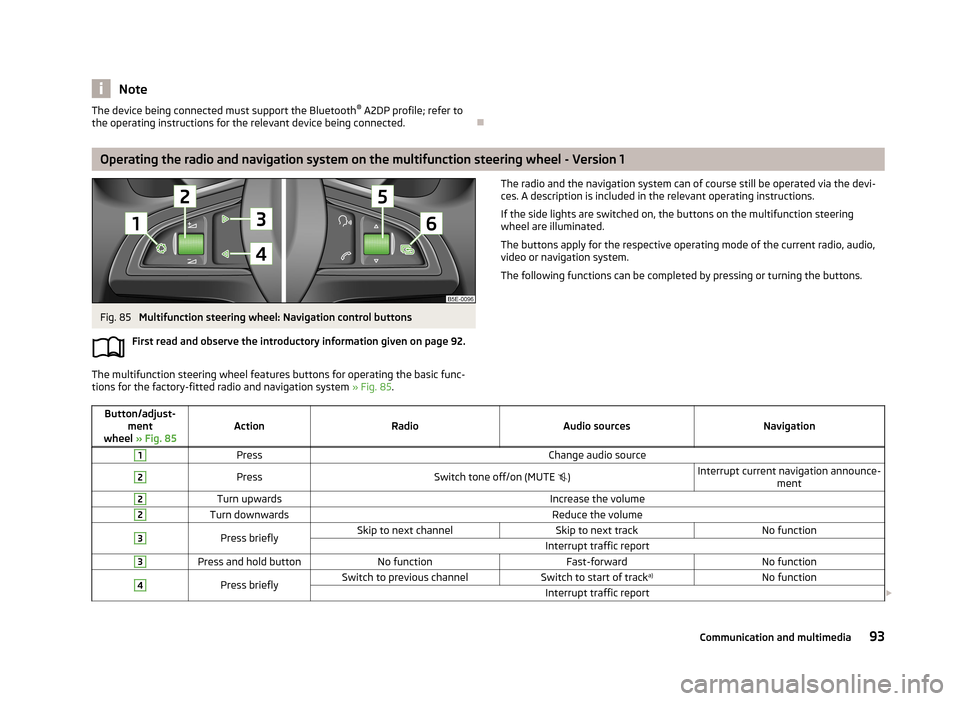
Fig. 85
Multifunction steering wheel: Navigation control buttons
First read and observe the introductory information given on page 92.
The multifunction steering wheel features buttons for operating the basic func-
tions for the factory-fitted radio and navigation system » Fig. 85.
The radio and the navigation system can of course still be operated via the devi-
ces. A description is included in the relevant operating instructions.
If the side lights are switched on, the buttons on the multifunction steering
wheel are illuminated.
The buttons apply for the respective operating mode of the current radio, audio,
video or navigation system.
The following functions can be completed by pressing or turning the buttons.Button/adjust- ment
wheel » Fig. 85ActionRadioAudio sourcesNavigation
1PressChange audio source2PressSwitch tone off/on (MUTE )Interrupt current navigation announce-
ment2Turn upwardsIncrease the volume2Turn downwardsReduce the volume3Press brieflySkip to next channelSkip to next trackNo functionInterrupt traffic report3Press and hold buttonNo functionFast-forwardNo function4Press brieflySwitch to previous channelSwitch to start of track a)No functionInterrupt traffic report
93Communication and multimedia
Page 97 of 226
Button/adjust-ment
wheel » Fig. 85ActionRadioAudio sourcesNavigation
4Press and hold buttonNo functionRewindNo function5
Turn upwardsSwitch to the previous station and at
the same time
display list of saved/available stationsSkip to next trackShow the option to stop navigation or display the list of recent destinations
5
Turn downwardsSwitch to the next station and at the same time
display list of saved/available stationsSwitch to start of track a)
6Press brieflyCall up the main menua)
To go to the previous track, press the adjustment wheel twice or rotate it by two positions.
Operating the radio and navigation system on the multifunction steering wheel - Version 2
Fig. 86
Multifunction steering wheel:
Navigation control buttons
First read and observe the introductory information given on page 92.
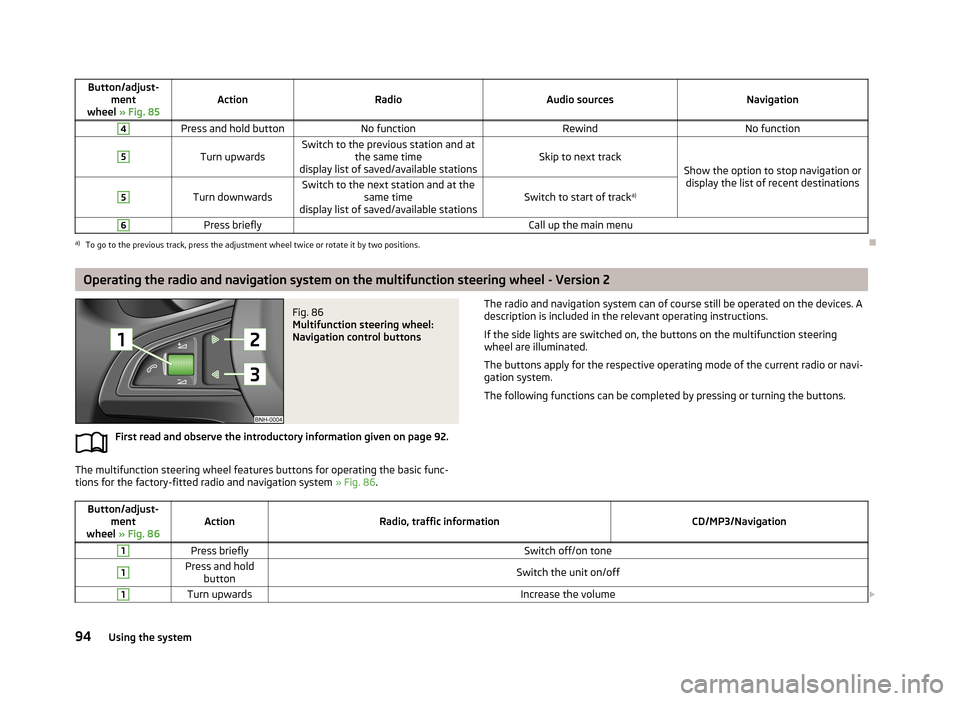
The multifunction steering wheel features buttons for operating the basic func-
tions for the factory-fitted radio and navigation system » Fig. 86.
The radio and navigation system can of course still be operated on the devices. A
description is included in the relevant operating instructions.
If the side lights are switched on, the buttons on the multifunction steeringwheel are illuminated.
The buttons apply for the respective operating mode of the current radio or navi-
gation system.
The following functions can be completed by pressing or turning the buttons.Button/adjust- ment
wheel » Fig. 86ActionRadio, traffic informationCD/MP3/Navigation
1Press brieflySwitch off/on tone1Press and hold
buttonSwitch the unit on/off1Turn upwardsIncrease the volume 94Using the system
Page 104 of 226
WARNINGPlease note that the handbrake must be fully released. A handbrake which is
only partially released can result in the rear brakes overheating. This can have a negative effect on the operation of the brake system – risk of accident!
Manual gear changing and pedals
Introduction
This chapter contains information on the following subjects:
Manual gear changing
101
Pedals
101
Manual gear changing
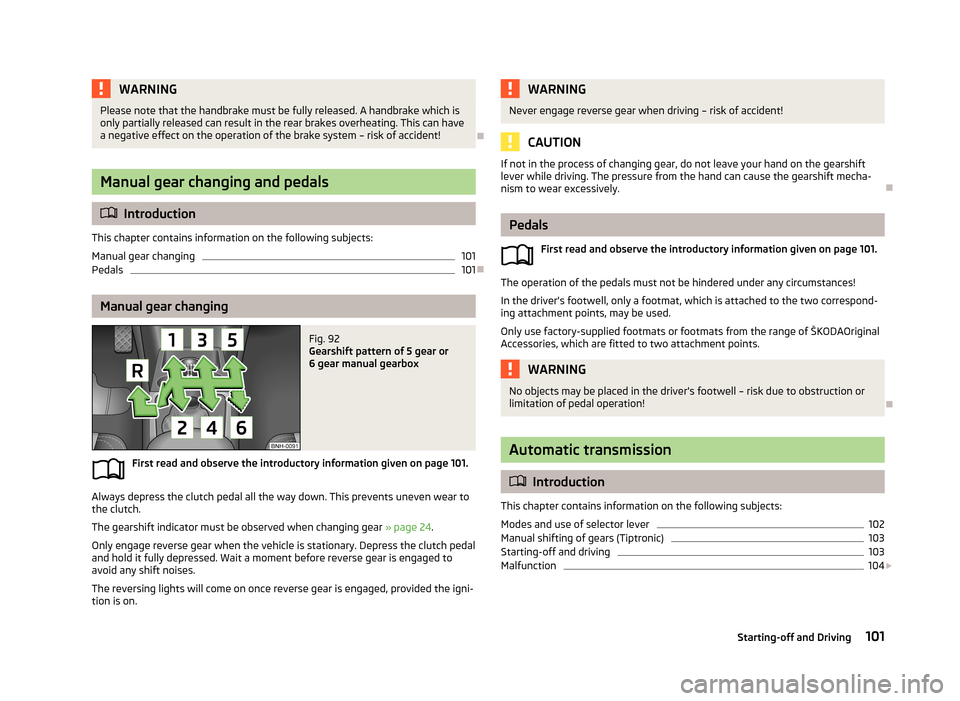
Fig. 92
Gearshift pattern of 5 gear or
6 gear manual gearbox
First read and observe the introductory information given on page 101.
Always depress the clutch pedal all the way down. This prevents uneven wear to
the clutch.
The gearshift indicator must be observed when changing gear » page 24.
Only engage reverse gear when the vehicle is stationary. Depress the clutch pedal
and hold it fully depressed. Wait a moment before reverse gear is engaged to
avoid any shift noises.
The reversing lights will come on once reverse gear is engaged, provided the igni- tion is on.
WARNINGNever engage reverse gear when driving – risk of accident!
CAUTION
If not in the process of changing gear, do not leave your hand on the gearshift
lever while driving. The pressure from the hand can cause the gearshift mecha-nism to wear excessively.
Pedals
First read and observe the introductory information given on page 101.
The operation of the pedals must not be hindered under any circumstances!
In the driver's footwell, only a footmat, which is attached to the two correspond- ing attachment points, may be used.
Only use factory-supplied footmats or footmats from the range of ŠKODAOriginal Accessories, which are fitted to two attachment points.
WARNINGNo objects may be placed in the driver's footwell – risk due to obstruction or
limitation of pedal operation!
Automatic transmission
Introduction
This chapter contains information on the following subjects:
Modes and use of selector lever
102
Manual shifting of gears (Tiptronic)
103
Starting-off and driving
103
Malfunction
104
101Starting-off and Driving