tyre pressure SKODA RAPID 2016 1.G User Guide
[x] Cancel search | Manufacturer: SKODA, Model Year: 2016, Model line: RAPID, Model: SKODA RAPID 2016 1.GPages: 184, PDF Size: 27.06 MB
Page 136 of 184

Fitting new tyres
Only fit approved radial tyres of the same type, size (rolling circumference) and
the same tread pattern on one axle on all four wheels.
When mounting new tyres the tyres have to be replaced axle by axle.
Unidirectional tyres
The direction of rotation of the tyres is marked by arrows on the wall of the
tyre .
The specified running direction must be strictly adhered to, otherwise the fol-
lowing tyre characteristics may be degraded. ▶ Driving stability.
▶ Traction.
▶ Tyre noise and tyre wear.WARNING■ Never use tyres if you do not know anything about their condition and
age - risk of accidents.■
Never drive with damaged tyres – there is the risk of an accident occur-
ring.
CAUTION
■ The tyres must be protected from contact with substances (e.g. oil, grease
and fuel) which could damage them. If the tyres come into contact with these
substances, then we recommend you have this checked out in a specialist
workshop.■
Do not use rims with ground or polished surfaces in winter conditions - there
is a risk of rim damage (e.g through salt spreading).
Note
■ We recommend that any work on the wheels or tyres be carried out by a spe-
cialist garage.■
We recommend that you use tyres, snow chains and full wheel trims from
ŠKODA Original Accessories.
Tyre pressureFig. 152
Label with a table of tyre sizes and tyre pressure value / inflate
tyres
The prescribed tyre inflation is on the sticker with pictograms
A
» Fig. 152 (for
some countries, the pictograms are replaced with a text).
Tyre pressure is always to match the load .
Inflation pressure for half load
Inflation pressure for environmentally friendly operation (slightly lower
fuel consumption and emissions)
Inflation pressure for full load
Tyre diameter in inches
This information serves merely as information for the prescribed tyre pres-
sure. This is not a list of shared tyre sizes for your vehicle. These are in the
vehicle's technical documentation, in the declaration of conformity (in so-
called COC document) and listed on the vehicle data » page 160.
Tyre pressure value on the front axle
Tyre pressure value on the rear axle
Check tyre pressures
Check the tyre pressure (including that of the emergency or spare wheel) at
least once a month and also before setting off on a long journey.
Always check the inflation pressure when the tyres are cold. Do not reduce the
higher pressure on warm tyres.
In vehicles with tyre pressure monitoring, tyre pressure values must be saved
each time the pressures are changed » page 106.
BCDEFG134General Maintenance
Page 137 of 184
WARNING■Do not drive with incorrect tyre pressure - risk of accident.■In the event of very rapid pressure loss (e.g. in the event of tyre damage)
an attempt should be made to bring the vehicle carefully to a stop without
sudden steering movements and without any hard braking - risk of acci-
dent.
Note
The declaration of conformity (COC document), can be obtained from a ŠKODA 1)
partner.
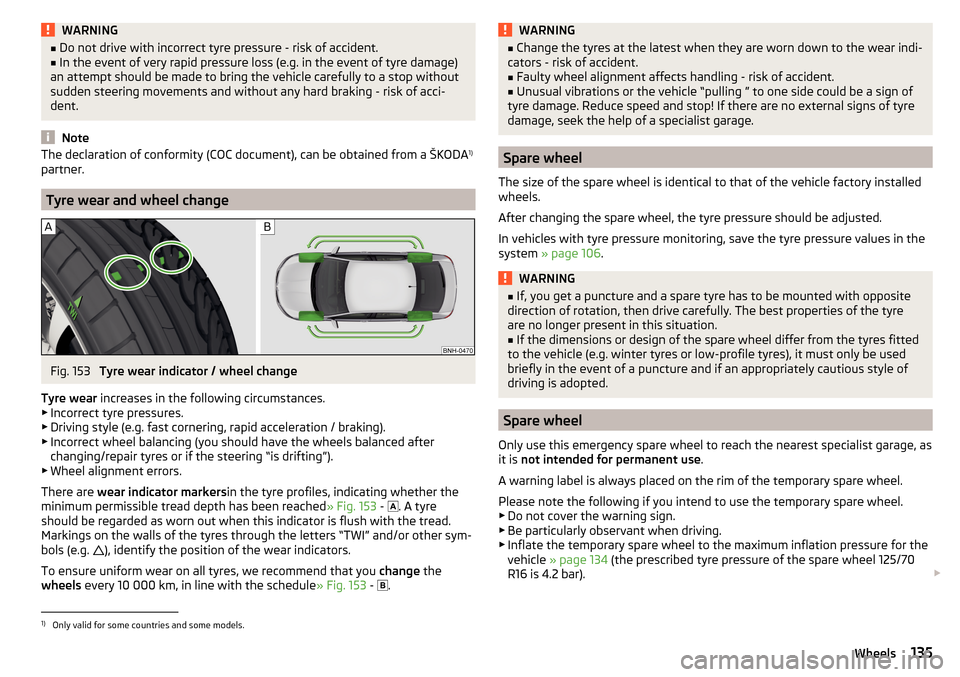
Tyre wear and wheel change
Fig. 153
Tyre wear indicator / wheel change
Tyre wear increases in the following circumstances.
▶ Incorrect tyre pressures.
▶ Driving style (e.g. fast cornering, rapid acceleration / braking).
▶ Incorrect wheel balancing (you should have the wheels balanced after
changing/repair tyres or if the steering “is drifting”).
▶ Wheel alignment errors.
There are wear indicator markers in the tyre profiles, indicating whether the
minimum permissible tread depth has been reached » Fig. 153 -
. A tyre
should be regarded as worn out when this indicator is flush with the tread.
Markings on the walls of the tyres through the letters “TWI” and/or other sym- bols (e.g. ), identify the position of the wear indicators.
To ensure uniform wear on all tyres, we recommend that you change the
wheels every 10 000 km, in line with the schedule » Fig. 153 -
.
WARNING■
Change the tyres at the latest when they are worn down to the wear indi-
cators - risk of accident.■
Faulty wheel alignment affects handling - risk of accident.
■
Unusual vibrations or the vehicle “pulling ” to one side could be a sign of
tyre damage. Reduce speed and stop! If there are no external signs of tyre
damage, seek the help of a specialist garage.
Spare wheel
The size of the spare wheel is identical to that of the vehicle factory installed
wheels.
After changing the spare wheel, the tyre pressure should be adjusted.
In vehicles with tyre pressure monitoring, save the tyre pressure values in the
system » page 106 .
WARNING■
If, you get a puncture and a spare tyre has to be mounted with opposite
direction of rotation, then drive carefully. The best properties of the tyre
are no longer present in this situation.■
If the dimensions or design of the spare wheel differ from the tyres fitted
to the vehicle (e.g. winter tyres or low-profile tyres), it must only be used
briefly in the event of a puncture and if an appropriately cautious style of
driving is adopted.
Spare wheel
Only use this emergency spare wheel to reach the nearest specialist garage, as
it is not intended for permanent use .
A warning label is always placed on the rim of the temporary spare wheel.
Please note the following if you intend to use the temporary spare wheel. ▶ Do not cover the warning sign.
▶ Be particularly observant when driving.
▶ Inflate the temporary spare wheel to the maximum inflation pressure for the
vehicle » page 134 (the prescribed tyre pressure of the spare wheel 125/70
R16 is 4.2 bar).
1)
Only valid for some countries and some models.
135Wheels
Page 138 of 184

In vehicles with tyre pressure monitoring, save the tyre pressure values in the
system » page 106 .WARNING■
Never drive with more than one temporary spare wheel mounted!■Avoid full throttle acceleration, sharp braking and fast cornering when
driving with the temporary spare wheel.■
Do not use snow chains on the temporary spare wheel.
■
Observe the instructions on the warning sign of the temporary spare
wheel.
Tyre marking
Explanation of tyre markings - e.g. 185/60 R 15 84 H
185Tyre width in mm60Height/width ratio in %RCode letter for the type of tyre – Radial15Diameter of wheel in inches84Load indexHSpeed symbol
Load index - indicates the maximum permissible load for each individual tyre
Load index838485868788Load
(In kg)487500515530545560
Speed symbol - indicates the maximum permissible speed for a vehicle fitted
with tyres in a given category
Speed
symbolSTUHVWMaximum speed
(in km/h)180190200210240270WARNINGNever exceed the maximum permissible load bearing capacity and speed
for the tyres fitted – risk of accident.
Operating in winter conditions
All-year (or “winter”) tyres
All-year or “winter”tyres (indicated by an M+S or a mountain peak/snowflake
symbol ) to improve the performance of the vehicle in winter conditions.
To get the best possible driving characteristics, all-year or “winter”tyres, with a
minimum tread depth of 4 mm on all four wheels, should be fitted.
If “winter” tyres are fitted, summer tyres should be fitted again in good time as
they provide better handling properties, a shorter braking distance, less tyre
noise and reduced tyre wear on roads which are free of snow and ice as well
as at temperatures above 7 °C.
Speed symbol
All-year or “winter”tyres (marked with M+S and a peak/snowflake symbol
) of
a lower speed category than listed in the vehicle’s technical documentation
can be used provided that the maximum permissible speed for these tyres is
not exceeded even if the maximum possible speed of the vehicle is higher.
For vehicles with Infotainment, use the button to adjust the speed limit for
all-year or “winter” tyres » Owner´s Manual - Infotainment . For other vehicles,
there is the possibility to set the speed limit for winter tyres at a specialist ga-
rage.
the vehicle has all-season or “winter” tyres with a speed category that is lower
than the specified top speed of the vehicle (does not apply to factory-supplied tyres), a warning label with the maximum value of the speed category supplied
for the mounted tyres in the interior of the vehicle and in a place which is con-
stantly visible in the driver’s field of vision. The warning label (sticker) can be
replaced by setting the maximum value of the speed category supplied for the mounted tyres in Infotainment 1)
. This specification defines the maximum vehi-
cle speed with mounted all-season or “winter”tires that must not be exceeded.
1)
Valid in certain countries.
136General Maintenance
Page 142 of 184
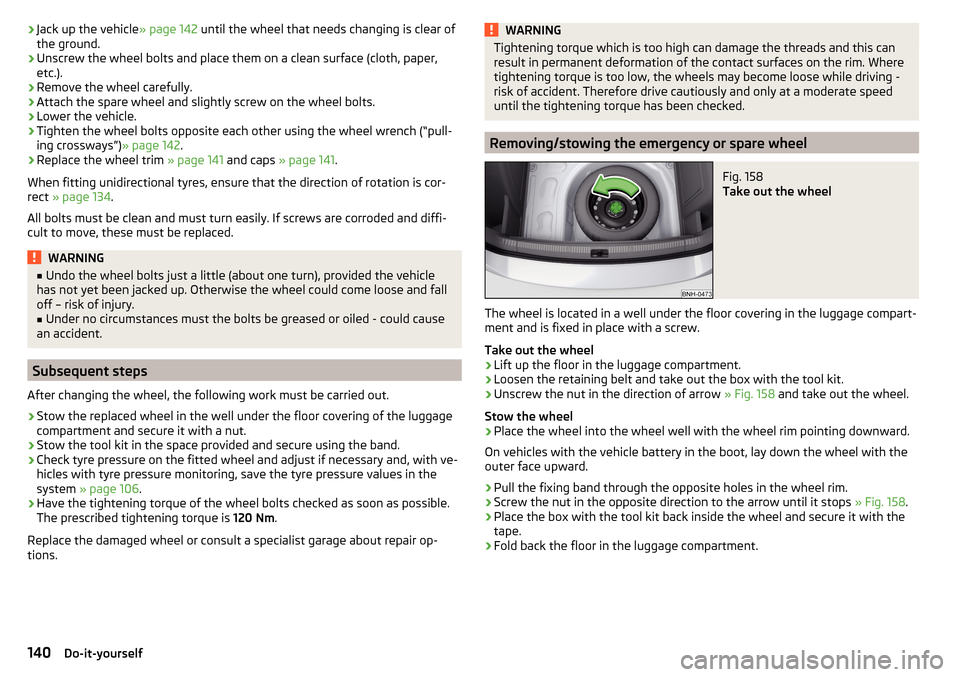
›Jack up the vehicle
» page 142 until the wheel that needs changing is clear of
the ground.›
Unscrew the wheel bolts and place them on a clean surface (cloth, paper,
etc.).
›
Remove the wheel carefully.
›
Attach the spare wheel and slightly screw on the wheel bolts.
›
Lower the vehicle.
›
Tighten the wheel bolts opposite each other using the wheel wrench (“pull- ing crossways”) » page 142.
›
Replace the wheel trim » page 141 and caps » page 141 .
When fitting unidirectional tyres, ensure that the direction of rotation is cor-
rect » page 134 .
All bolts must be clean and must turn easily. If screws are corroded and diffi-
cult to move, these must be replaced.
WARNING■ Undo the wheel bolts just a little (about one turn), provided the vehicle
has not yet been jacked up. Otherwise the wheel could come loose and fall
off – risk of injury.■
Under no circumstances must the bolts be greased or oiled - could cause
an accident.
Subsequent steps
After changing the wheel, the following work must be carried out.
›
Stow the replaced wheel in the well under the floor covering of the luggage
compartment and secure it with a nut.
›
Stow the tool kit in the space provided and secure using the band.
›
Check tyre pressure on the fitted wheel and adjust if necessary and, with ve-
hicles with tyre pressure monitoring, save the tyre pressure values in the
system » page 106 .
›
Have the tightening torque of the wheel bolts checked as soon as possible.
The prescribed tightening torque is 120 Nm.
Replace the damaged wheel or consult a specialist garage about repair op-
tions.
WARNINGTightening torque which is too high can damage the threads and this can
result in permanent deformation of the contact surfaces on the rim. Where
tightening torque is too low, the wheels may become loose while driving -
risk of accident. Therefore drive cautiously and only at a moderate speed
until the tightening torque has been checked.
Removing/stowing the emergency or spare wheel
Fig. 158
Take out the wheel
The wheel is located in a well under the floor covering in the luggage compart-
ment and is fixed in place with a screw.
Take out the wheel
›
Lift up the floor in the luggage compartment.
›
Loosen the retaining belt and take out the box with the tool kit.
›
Unscrew the nut in the direction of arrow » Fig. 158 and take out the wheel.
Stow the wheel
›
Place the wheel into the wheel well with the wheel rim pointing downward.
On vehicles with the vehicle battery in the boot, lay down the wheel with the
outer face upward.
›
Pull the fixing band through the opposite holes in the wheel rim.
›
Screw the nut in the opposite direction to the arrow until it stops » Fig. 158.
›
Place the box with the tool kit back inside the wheel and secure it with the
tape.
›
Fold back the floor in the luggage compartment.
140Do-it-yourself
Page 143 of 184
Full wheel trim
Remove trim›
Hang the clamps for removing the full wheel trims on the edge of the full
wheel trim.
›
Push the wheel wrench through the clamp, support on the tyre and pull off
the wheel trim.
Install trim
›
Press the wheel trim onto the wheel rim at the designated valve opening.
›
Then press the trim into the wheel rim until its entire circumference locks
correctly in place.
The position of the anti-theft wheel bolt is indicated by means of a symbol on
the back of the wheel trim supplied ex-factory or from the ŠKODA Original Ac-
cessories. If using the anti-theft wheel bolt, it should be fitted at this point
»
.
WARNINGIf wheel trims are fitted, an adequate flow of air must be assured in order
to cool the brake system - otherwise risk of accident.
CAUTION
■ If the wheel trim is positioned outside the position marked for the anti-theft
wheel bolt, there is a risk of damaging the wheel cover.■
Only use manual pressure and do not hit the full wheel trim – there is a risk
of damaging the trim.
Note
We recommend that you use wheel trims from ŠKODA Original Accessories.
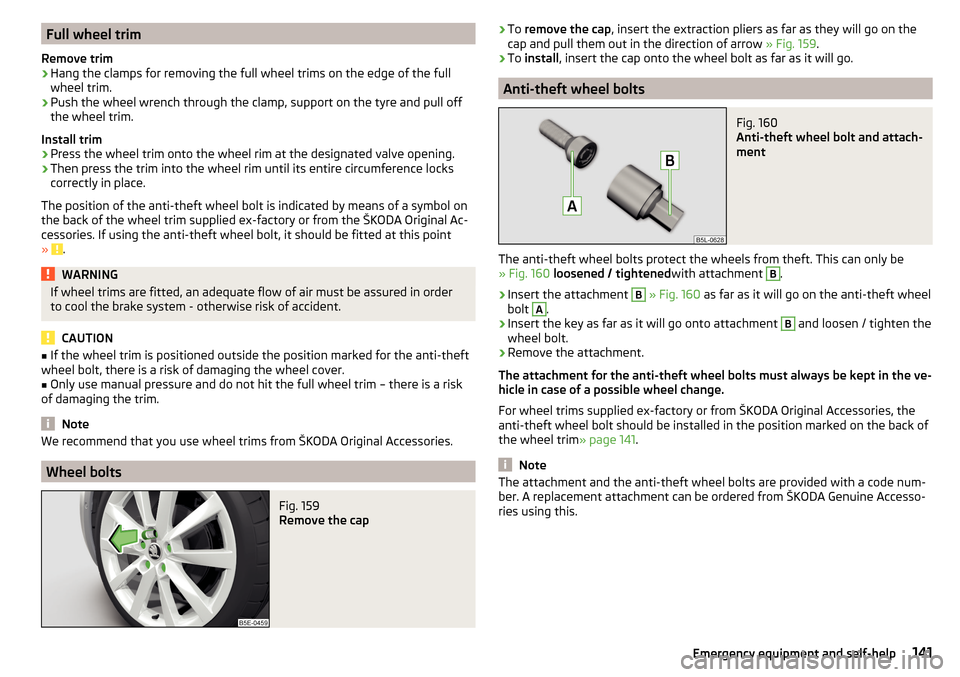
Wheel bolts
Fig. 159
Remove the cap
› To
remove the cap , insert the extraction pliers as far as they will go on the
cap and pull them out in the direction of arrow » Fig. 159.›
To install , insert the cap onto the wheel bolt as far as it will go.
Anti-theft wheel bolts
Fig. 160
Anti-theft wheel bolt and attach-
ment
The anti-theft wheel bolts protect the wheels from theft. This can only be » Fig. 160 loosened / tightened with attachment
B
.
›
Insert the attachment
B
» Fig. 160 as far as it will go on the anti-theft wheel
bolt
A
.
›
Insert the key as far as it will go onto attachment
B
and loosen / tighten the
wheel bolt.
›
Remove the attachment.
The attachment for the anti-theft wheel bolts must always be kept in the ve-
hicle in case of a possible wheel change.
For wheel trims supplied ex-factory or from ŠKODA Original Accessories, the
anti-theft wheel bolt should be installed in the position marked on the back of
the wheel trim » page 141.
Note
The attachment and the anti-theft wheel bolts are provided with a code num-
ber. A replacement attachment can be ordered from ŠKODA Genuine Accesso-
ries using this.141Emergency equipment and self-help
Page 144 of 184

Loosening/tightening wheel boltsFig. 161
Loosening the wheel bolts
›
Insert the wheel wrench onto the wheel bolt to the stop. Use the associated
attachment for the anti-theft wheel bolts » Fig. 160 on page 141 .
›
To loosen the screws , grasp the key end and turn the screw about one turn
rotation in the direction of the arrow » Fig. 161.
›
Totighten the screws , grasp the key end and turn the screw about against
the direction of the arrow » Fig. 161, until it is tight.
WARNINGIf it proves difficult to undo the bolts, carefully apply pressure to the end of
the wrench with your foot. Keep hold of the vehicle when doing so, and
make sure you keep your footing - danger of injury.
Raising the vehicle
Fig. 162
Jacking points for the jack
Fig. 163
Attach lifting jack
Before the vehicle is raised, please take note of the safety instructions »
.
In order to raise the vehicle, the jack from the tool kit is to be used. Position
the car jack at the jacking point closest to the flat tyre.
The jacking points are located on the lower sill » Fig. 162.
›
Position the base plate of the jack with its full area resting on level ground
and ensure that the jack will fit in the jacking point when raised » Fig. 163 -
.
›
Use the crank to raise the jack until its pawl covers the jacking
point » Fig. 163 -
.
›
Raise the vehicle until the wheel is a little off the floor.
WARNINGThe following instructions must be observed, otherwise there is risk of in-
jury.■
Ensure the vehicle cannot unexpectedly roll away.
■
Always ensure the base plate of the lifting jack cannot slip.
■ Place a wide and stable base material under the jack if on a loose surfa-
ces (e.g. gravel).
■ Place an anti-slip base material (e.g. a rubber mat) under the jack if on a
smooth surface (e.g. cobblestones).
■
Always raise the vehicle with the doors closed.
■
Never position any body parts (e.g. arms or legs) under the vehicle while
the vehicle is raised.
■
When the vehicle is raised, never start the engine.
CAUTION
It is important to ensure that the jack is correctly positioned against the bar of
the lower beam - otherwise there is a risk of damage to the vehicle.142Do-it-yourself
Page 145 of 184

Breakdown kit
Introduction
This chapter contains information on the following subjects:
Description of the breakdown kit
143
Preparing to use the breakdown kit
144
Sealing and inflating tyres
144
Information on driving with repaired tyres
144
The following information applies for the breakdown kit supplied ex-factory.
The breakdown kit can be used to seal punctures with a diameter of up to
about 4 mm.
A repair made using the breakdown kit is never intended to replace a perma-
nent repair on the tyre. Its purpose is to get you to the nearest specialist ga-
rage.
Replace the tyre that was repaired using the breakdown kit as soon as possi-
ble, or consult a specialist garage about repair options.
Do not remove foreign bodies which have penetrated into the tyre (e.g. nails).
Do not use the breakdown kit in the following cases.
▶ The rim is damaged.
▶ The outside temperature is below -20 ° C.
▶ Tyre punctures greater than 4 mm.
▶ Damage to the tyre wall.
▶ The use-by date (see inflation bottle) has passed.
WARNING■ If there is skin contact with the sealant wash the affected area immedi-
ately.■
Observe the manufacturer's usage instructions for the breakdown kit.
Description of the breakdown kitFig. 164
Description of the breakdown kit
Read and observe
on page 143 first.
The kit is located in a box under the floor covering in the luggage compart-
ment.
Sticker with speed designation “max. 80 km/h”/“max. 50 mph”Valve remover
Inflation hose with plug
Air compressor (the layout of the controls may be different depending on
the type of air compressor delivered with the vehicle)
Button for the tyre pressure reduction
12 volt cable connector
Tyre inflation hose
Tyre inflation pressure indicator
ON and OFF switch
Tyre inflator bottle with sealing agent
Replacement valve core
Note
The declaration of conformity is included with the air compressor or the log
folder.1234567891011143Emergency equipment and self-help
Page 146 of 184
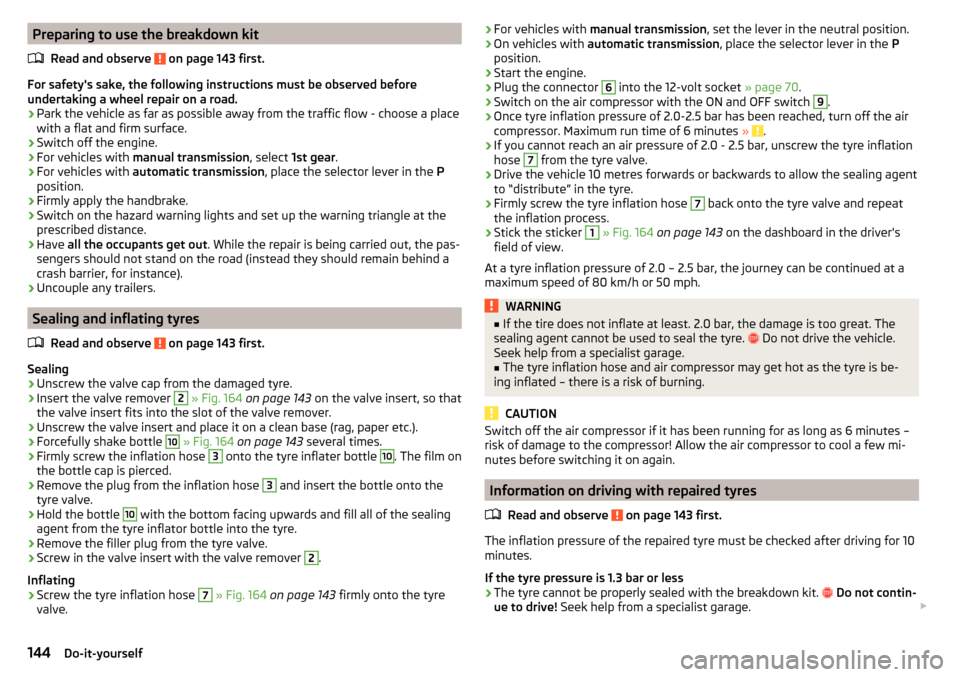
Preparing to use the breakdown kitRead and observe
on page 143 first.
For safety's sake, the following instructions must be observed before
undertaking a wheel repair on a road.
›
Park the vehicle as far as possible away from the traffic flow - choose a place
with a flat and firm surface.
›
Switch off the engine.
›
For vehicles with manual transmission , select 1st gear .
›
For vehicles with automatic transmission , place the selector lever in the P
position.
›
Firmly apply the handbrake.
›
Switch on the hazard warning lights and set up the warning triangle at the
prescribed distance.
›
Have all the occupants get out . While the repair is being carried out, the pas-
sengers should not stand on the road (instead they should remain behind a
crash barrier, for instance).
›
Uncouple any trailers.
Sealing and inflating tyres
Read and observe
on page 143 first.
Sealing
›
Unscrew the valve cap from the damaged tyre.
›
Insert the valve remover
2
» Fig. 164 on page 143 on the valve insert, so that
the valve insert fits into the slot of the valve remover.
›
Unscrew the valve insert and place it on a clean base (rag, paper etc.).
›
Forcefully shake bottle
10
» Fig. 164 on page 143 several times.
›
Firmly screw the inflation hose
3
onto the tyre inflater bottle
10
. The film on
the bottle cap is pierced.
›
Remove the plug from the inflation hose
3
and insert the bottle onto the
tyre valve.
›
Hold the bottle
10
with the bottom facing upwards and fill all of the sealing
agent from the tyre inflator bottle into the tyre.
›
Remove the filler plug from the tyre valve.
›
Screw in the valve insert with the valve remover
2
.
Inflating
›
Screw the tyre inflation hose
7
» Fig. 164 on page 143 firmly onto the tyre
valve.
› For vehicles with
manual transmission , set the lever in the neutral position.›On vehicles with automatic transmission , place the selector lever in the P
position.›
Start the engine.
›
Plug the connector
6
into the 12-volt socket » page 70.
›
Switch on the air compressor with the ON and OFF switch
9
.
›
Once tyre inflation pressure of 2.0-2.5 bar has been reached, turn off the air
compressor. Maximum run time of 6 minutes » .
›
If you cannot reach an air pressure of 2.0 - 2.5 bar, unscrew the tyre inflation
hose
7
from the tyre valve.
›
Drive the vehicle 10 metres forwards or backwards to allow the sealing agent
to “distribute” in the tyre.
›
Firmly screw the tyre inflation hose
7
back onto the tyre valve and repeat
the inflation process.
›
Stick the sticker
1
» Fig. 164 on page 143 on the dashboard in the driver's
field of view.
At a tyre inflation pressure of 2.0 – 2.5 bar, the journey can be continued at a maximum speed of 80 km/h or 50 mph.
WARNING■ If the tire does not inflate at least. 2.0 bar, the damage is too great. The
sealing agent cannot be used to seal the tyre. Do not drive the vehicle.
Seek help from a specialist garage.■
The tyre inflation hose and air compressor may get hot as the tyre is be-
ing inflated – there is a risk of burning.
CAUTION
Switch off the air compressor if it has been running for as long as 6 minutes –
risk of damage to the compressor! Allow the air compressor to cool a few mi-
nutes before switching it on again.
Information on driving with repaired tyres
Read and observe
on page 143 first.
The inflation pressure of the repaired tyre must be checked after driving for 10minutes.
If the tyre pressure is 1.3 bar or less
›
The tyre cannot be properly sealed with the breakdown kit.
Do not contin-
ue to drive! Seek help from a specialist garage.
144Do-it-yourself
Page 147 of 184

If the tyre pressure is 1.3 bar or more›Set the tyre pressure back to the correct value » page 134.›
Continue driving carefully to the nearest specialist garage at a maximum
speed of 80 km/h (50 mph).
WARNINGA tyre filled with sealant has the same driving characteristics as a standard
tyre. The following guidelines must be observed.■
Do not drive faster than 80 km/h (50 mph).
■
Avoid accelerating at full throttle, sharp braking and fast cornering.
Jump-starting
Introduction
This chapter contains information on the following subjects:
Jump-starting using the battery from another vehicle
145WARNING■ The following instructions must be followed at all times when working on
the engine compartment » page 125.■
When handling the vehicle battery, the following warnings must be ob-
served » page 131 .
■
A discharged vehicle battery may already freeze at temperatures just be-
low 0 °C. If the battery is frozen, do not carry out a jump start with the bat-
tery of another vehicle – risk of explosion and injury!
■
Never jump-start vehicle batteries with an electrolyte level that is too low
– risk of explosion and caustic burns!
Jump-starting using the battery from another vehicleFig. 165
Start assistance:
- Discharged battery,
-power-supplying
battery / ground point of the engine for the START-STOP system
Fig. 166
Positive terminal on vehicles with the vehicle battery in the lug-
gage compartment
Read and observe
on page 145 first.
If, because of a discharged battery, it is not possible to start the engine, the
battery of another vehicle can be used to start the engine. To do this, jump-
start cables are required which have a sufficiently large cross-section and in-
sulated terminal clamps.
The rated voltage of the two batteries must be 12 V. The capacity (Ah) of the
power-supplying battery must not be significantly lower than the capacity of
the discharged battery.
The jump-start cables must be attached in the following sequence.
›
Attach clamp
1
to the positive terminal of the discharged battery.
›
Attach clamp
2
to the positive terminal of the power-supplying battery.
145Emergency equipment and self-help
Page 174 of 184
Lock steering lock83
Low beam54
Low tyre pressure warning refer to the tyre pressure monitoring
106
Luggage compartment74
Cover76
Fastening elements75
Fixing nets75
Floor covering on both sides78
Lighting74
See boot lid51
unlock manually149
Unlock the boot lid149
Luggage compartment cover76
Luggage compartment lid50
M
Main beam
55
Warning light34
Manual air conditioning Air distribution control
81
Controls80
Manual gear changing see gear changing
88
Materials defect liability4
MAXI DOT See MAXI DOT display
41
MAXI DOT display Main menu
41
Menu item assist systems42
Menu item Audio41
Menu item navigation41
Menu item telephone42
Operation39
Maximum speed165
MCB95
Mechanical windows51
Open/close52
Media AUX67
See Owner´s Manual -Infotainment6
USB67
Memory40
Mirror61
Vanity59
Mobility warranty5
Modes of the automatic transmission89
Modifications and technical alterations115
MSR94
Multi collision brake (MCB)95
Multifunction display Functions
39
Information40
Memory40
Multifunction pocket76
Multifunction steering wheel39
Multimedia holder70
N
N1
78
Nameplate160
Navigation S Owner´s Manual -Infotainment
6
Nets75
O
oil see Engine oil
129
Oil Information messages
35
Oil changing Engine oil
128
On-board computer see multifunction display
39
Operating weight161
Original accessories116
Overview Cockpit27
Engine compartment127
Fuses151
Warning lights29
P
Parking
88
Parking aid96
Reversing camera98
Parking aid96
Automatic system activation when moving for- ward
98
Function96
Parking assistance Activation / deactivation
97
Display in the Infotainment display97
Parking light54
Parking the vehicle see Parking
88
Park Pilot96
Parts replacement115
Passive safety Before setting off
10
Driving safety10
Passive Safety10
Pedals88
Footmats88
Petrol124
Pocketin the luggage compartment76
Pockets72
Power steering31
Practical features Pockets
72
Storage compartment for umbrella72
Waste container68
Preheating unit32
172Index