parking brake SKODA RAPID 2016 1.G Owner's Manual
[x] Cancel search | Manufacturer: SKODA, Model Year: 2016, Model line: RAPID, Model: SKODA RAPID 2016 1.GPages: 184, PDF Size: 27.06 MB
Page 4 of 184
Table of Contents
materials defect liability and ŠKODA warranty
for new cars4
On-board literature
6
Notes
7
Structure of the Owner's Manual and further
information
8
Abbreviations
Safety
Passive Safety
10
General information
10
Correct and safe seated position
10
Seat belts
12
Using seat belts
12
Inertia reels and belt tensioners
14
Airbag system
15
Description of the airbag system
15
Airbag deactivation
18
Transporting children safely
19
Child seat
19
Fastening systems
22
Using the system
Cockpit
27
Overview
26
Instruments and warning lights
28
Instrument cluster
28
Warning lights
29
Information system
37
Driver information system
37
Operation of the information system
39Driving data (Multifunction display)39MAXI DOT display41
Service interval display
42
SmartGate
43
Unlocking and opening
45
Unlocking and locking
45
Anti-theft alarm system
49
Luggage compartment lid
50
Window operation
51
Lights and visibility
53
Lights
53
Interior lighting
57
Visibility
58
Windscreen wipers and washers
59
Rear view mirror
61
Seats and head restraints
62
Front seats
62
Rear seats
63
Headrests
64
Seat heaters
65
Useful features
66
Interior fittings
66
Tablet holder
73
Transport of cargo
74
Luggage compartment and transporting
objects
74
Transportation on the roof rack
78
Heating and ventilation
79
Heating, manual air conditioning system,
Climatronic
79
Driving
Starting-off and Driving
83
Starting and stopping the engine
83
START-STOPsystem
85Brakes and parking86Manual gear changing and pedals88
Automatic gearbox
89
Running in and economical driving
91
Avoiding damage to your vehicle
92
Assist systems
93
General information
93
Braking and stabilisation systems
93
Parking aid (ParkPilot)
96
Reversing camera
98
Cruise Control System
100
Speed limiter
101
Front Assist
102
Fatigue detection
105
Tyre pressure monitoring
106
Towing device and trailer
108
Hitch
108
Use the towing device
112
General Maintenance
Care and maintenance
115
Service work, adjustments and technical
alterations
115
Service intervals
117
Cleaning and care
119
Inspecting and replenishing
123
Fuel
123
Engine compartment
125
Engine oil
128
Coolant
129
Brake fluid
130
Vehicle battery
131
Wheels
133
Wheels and tyres
133
Operating in winter conditions
1362Table of Contents
Page 29 of 184
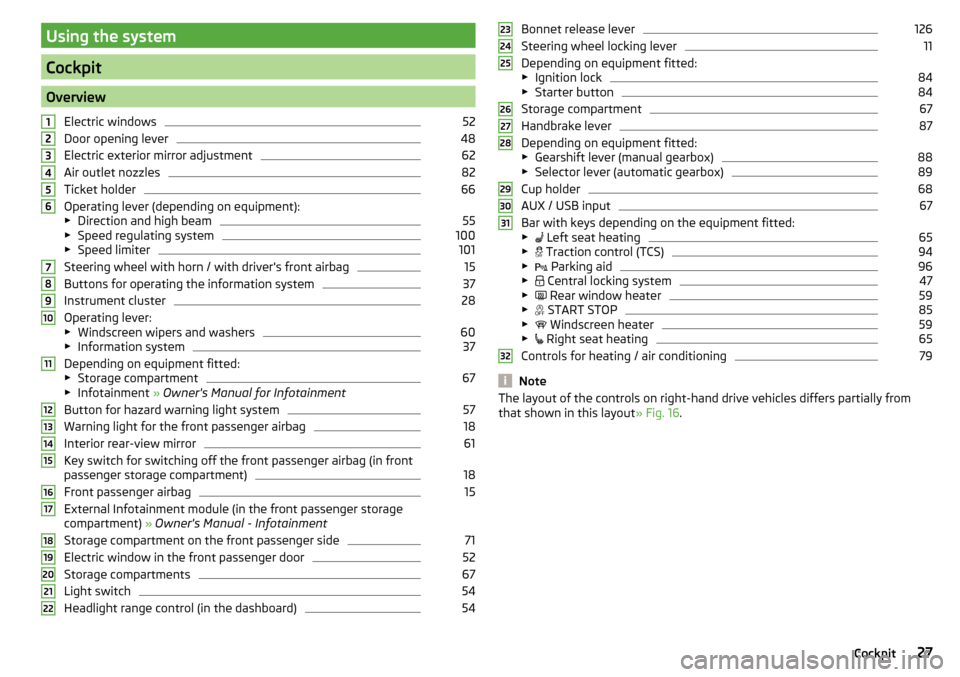
Using the system
Cockpit
OverviewElectric windows
52
Door opening lever
48
Electric exterior mirror adjustment
62
Air outlet nozzles
82
Ticket holder
66
Operating lever (depending on equipment):
▶ Direction and high beam
55
▶Speed regulating system
100
▶Speed limiter
101
Steering wheel with horn / with driver's front airbag
15
Buttons for operating the information system
37
Instrument cluster
28
Operating lever:
▶ Windscreen wipers and washers
60
▶Information system
37
Depending on equipment fitted:
▶ Storage compartment
67
▶Infotainment » Owner's Manual for Infotainment
Button for hazard warning light system
57
Warning light for the front passenger airbag
18
Interior rear-view mirror
61
Key switch for switching off the front passenger airbag (in front
passenger storage compartment)
18
Front passenger airbag
15
External Infotainment module (in the front passenger storage
compartment) » Owner's Manual - Infotainment
Storage compartment on the front passenger side
71
Electric window in the front passenger door
52
Storage compartments
67
Light switch
54
Headlight range control (in the dashboard)
5412345678910111213141516171819202122Bonnet release lever126
Steering wheel locking lever
11
Depending on equipment fitted:
▶ Ignition lock
84
▶Starter button
84
Storage compartment
67
Handbrake lever
87
Depending on equipment fitted:
▶ Gearshift lever (manual gearbox)
88
▶Selector lever (automatic gearbox)
89
Cup holder
68
AUX / USB input
67
Bar with keys depending on the equipment fitted:
▶ Left seat heating
65
▶
Traction control (TCS)
94
▶
Parking aid
96
▶
Central locking system
47
▶
Rear window heater
59
▶
START STOP
85
▶
Windscreen heater
59
▶
Right seat heating
65
Controls for heating / air conditioning
79
Note
The layout of the controls on right-hand drive vehicles differs partially from
that shown in this layout » Fig. 16.2324252627282930313227Cockpit
Page 88 of 184
Requirements for the system to function correctly
The following conditions must be met for the system to function correctly.
The driver's door is closed.
The driver has fastened the seat belt.
The driving speed was higher than 4 km/h after the last stop.
No trailer or other accessory is connected to the trailer socket.
System status
The system status is shown in the display when the vehicle comes to a halt
» Fig. 100 .
The engine is automatically switched off; when the vehicle moves off the
ignition process will be automatically initiated.
The engine is not automatically switched off.
The engine does not shut down when the vehicle stops, if e.g. the following
applies.
▶ The engine temperature for the proper function of the system has not yet
been reached.
▶ The charge state of the vehicle battery is too low.
▶ The current consumption is too high.
▶ High air conditioning or heating output (high fan speed, big difference be-
tween the desired and actual interior temperature).
If the engine has shut down automatically but the system detects that the en- gine is required to run (e.g. if the brake pedal is pressed repeatedly) then the
system automatically starts up the engine.
More information about the current system status can be displayed on the In-
fotainment screen » Owner´s Manual - Infotainment .
If there is a system fault , the following message will appear in the display of
the instrument cluster. Seek help from a specialist garage.Note■ If the driver's seat belt is removed for more than 30 seconds or the driver's
door is opened after the engine has switched off automatically, the engine will
have to be restarted manually.■
No automatic engine shut-down takes place when a vehicle with automatic
transmission is moving at low speed (e.g. during a traffic jam) and remains sta-
tionary after pressing the brake pedal lightly. Automatic engine shut-down
takes place if you press the brake pedal down with more force.
■
For vehicles with automatic transmission there is no automatic engine shut-
down when the system detects a manoeuvring action due to a large steering
angle.
Manually deactivating/activating the system
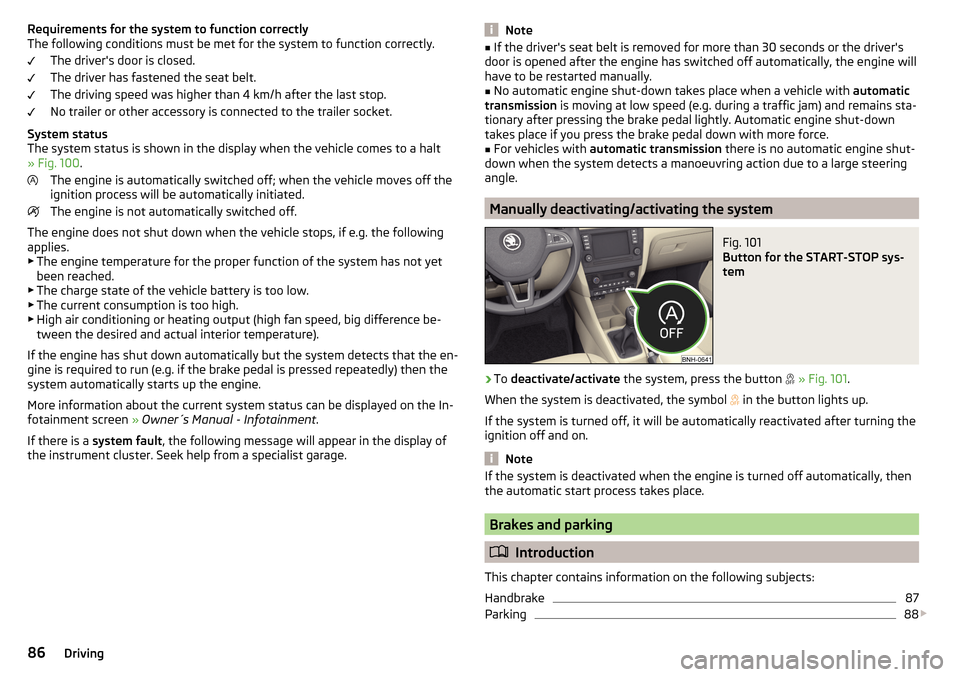
Fig. 101
Button for the START-STOP sys-
tem
›
To deactivate/activate the system, press the button
» Fig. 101 .
When the system is deactivated, the symbol
in the button lights up.
If the system is turned off, it will be automatically reactivated after turning the ignition off and on.
Note
If the system is deactivated when the engine is turned off automatically, then
the automatic start process takes place.
Brakes and parking
Introduction
This chapter contains information on the following subjects:
Handbrake
87
Parking
88
86Driving
Page 89 of 184
The wear and tear on the brake pads is dependent on the operating condi-
tions and driving style. In difficult conditions (e.g. urban, sporty driving), the
condition of the brakes should be checked between services by a specialist ga-
rage.
Brake response can be slower if the brakes are covered in moisture or, in win-
ter, have a layer of ice or salt on them . The brakes should be cleaned and
dried by applying the brakes many times over »
.
Corrosion on the brake discs and dirt on the brake pads can occur if the vehicle
has been parked for a long period and if you do not make much use of the
braking system. The brakes are cleaned by applying the brakes several times
over »
.
Before negotiating a long or steep gradient , reduce speed and shift down a
gear. As a result, the braking effect of the engine will be used, reducing the
load on the brakes. If, nevertheless, there is a need for additional braking, it
should be carried out at intervals.
Emergency braking warning - if it is necessary to brake hard, the system may
cause the brake lights to automatically flash, to alert the traffic behind.
New brake pads must first be ““run in”” because these do not initially have the
best possible braking effect. Drive especially carefully for the first 200 km or
so.
If the brake fluid level is too low, it can cause faults in the braking system ;
the warning light will illuminate in the instrument cluster
» page 30,
Braking system
. If the warning light does not light up, yet the stopping dis-
tance is perceived to be longer than before, the driving style should be adap-
ted in view of the unknown cause of the problem, and braking kept to a mini-
mum - seek the help of a specialist garage without delay.
The brake booster increases the pressure generated with the brake pedal. The
brake booster only operates when the engine is running.
WARNING■ Greater physical effort is required for braking when the engine is switch-
ed off – risk of accident!■
The clutch pedal must be actuated when braking on a vehicle with man-
ual transmission, when the vehicle is in gear and at low revs. Otherwise,
the functionality of the brake system may be impaired – risk of accident!
WARNING (Continued)■ Do not depress the brake pedal, if there is no requirement to slow down.
This causes the brakes to overheat and can also result in a longer braking
distance and excessive wear - risk of accident!■
Only brake for the purpose of drying and cleaning the brake discs if the
traffic conditions permit this. Do not place any other road users in jeopardy.
■
Recommendations for new brake pads should be followed.
■
When stopping and parking, the parking brake should always be applied
firmly, otherwise the vehicle could move off - risk of accident!
■
If a front spoiler, full wheel trim, etc. is mounted retrospectively, it must
be ensured that the air supply to the front wheel brakes is not reduced.
Otherwise, the front brakes could be in danger of overheating – risk of acci-
dent!
Handbrake
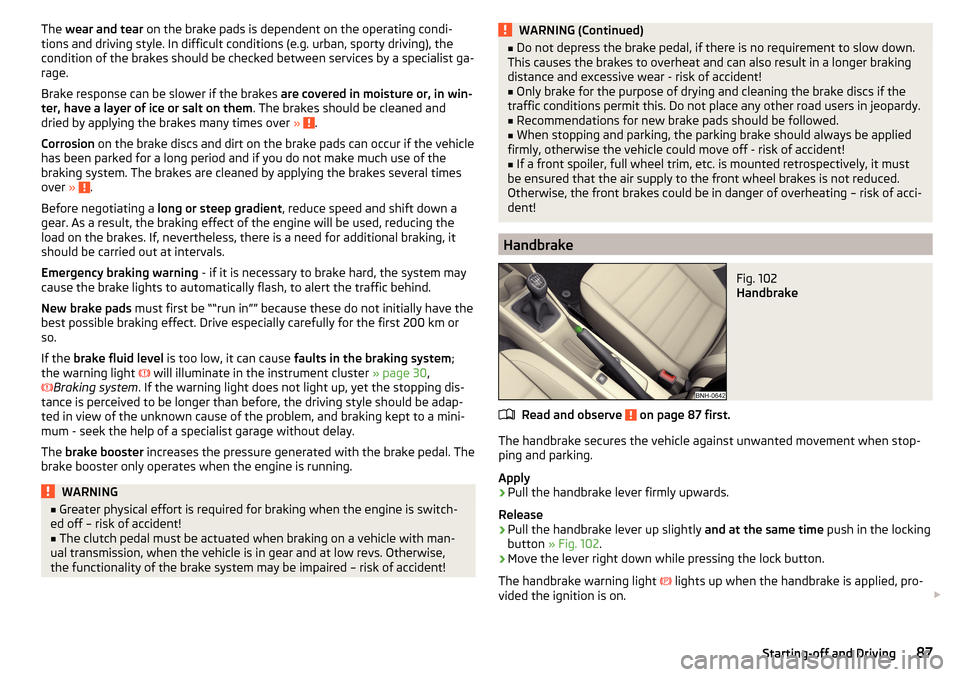
Fig. 102
Handbrake
Read and observe on page 87 first.
The handbrake secures the vehicle against unwanted movement when stop-
ping and parking.
Apply
›
Pull the handbrake lever firmly upwards.
Release
›
Pull the handbrake lever up slightly and at the same time push in the locking
button » Fig. 102 .
›
Move the lever right down while pressing the lock button.
The handbrake warning light
lights up when the handbrake is applied, pro-
vided the ignition is on.
87Starting-off and Driving
Page 90 of 184
A warning signal sounds if the vehicle is inadvertently driven off with the
handbrake applied. The handbrake warning is activated if the vehicle is driven
at a speed of over 5 km/h for more than 3 seconds.WARNINGDisengage the handbrake completely. A handbrake which is only partially
disengaged can result in the rear brakes overheating. This can have a nega-
tive effect on the operation of the brake system – risk of accident!
Parking
Read and observe
on page 87 first.
When stopping and parking, look for a place with a suitable surface » .
Only carry out the activities while parking in the specified order.
›
Bring the vehicle to a stop and depress the brake pedal.
›
Firmly apply the handbrake.
›
On vehicles with automatic transmission , place the selector lever in the P
position.
›
Switch off the engine.
›
For vehicles with Manual transmission , select 1st gear or Reverse gear R .
›
Release the brake pedal.
WARNING■
The parts of the exhaust system can become very hot. Therefore, never
stop the vehicle in places where the underside of your vehicle could come
into contact with flammable materials (e.g. dry grass, leaves, spilled fuel or
the like). - Risk of fire and serious injury can occur!■
When leaving the vehicle, never leave people unattended in the car who
could, for example, lock the vehicle or release the brake - risk of accidents
and injury!
Manual gear changing and pedals
Introduction
This chapter contains information on the following subjects:
Manual gear changing
88
Pedals
88Manual gear changingFig. 103
The shift pattern
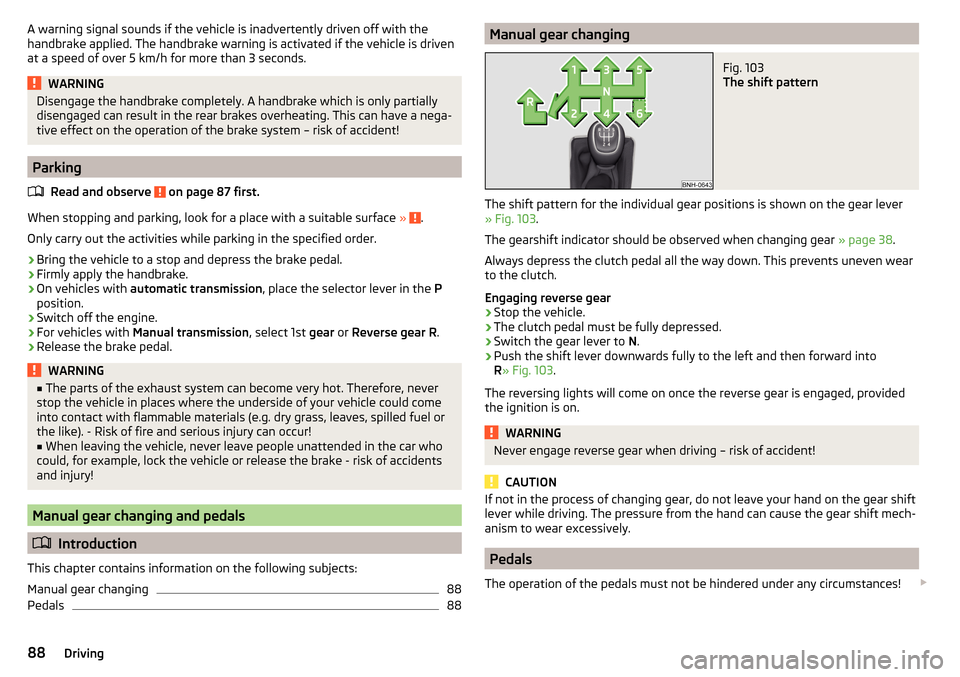
The shift pattern for the individual gear positions is shown on the gear lever » Fig. 103 .
The gearshift indicator should be observed when changing gear » page 38.
Always depress the clutch pedal all the way down. This prevents uneven wear
to the clutch.
Engaging reverse gear
›
Stop the vehicle.
›
The clutch pedal must be fully depressed.
›
Switch the gear lever to N.
›
Push the shift lever downwards fully to the left and then forward into
R » Fig. 103 .
The reversing lights will come on once the reverse gear is engaged, provided the ignition is on.
WARNINGNever engage reverse gear when driving – risk of accident!
CAUTION
If not in the process of changing gear, do not leave your hand on the gear shift
lever while driving. The pressure from the hand can cause the gear shift mech-
anism to wear excessively.
Pedals
The operation of the pedals must not be hindered under any circumstances!
88Driving
Page 91 of 184
Only a floor mat (ex-factory or from the ŠKODA Original Accessories range)
which can be secured to the attachment points should be used in the driver's
footwell.WARNINGThere should be no objects in the driver's footwell, otherwise the pedal op-
eration can be impeded - risk of accident!
Automatic gearbox
Introduction
This chapter contains information on the following subjects:
Select selector lever position
89
Selector lever lock
90
Manual shifting (Tiptronic)
90
Starting-off and driving
91
The automatic transmission performs an automatic gear change irrespective of
the engine load, the operation of the accelerator, the vehicle speed and the
selected driving mode.
The modes of the automatic transmission can be adjusted by the driver by
means of the selector lever.
WARNING■ Do not accelerate when selecting drive mode prior to moving off - risk of
accident!■
Never move the selector lever to mode R or P when driving – risk of acci-
dent!
■
If the vehicle stalls, with engine running, in the D, S , R or Tiptronic mode,
then the vehicle must be prevented from rolling away by means of the
brake pedal, parking brake or using the Auto Hold function. Even when the
engine is idling, the power transmission is never completely interrupted –
the vehicle crawls forward.
■
When leaving the vehicle, the selector lever must always be set to P. Oth-
erwise, the vehicle could be set in motion - risk of accident!
CAUTION
If you want to move the selector lever from position N to position D / S whilst
driving, the engine must be running at idling speed.Select selector lever positionFig. 104
Selector lever/display
Read and observe and on page 89 first.
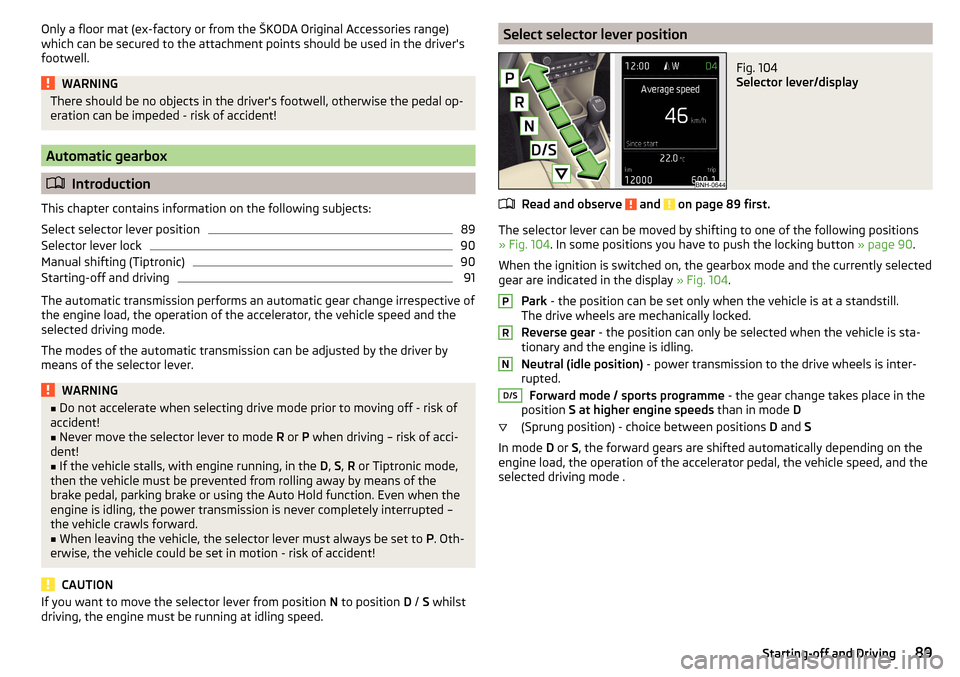
The selector lever can be moved by shifting to one of the following positions
» Fig. 104 . In some positions you have to push the locking button » page 90.
When the ignition is switched on, the gearbox mode and the currently selected
gear are indicated in the display » Fig. 104.
Park - the position can be set only when the vehicle is at a standstill.
The drive wheels are mechanically locked.
Reverse gear - the position can only be selected when the vehicle is sta-
tionary and the engine is idling.
Neutral (idle position) - power transmission to the drive wheels is inter-
rupted.
Forward mode / sports programme - the gear change takes place in the
position S at higher engine speeds than in mode D
(Sprung position) - choice between positions D and S
In mode D or S, the forward gears are shifted automatically depending on the
engine load, the operation of the accelerator pedal, the vehicle speed, and the
selected driving mode .
PRND/S89Starting-off and Driving
Page 156 of 184
Fuse arrangement in the engine compartmentFig. 183
Fuses
Read and observe and on page 151 first.
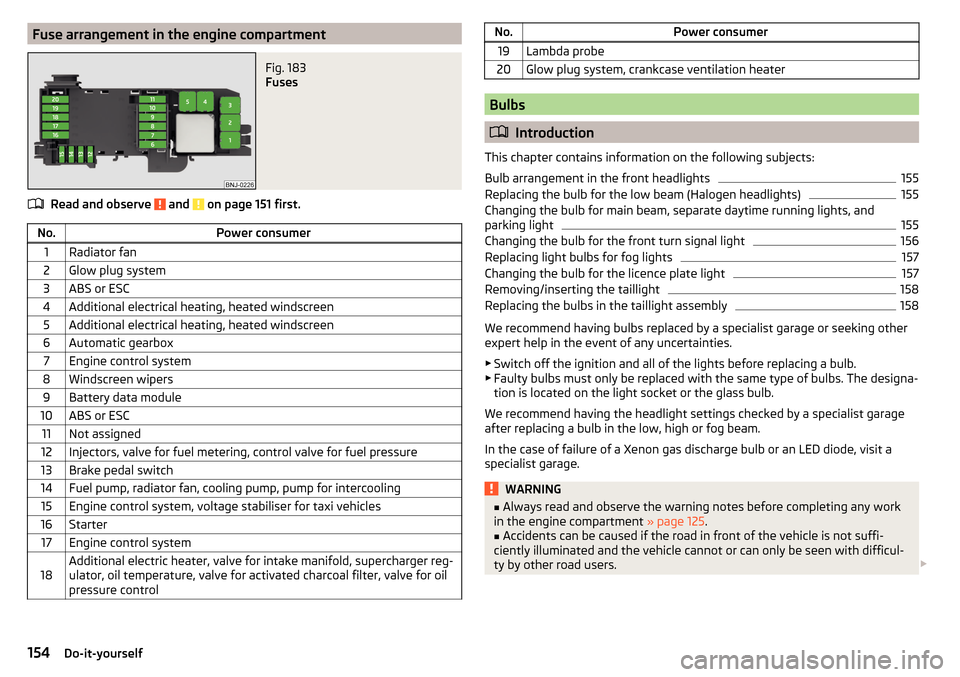
No.Power consumer1Radiator fan2Glow plug system3ABS or ESC4Additional electrical heating, heated windscreen5Additional electrical heating, heated windscreen6Automatic gearbox7Engine control system8Windscreen wipers9Battery data module10ABS or ESC11Not assigned12Injectors, valve for fuel metering, control valve for fuel pressure13Brake pedal switch14Fuel pump, radiator fan, cooling pump, pump for intercooling15Engine control system, voltage stabiliser for taxi vehicles16Starter17Engine control system18Additional electric heater, valve for intake manifold, supercharger reg-
ulator, oil temperature, valve for activated charcoal filter, valve for oil
pressure controlNo.Power consumer19Lambda probe20Glow plug system, crankcase ventilation heater
Bulbs
Introduction
This chapter contains information on the following subjects:
Bulb arrangement in the front headlights
155
Replacing the bulb for the low beam (Halogen headlights)
155
Changing the bulb for main beam, separate daytime running lights, and
parking light
155
Changing the bulb for the front turn signal light
156
Replacing light bulbs for fog lights
157
Changing the bulb for the licence plate light
157
Removing/inserting the taillight
158
Replacing the bulbs in the taillight assembly
158
We recommend having bulbs replaced by a specialist garage or seeking other
expert help in the event of any uncertainties.
▶ Switch off the ignition and all of the lights before replacing a bulb.
▶ Faulty bulbs must only be replaced with the same type of bulbs. The designa-
tion is located on the light socket or the glass bulb.
We recommend having the headlight settings checked by a specialist garage after replacing a bulb in the low, high or fog beam.
In the case of failure of a Xenon gas discharge bulb or an LED diode, visit a
specialist garage.
WARNING■ Always read and observe the warning notes before completing any work
in the engine compartment » page 125.■
Accidents can be caused if the road in front of the vehicle is not suffi-
ciently illuminated and the vehicle cannot or can only be seen with difficul-
ty by other road users.
154Do-it-yourself
Page 170 of 184
Index
A
ABS Operation
94
Warning light32
Acceptance and recycling of used vehicles
117
Accessories115
Adjusting Steering wheel
11
Adjusting the seats10
Adjustment Beam range
54
Advance warning / emergency braking37
Advice on tyre/wheel usage133
Air-conditioning system Air outlet vents
82
Airbag15
Adjustments and impairments to the airbag system
116
Deactivating18
deactivation18
Deployment16
Warning light32
Airbag system15
Air conditioning79
Air distribution control81
Climatronic80
Manual air conditioning80
Air distribution control81
Air outlet vents82
Alarm49
Trailer114
All-year tyres136
Anti-lock braking system (ABS)94
Anti-theft alarm system49
Trailer114
Anti-theft wheel bolts141
Armrest Front63
Rear64
Ashtray69
Assembling the bar ball, Step 1
110
bar ball, Step 2110
Assist systems93
Auto Check Control38
Automatic drive Selector lever
89
Automatic driving light control55
Automatic gearbox89
Kickdown91
Malfunction34
Selector lever emergency unlocking149
Selector lever lock90
Starting-off and driving91
Warning light34
Automatic shutdown of consumers131
Automatic transmission Selector lever lock
90
Tiptronic90
AUX67
Avoiding damage to your vehicle92
B
Ball bar Standy position
109
Ball head Check fitting
111
Ready position109
Battery Change in key
148
Belts12
Belt tensioners14
Bluetooth See Owner´s Manual -Infotainment
6
Bonnet Closing126
Opening126
Boot Cargo element
78
Class N1 vehicles78
Hooks76
Storage compartments77
Boot cover Parking position
77
Boot lid Automatic locking
51
Open/Close51
Brake Assist (HBA)95
Brake booster86
Brake fluid130
Check130
specification130
Brake pads new
86
Brake pedal (automatic transmission) Warning light
34
Brakes Brake booster
86
Brake fluid130
Braking and stabilisation systems93
Handbrake87
Information on braking86
Warning lights30
Brake system93
Braking Running in
91
Breakdown kit143
Breakdown service See Help in an emergency
8
Buttons in the door Electric windows
52
168Index
Page 173 of 184
Gear changeGear recommendation38
Information on the selected gear38
Gear changing Gear stick
88
Genuine parts116
Glasses compartment71
GPS See Owner´s Manual -Infotainment
6
H
Handbrake
87
Warning light30
Hazard warning light system57
HBA95
Headrests64
Heating79, 80
Air distribution control81
Exterior mirrors62
Seats65
Windscreen and rear window59
Help in an emergency8
HHC95
Hill Start Assist (HHC)95
Hitch108
Hooks76
Horn27
I
I-PAD holder
73
Ignition lock84
Images See Owner´s Manual -Infotainment
6
Immobiliser83
Inertia reels14
Information about the towing process146
Information system37
Auto Check Control37
Door alarm37
Gear recommendation38
MAXI DOT display41
Multifunction display39
Service interval display42
Infotainment6
Instrument cluster28
See instrument cluster28
Warning lights29
Interior light58
Interior lighting58
Interior monitor50
ISOFIX22, 23
J
Jack
139
Jacking points Raise vehicle
142
Jump-starting145
K
KESSY Unlocking/locking
47
Key Change battery
148
Lock46
Starting / stopping the engine84
Switch on/off ignition84
Unlock46
L
Lamp failure Warning light
36
Lamps Warning light
36
LEAVING HOME56
Lever Cruise control101
Front Assist105
Operation of the information system39
Speed regulating system102
Turn signal/main beam55
Windscreen wipers60
Light Cockpit
57
COMING HOME / LEAVING HOME56
Daytime running lights54
Flash55
Parking light57
Replacing bulbs154
Turn signal/main beam55
Light bulbs Replacing
154
Lighting Interior lighting
57
Luggage compartment74
Lights53
Automatic driving light control55
Beam range adjustment54
Driving abroad57
Fog lights/rear fog light56
Fog lights with the CORNER function56
Hazard warning light system57
Headlight cleaning system61
Low beam54
Parking light54
Switching on/off54
Warning lights29
Load161
Lock Individual settings
48
Key46
Locking Central locking button
47
in case of emergency149
KESSY47
Remote control46
171Index
Page 174 of 184
Lock steering lock83
Low beam54
Low tyre pressure warning refer to the tyre pressure monitoring
106
Luggage compartment74
Cover76
Fastening elements75
Fixing nets75
Floor covering on both sides78
Lighting74
See boot lid51
unlock manually149
Unlock the boot lid149
Luggage compartment cover76
Luggage compartment lid50
M
Main beam
55
Warning light34
Manual air conditioning Air distribution control
81
Controls80
Manual gear changing see gear changing
88
Materials defect liability4
MAXI DOT See MAXI DOT display
41
MAXI DOT display Main menu
41
Menu item assist systems42
Menu item Audio41
Menu item navigation41
Menu item telephone42
Operation39
Maximum speed165
MCB95
Mechanical windows51
Open/close52
Media AUX67
See Owner´s Manual -Infotainment6
USB67
Memory40
Mirror61
Vanity59
Mobility warranty5
Modes of the automatic transmission89
Modifications and technical alterations115
MSR94
Multi collision brake (MCB)95
Multifunction display Functions
39
Information40
Memory40
Multifunction pocket76
Multifunction steering wheel39
Multimedia holder70
N
N1
78
Nameplate160
Navigation S Owner´s Manual -Infotainment
6
Nets75
O
oil see Engine oil
129
Oil Information messages
35
Oil changing Engine oil
128
On-board computer see multifunction display
39
Operating weight161
Original accessories116
Overview Cockpit27
Engine compartment127
Fuses151
Warning lights29
P
Parking
88
Parking aid96
Reversing camera98
Parking aid96
Automatic system activation when moving for- ward
98
Function96
Parking assistance Activation / deactivation
97
Display in the Infotainment display97
Parking light54
Parking the vehicle see Parking
88
Park Pilot96
Parts replacement115
Passive safety Before setting off
10
Driving safety10
Passive Safety10
Pedals88
Footmats88
Petrol124
Pocketin the luggage compartment76
Pockets72
Power steering31
Practical features Pockets
72
Storage compartment for umbrella72
Waste container68
Preheating unit32
172Index