snow chains SKODA RAPID SPACEBACK 2014 1.G Owner's Manual
[x] Cancel search | Manufacturer: SKODA, Model Year: 2014, Model line: RAPID SPACEBACK, Model: SKODA RAPID SPACEBACK 2014 1.GPages: 204, PDF Size: 27.11 MB
Page 43 of 204
WARNINGWhen a fault in the airbag system occurs, there is a risk of the system not
being triggered in the event of an accident. Therefore, this must be
checked immediately by a specialized company.
ï Tyre inflation pressure
Read and observe
on page 35 first.
The warning light ï is illuminated
If the warning light ïilluminates while driving, it means one of the tyres has
undergone a pressure change.
An audible signal sounds as a warning signal.
âº
Immediately reduce speed and avoid sudden steering and braking manoeu-
vres.
âº
Stop the vehicle, turn the ignition off and check the tyres and their inflation
pressure » page 153 .
âº
Correct the tyre pressure, if necessary or replace the affected
wheel » page 160 or use the repair kit » page 164.
âº
Store the tyre pressure values in the system » page 119.
The warning light ï flashes for about 1 min. and remains illuminated
If the warning light ï flashes for approximately 1 min. and remains on, there
may be a fault in the tyre pressure monitoring system.
âº
Stop the vehicle, turn the ignition off and start the engine again.
If the warning light ï flashes after starting the engine again, there is a system
error.
Seek help from a specialist garage.
The illumination of the warning light ï can have the following reasons.
⺠The vehicle is loaded on one side. Distribute loads as evenly as possible.
⺠The wheels of one axle are loaded more heavily (e.g. when towing a trailer or
when driving uphill or downhill).
⺠Snow chains are mounted.
⺠A wheel has been changed.
Store the tyre pressure values in the system » page 119.
ï¤CAUTIONUnder certain circumstances (e.g. sporty style of driving, wintry or unpaved
roads) the warning light ïin the instrument cluster may be delayed or not
light up at all.
Note
If the vehicle battery has been disconnected and then reconnected, the indica-
tor light ï comes on after switching on the ignition. If the warning light does
not go out after moving a short distance, this means that there is an error in
the system. Seek help from a specialist garage.
ï»Windscreen washer fluid
Read and observe
on page 35 first.
If the windscreen washer fluid level is too low, the warning light ï»
illumi-
nates .
The following message is shown in the MAXI DOT display. Top up wash fluid!
Top up with liquid » page 143, Windscreen washer system .
ï¬ ï Turn signal system
Read and observe
on page 35 first.
Either the left ï¬
or the right ï
warning light flashes depending on the position
of the turn signal lever.
If there is a fault in the turn signal system, the warning light flashes at twice
its normal rate.
Switching off the hazard warning light system is switched on will cause all of
the turn signal lights as well as both warning lights to flash.
ï© Fog lights
Read and observe
on page 35 first.
The warning light ï©
illuminates when the fog lights are operating.
ï¤ï©ï¤ï¤40Using the system
Page 116 of 204
Assist systems
Braking and stabilisation systems
ï¤Introduction
This chapter contains information on the following subjects:
Electronic Stability Control (ESC)
113
Anti-lock Braking System (ABS)
113
Traction Control System (TCS)
113
Electronic Differential Lock (EDL)
114
Hydraulic Brake Assist (HBA)
114
Hill Hold Control (HHC)
114
This chapter deals with the functions of the braking and stabilisation systems,
with the error indicator referred to in chapter » page 34, Indicator lights .
The braking and stabilisation systems are automatically activated each time
the ignition is switched on.
WARNINGâ A lack of fuel can cause irregular engine running or cause the engine to
shut down. The brake assist systems would then fail to function â risk of
accident!â
The increased safety provided by the brake assist systems must not
tempt you to take safety risks â risk of accident!
â
Adjust the speed and driving style to the current visibility, weather, road
and traffic conditions.
Electronic Stability Control (ESC)
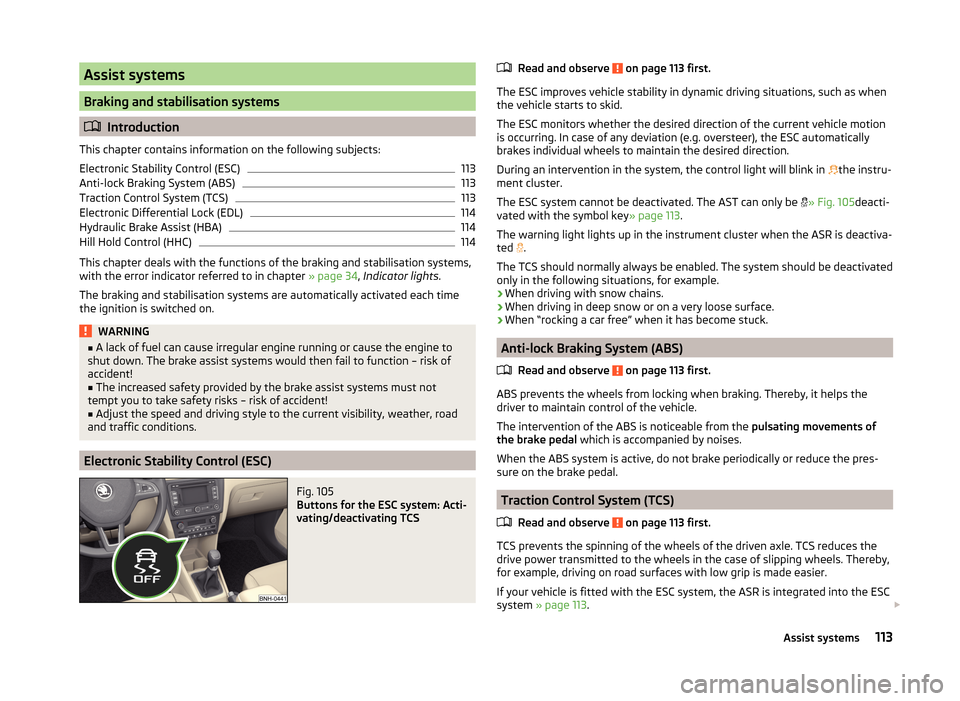
Fig. 105
Buttons for the ESC system: Acti-
vating/deactivating TCS
Read and observe on page 113 first.
The ESC improves vehicle stability in dynamic driving situations, such as when the vehicle starts to skid.
The ESC monitors whether the desired direction of the current vehicle motion
is occurring. In case of any deviation (e.g. oversteer), the ESC automatically
brakes individual wheels to maintain the desired direction.
During an intervention in the system, the control light will blink in ï¢
the instru-
ment cluster.
The ESC system cannot be deactivated. The AST can only be ï«
» Fig. 105 deacti-
vated with the symbol key » page 113.
The warning light lights up in the instrument cluster when the ASR is deactiva- ted ï«.
The TCS should normally always be enabled. The system should be deactivated
only in the following situations, for example.
⺠When driving with snow chains.
⺠When driving in deep snow or on a very loose surface.
⺠When ârocking a car freeâ when it has become stuck.
Anti-lock Braking System (ABS)
Read and observe
on page 113 first.
ABS prevents the wheels from locking when braking. Thereby, it helps the
driver to maintain control of the vehicle.
The intervention of the ABS is noticeable from the pulsating movements of
the brake pedal which is accompanied by noises.
When the ABS system is active, do not brake periodically or reduce the pres-
sure on the brake pedal.
Traction Control System (TCS)
Read and observe
on page 113 first.
TCS prevents the spinning of the wheels of the driven axle. TCS reduces thedrive power transmitted to the wheels in the case of slipping wheels. Thereby,
for example, driving on road surfaces with low grip is made easier.
If your vehicle is fitted with the ESC system, the ASR is integrated into the ESC
system » page 113 . ï£
ï¤
ï¤ï¤113Assist systems
Page 155 of 204

CAUTIONâ Despite such intervention by the vehicle electric system management, the
vehicle battery may be drained. For example, when the ignition is switched on
a long time with the engine turned off or the side or parking lights are turned
on during longer parking.â
Consumers that are supplied via a 12-V power socket can cause the vehicle
battery to discharge when the ignition is switched off.
Note
Driving comfort is not impaired by consumers being deactivated. The driver is
often not aware of it having taken place.Wheels
Tyres and wheel rims
ï¤ Introduction
This chapter contains information on the following subjects:
Notes on using wheels
152
Tyre pressure
153
Tyre wear
153
Tyre wear indicator and wheels exchange
154
Tyre damage
154
Unidirectional tyres
155
Only use tyres or wheel rims that have been approved by Å KODA for your mod-
el of vehicle.
WARNINGThe national legal regulations must be observed for the use of tyres.WARNINGFor reasons of driving safety, do not replace tyres individually.
For the sake of the environment
Old and unserviceable tyres are classified in a special environmentally hazard- ous category. These must be disposed of in accordance with national legal reg-
ulations.
Note
â We recommend that any works on the wheels or tyres be carried out by a
specialist garage.â
We recommend that you use wheel rims, tyres, full wheel trims and snow
chains from Å KODA Original Accessories.
Notes on using wheels
Read and observe
on page 152 first.
During the first 500 km, new tyres do not offer optimum grip and appropriate
care should therefore be taken when driving. ï£
ï¤152General Maintenance
Page 159 of 204

CAUTIONThe information about load index and speed symbol can be found in the vehi-
cle sales and technical documentation.
Spaceback
MotorisationTyre sizeMinimal
Load indexMinimal
Speed symbol
1.2 l./55 kW MPI
175/70 R1484T185/60 R1584T215/45 R16 a)86T215/40 R17a)87T
1.2 l/63 kW TSI
175/70 R1484T185/60 R1584T215/45 R16 a)86T215/40 R17a)87T
1.2 l/77 kW TSI
185/60 R1584H195/55 R1585H215/45 R16 a)86H215/40 R17a)87H
1.4 l/90 kW TSI
185/60 R1584H195/55 R1585H215/45 R16 a)86H215/40 R17a)87H
1.6 l./77 kW MPI
185/60 R1584H195/55 R1585H215/45 R16 a)86H215/40 R17a)87H
1.6 ltr. / 66 kW TDI
CR
185/60 R1584H195/55 R1585H215/45 R16 a)86H215/40 R17a)87HMotorisationTyre
sizeMinimal
Load indexMinimal
Speed symbol
1.6 ltr. / 77 kW TDI CR
185/60 R1584H195/55 R1585H215/45 R16 a)86H215/40 R17a)87Ha)
Not valid for the following markets: Armenia, Azerbaijan, Belarus, Georgia, Kazakhstan, Kyrgyzstan, Mol-
dova, Russia, Tajikistan, Turkmenistan, Ukraine, and Uzbekistan.
Spaceback Green Line
MotorisationTyre
sizeMinimal
Load indexMinimal
Speed symbol1.6 ltr. / 66 kW TDI CR185/60 R1584H
Spaceback Green tec
MotorisationTyresizeMinimal
Load indexMinimal
Speed symbol1.2 l/77 kW TSI185/60 R1584H1.4 l/90 kW TSI185/60 R1584H1.6 ltr. / 66 kW TDI CR185/60 R1584H1.6 ltr. / 77 kW TDICR185/60 R1584H
Winter operation
ï¤Introduction
This chapter contains information on the following subjects:
Winter tyres
157
Snow chains
157156General Maintenance
Page 160 of 204

Winter tyres
Summer tyres have less grip on ice, snow and at temperatures below 7 °C. This
is especially true of vehicles fitted with wide tyres or high-speed tyres .
Fitting winter tyres will significantly improve the handling of your vehicle when
driving in wintry road conditions.
To get best possible handling, winter tyres must be fitted to all four wheels. The minimum tread depth must be 4 mm.
Winter tyres (marked with M+S and a peak/snowflake symbol) of a lower speed
category can be used provided that the permissible maximum speed of these
tyres is not exceeded even if the possible maximum speed of the vehicle is
higher.
The speed limit for winter tyres can be set in the MAXI DOT display in the
menu item Winter tyres » page 47 .
Only use those tyres or wheel rims which have been approved by Å KODA for
your model of vehicle.
For the sake of the environment
Fit the summer tyres on again in good time as they provide better handling
properties, a shorter braking distance, less tyre noise, and reduced tyre wear
on roads which are free of snow and ice as well as at temperatures above 7 °C.
The fuel consumption is also lower.
Snow chains
When driving in wintry road conditions, snow chains improve not only traction,
but also the braking performance.
Snow chains must only be mounted on the front wheels.
For technical reasons, it is only permissible to fit snow chains with the follow-
ing wheel/tyre combinations.
Wheel sizeDepth DTyre size5J x 14 a)35 mm175/70 R146J x 15 b)38 mm185/60 R156J x 15 b)38 mm195/55 R15a)
Only fit snow chains with links and locks not larger than
9 mm.
b)
Only fit snow chains with links and locks not larger than 13 mm.
Remove the full wheel trims before installing the snow chains » page 161.WARNINGObserve the national legal regulations relating to the use of snow chains.
CAUTION
The chains are to be removed when driving on snow-free paths. They would
otherwise cause loss of performance and damage the tyres.157Wheels
Page 163 of 204
WARNINGâ If, in the case of puncture occurring, the spare tyre with a non-bound di-
rection or an opposite direction of rotation must be mounted, then drive
carefully. The best properties of the tyre are no longer present in this situa-
tion.â
If the dimensions or design of the spare wheel differ from the tyres fitted
to the vehicle (e.g. winter tyres or low-profile tyres), it must only be used
briefly in the event of a puncture and if an appropriately cautious style of
driving is adopted.
â
If the dimensions or design of the temporary spare wheel differ from the
fitted tyres, never drive faster than 80 km/h (or 50 mph).
â
Never use the temporary spare wheel if it is damaged.
Remove / store wheel
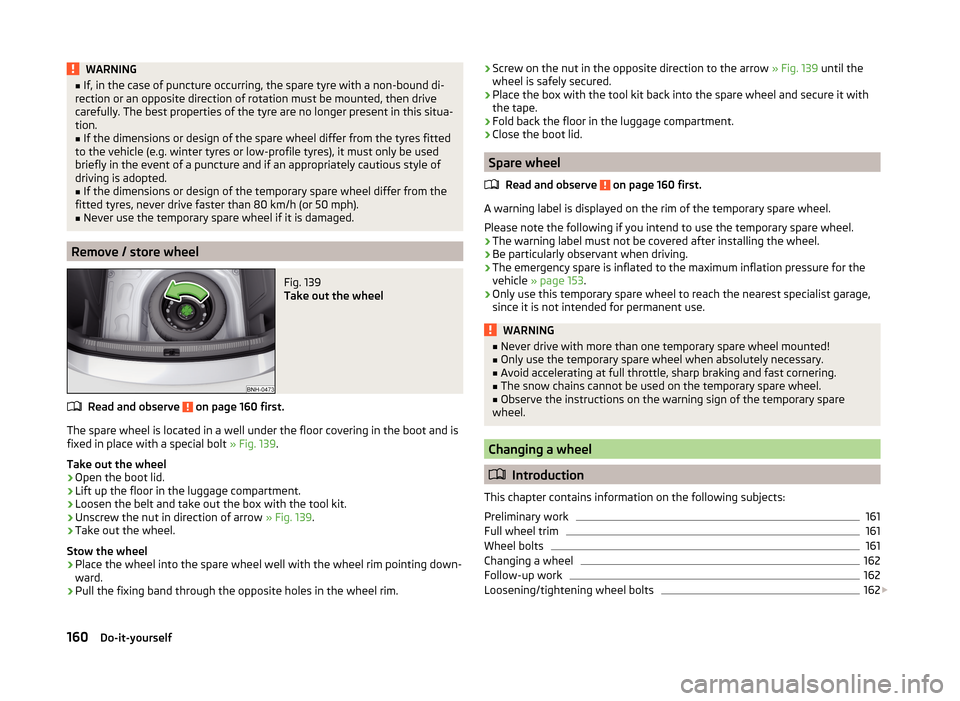
Fig. 139
Take out the wheel
Read and observe on page 160 first.
The spare wheel is located in a well under the floor covering in the boot and is fixed in place with a special bolt » Fig. 139.
Take out the wheel
âº
Open the boot lid.
âº
Lift up the floor in the luggage compartment.
âº
Loosen the belt and take out the box with the tool kit.
âº
Unscrew the nut in direction of arrow » Fig. 139.
âº
Take out the wheel.
Stow the wheel
âº
Place the wheel into the spare wheel well with the wheel rim pointing down-
ward.
âº
Pull the fixing band through the opposite holes in the wheel rim.
ï¤âº Screw on the nut in the opposite direction to the arrow
» Fig. 139 until the
wheel is safely secured.âº
Place the box with the tool kit back into the spare wheel and secure it with
the tape.
âº
Fold back the floor in the luggage compartment.
âº
Close the boot lid.
Spare wheel
Read and observe
on page 160 first.
A warning label is displayed on the rim of the temporary spare wheel.
Please note the following if you intend to use the temporary spare wheel. ⺠The warning label must not be covered after installing the wheel.
⺠Be particularly observant when driving.
⺠The emergency spare is inflated to the maximum inflation pressure for the
vehicle » page 153 .
⺠Only use this temporary spare wheel to reach the nearest specialist garage,
since it is not intended for permanent use.
WARNINGâ Never drive with more than one temporary spare wheel mounted!â Only use the temporary spare wheel when absolutely necessary.â
Avoid accelerating at full throttle, sharp braking and fast cornering.
â
The snow chains cannot be used on the temporary spare wheel.
â
Observe the instructions on the warning sign of the temporary spare
wheel.
Changing a wheel
ï¤ Introduction
This chapter contains information on the following subjects:
Preliminary work
161
Full wheel trim
161
Wheel bolts
161
Changing a wheel
162
Follow-up work
162
Loosening/tightening wheel bolts
162
ï£
ï¤160Do-it-yourself
Page 198 of 204
Rear fog light61
Warning light38
Rear mirror67
Exterior mirror68
Interior mirror67
Refuelling139
Fuel139
Remote control Locking
50
Replacing the battery170
Synchronisation process170
Unlocking50
Remote control key Replacing the battery
170
Removing the bar ball, Step 1
123
bar ball, Step 2123
Repairs and technical alterations128
Replacement parts128
Replacing Bulb for main beam, daytime running lights and parking light
177
Bulb for the fog light178
Bulb for the licence plate light179
Bulb in rear light180
Fuses173
Fuses in the dash panel173
Fuses in the engine compartment175
High beam bulb (halogen headlights)177
Rear window wiper blade172
Vehicle battery151
windscreen wiper blades172
Replenishing Coolant
147
Engine oil146
Windscreen washer fluid143
Retraction and economical driving111
Revolution counter31
Roof Load
88
Roof rack88
mounting points88
Roof load88
Rubber seals133
S
SAFE See Safe securing system
51
SAFELOCK See Safe securing system
51
Safe securing system51
Safety8
Child safety22
Child safety seats22
Correct seated position9
Head restraints70
ISOFIX25
TOP TETHER26
Save electrical energy111
Save fuel111
Seals Vehicle care
133
Seat Adjusting
69
Seat belt Warning light
35
Seat belts12
Belt tensioners15
fastening and unfastening14
Height adjustment15
Inertia reels15
The physical principle of a frontal collision13
Seat features71
Seats Front armrest
72
Head restraints70
Heating71
Rear armrest72
Seat backrests72
Seats and head restraint69
Selector lever Refer to Selector lever109
Service129
Service interval display47
Setting33
Lower position of the variable loading floor86
seats and head restraints69
Upper position of the variable loading floor85
Setting the33
Side airbag18
SmartGate connection
102
Password103
Settings102
Smart Gate Website
102
Snow chains157
Spare change
160
spare wheel159
change160
instructions160
Speedometer31
See speedometer31
Speed symbol Refer to Wheels
155
Spoiler130
Staring engine Jump-starting
167
START-STOP116
Jump-starting167
Manually deactivating/activating the system118
Operating conditions of the system117
operation in vehicles with automatic gearbox117
operation in vehicles with manual gearbox117
system-related automatic start-up118
Start engine105
Starting engine Jump-starting
166
195Index
Page 200 of 204
Lower position86
Parking position87
Removing86
Upper position85
Vehicle battery Automatic load deactivation
151
charging150
Checking the battery electrolyte level150
Cover149
Operation in winter150
Replacing151
Safety instructions148
vehicle care chrome parts
133
Vehicle care Alcantara
137
Artificial leather137
Cavity protection135
Cleaning vehicle exterior132
Cleaning wheels135
Decorative films134
Door locking cylinder135
Headlight glasses134
Interior care136
Maintenance133
Materials137
Natural leather136
Plastic parts133
Polishing vehicle paint work133
Rubber seals133
Safety belt138
Seat covers138
Under-body protections135
washing131
Vehicle Condition see Auto Check Control
33
Vehicle data sticker181
Vehicle data sticker and nameplate Vehicle data sticker and nameplate
181
Vehicle dimensions183
Vehicle height183
Vehicle Identification Number (VIN)181
Vehicle length183
Vehicle tool kit159
Vehicle width183
Vest Placement of the reflective vest
158
VIN Vehicle Identification Number
181
Visibility64
Visors See front sun visors
65
W
Warning at excessive speeds
46
Warning triangle158
Washing Automatic car wash system
132
by hand131
High-pressure cleaner132
Washing vehicles131
Waste container77
Water Driving through
111
Weather conditions128
Wheel bolts Anti-theft wheel bolts
164
Caps161
Loosening and tightening162
Wheel rims152
wheels spare wheel
160
Wheels Age of wheels
152
Changing160
Driving style153
Full trim161
General information152
Load index155
Snow chains157
Speed symbol155
Storage of wheels152
Tyre damage154
Tyre pressure153
Tyre size155
Tyre wear153
Tyre wear indicator154
Unidirectional tyres155
Wheel balance153
Wheels exchange154
Winter tyres157
Wi-Fi Password
102, 103
Settings102
Website102
Window Interior mirror
67
Window wiper Replacing the rear window wiper blade
172
Windscreen washer fluid Checking
143
Replenishing143
Warning light40
Winter143
Windscreen washer system143
Windscreen wipers66
Windscreen wipers Activating
66
Replacing the windscreen wipers172
Windscreen washer fluid143
Windscreen wipers and washers65
Winter operation156
De-icing windows134
Snow chains157
Winter tyres157
Winter tyres See Wheels
157
Wiper blades136
Service position of the windscreen wiper arms 172
197Index