display SKODA RAPID SPACEBACK 2016 1.G Columbus Amundsen Bolero Infotainment System Navigation Manual
[x] Cancel search | Manufacturer: SKODA, Model Year: 2016, Model line: RAPID SPACEBACK, Model: SKODA RAPID SPACEBACK 2016 1.GPages: 100, PDF Size: 12.8 MB
Page 5 of 100
Important information about this Owner's Manual
This manual is valid for all types of Columbus, Amundsen and Bolero infotain-
ment systems (hereafter only known as devices). The device may differ de-
pending on the vehicle model, in which it is installed in both its appearance
and in the arrangement of the controls.
This Owner's Manual describes all possible device functions without identify-
ing them as special equipment, model variants or market-dependent equip-
ment. Consequently, the device in your vehicle does not need to contain all of
the functions described in this Owner's Manual.
For example, if the vehicle is not factory equipped with the CANTON sound
system, the menu points
CANTON Optimisation
,
CANTON Surround
and
CANTON Equalis-er
are not shown.
The availability of some features described in this Owner's Manual depends
on the type of external devices (for example, telephone, music player, etc.).
The illustrations in this Owner's Manual are for illustrative purposes only. The
illustrations can differ in minor details from your vehicle; they are only inten-
ded to provide general information.
ŠKODA AUTO pursues a policy of ongoing product and model development
with all vehicles. Therefore, changes to the scope of delivery with regard to
design, equipment and technology are possible at any time. The information
provided in this Owner's Manual corresponds to the information available at
the time of publishing.
Therefore, legal claims cannot be made based on the technical data, illustra-
tions and information contained in this Owner's Manual.
We recommend that the web pages that are referred to in this Owner's Man-
ual are displayed using the classic view. Not all necessary information may be
displayed correctly if the mobile view is chosen.
Screen texts that appear in this Owner's Manual may differ slightly depending
on the texts show on the device screen.
Information and System Support
Information e.g. related to updating the device software, compatible external
devices etc., Please refer to the following websites.
http://go.skoda.eu/infotainment
Declaration of conformity
ŠKODA AUTO hereby declares that the ŠKODA Infotainment systems meet the
basic requirements and additional provisions of the 1999/5/EC Directive with
reference to radio equipment and telecommunications devices.3Important information about this Owner's Manual
Page 7 of 100
AbbreviationsAbbreviationDefinition2Dplanar map display3Dspatial map displayA2DPa Bluetooth®
profile for the one-sided audio data transmis-
sionACCAdaptive cruise controlAFAlternative frequencies for the current radio stationAMIdentification of the radio-frequency rangeTCSTraction Control of the drive wheelsaviCompressed video formatAVRCPa Bluetooth ®
profile for the operation associated with the
transmission of audio data multimedia functionsBTBluetooth ®
- wireless communication for reception and
transmission of voice and data informationCNGcompressed natural gasDABDigital radio receptionDRMa system for monitoring or restricting the use of digital me-
dia contentDTMFa dialling tone during a telephone communicationESCElectronic Stability ControlFMIdentification of the radio-frequency rangeHFPa Bluetooth ®
profile for communication between a mobile
telephone and the InfotainmentGPSSatellite system for determining the positionGPTmethod for the division of the areas in the data devices (to
be used for mass storage resources)GSMGlobal system for mobile communicationsID3 tagan additional feature of a music file, which allows for the dis-
play of artist, title, album name, etc.mp3compressed audio formatmp4Compressed video formatMSCa communication protocol for a USB deviceAbbreviationDefinitionMTPa communication protocol for a data devicePI codea program identification of the radio station, which allows a
group sort of radio stationsPINpersonal identification numberQiStandard for wireless charging of external devicesRDSa system for the transmission of additional information for
FM radio receptionrSAPA Bluetooth ®
profile for the communication between a mo-
bile telephone and Infotainment in the mode for distance
transmission of SIM dataMessagesa service for short text messagesTMCTraffic reports, which may affect the navigationTPIdentification of a traffic information stationUPnPNetwork protocol for establishing a wireless connection of
an external device with the deviceVINVehicle identification numberwavAudio formatWLANWireless Local Area NetworkWPSEstablishing a secure connection of the device to an availa-
ble hotspot (WLAN)wmacompressed audio formatwmvCompressed video format5Abbreviations
Page 9 of 100
ŠKODA AUTO does not accept any liability for any damage to the device or ve-
hicle due to the use of incorrect or illegal applications or the improper or unau-
thorized use of mobile phones.
Applications
Applications can be installed in external devices (e.g. Mobile, tablet) making it
possible to display additional information in the device screen or to operate
the device.
Due to the large number of applications and communication systems (e.g..
SmartLink » page 54) As well as the ongoing development of these devices,
the applications may not be functional in all external devices. ŠKODA AUTO can
accept no liability for their proper function.
Applications, their use and the required data connection may be chargeable.
The range of available applications and their functionality is dependent on the
device, vehicle and region.
The function of mobile applications can be influenced by the quality of the In-
ternet connection.
Some applications are dependent on the availability of services that are provi-
ded by third parties.Device overview
Device Description - Columbus
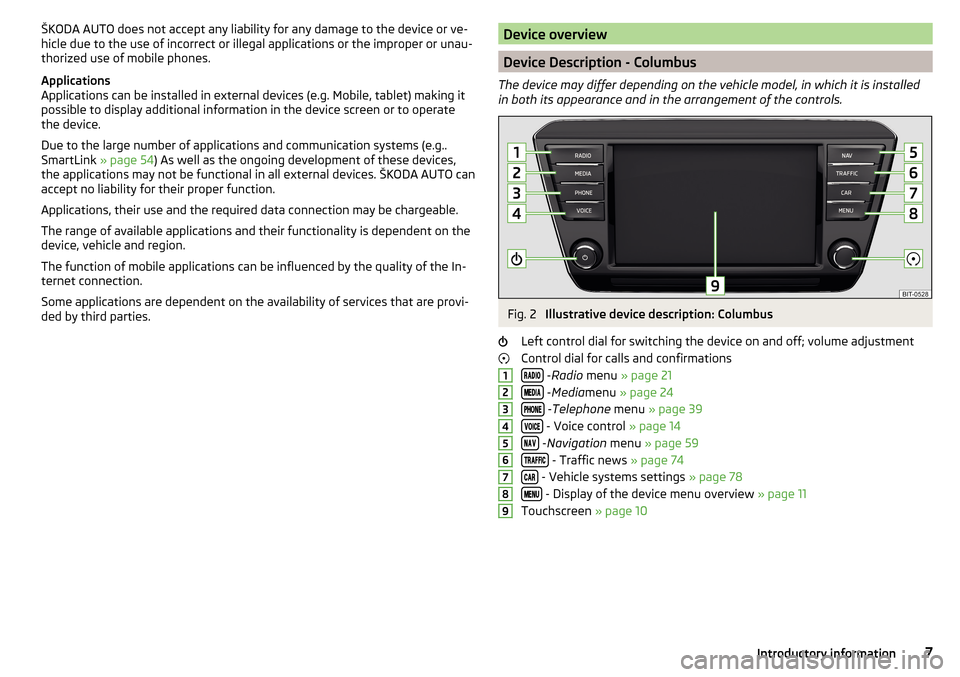
The device may differ depending on the vehicle model, in which it is installed
in both its appearance and in the arrangement of the controls.
Fig. 2
Illustrative device description: Columbus
Left control dial for switching the device on and off; volume adjustment
Control dial for calls and confirmations
- Radio menu » page 21
- Media menu » page 24
- Telephone menu » page 39
- Voice control » page 14
- Navigation menu » page 59
- Traffic news » page 74
- Vehicle systems settings » page 78
- Display of the device menu overview » page 11
Touchscreen » page 10
1234567897Introductory information
Page 10 of 100
Device Description - Amundsen (not applicable to Yeti)
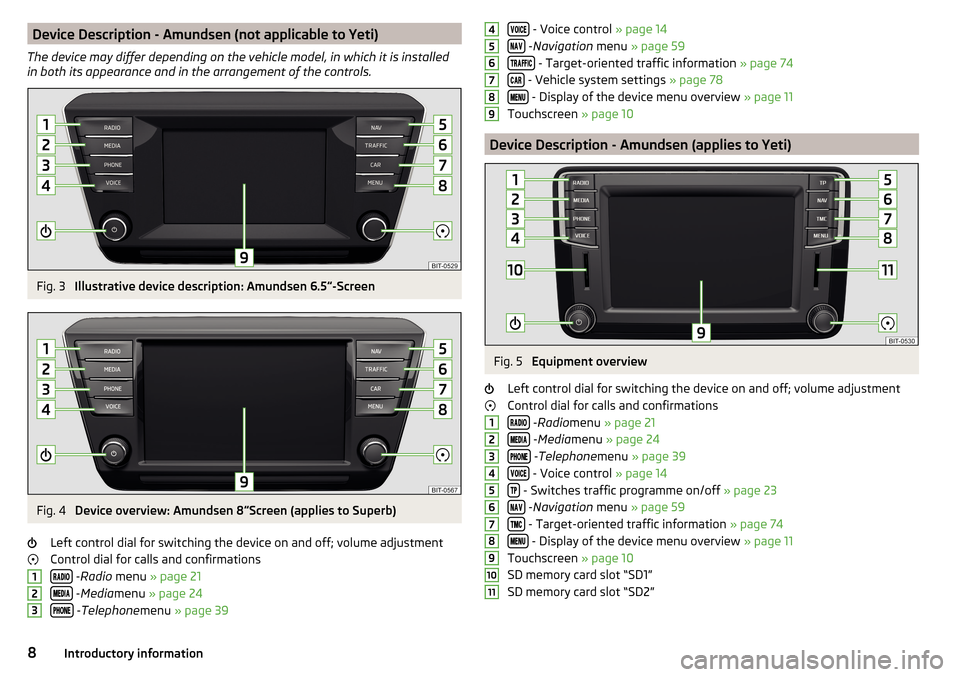
The device may differ depending on the vehicle model, in which it is installed
in both its appearance and in the arrangement of the controls.Fig. 3
Illustrative device description: Amundsen 6.5 -Screen
Fig. 4
Device overview: Amundsen 8
Screen (applies to Superb)
Left control dial for switching the device on and off; volume adjustment
Control dial for calls and confirmations
- Radio menu » page 21
- Media menu » page 24
- Telephone menu » page 39
123 - Voice control » page 14
- Navigation menu » page 59
- Target-oriented traffic information » page 74
- Vehicle system settings » page 78
- Display of the device menu overview » page 11
Touchscreen » page 10
Device Description - Amundsen (applies to Yeti)
Fig. 5
Equipment overview
Left control dial for switching the device on and off; volume adjustment
Control dial for calls and confirmations
- Radio menu » page 21
- Media menu » page 24
- Telephone menu » page 39
- Voice control » page 14
- Switches traffic programme on/off » page 23
- Navigation menu » page 59
- Target-oriented traffic information » page 74
- Display of the device menu overview » page 11
Touchscreen » page 10
SD memory card slot “SD1”
SD memory card slot “SD2”
45678912345678910118Introductory information
Page 11 of 100
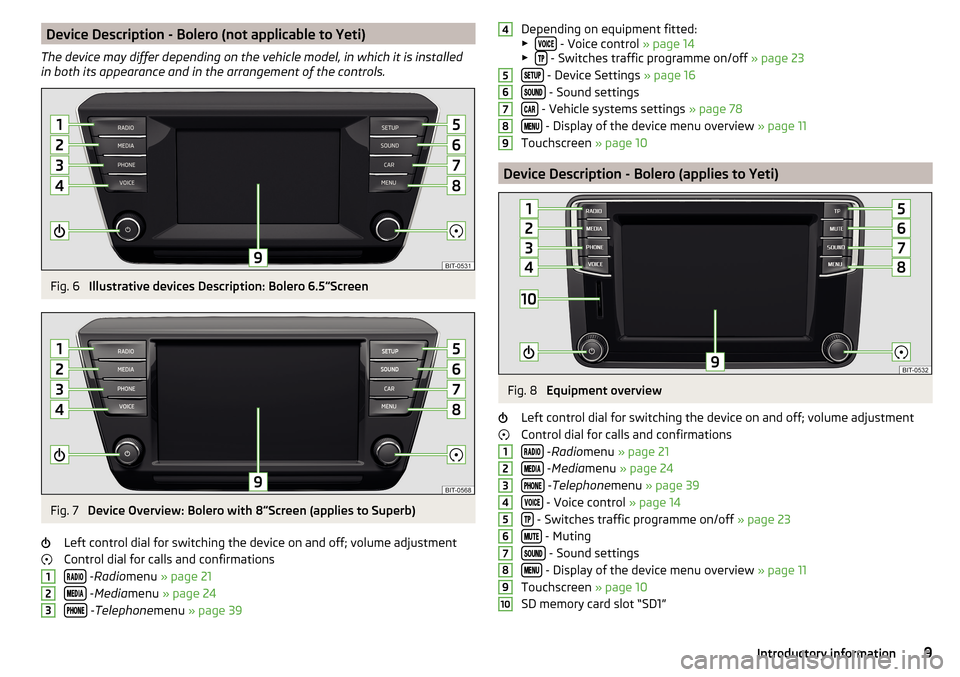
Device Description - Bolero (not applicable to Yeti)
The device may differ depending on the vehicle model, in which it is installed
in both its appearance and in the arrangement of the controls.Fig. 6
Illustrative devices Description: Bolero 6.5 Screen
Fig. 7
Device Overview: Bolero with 8
Screen (applies to Superb)
Left control dial for switching the device on and off; volume adjustment
Control dial for calls and confirmations
- Radio menu » page 21
- Media menu » page 24
- Telephone menu » page 39
123Depending on equipment fitted:
▶ - Voice control » page 14
▶ - Switches traffic programme on/off » page 23
- Device Settings » page 16
- Sound settings
- Vehicle systems settings » page 78
- Display of the device menu overview » page 11
Touchscreen » page 10
Device Description - Bolero (applies to Yeti)
Fig. 8
Equipment overview
Left control dial for switching the device on and off; volume adjustment
Control dial for calls and confirmations
- Radio menu » page 21
- Media menu » page 24
- Telephone menu » page 39
- Voice control » page 14
- Switches traffic programme on/off » page 23
- Muting
- Sound settings
- Display of the device menu overview » page 11
Touchscreen » page 10
SD memory card slot “SD1”
456789123456789109Introductory information
Page 13 of 100
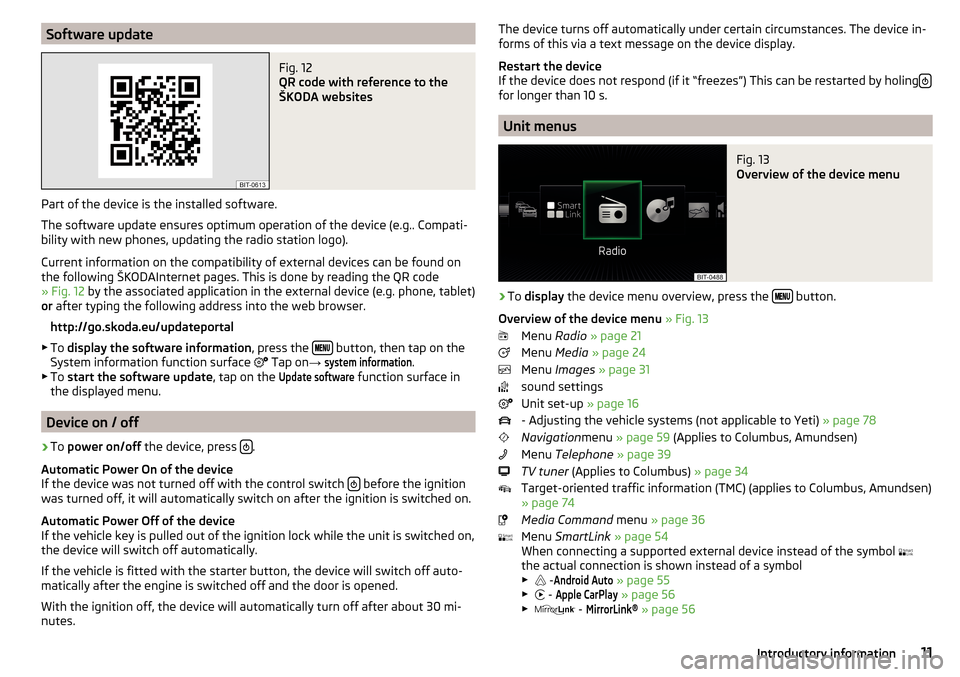
Software updateFig. 12
QR code with reference to the
ŠKODA websites
Part of the device is the installed software.
The software update ensures optimum operation of the device (e.g.. Compati-
bility with new phones, updating the radio station logo).
Current information on the compatibility of external devices can be found on
the following ŠKODAInternet pages. This is done by reading the QR code
» Fig. 12 by the associated application in the external device (e.g. phone, tablet)
or after typing the following address into the web browser.
http://go.skoda.eu/updateportal
▶ To display the software information , press the
button, then tap on the
System information function surface Tap on
→
system information
.
▶ To start the software update , tap on the
Update software
function surface in
the displayed menu.
Device on / off
›
To power on/off the device, press .
Automatic Power On of the device
If the device was not turned off with the control switch
before the ignition
was turned off, it will automatically switch on after the ignition is switched on.
Automatic Power Off of the device
If the vehicle key is pulled out of the ignition lock while the unit is switched on,
the device will switch off automatically.
If the vehicle is fitted with the starter button, the device will switch off auto-
matically after the engine is switched off and the door is opened.
With the ignition off, the device will automatically turn off after about 30 mi-
nutes.
The device turns off automatically under certain circumstances. The device in-
forms of this via a text message on the device display.
Restart the device
If the device does not respond (if it “freezes”) This can be restarted by holing
for longer than 10 s.
Unit menus
Fig. 13
Overview of the device menu
›
To
display the device menu overview, press the button.
Overview of the device menu » Fig. 13
Menu Radio » page 21
Menu Media » page 24
Menu Images » page 31
sound settings
Unit set-up » page 16
- Adjusting the vehicle systems (not applicable to Yeti) » page 78
Navigation menu » page 59 (Applies to Columbus, Amundsen)
Menu Telephone » page 39
TV tuner (Applies to Columbus) » page 34
Target-oriented traffic information (TMC) (applies to Columbus, Amundsen)
» page 74
Media Command menu » page 36
Menu SmartLink » page 54
When connecting a supported external device instead of the symbol
the actual connection is shown instead of a symbol
▶ -
Android Auto
» page 55
▶ -
Apple CarPlay
» page 56
▶ -
MirrorLink®
» page 56
11Introductory information
Page 14 of 100
Adjusting the volume
Every change in volume is displayed on the screen.›
To increase the volume , turn the controller clockwise.
›
To
reduce volume , turn the controller anticlockwise.
›
To
mute , turn the controller to the left to 0.
›
or:
Press The button (applies to Bolero in the Yeti model).
The following symbol appears in the display when the sound is muted:
.
If, at the time of muting, sound is played from the source in the media menu,
then the playback is interrupted (pause) 1)
.
CAUTION
■ High volumes can cause sound resonance in the vehicle.■When changing or connecting an audio source, this may cause sudden
changes in volume. Reduce the volume before changing or connecting an au-
dio source.Device operation and settings
Device operation
Operating principles
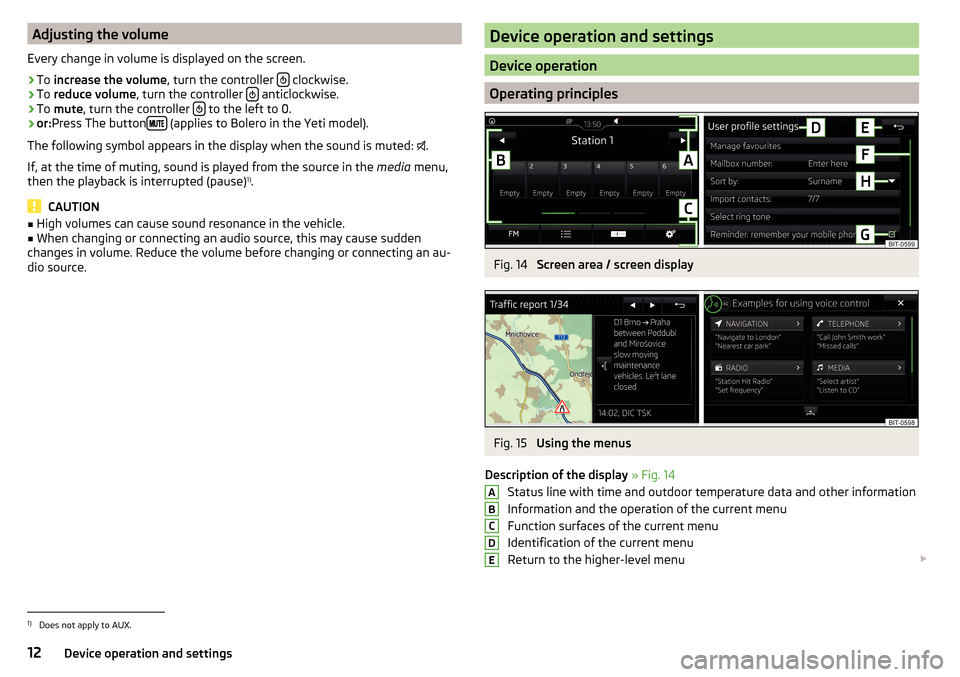
Fig. 14
Screen area / screen display
Fig. 15
Using the menus
Description of the display » Fig. 14
Status line with time and outdoor temperature data and other information
Information and the operation of the current menu
Function surfaces of the current menu
Identification of the current menu
Return to the higher-level menu
ABCDE1)
Does not apply to AUX.
12Device operation and settings
Page 15 of 100
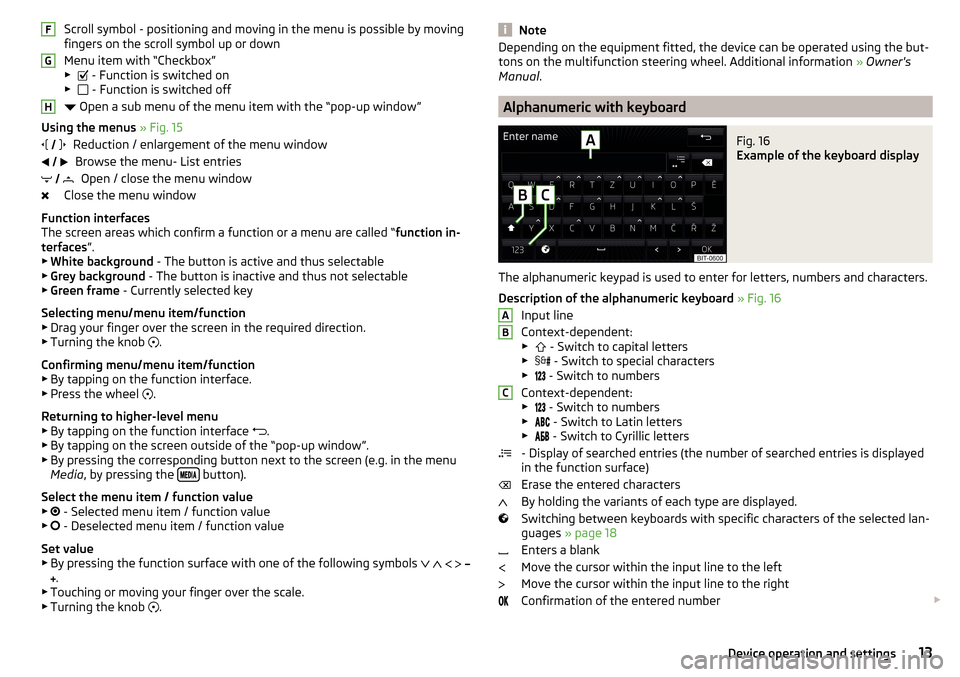
Scroll symbol - positioning and moving in the menu is possible by moving
fingers on the scroll symbol up or down
Menu item with “Checkbox”
▶ - Function is switched on
▶ - Function is switched off
Open a sub menu of the menu item with the “pop-up window”
Using the menus » Fig. 15
Reduction / enlargement of the menu window Browse the menu- List entries Open / close the menu window
Close the menu window
Function interfaces
The screen areas which confirm a function or a menu are called “ function in-
terfaces ”.
▶ White background - The button is active and thus selectable
▶ Grey background - The button is inactive and thus not selectable
▶ Green frame - Currently selected key
Selecting menu/menu item/function ▶ Drag your finger over the screen in the required direction.
▶ Turning the knob .
Confirming menu/menu item/function
▶ By tapping on the function interface.
▶ Press the wheel .
Returning to higher-level menu ▶ By tapping on the function interface .
▶ By tapping on the screen outside of the “pop-up window”.
▶ By pressing the corresponding button next to the screen (e.g. in the menu
Media , by pressing the
button).
Select the menu item / function value ▶ - Selected menu item / function value
▶ - Deselected menu item / function value
Set value
▶ By pressing the function surface with one of the following symbols
.
▶ Touching or moving your finger over the scale.
▶ Turning the knob .
FGH
NoteDepending on the equipment fitted, the device can be operated using the but-
tons on the multifunction steering wheel. Additional information » Owner's
Manual .
Alphanumeric with keyboard
Fig. 16
Example of the keyboard display
The alphanumeric keypad is used to enter for letters, numbers and characters.
Description of the alphanumeric keyboard » Fig. 16
Input line
Context-dependent: ▶ - Switch to capital letters
▶ - Switch to special characters
▶ - Switch to numbers
Context-dependent: ▶ - Switch to numbers
▶ - Switch to Latin letters
▶
- Switch to Cyrillic letters
- Display of searched entries (the number of searched entries is displayed
in the function surface)
Erase the entered characters
By holding the variants of each type are displayed.
Switching between keyboards with specific characters of the selected lan-
guages » page 18
Enters a blank
Move the cursor within the input line to the left
Move the cursor within the input line to the right
Confirmation of the entered number
ABC13Device operation and settings
Page 17 of 100
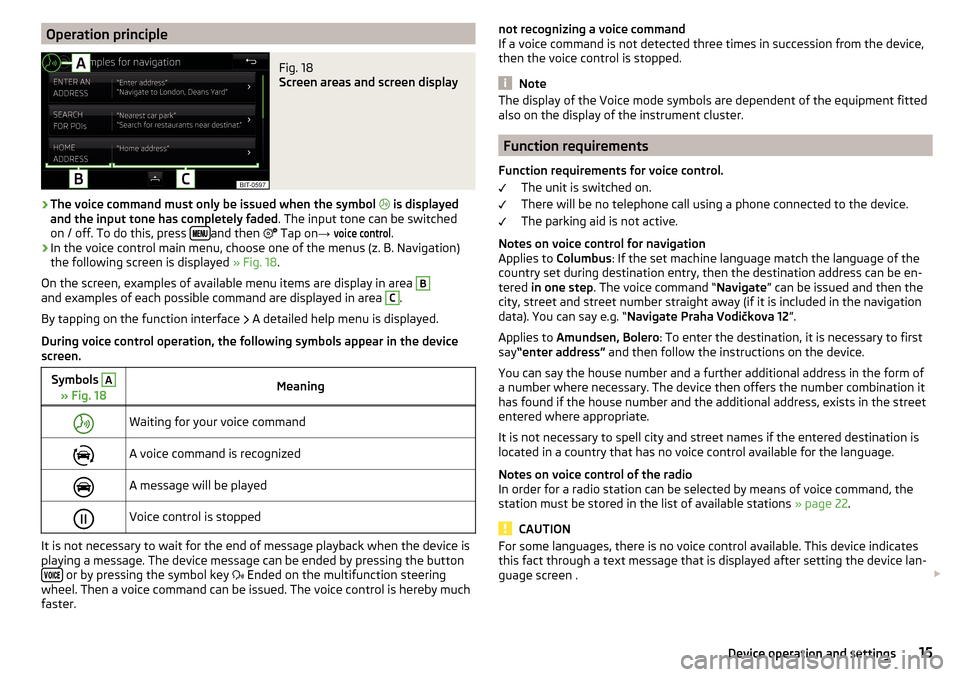
Operation principleFig. 18
Screen areas and screen display
›
The voice command must only be issued when the symbol
is displayed
and the input tone has completely faded . The input tone can be switched
on / off. To do this, press
and then
Tap on
→
voice control
.
›
In the voice control main menu, choose one of the menus (z. B. Navigation)
the following screen is displayed » Fig. 18.
On the screen, examples of available menu items are display in area
Band examples of each possible command are displayed in area C
.
By tapping on the function interface A detailed help menu is displayed.
During voice control operation, the following symbols appear in the device
screen.
Symbols A
» Fig. 18MeaningWaiting for your voice commandA voice command is recognizedA message will be playedVoice control is stopped
It is not necessary to wait for the end of message playback when the device is
playing a message. The device message can be ended by pressing the button
or by pressing the symbol key Ended on the multifunction steering
wheel. Then a voice command can be issued. The voice control is hereby much
faster.
not recognizing a voice command
If a voice command is not detected three times in succession from the device,
then the voice control is stopped.
Note
The display of the Voice mode symbols are dependent of the equipment fitted
also on the display of the instrument cluster.
Function requirements
Function requirements for voice control. The unit is switched on.
There will be no telephone call using a phone connected to the device.
The parking aid is not active.
Notes on voice control for navigation Applies to Columbus: If the set machine language match the language of the
country set during destination entry, then the destination address can be en-
tered in one step . The voice command “ Navigate” can be issued and then the
city, street and street number straight away (if it is included in the navigation
data). You can say e.g. “ Navigate Praha Vodičkova 12 ”.
Applies to Amundsen, Bolero : To enter the destination, it is necessary to first
say “enter address” and then follow the instructions on the device.
You can say the house number and a further additional address in the form of
a number where necessary. The device then offers the number combination it
has found if the house number and the additional address, exists in the street
entered where appropriate.
It is not necessary to spell city and street names if the entered destination is
located in a country that has no voice control available for the language.
Notes on voice control of the radio
In order for a radio station can be selected by means of voice command, the
station must be stored in the list of available stations » page 22.
CAUTION
For some languages, there is no voice control available. This device indicates
this fact through a text message that is displayed after setting the device lan-
guage screen . 15Device operation and settings
Page 18 of 100
NoteDuring voice control, no navigation announcements and traffic announce-
ments are played.
voice commands
Requirements for optimum voice command recognition
▶ Speak with a normal tone of voice without intonation and excessive pauses.
▶ Avoid bad pronunciation.
▶ Close the doors, windows and sliding roof, in order to avoid disturbing envi-
ronmental influences on the function of the voice commands.
▶ You are recommended to speak louder at higher speeds, so that the sound of
your voice is not drowned out by the increased ambient noise.
▶ During voice control, limit additional noise in the vehicle, e.g. passengers
talking at the same time.
Voice commands can be used anytime during voice control.
Voice commandFunction“ Back ”Return to the previous menu“Help ”reproducing and displaying possible voice com-
mands
Voice commands that can be used while browsing the list entries.
Voice commandFunction“ Next page ”
Browse menu / list / directory
“Previous page ”“First page ”“Last page ”
Correction of a voice command input
A voice command can be corrected, modified or re-entered by pressing the
button
or the icon key
Operated on the multifunction steering wheel.
However, this is only possible as long as the symbol appears on the screen.
You do not have to wait until the voice command is recognized by the device.
Stop/restore voice command input
Stop
This allows you more time for the voice command input.
The process for voice command input can by turning the dial Be stopped.
When stopping, the symbol changes from
.
Restore
The procedure for voice command input can be restarted in one of the follow-
ing ways.
▶ By tapping on the function interface
.
▶ By pressing the button
on the device.
▶ By pressing the icon key
on the multifunction steering wheel.
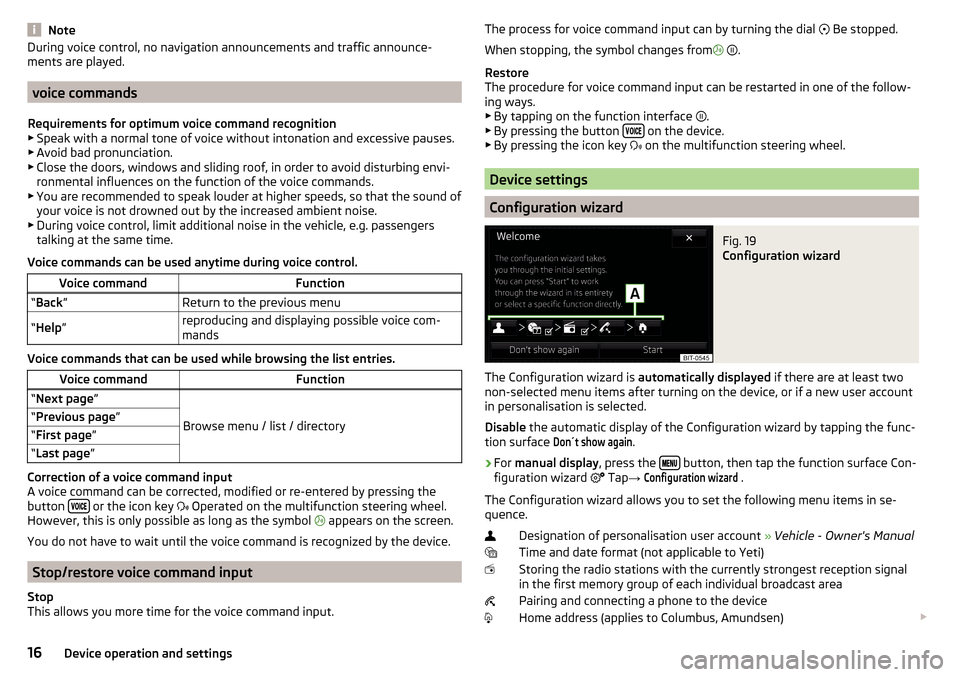
Device settings
Configuration wizard
Fig. 19
Configuration wizard
The Configuration wizard is automatically displayed if there are at least two
non-selected menu items after turning on the device, or if a new user account
in personalisation is selected.
Disable the automatic display of the Configuration wizard by tapping the func-
tion surface
Don´t show again
.
›
For manual display , press the button, then tap the function surface Con-
figuration wizard Tap
→
Configuration wizard
.
The Configuration wizard allows you to set the following menu items in se-
quence.
Designation of personalisation user account » Vehicle - Owner's Manual
Time and date format (not applicable to Yeti)
Storing the radio stations with the currently strongest reception signal in the first memory group of each individual broadcast area
Pairing and connecting a phone to the device
Home address (applies to Columbus, Amundsen)
16Device operation and settings