warning lights SKODA RAPID SPACEBACK 2016 1.G Owner's Guide
[x] Cancel search | Manufacturer: SKODA, Model Year: 2016, Model line: RAPID SPACEBACK, Model: SKODA RAPID SPACEBACK 2016 1.GPages: 184, PDF Size: 28.1 MB
Page 98 of 184
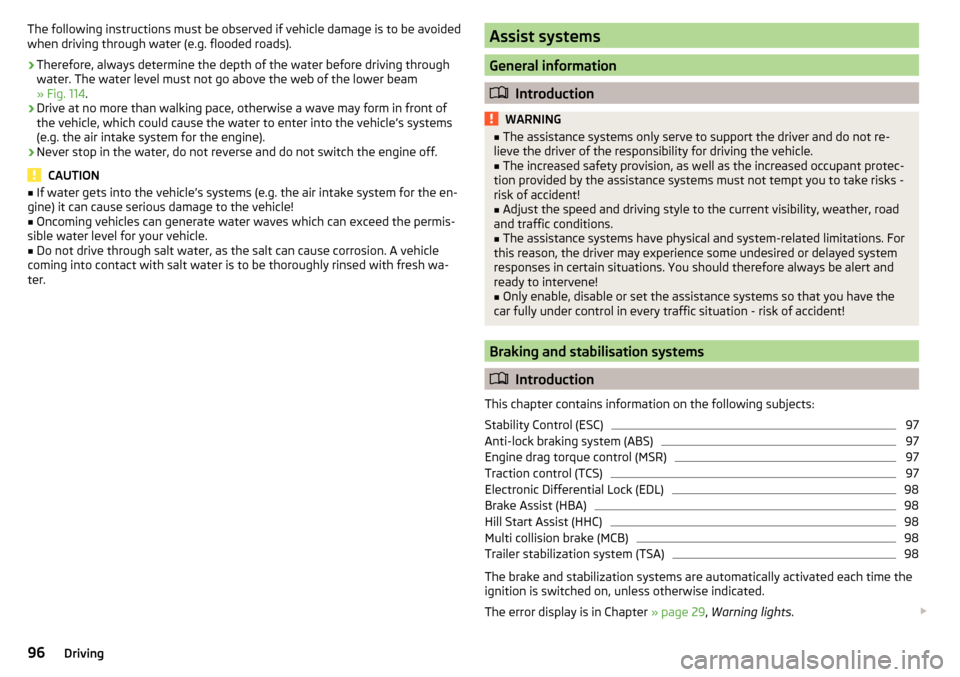
The following instructions must be observed if vehicle damage is to be avoided
when driving through water (e.g. flooded roads).›
Therefore, always determine the depth of the water before driving through
water. The water level must not go above the web of the lower beam
» Fig. 114 .
›
Drive at no more than walking pace, otherwise a wave may form in front of
the vehicle, which could cause the water to enter into the vehicle’s systems
(e.g. the air intake system for the engine).
›
Never stop in the water, do not reverse and do not switch the engine off.
CAUTION
■ If water gets into the vehicle’s systems (e.g. the air intake system for the en-
gine) it can cause serious damage to the vehicle!■
Oncoming vehicles can generate water waves which can exceed the permis-
sible water level for your vehicle.
■
Do not drive through salt water, as the salt can cause corrosion. A vehicle
coming into contact with salt water is to be thoroughly rinsed with fresh wa-
ter.
Assist systems
General information
Introduction
WARNING■
The assistance systems only serve to support the driver and do not re-
lieve the driver of the responsibility for driving the vehicle.■
The increased safety provision, as well as the increased occupant protec-
tion provided by the assistance systems must not tempt you to take risks -
risk of accident!
■
Adjust the speed and driving style to the current visibility, weather, road
and traffic conditions.
■
The assistance systems have physical and system-related limitations. For
this reason, the driver may experience some undesired or delayed system
responses in certain situations. You should therefore always be alert and
ready to intervene!
■
Only enable, disable or set the assistance systems so that you have the
car fully under control in every traffic situation - risk of accident!
Braking and stabilisation systems
Introduction
This chapter contains information on the following subjects:
Stability Control (ESC)
97
Anti-lock braking system (ABS)
97
Engine drag torque control (MSR)
97
Traction control (TCS)
97
Electronic Differential Lock (EDL)
98
Brake Assist (HBA)
98
Hill Start Assist (HHC)
98
Multi collision brake (MCB)
98
Trailer stabilization system (TSA)
98
The brake and stabilization systems are automatically activated each time the
ignition is switched on, unless otherwise indicated.
The error display is in Chapter » page 29, Warning lights .
96Driving
Page 99 of 184
WARNINGThe general information relating to the use of assistance systems must be
observed » page 96, in section Introduction .
Stability Control (ESC)
Read and observe
on page 97 first.
The ESC improves vehicle stability when driving at the limit (e.g. if the vehicle
starts to skid) by braking individual wheels to maintain the desired direction.
If there is a TCS intervention, the warning light flashes in the instrument
cluster.
Anti-lock braking system (ABS)
Read and observe
on page 97 first.
ABS prevents the wheels from locking when braking. Thereby, it helps the
driver to maintain control of the vehicle.
The intervention of the ABS is noticeable from the pulsating movements of
the brake pedal which is accompanied by noises.
When the ABS system is active, do not brake periodically or reduce the pres- sure on the brake pedal.
Engine drag torque control (MSR)
Read and observe
on page 97 first.
MSR counteracts the tendency of the drive wheels to lock during downshifts
or sudden deceleration (e.g. on icy or an otherwise slippery road surface).
If the drive wheels should lock, then the engine speed is automatically in-
creased. This reduces the braking effect of the engine and the wheels can ro-
tate freely again.
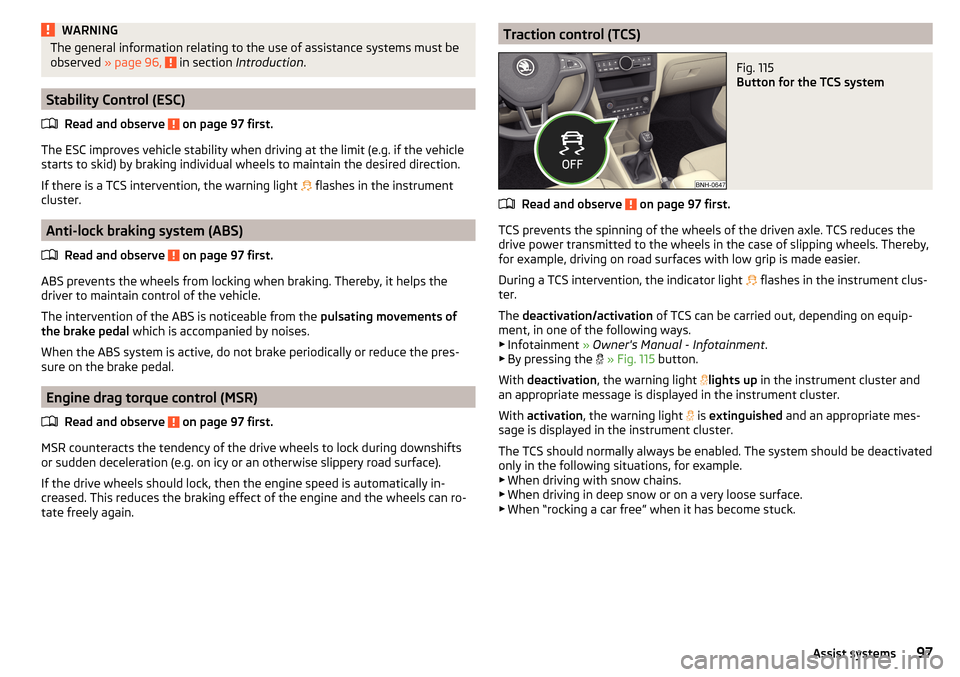
Traction control (TCS)Fig. 115
Button for the TCS system
Read and observe on page 97 first.
TCS prevents the spinning of the wheels of the driven axle. TCS reduces the
drive power transmitted to the wheels in the case of slipping wheels. Thereby,
for example, driving on road surfaces with low grip is made easier.
During a TCS intervention, the indicator light flashes in the instrument clus-
ter.
The deactivation/activation of TCS can be carried out, depending on equip-
ment, in one of the following ways. ▶ Infotainment » Owner's Manual - Infotainment .
▶ By pressing the
» Fig. 115 button.
With deactivation , the warning light
lights
up in the instrument cluster and
an appropriate message is displayed in the instrument cluster.
With activation , the warning light
is
extinguished and an appropriate mes-
sage is displayed in the instrument cluster.
The TCS should normally always be enabled. The system should be deactivated
only in the following situations, for example. ▶ When driving with snow chains.
▶ When driving in deep snow or on a very loose surface.
▶ When “rocking a car free” when it has become stuck.
97Assist systems
Page 106 of 184

Operation descriptionFig. 125
Cruise control system controls
Read and observe on page 103 first.
Overview of the CCS controls » Fig. 125AActivate CCS (control deactivated) Interrupt control (sprung position) Deactivate CCS (delete set speed)BTake control again a)
/ Increase speedCStart control / reduce speedDSwitching between CCS and speed limitera)
If no speed is set the current speed is adopted.
Once the controls are activated, the CCS maintains the vehicle at the set
speed; the warning light lights up in the instrument cluster.
Controls are automatically interrupted if any of the following occur.
▶ The brake pedal is operated.
▶ When one of the brake assist systems (e.g. ESC) intervenes.
▶ Through an airbag deployment.
▶ By pressing the
D
button.
WARNING■ Always deactivate the cruise control system after use to prevent the sys-
tem being switched on unintentionally.■
Control may only be resumed if the set speed is not too high for the cur-
rent traffic conditions.
Note■ During control, speed can be increased by pressing the accelerator pedal. Re-
leasing the accelerator pedal will cause the speed to drop again to the set
speed.■
By pressing the
D
button during the regulation, this is cancelled and the
speed limiter is activated.
Speed limiter
Introduction
This chapter contains information on the following subjects:
Operation
104
Description of operation
105
The speed limiter limits the maximum driving speed to the set speed limit.
This limit can only be exceeded by depressing the accelerator pedal fully.
The condition in which the Speed Limiter monitors a potential set speed limit
excess is referred to as regulation.
WARNINGThe general information relating to the use of assistance systems must be
observed » page 96, in section Introduction .
Operation
Fig. 126
MAXI DOT display: Examples of speed limiter status displays
104Driving
Page 107 of 184
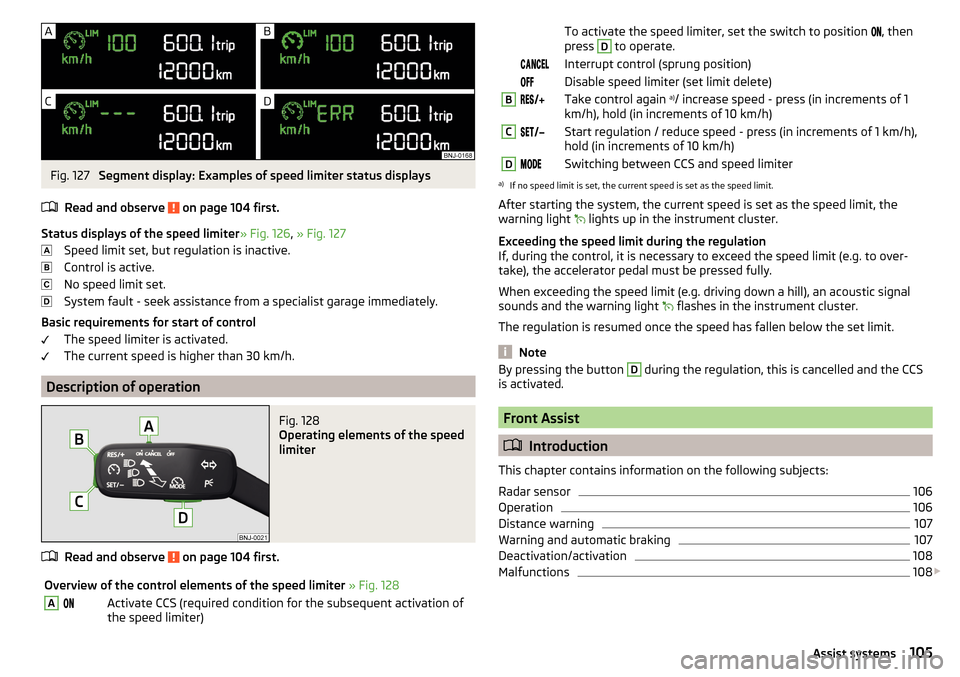
Fig. 127
Segment display: Examples of speed limiter status displays
Read and observe
on page 104 first.
Status displays of the speed limiter » Fig. 126, » Fig. 127
Speed limit set, but regulation is inactive.
Control is active.
No speed limit set.
System fault - seek assistance from a specialist garage immediately.
Basic requirements for start of control The speed limiter is activated.
The current speed is higher than 30 km/h.
Description of operation
Fig. 128
Operating elements of the speed
limiter
Read and observe on page 104 first.
Overview of the control elements of the speed limiter » Fig. 128AActivate CCS (required condition for the subsequent activation of
the speed limiter) To activate the speed limiter, set the switch to position , then
press D
to operate. Interrupt control (sprung position) Disable speed limiter (set limit delete)BTake control again a)
/ increase speed - press (in increments of 1
km/h), hold (in increments of 10 km/h)CStart regulation / reduce speed - press (in increments of 1 km/h),
hold (in increments of 10 km/h)DSwitching between CCS and speed limitera)
If no speed limit is set, the current speed is set as the speed limit.
After starting the system, the current speed is set as the speed limit, the
warning light lights up in the instrument cluster.
Exceeding the speed limit during the regulation
If, during the control, it is necessary to exceed the speed limit (e.g. to over-
take), the accelerator pedal must be pressed fully.
When exceeding the speed limit (e.g. driving down a hill), an acoustic signal
sounds and the warning light flashes in the instrument cluster.
The regulation is resumed once the speed has fallen below the set limit.
Note
By pressing the button D during the regulation, this is cancelled and the CCS
is activated.
Front Assist
Introduction
This chapter contains information on the following subjects:
Radar sensor
106
Operation
106
Distance warning
107
Warning and automatic braking
107
Deactivation/activation
108
Malfunctions
108
105Assist systems
Page 108 of 184
The Front Assist (hereinafter referred to as the system) warns you of the dan-
ger of a collision with a vehicle or another obstacle in front of the vehicle, and
tries to avoid a collision or mitigate its consequences by automatically applying
the brakes where necessary.
The area in front of the vehicle is monitored by a radar sensor » Fig. 129 on
page 106 .WARNING■
The general information relating to the use of assistance systems must
be observed » page 96, in section Introduction .■
The system does not respond to crossing or oncoming objects.
CAUTION
In case of failure of more than one brake light on the vehicle or on the electri-
cally connected trailer, the system becomes unavailable.
Radar sensor
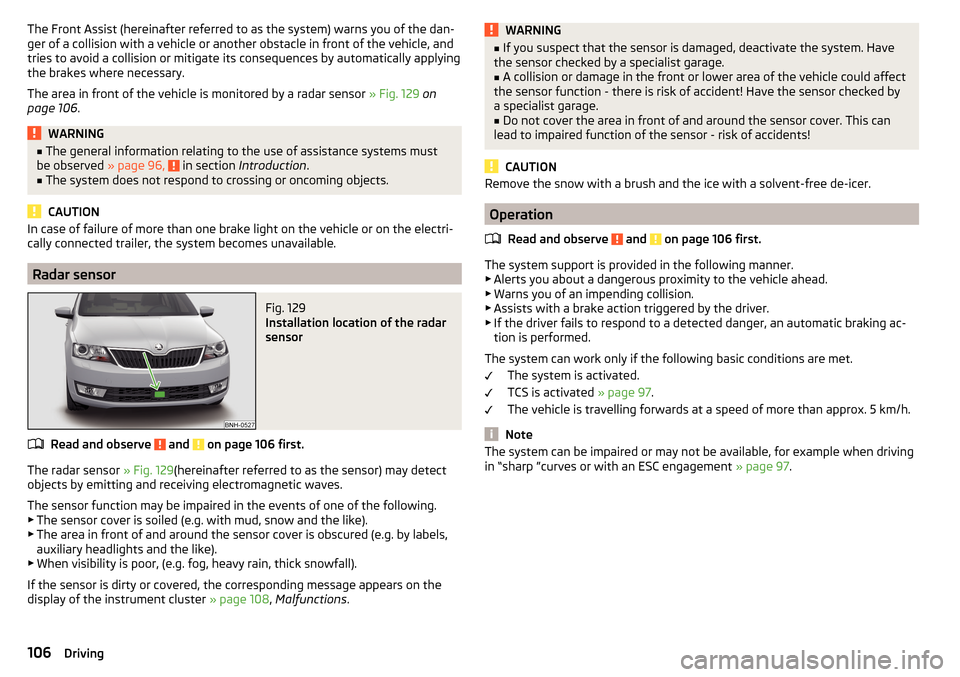
Fig. 129
Installation location of the radar
sensor
Read and observe and on page 106 first.
The radar sensor » Fig. 129(hereinafter referred to as the sensor) may detect
objects by emitting and receiving electromagnetic waves.
The sensor function may be impaired in the events of one of the following. ▶ The sensor cover is soiled (e.g. with mud, snow and the like).
▶ The area in front of and around the sensor cover is obscured (e.g. by labels,
auxiliary headlights and the like).
▶ When visibility is poor, (e.g. fog, heavy rain, thick snowfall).
If the sensor is dirty or covered, the corresponding message appears on the
display of the instrument cluster » page 108, Malfunctions .
WARNING■
If you suspect that the sensor is damaged, deactivate the system. Have
the sensor checked by a specialist garage.■
A collision or damage in the front or lower area of the vehicle could affect
the sensor function - there is risk of accident! Have the sensor checked by
a specialist garage.
■
Do not cover the area in front of and around the sensor cover. This can
lead to impaired function of the sensor - risk of accidents!
CAUTION
Remove the snow with a brush and the ice with a solvent-free de-icer.
Operation
Read and observe
and on page 106 first.
The system support is provided in the following manner.▶ Alerts you about a dangerous proximity to the vehicle ahead.
▶ Warns you of an impending collision.
▶ Assists with a brake action triggered by the driver.
▶ If the driver fails to respond to a detected danger, an automatic braking ac-
tion is performed.
The system can work only if the following basic conditions are met. The system is activated.
TCS is activated » page 97.
The vehicle is travelling forwards at a speed of more than approx. 5 km/h.
Note
The system can be impaired or may not be available, for example when driving
in “sharp ”curves or with an ESC engagement » page 97.106Driving
Page 111 of 184
If none of these conditions are met or if the driving style is not changed, the
system recommends a driving break again after 15 minutes.
The system can be activated/deactivated in Infotainment » Owner´s Manual -
Infotainment .
Pause recommendation
The icon appears and the following message for a few seconds in the display
of the instrument cluster and a message about the detected fatigue. An au-
dible signal is also emitted.WARNING■ The general information relating to the use of assistance systems must
be observed » page 96, in section Introduction .■
For the driving ability is always the driver's responsibility. Never drive if
you feel tired.
■
The system may not detect all cases where a break is needed.
■
Therefore, take regular, sufficient breaks during long trips.
■
There will be no system warning during the so-called micro-sleep.
Note
■ In some situations, the system may evaluate the driving incorrectly and thus
mistakenly recommend a break (e.g. sporty driving, adverse weather condi-
tions or poor road conditions).■
The system is designed primarily for use on motorways.
Tyre pressure monitoring
Introduction
This chapter contains information on the following subjects:
Storing the tyre pressure values
109
Storing the tyre pressure values and Infotainment display
110
Storing the tyre pressure values by means of the button
110
The tyre pressure monitoring function (hereinafter referred to as the system)
monitors the tyre pressure while driving.
If the tyre inflation pressure changes, the warning light
lights up in the in-
strument cluster and an audible signal is heard » page 33,
Tyre pressure .
The system can only function properly if the tyres have the prescribed inflation
pressure and this pressure values are stored in the system.
WARNING■ The general information relating to the use of assistance systems must
be observed » page 96, in section Introduction .■
Having the correct tyre inflation pressure is always the driver's responsi-
bility. Tyre pressure should be checked regularly » page 137.
■
The system cannot warn in case of very rapid tyre inflation pressure loss,
e.g. in case of sudden tyre damage.
Storing the tyre pressure values
Read and observe
on page 109 first.
The tyre pressure values are always stored in the system, if one of the fol-
lowing events occurs. ▶ Change of tyre inflation pressure.
▶ Change one or more wheels.
▶ Change in position of a wheel on the vehicle.
▶ The warning light in the instrument cluster.
The storage of the tyre pressure values depends on equipment, either in the
infotainment or by pressing a button.
WARNINGBefore storing the pressures, the tyres must be inflated to the specified in-
flation pressure » page 137. When storing incorrect pressure values, the
system could possibly not issue any warnings, even with a too low tyre
pressure.
CAUTION
The tyre pressure values are to be saved every 10,000 km or once annually to
ensure correct system functioning.109Assist systems
Page 118 of 184
Exterior mirrors
You should have additional exterior mirrors fitted if you are not able to see the
traffic behind the trailer using the standard rear-view mirrors.
Headlights
The front of the vehicle may lift up when a trailer (accessory) is being towed
and the headlights may dazzle other road users. Set the range of the head-
lights » page 54 .
Power supply of the trailer / accessory power system
In the electrical connection between the vehicle and trailer (accessory), the
trailer (accessories) is supplied with power from the vehicle (with ignition
switched on and off).
With the engine switched off, the vehicle battery is discharged by the connec-
ted consumers.
At low charge state of the vehicle battery, the power supply to the trailer (ac-
cessories) is interrupted.WARNING■ An improperly connected electrical installation of the trailer (accessories)
may result in an accident or serious injury from electrical shock.■
Do not make any adjustments to the electrical installation of the vehicle
and the trailer (accessories) - risk of an accident or serious injury from elec-
trical shock.
WARNING (Continued)■ After the electrical connection between the vehicle and trailer (accessory)
the trailer / accessory lights should be checked for function.■
Never use the securing eye to tow - risk of accident!
CAUTION
■ An improperly connected electrical installation of the trailer (accessories) can
lead to the inoperability of the vehicle electronics.■
The total power consumption of all the connected consumers to the trailer
power supply must not exceed 350 watts, otherwise there is a risk of damage
to the electrical system of the vehicle.
Loading a trailer
Correct the tyre inflation pressure on the vehicle for “full load” » page 137.
Distribution of the cargo
Distribute the cargo in the trailer in such a way that heavy items are located as
close to the trailer axle as possible. Secure the load from slipping.
The distribution of the weight is very poor if your vehicle is unladen and the
trailer is laden. Nevertheless, maintain a particularly low speed if you cannot
avoid driving with this combination.
WARNINGA sliding cargo can significantly adversely affect stability and driving safety
- there is a risk of accident!
Trailer load
The permissible trailer load must not be exceeded under any circumstances.Permissible trailer loadEngineGearboxPermissible trailer load, braked (kg)Permissible trailer load, unbraked (kg)Gradients of up to 12 %Gradients of up to 8% a)1.2 l/66 kW TSIMG9001000580DSG90010005901.2 ltr./81 kW TSIMG110012005901.4 ltr./92 kW TSIDSG12001200600DSG (Green tec)12001200610
116Driving
Page 119 of 184
EngineGearboxPermissible trailer load, braked (kg)Permissible trailer load, unbraked (kg)Gradients of up to 12 %Gradients of up to 8%a)1.6 l./81 kW MPIMG10001100580AG100011006001.4 l/66 kW TDI CRMG10001100610DSG100011006201.6 l/85 kW TDI CRMG12001200630a)
Only valid for some countries.
WARNINGThe maximum vertical load and the maximum trailer load must not be ex-
ceeded - there is risk of accident!
Towing a trailer
Driving speed
For safety reasons, do not drive with the trailer any faster than 100 km/h
(when the towing vehicle is a passenger car of category M1) or 80 km/h (when
the towing vehicle is a truck of category N1).
Immediately reduce your speed as soon as even the slightest swaying of the
trailer is detected. Never attempt to stop the trailer from “swaying” by acceler-
ating.
Brakes
Apply the brakes in good time! If the trailer is fitted with a trailer brake, apply
the brakes gently at first, then brake firmly. This will avoid brake jolts resulting
from the trailer wheels locking.
On downhill sections shift down a gear in good time to also use the engine as
a brake.
WARNINGAlways drive particularly carefully with the trailer.
CAUTION
With frequent towing, the vehicle is excessively loaded so this must also be
checked between service intervals.Anti-theft alarm system
The alarm is triggered if, with a vehicle with activated anti-theft alarm (herein-
after only warning system), the electrical connection to the trailer (accessory)
is interrupted.
Always switch off the anti-theft alarm system before a trailer (accessory) is
coupled or uncoupled » page 49.
Conditions for including a trailer (accessory) in the anti-theft alarm system. The vehicle is factory-fitted with an anti-theft alarm system and a towing
device.
The trailer (accessory) is electrically connected to the towing vehicle by
means of the trailer socket.
The electrical system of the vehicle and trailer (accessory) is functional.
The vehicle is locked and the anti-theft alarm system is activated.
The trailer (accessory) is not equipped with LED taillights.117Towing device and trailer
Page 125 of 184
WARNING■When washing your vehicle in the winter: Water and ice in the braking
system can affect the braking efficiency – risk of accident!■
Take care when cleaning the underbody or the inside of the wheel wells -
there is a risk of injury from sharp metal parts!
CAUTION
■ Do not wash the vehicle in direct sunlight, do not exert pressure on the body
while washing. The temperature of the washing water should be no more than
60 °C max. - otherwise there is a risk of damaging the vehicle paint.■
Before driving through a car wash fold in the exterior mirrors - risk of dam-
age.
■
For vehicles with roof antenna the antenna rod should be unscrewed before
driving through a car wash - there is a risk of damage.
CAUTION
Washing the vehicle with high-pressure cleaners■Films should not be washed with any high-pressure cleaners - risk of dam-
age.■
Do not aim the water jet directly at the lock cylinders or the door or opening
joints when washing the vehicle in the winter – there is a risk of freezing.
■
Hold a large spraying distance to the rear camera lens, to plastic parts (e.g.
Roof racks, spoilers, protective strips and the like), as well as soft materials
such as rubber hoses or insulation material.
■
The sensors of the parking aid can be sprayed only for a short time and there
must be a minimum distance of 10 cm - there is a risk of damage.
Exterior car care
Read and observe
and on page 122 first.
Vehicle compo- nentsCircumstancesRemedy
Paint
Spilled fuelClear water, cloth, (clean as soon as
possible)No water drop-
lets form on the
paintUse hard wax preserve (at least twice a
year), apply wax to clean and dry bodyPaint has gone
mattUse polish, then wax (if the polish does
not contain any preservative ingredi-
ents)Plastic partsSoilingClear water, cloth / sponge, possibly
cleaners provided for this purposeChrome
and anodised
partsSoilingclear water, cloth, possibly cleaners
provided for this purpose, clean then
polish with a soft dry clothFilmsSoilingSoft sponge and mild soap solution a)Windows
and door mirrorsSoilingWash with clean water and dry with a
wipe specifically for that purposeHead / taillightsSoilingSoft sponge and mild soap solution a)
Reversing cameraSoilingWash with clean water and dry with a
soft clothSnow/iceHand brush / de-icerDoor lock cylin-
dersSnow/iceDe-icing fluid specifically for that pur-
poseWiper / wiper
bladesSoilingWindscreen cleaner, sponge or clothWheelsSoilingClear water, then apply appropriate
substancea)
Mild soap solution = 2 tablespoons of natural soap to 1 litre of lukewarm water.
The jack is maintenance-free. If necessary, the moving parts of the jack should
be lubricated with a suitable lubricant.
The towing device is maintenance-free. Coat the ball head of the towing de-
vice with a suitable grease whenever necessary.
123Care and maintenance
Page 132 of 184
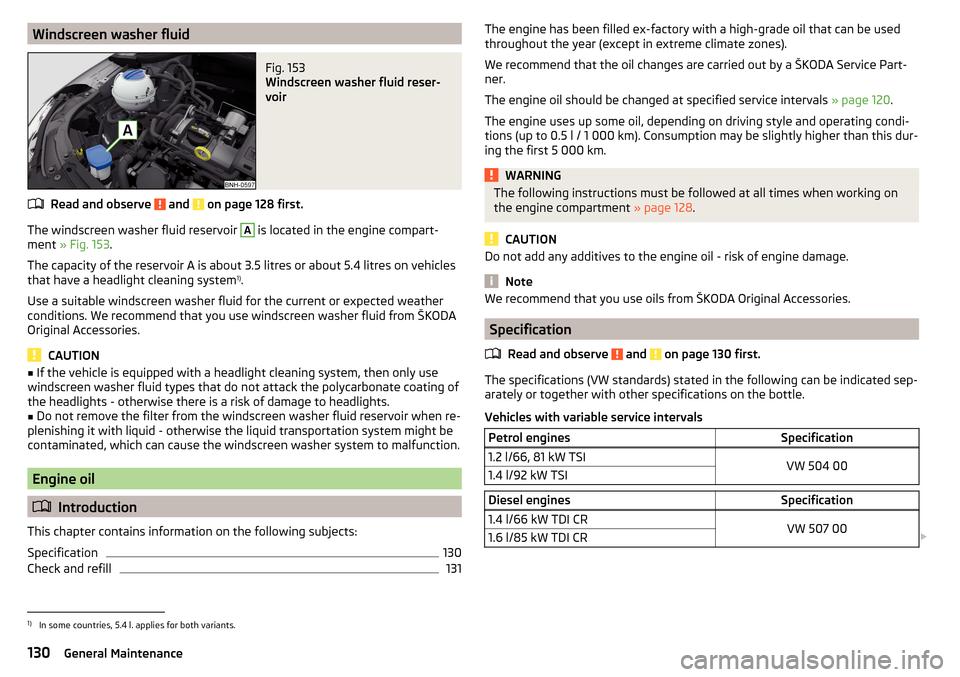
Windscreen washer fluidFig. 153
Windscreen washer fluid reser-
voir
Read and observe and on page 128 first.
The windscreen washer fluid reservoir
A
is located in the engine compart-
ment » Fig. 153 .
The capacity of the reservoir A is about 3.5 litres or about 5.4 litres on vehicles
that have a headlight cleaning system 1)
.
Use a suitable windscreen washer fluid for the current or expected weather
conditions. We recommend that you use windscreen washer fluid from ŠKODA
Original Accessories.
CAUTION
■ If the vehicle is equipped with a headlight cleaning system, then only use
windscreen washer fluid types that do not attack the polycarbonate coating of
the headlights - otherwise there is a risk of damage to headlights.■
Do not remove the filter from the windscreen washer fluid reservoir when re-
plenishing it with liquid - otherwise the liquid transportation system might be
contaminated, which can cause the windscreen washer system to malfunction.
Engine oil
Introduction
This chapter contains information on the following subjects:
Specification
130
Check and refill
131The engine has been filled ex-factory with a high-grade oil that can be used
throughout the year (except in extreme climate zones).
We recommend that the oil changes are carried out by a ŠKODA Service Part-
ner.
The engine oil should be changed at specified service intervals » page 120.
The engine uses up some oil, depending on driving style and operating condi-
tions (up to 0.5 l / 1 000 km). Consumption may be slightly higher than this dur-
ing the first 5 000 km.WARNINGThe following instructions must be followed at all times when working on
the engine compartment » page 128.
CAUTION
Do not add any additives to the engine oil - risk of engine damage.
Note
We recommend that you use oils from ŠKODA Original Accessories.
Specification
Read and observe
and on page 130 first.
The specifications (VW standards) stated in the following can be indicated sep-arately or together with other specifications on the bottle.
Vehicles with variable service intervals
Petrol enginesSpecification1.2 l/66, 81 kW TSIVW 504 001.4 l/92 kW TSIDiesel enginesSpecification1.4 l/66 kW TDI CRVW 507 001.6 l/85 kW TDI CR 1)
In some countries, 5.4 l. applies for both variants.
130General Maintenance