check oil SKODA ROOMSTER 2006 1.G Owner's Manual
[x] Cancel search | Manufacturer: SKODA, Model Year: 2006, Model line: ROOMSTER, Model: SKODA ROOMSTER 2006 1.GPages: 274, PDF Size: 48.64 MB
Page 27 of 274
Instruments and Indicator/Warning Lights
26
Three successive warning signals will sound if a red symbol appears.
If several operational faults of priority 1 exist, the symbols appear one after
the other and are each illuminated for about 5 seconds.
Yellow symbols
A yellow symbol signals a warning.
The meaning of the yellow symbols: One
warning signal will sound if a yellow symbol appears.
If several operational faults of priority 2 exist, the symbols appear one after
the other and are each illuminated for about 10 seconds.
Check the relevant function as soon as possible.
Navigation system*
The controls for the navigation system, radio, CD player are located in the
centre console on both sides of the monitor screen. Navigation data is
also shown in the information display of the instrument cluster.
Information and warning texts are displayed preferentially when the navi-
gation system is switched on.
Operation of the navigation system is described in separate operating
instructions to be found in the on-board literature.
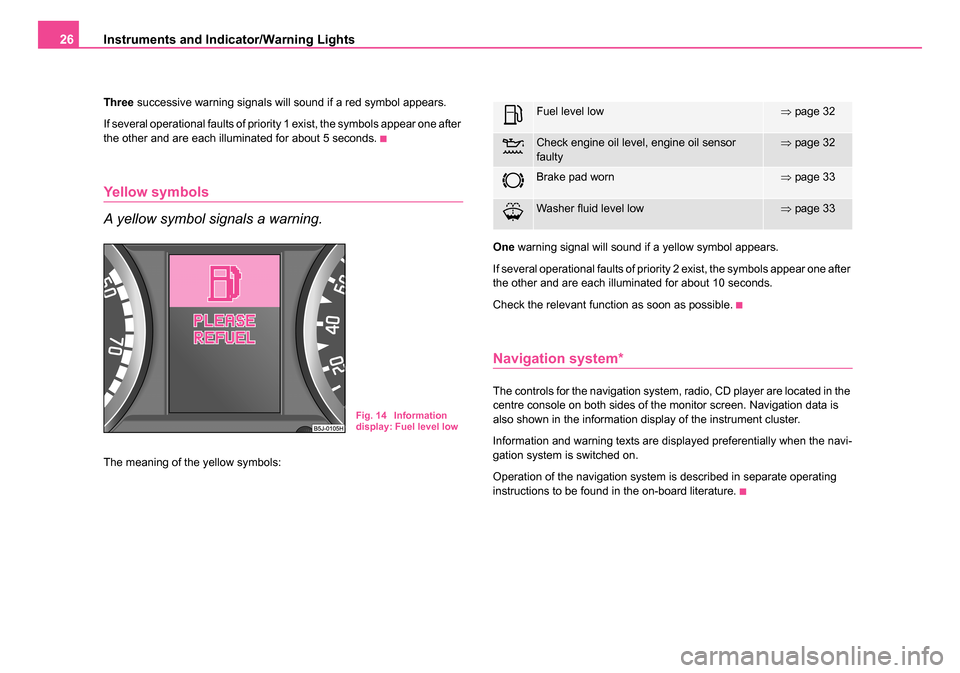
Fig. 14 Information
display: Fuel level low
Fuel level low⇒ page 32
Check engine oil level, engine oil sensor
faulty⇒page 32
Brake pad worn⇒page 33
Washer fluid level low⇒page 33
NKO 20 A05.book Page 26 Wednesday, June 21, 2006 1:42 PM
Page 33 of 274
Instruments and Indicator/Warning Lights
32
Electronic immobiliser
Data is compared between the ignition key and the control unit when
switching on the ignition. The indicator light will light up for a few
seconds when ignition key authorisation is confirmed.
The warning light will start flashing continuously if a non-authorised igni-
tion key (for example the wrong ignition key) has been used. The engine
cannot be started ⇒page 41.
It is only possible to start the engine of your car with a Genuine Škoda key
with the matching code .
Fuel reserve
The warning light comes on, if the fuel level is still about 7 litres.
A peep sounds as an additional warning signal.
The following text will be displayed in the information display*: PLEASE REFUEL
Engine oil
The warning light lights up red (low oil pressure)
The warning light comes on for a few seconds 2) when the ignition is
switched on. Stop the vehicle and switch the engine off
if the warning light does not
go off after the engine has started or flashes while driving. Check the oil
level and top up with oil as necessary ⇒page 213.
3 peeps sound as an additional warning signal.
Do not continue your journey if for some reason it is not possible under
the conditions prevailing to top up with oil. Keep the engine switched off
and obtain professional assistance from a specialist garage, otherwise it
could lead to severe engine damage.
Do not drive any further if the warning light flashes even if the oil is at
the correct level. Do not run the engine not at idling speed either. Contact
the nearest specialist garage to obtain professional assistance.
The following text will be displayed in the information display*:
STOP OIL PRESS. ENGINE OFF! OWNER'S MANUAL!
The warning light
lights up yellow* (oil quantity too low)
If the warning light lights up yellow, the quantity of oil in the engine is prob-
ably too low. Check as soon as possible the oil level or top up ⇒page 213
with engine oil.
A peep sounds as an additional warning signal.
The following text will be displayed in the information display*:
CHECK OIL LEVEL
The warning light will go out if the bonnet is left open for more than 30
seconds. If no engine oil has been replenished, the warning light will come
on again after driving about 100 km.
The warning light
flashes yellow* (engine oil level sensor faulty)
A fault on the engine oil level sensor is indicated additionally by an audible
signal and the warning light coming on several times after the ignition has
been switched on.
2)The warning light on vehicles fitted with information display does not come on
after switching the ignition on, but only if a fault exists or the engine oil level is too
low.
NKO 20 A05.book Page 32 Wednesday, June 21, 2006 1:42 PM
Page 34 of 274
Instruments and Indicator/Warning Lights33
Using the systemSafetyDriving TipsGeneral MaintenanceBreakdown assistanceTechnical Data
In this case have the engine inspected without delay by a specialist
garage.
The following text will be displayed in the information display*:
OIL SENSOR WORKSHOP! (OIL SENSOR WORKSHOP!)
WARNING
•If you must stop for technical reasons, then park the vehicle at
a safe distance from the traffic and switch off the engine and switch
on the hazard warning light system ⇒page 59.
•The red oil pressure light is not an oil level indicator! One
should therefore check the oil level at regular intervals, preferably
after every refueling stop.
•Pay attention to the following instructions ⇒page 210,
“Working in the engine compartmen t” before checking the coolant
fluid level and opening the bonnet.
Thickness of the brake pads*
If the warning light comes on, contact a specialist garage immediately
and have the brake pads on all of the wheels inspected.
A peep sounds as an additional warning signal.
The following text will be displayed in the information display*: CHECK BRAKE PAD
Open door*
The warning light comes on if one or several doors, the bonnet or tail-
gate is opened.
The warning light comes on even when the ignition is switched off. The
warning light goes out 5 minutes after switching off the ignition if one or
several doors, the bonnet or tailgate is opened. The warning light goes out
after closing the doors.
Windshield washer fluid level*
The warning light comes on when the ignition is switched on if there is
insufficient fluid in the windshield washer system. Top up with liquid
⇒ page 224.
A peep sounds as an additional warning signal.
The following text will be displayed in the information display*: REFILL WASHER LIQUID
Control system for exhaust
The warning light comes on after the ignition has been switched on.
If the warning light does not go out after starting the engine or it lights up
or flashes when driving, a fault exists in an exhaust relevant component.
The engine management system selects an emergency programme
which enables you to drive to the nearest specialist garage by adopting a
gentle style of driving.
NKO 20 A05.book Page 33 Wednesday, June 21, 2006 1:42 PM
Page 150 of 274
Seat belts149
Using the systemSafetyDriving TipsGeneral MaintenanceBreakdown assistanceTechnical Data
Important safety information regarding
the use of seat belts
The correct use of the seat belts considerably reduces the
risk of injury!
WARNING
•The belt webbing must not be jammed in-between at any point
or twisted, or chafe against any sharp edges.
•It is important that the belt webb ing is properly routed if the seat
belts are to offer their maximum protection ⇒page 150, “How are
seat belts correctly fastened?”.
•No two persons (also not children) should ever use a single seat
belt together.
•The maximum protection which seat belts can offer is only
achieved if you are correctly seated ⇒page 143, “Correct seated
position”.
•The belt webbing must not run across solid or fragile objects
(e.g. spectacles, ball-point pens, keys etc.) as this may be a cause
of injuries.
•Bulky, loose clothing (e.g. a winter coat over a jacket) does not
allow you to be correctly seated and impairs proper operation of
the seat belts.
•It is prohibited to use clamps or other objects to adjust seat
belts (e.g. for shortening the belts for smaller persons).
•The lock tongue should only be inserted into the lock which is
the correct one for your seat. Wrong use of the safety belt will
reduce its capacity to protect and the risk of injury increases.
•The backrests must not be tilted too far to the rear otherwise the
seatbelts can lose their effectiveness.
•The belt webbing must always be kept clean. Soiled belt
webbing may impair proper operation of the inertia reel
⇒ page 204, “Seat belts”.
•The slot of the belt tongue must not be blocked by paper or
similar objects otherwise the belt tongue will not lock in place prop-
erly.
•Inspect the seat belts regularly to ensure they are in good condi-
tion. If you find seat belts which have damage to the seat belt
webbing, seat belt connections, to the inertia reels or to the lock,
the relevant safety belt must be replaced by a specialist garage.
•The seat belts must not be removed or changed in any way. Do
not make an attempt to repair the seat belts yourself.
•Damaged seat belts which have been subjected to stress in an
accident and were therefore stretched, must be replaced - this is
best done by a specialist garage. The anchorage points of the belts
must also be inspected. The anchorage points for the belts should
also be checked.
•In certain countries it is possible to use seat belts which differ
in terms of their operation from the seat belts which are described
on the pages which follow.
WARNING (continued)
NKO 20 A05.book Page 149 Wednesday, June 21, 2006 1:42 PM
Page 190 of 274
Driving and the Environment189
Using the systemSafetyDriving TipsGeneral MaintenanceBreakdown assistanceTechnical Data
You should avoid fully exploiting the top speed of your vehicle wherever
possible. Fuel consumption, pollutant emissions and vehicle noises
increase disproportionally at high speeds.
The
⇒page 188, fig. 149 shows the ratio of fuel consumption to the
speed of your vehicle. You will cut your fuel consumption by half if you only
make use three-quarters of the possible top speed of your vehicle.
Reducing idling
Idling also costs fuel.
It is worthwhile switching off the engine in a traffic jam or when waiting at
a level crossing or at traffic lights with a lengthy red phase. Even after just
30 - 40 seconds you will have saved more fuel than that is needed when
you start the engine up again.
If an engine is only idling it takes much longer for it to reach its normal
operating temperature. Wear-and-tear and pollutant emissions, though,
are particularly high in the warming-up phase. This is why you should
drive off right after starting the engine. Do avoid high engine revolutions at
this time, however.
Regular servicing
A poorly tuned engine consumes an unnecessarily high
amount of fuel.
Having your vehicle serviced regularly at a specialist garge enables you
to satisfy one of the requirements for economical motoring even before
you set off on your journey. Keeping your vehicle properly serviced not
only has a positive effect on the safety of your vehicle and maintaining its
value, but also saves on fuel. A poorly tuned engine can result in a fuel consumption which is 10%
higher than normal.
The foreseen maintenance work should be undertaken exactly according
to the Service schedule by a specialist garage.
Also check the
oil level after refueling. Oil consumption is dependent to
a considerable extent on the load and speed of the engine. Oil consump-
tion could be as high as 0.5 litres/1 000 km depending on your style of
driving.
It is quite normal that a new engine has a higher oil consumption at first,
and reaches its lowest level only after a certain running in time. It is there-
fore not possible to correctly assess the oil consumption of a new vehicle
until after you have driven about 5 000 km.
For the sake of the environment
•You can achieve additional improvements in your fuel economy by
using high-lubricity oils.
•Check the ground below your car at regular intervals to detect any
leakages in good time. Please have your vehicle inspected by a specialist
garge if you find any stains caused by oil or other fluids on the floor.
NKO 20 A05.book Page 189 Wednesday, June 21, 2006 1:42 PM
Page 211 of 274
Inspecting and Replenishing
210
Opening the bonnet
– Unlock the bonnet ⇒page 209, fig. 153 .
– Ensure that the arms of the windscreen wipers are correctly in place against the windscreen before opening the bonnet
otherwise damage could occur to the paintwork.
– Press the locking button ⇒page 209, fig. 154 , the bonnet
unlocks itself.
– Grip the bonnet and lift it up.
– Take the bonnet support out of its holder and set it in the opening designed for it ⇒page 209, fig. 155 .
Closing the bonnet
– Lift the bonnet slightly and unhook the bonnet support. Press the bonnet support into the holder designed to hold it.
– Allow the bonnet to drop from a height of about 30 cm into the lock - bonnet do not press down on it!
WARNING
•Never open the bonnet if you see that steam or coolant is
flowing out of the engine compartm ent - risk of scalding! Wait long
enough until the steam or coolant has stopped escaping.
•For safety reasons, the bonnet must always be properly closed
when driving. One should therefore check that the lock has in fact
engaged properly after closing the bonnet.
•Stop your vehicle immediately wh ile driving if you notice that
the lock is not properly engaged and close the bonnet properly -
risk of an accident!
Caution
•Before opening the bonnet, ensure that the arms of the windscreen
wipers are correctly in place against the windscreen. Otherwise, there is
a risk of damage to the paintwork.
Working in the engine compartment
Particular care is required when carrying out any work in
the engine compartment!
There is a risk of injuries, scalding, accidents and fire when working
in the engine compartment, e.g. inspecting and replenishing oil and
other fluids. For this reason, it is essential to comply with the
warning instructions stated below and with the general applicable
rules of safety. The engine compartment of your car is a hazardous
area ⇒ .
WARNING
•Never open the bonnet if you see that steam or coolant is
flowing out of the engine compartment - risk of scalding! Wait long
enough until the steam or coolant has stopped escaping.
•Switch off the engine and pull out the ignition key.
•Apply the handbrake firmly.
•If your vehicle is fitted with a manual gearbox, move the gear-
shift lever into Neutral, or if it is fitted with automatic gearbox, move
the selector lever into position P.
•Allow the engine to cool down.
•Keep children clear of the engine compartment.
•Do not touch any hot engine parts - risk of burns!
NKO 20 A05.book Page 210 Wednesday, June 21, 2006 1:42 PM
Page 214 of 274
Inspecting and Replenishing213
Using the systemSafetyDriving TipsGeneral MaintenanceBreakdown assistanceTechnical Data
Engine oil specifications for models with flexible service intervals
(QG1)
Caution
Only the above-mentioned oils may be used on vehicles with flexible
service intervals (QG1). We recommend always refilling with oil of the
same specification since this will maintain the properties of the oil. In
exceptional cases, you must top up only once engine oil complying with
Specification VW 502 00 (only for petrol engines) or Specification VW 505
01 (only for diesel engines) to maximum 0.5 litres. You must not use other
engine oils - risk of engine damage!
Note
•Before a long drive we recommend that you purchase and carry with
you engine oil which complies with the specification for your vehicle.
Consequently, you will always have the correct engine oil for refilling.
•We recommend using a preservative from the Škoda original accesso-
ries offered by your Škoda dealer.
•For further information - see Service shedule.
Check engine oil level
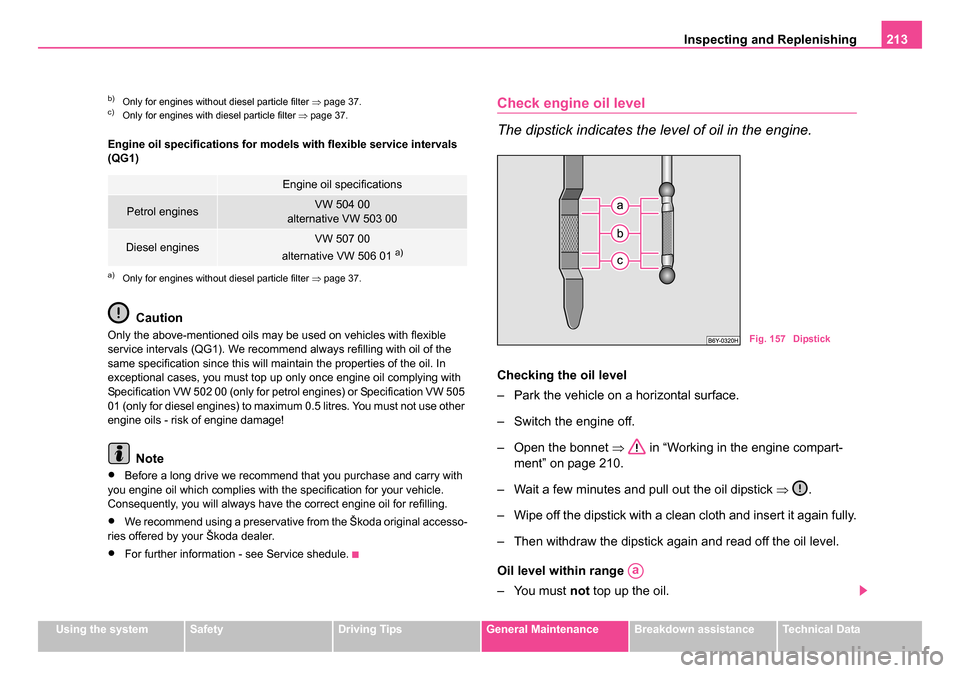
The dipstick indicates the level of oil in the engine.
Checking the oil level
– Park the vehicle on a horizontal surface.
– Switch the engine off.
– Open the bonnet ⇒ in “Working in the engine compart-
ment” on page 210.
– Wait a few minutes and pull out the oil dipstick ⇒.
– Wipe off the dipstick with a clean cloth and insert it again fully.
– Then withdraw the dipstick again and read off the oil level.
Oil level within range
– You must not top up the oil.
b)Only for engines without diesel particle filter ⇒page 37.c)Only for engines with diesel particle filter ⇒page 37.
Engine oil specifications
Petrol enginesVW 504 00
alternative VW 503 00
Diesel enginesVW 507 00
alternative VW 506 01 a)
a)Only for engines without diesel particle filter ⇒page 37.
Fig. 157 Dipstick
Aa
NKO 20 A05.book Page 213 Wednesday, June 21, 2006 1:42 PM
Page 215 of 274
Inspecting and Replenishing
214
Oil level within range
– You may top up the oil. It is possible that the oil level may then
be within range after doing this.
Oil level within range
– You must top up the oil. It is sufficient, once this is done, to
keep the oil level is within range .
It is normal for the engine to consume oil. The oil consumption may be as
much as 0.5 l/1 000 km depending on your style of driving and the condi-
tions under which you operate your vehicle. The oil consumption may be
slightly higher than this during the first 5 000 kilometres.
One should therefore check the oil level at regular intervals, preferably
every time after the fuel tank is filled or after driving for long stretches.
We recommend maintaining the oil level within the range if the engine
has been operating at high loads, for example during a lengthy motorway
trip during the summer months, towing a trailer or negotiating a high
mountain pass, but not above this .
The warning light in the instrument cluster* will indicate ⇒page 32
whether the oil level is too low. In this case, check the oil level as soon as
possible. Top up with an appropriate quantity of oil.
WARNING
Read and observe the warning notes ⇒page 210, “Working in the
engine compartment” before working in the engine compartment.
Caution
•Always check the oil level on vehicles with engine 1.2 l/47 kW when
the engine is warm. Otherwise the measuring result is incorrect und oil
could be incorrectly replenished - risk of engine damage!
•The oil level must on no account extend beyond the range . Danger
of damaging the catalytic converter.
•Do not continue your journey if for some reason it is not possible
under the conditions prevailing to top up with oil. Switch the engine off
and obtain professional assistance from a specialist garage, otherwise it
could lead to severe engine damage.
Replenishing engine oil
– Inspect the oil level ⇒page 213.
– Unscrew the cap of the engine oil filler opening.
– Pour in a suitable grade of oil in portions of 0.5 litres ⇒page 212, “Engine oil specifications”.
– Inspect the oil level ⇒page 213.
– Carefully screw on the cap of the filler opening and push the dipstick in fully.
WARNING
•Avoid dripping oil onto hot parts of the engine when topping up
will oil - a risk of fire!
•Read and observe the warning notes ⇒page 210, “Working in
the engine compartment” before working in the engine compart-
ment.
Ab
Aa
Ac
Ab
Ab
Aa
NKO 20 A05.book Page 214 Wednesday, June 21, 2006 1:42 PM
Page 266 of 274
Index265
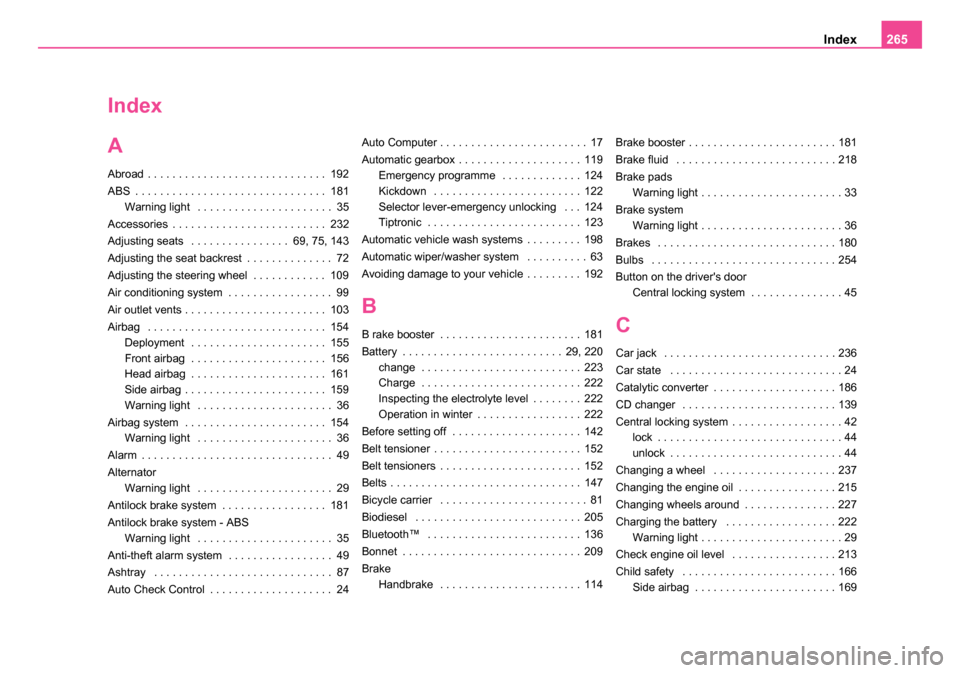
Index
A
Abroad . . . . . . . . . . . . . . . . . . . . . . . . . . . . . 192
ABS . . . . . . . . . . . . . . . . . . . . . . . . . . . . . . . 181
Warning light . . . . . . . . . . . . . . . . . . . . . . 35
Accessories . . . . . . . . . . . . . . . . . . . . . . . . . 232
Adjusting seats . . . . . . . . . . . . . . . . 69, 75, 143
Adjusting the seat backrest . . . . . . . . . . . . . . 72
Adjusting the steering wheel . . . . . . . . . . . . 109
Air conditioning system . . . . . . . . . . . . . . . . . 99
Air outlet vents . . . . . . . . . . . . . . . . . . . . . . . 103
Airbag . . . . . . . . . . . . . . . . . . . . . . . . . . . . . 154 Deployment . . . . . . . . . . . . . . . . . . . . . . 155
Front airbag . . . . . . . . . . . . . . . . . . . . . . 156
Head airbag . . . . . . . . . . . . . . . . . . . . . . 161
Side airbag . . . . . . . . . . . . . . . . . . . . . . . 159
Warning light . . . . . . . . . . . . . . . . . . . . . . 36
Airbag system . . . . . . . . . . . . . . . . . . . . . . . 154 Warning light . . . . . . . . . . . . . . . . . . . . . . 36
Alarm . . . . . . . . . . . . . . . . . . . . . . . . . . . . . . . 49
Alternator Warning light . . . . . . . . . . . . . . . . . . . . . . 29
Antilock brake system . . . . . . . . . . . . . . . . . 181
Antilock brake system - ABS Warning light . . . . . . . . . . . . . . . . . . . . . . 35
Anti-theft alarm system . . . . . . . . . . . . . . . . . 49
Ashtray . . . . . . . . . . . . . . . . . . . . . . . . . . . . . 87
Auto Check Control . . . . . . . . . . . . . . . . . . . . 24 Auto Computer . . . . . . . . . . . . . . . . . . . . . . . . 17
Automatic gearbox . . . . . . . . . . . . . . . . . . . . 119
Emergency programme . . . . . . . . . . . . . 124
Kickdown . . . . . . . . . . . . . . . . . . . . . . . . 122
Selector lever-emergency unlocking . . . 124
Tiptronic . . . . . . . . . . . . . . . . . . . . . . . . . 123
Automatic vehicle wash systems . . . . . . . . . 198
Automatic wiper/washer system . . . . . . . . . . 63
Avoiding damage to your vehicle . . . . . . . . . 192
B
B rake booster . . . . . . . . . . . . . . . . . . . . . . . 181
Battery . . . . . . . . . . . . . . . . . . . . . . . . . . 29, 220 change . . . . . . . . . . . . . . . . . . . . . . . . . . 223
Charge . . . . . . . . . . . . . . . . . . . . . . . . . . 222
Inspecting the electrolyte level . . . . . . . . 222
Operation in winter . . . . . . . . . . . . . . . . . 222
Before setting off . . . . . . . . . . . . . . . . . . . . . 142
Belt tensioner . . . . . . . . . . . . . . . . . . . . . . . . 152
Belt tensioners . . . . . . . . . . . . . . . . . . . . . . . 152
Belts . . . . . . . . . . . . . . . . . . . . . . . . . . . . . . . 147
Bicycle carrier . . . . . . . . . . . . . . . . . . . . . . . . 81
Biodiesel . . . . . . . . . . . . . . . . . . . . . . . . . . . 205
Bluetooth™ . . . . . . . . . . . . . . . . . . . . . . . . . 136
Bonnet . . . . . . . . . . . . . . . . . . . . . . . . . . . . . 209
Brake Handbrake . . . . . . . . . . . . . . . . . . . . . . . 114 Brake booster . . . . . . . . . . . . . . . . . . . . . . . . 181
Brake fluid . . . . . . . . . . . . . . . . . . . . . . . . . . 218
Brake pads
Warning light . . . . . . . . . . . . . . . . . . . . . . . 33
Brake system Warning light . . . . . . . . . . . . . . . . . . . . . . . 36
Brakes . . . . . . . . . . . . . . . . . . . . . . . . . . . . . 180
Bulbs . . . . . . . . . . . . . . . . . . . . . . . . . . . . . . 254
Button on the driver's door Central locking system . . . . . . . . . . . . . . . 45C
Car jack . . . . . . . . . . . . . . . . . . . . . . . . . . . . 236
Car state . . . . . . . . . . . . . . . . . . . . . . . . . . . . 24
Catalytic converter . . . . . . . . . . . . . . . . . . . . 186
CD changer . . . . . . . . . . . . . . . . . . . . . . . . . 139
Central locking system . . . . . . . . . . . . . . . . . . 42lock . . . . . . . . . . . . . . . . . . . . . . . . . . . . . . 44
unlock . . . . . . . . . . . . . . . . . . . . . . . . . . . . 44
Changing a wheel . . . . . . . . . . . . . . . . . . . . 237
Changing the engine oil . . . . . . . . . . . . . . . . 215
Changing wheels around . . . . . . . . . . . . . . . 227
Charging the battery . . . . . . . . . . . . . . . . . . 222 Warning light . . . . . . . . . . . . . . . . . . . . . . . 29
Check engine oil level . . . . . . . . . . . . . . . . . 213
Child safety . . . . . . . . . . . . . . . . . . . . . . . . . 166 Side airbag . . . . . . . . . . . . . . . . . . . . . . . 169
NKO 20 A05.book Page 265 Wednesday, June 21, 2006 1:42 PM
Page 267 of 274
Index
266
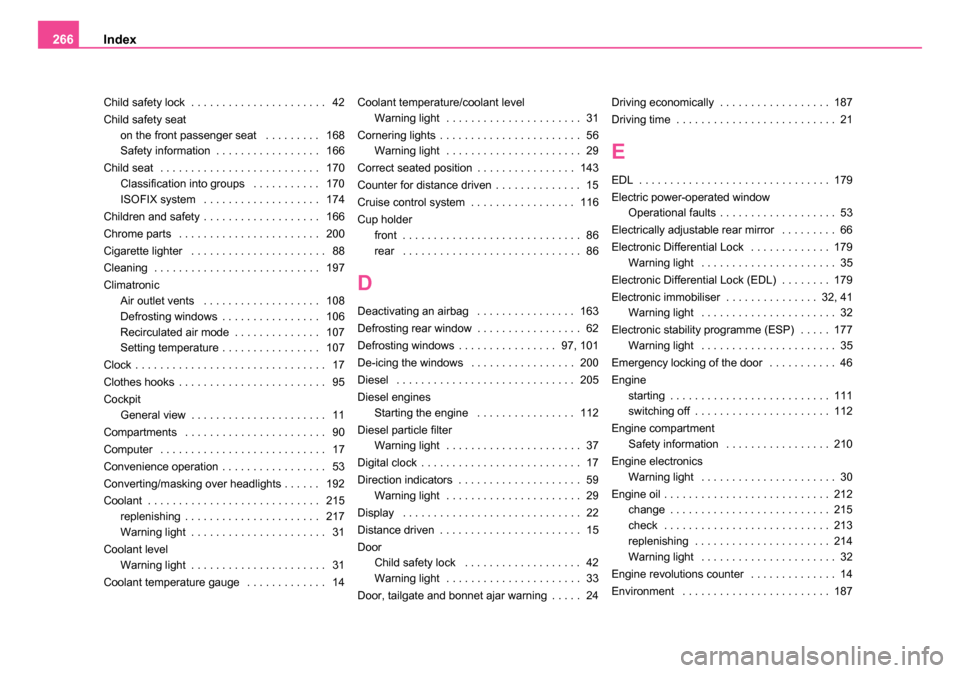
Child safety lock . . . . . . . . . . . . . . . . . . . . . . 42
Child safety seat
on the front passenger seat . . . . . . . . . 168
Safety information . . . . . . . . . . . . . . . . . 166
Child seat . . . . . . . . . . . . . . . . . . . . . . . . . . 170 Classification into groups . . . . . . . . . . . 170
ISOFIX system . . . . . . . . . . . . . . . . . . . 174
Children and safety . . . . . . . . . . . . . . . . . . . 166
Chrome parts . . . . . . . . . . . . . . . . . . . . . . . 200
Cigarette lighter . . . . . . . . . . . . . . . . . . . . . . 88
Cleaning . . . . . . . . . . . . . . . . . . . . . . . . . . . 197
Climatronic Air outlet vents . . . . . . . . . . . . . . . . . . . 108
Defrosting windows . . . . . . . . . . . . . . . . 106
Recirculated air mode . . . . . . . . . . . . . . 107
Setting temperature . . . . . . . . . . . . . . . . 107
Clock . . . . . . . . . . . . . . . . . . . . . . . . . . . . . . . 17
Clothes hooks . . . . . . . . . . . . . . . . . . . . . . . . 95
Cockpit General view . . . . . . . . . . . . . . . . . . . . . . 11
Compartments . . . . . . . . . . . . . . . . . . . . . . . 90
Computer . . . . . . . . . . . . . . . . . . . . . . . . . . . 17
Convenience operation . . . . . . . . . . . . . . . . . 53
Converting/masking over headlights . . . . . . 192
Coolant . . . . . . . . . . . . . . . . . . . . . . . . . . . . 215 replenishing . . . . . . . . . . . . . . . . . . . . . . 217
Warning light . . . . . . . . . . . . . . . . . . . . . . 31
Coolant level Warning light . . . . . . . . . . . . . . . . . . . . . . 31
Coolant temperature gauge . . . . . . . . . . . . . 14 Coolant temperature/coolant level
Warning light . . . . . . . . . . . . . . . . . . . . . . 31
Cornering lights . . . . . . . . . . . . . . . . . . . . . . . 56 Warning light . . . . . . . . . . . . . . . . . . . . . . 29
Correct seated position . . . . . . . . . . . . . . . . 143
Counter for distance driven . . . . . . . . . . . . . . 15
Cruise control system . . . . . . . . . . . . . . . . . 116
Cup holder front . . . . . . . . . . . . . . . . . . . . . . . . . . . . . 86
rear . . . . . . . . . . . . . . . . . . . . . . . . . . . . . 86
D
Deactivating an airbag . . . . . . . . . . . . . . . . 163
Defrosting rear window . . . . . . . . . . . . . . . . . 62
Defrosting windows . . . . . . . . . . . . . . . . 97, 101
De-icing the windows . . . . . . . . . . . . . . . . . 200
Diesel . . . . . . . . . . . . . . . . . . . . . . . . . . . . . 205
Diesel enginesStarting the engine . . . . . . . . . . . . . . . . 112
Diesel particle filter Warning light . . . . . . . . . . . . . . . . . . . . . . 37
Digital clock . . . . . . . . . . . . . . . . . . . . . . . . . . 17
Direction indicators . . . . . . . . . . . . . . . . . . . . 59 Warning light . . . . . . . . . . . . . . . . . . . . . . 29
Display . . . . . . . . . . . . . . . . . . . . . . . . . . . . . 22
Distance driven . . . . . . . . . . . . . . . . . . . . . . . 15
Door Child safety lock . . . . . . . . . . . . . . . . . . . 42
Warning light . . . . . . . . . . . . . . . . . . . . . . 33
Door, tailgate and bonnet ajar warning . . . . . 24 Driving economically . . . . . . . . . . . . . . . . . . 187
Driving time . . . . . . . . . . . . . . . . . . . . . . . . . . 21
E
EDL . . . . . . . . . . . . . . . . . . . . . . . . . . . . . . . 179
Electric power-operated window
Operational faults . . . . . . . . . . . . . . . . . . . 53
Electrically adjustable rear mirror . . . . . . . . . 66
Electronic Differential Lock . . . . . . . . . . . . . 179 Warning light . . . . . . . . . . . . . . . . . . . . . . 35
Electronic Differential Lock (EDL) . . . . . . . . 179
Electronic immobiliser . . . . . . . . . . . . . . . 32, 41 Warning light . . . . . . . . . . . . . . . . . . . . . . 32
Electronic stability programme (ESP) . . . . . 177 Warning light . . . . . . . . . . . . . . . . . . . . . . 35
Emergency locking of the door . . . . . . . . . . . 46
Engine starting . . . . . . . . . . . . . . . . . . . . . . . . . . 111
switching off . . . . . . . . . . . . . . . . . . . . . . 112
Engine compartment Safety information . . . . . . . . . . . . . . . . . 210
Engine electronics Warning light . . . . . . . . . . . . . . . . . . . . . . 30
Engine oil . . . . . . . . . . . . . . . . . . . . . . . . . . . 212 change . . . . . . . . . . . . . . . . . . . . . . . . . . 215
check . . . . . . . . . . . . . . . . . . . . . . . . . . . 213
replenishing . . . . . . . . . . . . . . . . . . . . . . 214
Warning light . . . . . . . . . . . . . . . . . . . . . . 32
Engine revolutions counter . . . . . . . . . . . . . . 14
Environment . . . . . . . . . . . . . . . . . . . . . . . . 187
NKO 20 A05.book Page 266 Wednesday, June 21, 2006 1:42 PM