turn signal SKODA ROOMSTER 2006 1.G Owner's Manual
[x] Cancel search | Manufacturer: SKODA, Model Year: 2006, Model line: ROOMSTER, Model: SKODA ROOMSTER 2006 1.GPages: 274, PDF Size: 48.64 MB
Page 12 of 274
Cockpit11
Using the systemSafetyDriving TipsGeneral MaintenanceBreakdown assistanceTechnical Data
Cockpit
General view
This general view is designed to help you to quickly
become familiar with the instruments, gauges and
controls.
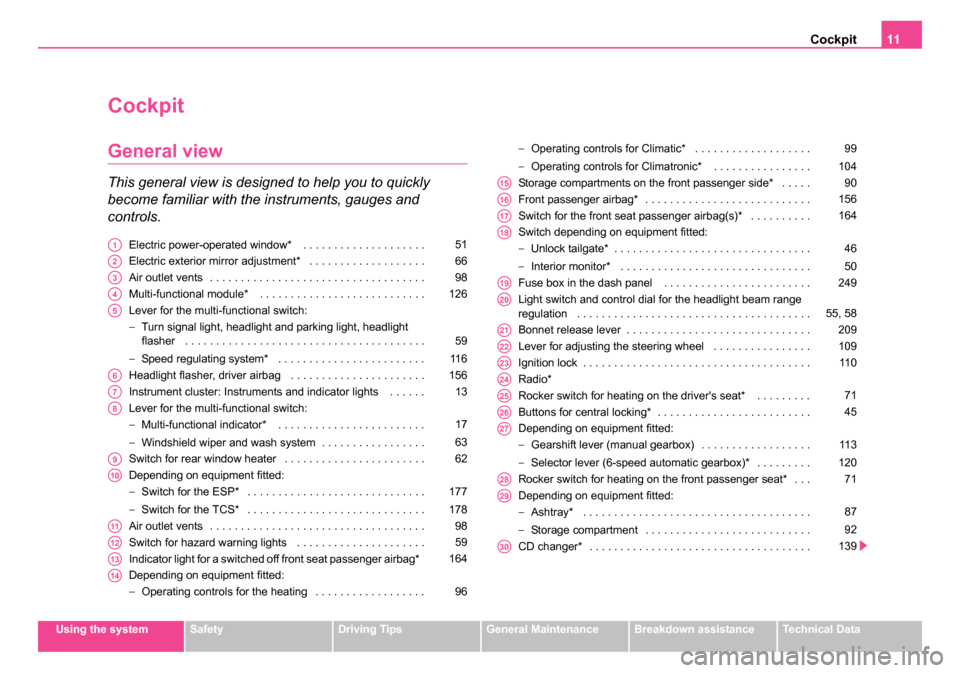
Electric power-operated window* . . . . . . . . . . . . . . . . . . . .
Electric exterior mirror adjustment* . . . . . . . . . . . . . . . . . . .
Air outlet vents . . . . . . . . . . . . . . . . . . . . . . . . . . . . . . . . . . .
Multi-functional module* . . . . . . . . . . . . . . . . . . . . . . . . . . .
Lever for the multi-functional switch:
−Turn signal light, headlight and parking light, headlight
flasher . . . . . . . . . . . . . . . . . . . . . . . . . . . . . . . . . . . . . . .
− Speed regulating system* . . . . . . . . . . . . . . . . . . . . . . . .
Headlight flasher, driver airbag . . . . . . . . . . . . . . . . . . . . . .
Instrument cluster: Instruments and indicator lights . . . . . .
Lever for the multi-functional switch:
− Multi-functional indicator* . . . . . . . . . . . . . . . . . . . . . . . .
− Windshield wiper and wash system . . . . . . . . . . . . . . . . .
Switch for rear window heater . . . . . . . . . . . . . . . . . . . . . . .
Depending on equipment fitted:
− Switch for the ESP* . . . . . . . . . . . . . . . . . . . . . . . . . . . . .
− Switch for the TCS* . . . . . . . . . . . . . . . . . . . . . . . . . . . . .
Air outlet vents . . . . . . . . . . . . . . . . . . . . . . . . . . . . . . . . . . .
Switch for hazard warning lights . . . . . . . . . . . . . . . . . . . . .
Indicator light for a switched off front seat passenger airbag*
Depending on equipment fitted:
− Operating controls for the heating . . . . . . . . . . . . . . . . . . −
Operating controls for Climatic* . . . . . . . . . . . . . . . . . . .
− Operating controls for Climatronic* . . . . . . . . . . . . . . . .
Storage compartments on the front passenger side* . . . . .
Front passenger airbag* . . . . . . . . . . . . . . . . . . . . . . . . . . .
Switch for the front seat passenger airbag(s)* . . . . . . . . . .
Switch depending on equipment fitted:
− Unlock tailgate* . . . . . . . . . . . . . . . . . . . . . . . . . . . . . . . .
− Interior monitor* . . . . . . . . . . . . . . . . . . . . . . . . . . . . . . .
Fuse box in the dash panel . . . . . . . . . . . . . . . . . . . . . . . .
Light switch and control dial for the headlight beam range
regulation . . . . . . . . . . . . . . . . . . . . . . . . . . . . . . . . . . . . . .
Bonnet release lever . . . . . . . . . . . . . . . . . . . . . . . . . . . . . .
Lever for adjusting the steering wheel . . . . . . . . . . . . . . . .
Ignition lock . . . . . . . . . . . . . . . . . . . . . . . . . . . . . . . . . . . . .
Radio*
Rocker switch for heating on the driver's seat* . . . . . . . . .
Buttons for central locking* . . . . . . . . . . . . . . . . . . . . . . . . .
Depending on equipment fitted:
− Gearshift lever (manual gearbox) . . . . . . . . . . . . . . . . . .
− Selector lever (6-speed automatic gearbox)* . . . . . . . . .
Rocker switch for heating on the front passenger seat* . . .
Depending on equipment fitted:
− Ashtray* . . . . . . . . . . . . . . . . . . . . . . . . . . . . . . . . . . . . .
− Storage compartment . . . . . . . . . . . . . . . . . . . . . . . . . . .
CD changer* . . . . . . . . . . . . . . . . . . . . . . . . . . . . . . . . . . . . A151
A266
A398
A4126
A5
59
11 6
A6156
A713
A8
17
63
A962
A10
177
178
A1198
A1259
A13164
A14
96 99
104
A1590
A16156
A17164
A18
46
50
A19249
A2055, 58
A21209
A22109
A2311 0
A24
A2571
A2645
A27
11 3
120
A2871
A29
87
92
A30139
NKO 20 A05.book Page 11 Wednesday, June 21, 2006 1:42 PM
Page 25 of 274
Instruments and Indicator/Warning Lights
24
Door, tailgate and bonnet ajar warning
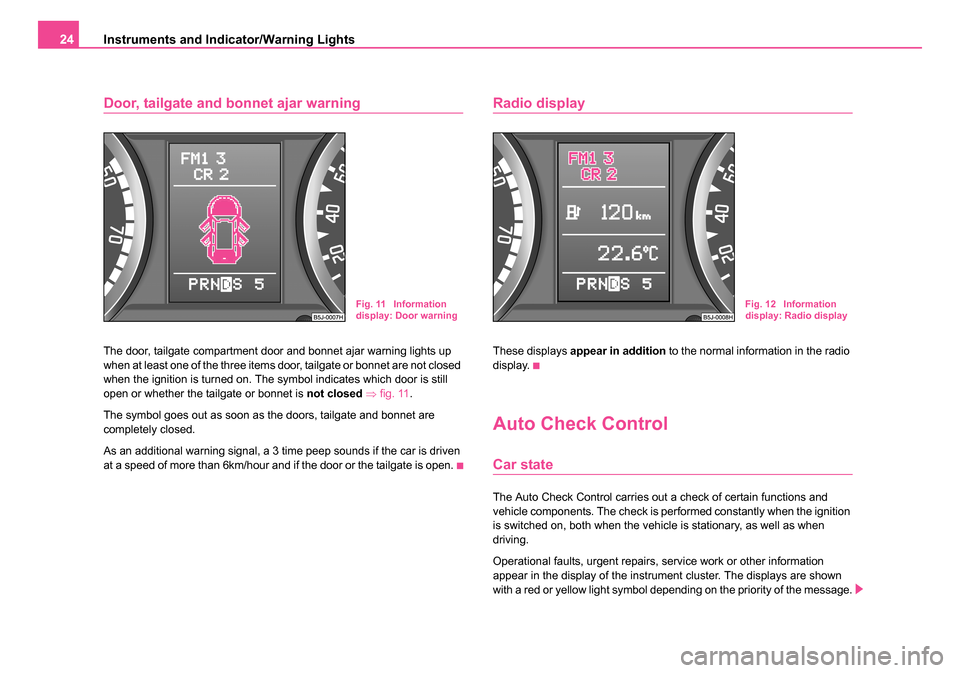
The door, tailgate compartment door and bonnet ajar warning lights up
when at least one of the three items door, tailgate or bonnet are not closed
when the ignition is turned on. The symbol indicates which door is still
open or whether the tailgate or bonnet is not closed ⇒ fig. 11 .
The symbol goes out as soon as the doors, tailgate and bonnet are
completely closed.
As an additional warning signal, a 3 time peep sounds if the car is driven
at a speed of more than 6km/hour and if the door or the tailgate is open.
Radio display
These displays appear in addition to the normal information in the radio
display.
Auto Check Control
Car state
The Auto Check Control carries out a check of certain functions and
vehicle components. The check is performed constantly when the ignition
is switched on, both when the vehicle is stationary, as well as when
driving.
Operational faults, urgent repairs, service work or other information
appear in the display of the instrument cluster. The displays are shown
with a red or yellow light symbol depending on the priority of the message.
Fig. 11 Information
display: Door warningFig. 12 Information
display: Radio display
NKO 20 A05.book Page 24 Wednesday, June 21, 2006 1:42 PM
Page 28 of 274
Instruments and Indicator/Warning Lights27
Using the systemSafetyDriving TipsGeneral MaintenanceBreakdown assistanceTechnical Data
Warning lights
Overview
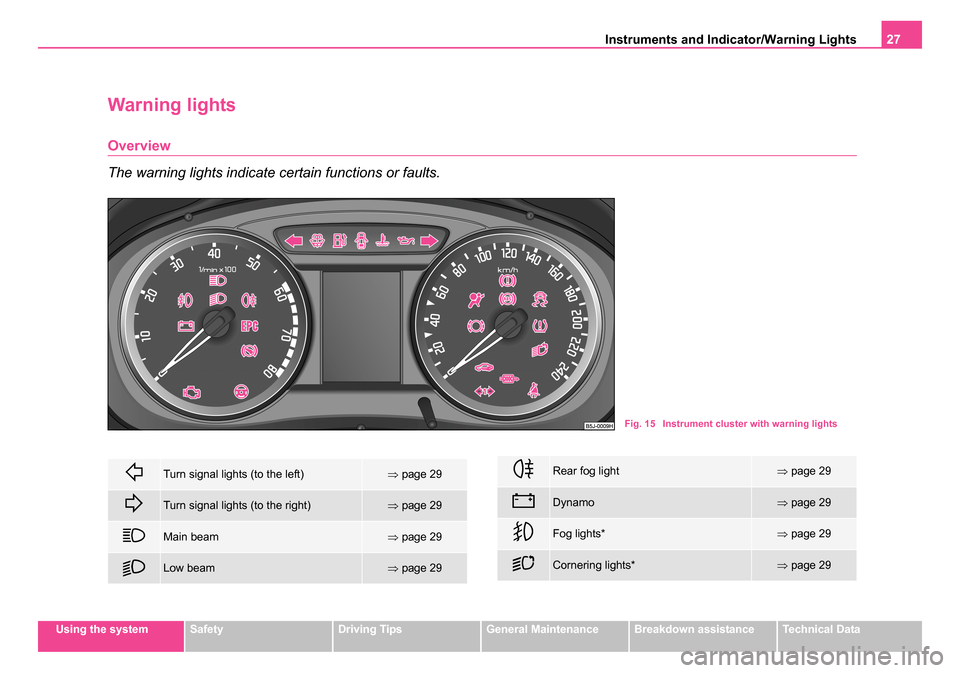
The warning lights indicate certain functions or faults.
Fig. 15 Instrument cluster with warning lights
Turn signal lights (to the left)⇒page 29
Turn signal lights (to the right)⇒page 29
Main beam⇒page 29
Low beam⇒page 29
Rear fog light⇒page 29
Dynamo⇒page 29
Fog lights*⇒page 29
Cornering lights*⇒page 29
NKO 20 A05.book Page 27 Wednesday, June 21, 2006 1:42 PM
Page 29 of 274
Instruments and Indicator/Warning Lights
28
WARNING
•If you do not pay attention to the warning lights coming on and
the corresponding descriptions and warning notes, this may result
in severe body injuries or major vehicle damage.
•The engine compartment of your car is a hazardous area. There
is a risk of injuries, scalding, accid ents and fire when working in the
engine compartment, e.g. inspecting and replenishing oil and other
fluids. It is also essential to observe all warnings ⇒page 210.
Note
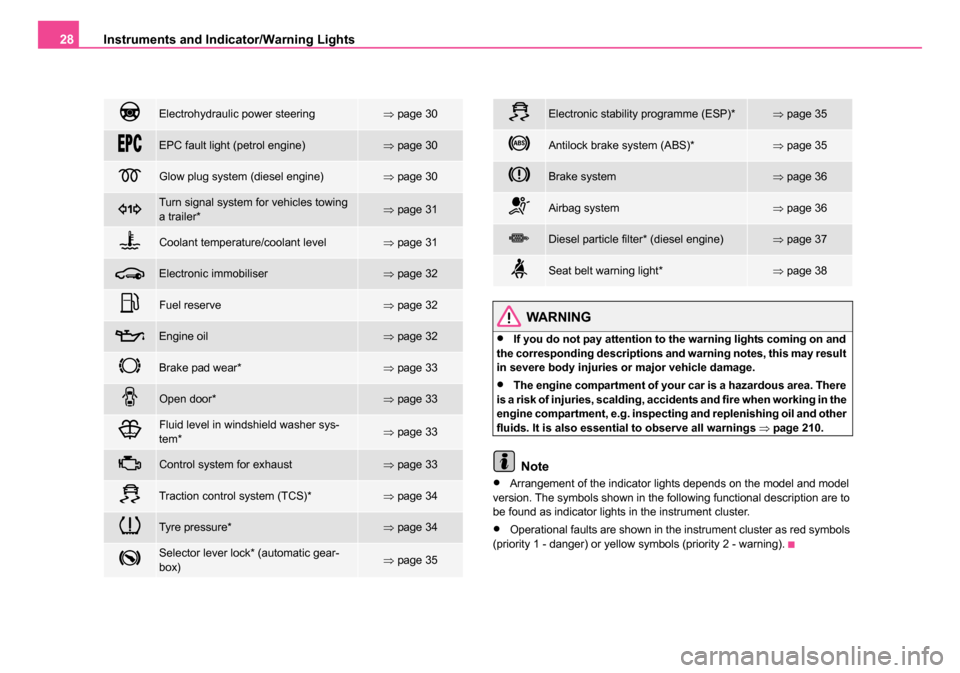
•Arrangement of the indicator lights depends on the model and model
version. The symbols shown in the following functional description are to
be found as indicator lights in the instrument cluster.
•Operational faults are shown in the instrument cluster as red symbols
(priority 1 - danger) or yellow symbols (priority 2 - warning).
Electrohydraulic power steering⇒ page 30
EPC fault light (petrol engine)⇒page 30
Glow plug system (diesel engine)⇒page 30
Turn signal system for vehicles towing
a trailer*⇒page 31
Coolant temperature/coolant level⇒page 31
Electronic immobiliser⇒page 32
Fuel reserve⇒page 32
Engine oil⇒page 32
Brake pad wear*⇒page 33
Open door*⇒page 33
Fluid level in windshield washer sys-
tem*⇒page 33
Control system for exhaust⇒page 33
Traction control system (TCS)*⇒page 34
Tyre pressure*⇒page 34
Selector lever lock* (automatic gear-
box)⇒page 35
Electronic stability programme (ESP)*⇒page 35
Antilock brake system (ABS)*⇒page 35
Brake system⇒page 36
Airbag system⇒page 36
Diesel particle filter* (diesel engine)⇒page 37
Seat belt warning light*⇒page 38
NKO 20 A05.book Page 28 Wednesday, June 21, 2006 1:42 PM
Page 30 of 274
Instruments and Indicator/Warning Lights29
Using the systemSafetyDriving TipsGeneral MaintenanceBreakdown assistanceTechnical Data
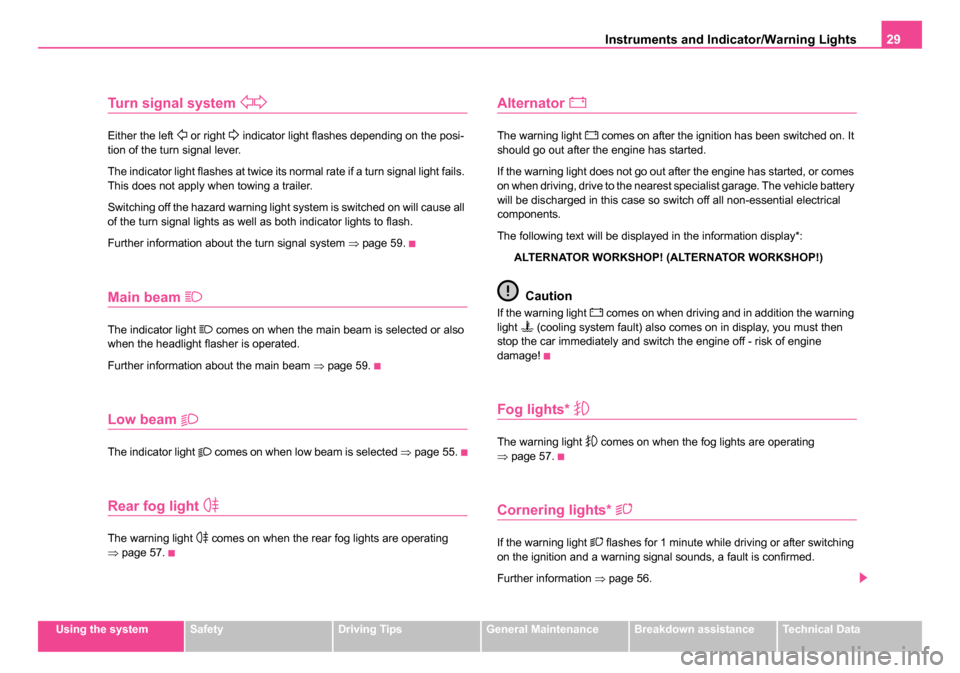
Turn signal system
Either the left or right indicator light flashes depending on the posi-
tion of the turn signal lever.
The indicator light flashes at twice its normal rate if a turn signal light fails.
This does not apply when towing a trailer.
Switching off the hazard warning light system is switched on will cause all
of the turn signal lights as well as both indicator lights to flash.
Further information about the turn signal system ⇒page 59.
Main beam
The indicator light comes on when the main beam is selected or also
when the headlight flasher is operated.
Further information about the main beam ⇒page 59.
Low beam
The indicator light comes on when low beam is selected ⇒page 55.
Rear fog light
The warning light comes on when the rear fog lights are operating
⇒ page 57.
Alternator
The warning light comes on after the ignition has been switched on. It
should go out after the engine has started.
If the warning light does not go out after the engine has started, or comes
on when driving, drive to the nearest specialist garage. The vehicle battery
will be discharged in this case so switch off all non-essential electrical
components.
The following text will be displayed in the information display*:
ALTERNATOR WORKSHOP! (ALTERNATOR WORKSHOP!)
Caution
If the warning light comes on when driving and in addition the warning
light (cooling system fault) also comes on in display, you must then
stop the car immediately and switch the engine off - risk of engine
damage!
Fog lights*
The warning light comes on when the fog lights are operating
⇒ page 57.
Cornering lights*
If the warning light flashes for 1 minute while driving or after switching
on the ignition and a warning signal sounds, a fault is confirmed.
Further information ⇒page 56.
NKO 20 A05.book Page 29 Wednesday, June 21, 2006 1:42 PM
Page 32 of 274
Instruments and Indicator/Warning Lights31
Using the systemSafetyDriving TipsGeneral MaintenanceBreakdown assistanceTechnical Data
an emergency programme which enables you to drive to the nearest
specialist garage by adopting a gentle style of driving.
The following text will be displayed in the information display*:
ENGINE FAULT WORKSHOP!
Turn signal system for vehicles towing a trailer*
The indicator light on vehicles towing a trailer flashes together with the
respective indicator light for the turn signal system.
The indicator light
does not flash if a turn signal light on the trailer or
on the vehicle is not operating.
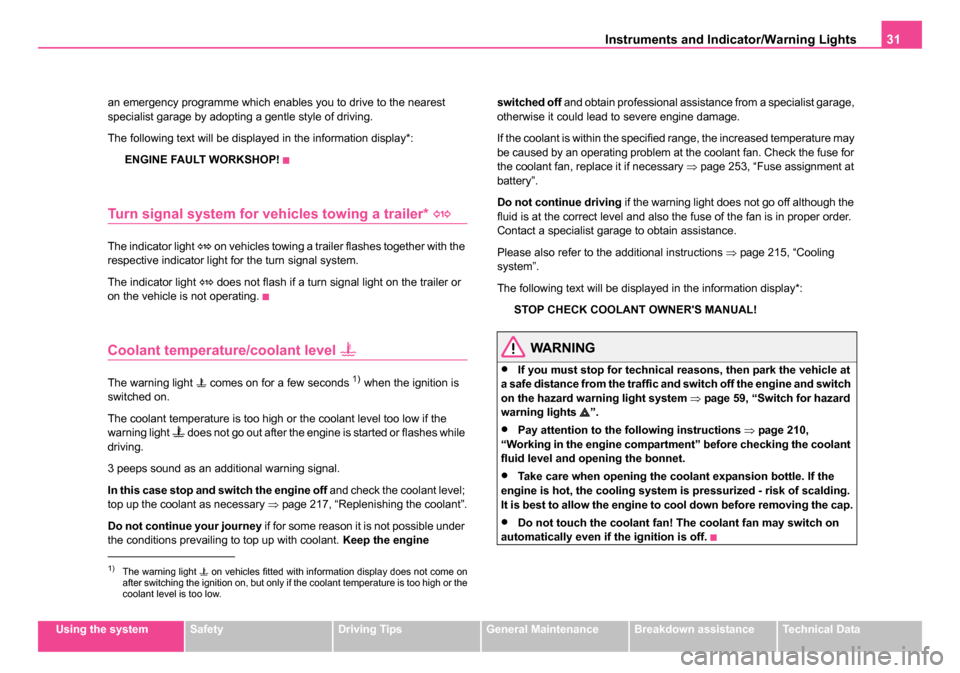
Coolant temperature/coolant level
The warning light comes on for a few seconds 1) when the ignition is
switched on.
The coolant temperature is too high or the coolant level too low if the
warning light
does not go out after the engine is started or flashes while
driving.
3 peeps sound as an additional warning signal.
In this case stop and switch the engine off and check the coolant level;
top up the coolant as necessary ⇒page 217, “Replenishing the coolant”.
Do not continue your journey if for some reason it is not possible under
the conditions prevailing to top up with coolant. Keep the engine switched off
and obtain professional assistance from a specialist garage,
otherwise it could lead to severe engine damage.
If the coolant is within the specified range, the increased temperature may
be caused by an operating problem at the coolant fan. Check the fuse for
the coolant fan, replace it if necessary ⇒page 253, “Fuse assignment at
battery”.
Do not continue driving if the warning light does not go off although the
fluid is at the correct level and also the fuse of the fan is in proper order.
Contact a specialist garage to obtain assistance.
Please also refer to the additional instructions ⇒page 215, “Cooling
system”.
The following text will be displayed in the information display*:
STOP CHECK COOLANT OWNER'S MANUAL!
WARNING
•If you must stop for technical reasons, then park the vehicle at
a safe distance from the traffic and switch off the engine and switch
on the hazard warning light system ⇒page 59, “Switch for hazard
warning lights ”.
•Pay attention to the following instructions ⇒page 210,
“Working in the engine compartment” before checking the coolant
fluid level and opening the bonnet.
•Take care when opening the coolant expansion bottle. If the
engine is hot, the cooling system is pressurized - risk of scalding.
It is best to allow the engine to cool down before removing the cap.
•Do not touch the coolant fan! The coolant fan may switch on
automatically even if the ignition is off.
1)The warning light on vehicles fitted with information display does not come on
after switching the ignition on, but only if the coolant temperature is to\
o high or the
coolant level is too low.
NKO 20 A05.book Page 31 Wednesday, June 21, 2006 1:42 PM
Page 50 of 274
Unlocking and locking49
Using the systemSafetyDriving TipsGeneral MaintenanceBreakdown assistanceTechnical Data
Folding out of the key
– Press button .
Folding up of the key
– Press button and collapse the key bit in the housing.
The turn signal lights flash twice as confirmation that the vehicle has been
unlocked. The vehicle will lock again automatically if you unlock the
vehicle using button but do not open a door or the tailgate within the
next 30 seconds. This function is intended to prevent the car being
unlocked unintentionally.
The safe securing system along with the anti-theft alarm system* are,
however, deactivated during these 30 seconds.
When the vehicle is unlocked or locked, the interior lights in the door
contact are automatically switched on or off.
The turn signal lights flash once to confirm that the vehicle has been
correctly locked.
If the turn signal lights do not flash, check the doors, bonnet and tailgate
again to ensure that they are closed. If the doors, the bonnet or the tailgate
remain open when the anti-theft alarm system* is activated, the turn signal
lights do not flash until after they have been closed.
WARNING
If the vehicle is locked from the outside and the safe securing
system is activated, there must not be any person in the vehicle as
it is then not possible to open either a door or a window from the
inside. The locked doors make it more difficult for rescuers to get
into the vehicle in an emergency - hazard!
Note
•Operate the radio remote control only when the doors and tailgate are
closed and you have visual contact with the vehicle.
•Once in the car, you must not press the lock button of the master key
before inserting the key into the ignition lock in order to avoid the car being
inadvertently locked and, in addition, the anti-theft alarm system* being
switched on. Should this happen, press the unlock button
of the master
key.
Synchonisation of the remote control
If the vehicle cannot be unlocked by actuating the remote control system
then it is possible that the code in the key and the control unit in the vehicle
are no longer synchronised. This can occur when the buttons on the radio-
operated key are actuated a number of times outside of the operative
range of the equipment or the battery on the remote control was replaced.
This means it is necessary to synchronise the code as follows:
•Press any button on the remote control.
•pressing of the button means that the door will unlock with the key
within 1 minute.
Anti-theft alarm system*
The anti-theft alarm system increases the level of protection against
people seeking to break into the vehicle. The system triggers audible and
visual warning signals if an attempt is made to break into the vehicle.
A3
A3
A1
NKO 20 A05.book Page 49 Wednesday, June 21, 2006 1:42 PM
Page 57 of 274
Lights and Visibility
56
– Turn the light switch into position O ⇒page 55, fig. 32 .
– Switch on the switch for daylight driving lights ⇒page 55,
fig. 33 .
– After switching on the ignition the side lights are switched on.
– After starting the engine the low beam is switched on.
Switching off daylight driving lights*
– Switch off the switch for daylight driving lights ⇒page 55,
fig. 33 .
– Turn the light switch to the position side lights
or low beam
⇒ page 55, fig. 32 .
Low beam comes on only if the ignition is switched on. The low beam is
switched off automatically when the engine is started and after switching
the ignition off; only the side lights come on.
On models fitted with right-hand steering* the position of certain
switches differs from that shown in ⇒page 55, fig. 32 . The symbols which
mark the switch positions are identical, however.
WARNING
Never drive with side lights on - risk of accident! The side lights are
not bright enough to light up the road sufficiently in front of you or
to be seen by other oncoming traffic. In this case, always switch on
the low beam when it is dark or if visibility is poor.
Note
•An audible warning will sound if you withdraw the ignition key and open
the driver's door when the vehicle lights are still on.
•The acoustic warning signal is switched off over the door contact when
the driver's door is closed (ignition off). The vehicle can be parked with the
side lights on.
•If you park the car for a lengthy period, we recommend switching off all
lights, or leaving only the side lights switched on.
•The switching on of the described lights should only be undertaken in
accordance with the legal requirements.
•In the event of cool or humid weather conditions, the headlights can be
misted up from inside.
−The temperature difference between interior and external area of
the headlight lenses is decisive.
− When the driving lights are switched on, the light outlet surfaces are
free from mist after a short period. The headlight lenses can possibly
mist up at the border areas.
− It also concerns reverse light and turn signal lights.
− This mist has no influence on the life of the lighting system.
Cornering lights*
For a better cornering illumination the cornering lights are controlled in the
optimal position in line with the vehicle speed and the steering angle.
If the warning light
flashes for 1 minute while driving or after switching
on the ignition and a warning signal sounds, a fault is confirmed.
NKO 20 A05.book Page 56 Wednesday, June 21, 2006 1:42 PM
Page 58 of 274
Lights and Visibility57
Using the systemSafetyDriving TipsGeneral MaintenanceBreakdown assistanceTechnical Data
WARNING
If there is a fault in the corn ering lights, the warning light flashes
in the instrument cluster. The cornering lights are automatically
lowered to the emergency position, which prevents a possible
dazzling of oncoming traffic. Thus the illuminated length of the
road is shortened. Drive carefully and have the car inspected imme-
diately by a specialist garage.
Fog lights*
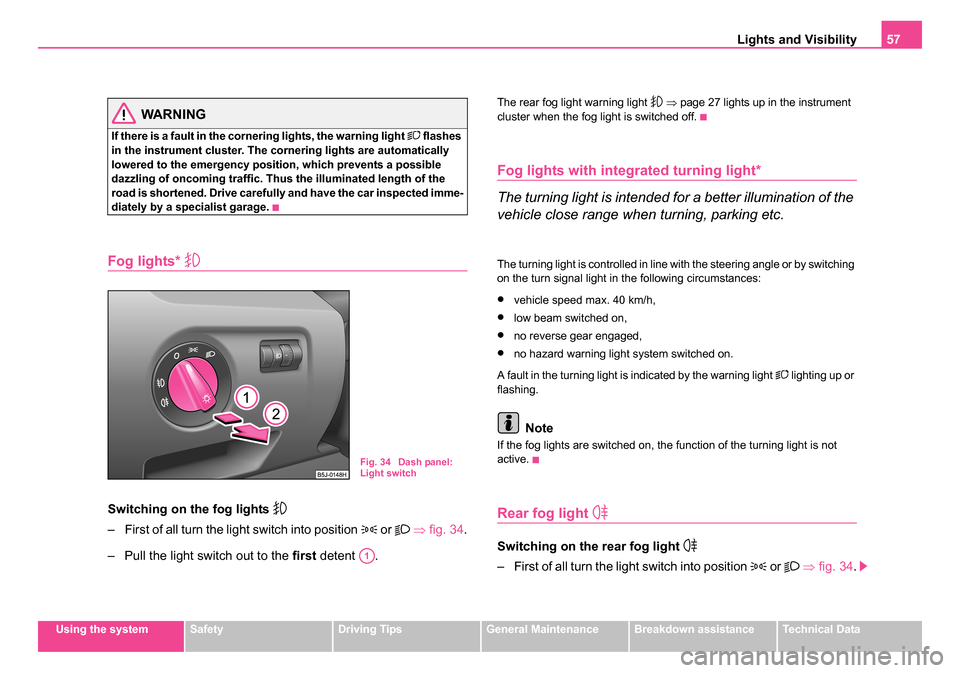
Switching on the fog lights
– First of all turn the light switch into position or ⇒ fig. 34 .
– Pull the light switch out to the first detent .
The rear fog light warning light ⇒ page 27 lights up in the instrument
cluster when the fog light is switched off.
Fog lights with integrated turning light*
The turning light is intended for a better illumination of the
vehicle close range when turning, parking etc.
The turning light is controlled in line with the steering angle or by switching
on the turn signal light in the following circumstances:
•vehicle speed max. 40 km/h,
•low beam switched on,
•no reverse gear engaged,
•no hazard warning light system switched on.
A fault in the turning light is indicated by the warning light
lighting up or
flashing.
Note
If the fog lights are switched on, the function of the turning light is not
active.
Rear fog light
Switching on the rear fog light
– First of all turn the light switch into position or ⇒ fig. 34 .
Fig. 34 Dash panel:
Light switch
A1
NKO 20 A05.book Page 57 Wednesday, June 21, 2006 1:42 PM
Page 60 of 274
Lights and Visibility59
Using the systemSafetyDriving TipsGeneral MaintenanceBreakdown assistanceTechnical Data
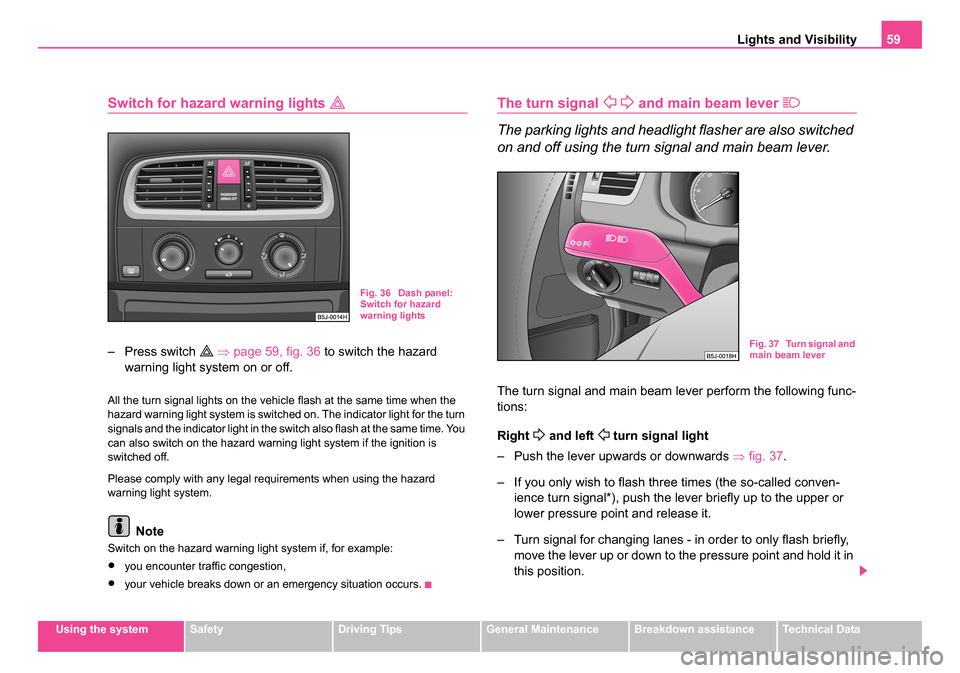
Switch for hazard warning lights
– Press switch ⇒ page 59, fig. 36 to switch the hazard
warning light system on or off.
All the turn signal lights on the vehicle flash at the same time when the
hazard warning light system is switched on. The indicator light for the turn
signals and the indicator light in the switch also flash at the same time. You
can also switch on the hazard warning light system if the ignition is
switched off.
Please comply with any legal requirements when using the hazard
warning light system.
Note
Switch on the hazard warning light system if, for example:
•you encounter traffic congestion,
•your vehicle breaks down or an emergency situation occurs.
The turn signal and main beam lever
The parking lights and headlight flasher are also switched
on and off using the turn signal and main beam lever.
The turn signal and main beam lever perform the following func-
tions:
Right
and left turn signal light
– Push the lever upwards or downwards ⇒fig. 37 .
– If you only wish to flash three times (the so-called conven- ience turn signal*), push the lever briefly up to the upper or
lower pressure point and release it.
– Turn signal for changing lanes - in order to only flash briefly, move the lever up or down to the pressure point and hold it in
this position.
Fig. 36 Dash panel:
Switch for hazard
warning lights
Fig. 37 Turn signal and
main beam lever
NKO 20 A05.book Page 59 Wednesday, June 21, 2006 1:42 PM