roof SKODA ROOMSTER 2006 1.G Owner's Manual
[x] Cancel search | Manufacturer: SKODA, Model Year: 2006, Model line: ROOMSTER, Model: SKODA ROOMSTER 2006 1.GPages: 274, PDF Size: 48.64 MB
Page 3 of 274
Introduction
2
On-board literature
The on-board literature for your vehicle consists of this “ Owner's
Manual ” as well as the brochures “ Service schedule”, “Brief
instruction ”, “Te c h n i c a l d a t a ” and “Help on the road ”. There
can also be a variety of other additional operating manuals and
instructions on-board (e.g. an operating manual for the radio)
depending on the vehicle model and equipment.
If one of the publications listed above is missing, please contact
a Škoda Service Partner immediately, where one will be glad to
assist you in such matters.
One should note that the details given in the vehicle's papers
always take precedence over th ose in the Owner's Manual.
Owner's Manual
This Owner's Manual describes the current scope of equip-
ment . Certain items of equipment listed are only installed later on
and only envisaged for particular markets. The illustrations can
differ in minor details from your vehicle; they are only intended for
general information.
In addition to information regarding all the controls and equip-
ment, the Owner's Manual also contains important information
regarding care and operation for your safety and also to retain the
value of your vehicle. To provide you with valuable tips and aids.
You can learn how how you can operate your vehicle safely,
economically and in an environmentally conscious way.
For safety reasons, please also pay attention to the informa-
tion on accessories, modificati ons and replacement of parts
⇒ page 232. The other chapters of the Owner's Manual are also important,
however, for proper treatment of your car - in addition to regular
care and maintenance - helps to retain its value and in many
cases is also one of the conditions for possible warranty claims.
The Brief instruction
includes an overview of the most important controls of your
vehicle.
The Service schedule
contains:
•Vehicle data,
•Service intervals,
•Overview of the service work,
•Service proof,
•Confirmation of mobility warranty,
•Important information on the warranty.
The confirmations of the carried out service work are one of the
conditions for possible warranty claims.
Please always present the Service schedule when you take your
car to a Škoda Service Partner.
If the Service schedule is missing or worn, please contact your
Škoda Service Partner, where your car is serviced regularly. You
will receive a duplicate, in which the previously carried out
service work are confirmed.
Help on the road
contains the addresses and telephone numbers of Škoda
Importers.
NKO 20 A05.book Page 2 Wednesday, June 21, 2006 1:42 PM
Page 6 of 274
Contents5
Contents
Layout of this Owner's Manual
(explanations)
. . . . . . . . . . . . . . . . . . .
Using the system . . . . . . . . . . . . . . .
Cockpit . . . . . . . . . . . . . . . . . . . . . . . . . . . . . . .
General view . . . . . . . . . . . . . . . . . . . . . . . . .
Instruments and Indicator/Warning LightsGeneral view of the instrument cluster . . . . . .
Engine revolutions counter . . . . . . . . . . . . . . .
Coolant temperature gauge* . . . . . . . . . . . . .
Fuel gauge* . . . . . . . . . . . . . . . . . . . . . . . . . .
Counter for distance driven . . . . . . . . . . . . . .
Service Interval Display . . . . . . . . . . . . . . . . .
Digital clock . . . . . . . . . . . . . . . . . . . . . . . . . .
Multi-functional indicator (onboard computer)*
Information display* . . . . . . . . . . . . . . . . . . . .
Auto Check Control . . . . . . . . . . . . . . . . . . . .
Warning lights . . . . . . . . . . . . . . . . . . . . . . . . .
Unlocking and locking . . . . . . . . . . . . . . . . . .
Key . . . . . . . . . . . . . . . . . . . . . . . . . . . . . . . . .
Locking . . . . . . . . . . . . . . . . . . . . . . . . . . . . . .
Child safety lock . . . . . . . . . . . . . . . . . . . . . . .
Central locking system* . . . . . . . . . . . . . . . . .
Remote control* . . . . . . . . . . . . . . . . . . . . . . .
Anti-theft alarm system* . . . . . . . . . . . . . . . . .
Interior monitor* and Towing protection* . .
Power windows* . . . . . . . . . . . . . . . . . . . . . . .
Panorama roof* . . . . . . . . . . . . . . . . . . . . . . .
Lights and Visibility. . . . . . . . . . . . . . . . . . . . .
Lights . . . . . . . . . . . . . . . . . . . . . . . . . . . . . . .
Interior lighting . . . . . . . . . . . . . . . . . . . . . . . . Visibility . . . . . . . . . . . . . . . . . . . . . . . . . . . . .
Windshield wiper and wash system . . . . . . . .
Rear mirror . . . . . . . . . . . . . . . . . . . . . . . . . . .
Seats and Stowage . . . . . . . . . . . . . . . . . . . .
Front seats . . . . . . . . . . . . . . . . . . . . . . . . . . .
Head restraints . . . . . . . . . . . . . . . . . . . . . . . .
Heating the front seats* . . . . . . . . . . . . . . . . .
Rear seats . . . . . . . . . . . . . . . . . . . . . . . . . . .
Pedals . . . . . . . . . . . . . . . . . . . . . . . . . . . . . .
Luggage compartment . . . . . . . . . . . . . . . . . .
Bicycle carrier* . . . . . . . . . . . . . . . . . . . . . . . .
The roof luggage rack system* . . . . . . . . . . .
Front cup holder . . . . . . . . . . . . . . . . . . . . . . .
Rear cup holder* . . . . . . . . . . . . . . . . . . . . . .
Note holder . . . . . . . . . . . . . . . . . . . . . . . . . .
Ashtray* . . . . . . . . . . . . . . . . . . . . . . . . . . . . .
Cigarette lighter* and power sockets* . . . . . .
Storage compartments . . . . . . . . . . . . . . . . . .
Heating and air conditioning system . . . . .
Heating . . . . . . . . . . . . . . . . . . . . . . . . . . . . . .
Climatic (semi-automatic air conditioning
system)* . . . . . . . . . . . . . . . . . . . . . . . . . . . . .
Climatronic (automatic air conditioning)* . . . .
Starting-off and Driving. . . . . . . . . . . . . . . . .
Setting steering wheel position* . . . . . . . . . . .
Ignition lock . . . . . . . . . . . . . . . . . . . . . . . . . .
Starting the engine . . . . . . . . . . . . . . . . . . . . .
Switching off the engine . . . . . . . . . . . . . . . . .
Shifting (manual gearbox) . . . . . . . . . . . . . . .
Handbrake . . . . . . . . . . . . . . . . . . . . . . . . . . .
Parking aid* . . . . . . . . . . . . . . . . . . . . . . . . . .
Cruise control system (CCS)* . . . . . . . . . . . .
Automatic gearbox. . . . . . . . . . . . . . . . . . . . .
6-speed automatic gearbox* . . . . . . . . . . . . .
Communication . . . . . . . . . . . . . . . . . . . . . . .
Operating the radio . . . . . . . . . . . . . . . . . . . .
Radio and mobile phone operation . . . . . . . .
Universal telephone preinstallation with voice
control* . . . . . . . . . . . . . . . . . . . . . . . . . . . . .
Inserting the mobile phone and adapter . . . .
Mobile phone operation . . . . . . . . . . . . . . . . .
Voice commands . . . . . . . . . . . . . . . . . . . . . .
Enter PIN code . . . . . . . . . . . . . . . . . . . . . . .
Select number . . . . . . . . . . . . . . . . . . . . . . . .
Repeat last call . . . . . . . . . . . . . . . . . . . . . . .
Phone voice phonebook* . . . . . . . . . . . . . . . .
Bluetooth™* . . . . . . . . . . . . . . . . . . . . . . . . .
Mobile phones and two-way radio systems . .
Input AUX-IN* . . . . . . . . . . . . . . . . . . . . . . . .
CD changer* . . . . . . . . . . . . . . . . . . . . . . . . .
Safety. . . . . . . . . . . . . . . . . . . . . . . . . . . . . .
Passive Safety . . . . . . . . . . . . . . . . . . . . . . . .
Basic information . . . . . . . . . . . . . . . . . . . . . .
Correct seated position . . . . . . . . . . . . . . . . .
Seat belts. . . . . . . . . . . . . . . . . . . . . . . . . . . . .
Why seat belts? . . . . . . . . . . . . . . . . . . . . . . .
The physical principle of a frontal collision . .
Important safety information regarding the use
of seat belts . . . . . . . . . . . . . . . . . . . . . . . . . .
How are seat belts correctly fastened? . . . . .
Belt tensioner . . . . . . . . . . . . . . . . . . . . . . . . .
8
9
11
11
13
13
14
14
14
15
16
17
17
22
24
27
39
39
41
42
42
48
49
50
51
54
55
55
60 62
63
66
68
68
70
71
72
76
77
81
85
86
86
87
87
88
90
96
96
99
104
109
109 11 0111
11 2
11 3
11 4
11 5
11 6 11 9
11 9
126
126
127
128
129
130
131
132
133
133
134
136
138
138
139
141
141
141
143
147
147
148
149
150
152
NKO 20 A05.book Page 5 Wednesday, June 21, 2006 1:42 PM
Page 55 of 274
Unlocking and locking
54
Operation in winter
Ice accumulating on the surface of the windows during the winter may
result in a greater resistance when closing the windows and the window
may stop and move back several centimetres
Proceed as follows to close the window fully:
•turn the key in the lock of the driver door into the closing position and
hold it there until all of the windows are closed,
•repeat this operation until the window stops.
WARNING
•Obstruction protection is not active during the closing of the
windows ⇒ in “Switch for power windows” on page 51.
•You should take particular care when closing the windows! You
may otherwise suffer severe injuries as a result of getting an arm,
for example, jammed in the window!
Panorama roof*
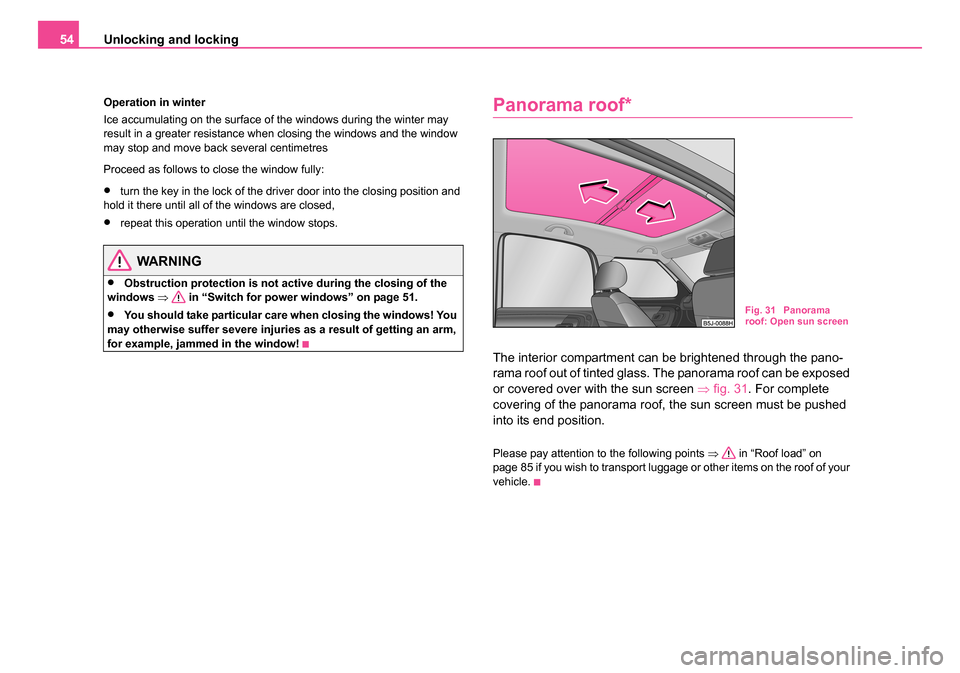
The interior compartment can be brightened through the pano-
rama roof out of tinted glass. The panorama roof can be exposed
or covered over with the sun screen ⇒fig. 31 . For complete
covering of the panorama roof, the sun screen must be pushed
into its end position.
Please pay attention to the following points ⇒ in “Roof load” on
page 85 if you wish to transport luggage or other items on the roof of your
vehicle.
Fig. 31 Panorama
roof: Open sun screen
NKO 20 A05.book Page 54 Wednesday, June 21, 2006 1:42 PM
Page 62 of 274
Lights and Visibility61
Using the systemSafetyDriving TipsGeneral MaintenanceBreakdown assistanceTechnical Data
Door contact switching mechan ism (on the front and rear*
door)
– Press the switch to the right into position
⇒ page 60,
fig. 38 .
– On the version without reading lights press the switch into the middle position
.
Switching the interior light on
– Press the switch to the left into position
.
Switching the interior light off
– Press the switch into the middle position O.
– On the version without reading lights press the switch to the right, the symbol O appears.
Reading lights
– Press on one of the switches ⇒page 60, fig. 38 in order to
switch the right or left reading light on or off.
Lighting of storage compar tment on the front passenger
side
– When opening the flap of the storage compartment on the front passenger side the lighting in the storage compartment
comes on.
– The light switches on automatically when the parking light is switched on and goes out when the flap is closed.
The interior light is switched on for about 20 seconds when a vehicle with
a central locking system is unlocked, when a door is opened or when the ignition key is removed. The requirement for this is that the switch is in the
door contact position. The inner light goes out out immediately after the
ignition is switched on.
A time delay switch* causes the inner lighting on vehicles without a central
locking system stays on for a few seconds after the doors have been
closed. The inner light goes out out immediately after the ignition is
switched on.
The interior lighting is switched off after about 30 minutes when a door has
been left open in order to avoid discharging the battery of the vehicle.
Rear interior lighting*
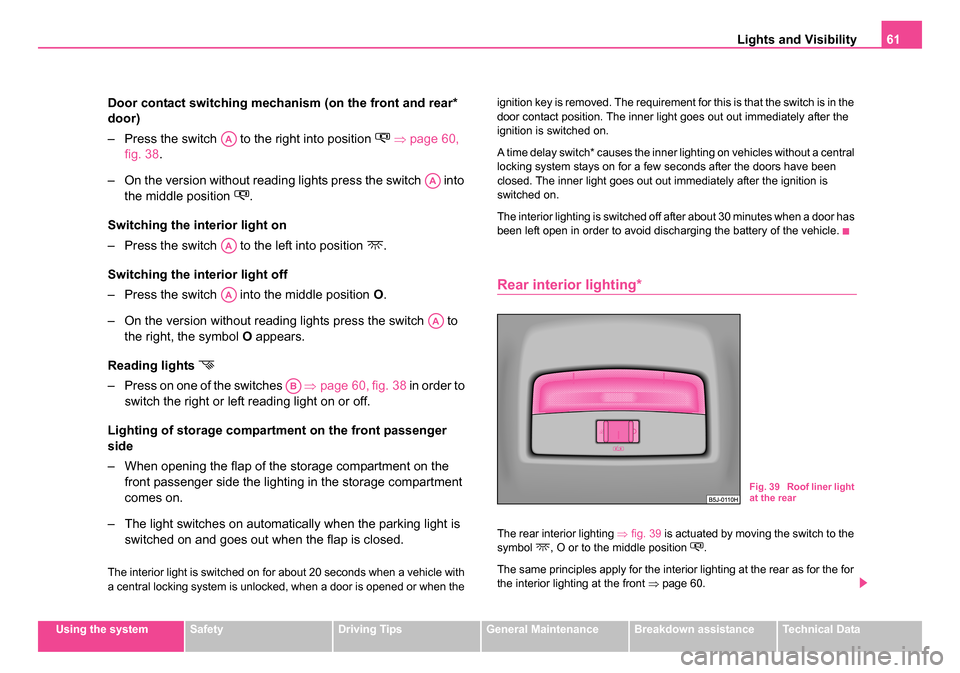
The rear interior lighting
⇒fig. 39 is actuated by moving the switch to the
symbol , O or to the middle position .
The same principles apply for the interior lighting at the rear as for the for
the interior lighting at the front ⇒page 60.
AA
AA
AA
AA
AA
AB
Fig. 39 Roof liner light
at the rear
NKO 20 A05.book Page 61 Wednesday, June 21, 2006 1:42 PM
Page 86 of 274
Seats and Stowage85
Using the systemSafetyDriving TipsGeneral MaintenanceBreakdown assistanceTechnical Data
The roof luggage rack system*
Roof rail*
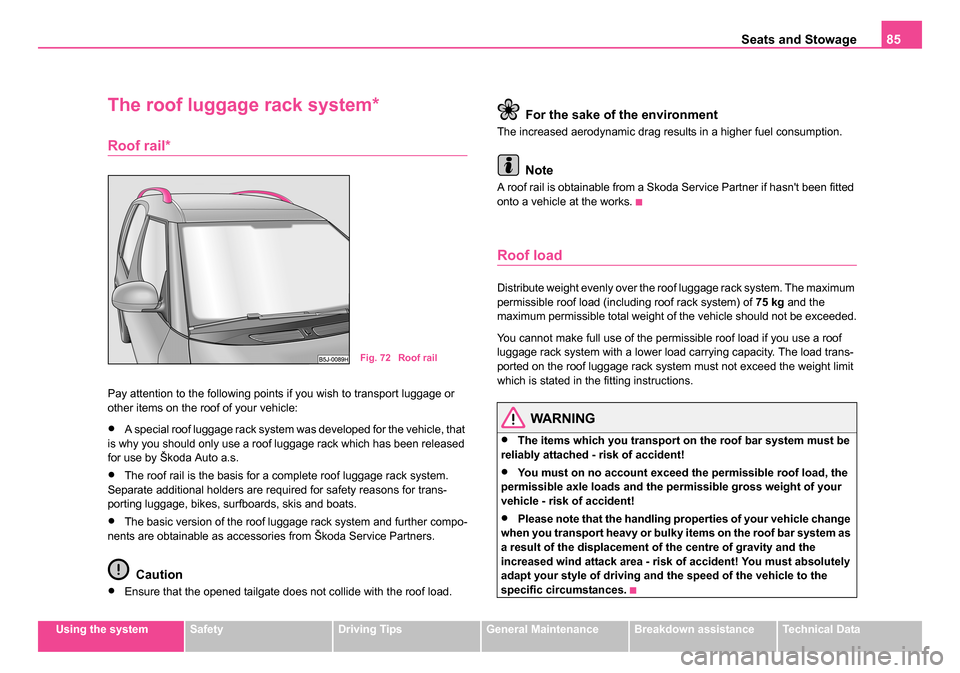
Pay attention to the following points if you wish to transport luggage or
other items on the roof of your vehicle:
•A special roof luggage rack system was developed for the vehicle, that
is why you should only use a roof luggage rack which has been released
for use by Škoda Auto a.s.
•The roof rail is the basis for a complete roof luggage rack system.
Separate additional holders are required for safety reasons for trans-
porting luggage, bikes, surfboards, skis and boats.
•The basic version of the roof luggage rack system and further compo-
nents are obtainable as accessories from Škoda Service Partners.
Caution
•Ensure that the opened tailgate does not collide with the roof load.
For the sake of the environment
The increased aerodynamic drag results in a higher fuel consumption.
Note
A roof rail is obtainable from a Skoda Service Partner if hasn't been fitted
onto a vehicle at the works.
Roof load
Distribute weight evenly over the roof luggage rack system. The maximum
permissible roof load (including roof rack system) of 75 kg and the
maximum permissible total weight of the vehicle should not be exceeded.
You cannot make full use of the permissible roof load if you use a roof
luggage rack system with a lower load carrying capacity. The load trans-
ported on the roof luggage rack system must not exceed the weight limit
which is stated in the fitting instructions.
WARNING
•The items which you transport on the roof bar system must be
reliably attached - risk of accident!
•You must on no account exceed the permissible roof load, the
permissible axle loads and the permissible gross weight of your
vehicle - risk of accident!
•Please note that the handling properties of your vehicle change
when you transport heavy or bulky items on the roof bar system as
a result of the displacement of the centre of gravity and the
increased wind attack area - risk of accident! You must absolutely
adapt your style of driving and the speed of the vehicle to the
specific circumstances.
Fig. 72 Roof rail
NKO 20 A05.book Page 85 Wednesday, June 21, 2006 1:42 PM
Page 129 of 274
Communication
128
Note
The operation of the mobile phone fitted with multi-functional module* is
only possible on certain models of mobile phone. More detailed informa-
tion is available from your Škoda Service Partner.
Universal telephone preinstallation with
voice control*
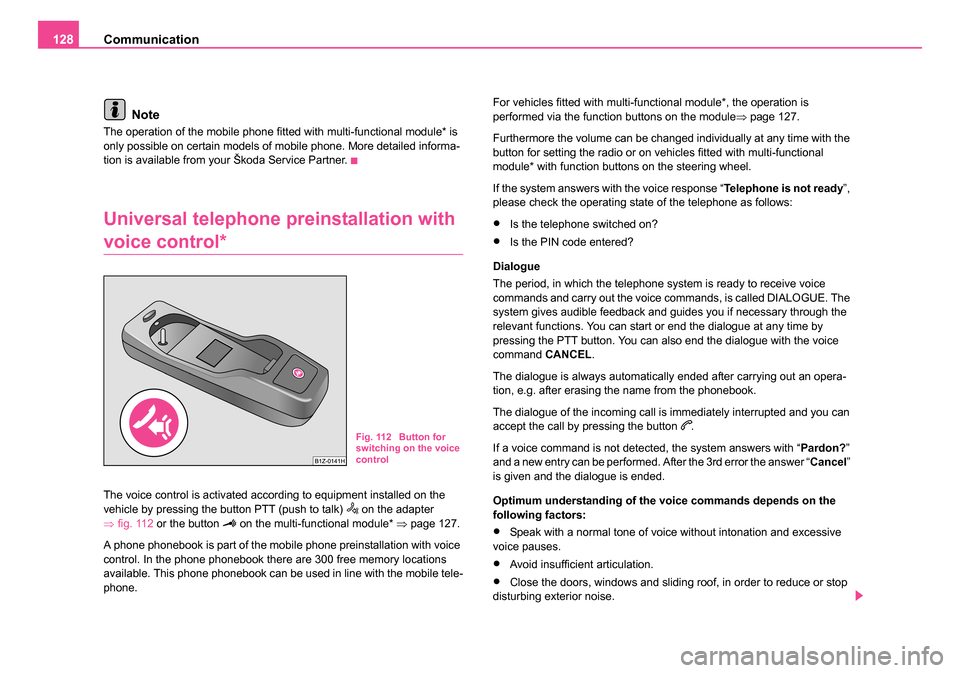
The voice control is activated according to equipment installed on the
vehicle by pressing the button PTT (push to talk) on the adapter
⇒ fig. 112 or the button on the multi-functional module* ⇒page 127.
A phone phonebook is part of the mobile phone preinstallation with voice
control. In the phone phonebook there are 300 free memory locations
available. This phone phonebook can be used in line with the mobile tele-
phone. For vehicles fitted with multi-functional module*, the operation is
performed via the function buttons on the module
⇒page 127.
Furthermore the volume can be changed individually at any time with the
button for setting the radio or on vehicles fitted with multi-functional
module* with function buttons on the steering wheel.
If the system answers with the voice response “ Telephone is not ready”,
please check the operating state of the telephone as follows:
•Is the telephone switched on?
•Is the PIN code entered?
Dialogue
The period, in which the telephone system is ready to receive voice
commands and carry out the voice commands, is called DIALOGUE. The
system gives audible feedback and guides you if necessary through the
relevant functions. You can start or end the dialogue at any time by
pressing the PTT button. You can also end the dialogue with the voice
command CANCEL.
The dialogue is always automatically ended after carrying out an opera-
tion, e.g. after erasing the name from the phonebook.
The dialogue of the incoming call is immediately interrupted and you can
accept the call by pressing the button
.
If a voice command is not detected, the system answers with “ Pardon?”
and a new entry can be performed. After the 3rd error the answer “ Cancel”
is given and the dialogue is ended.
Optimum understanding of the voice commands depends on the
following factors:
•Speak with a normal tone of voice without intonation and excessive
voice pauses.
•Avoid insufficient articulation.
•Close the doors, windows and sliding roof, in order to reduce or stop
disturbing exterior noise.
Fig. 112 Button for
switching on the voice
control
NKO 20 A05.book Page 128 Wednesday, June 21, 2006 1:42 PM
Page 184 of 274
Intelligent Technology183
Using the systemSafetyDriving TipsGeneral MaintenanceBreakdown assistanceTechnical Data
•The increased safety offered by the Brake Assist must not tempt
you to take a greater safety risk than otherwise.
Power steering*
The power steering enables you to steer the vehicle with less physical
force.
The steering characteristics can be changed by a specialist garage.
You will place great stresses on the power steering system if the steering
is turned to full lock when the vehicle is stationary. Turning the steering to
full lock in such a situation will be accompanied by noises.
It is still possible to fully steer the vehicle if the power steering fails or if the
engine is not running (vehicle being towed in). The only difference is that
greater physical effort is required.
It is possible that the hydraulic pump of the power steering will not run due
to the low vehicle network voltage if the battery has gone flat and the
engine must started with the help off jump leads. This condition will be
indicated by lighting up of the warning light.
The power steering operates again if the battery is charged to a specific
range when engine is running. It also operates again, if the engine can be
started with its own battery.
Caution
Do not leave the steering at full lock for more than 15 seconds when the
engine is running - risk of damaging the power steering!
Note
Have the steering inspected as soon as possible by a specialist garage if
there is a leak or fault in the system.
Tyre inflation pressure-control system*
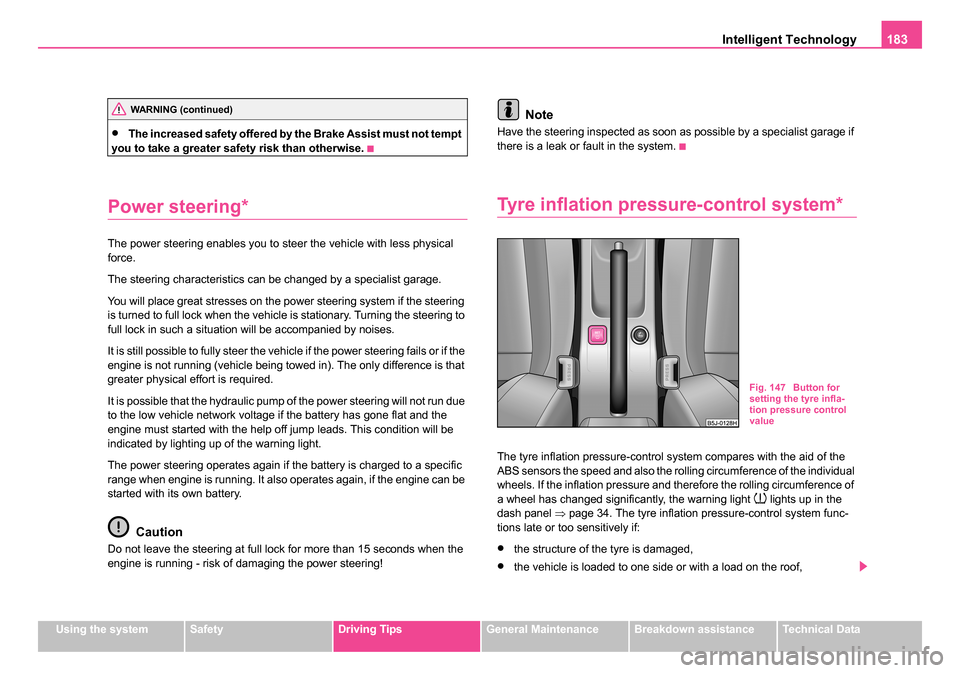
The tyre inflation pressure-control system compares with the aid of the
ABS sensors the speed and also the roll ing circumference of the individual
wheels. If the inflation pressure and therefore the rolling circumference of
a wheel has changed significantly, the warning light
lights up in the
dash panel ⇒page 34. The tyre inflation pressure-control system func-
tions late or too sensitively if:
•the structure of the tyre is damaged,
•the vehicle is loaded to one side or with a load on the roof,
WARNING (continued)
Fig. 147 Button for
setting the tyre infla-
tion pressure control
value
NKO 20 A05.book Page 183 Wednesday, June 21, 2006 1:42 PM
Page 191 of 274
Driving and the Environment
190
Avoid driving short distances
Short distances result in an above-average high fuel
consumption.
– Avoid driving a distance of no more than 4 km if the engine is
cold.
The engine and catalytic converter must first have reached their optimal
operating temperature in order to effectively reduce fuel consumption
and pollutant emissions.
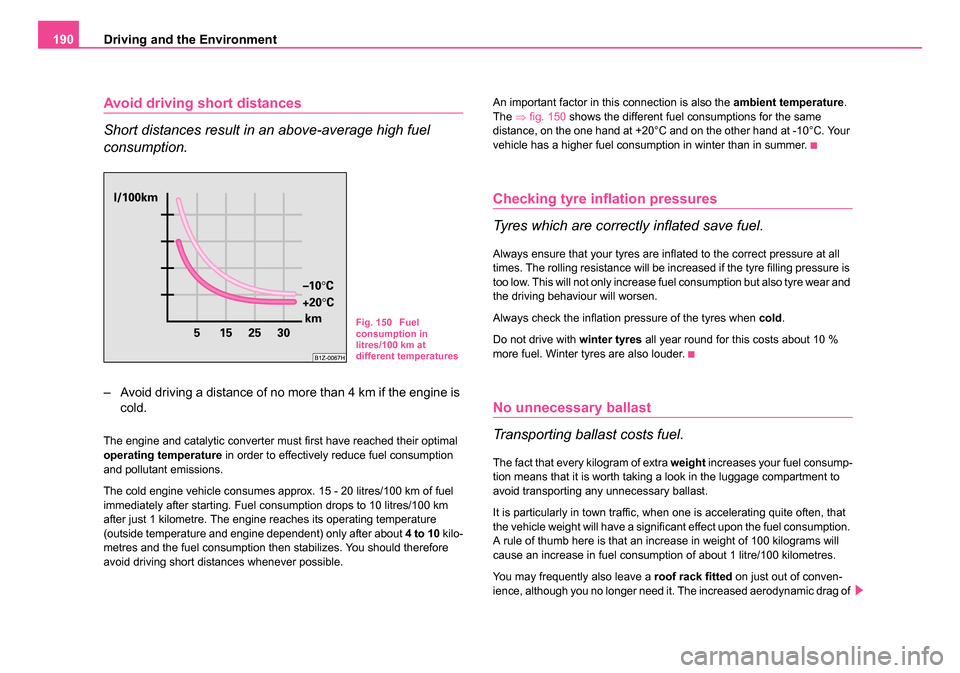
The cold engine vehicle consumes approx. 15 - 20 litres/100 km of fuel
immediately after starting. Fuel consumption drops to 10 litres/100 km
after just 1 kilometre. The engine reaches its operating temperature
(outside temperature and engine dependent) only after about 4 to 10 kilo-
metres and the fuel consumption then stabilizes. You should therefore
avoid driving short distances whenever possible. An important factor in this connection is also the
ambient temperature.
The ⇒fig. 150 shows the different fuel consumptions for the same
distance, on the one hand at +20°C and on the other hand at -10°C. Your
vehicle has a higher fuel consumption in winter than in summer.
Checking tyre inflation pressures
Tyres which are correctly inflated save fuel.
Always ensure that your tyres are inflated to the correct pressure at all
times. The rolling resistance will be increased if the tyre filling pressure is
too low. This will not only increase fuel consumption but also tyre wear and
the driving behaviour will worsen.
Always check the inflation pressure of the tyres when cold.
Do not drive with winter tyres all year round for this costs about 10 %
more fuel. Winter tyres are also louder.
No unnecessary ballast
Transporting ballast costs fuel.
The fact that every kilogram of extra weight increases your fuel consump-
tion means that it is worth taking a look in the luggage compartment to
avoid transporting any unnecessary ballast.
It is particularly in town traffic, when one is accelerating quite often, that
the vehicle weight will have a significant effect upon the fuel consumption.
A rule of thumb here is that an increase in weight of 100 kilograms will
cause an increase in fuel consumption of about 1 litre/100 kilometres.
You may frequently also leave a roof rack fitted on just out of conven-
ience, although you no longer need it. The increased aerodynamic drag of
Fig. 150 Fuel
consumption in
litres/100 km at
different temperatures
NKO 20 A05.book Page 190 Wednesday, June 21, 2006 1:42 PM
Page 192 of 274
Driving and the Environment191
Using the systemSafetyDriving TipsGeneral MaintenanceBreakdown assistanceTechnical Data
your vehicle causes it to use about 1 l more fuel than normal at a speed
of 100 - 120 km/h, even when you are not carrying a load on the roof.
Saving electricity
Generating electricity costs fuel.
– Switch off electrical components as soon as you no longer
need them.
When the engine is running, the alternator generates and supplies elec-
trical power. The greater the load on the alternator as a result of having a
large number of electrical components switched on, the more fuel will be
consumed for operating the alternator.
Keeping a log of your fuel consumption
If you really wish to keep a close check on your fuel consumption, it is
best to enter the figures in a logbook. This does not take much time but is
a very worthwhile exercise. It enables you to detect any change (positive
and negative) at an early stage and to take any appropriate action.
If you find that your fuel consumption is too high, you should reflect on
how, where and in what conditions you have driven the vehicle since you
last refuelled.
Environmental compatibility
Environmental protection has played a major role in the design, selection
of materials and manufacture of your new Škoda. Particular emphasis has
been paid to a number of aspects, including:
Design measures
•joints designed to be easily detached
•simplified disassembly due to the modular structure system
•improved purity of different classes of materials
•identification of all plastic parts in accordance with VDA Recommen-
dation 260
•reduced fuel consumption and exhaust emission CO2
•minimum fuel leakage during accidents
•reduced noise
Choice of materials
•extensive use of recyclable material
•air conditioning filled with CFC-free refrigerant
•no cadmium
•no asbestos
•reduction in the “vaporisation” of plastics
Manufacture
•solvent-free cavity protection
•solvent-free protection of the vehicle for transportation from the
production plant to the customer
•the use of solvent-free adhesives
•no CFCs used in the production process
•without use of mercury
•use of water-soluble paints
NKO 20 A05.book Page 191 Wednesday, June 21, 2006 1:42 PM
Page 199 of 274
Taking care of your vehicle and cleaning the vehicle
198
WARNING
When washing your vehicle in the winter: Water and ice in the brake
system can affect the braking efficiency - risk of accident!
Automatic vehicle wash systems
The paintwork of the vehicle is sufficiently resistant that the vehicle can be
washed normally in automatic vehicle wash plants without any problem.
The actual stress to which the paintwork is subjected, however, depends
primarily on the design of the vehicle wash system, the filtering of the
water and the type of washing and care products used. If the paintwork of
your vehicle appears mat after being washed or even has scratches, point
this out to the operator of the vehicle wash plant. Use a different vehicle
wash plant, if necessary.
There are no particular points to note before washing your vehicle in such
a plant other than the usual precautionary measures (closing windows,
moving any factory-fitted aerials down flat against the bodywork, etc.).
If you have any particular attached parts fitted to your car - such as spoiler,
roof rack system, two-way radio aerial - it is best to first of all consult the
operator of the car wash plant.
It is important to degrease the lips of the windscreen wiper rubbers after
passing through the automatic vehicle wash system.
Caution
Do not screw the swivelling down roof aerial tight before washing the
vehicle in an automatic vehicle wash system - risk of damage!
Washing vehicle by hand
It is important to first soften the dirt with plenty of water and rinse it off as
thoroughly as possible before washing your vehicle by hand.
One should then clean the vehicle using a soft washing sponge,
washing glove or a washing brush and only slight pressure. Work from
the top to the bottom - beginning with the roof. Only place slight pressure
on the vehicle paintwork during cleaning Only use a car shampoo for
stubborn dirt.
Wash out the sponge or washing glove thoroughly at short intervals.
Clean wheels, door sills and similar parts last. Use a second sponge for
such areas.
Rinse off the vehicle well after giving it a wash and dry it off using a
chamois leather.
WARNING
•The ignition should always be switched off when you wash your
vehicle - risk of accident!
•Protect your hands and arms from sharp-edged metal parts
when you are cleaning the underfloor, the inside of the wheel hous-
ings or the wheel trims - risk of cuts.
Caution
•Do not wash your vehicle in bright sunlight - risk of paint damage.
•Ensure that the jet of water is not aimed directly at the locks or at the
door and panel joints if you spray your vehicle in winter down with a hose
- risk of freezing.
•Do not use any insect sponges, rough kitchen sponges or similar
cleaning products - risk of damage to the surface of paintwork.
NKO 20 A05.book Page 198 Wednesday, June 21, 2006 1:42 PM