steering wheel SKODA ROOMSTER 2007 1.G User Guide
[x] Cancel search | Manufacturer: SKODA, Model Year: 2007, Model line: ROOMSTER, Model: SKODA ROOMSTER 2007 1.GPages: 248, PDF Size: 46.44 MB
Page 91 of 248
Starting-off and Driving90
Ignition lock
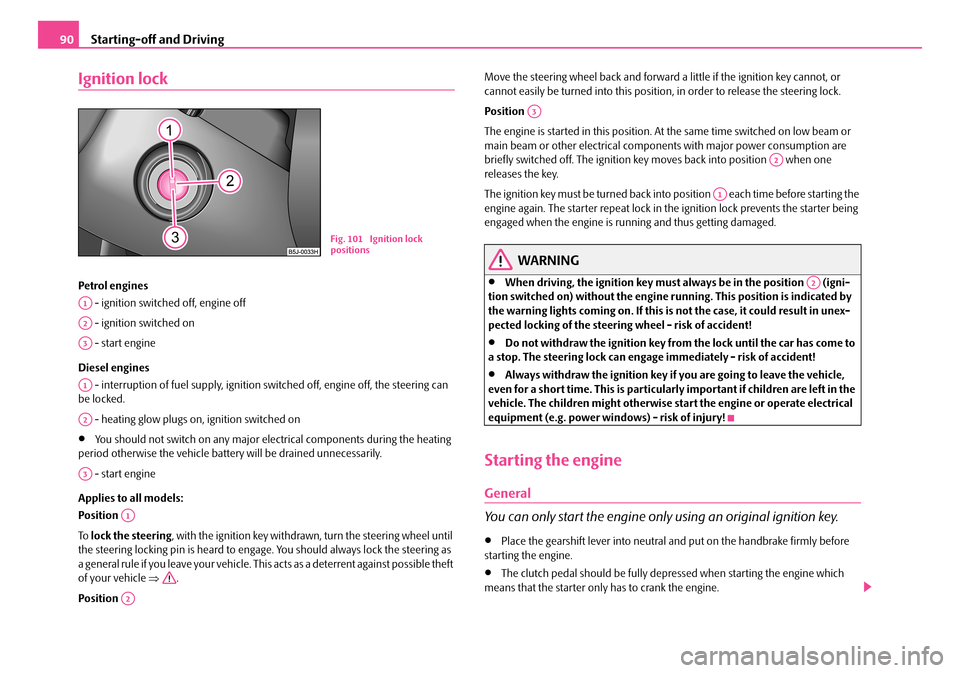
Petrol engines
- ignition switched off, engine off
- ignition switched on
- start engine
Diesel engines
- interruption of fuel supply, ignition sw itched off, engine off, the steering can be locked.
- heating glow plugs on, ignition switched on
•You should not switch on any major elec trical components during the heating period otherwise the vehicle batt ery will be drained unnecessarily.
- start engine
Applies to all models:
Position
To lock the steering, with the ignition key withdrawn, turn the steering wheel until the steering locking pin is heard to engage. You should always lock the steering as a general rule if you leave your vehicle. This acts as a deterrent against possible theft of your vehicle ⇒.
Position
Move the steering wheel back and forward a little if the ignition key cannot, or cannot easily be turned into this position , in order to release the steering lock.
Position
The engine is started in this position. At the same time switched on low beam or main beam or other electrical compon ents with major power consumption are briefly switched off. The ignition key moves back into position when one releases the key.
The ignition key must be turned back into position each time before starting the engine again. The starter repeat lock in th e ignition lock prevents the starter being engaged when the engine is r unning and thus getting damaged.
WARNING
•When driving, the ignition key must always be in the position (igni- tion switched on) without the engine running. This position is indicated by the warning lights coming on. If this is not the case, it could result in unex- pected locking of the steerin g wheel - risk of accident!
•Do not withdraw the ignition key from the lock until the car has come to a stop. The steering lock can engage immediately - risk of accident!
•Always withdraw the ignition key if you are going to leave the vehicle, even for a short time. This is particularly important if children are left in the vehicle. The children might otherwise st art the engine or operate electrical equipment (e.g. power windows) - risk of injury!
Starting the engine
General
You can only start the engine only using an original ignition key.
•Place the gearshift lever into neutral and put on the handbrake firmly before starting the engine.
•The clutch pedal should be fully depr essed when starting the engine which means that the starter only has to crank the engine.
Fig. 101 Ignition lock positions
A1
A2
A3
A1
A2
A3
A1
A2
A3
A2
A1
A2
NKO A05R 20 MR08.book Page 90 Wednesday, March 28, 2007 9:42 AM
Page 103 of 248
Communication102
Communication
Operating the radio
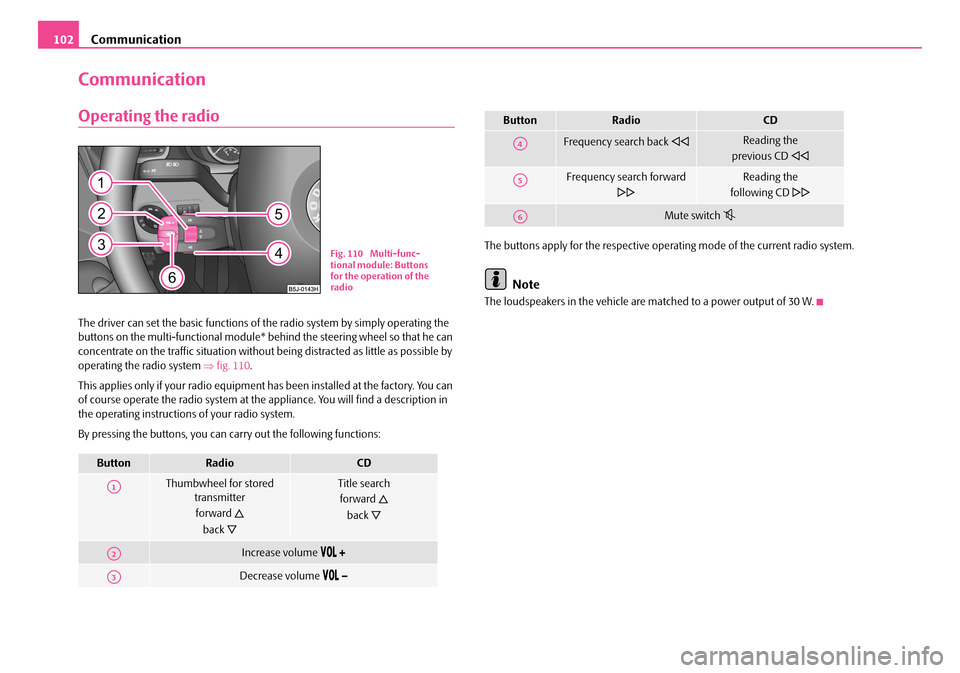
The driver can set the basic functions of the radio system by simply operating the buttons on the multi-functional module* be hind the steering wheel so that he can concentrate on the traffic situation without being distracted as little as possible by operating the radio system ⇒fig. 110.
This applies only if your radio equipment has been installed at the factory. You can of course operate the radio system at the appliance. You will find a description in the operating instructions of your radio system.
By pressing the buttons, you can carry out the following functions:
The buttons apply for the respective operating mode of the current radio system.
Note
The loudspeakers in the vehicle are matched to a power output of 30 W.
ButtonRadioCD
Thumbwheel for stored transmitter
forward
back
Title search
forward
back
Increase volume
Decrease volume
Fig. 110 Multi-func- tional module: Buttons for the operation of the radio
A1
A2
A3
Frequency search back Reading the
previous CD
Frequency search forward
Reading the
following CD
Mute switch
ButtonRadioCD
A4
A5
A6
NKO A05R 20 MR08.book Page 102 Wednesday, March 28, 2007 9:42 AM
Page 104 of 248
Communication103
Using the systemSafetyDriving TipsGeneral MaintenanceBreakdown assistancePraktikTechnical Data
Radio and mobile phone operation
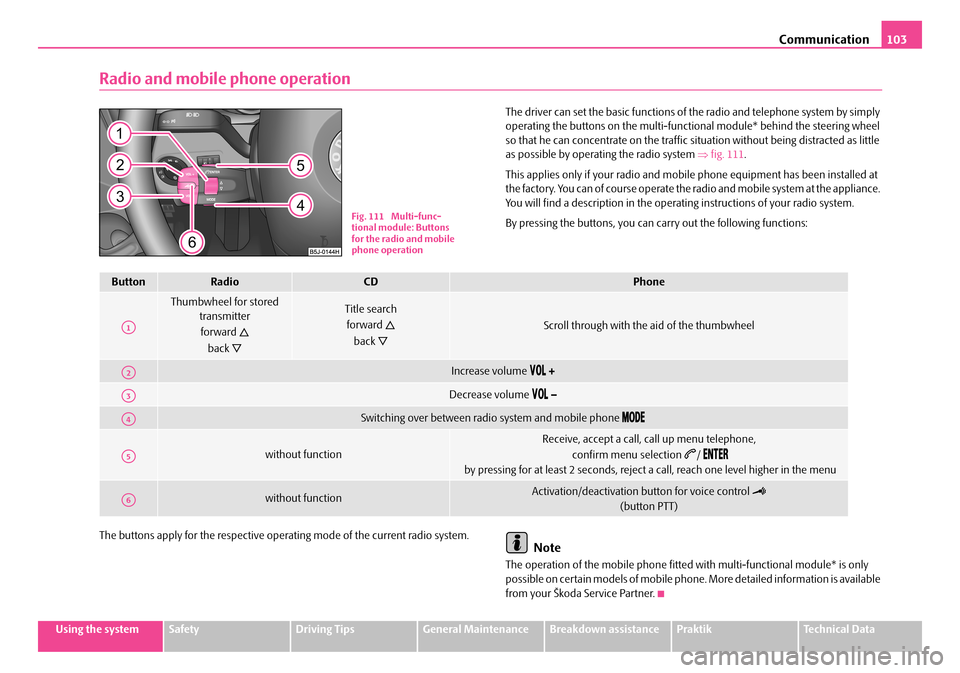
The driver can set the basic functions of the radio and telephone system by simply operating the buttons on the multi-functi onal module* behind the steering wheel so that he can concentrate on the traffic si tuation without being distracted as little as possible by operating the radio system ⇒fig. 111.
This applies only if your radio and mobi le phone equipment has been installed at the factory. You can of course operate the radio and mobile system at the appliance. You will find a description in the operating instructions of your radio system.
By pressing the buttons, you can carry out the following functions:
The buttons apply for the respective operating mode of the current radio system.Note
The operation of the mobile phone fitted with multi-functional module* is only possible on certain models of mobile phone. More detailed information is available from your Škoda Service Partner.
Fig. 111 Multi-func- tional module: Buttons for the radio and mobile phone operation
ButtonRadioCDPhone
Thumbwheel for stored transmitter
forward
back
Title search
forward
back
Scroll through with the aid of the thumbwheel
Increase volume
Decrease volume
Switching over between radio system and mobile phone
without function
Receive, accept a call, call up menu telephone,
confirm menu selection /
by pressing for at least 2 seconds, reject a call, reach one level higher in the menu
without functionActivation/deactivation button for voice control
(button PTT)
A1
A2
A3
A4
A5
A6
NKO A05R 20 MR08.book Page 103 Wednesday, March 28, 2007 9:42 AM
Page 105 of 248
Communication104
Universal telephone preinstallation with voice
control*
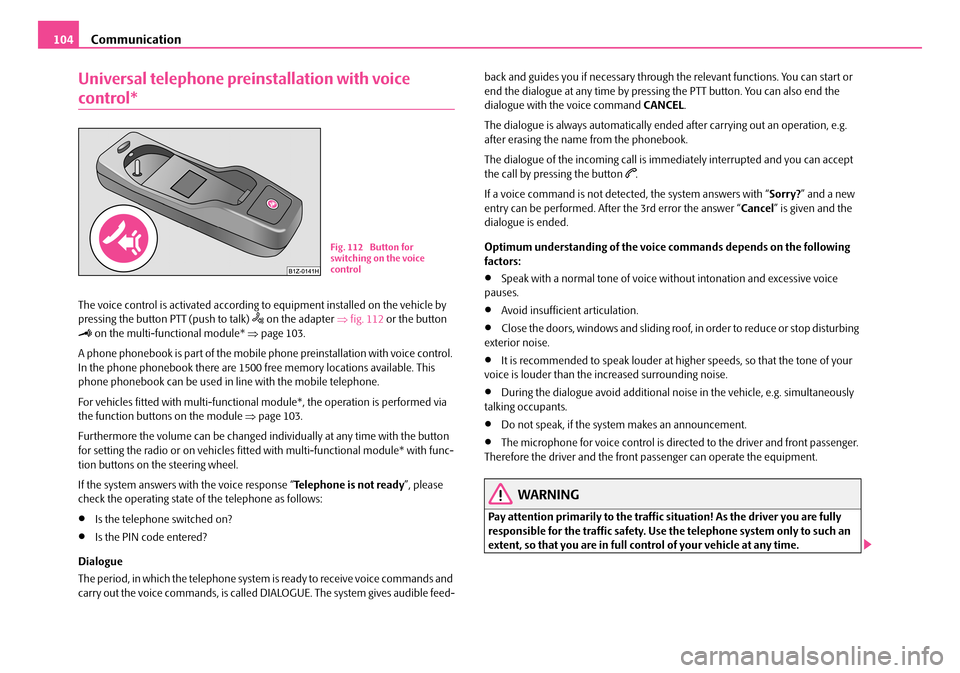
The voice control is activated according to equipment installed on the vehicle by pressing the button PTT (push to talk) on the adapter ⇒fig. 112 or the button on the multi-functional module* ⇒page 103.
A phone phonebook is part of the mobile phone preinstallation with voice control. In the phone phonebook there are 1500 free memory locations available. This phone phonebook can be used in line with the mobile telephone.
For vehicles fitted with multi-functional module*, the operation is performed via the function buttons on the module ⇒page 103.
Furthermore the volume can be changed indi vidually at any time with the button for setting the radio or on vehicles fitted with multi-functional module* with func- tion buttons on the steering wheel.
If the system answers with the voice response “ Telephone is not ready”, please check the operating state of the telephone as follows:
•Is the telephone switched on?
•Is the PIN code entered?
Dialogue
The period, in which the telephone system is ready to receive voice commands and carry out the voice commands, is called DIALOGUE. The system gives audible feed-
back and guides you if necessary through the relevant functions. You can start or end the dialogue at any time by pressi ng the PTT button. You can also end the dialogue with the voice command CANCEL.
The dialogue is always automatically ended after carrying out an operation, e.g. after erasing the name from the phonebook.
The dialogue of the incoming call is i mmediately interrupted and you can accept the call by pressing the button .
If a voice command is not detected, the system answers with “ Sorry?” and a new entry can be performed. After the 3rd error the answer “ Cancel” is given and the dialogue is ended.
Optimum understanding of the voice commands depends on the following factors:
•Speak with a normal tone of voice wi thout intonation and excessive voice pauses.
•Avoid insufficient articulation.
•Close the doors, windows and sliding roof, in order to reduce or stop disturbing exterior noise.
•It is recommended to speak louder at higher speeds, so that the tone of your voice is louder than the increased surrounding noise.
•During the dialogue avoid additional nois e in the vehicle, e.g. simultaneously talking occupants.
•Do not speak, if the system makes an announcement.
•The microphone for voice control is directed to the driver and front passenger. Therefore the driver and the front passenger can operate the equipment.
WARNING
Pay attention primarily to the traffic si tuation! As the driver you are fully responsible for the traffic safety. Use the telephone system only to such an extent, so that you are in full control of your vehicle at any time.
Fig. 112 Button for switching on the voice control
NKO A05R 20 MR08.book Page 104 Wednesday, March 28, 2007 9:42 AM
Page 120 of 248
Passive Safety119
Using the systemSafetyDriving TipsGeneral MaintenanceBreakdown assistancePraktikTechnical Data
Correct seated position
Correct seated position for the driver
Correct seated position for the driver is important for safe and
relaxed driving.
For your own safety and to reduce the risk of injury in the event of an accident, we recommend the following setting.
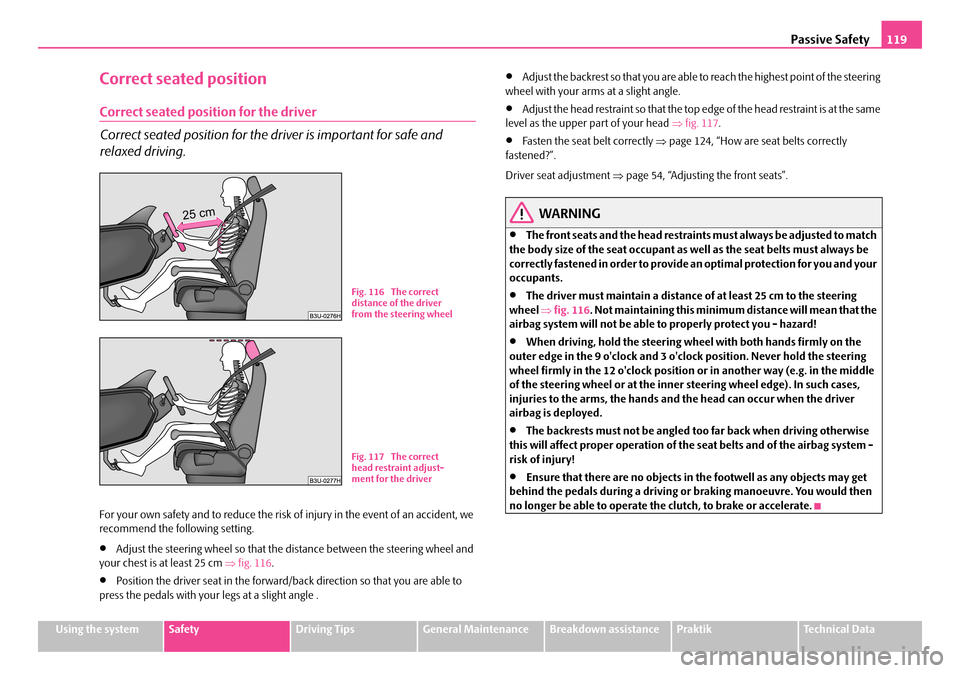
•Adjust the steering wheel so that the distance between the steering wheel and your chest is at least 25 cm ⇒fig. 116.
•Position the driver seat in the forward/back direction so that you are able to press the pedals with your legs at a slight angle .
•Adjust the backrest so that you are able to reach the highest point of the steering wheel with your arms at a slight angle.
•Adjust the head restraint so that the top edge of the head restraint is at the same level as the upper part of your head ⇒fig. 117.
•Fasten the seat belt correctly ⇒page 124, “How are seat belts correctly fastened?”.
Driver seat adjustment ⇒page 54, “Adjusting the front seats”.
WARNING
•The front seats and the head restraints must always be adjusted to match the body size of the seat occupant as well as the seat belts must always be correctly fastened in order to provide an optimal protection for you and your occupants.
•The driver must maintain a distance of at least 25 cm to the steering wheel ⇒fig. 116. Not maintaining this minimum distance will mean that the airbag system will not be able to properly protect you - hazard!
•When driving, hold the steering wheel with both hands firmly on the outer edge in the 9 o'clock and 3 o'clock position. Never hold the steering wheel firmly in the 12 o'clock position or in another way (e.g. in the middle of the steering wheel or at the inner steering wheel edge). In such cases, injuries to the arms, the hands and the head can occur when the driver airbag is deployed.
•The backrests must not be angled to o far back when driving otherwise this will affect proper operation of the seat belts and of the airbag system - risk of injury!
•Ensure that there are no objects in the footwell as any objects may get behind the pedals during a driving or braking manoeuvre. You would then no longer be able to operate the clutch, to brake or accelerate.
Fig. 116 The correct distance of the driver from the steering wheel
Fig. 117 The correct head restraint adjust-ment for the driver
NKO A05R 20 MR08.book Page 119 Wednesday, March 28, 2007 9:42 AM
Page 124 of 248
Seat belts123
Using the systemSafetyDriving TipsGeneral MaintenanceBreakdown assistancePraktikTechnical Data
The physical principle of a frontal collision
The physical principle of a frontal accident can be explained quite simply:
Motion energy, so-called kinetic energy, is produced as soon as the vehicle is moving, both for the vehicle and its occupants. The magnitude of this kinetic energy depends essentially on the speed at which the vehicle is travelling and on the weight of the vehicle and the occupants. The greater the speed and weight increase,
the greater the amount of energy which has to be absorbed in the event of an acci- dent.
The speed of the vehicle is, nevertheless, the most important factor. Doubling the speed of the vehicle from 25 km/h up to 50 km/hour increases the kinetic energy four times.
The common opinion that it is possible to support your body in a minor accident with your hands, is incorrect. Even in a collision at only a low speed, the forces acting on the body are such that it is no longer possible to support your body.
Even if you only drive at a speed within the range from 30 km/hour to 50 km/hour, the forces which are produced on your body in the event of an accident can easily exceed 10.000 N (Newton). This equals a weight of one tonne (1 000 kg).
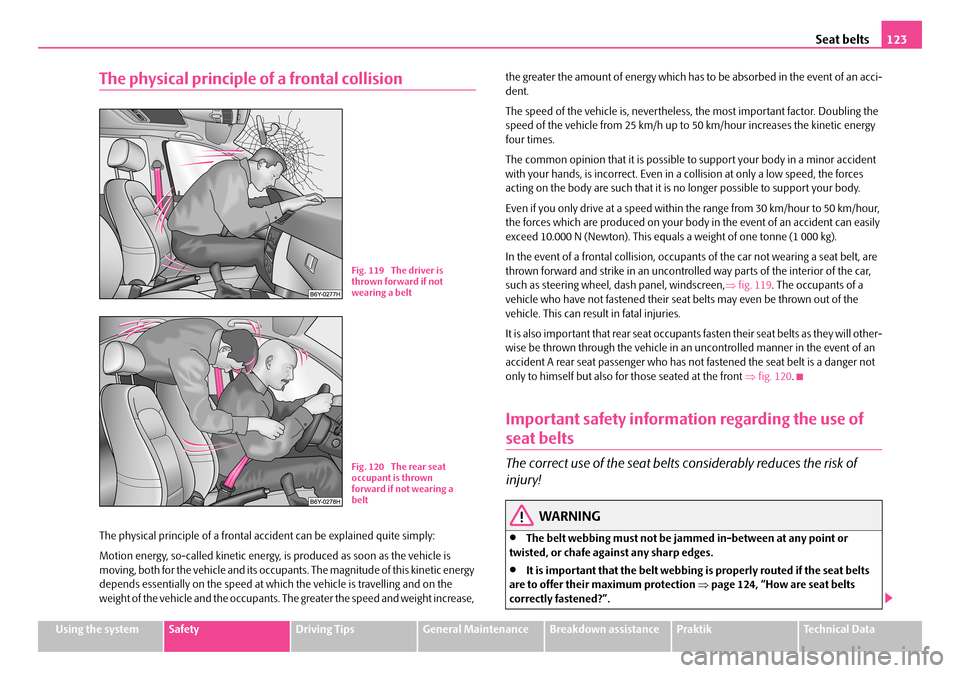
In the event of a frontal collision, occupants of the car not wearing a seat belt, are thrown forward and strike in an uncontrolle d way parts of the interior of the car, such as steering wheel, dash panel, windscreen, ⇒fig. 119. The occupants of a vehicle who have not fastened their seat belts may even be thrown out of the vehicle. This can resu lt in fatal injuries.
It is also important that rear seat occupants fasten their seat belts as they will other- wise be thrown through the vehicle in an uncontrolled manner in the event of an accident A rear seat passenger who has not fastened the seat belt is a danger not only to himself but also fo r those seated at the front ⇒fig. 120.
Important safety information regarding the use of
seat belts
The correct use of the seat belts considerably reduces the risk of
injury!
WARNING
•The belt webbing must not be jammed in-between at any point or twisted, or chafe against any sharp edges.
•It is important that the belt webbing is properly routed if the seat belts are to offer their maximum protection ⇒page 124, “How are seat belts correctly fa stened?”.
Fig. 119 The driver is thrown forward if not wearing a belt
Fig. 120 The rear seat occupant is thrown forward if not wearing a belt
NKO A05R 20 MR08.book Page 123 Wednesday, March 28, 2007 9:42 AM
Page 131 of 248
Airbag system130
Front airbags
Description of the front airbags
The airbag system is not a su bstitute for the seat belt!
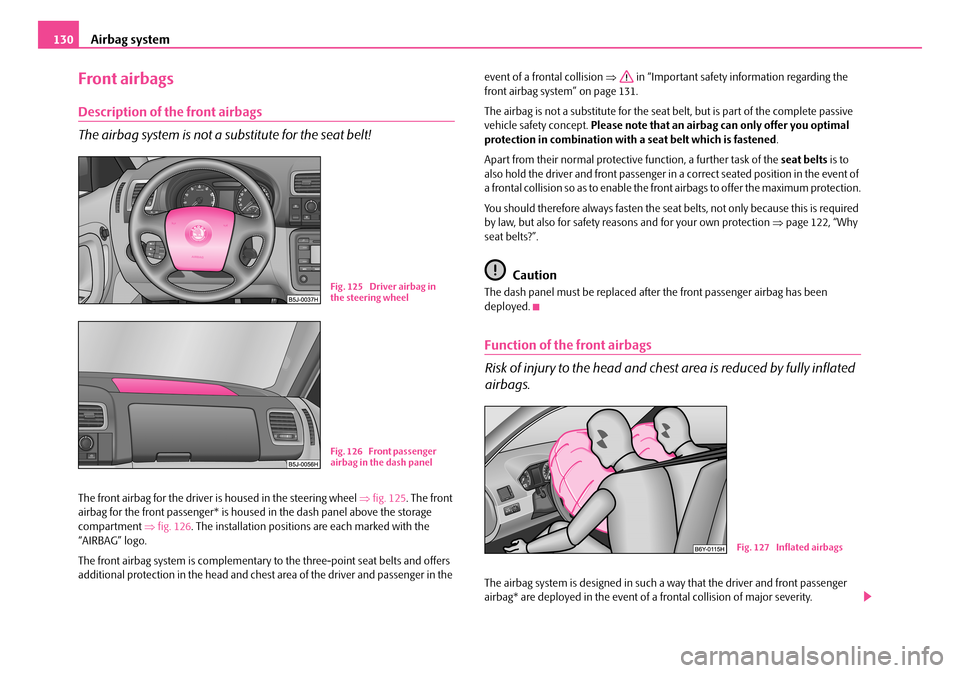
The front airbag for the driver is housed in the steering wheel ⇒fig. 125. The front airbag for the front passenger* is housed in the dash panel above the storage compartment ⇒fig. 126. The installation positions are each marked with the “AIRBAG” logo.
The front airbag system is complementary to the three-point seat belts and offers additional protection in the head and chest area of the driver and passenger in the
event of a frontal collision ⇒ in “Important safety information regarding the front airbag system” on page 131.
The airbag is not a substitute for the seat belt, but is part of the complete passive vehicle safety concept. Please note that an airbag can only offer you optimal protection in combination with a seat belt which is fastened .
Apart from their normal protective function, a further task of the seat belts is to also hold the driver and front passenger in a correct seated position in the event of a frontal collision so as to enable the fr ont airbags to offer the maximum protection.
You should therefore always fasten the seat belts, not only because this is required by law, but also for safety reasons and for your own protection ⇒page 122, “Why seat belts?”.
Caution
The dash panel must be replaced afte r the front passenger airbag has been deployed.
Function of the front airbags
Risk of injury to the head and chest area is reduced by fully inflated
airbags.
The airbag system is designed in such a way that the driver and front passenger airbag* are deployed in the event of a frontal collision of major severity.
Fig. 125 Driver airbag in the steering wheel
Fig. 126 Front passenger airbag in the dash panel
Fig. 127 Inflated airbags
NKO A05R 20 MR08.book Page 130 Wednesday, March 28, 2007 9:42 AM
Page 132 of 248
Airbag system131
Using the systemSafetyDriving TipsGeneral MaintenanceBreakdown assistancePraktikTechnical Data
In certain accident situations both the front airbags as well as the head and side airbags may be deployed together.
If the airbags are deployed, the airbags are filled with a propellant gas and inflated in front of the driver and front passenger ⇒page 130, fig. 127. The airbags inflate in fractions of a second and at a high speed in order to be able to offer that addi- tional protection in the event of an acci dent. The forward movement of the driver and of the front passenger is cushioned when they make contact with the fully inflated airbag and the risk of injury to head and chest is thus reduced.
The specially developed airbag allows the gas to flow out of the inflated airbag in a controlled manner (depending on the load of the particular car occupant) in order to cushion head and chest areas. The airbag then deflates subsequently to such an extent, after an accident, to again provide a clear view forward.
A grey white, non harmful gas is released when airbag is inflated. This is perfectly normal and is not an indication of a fire in the vehicle.
The airbag develops enormous forces when triggered, which can lead to injuries if the sitting position or seated position is not correct ⇒ in “Important safety information regarding the front airbag system” on page 131.
Important safety information regarding the front airbag system
Correct use of the airbag system considerably reduces the risk of
injury!
WARNING
•Never transport children on the front seat of a vehicle without using a proper restraint system. If airbags are deployed in the event of an accident, the child might suffer severe or even fatal injuries!
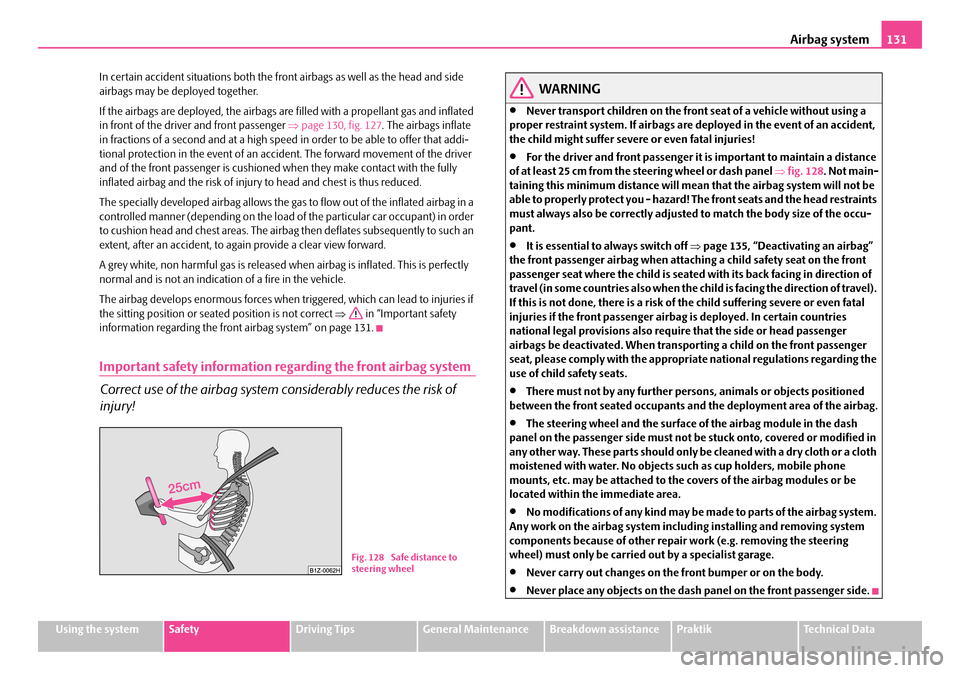
•For the driver and front passenger it is important to maintain a distance of at least 25 cm from the steering wheel or dash panel ⇒fig. 128. Not main- taining this minimum distance will mean that the airbag system will not be able to properly protect you - hazard! The front seats and the head restraints must always also be correctly adjusted to match the body size of the occu- pant.
•It is essential to always switch off ⇒page 135, “Deactivating an airbag” the front passenger airbag when attaching a child safety seat on the front passenger seat where the child is seated with its back facing in direction of travel (in some countries al so when the child is facing the direction of travel). If this is not done, there is a risk of the child suffering severe or even fatal injuries if the front passenger airbag is deployed. In certain countries national legal provisions also requir e that the side or head passenger airbags be deactivated. When transpor ting a child on the front passenger seat, please comply with the appropriate national regulations regarding the use of child safety seats.
•There must not by any further persons, animals or objects positioned between the front seated occupants and the deployment area of the airbag.
•The steering wheel and the surface of the airbag module in the dash panel on the passenger side must not be stuck onto, covered or modified in any other way. These parts should only be cleaned with a dry cloth or a cloth moistened with water. No objects such as cup holders, mobile phone mounts, etc. may be attached to the covers of the airbag modules or be located within the immediate area.
•No modifications of any kind may be made to parts of the airbag system. Any work on the airbag system includ ing installing and removing system components because of other repair work (e.g. removing the steering wheel) must only be carried out by a specialist garage.
•Never carry out changes on the front bumper or on the body.
•Never place any objects on the dash panel on the front passenger side.
Fig. 128 Safe distance to steering wheel
NKO A05R 20 MR08.book Page 131 Wednesday, March 28, 2007 9:42 AM
Page 136 of 248
Airbag system135
Using the systemSafetyDriving TipsGeneral MaintenanceBreakdown assistancePraktikTechnical Data
clothing. In addition, it is not permitted to use clothes hangers for hanging up items of clothing.
•There must not be any other persons (e.g. children) or animals between the car occupant and the deployment ar ea of the head airbag. In addition, none of the occupants should lean their head out of the window when driving, or extend their arms and hands out of the window.
•The sun visors must not be swivelled to the side windows into the deployment area of the head airbags if any objects, such as ball-point pens etc. are attached to them. This might result in injuries to the occupants if the head airbag is deployed.
•Installing impermissible accessories in the area of the head airbags may considerably impair the protection offered by the head airbag in the event of it being deployed. When the deployed head airbag is inflated, parts of the accessories fitted may in certain circumstances be thrown into the interior of the car and cause injuries to the occupants ⇒page 193.
•Any work on the head airbag system including installing and removing system components because of other re pair work (e.g. removing headliner) must only be carried ou t by a specialist garage.
Deactivating an airbag
Deactivating airbags
If any airbags have been deactivated, switch them on again as soon
as possible so that they are able to again provide their proper protec-
tion.
There is the technical means installed within your vehicle to switch off the front, side* or head airbag* (take out of commission).
This is why you should have the deactiva tion of the airbags carried out by a specialist garage.
On vehicles equipped with the switch for de activation of the airbags, you can deac- tivate the front passenger airbag or passen ger side airbag by means of this switch ⇒ page 136.
Deactivation of airbags is envisaged only for particular instances, such as if:
•you must in exceptional cases use a child seat on the front passenger seat where the child has its back to the directio n of travel of the vehicle (in some coun- tries this must be in the direction of travel due to other legal regulations applying) ⇒ page 137, “Important safety information regarding the use of child safety seats”
•you are not able to maintain the distance of at least 25 cm between middle of steering wheel and chest, despite the driver seat being correctly adjusted,
•special attachments are required in the area of the steering wheel because of a physical disability,
•you have installed other seats (e.g. orthopaedic seats without side airbags).
Monitoring the airbag system
The functionality of the airbag system is also monitored electronically, when one airbag has been switched off
If the airbag was switched of f using diagnostic equipment:
•The airbag indicator light in the instrument cluster lights up for about 3 seconds after switching on the ignition and then flashes after that for about 12 seconds.
If the airbag was switched off using the airbag switch* on the side of the dash panel:
•The airbag warning light comes on in the instrument cluster for about 3 seconds each time the ignition is switched on.
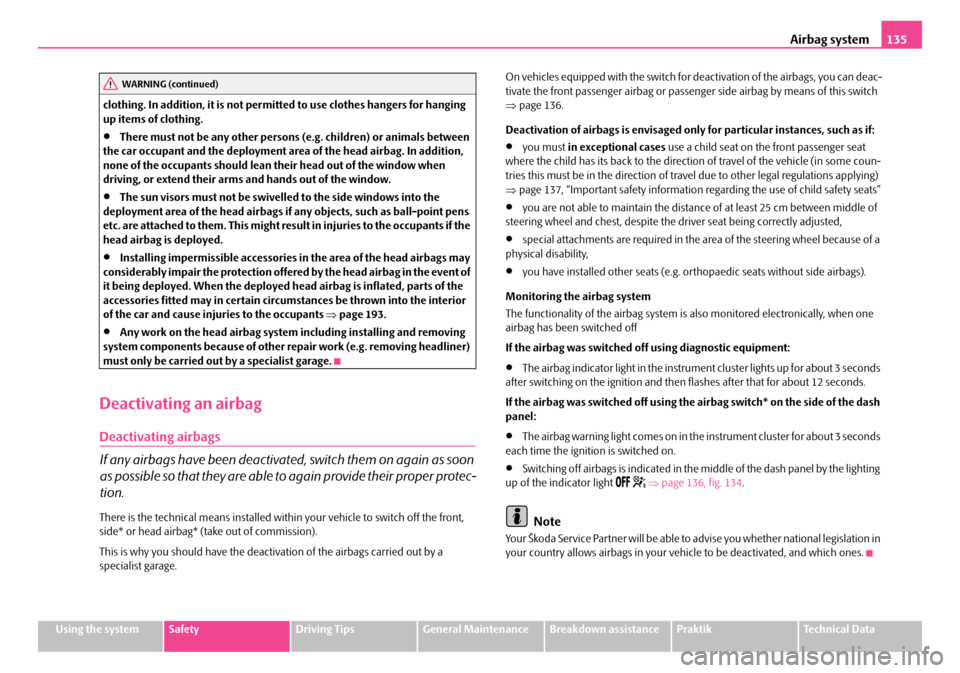
•Switching off airbags is indicated in the middle of the dash panel by the lighting up of the indicator light ⇒page 136, fig. 134.
Note
Your Škoda Service Partner will be able to advise you whether national legislation in your country allows airbags in your vehi cle to be deactivated, and which ones.
WARNING (continued)
NKO A05R 20 MR08.book Page 135 Wednesday, March 28, 2007 9:42 AM
Page 146 of 248
Intelligent Technology145
Using the systemSafetyDriving TipsGeneral MaintenanceBreakdown assistancePraktikTechnical Data
Driving Tips
Intelligent Technology
Electronic stability programme (ESP)*
General
General
The ESP aids you maintain control of your vehicle in situations in borderline driving situations such as when negotiating a curve too fast. The risk of skidding is reduced and your car thus offers greater driving stability depending on the conditions of the road surface. This occurs at all speeds.
The following systems are integrated into the electronic stability programme:
•Electronic Differential Lock (EDL),
•Traction control system (TCS),
•Antilock brake system (ABS),
•Brake Assist.
Operating principle
The ESP switches on automatically when the engine is started and then conducts a self-test. The ESP control unit processes data from the individual systems. It also processes additional measurement data which are supplied by highly sensitive sensors: the rotational velocity of the vehi cle about its vertical axis, the lateral accel- eration of the vehicle, the brakin g pressure and the steering angle.
The direction which the driver wishes to ta ke is determined based on the steering angle and the speed of the vehicle and is constantly compared with the actual behaviour of the vehicle. If differences exis t, such as the car beginning to skid, the ESP will automatically brake the appropriate wheel.
The car is stabilised again by the forces which take effect when the wheel is braked. Intervention into the brake system takes place primarily on the outer front wheel of a vehicle which tends to oversteer (tendency for the rear of the vehicle to break away) while occurs this is on the inner re ar wheel of a vehicle which tends to under- steer (tendency to shift out of the curve). This braking control cycle is accompanied by noises.
The ESP operates in combination with the ABS ⇒page 149, “Antilock brake system (ABS)*”. If there is a fault in the ABS system, the ESP also does not operate.
The ESP warning light ⇒page 27 lights up in the instrument cluster when there is a fault on the ESP.
Switching off
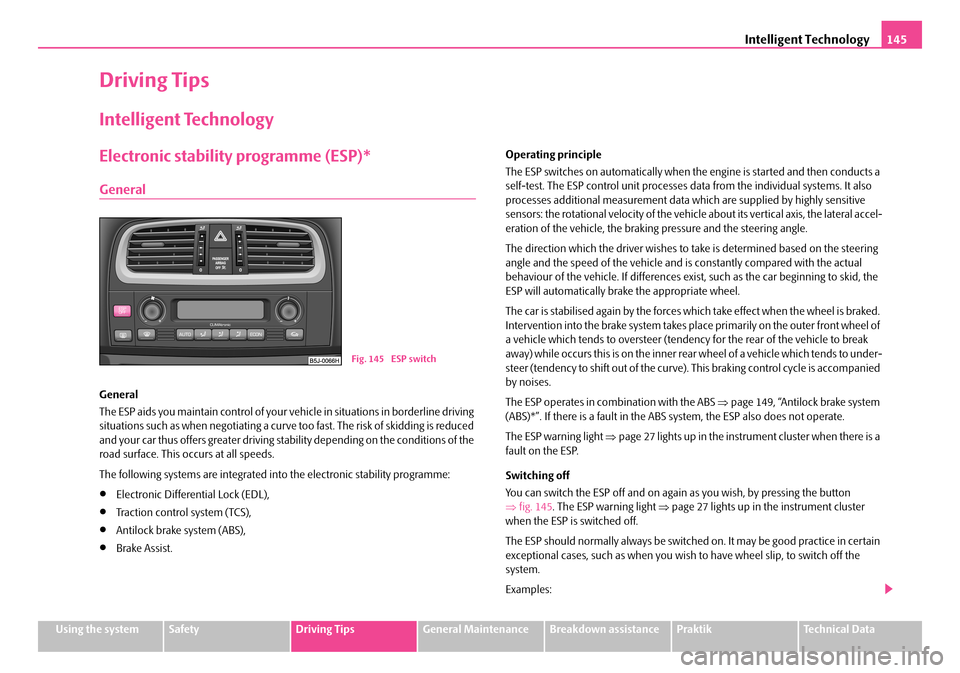
You can switch the ESP off and on again as you wish, by pressing the button ⇒ fig. 145. The ESP warning light ⇒page 27 lights up in the instrument cluster when the ESP is switched off.
The ESP should normally always be switched on. It may be good practice in certain exceptional cases, such as when you wish to have wheel slip, to switch off the system.
Examples:
Fig. 145 ESP switch
NKO A05R 20 MR08.book Page 145 Wednesday, March 28, 2007 9:42 AM