oil pressure SKODA ROOMSTER 2009 1.G Owner's Manual
[x] Cancel search | Manufacturer: SKODA, Model Year: 2009, Model line: ROOMSTER, Model: SKODA ROOMSTER 2009 1.GPages: 263, PDF Size: 32.25 MB
Page 5 of 263
Contents 4Important safety information regarding the use of seat
belts . . . . . . . . . . . . . . . . . . . . . . . . . . . . . . . . . . . . . . . . .
How are seat belts correctly fastened? . . . . . . . . . .
Belt tensioner . . . . . . . . . . . . . . . . . . . . . . . . . . . . . . . . Airbag system
. . . . . . . . . . . . . . . . . . . . . . . . . . . . . . . . .
Description of the airbag system . . . . . . . . . . . . . . .
Front airbags . . . . . . . . . . . . . . . . . . . . . . . . . . . . . . . . .
Side airbags* . . . . . . . . . . . . . . . . . . . . . . . . . . . . . . . . .
Head airbags* . . . . . . . . . . . . . . . . . . . . . . . . . . . . . . . .
Deactivating airbags . . . . . . . . . . . . . . . . . . . . . . . . . .
Transporting children safely
. . . . . . . . . . . . . . . . . .
What you should know about transporting children!
Child seat . . . . . . . . . . . . . . . . . . . . . . . . . . . . . . . . . . . .
Attaching a child seat using the “ISOFIX” system*
Attaching child seat using the “Top Tether” system
Driving Tips
. . . . . . . . . . . . . . . . . . . . . . . . . . . . . .
Intelligent Technology
. . . . . . . . . . . . . . . . . . . . . . . .
Electronic stability programme (ESP)* . . . . . . . . . .
Brakes . . . . . . . . . . . . . . . . . . . . . . . . . . . . . . . . . . . . . . .
Brake booster . . . . . . . . . . . . . . . . . . . . . . . . . . . . . . . .
Antilock brake system (ABS)* . . . . . . . . . . . . . . . . . .
Brake Assist* . . . . . . . . . . . . . . . . . . . . . . . . . . . . . . . . .
Electrohydraulic power steering . . . . . . . . . . . . . . .
Tyre inflation pressure-control system* . . . . . . . . .
Diesel particle filter* (diesel engine) . . . . . . . . . . . .
Driving and the Environment
. . . . . . . . . . . . . . . . .
The first 1 500 kilometres and then afterwards . .
Catalytic converter . . . . . . . . . . . . . . . . . . . . . . . . . . . .
Driving in an economical and environmentally
conscious manner . . . . . . . . . . . . . . . . . . . . . . . . . . . .
Environmental compatibility . . . . . . . . . . . . . . . . . . .
Motoring abroad . . . . . . . . . . . . . . . . . . . . . . . . . . . . .
Avoiding damage to your vehicle . . . . . . . . . . . . . .
To w i n g a t r a i l e r
. . . . . . . . . . . . . . . . . . . . . . . . . . . . . . . .
Towing a trailer . . . . . . . . . . . . . . . . . . . . . . . . . . . . . . .
General Maintenance
. . . . . . . . . . . . . . .
Taking care of your vehicle and cleaning the
vehicle
. . . . . . . . . . . . . . . . . . . . . . . . . . . . . . . . . . . . . . . . .
General . . . . . . . . . . . . . . . . . . . . . . . . . . . . . . . . . . . . . .
Care of the exterior of vehicle . . . . . . . . . . . . . . . . . .
Care of the interior of vehicle . . . . . . . . . . . . . . . . . .
Fuel
. . . . . . . . . . . . . . . . . . . . . . . . . . . . . . . . . . . . . . . . . . . .
Petrol . . . . . . . . . . . . . . . . . . . . . . . . . . . . . . . . . . . . . . . .
Diesel . . . . . . . . . . . . . . . . . . . . . . . . . . . . . . . . . . . . . . . .
Refuelling . . . . . . . . . . . . . . . . . . . . . . . . . . . . . . . . . . . .
Inspecting and replenishing
. . . . . . . . . . . . . . . . . .
Engine compartment . . . . . . . . . . . . . . . . . . . . . . . . .
Engine oil . . . . . . . . . . . . . . . . . . . . . . . . . . . . . . . . . . . .
Cooling system . . . . . . . . . . . . . . . . . . . . . . . . . . . . . . .
Brake fluid . . . . . . . . . . . . . . . . . . . . . . . . . . . . . . . . . . .
Battery . . . . . . . . . . . . . . . . . . . . . . . . . . . . . . . . . . . . . . .
Windshield washer system . . . . . . . . . . . . . . . . . . . .
Wheels and Tyres
. . . . . . . . . . . . . . . . . . . . . . . . . . . . . .
Wheels . . . . . . . . . . . . . . . . . . . . . . . . . . . . . . . . . . . . . .
Accessories, changes and replacement of partsAccessories and replacement parts . . . . . . . . . . . . .
Technical changes . . . . . . . . . . . . . . . . . . . . . . . . . . . .
Vehicles of the group N1 . . . . . . . . . . . . . . . . . . . . . .Breakdown assistance
. . . . . . . . . . . . . .
Breakdown assistance
. . . . . . . . . . . . . . . . . . . . . . . .
First-aid box* and Warning triangle* . . . . . . . . . . .
Fire extinguisher* . . . . . . . . . . . . . . . . . . . . . . . . . . . . .
Vehicle tool kit . . . . . . . . . . . . . . . . . . . . . . . . . . . . . . . .
Tyre repair kit* . . . . . . . . . . . . . . . . . . . . . . . . . . . . . . . .
Spare wheel* . . . . . . . . . . . . . . . . . . . . . . . . . . . . . . . . .
Changing a wheel . . . . . . . . . . . . . . . . . . . . . . . . . . . . .
Jump-starting . . . . . . . . . . . . . . . . . . . . . . . . . . . . . . . .
Tow-starting and towing vehicle . . . . . . . . . . . . . . .
Fuses and light bulbs
. . . . . . . . . . . . . . . . . . . . . . . . . .
Electric fuses . . . . . . . . . . . . . . . . . . . . . . . . . . . . . . . . .
Bulbs . . . . . . . . . . . . . . . . . . . . . . . . . . . . . . . . . . . . . . . .
Praktik
. . . . . . . . . . . . . . . . . . . . . . . . . . . . . . . . . . . . . .
Praktik
. . . . . . . . . . . . . . . . . . . . . . . . . . . . . . . . . . . . . . . . .
Lashing eyes . . . . . . . . . . . . . . . . . . . . . . . . . . . . . . . . . .
Adjustable safety partition behind the front seats
Fixing of the loading floor . . . . . . . . . . . . . . . . . . . . . .
Adjustment of the safety partition . . . . . . . . . . . . . .
Emergency unlocking of the loading area door . .
Technical Data
. . . . . . . . . . . . . . . . . . . . . . . . . .
Technical Data
. . . . . . . . . . . . . . . . . . . . . . . . . . . . . . . . .
General information . . . . . . . . . . . . . . . . . . . . . . . . . . .
Used abbreviations . . . . . . . . . . . . . . . . . . . . . . . . . . .
Performances . . . . . . . . . . . . . . . . . . . . . . . . . . . . . . . . .
Weight . . . . . . . . . . . . . . . . . . . . . . . . . . . . . . . . . . . . . . .
Identification details . . . . . . . . . . . . . . . . . . . . . . . . . .
Fuel consumption according to the regulations
(99/100/EU) . . . . . . . . . . . . . . . . . . . . . . . . . . . . . . . . . .
Dimensions . . . . . . . . . . . . . . . . . . . . . . . . . . . . . . . . . .
Engine oil specifications . . . . . . . . . . . . . . . . . . . . . . .
1.2 ltr./51 kW - EU 4/EU 2DDK . . . . . . . . . . . . . . . . .
1.4 ltr./63 kW - EU 4/EU 2DDK . . . . . . . . . . . . . . . . .
1.6 ltr./77 kW - EU 4/EU 2DDK . . . . . . . . . . . . . . . . .
1.4 ltr./51 kW TDI PD - EU 4 . . . . . . . . . . . . . . . . . . . .
1.4 ltr./59 kW TDI PD - EU 4 . . . . . . . . . . . . . . . . . . . .
1.9 ltr./77 kW TDI°PD - EU°4 . . . . . . . . . . . . . . . . . . .
Roomster - Vehicles of the group N1 . . . . . . . . . . .
Scout - Vehicles of the group N1 . . . . . . . . . . . . . . .
Index
. . . . . . . . . . . . . . . . . . . . . . . . . . . . . . . . . . . . . . . . 133
134
136
138
138
139
142
143
145
147
147
150
153
154
155
155
155
158
158
159
159
160
160
162
163
163
164
164
167
168
169
170
170173
173
173
173
178
181
181
181
182
184
184
187
189
191
192
196
198
198
204
204
204
205
207
207
207
207
208
208
208
209
213
215218
218
223
229
229
229
229
230
230
231
233
233
233
233
233
233
233
234
235
236
237
239
241
243
245
247
249
249
251
s29g.4.book Page 4 Wednesday, June 17, 2009 9:54 AM
Page 28 of 263
Instruments and Indicator/Warning Lights27
Using the system
Safety
Driving Tips
General Maintenance
Breakdown assistance
Praktik
Technical Data
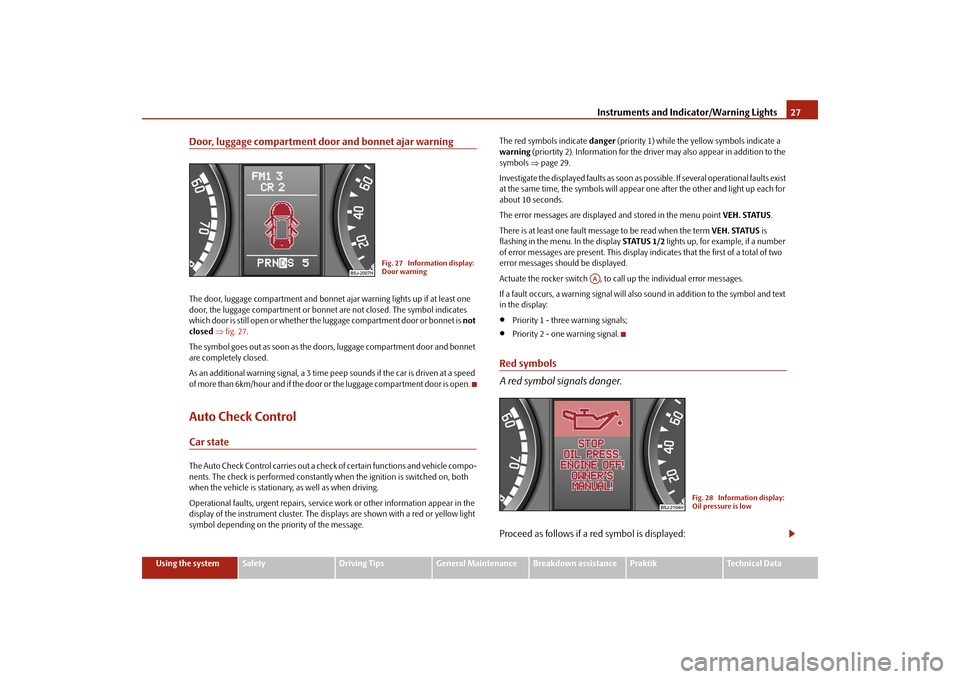
Door, luggage compartment door and bonnet ajar warningThe door, luggage compartment and bonnet ajar warning lights up if at least one
door, the luggage compartment or bonnet are not closed. The symbol indicates
which door is still open or whether the luggage compartment door or bonnet is not
closed ⇒fig. 27.
The symbol goes out as soon as the doors, luggage compartment door and bonnet
are completely closed.
As an additional warning signal, a 3 time peep sounds if the car is driven at a speed
of more than 6km/hour and if the door or the luggage compartment door is open.Auto Check ControlCar stateThe Auto Check Control carries out a check of certain functions and vehicle compo-
nents. The check is performed constantly when the ignition is switched on, both
when the vehicle is stationary, as well as when driving.
Operational faults, urgent repairs, service work or other information appear in the
display of the instrument cluster. The displays are shown with a red or yellow light
symbol depending on the priority of the message.The red symbols indicate danger (priority 1) while the yellow symbols indicate a
warning (priortity 2). Information for the driver may also appear in addition to the
symbols ⇒page 29.
Investigate the displayed faults as soon as possible. If several operational faults exist
at the same time, the symbols will appear one after the other and light up each for
about 10 seconds.
The error messages are displayed and stored in the menu point VEH. STATUS.
There is at least one fault message to be read when the term VEH. STATUS is
flashing in the menu. In the display STATUS 1/2 lights up, for example, if a number
of error messages are present. This display indicates that the first of a total of two
error messages should be displayed.
Actuate the rocker switch , to call up the individual error messages.
If a fault occurs, a warning signal will also sound in addition to the symbol and text
in the display:
•
Priority 1 - three warning signals;
•
Priority 2 - one warning signal.
Red symbols
A red symbol signals danger.Proceed as follows if a red symbol is displayed:
Fig. 27 Information display:
Door warning
AA
Fig. 28 Information display:
Oil pressure is low
s29g.4.book Page 27 Wednesday, June 17, 2009 9:54 AM
Page 29 of 263
Instruments and Indicator/Warning Lights 28
– Stop the vehicle.
– Switch the engine off.
– Check the functions indicated.
– Obtain professional assistance.Meaning of the red symbols:
Three successive warning signals will sound if a red symbol appears.
If several operational faults of priority 1 exist at the same time, the symbols appear
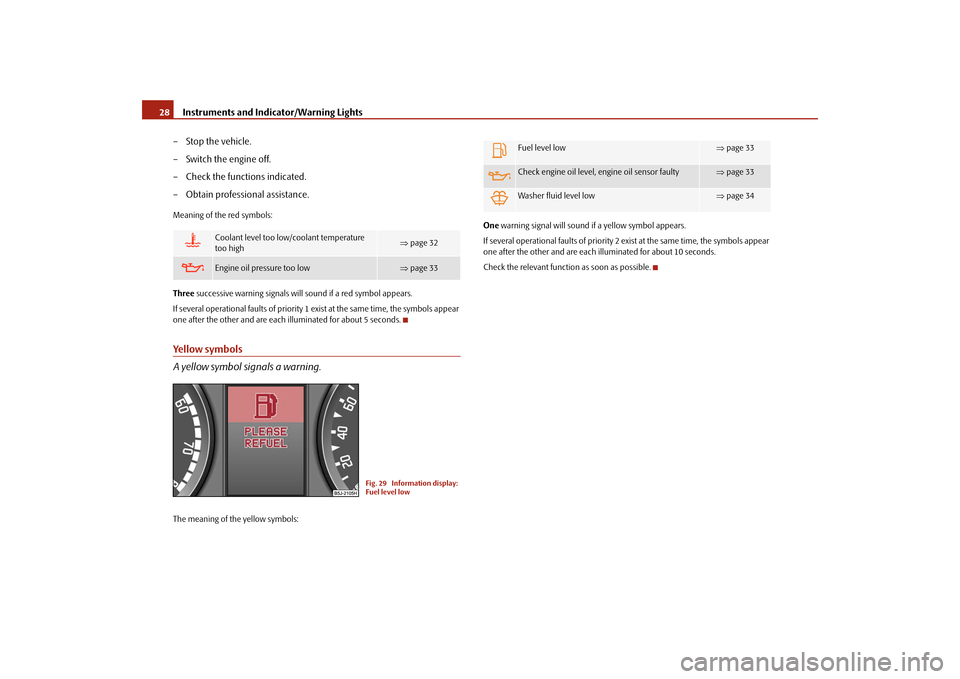
one after the other and are each illuminated for about 5 seconds.Yellow symbols
A yellow symbol signals a warning.The meaning of the yellow symbols:One warning signal will sound if a yellow symbol appears.
If several operational faults of priority 2 exist at the same time, the symbols appear
one after the other and are each illuminated for about 10 seconds.
Check the relevant function as soon as possible.
Coolant level too low/coolant temperature
too high
⇒page 32
Engine oil pressure too low
⇒page 33
Fig. 29 Information display:
Fuel level low
Fuel level low
⇒page 33
Check engine oil level, engine oil sensor faulty
⇒page 33
Washer fluid level low
⇒page 34
s29g.4.book Page 28 Wednesday, June 17, 2009 9:54 AM
Page 31 of 263
Instruments and Indicator/Warning Lights 30
WARNING
•
If you do not pay attention to the warning lights coming on and the corre-
sponding descriptions and warning notes, this may result in severe body
injuries or major vehicle damage.
•
The engine compartment of your car is a hazardous area. There is a risk
of injuries, scalding, accidents and fire when working in the engine
compartment, e.g. inspecting and replenishing oil and other fluids. It is also
essential to observe all warnings ⇒page 185.Note
•
Arrangement of the indicator lights depends on the model and model version.
The symbols shown in the following functional description are to be found as indi-
cator lights in the instrument cluster.
•
Operational faults are shown in the instrument cluster as red symbols (priority
1 - danger) or yellow symbols (priority 2 - warning).
Turn signal system
Either the left
or right
indicator light flashes depending on the position of the
turn signal lever.
The indicator light flashes at twice its normal rate if a turn signal light fails. This does
not apply when towing a trailer.
Switching off the hazard warning light system is switched on will cause all of the
turn signal lights as well as both indicator lights to flash.
Further information about the turn signal system ⇒page 56.
Main beam
The indicator light
comes on when the main beam is selected or also when the
headlight flasher is operated.
Further information about the main beam ⇒page 56.
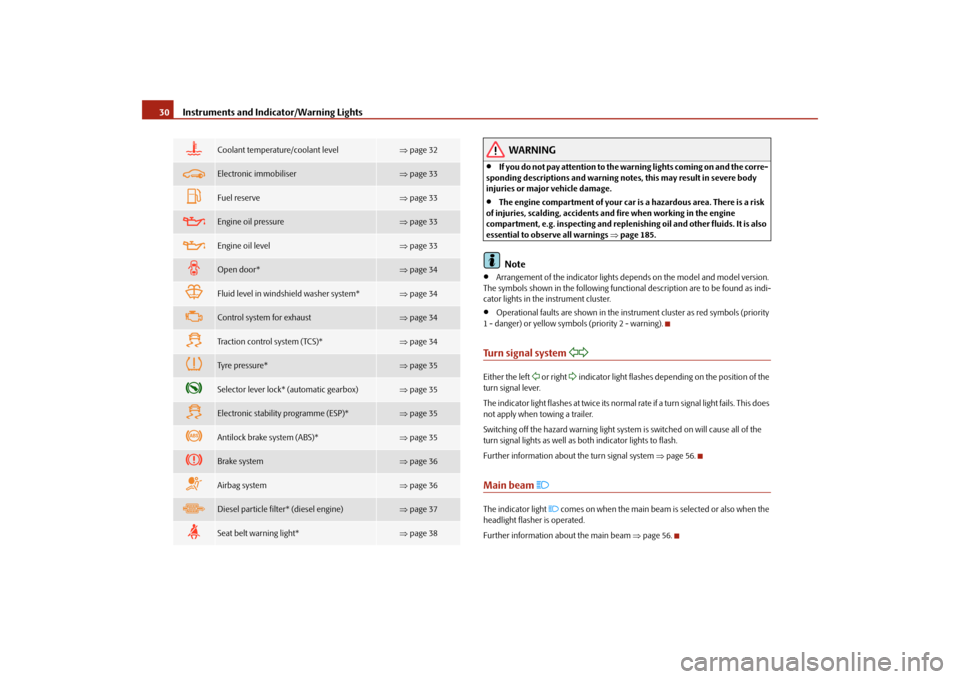
Coolant temperature/coolant level
⇒page 32
Electronic immobiliser
⇒page 33
Fuel reserve
⇒page 33
Engine oil pressure
⇒page 33
Engine oil level
⇒page 33
Open door*
⇒page 34
Fluid level in windshield washer system*
⇒page 34
Control system for exhaust
⇒page 34
Traction control system (TCS)*
⇒page 34
Tyre pressure*
⇒page 35
Selector lever lock* (automatic gearbox)
⇒page 35
Electronic stability programme (ESP)*
⇒page 35
Antilock brake system (ABS)*
⇒page 35
Brake system
⇒page 36
Airbag system
⇒page 36
Diesel particle filter* (diesel engine)
⇒page 37
Seat belt warning light*
⇒page 38
s29g.4.book Page 30 Wednesday, June 17, 2009 9:54 AM
Page 34 of 263
Instruments and Indicator/Warning Lights33
Using the system
Safety
Driving Tips
General Maintenance
Breakdown assistance
Praktik
Technical Data
WARNING
•
If you must stop for technical reasons, then park the vehicle at a safe
distance from the traffic and switch off the engine and switch on the hazard
warning light system ⇒page 56, “Switch for hazard warning lights ”.
•
Pay attention to the following instructions ⇒page 185, “Working in the
engine compartment” before checking the coolant fluid level and opening
the bonnet.
•
Take care when opening the coolant expansion bottle. If the engine is hot,
the cooling system is pressurized - risk of scalding. It is best to allow the
engine to cool down before removing the cap.
•
Do not touch the coolant fan! The coolant fan may switch on automati-
cally even if the ignition is off.
Electronic immobiliser
Data is compared between the ignition key and the control unit when switching on
the ignition. The indicator light
will light up for a few seconds when ignition key
authorisation is confirmed.
The warning light will start flashing continuously if a non-authorised ignition key
(for example the wrong ignition key) has been used. The engine cannot be started
⇒page 40.
It is only possible to start the engine of your car with a Genuine Škoda key with the
matching code.
Fuel reserve
The warning light
comes on, if the fuel level is less than 7 litres.
A peep sounds as an additional warning signal.
The following text will be displayed in the information display*:
PLEASE REFUEL
Engine oil
The warning light
lights up red (low oil pressure)
The warning light comes on for a few seconds
2) when the ignition is switched on.
Stop the vehicle and switch the engine off if the warning light does not go off
after the engine has started or flashes while driving. Check the oil level and top up
with oil as necessary ⇒page 187.
3 peeps sound as an additional warning signal.
Do not continue your journey if for some reason it is not possible under the
conditions prevailing to top up with oil. Keep the engine switched off and obtain
professional assistance from a specialist garage, otherwise it could lead to severe
engine damage.
Do not drive any further if the warning light flashes even if the oil is at the correct
level. Do not run the engine not at idling speed either. Contact the nearest specialist
garage to obtain professional assistance.
The following text will be displayed in the information display*:
STOP OIL PRESS. ENGINE OFF! OWNER'S MANUAL!
The warning light
lights up yellow* (oil quantity too low)
If the warning light lights up yellow, the quantity of oil in the engine is probably too
low. Check as soon as possible the oil level or top up ⇒page 187 with engine oil.
A peep sounds as an additional warning signal.
The following text will be displayed in the information display*:
CHECK OIL LEVEL
The warning light will go out if the bonnet is left open for more than 30 seconds. If
no engine oil has been replenished, the warning light will come on again after
driving about 100 km.
2)The warning light on vehicles fitted with information display does not come on after
switching the ignition on, but only if a fault exists or the engine oil level is too low.
s29g.4.book Page 33 Wednesday, June 17, 2009 9:54 AM
Page 35 of 263
Instruments and Indicator/Warning Lights 34The warning light
flashes yellow* (engine oil level sensor faulty)
A fault on the engine oil level sensor is indicated additionally by an audible signal
and the warning light coming on several times after the ignition has been switched
on.
In this case have the engine inspected without delay by a specialist garage.
The following text will be displayed in the information display*:
OIL SENSOR WORKSHOP!
WARNING
•
If you must stop for technical reasons, then park the vehicle at a safe
distance from the traffic and switch off the engine and switch on the hazard
warning light system ⇒page 56.
•
The red oil pressure light
is not an oil level indicator! One should
therefore check the oil level at regular intervals, preferably after every refu-
eling stop.
•
Pay attention to the following instructions ⇒page 185, “Working in the
engine compartment” before checking the coolant fluid level and opening
the bonnet.
Open door*
The warning light
comes on if one or several doors, the bonnet or boot lid is
opened.
The warning light comes on even when the ignition is switched off. The warning
light goes out 5 minutes after switching off the ignition if one or several doors, the
bonnet or boot lid is opened. The warning light goes out after closing the doors.
Windshield washer fluid level*
The warning light
comes on when the ignition is switched on if there is insuffi-
cient fluid in the windshield washer system. Top up with liquid ⇒page 196.
A peep sounds as an additional warning signal.The following text will be displayed in the information display*:
REFILL WASHER LIQUID
Control system for exhaust
The warning light
comes on after the ignition has been switched on.
If the warning light does not go out after starting the engine or it lights up when
driving, a fault exists in an exhaust relevant component. The engine management
system selects an emergency programme which enables you to drive to the nearest
specialist garage by adopting a gentle style of driving.
The following text will be displayed in the information display*:
EXHAUST WORKSHOP!
Traction control system (TCS) *
The warning light
comes on for a few seconds when the ignition is switched on.
The warning light flashes when a control cycle is activated while driving.
The warning light will come on and remains on if the TCS is switched off or if there
is a fault in the system.
The fact that the TCS system operates together with the ABS means that the TCS
warning light will also come on if the ABS system is not operating properly.
If the warning light comes on immediately after starting the engine, the TCS
system can be switched off for technical reasons. In this case, the TCS system can
be switched on again by switching the ignition on and off. If the warning light goes
out, the TCS system is fully functional again.
Further information about the TCS ⇒page 156.
Note
If the battery has been disconnected and reconnected, the warning light
comes
on after switching on the ignition. The warning light must go out after driving a short
distance.
s29g.4.book Page 34 Wednesday, June 17, 2009 9:54 AM
Page 102 of 263
Starting-off and Driving101
Using the system
Safety
Driving Tips
General Maintenance
Breakdown assistance
Praktik
Technical Data
•
Let go of the key as soon as the engine starts otherwise there may be damage
to the starter.
The engine running noises may louder at first be louder for a short time after
starting the cold engine until oil pressure can be built up in the hydraulic valve
clearance compensation. This is quite normal and is not an operating problem.
If the engine does not start ...
You can use the battery of another vehicle as a jump-start aid ⇒page 213.
It is only possible to tow-start vehicles fitted with a manual gearbox. The tow-
starting distance must not be more than 50 metres ⇒page 216.
WARNING
•
Never run the engine in non ventilated or enclosed areas. The exhaust
gases of the engine contain besides the odorless and colourless carbon
monoxide a poisonous gas - hazard! Carbon monoxide can cause uncon-
sciousness and death.
•
Never leave your vehicle unattended with the engine running.Caution
•
The starter may only be operated (ignition key position ), if the engine is not
running. If the starter is immediately operated after switching off the engine, the
starter or the engine can be damaged.
•
Avoid high engine revolutions, full throttle and high engine loads as long as the
engine has not yet reached its normal operating temperature - risk of damaging the
engine!
•
Vehicles which are fitted with an exhaust gas catalytic converter should not be
tow-started over a distance of more than 50 metres.For the sake of the environment
Never warm up the engine when the vehicle is standing. Drive off right away. When
driving the engine reaches its operating temperature more rapidly and the pollutant
emissions are lower.
Petrol enginesThese engines are fitted with a starter system which selects the correct fuel-air
mixture for every external air temperature.•
Do not operate accelerator before and when starting engine.
•
Interrupt the attempt at starting after 10 seconds if the engine does not start
right awayand wait for about 30 seconds before repeating the attempt.
•
It is possible that the fuse on the electrical fuel pump is defect if the engine still
does not start. Check the fuse and replace it if necessary ⇒page 218.
•
If the engine does not start, contact the nearest specialist garage to obtain
professional assistance.
It may be necessary, if the engine is very hot, to slightly depress the accelerator
after the engine has started.
Diesel enginesGlow plug system
Diesel engines are equipped with a glow plug system, the preglow period being
controlled automatically in line with the coolant temperature and outside temper-
ature.
The preglow indicator light
comes on after the ignition has been switched on.
You should not switch on any major electrical components during the heating
period otherwise the vehicle battery will be drained unnecessarily.
•
You should start the engine immediately after the glow plug warning light
has gone out.
•
The glow plug warning light will come on for about one second if the engine is
at a normal operating temperature or if the outside temperature is above +5°C. This
means that you can start the engine right away.
•
Interrupt the attempt at starting after 10 seconds if the engine does not start
right awayand wait for about 30 seconds before repeating the attempt.
•
It is possible that the fuse on the diesel preglow system is defect if the engine
still does not start. Check the fuse and replace it if necessary ⇒page 218.
A3
s29g.4.book Page 101 Wednesday, June 17, 2009 9:54 AM
Page 159 of 263
Intelligent Technology 158BrakesWhat has a negative effect on braking efficiency?Wear-and-tear
Wear-and-tear to the brake pads is greatly dependent on the operating conditions
of the vehicle and your style of driving. Particularly if you drive a great deal in towns
and over short distances or if you adopt a sporty style of driving, it may be neces-
sary to have the thickness of the brake pads inspected at a specialist garage
between the service inspections.
Wet roads or road salt
There may be a certain delay before the brakes take full effect under certain condi-
tions such as when driving through water, during heavy rain showers or after the
vehicle has been washed in an automatic vehicle wash, since the brake discs and
brake pads may be moist or even have a coating of ice on them in winter. You
should dry the brakes as soon as possible by applying and releasing the brakes
several times.
There also may be a certain delay before the full braking efficiency is available when
driving on roads which have been treated with road salt if you have not used the
brakes for some considerable time beforehand. The layer of salt on the brake discs
and brake pads must first be rubbed off when you apply the brakes.
Corrosion
Corrosion on the brake discs and dirt on the bake pads occur if the vehicle has been
parked for a long period and if you do not make much use of the braking system.
We recommend cleaning the brake discs by firmly applying the brakes at a fairly
high speed if you do not make much use of the braking system or if surface corro-
sion is present ⇒.
Faults in the brake surface
If you notice that the braking distance has suddenly become longer and that the
brake pedal can be depressed further, it is possible that a brake circuit of the dual-
circuit brake system has failed. Drive, in such cases, to the nearest specialist garage
without delay in order to have the problem rectified. Drive at a reduced speed while
on your way to the dealer and adapt your style of driving to the higher brake pedal
pressure required.Low brake fluid level
An insufficient level of brake fluid may result in problems in the brake system. The
level of the brake fluid is monitored electronically ⇒page 36, “Brake system ”.
WARNING
•
Only apply the brakes for the purpose of drying and cleaning the brake
discs if the traffic conditions permit this. Do not place any other road users
in jeopardy.
•
When retrospectively mounting a front spoiler, solid wheel hubs etc. one
must ensure that the air supply to the front wheel brakes is not reduced
otherwise the braking system could run too hot.
•
Allow for the fact that new brake pads do not achieve their full braking
efficiency until approximately 200 kilometres. New brake pads must be first
“run in” before they develop their optimal friction force. You can, however,
compensate for this slightly reduced braking force by increasing the pres-
sure on the brake pedal. This guideline also applies to any new brake pads
installed at a future date.Caution
•
Never allow the brakes to rub by applying slight pressure if you do not wish to
brake the vehicle. This causes the brakes to overheat and can also result in a longer
braking distance and excessive wear.
•
Before negotiating a steep downhill section, please reduce your speed and shift
down into the next lower gear (manual gearbox) or select a lower driving stage
(automatic gearbox). This enables you to make full use of the braking power of the
vehicle and reduces the strain on the brakes. Any additional braking should be done
intermittently, not continuously.
Brake boosterThe brake booster boosts the pressure which you generate with the brake pedal.
The necessary pressure is only generated when the engine is running.
s29g.4.book Page 158 Wednesday, June 17, 2009 9:54 AM
Page 175 of 263
Taking care of your vehicle and cleaning the vehicle 174Automatic vehicle wash systemsThe paintwork of the vehicle is sufficiently resistant that the vehicle can be washed
normally in automatic vehicle wash plants without any problem. The actual stress
to which the paintwork is subjected, however, depends primarily on the design of
the vehicle wash system, the filtering of the water and the type of washing and care
products used. If the paintwork of your vehicle appears mat after being washed or
even has scratches, point this out to the operator of the vehicle wash plant. Use a
different vehicle wash plant, if necessary.
There are no particular points to note before washing your vehicle in such a plant
other than the usual precautionary measures (closing windows, moving any
factory-fitted aerials down flat against the bodywork, etc.).
If you have any particular attach e d p a r t s f i t te d t o y o u r c a r - s u ch a s s p o i l e r, ro o f ra ck
system, two-way radio aerial - it is best to first of all consult the operator of the car
wash plant.
It is important to degrease the lips of the windscreen wiper rubbers after passing
through the automatic vehicle wash system.
Caution
Do not screw the swivelling down roof aerial tight before washing the vehicle in an
automatic vehicle wash system - risk of damage!Washing vehicle by handIt is important to first soften the dirt with plenty of water and rinse it off as thor-
oughly as possible before washing your vehicle by hand.
One should then clean the vehicle using a soft washing sponge, washing glove or
a washing brush and only slight pressure. Work from the top to the bottom -
beginning with the roof. Only place slight pressure on the vehicle paintwork during
cleaning Only use a car shampoo for stubborn dirt.
Wash out the sponge or washing glove thoroughly at short intervals.
Clean wheels, door sills and similar parts last. Use a second sponge for such areas.Rinse off the vehicle well after giving it a wash and dry it off using a chamois leather.
WARNING
•
The ignition should always be switched off when you wash your vehicle -
risk of accident!
•
Protect your hands and arms from sharp-edged metal parts when you
are cleaning the underfloor, the inside of the wheel housings or the wheel
trims - risk of cuts.Caution
•
Do not wash your vehicle in bright sunlight - risk of paint damage.
•
Ensure that the jet of water is not aimed directly at the locking cylinders or at the
door and panel joints if you spray your vehicle in winter down with a hose - risk of
freezing.
•
Do not use any insect sponges, rough kitchen sponges or similar cleaning prod-
ucts - risk of damage to the surface of paintwork.For the sake of the environment
Only wash your vehicle at washing bays specifically reserved for this purpose. This
ensures that no water which may be contaminated by oil flows into the sewage
system. It is not even permitted to wash your vehicle in certain areas except at such
specific washing bays.Washing with a high-pressure cleanerWhen you wash your vehicle with a high-pressure cleaner, it is essential to comply
with the instructions for use of the cleaning equipment. This applies in particular to
the pressure used and to the spraying distance. Maintain a sufficiently large
distance to soft materials such as rubber hoses or insulation material.
On no account use circular spray nozzles or so-called dirt cutters.
s29g.4.book Page 174 Wednesday, June 17, 2009 9:54 AM
Page 191 of 263
Inspecting and replenishing 190If the coolant level in the reservoir is too low, this is indicated by the warning light
in the instrument cluster
⇒page 32. We nevertheless recommend inspecting
the coolant level directly at the reservoir from time to time.
Loss of coolant
A loss of coolant is first and foremost an indication of a leak in the system. You
should not merely top up the coolant in the reservoir. It is also important to have
the cooling system inspected without delay by a specialist garage.
Losses can only occur through the pressure relief in the cap of the coolant expan-
sion bottle which is completely free of leaks if the coolant boils as a result of over-
heating and is forced out of the cooling system.
WARNING
Read and observe the warning notes ⇒page 185, “Working in the engine
compartment” before working in the engine compartment.
Caution
One should contact a specialist garage as soon as possible if the source of over-
heating itself cannot be determined and removed, since there may be grave
damage to the engine.Replenishing the coolant– Switch the engine off.
– Allow the engine to cool down.
– Place a cloth over the cap of the coolant expansion reservoir
⇒page 189, fig. 179 and unscrew the cap carefully by turning it to the
left ⇒.
– Top up the coolant.
– Screw the cap tight until it is heard to lock.
The coolant which you use for replenishing the system, must comply with one
specific specification ⇒page 189, “Coolant”. Do not use an alternative additive if
the coolant additive G12 PLUS is not available in exceptional cases. Just top up the
system with water and as soon as possible arrange adjustment to correct the mixing
ratio of water and coolant additive again by a specialist garage.
Only use fresh coolant for topping up the system.
Do not fill up over the “MAX” marking! Excess coolant which is heated up is forced
out of the cooling system through the pressure relief valve in the cap of the coolant
compensation bottle.
Wait until the engine has cooled down for a system which has suffered a major loss
of coolant before pouring in coolant. This is necessary to avoid engine damage.
WARNING
•
The cooling system is pressurized! Do not open the cap of the coolant
expansion bottle if the engine is still hot - risk of scalding!
•
The coolant additive and thus all of the coolant is harmful to your health.
Avoid contact with the coolant. Coolant vapours are also harmful to the
health. It is important, therefore, to always safely store any coolant additive
in its original container out of the reach of children - risk of poisoning!
•
If any splashes of coolant get into your eyes, rinse out your eyes immedi-
ately with clear water and contact a doctor as soon as possible.
•
You should also consult a doctor without delay if you have inadvertently
swallowed coolant.Caution
Do not continue your journey if for some reason it is not possible under the
conditions prevailing to top up with coolant. Switch the engine off and obtain
professional assistance from a specialist garage, otherwise it could lead to severe
engine damage.
s29g.4.book Page 190 Wednesday, June 17, 2009 9:54 AM