wheel SKODA ROOMSTER 2009 1.G Owner's Manual
[x] Cancel search | Manufacturer: SKODA, Model Year: 2009, Model line: ROOMSTER, Model: SKODA ROOMSTER 2009 1.GPages: 263, PDF Size: 32.25 MB
Page 4 of 263
Contents3
Using the system
Safety
Driving Tips
General Maintenance
Breakdown assistance
Praktik
Technical Data
ContentsLayout of this Owner's Manual
(explanations)
. . . . . . . . . . . . . . . . . . . . . . . . . .
Using the system
. . . . . . . . . . . . . . . . . . . . . .
Cockpit
. . . . . . . . . . . . . . . . . . . . . . . . . . . . . . . . . . . . . . . .
General view . . . . . . . . . . . . . . . . . . . . . . . . . . . . . . . . .
The brief instruction
. . . . . . . . . . . . . . . . . . . . . . . . . .
Basic functions and important information . . . . .
Instruments and Indicator/Warning Lights
. . .
General view of the instrument cluster . . . . . . . . .
Engine revolutions counter . . . . . . . . . . . . . . . . . . . .
Coolant temperature gauge* . . . . . . . . . . . . . . . . . .
Fuel gauge* . . . . . . . . . . . . . . . . . . . . . . . . . . . . . . . . . .
Counter for distance driven . . . . . . . . . . . . . . . . . . .
Service Interval Display . . . . . . . . . . . . . . . . . . . . . . .
Digital clock . . . . . . . . . . . . . . . . . . . . . . . . . . . . . . . . . .
Multi-functional indicator (onboard computer)*
Information display* . . . . . . . . . . . . . . . . . . . . . . . . . .
Auto Check Control . . . . . . . . . . . . . . . . . . . . . . . . . . .
Warning lights . . . . . . . . . . . . . . . . . . . . . . . . . . . . . . . .
Unlocking and locking
. . . . . . . . . . . . . . . . . . . . . . . .
Key . . . . . . . . . . . . . . . . . . . . . . . . . . . . . . . . . . . . . . . . . .
Locking . . . . . . . . . . . . . . . . . . . . . . . . . . . . . . . . . . . . . .
Child safety lock . . . . . . . . . . . . . . . . . . . . . . . . . . . . . .
Central locking system* . . . . . . . . . . . . . . . . . . . . . . .
Remote control* . . . . . . . . . . . . . . . . . . . . . . . . . . . . . .
Anti-theft alarm system* . . . . . . . . . . . . . . . . . . . . . .
Interior monitor* and towing protection
monitoring* . . . . . . . . . . . . . . . . . . . . . . . . . . . . . . . . . .
Electrical power windows* . . . . . . . . . . . . . . . . . . . .
Panorama roof* . . . . . . . . . . . . . . . . . . . . . . . . . . . . . .
Lights and Visibility
. . . . . . . . . . . . . . . . . . . . . . . . . . .
Lights . . . . . . . . . . . . . . . . . . . . . . . . . . . . . . . . . . . . . . . .
Interior lighting . . . . . . . . . . . . . . . . . . . . . . . . . . . . . . .
Visibility . . . . . . . . . . . . . . . . . . . . . . . . . . . . . . . . . . . . .
Windshield wiper and wash system . . . . . . . . . . . .
Rear mirror . . . . . . . . . . . . . . . . . . . . . . . . . . . . . . . . . .
Seats and Storage
. . . . . . . . . . . . . . . . . . . . . . . . . . . . .
Front seats . . . . . . . . . . . . . . . . . . . . . . . . . . . . . . . . . . .
Head restraints . . . . . . . . . . . . . . . . . . . . . . . . . . . . . . .
Heating the front seats* . . . . . . . . . . . . . . . . . . . . . . .
Rear seats . . . . . . . . . . . . . . . . . . . . . . . . . . . . . . . . . . . .
Pedals . . . . . . . . . . . . . . . . . . . . . . . . . . . . . . . . . . . . . . .
luggage compartment . . . . . . . . . . . . . . . . . . . . . . . .
Variable loading floor* . . . . . . . . . . . . . . . . . . . . . . . .
Bicycle carrier* . . . . . . . . . . . . . . . . . . . . . . . . . . . . . . .
The roof luggage rack system* . . . . . . . . . . . . . . . . .
Front cup holder . . . . . . . . . . . . . . . . . . . . . . . . . . . . .
Rear cup holder* . . . . . . . . . . . . . . . . . . . . . . . . . . . . .
Note holder . . . . . . . . . . . . . . . . . . . . . . . . . . . . . . . . . .
Ashtray* . . . . . . . . . . . . . . . . . . . . . . . . . . . . . . . . . . . . .
Cigarette lighter* and power sockets* . . . . . . . . . .
Storage compartments . . . . . . . . . . . . . . . . . . . . . . . .
Heating and air conditioning system
. . . . . . . . .
Air outlet vents . . . . . . . . . . . . . . . . . . . . . . . . . . . . . . .
Recirculated air mode . . . . . . . . . . . . . . . . . . . . . . . .
Heating . . . . . . . . . . . . . . . . . . . . . . . . . . . . . . . . . . . . . .
Climatic (semi-automatic air conditioning
system)* . . . . . . . . . . . . . . . . . . . . . . . . . . . . . . . . . . . . .
Climatronic (automatic air conditioning)* . . . . . .
Starting-off and Driving
. . . . . . . . . . . . . . . . . . . . . . .
Setting steering wheel position . . . . . . . . . . . . . . . .
Ignition lock . . . . . . . . . . . . . . . . . . . . . . . . . . . . . . . . . .
Starting the engine . . . . . . . . . . . . . . . . . . . . . . . . . . . Switching off the engine . . . . . . . . . . . . . . . . . . . . . .
Shifting (manual gearbox) . . . . . . . . . . . . . . . . . . . . .
Handbrake . . . . . . . . . . . . . . . . . . . . . . . . . . . . . . . . . . .
Parking aid* . . . . . . . . . . . . . . . . . . . . . . . . . . . . . . . . . .
Cruise control system (CCS)* . . . . . . . . . . . . . . . . . .
Automatic gearbox
. . . . . . . . . . . . . . . . . . . . . . . . . . .
6-speed automatic gearbox* . . . . . . . . . . . . . . . . . .
Communication
. . . . . . . . . . . . . . . . . . . . . . . . . . . . . .
Operating the radio . . . . . . . . . . . . . . . . . . . . . . . . . . .
Radio and mobile phone operation . . . . . . . . . . . .
Universal telephone preinstallation with voice
control* . . . . . . . . . . . . . . . . . . . . . . . . . . . . . . . . . . . . .
Inserting the mobile phone with the adapter* . .
Mobile phone operation . . . . . . . . . . . . . . . . . . . . . .
Voice commands . . . . . . . . . . . . . . . . . . . . . . . . . . . . .
Enter PIN code . . . . . . . . . . . . . . . . . . . . . . . . . . . . . . .
Dial number . . . . . . . . . . . . . . . . . . . . . . . . . . . . . . . . .
Repeat last call . . . . . . . . . . . . . . . . . . . . . . . . . . . . . . .
Phone voice phonebook* . . . . . . . . . . . . . . . . . . . . .
Bluetooth®* . . . . . . . . . . . . . . . . . . . . . . . . . . . . . . . . .
Mobile phones and two-way radio system . . . . .
Input AUX-IN* . . . . . . . . . . . . . . . . . . . . . . . . . . . . . . .
CD changer* . . . . . . . . . . . . . . . . . . . . . . . . . . . . . . . . .
Safety
. . . . . . . . . . . . . . . . . . . . . . . . . . . . . . . . . . . . . .
Passive Safety
. . . . . . . . . . . . . . . . . . . . . . . . . . . . . . . . .
Basic information . . . . . . . . . . . . . . . . . . . . . . . . . . . .
Correct seated position . . . . . . . . . . . . . . . . . . . . . . .
Seat belts
. . . . . . . . . . . . . . . . . . . . . . . . . . . . . . . . . . . . . .
Why seat belts? . . . . . . . . . . . . . . . . . . . . . . . . . . . . . .
The physical principle of a frontal collision . . . . . 6
9
11
11
12
12
18
18
18
19
19
20
20
22
22
25
27
29
39
39
41
41
42
46
48
49
49
5253
53
57
58
59
62
63
63
64
65
66
70
70
74
77
79
80
81
81
81
82
83
89
89
89
90
92
95
99
99
100
100102
102
103
103
104
107
107
112
112
113
114
115
116
117
117
118
118
119
121
122
123
123
127
127
127
128
132
132
133
s29g.4.book Page 3 Wednesday, June 17, 2009 9:54 AM
Page 5 of 263
Contents 4Important safety information regarding the use of seat
belts . . . . . . . . . . . . . . . . . . . . . . . . . . . . . . . . . . . . . . . . .
How are seat belts correctly fastened? . . . . . . . . . .
Belt tensioner . . . . . . . . . . . . . . . . . . . . . . . . . . . . . . . . Airbag system
. . . . . . . . . . . . . . . . . . . . . . . . . . . . . . . . .
Description of the airbag system . . . . . . . . . . . . . . .
Front airbags . . . . . . . . . . . . . . . . . . . . . . . . . . . . . . . . .
Side airbags* . . . . . . . . . . . . . . . . . . . . . . . . . . . . . . . . .
Head airbags* . . . . . . . . . . . . . . . . . . . . . . . . . . . . . . . .
Deactivating airbags . . . . . . . . . . . . . . . . . . . . . . . . . .
Transporting children safely
. . . . . . . . . . . . . . . . . .
What you should know about transporting children!
Child seat . . . . . . . . . . . . . . . . . . . . . . . . . . . . . . . . . . . .
Attaching a child seat using the “ISOFIX” system*
Attaching child seat using the “Top Tether” system
Driving Tips
. . . . . . . . . . . . . . . . . . . . . . . . . . . . . .
Intelligent Technology
. . . . . . . . . . . . . . . . . . . . . . . .
Electronic stability programme (ESP)* . . . . . . . . . .
Brakes . . . . . . . . . . . . . . . . . . . . . . . . . . . . . . . . . . . . . . .
Brake booster . . . . . . . . . . . . . . . . . . . . . . . . . . . . . . . .
Antilock brake system (ABS)* . . . . . . . . . . . . . . . . . .
Brake Assist* . . . . . . . . . . . . . . . . . . . . . . . . . . . . . . . . .
Electrohydraulic power steering . . . . . . . . . . . . . . .
Tyre inflation pressure-control system* . . . . . . . . .
Diesel particle filter* (diesel engine) . . . . . . . . . . . .
Driving and the Environment
. . . . . . . . . . . . . . . . .
The first 1 500 kilometres and then afterwards . .
Catalytic converter . . . . . . . . . . . . . . . . . . . . . . . . . . . .
Driving in an economical and environmentally
conscious manner . . . . . . . . . . . . . . . . . . . . . . . . . . . .
Environmental compatibility . . . . . . . . . . . . . . . . . . .
Motoring abroad . . . . . . . . . . . . . . . . . . . . . . . . . . . . .
Avoiding damage to your vehicle . . . . . . . . . . . . . .
To w i n g a t r a i l e r
. . . . . . . . . . . . . . . . . . . . . . . . . . . . . . . .
Towing a trailer . . . . . . . . . . . . . . . . . . . . . . . . . . . . . . .
General Maintenance
. . . . . . . . . . . . . . .
Taking care of your vehicle and cleaning the
vehicle
. . . . . . . . . . . . . . . . . . . . . . . . . . . . . . . . . . . . . . . . .
General . . . . . . . . . . . . . . . . . . . . . . . . . . . . . . . . . . . . . .
Care of the exterior of vehicle . . . . . . . . . . . . . . . . . .
Care of the interior of vehicle . . . . . . . . . . . . . . . . . .
Fuel
. . . . . . . . . . . . . . . . . . . . . . . . . . . . . . . . . . . . . . . . . . . .
Petrol . . . . . . . . . . . . . . . . . . . . . . . . . . . . . . . . . . . . . . . .
Diesel . . . . . . . . . . . . . . . . . . . . . . . . . . . . . . . . . . . . . . . .
Refuelling . . . . . . . . . . . . . . . . . . . . . . . . . . . . . . . . . . . .
Inspecting and replenishing
. . . . . . . . . . . . . . . . . .
Engine compartment . . . . . . . . . . . . . . . . . . . . . . . . .
Engine oil . . . . . . . . . . . . . . . . . . . . . . . . . . . . . . . . . . . .
Cooling system . . . . . . . . . . . . . . . . . . . . . . . . . . . . . . .
Brake fluid . . . . . . . . . . . . . . . . . . . . . . . . . . . . . . . . . . .
Battery . . . . . . . . . . . . . . . . . . . . . . . . . . . . . . . . . . . . . . .
Windshield washer system . . . . . . . . . . . . . . . . . . . .
Wheels and Tyres
. . . . . . . . . . . . . . . . . . . . . . . . . . . . . .
Wheels . . . . . . . . . . . . . . . . . . . . . . . . . . . . . . . . . . . . . .
Accessories, changes and replacement of partsAccessories and replacement parts . . . . . . . . . . . . .
Technical changes . . . . . . . . . . . . . . . . . . . . . . . . . . . .
Vehicles of the group N1 . . . . . . . . . . . . . . . . . . . . . .Breakdown assistance
. . . . . . . . . . . . . .
Breakdown assistance
. . . . . . . . . . . . . . . . . . . . . . . .
First-aid box* and Warning triangle* . . . . . . . . . . .
Fire extinguisher* . . . . . . . . . . . . . . . . . . . . . . . . . . . . .
Vehicle tool kit . . . . . . . . . . . . . . . . . . . . . . . . . . . . . . . .
Tyre repair kit* . . . . . . . . . . . . . . . . . . . . . . . . . . . . . . . .
Spare wheel* . . . . . . . . . . . . . . . . . . . . . . . . . . . . . . . . .
Changing a wheel . . . . . . . . . . . . . . . . . . . . . . . . . . . . .
Jump-starting . . . . . . . . . . . . . . . . . . . . . . . . . . . . . . . .
Tow-starting and towing vehicle . . . . . . . . . . . . . . .
Fuses and light bulbs
. . . . . . . . . . . . . . . . . . . . . . . . . .
Electric fuses . . . . . . . . . . . . . . . . . . . . . . . . . . . . . . . . .
Bulbs . . . . . . . . . . . . . . . . . . . . . . . . . . . . . . . . . . . . . . . .
Praktik
. . . . . . . . . . . . . . . . . . . . . . . . . . . . . . . . . . . . . .
Praktik
. . . . . . . . . . . . . . . . . . . . . . . . . . . . . . . . . . . . . . . . .
Lashing eyes . . . . . . . . . . . . . . . . . . . . . . . . . . . . . . . . . .
Adjustable safety partition behind the front seats
Fixing of the loading floor . . . . . . . . . . . . . . . . . . . . . .
Adjustment of the safety partition . . . . . . . . . . . . . .
Emergency unlocking of the loading area door . .
Technical Data
. . . . . . . . . . . . . . . . . . . . . . . . . .
Technical Data
. . . . . . . . . . . . . . . . . . . . . . . . . . . . . . . . .
General information . . . . . . . . . . . . . . . . . . . . . . . . . . .
Used abbreviations . . . . . . . . . . . . . . . . . . . . . . . . . . .
Performances . . . . . . . . . . . . . . . . . . . . . . . . . . . . . . . . .
Weight . . . . . . . . . . . . . . . . . . . . . . . . . . . . . . . . . . . . . . .
Identification details . . . . . . . . . . . . . . . . . . . . . . . . . .
Fuel consumption according to the regulations
(99/100/EU) . . . . . . . . . . . . . . . . . . . . . . . . . . . . . . . . . .
Dimensions . . . . . . . . . . . . . . . . . . . . . . . . . . . . . . . . . .
Engine oil specifications . . . . . . . . . . . . . . . . . . . . . . .
1.2 ltr./51 kW - EU 4/EU 2DDK . . . . . . . . . . . . . . . . .
1.4 ltr./63 kW - EU 4/EU 2DDK . . . . . . . . . . . . . . . . .
1.6 ltr./77 kW - EU 4/EU 2DDK . . . . . . . . . . . . . . . . .
1.4 ltr./51 kW TDI PD - EU 4 . . . . . . . . . . . . . . . . . . . .
1.4 ltr./59 kW TDI PD - EU 4 . . . . . . . . . . . . . . . . . . . .
1.9 ltr./77 kW TDI°PD - EU°4 . . . . . . . . . . . . . . . . . . .
Roomster - Vehicles of the group N1 . . . . . . . . . . .
Scout - Vehicles of the group N1 . . . . . . . . . . . . . . .
Index
. . . . . . . . . . . . . . . . . . . . . . . . . . . . . . . . . . . . . . . . 133
134
136
138
138
139
142
143
145
147
147
150
153
154
155
155
155
158
158
159
159
160
160
162
163
163
164
164
167
168
169
170
170173
173
173
173
178
181
181
181
182
184
184
187
189
191
192
196
198
198
204
204
204
205
207
207
207
207
208
208
208
209
213
215218
218
223
229
229
229
229
230
230
231
233
233
233
233
233
233
233
234
235
236
237
239
241
243
245
247
249
249
251
s29g.4.book Page 4 Wednesday, June 17, 2009 9:54 AM
Page 12 of 263
Cockpit11
Using the system
Safety
Driving Tips
General Maintenance
Breakdown assistance
Praktik
Technical Data
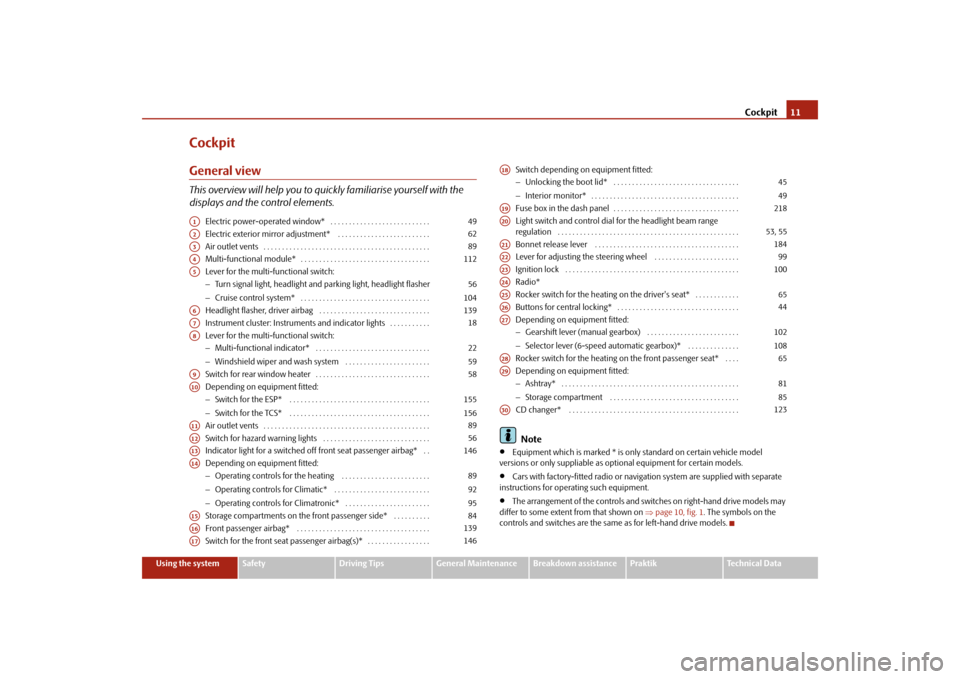
CockpitGeneral viewThis overview will help you to quickly familiarise yourself with the
displays and the control elements.
Electric power-operated window* . . . . . . . . . . . . . . . . . . . . . . . . . . .
Electric exterior mirror adjustment* . . . . . . . . . . . . . . . . . . . . . . . . .
Air outlet vents . . . . . . . . . . . . . . . . . . . . . . . . . . . . . . . . . . . . . . . . . . . . .
Multi-functional module* . . . . . . . . . . . . . . . . . . . . . . . . . . . . . . . . . . .
Lever for the multi-functional switch:
−Turn signal light, headlight and parking light, headlight flasher
−Cruise control system* . . . . . . . . . . . . . . . . . . . . . . . . . . . . . . . . . . .
Headlight flasher, driver airbag . . . . . . . . . . . . . . . . . . . . . . . . . . . . . .
Instrument cluster: Instruments and indicator lights . . . . . . . . . . .
Lever for the multi-functional switch:
−Multi-functional indicator* . . . . . . . . . . . . . . . . . . . . . . . . . . . . . . .
−Windshield wiper and wash system . . . . . . . . . . . . . . . . . . . . . . .
Switch for rear window heater . . . . . . . . . . . . . . . . . . . . . . . . . . . . . . .
Depending on equipment fitted:
−Switch for the ESP* . . . . . . . . . . . . . . . . . . . . . . . . . . . . . . . . . . . . . .
−Switch for the TCS* . . . . . . . . . . . . . . . . . . . . . . . . . . . . . . . . . . . . . .
Air outlet vents . . . . . . . . . . . . . . . . . . . . . . . . . . . . . . . . . . . . . . . . . . . . .
Switch for hazard warning lights . . . . . . . . . . . . . . . . . . . . . . . . . . . . .
Indicator light for a switched off front seat passenger airbag* . .
Depending on equipment fitted:
−Operating controls for the heating . . . . . . . . . . . . . . . . . . . . . . . .
−Operating controls for Climatic* . . . . . . . . . . . . . . . . . . . . . . . . . .
−Operating controls for Climatronic* . . . . . . . . . . . . . . . . . . . . . . .
Storage compartments on the front passenger side* . . . . . . . . . .
Front passenger airbag* . . . . . . . . . . . . . . . . . . . . . . . . . . . . . . . . . . . .
Switch for the front seat passenger airbag(s)* . . . . . . . . . . . . . . . . . Switch depending on equipment fitted:
−Unlocking the boot lid* . . . . . . . . . . . . . . . . . . . . . . . . . . . . . . . . . .
−Interior monitor* . . . . . . . . . . . . . . . . . . . . . . . . . . . . . . . . . . . . . . . .
Fuse box in the dash panel . . . . . . . . . . . . . . . . . . . . . . . . . . . . . . . . . .
Light switch and control dial for the headlight beam range
regulation . . . . . . . . . . . . . . . . . . . . . . . . . . . . . . . . . . . . . . . . . . . . . . . . .
Bonnet release lever . . . . . . . . . . . . . . . . . . . . . . . . . . . . . . . . . . . . . . .
Lever for adjusting the steering wheel . . . . . . . . . . . . . . . . . . . . . . .
Ignition lock . . . . . . . . . . . . . . . . . . . . . . . . . . . . . . . . . . . . . . . . . . . . . . .
Radio*
Rocker switch for the heating on the driver's seat* . . . . . . . . . . . .
Buttons for central locking* . . . . . . . . . . . . . . . . . . . . . . . . . . . . . . . . .
Depending on equipment fitted:
−Gearshift lever (manual gearbox) . . . . . . . . . . . . . . . . . . . . . . . . .
−Selector lever (6-speed automatic gearbox)* . . . . . . . . . . . . . .
Rocker switch for the heating on the front passenger seat* . . . .
Depending on equipment fitted:
−Ashtray* . . . . . . . . . . . . . . . . . . . . . . . . . . . . . . . . . . . . . . . . . . . . . . . .
−Storage compartment . . . . . . . . . . . . . . . . . . . . . . . . . . . . . . . . . . .
CD changer* . . . . . . . . . . . . . . . . . . . . . . . . . . . . . . . . . . . . . . . . . . . . . .
Note
•
Equipment which is marked * is only standard on certain vehicle model
versions or only suppliable as optional equipment for certain models.
•
Cars with factory-fitted radio or navigation system are supplied with separate
instructions for operating such equipment.
•
The arrangement of the controls and switches on right-hand drive models may
differ to some extent from that shown on ⇒page 10, fig. 1. The symbols on the
controls and switches are the same as for left-hand drive models.
A1
49
A2
62
A3
89
A4
112
A5
56
104
A6
139
A7
18
A8
22
59
A9
58
A10
155
156
A11
89
A12
56
A13
146
A14
89
92
95
A15
84
A16
139
A17
146
A18
45
49
A19
218
A20
53, 55
A21
184
A22
99
A23
100
A24A25
65
A26
44
A27
102
108
A28
65
A29
81
85
A30
123
s29g.4.book Page 11 Wednesday, June 17, 2009 9:54 AM
Page 13 of 263
The brief instruction 12The brief instructionBasic functions and important informationIntroduction
The chapter of the brief instruction is only used as a quick reference
of the most important operating elements of the vehicle. It is neces-
sary to observe all the information which is contained in the
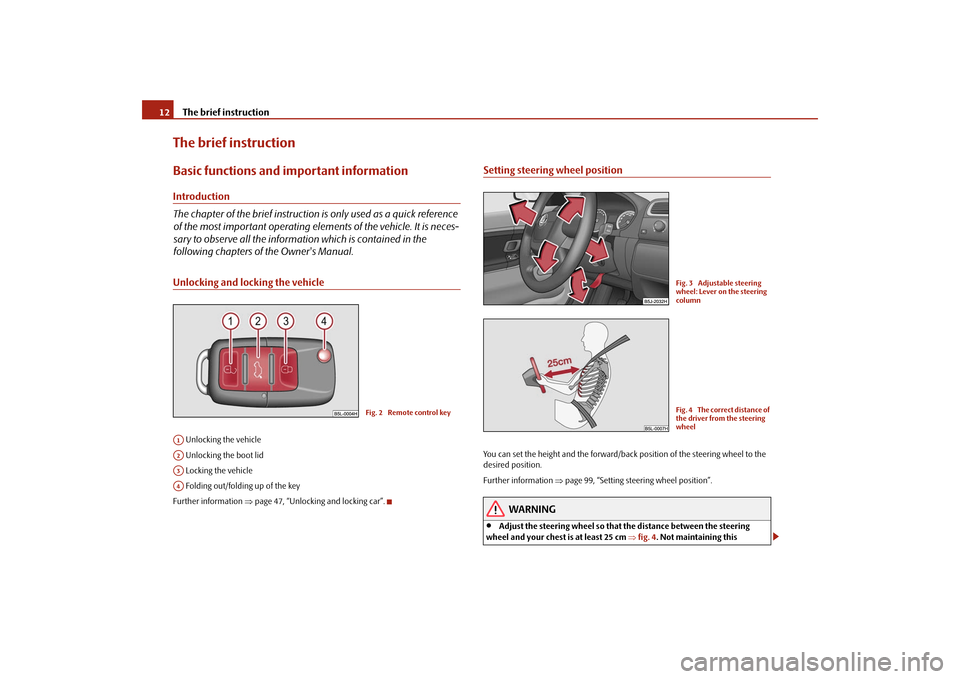
following chapters of the Owner's Manual.Unlocking and locking the vehicle Unlocking the vehicle
Unlocking the boot lid
Locking the vehicle
Folding out/folding up of the key
Further information ⇒page 47, “Unlocking and locking car”.
Setting steering wheel positionYou can set the height and the forward/back position of the steering wheel to the
desired position.
Further information ⇒page 99, “Setting steering wheel position”.
WARNING
•
Adjust the steering wheel so that the distance between the steering
wheel and your chest is at least 25 cm ⇒fig. 4. Not maintaining this
Fig. 2 Remote control key
A1A2A3A4
Fig. 3 Adjustable steering
wheel: Lever on the steering
columnFig. 4 The correct distance of
the driver from the steering
wheel
s29g.4.book Page 12 Wednesday, June 17, 2009 9:54 AM
Page 14 of 263
The brief instruction13
Using the system
Safety
Driving Tips
General Maintenance
Breakdown assistance
Praktik
Technical Data minimum distance will mean that the airbag system will not be able to prop-
erly protect you - hazard!
•
You must not adjust the steering wheel when the vehicle is moving!
•
For safety reasons the lever must always be firmly pushed up to avoid the
steering wheel altering its position unintentionally when driving - risk of
accident!
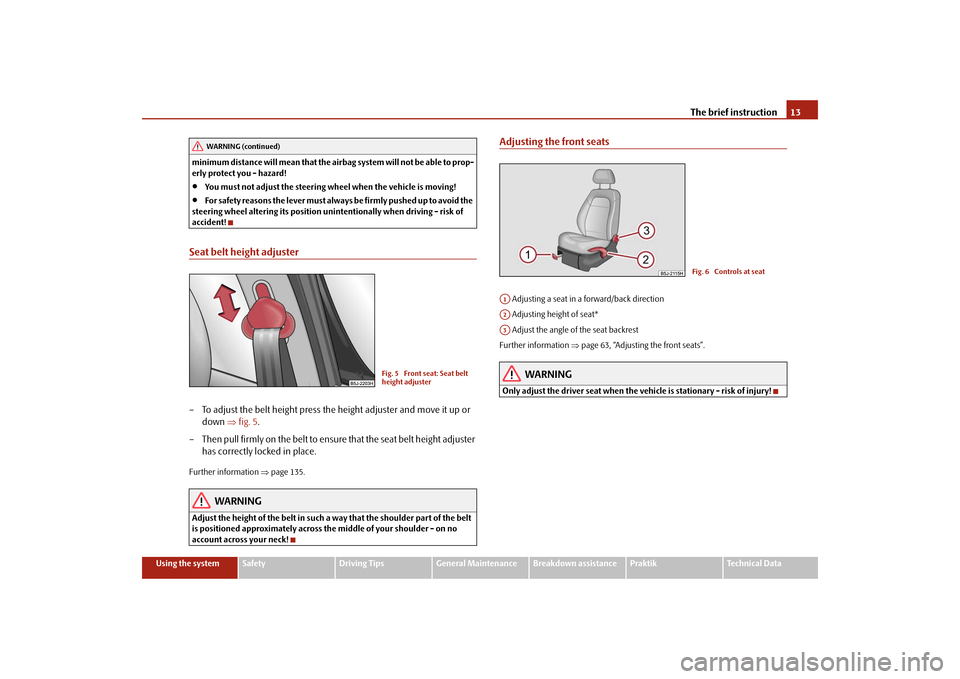
Seat belt height adjuster– To adjust the belt height press the height adjuster and move it up or
down ⇒fig. 5.
– Then pull firmly on the belt to ensure that the seat belt height adjuster
has correctly locked in place.Further information ⇒page 135.
WARNING
Adjust the height of the belt in such a way that the shoulder part of the belt
is positioned approximately across the middle of your shoulder - on no
account across your neck!
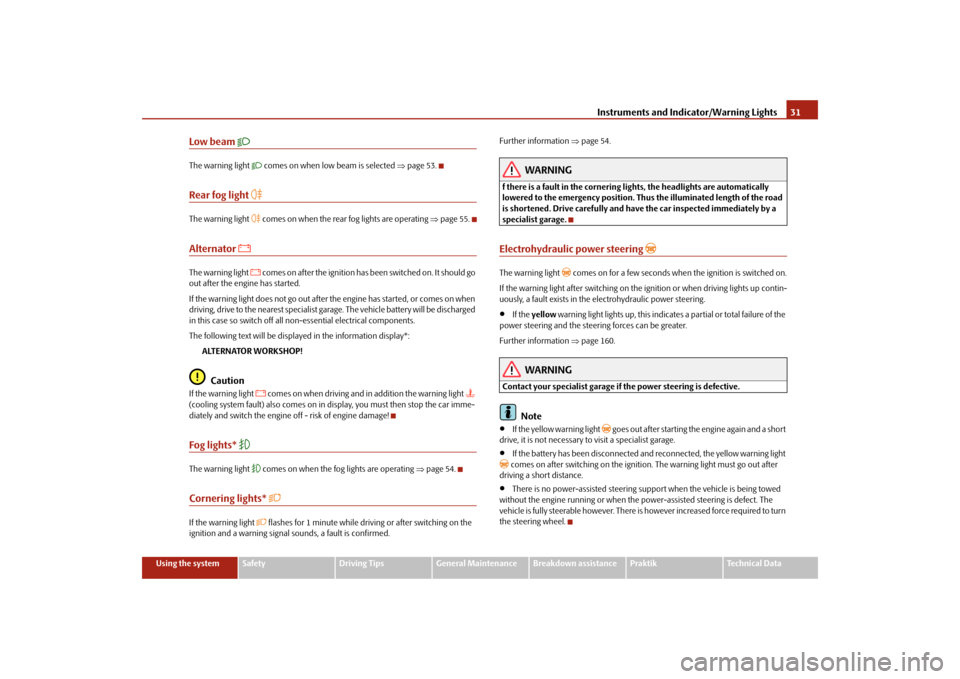
Adjusting the front seats Adjusting a seat in a forward/back direction
Adjusting height of seat*
Adjust the angle of the seat backrest
Further information ⇒page 63, “Adjusting the front seats”.
WARNING
Only adjust the driver seat when the vehicle is stationary - risk of injury!
WARNING (continued)
Fig. 5 Front seat: Seat belt
height adjuster
Fig. 6 Controls at seat
A1A2A3
s29g.4.book Page 13 Wednesday, June 17, 2009 9:54 AM
Page 32 of 263
Instruments and Indicator/Warning Lights31
Using the system
Safety
Driving Tips
General Maintenance
Breakdown assistance
Praktik
Technical Data
Low beam
The warning light
comes on when low beam is selected ⇒page 53.
Rear fog light
The warning light
comes on when the rear fog lights are operating ⇒page 55.
Alternator
The warning light
comes on after the ignition has been switched on. It should go
out after the engine has started.
If the warning light does not go out after the engine has started, or comes on when
driving, drive to the nearest specialist garage. The vehicle battery will be discharged
in this case so switch off all non-essential electrical components.
The following text will be displayed in the information display*:
ALTERNATOR WORKSHOP!
Caution
If the warning light
comes on when driving and in addition the warning light
(cooling system fault) also comes on in display, you must then stop the car imme-
diately and switch the engine off - risk of engine damage!
Fog lights*
The warning light
comes on when the fog lights are operating ⇒page 54.
Cornering lights*
If the warning light
flashes for 1 minute while driving or after switching on the
ignition and a warning signal sounds, a fault is confirmed.Further information ⇒page 54.
WARNING
f there is a fault in the cornering lights, the headlights are automatically
lowered to the emergency position. Thus the illuminated length of the road
is shortened. Drive carefully and have the car inspected immediately by a
specialist garage.Electrohydraulic power steering
The warning light
comes on for a few seconds when the ignition is switched on.
If the warning light after switching on the ignition or when driving lights up contin-
uously, a fault exists in the electrohydraulic power steering.
•
If the yellow warning light lights up, this indicates a partial or total failure of the
power steering and the steering forces can be greater.
Further information ⇒page 160.
WARNING
Contact your specialist garage if the power steering is defective.
Note
•
If the yellow warning light
goes out after starting the engine again and a short
drive, it is not necessary to visit a specialist garage.
•
If the battery has been disconnected and reconnected, the yellow warning light
comes on after switching on the ignition. The warning light must go out after
driving a short distance.•
There is no power-assisted steering support when the vehicle is being towed
without the engine running or when the power-assisted steering is defect. The
vehicle is fully steerable however. There is however increased force required to turn
the steering wheel.
s29g.4.book Page 31 Wednesday, June 17, 2009 9:54 AM
Page 37 of 263
Instruments and Indicator/Warning Lights 36Further information about ABS ⇒page 159, “Antilock brake system (ABS)*”.
A fault in the entire brake system
If the ABS warning light
comes on together with the brake system warning light
(handbrake must be released), there is a fault not only in the ABS but also in
another part of the brake system ⇒.
The following text will be displayed in the information display*:
STOP BRAKE FAULT OWNER'S MANUAL!
WARNING
•
If the brake system warning light
comes on together with the ABS
warning light
stop the vehicle immediately and check the brake fluid
level in the reservoir ⇒page 191, “Brake fluid”. If the fluid level has dropped
below the MIN marking, do not drive any further - risk of accident! Obtain
professional assistance.
•
Pay attention to the following instructions before checking the brake
fluid level and opening the bonnet ⇒page 185, “Working in the engine
compartment”.
•
If the brake fluid is at the correct level, the ABS control function has
failed. The rear wheels may then block very rapidly when braking. In certain
circumstances, this can result in the rear end of the car breaking away - risk
of skidding! Drive carefully to the nearest specialist garage and have the
fault rectified.
Brake system
The warning light
flashes or comes on if the brake fluid level is too low, if there
is a fault in the ABS or if the handbrake is applied.
If the warning light flashes (handbrake is not applied), stop and check the brake
fluid level ⇒.
The following text will be displayed in the information display*:
STOP BRAKE FLUID SERVICE MANUALIf there is a fault in the ABS which also influences the function of the normal brake
system (e.g. distribution of brake pressure), the ABS warning light
comes on
together with the brake system warning light
. Be aware that not only the ABS but
also another part of th brake system is defective ⇒.
3 peeps sound as an additional warning signal.
One should get used to high pedal forces, an extended free play of the brake pedal
and long braking distances when carefully driving to the specialist garage.
The following text will be displayed in the information display*:
STOP BRAKE FAULT OWNER'S MANUAL!
For further information on the brake system ⇒page 158, “Brakes”.
Handbrake applied
The warning light
also comes on if the handbrake is applied. An audible warning
is also given if you drive the vehicle for at least 3 seconds at a speed of more than 6
km/h.
The following text will be displayed in the information display*:
HANDBRAKE ON
WARNING
•
Pay attention to the following instructions before checking the brake
fluid level and opening the bonnet ⇒page 185, “Working in the engine
compartment”.
•
If the brake system warning light
does not go out a few seconds after
switching on the ignition or comes on when driving, stop immediately and
check the brake fluid in the reservoir ⇒page 191, “Brake fluid”. If the fluid
level has dropped below the MIN marking, do not drive any further - risk of
accident! Obtain professional assistance.
Airbag system
Monitoring the airbag system
The warning light
comes on for a few seconds when the ignition is switched on.
s29g.4.book Page 36 Wednesday, June 17, 2009 9:54 AM
Page 56 of 263
Lights and Visibility55
Using the system
Safety
Driving Tips
General Maintenance
Breakdown assistance
Praktik
Technical Data
Fog lights with the function “Corner”*
The fog lights with the function “Corner” improve the illumination of
areas close to the vehicle when turning, parking etc.The fog lights with the function “Corner” are regulated according to the steering
angle or after switching on the turn signal light
4) in the following circumstances:
•
the vehicle is stationary and the engine is running or it moves with a speed of
maximum 40 km/h;
•
the daylight driving lights are not switched on;
•
low beam switched on;
•
no reverse gear engaged;
•
no hazard warning light system switched on.
A fault in the system of the fog lights with the function “Corner” is confirmed by the
warning light lighting up or flashing
.
Note
If the fog lights are switched on, the function of the lights “Corner” is not active.Rear fog light
Switching on the rear fog light
– First of all turn the light switch into position
or
⇒page 54,
fig. 48.
– Pull the light switch out to the second detent . The fog lights* light
up at the same time.
If the vehicle is not fitted with fog lights*, the rear fog light is switched on by turning
the light switch to the position
and is pulled out directly to the position . This
switch does not have two positions, but only one position.The rear fog light warning light
⇒page 29 lights up in the instrument cluster
when the fog light is switched off.
Only the rear fog light of the trailer lights up if the vehicle is fitted with a towing
device from Škoda original accessoriesand when you are towing a trailer which
is fitted with the rear fog light.
Caution
The rear fog light should only be switched on if visibility is particularly poor
(conform with any varying legal provisions) to avoid dazzling vehicles behind your
vehicle.Headlamp range adjustment
Once the low beam is switched on you can then adapt the range of
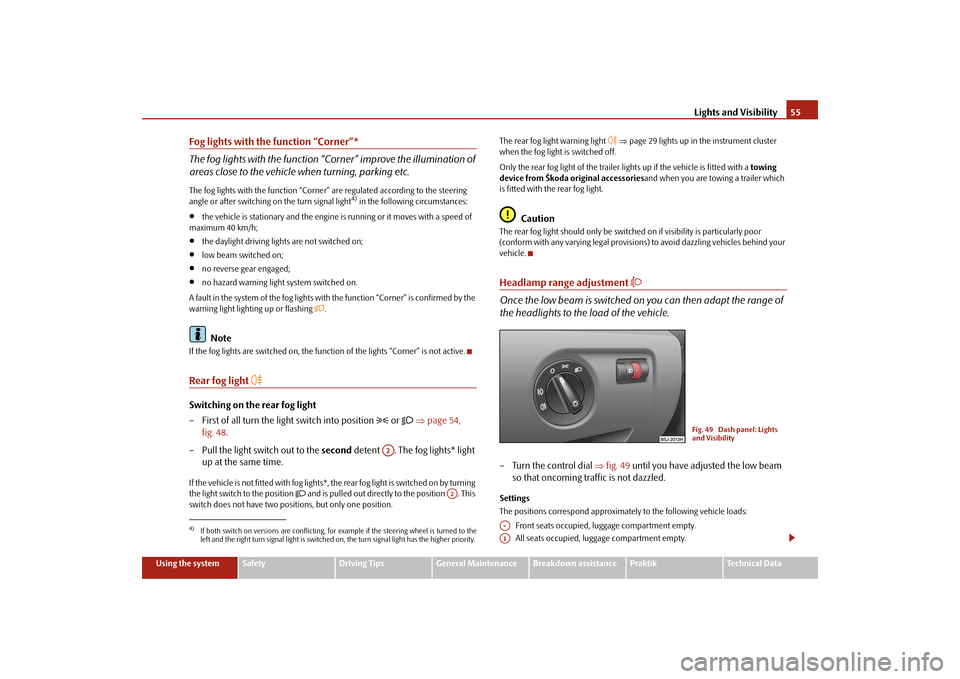
the headlights to the load of the vehicle.– Turn the control dial ⇒fig. 49 until you have adjusted the low beam
so that oncoming traffic is not dazzled.Settings
The positions correspond approximately to the following vehicle loads:
Front seats occupied, luggage compartment empty.
All seats occupied, luggage compartment empty.
4)If both switch on versions are conflicting, for example if the steering wheel is turned to the
left and the right turn signal light is switched on, the turn signal light has the higher priority.
A2
A2
Fig. 49 Dash panel: Lights
and Visibility
A-A1
s29g.4.book Page 55 Wednesday, June 17, 2009 9:54 AM
Page 58 of 263
Lights and Visibility57
Using the system
Safety
Driving Tips
General Maintenance
Breakdown assistance
Praktik
Technical Data
– Push the lever forwards - the main beam and warning light in the
instrument cluster come on.
– Pull the lever back into the initial position in order to switch the main
beam off again.
Headlight flasher
– Pull on the lever of the steering wheel (sprung position) - the main
beam and warning light in the instrument cluster come on.
Parking light
– Switch off the ignition.
– Push the lever up or down - the right-hand or left-hand parking light
is switched on.Information concerning the function of the lights.•
The turn signal system only operates when the ignition is switched on. The
corresponding indicator light
or in the instrument cluster also flashes.
•
The turn signal is automatically cancelled after negotiating a curve.
•
The side light and rear light on the appropriate side of the vehicle are switched
on when the parking light is selected. The parking light function only operates if
the ignition is switched off.
•
An acoustic warning signal will sound when the driver's door is opened if the
lever is not in the middle position after removing the ignition key. The acoustic
warning signal will stop just as soon as the driver's door is closed.Caution
Use main beam or the headlight flasher only if this does not risk dazzling other road
users.
Note
Use only in accordance with the legal requirements the described lighting and
signal systems.
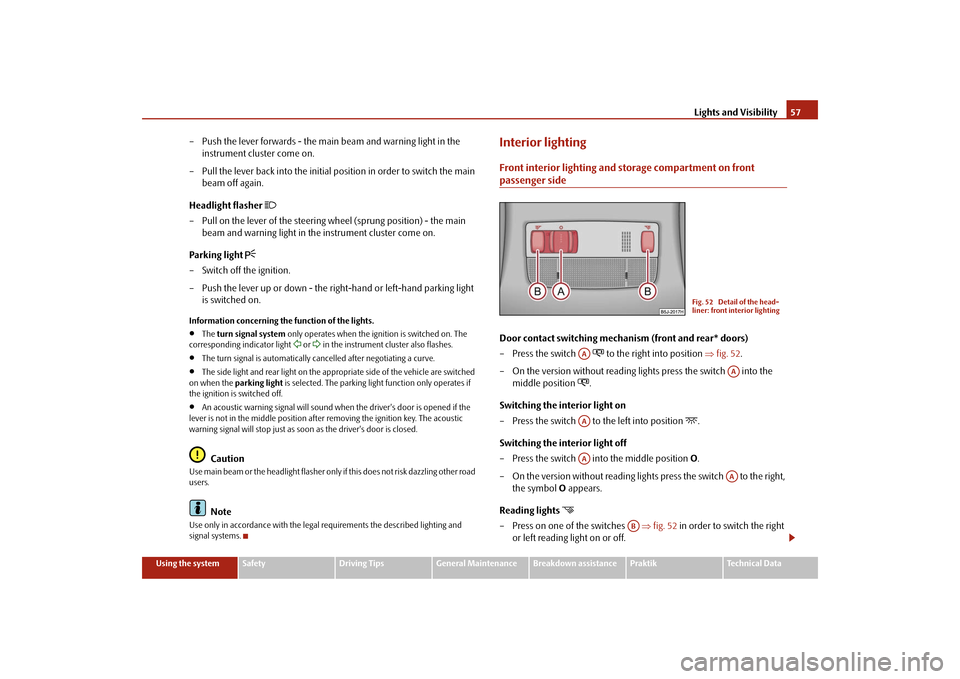
Interior lightingFront interior lighting and storage compartment on front passenger sideDoor contact switching mechanism (front and rear* doors)
– Press the switch
to the right into position ⇒fig. 52.
– On the version without reading lights press the switch into the
middle position
.
Switching the interior light on
– Press the switch to the left into position
.
Switching the interior light off
– Press the switch into the middle position O.
– On the version without reading lights press the switch to the right,
the symbol O appears.
Reading lights
– Press on one of the switches ⇒fig. 52 in order to switch the right
or left reading light on or off.
Fig. 52 Detail of the head-
liner: front interior lighting
AA
AA
AAAA
AA
AB
s29g.4.book Page 57 Wednesday, June 17, 2009 9:54 AM
Page 61 of 263
Lights and Visibility 60
Fast wipe
– Position the lever up into position .
Automatic wipe/wash for windscreen
– Pull the lever towards the steering wheel into position and the
widescreen wiper and wash system will operate - in the sprung posi-
tion.
– Release the lever. The windscreen wash system stops and the wiper
continues for another 1 - 3 wiper strokes (depending on the period of
spraying of the windscreen).
Wiping the rear window pane*
– Push the lever away from the steering wheel into position
⇒page 59, fig. 56, the widescreen wiper will operate every 6 seconds.
Automatic wipe/wash for the rear window pane*
– Push the lever away from the steering wheel into position - the
widescreen wiper and wash system will operate - in the sprung posi-
tion.
– Letting go of the lever will cause the windscreen wash system to stop
and the wiper to continue for another 1 - 3 wiper strokes (depending
on the period of spraying of the windscreen). The lever will stay in
position after releasing it .
Switching windscreen wipers off
– Move the lever back into its home position .The windscreen wipers and the windscreen washer system only operate if the igni-
tion is switched on.
The rear window will be wiped again if the window wipers are on when reverse gear
is selected.
The windscreen washer nozzles are heated* when the ignition is switched on.Top up with wash liquid ⇒page 196.
WARNING
•
Properly maintained windscreen wiper blades are essential for clear visi-
bility and safe driving ⇒page 61.
•
Do not use the windscreen washer system at low temperatures, without
heating the windscreen beforehand. Otherwise the window cleaner could
freeze on the windscreen and restrict the view to the front.
•
In the event of a freezing up of the windscreen, first of all eliminate the ice
⇒page 176 and then operate the windscreen wiper otherwise the wind-
screen wiper blades could be damaged.Caution
In frosty weather, please first of all check whether the windscreen wiper blades are
not frozen to the windscreen before switching them on. Switching on windscreen
wipers when the blades are frozen to the windscreen may result in damage both to
the blades and the motor of the windscreen wipers!Headlight cleaning system*The headlights are being cleaned after the windscreen washer system has been
operated for the fifth time, the low beam or main beam are switched on as well as
the windscreen wiper lever is held in the position ⇒page 59, fig. 56 for about 1
second.
You should remove stubborn dirt (such as insect residues) from the headlight
lenses at regular intervals, for example when refuelling. Please refer to the following
guidelines ⇒page 176, “The headlight lenses”.
You should remove any snow from the fixtures of the washer nozzles and clear ice
in winter with a de-icing spray in order to ensure proper operation of the cleaning
system.
A3
A5A6A7
A6
A0
A5
s29g.4.book Page 60 Wednesday, June 17, 2009 9:54 AM