towing SKODA ROOMSTER 2010 1.G Owner's Manual
[x] Cancel search | Manufacturer: SKODA, Model Year: 2010, Model line: ROOMSTER, Model: SKODA ROOMSTER 2010 1.GPages: 231, PDF Size: 12.91 MB
Page 4 of 231
Contents3
Using the system
Safety
Driving Tips
General Maintenance
Breakdown assistance
Praktik
Technical Data
ContentsLayout of this Owner's Manual
(explanations)
. . . . . . . . . . . . . . . . . . . . . . . . . .
Using the system
. . . . . . . . . . . . . . . . . . . . . .
Cockpit
. . . . . . . . . . . . . . . . . . . . . . . . . . . . . . . . . . . . . . . .
General view . . . . . . . . . . . . . . . . . . . . . . . . . . . . . . . . .
The brief instruction
. . . . . . . . . . . . . . . . . . . . . . . . . .
Basic functions and important information . . . . .
Instruments and warning lights
. . . . . . . . . . . . . . .
Overview of the instrument cluster . . . . . . . . . . . . .
Engine revolutions counter . . . . . . . . . . . . . . . . . . . .
Speedometer . . . . . . . . . . . . . . . . . . . . . . . . . . . . . . . .
Coolant temperature gauge* . . . . . . . . . . . . . . . . . .
Fuel gauge* . . . . . . . . . . . . . . . . . . . . . . . . . . . . . . . . . .
Counter for distance driven . . . . . . . . . . . . . . . . . . .
Service Interval Display . . . . . . . . . . . . . . . . . . . . . . .
Digital clock . . . . . . . . . . . . . . . . . . . . . . . . . . . . . . . . . .
Multi-functional indicator (onboard computer)*
MAXI DOT display (information display)* . . . . . . .
Auto Check Control . . . . . . . . . . . . . . . . . . . . . . . . . . .
Warning lights . . . . . . . . . . . . . . . . . . . . . . . . . . . . . . . .
Unlocking and locking
. . . . . . . . . . . . . . . . . . . . . . . .
Key . . . . . . . . . . . . . . . . . . . . . . . . . . . . . . . . . . . . . . . . . .
Locking . . . . . . . . . . . . . . . . . . . . . . . . . . . . . . . . . . . . . .
Child safety lock . . . . . . . . . . . . . . . . . . . . . . . . . . . . . .
Central locking system* . . . . . . . . . . . . . . . . . . . . . . .
Remote control* . . . . . . . . . . . . . . . . . . . . . . . . . . . . . .
Anti-theft alarm system* . . . . . . . . . . . . . . . . . . . . . .
Interior monitor* and Towing protection monitoring*
Electrical power windows* . . . . . . . . . . . . . . . . . . . .
Panorama roof* . . . . . . . . . . . . . . . . . . . . . . . . . . . . . .
Lights and Visibility
. . . . . . . . . . . . . . . . . . . . . . . . . . . .
Lights . . . . . . . . . . . . . . . . . . . . . . . . . . . . . . . . . . . . . . . .
Interior lighting . . . . . . . . . . . . . . . . . . . . . . . . . . . . . . .
Visibility . . . . . . . . . . . . . . . . . . . . . . . . . . . . . . . . . . . . . .
Windshield wiper and wash system . . . . . . . . . . . . .
Rear mirror . . . . . . . . . . . . . . . . . . . . . . . . . . . . . . . . . . .
Seats and Storage
. . . . . . . . . . . . . . . . . . . . . . . . . . . . . .
Front seats . . . . . . . . . . . . . . . . . . . . . . . . . . . . . . . . . . . .
Head restraints . . . . . . . . . . . . . . . . . . . . . . . . . . . . . . . .
Heating the front seats* . . . . . . . . . . . . . . . . . . . . . . .
Rear seats . . . . . . . . . . . . . . . . . . . . . . . . . . . . . . . . . . . .
Pedals . . . . . . . . . . . . . . . . . . . . . . . . . . . . . . . . . . . . . . . .
luggage compartment . . . . . . . . . . . . . . . . . . . . . . . . .
Variable loading floor in the luggage compartment*
Bicycle holder in the luggage compartment* . . . .
The roof luggage rack system* . . . . . . . . . . . . . . . . .
Front cup holder . . . . . . . . . . . . . . . . . . . . . . . . . . . . . .
Rear cup holder* . . . . . . . . . . . . . . . . . . . . . . . . . . . . . .
Parking ticket holder . . . . . . . . . . . . . . . . . . . . . . . . . . .
Ashtray* . . . . . . . . . . . . . . . . . . . . . . . . . . . . . . . . . . . . . .
Cigarette lighter* and power sockets* . . . . . . . . . .
Storage compartments . . . . . . . . . . . . . . . . . . . . . . . .
Heating and air conditioning system
. . . . . . . . . .
Air outlet vents . . . . . . . . . . . . . . . . . . . . . . . . . . . . . . . .
Recirculated air mode . . . . . . . . . . . . . . . . . . . . . . . . .
Heating . . . . . . . . . . . . . . . . . . . . . . . . . . . . . . . . . . . . . .
Climatic (semi-automatic air conditioning system)*
Climatronic* (automatic air conditioning) . . . . . . .
Starting-off and Driving
. . . . . . . . . . . . . . . . . . . . . . .
Setting steering wheel position . . . . . . . . . . . . . . . . .
Ignition lock . . . . . . . . . . . . . . . . . . . . . . . . . . . . . . . . . .
Starting the engine . . . . . . . . . . . . . . . . . . . . . . . . . . . .
Switching off the engine . . . . . . . . . . . . . . . . . . . . . . .
Shifting (manual gearbox) . . . . . . . . . . . . . . . . . . . . . .
Handbrake . . . . . . . . . . . . . . . . . . . . . . . . . . . . . . . . . . . Parking aid* . . . . . . . . . . . . . . . . . . . . . . . . . . . . . . . . . .
Cruise control system (CCS)* . . . . . . . . . . . . . . . . . .
Automatic gearbox
. . . . . . . . . . . . . . . . . . . . . . . . . . . .
Automatic gearbox* . . . . . . . . . . . . . . . . . . . . . . . . . .
Communication
. . . . . . . . . . . . . . . . . . . . . . . . . . . . . . .
Multifunction steering wheel* . . . . . . . . . . . . . . . . .
Universal telephone preinstallation GSM II* . . . . .
Voice control . . . . . . . . . . . . . . . . . . . . . . . . . . . . . . . . .
Music playback via Bluetooth® . . . . . . . . . . . . . . . .
Inputs AUX-IN* and MDI* . . . . . . . . . . . . . . . . . . . . .
Safety
. . . . . . . . . . . . . . . . . . . . . . . . . . . . . . . . . . . . . . .
Passive Safety
. . . . . . . . . . . . . . . . . . . . . . . . . . . . . . . . .
Basic information . . . . . . . . . . . . . . . . . . . . . . . . . . . . .
Correct seated position . . . . . . . . . . . . . . . . . . . . . . .
Seat belts
. . . . . . . . . . . . . . . . . . . . . . . . . . . . . . . . . . . . . .
Why seat belts? . . . . . . . . . . . . . . . . . . . . . . . . . . . . . . .
The physical principle of a frontal collision . . . . . .
Important safety information regarding the use of seat
belts . . . . . . . . . . . . . . . . . . . . . . . . . . . . . . . . . . . . . . . . .
How are seat belts correctly fastened? . . . . . . . . . .
Belt tensioner . . . . . . . . . . . . . . . . . . . . . . . . . . . . . . . .
Airbag system
. . . . . . . . . . . . . . . . . . . . . . . . . . . . . . . . .
Description of the airbag system . . . . . . . . . . . . . . .
Front airbags . . . . . . . . . . . . . . . . . . . . . . . . . . . . . . . . .
Side airbags* . . . . . . . . . . . . . . . . . . . . . . . . . . . . . . . . .
Head airbags* . . . . . . . . . . . . . . . . . . . . . . . . . . . . . . . .
Deactivating airbags . . . . . . . . . . . . . . . . . . . . . . . . . .
Transporting children safely
. . . . . . . . . . . . . . . . . .
What you should know about transporting children!
Child seat . . . . . . . . . . . . . . . . . . . . . . . . . . . . . . . . . . . .
Attaching a child seat using the “ISOFIX” system*
Attaching child seat using the “Top Tether” system
679910101515151616161717181822232534343535364041424345
4646515253555757585959626266687071717272727378787879818487878788899090
91929494100100101106107107109109109110113113113114115116118118119121123124126126128131132
s16g.4.book Page 3 Wednesda y, February 10, 2010 3:53 PM
Page 5 of 231
Contents
4
Driving Tips
. . . . . . . . . . . . . . . . . . . . . . . . . . . . . .
Intelligent Technology
. . . . . . . . . . . . . . . . . . . . . . . .
Electronic stability programme (ESP)* . . . . . . . . . .
Brakes . . . . . . . . . . . . . . . . . . . . . . . . . . . . . . . . . . . . . . .
Brake booster . . . . . . . . . . . . . . . . . . . . . . . . . . . . . . . .
Antilock brake system (ABS) . . . . . . . . . . . . . . . . . . .
Brake Assist* . . . . . . . . . . . . . . . . . . . . . . . . . . . . . . . . .
Uphill Start Assist* . . . . . . . . . . . . . . . . . . . . . . . . . . . .
Electrohydraulic power steering . . . . . . . . . . . . . . .
Tyre pressure monitoring system* . . . . . . . . . . . . . .
Diesel particle filter* (diesel engine) . . . . . . . . . . . .
Driving and the Environment
. . . . . . . . . . . . . . . . .
The first 1 500 kilometres and then afterwards . .
Catalytic converter . . . . . . . . . . . . . . . . . . . . . . . . . . . .
Driving in an economical and environmentally
conscious manner . . . . . . . . . . . . . . . . . . . . . . . . . . . .
Environmental compatibility . . . . . . . . . . . . . . . . . . .
Motoring abroad . . . . . . . . . . . . . . . . . . . . . . . . . . . . .
Avoiding damage to your vehicle . . . . . . . . . . . . . .
Driving through bodies of water on roads . . . . . . .
Towing a trailer
. . . . . . . . . . . . . . . . . . . . . . . . . . . . . . . .
Towing a trailer . . . . . . . . . . . . . . . . . . . . . . . . . . . . . . .
General Maintenance
. . . . . . . . . . . . . . .
Taking care of your ve hicle and cleaning the
vehicle
. . . . . . . . . . . . . . . . . . . . . . . . . . . . . . . . . . . . . . . . .
General . . . . . . . . . . . . . . . . . . . . . . . . . . . . . . . . . . . . . .
Care of the exterior of vehicle . . . . . . . . . . . . . . . . . .
Care of the interior of vehicle . . . . . . . . . . . . . . . . . .
Fuel
. . . . . . . . . . . . . . . . . . . . . . . . . . . . . . . . . . . . . . . . . . . .
Petrol . . . . . . . . . . . . . . . . . . . . . . . . . . . . . . . . . . . . . . . .
Diesel . . . . . . . . . . . . . . . . . . . . . . . . . . . . . . . . . . . . . . .
Refuelling . . . . . . . . . . . . . . . . . . . . . . . . . . . . . . . . . . . .
Inspecting and replenishing
. . . . . . . . . . . . . . . . . .
Engine compartment . . . . . . . . . . . . . . . . . . . . . . . . .
Engine oil . . . . . . . . . . . . . . . . . . . . . . . . . . . . . . . . . . . . Cooling system . . . . . . . . . . . . . . . . . . . . . . . . . . . . . . .
Brake fluid . . . . . . . . . . . . . . . . . . . . . . . . . . . . . . . . . . . .
Battery . . . . . . . . . . . . . . . . . . . . . . . . . . . . . . . . . . . . . . .
Windshield washer system . . . . . . . . . . . . . . . . . . . . .
Wheels and Tyres
. . . . . . . . . . . . . . . . . . . . . . . . . . . . . .
Wheels . . . . . . . . . . . . . . . . . . . . . . . . . . . . . . . . . . . . . . .
Accessories, changes and replacement of partsAccessories and replacement parts . . . . . . . . . . . . .
Technical changes . . . . . . . . . . . . . . . . . . . . . . . . . . . . .
Vehicles of category N1 . . . . . . . . . . . . . . . . . . . . . . . .Breakdown assistance
. . . . . . . . . . . . . .
Breakdown assistance
. . . . . . . . . . . . . . . . . . . . . . . . .
First-aid box* and Warning triangle* . . . . . . . . . . . .
Fire extinguisher* . . . . . . . . . . . . . . . . . . . . . . . . . . . . .
Vehicle tool kit . . . . . . . . . . . . . . . . . . . . . . . . . . . . . . . .
Tyre repair kit . . . . . . . . . . . . . . . . . . . . . . . . . . . . . . . . .
Spare wheel* . . . . . . . . . . . . . . . . . . . . . . . . . . . . . . . . .
Changing a wheel . . . . . . . . . . . . . . . . . . . . . . . . . . . . .
Jump-starting . . . . . . . . . . . . . . . . . . . . . . . . . . . . . . . . .
Tow-starting and towing vehicle . . . . . . . . . . . . . . . .
Fuses and light bulbs
. . . . . . . . . . . . . . . . . . . . . . . . . .
Electric fuses . . . . . . . . . . . . . . . . . . . . . . . . . . . . . . . . . .
Bulbs . . . . . . . . . . . . . . . . . . . . . . . . . . . . . . . . . . . . . . . . .
Praktik
. . . . . . . . . . . . . . . . . . . . . . . . . . . . . . . . . . . . . .
Praktik
. . . . . . . . . . . . . . . . . . . . . . . . . . . . . . . . . . . . . . . . .
Lashing eyes . . . . . . . . . . . . . . . . . . . . . . . . . . . . . . . . . .
Adjustable safety partition behind the front seats
Fixing of the loading floor . . . . . . . . . . . . . . . . . . . . . .
Adjustment of the safety partition . . . . . . . . . . . . . .
Emergency unlocking of the loading area door . .
Technical Data
. . . . . . . . . . . . . . . . . . . . . . . . . .
Technical Data
. . . . . . . . . . . . . . . . . . . . . . . . . . . . . . . .
General information . . . . . . . . . . . . . . . . . . . . . . . . . .
Used abbreviations . . . . . . . . . . . . . . . . . . . . . . . . . . .
Performances . . . . . . . . . . . . . . . . . . . . . . . . . . . . . . . .
Weight . . . . . . . . . . . . . . . . . . . . . . . . . . . . . . . . . . . . . . .
Identification details . . . . . . . . . . . . . . . . . . . . . . . . . .
Fuel consumption according to the ECE standards and
EU guidelines . . . . . . . . . . . . . . . . . . . . . . . . . . . . . . . .
Dimensions . . . . . . . . . . . . . . . . . . . . . . . . . . . . . . . . . .
Engine oil specifications . . . . . . . . . . . . . . . . . . . . . . .
1.2 ltr./51 kW - EU5 / EU2 DDK . . . . . . . . . . . . . . . . .
1.2 ltr./63 kW TSI - EU5 . . . . . . . . . . . . . . . . . . . . . . . .
1.2 ltr./77 kW TSI - EU5 . . . . . . . . . . . . . . . . . . . . . . . .
1.6 ltr./66 kW TDI CR DPF - EU5 . . . . . . . . . . . . . . . .
1.6 ltr./77 kW TDI CR DPF - EU5 . . . . . . . . . . . . . . . .
Index
. . . . . . . . . . . . . . . . . . . . . . . . . . . . . . . . . . . . . . . .
133133133135136136137137137138139141141142142145146146147148148151151151151155158158158159161161163
165167168172173173179179179179181181181181181182182183186188191191196203203203203203204204
205205205205205205205206207208210212214216218221
s16g.4.book Page 4 Wednesda y, February 10, 2010 3:53 PM
Page 43 of 231
Unlocking and locking
42
A drop in voltage of the on-board power supply.
An alarm is immediately triggered if either of the two battery terminals is disconnected
while the anti-theft alarm system is activated.
How is the alarm switched off?
You switch the alarm off if you unlock the vehi cle with the radio remote control or if you
switch the ignition on.Note
The working life of the alarm siren is 5 years. More detailed information is available
by a specialist garage.
Before leaving the car, check that all the doors, windows and the electric
sliding/tilting roof* are properly closed in order to ensure that the anti-theft alarm
system is fully operational.
Coding of the radio remote control and th e receiver unit precludes the use of the
radio remote control from other vehicles.
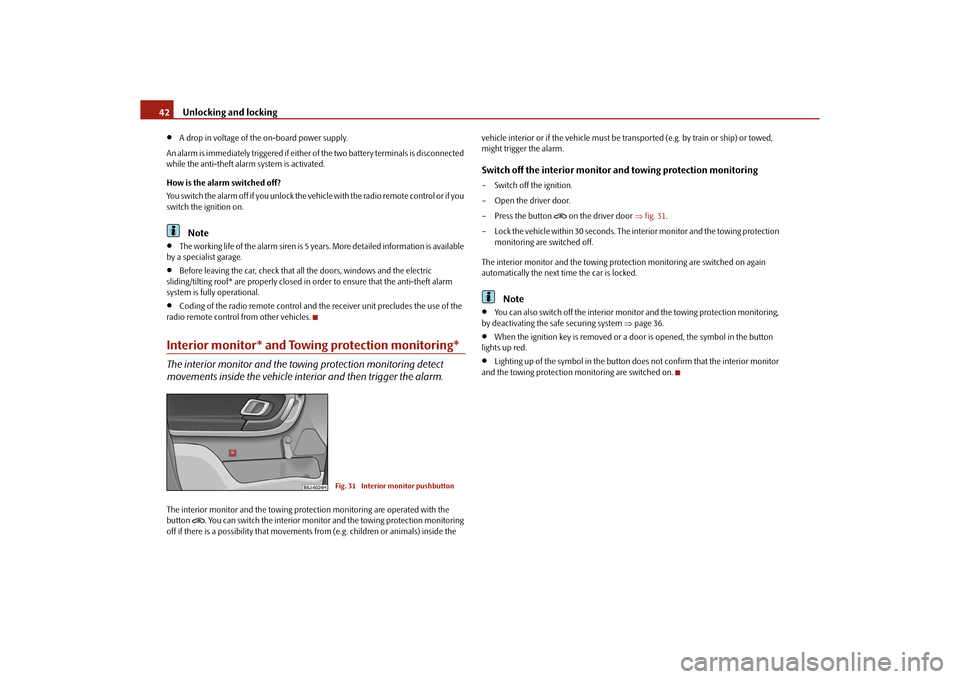
Interior monitor* and Towing protection monitoring*The interior monitor and the towing protection monitoring detect
movements inside the vehicle interior and then trigger the alarm.The interior monitor and the towing protec tion monitoring are operated with the
button
. You can switch the interior monitor and the towing protection monitoring
off if there is a possibility that movements from (e.g. children or animals) inside the vehicle interior or if the vehi
cle must be transported (e.g. by train or ship) or towed,
might trigger the alarm.
Switch off the interior monitor and towing protection monitoring– Switch off the ignition.
– Open the driver door.
– Press the button
on the driver door fig. 31 .
– Lock the vehicle within 30 seconds. The in terior monitor and the towing protection
monitoring are switched off.
The interior monitor and the towing protec tion monitoring are switched on again
automatically the next ti me the car is locked.
Note
You can also switch off the interior moni tor and the towing protection monitoring,
by deactivating the sa fe securing system page 36.
When the ignition key is removed or a door is opened, the symbol in the button
lights up red.
Lighting up of the symbol in the button does not confirm that the interior monitor
and the towing protection monitoring are switched on.
Fig. 31 Interior monitor pushbutton
s16g.4.book Page 42 Wednesda y, February 10, 2010 3:53 PM
Page 49 of 231
Lights and Visibility
48
The adaptation of the halogen projector he adlights must be performed as follows
page 146.Fog lights*
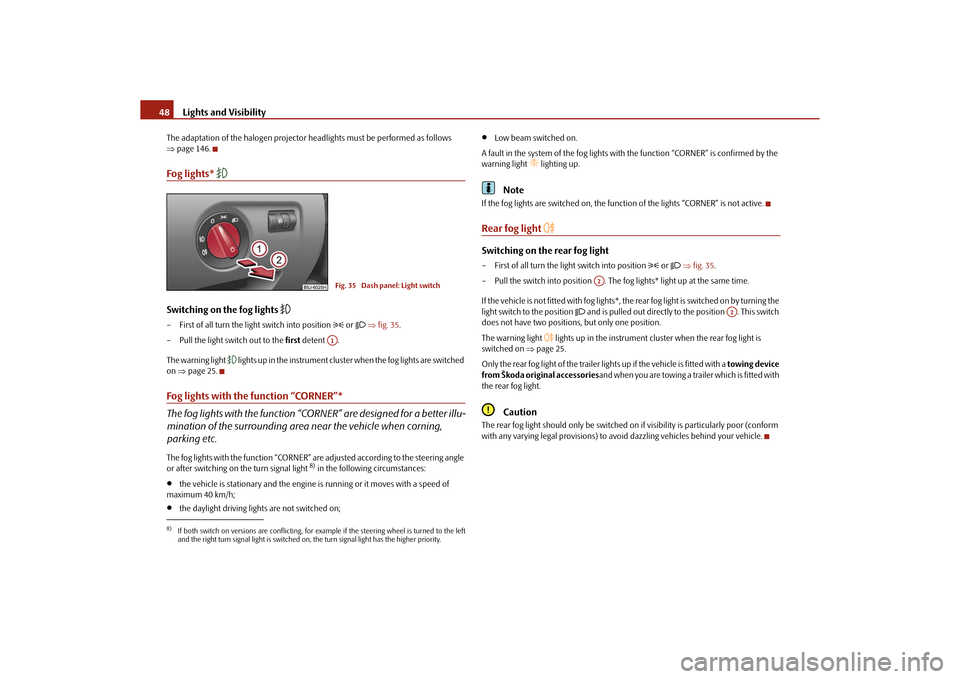
Switching on the fog lights
– First of all turn the light switch into position
or fig. 35 .
– Pull the light switch out to the first detent .
The warning light
l i g h t s u p i n t h e i n s t r u m e n t c l u s t e r when the fog lights are switched
on page 25.
Fog lights with the function “CORNER”*
The fog lights with the function “CORNER” are designed for a better illu-
mination of the surrounding area near the vehicle when corning,
parking etc.The fog lights with the function “CORNER” ar e adjusted according to the steering angle
or after switching on the turn signal light
8) in the following circumstances:
the vehicle is stationary and the engine is running or it moves with a speed of
maximum 40 km/h;
the daylight driving lights are not switched on;
Low beam switched on.
A fault in the system of the fog lights with the function “CORNER” is confirmed by the
warning light
lighting up.
Note
If the fog lights are switched on, the function of the lights “CORNER” is not active.Rear fog light
Switching on the rear fog light– First of all turn the light switch into position
or fig. 35 .
– Pull the switch into position . The fog lights* light up at the same time.
If the vehicle is not fitted with fog lights*, th e rear fog light is switched on by turning the
light switch to the position
and is pulled out directly to the position . This switch
does not have two position s, but only one position.
The warning light
lights up in the instrument cluster when the rear fog light is
switched on page 25.
Only the rear fog light of the trailer lights up if the vehicle is fitted with a towing device
from Škoda original accessories and when you are towing a trailer which is fitted with
the rear fog light.
Caution
The rear fog light should only be switched on if visibility is partic ularly poor (conform
with any varying legal provisions) to avoid dazzling vehicles behind your vehicle.
8)If both switch on versions are conflicting, for example if the steering wheel is turned to the left
and the right turn signal light is switched on, the turn signal light has the higher priority.
Fig. 35 Dash panel: Light switchA1
A2
A2
s16g.4.book Page 48 Wednesda y, February 10, 2010 3:53 PM
Page 92 of 231
Starting-off and Driving91
Using the system
Safety
Driving Tips
General Maintenance
Breakdown assistance
Praktik
Technical Data
Never leave children unattended in the vehicle. The children might, for
example, release the handbrake or take the vehicle out of gear. The vehicle
might then move off - risk of accident!Caution
After the car has come to a stop, always firs t of all apply the handbrake firmly before
then additionally engaging a gear (manual gearbox) or moving the selector lever into
position P (automatic gearbox).Parking aid*The parking aid provides a warning of obstacles behind the vehicle.The audible parking aid determines the di stance between the rear bumper and an
obstacle located behind the vehicle with the aid of ultrasound sensors. The sensors are
integrated in the rear bumper.
Range of sensors
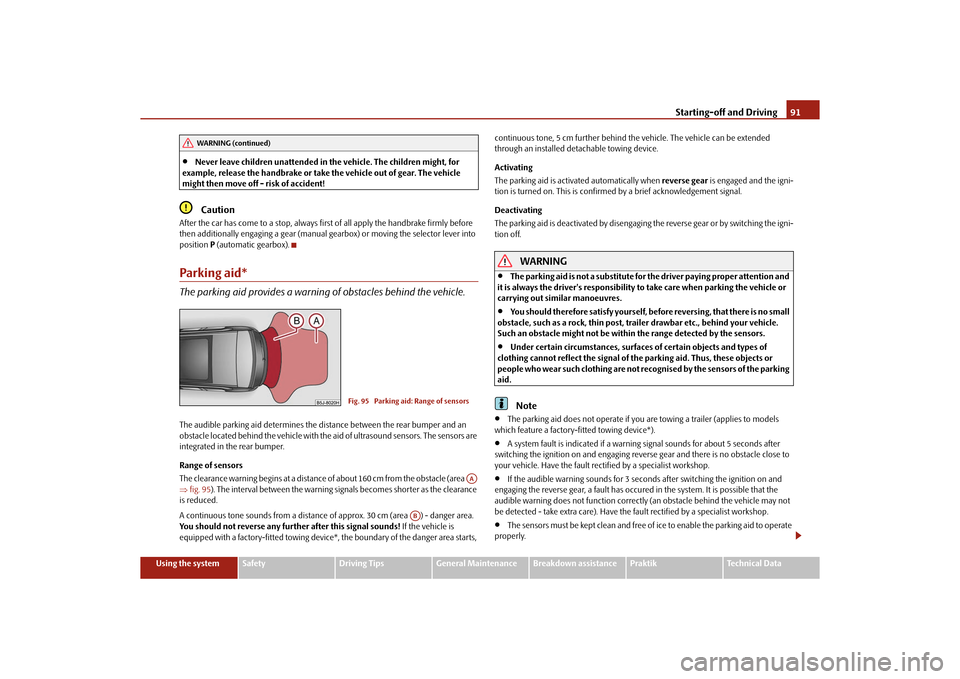
The clearance warning begins at a distance of about 160 cm from the obstacle (area
fig. 95 ). The interval between the warning signals becomes shorter as the clearance
is reduced.
A continuous tone sounds from a distance of approx. 30 cm (area ) - danger area.
You should not reverse any further after this signal sounds! If the vehicle is
equipped with a factory-fitted towing device*, the boundary of the danger area starts, continuous tone, 5 cm furt
her behind the vehicle. The vehicle can be extended
through an installed deta chable towing device.
Activating
The parking aid is activated automatically when reverse gear is engaged and the igni-
tion is turned on. This is confirmed by a brief acknowledgement signal.
Deactivating
The parking aid is deactivated by disengaging the reverse gear or by switching the igni-
tion off.
WARNING
The parking aid is not a substitute for the driver paying proper attention and
it is always the driver's responsibility to take care when parking the vehicle or
carrying out similar manoeuvres.
You should therefore satisfy yourself, before reversing, that there is no small
obstacle, such as a rock, thin post, trailer drawbar etc., behind your vehicle.
Such an obstacle might not be within the range detected by the sensors.
Under certain circumstances, surfaces of certain objects and types of
clothing cannot reflect the signal of the parking aid. Thus, these objects or
people who wear such clothing are not recognised by the sensors of the parking
aid.Note
The parking aid does not operate if you are towing a trailer (applies to models
which feature a factory-fitted towing device*).
A system fault is indicated if a warning signal sounds for about 5 seconds after
switching the ignition on and engaging reverse gear and there is no obstacle close to
your vehicle. Have the fault rectified by a specialist workshop.
If the audible warning sounds for 3 seconds after switching the ignition on and
engaging the reverse gear, a fault has occured in the system. It is possible that the
audible warning does not function correctl y (an obstacle behind the vehicle may not
be detected - take extra care). Have the fault rectified by a specialist workshop.
The sensors must be kept clean and free of ice to enable the parking aid to operate
properly.
WARNING (continued)
Fig. 95 Parking aid: Range of sensors
AA
AB
s16g.4.book Page 91 Wednesda y, February 10, 2010 3:53 PM
Page 97 of 231
Automatic gearbox
96
the right. In the positions D and S the gear you have already engaged will be addition-
ally displayed on the display.
- Parklock
The driven wheels are locked mechanically in this position.
The Parklock must only be engage d when the vehicle is stationary .
If you wish to move the selector lever into or out of this position, you must press the
Shiftlock button in the handle of the selector lever and at the same time depress the
brake pedal.
- Reverse gear
Reverse gear must only be engaged when the vehicle is stationary and the engine
idling .
The brake pedal must be depressed and at the same time the Shiftlock must be
pressed, if you wish to obtain the selector lever positions R, P or N.
When the ignition is switched on an d the selector lever is in position R, the reverse
lights will come on.
- Neutral
The transmission is in Neutral in this position.
The brake pedal must be depressed (if the le ver is in its position for longer than 2
seconds) in order to move the selector lever out of the position N into the position D,
with the ignition switched on, on a vehicle travelling at less than 5 km/hour or on a
stationary vehicle.
- Position for driving forward
When the selector lever is in this position , the forward gears are shifted up and down
automatically in line with engine lo ad, vehicle speed and the dynamic shift
programme.
You must depress the brake pedal if you wish to move into position D from N when the
vehicle is travelling at less th an 5 km/hour or is stationary .
In certain circumstances (e.g. when driving in mountainous regions or when towing a
trailer) it may be beneficial to select the manual shift programme page 98 for a short
time in order to adapt the gearbox rati os manually to the driving situations. - Position for sporty style of driving
Shifting up later into a higher gear makes it possible to fully exploit the power potential
of the engine. The gearbox also then shifts down at higher engine speeds as in the posi-
tion D.
The gearbox does not shift into the 6th gear in the position S, because the maximum
speed is reached with the 5th gear
9).
The Shiftlock on the selector lever grip mu st be pressed when moving the selector
lever out of the position D into the position S.
WARNING
Never move the selector lever into position R or P when driving - risk of an
accident!
When the engine is running and the vehi cle is stationary, it is necessary to
hold the car with the brake pedal in all the positions of the selector lever (except
P and N) since the power transmission is never completely interrupted, also not
when the engine is idling - the vehicle creeps.
You must on no account unintentionally operate the throttle (e.g. by hand
from the engine compartment) if a driv e position is engaged when the car is
stationary. The vehicle would otherwise immediately start off - also when the
handbrake is firmly applied - risk of an accident!
You must move the selector lever into position P and firmly apply the hand-
brake first before you or any other person opens the bonnet and starts working
on the engine when it is running - risk of accident! It is also essential to observe
all warnings page 162, “Working in the engine compartment”.
Selector lever lockAutomatic selector lever lock
With the ignition on, the selector lever is locked when it is in the positions P and N. You
must first of all depress the brake pedal in or der to move the selector lever out of this
position. The warning light
page 30 lights up in the instrument cluster as a
reminder for the driver when the selector lever is in position P or N.
APARANAD
9)Not valid for vehicles with automatic gearbox DSG.AS
s16g.4.book Page 96 Wednesda y, February 10, 2010 3:53 PM
Page 100 of 231
Automatic gearbox99
Using the system
Safety
Driving Tips
General Maintenance
Breakdown assistance
Praktik
Technical Data
– Simultaneously press the shiftlock button in
the handle of the selector lever in the
position N
10).
Tow-starting and towing vehicle Tow-starting a vehicle
It is not possible to tow-start vehicles fitted with automatic gearbox page 188.
you can use jump-start cables connected to the battery of another vehicle for starting
your car if the vehicle battery is flat page 187.
Towing a vehicle
Please pay attention to the following information if it comes necessary to tow-in your
car page 188.10)If the selector lever is moved again into the position P, it is once again blocked.
s16g.4.book Page 99 Wednesday, February 10, 2010 3:53 PM
Page 139 of 231
Intelligent Technology
138
You will place great stresses on the power steering system if the steering is turned to
full lock when the vehicle is stationary. Turn ing the steering to full lock in such a situa-
tion will be accompanied by noises.
It is still possible to fully steer the vehicle if the power steering fails or if the engine is
not running (vehicle being towed in). The only difference is that greater physical effort
is required.
It is possible that the hydraulic pump of the power steering will not run due to the low
vehicle network voltage if the battery has gone flat and the engine must started with
the help off jump leads. This condition will be indicated by lighting up of the warning
light.
The power steering operates again if the ba ttery is charged to a specific range when
engine is running. It also op erates again, if the engine can be started with its own
battery.
If there is a fault in the power steering, the warning light lights up in the instrument
cluster
page 25.
Caution
Do not leave the steering at full lock fo r more than 15 seconds when the engine is
running - risk of damaging the power steering!
Note
Have the steering inspected as soon as possible by a specialist garage if there is a leak
or fault in the system.
Tyre pressure monitoring system*The tyre pressure monitoring system compares with the aid of the ABS sensors the
speed and also the rolling circumference of the individual wheels. If the tyre inflation
pressure is significantly changed and thus the rolling circumference of a wheel, the
warning light
lights up in the instrument cluster page 30. The tyre pressure moni-
toring system functions late or too sensitively if:
the structure of the tyre is damaged,
the vehicle is loaded to one side or with a load on the roof,
the wheels of an axle are loaded heavily (e.g. when towing a trailer or when driving
uphill or downhill),
the vehicle is operated in unfavourable wi nter conditions or on an unfirm ground,
snow chains or emergency wheel are mounted,
the driver has a sporty style of driving (with sharp acceleration and high speed
when cornering).
Basic setting of the system
After changing the tyre inflation pressures or after changing one or several wheels, a
basic setting of the system mu st be carried out as follows.
Inflate all tyres to the specified inflation pressure page 173.
Switch on the ignition.
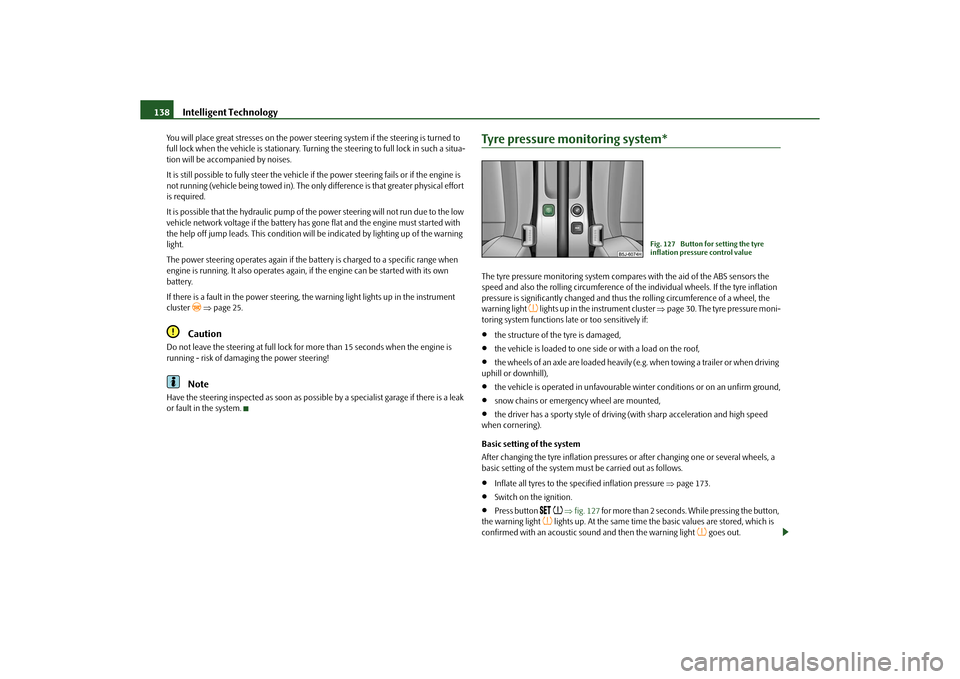
Press button
fig. 127 for more than 2 seconds. While pressing the button,
the warning light
lights up. At the same time the basic values are stored, which is
confirmed with an acoustic sound and then the warning light
goes out.
Fig. 127 Button for setting the tyre
inflation pressure control value
s16g.4.book Page 138 Wednesda y, February 10, 2010 3:53 PM
Page 143 of 231
Driving and the Environment
142
Catalytic converterProper operation of the emission cont rol system (catalytic converter) is
of major significance for driving your vehicle in an environmentally
conscious way.Please refer to the following guidelines:
– For vehicles with petrol engine only refuel with unleaded petrol page 158,
“Grades of petrol”.
– Never run the fuel tank completely empty.
– Do not switch off the ignition while you are driving the vehicle.
– Do not pour too much oil into the engine page 164, “Replenishing engine oil”.
– Do not tow-start the vehicle over a distance of more than 50 metres page 189,
“Tow-starting a vehicle”.
If you drive your vehicle in a country in which unleaded petrol is not available, you
must have the catalytic converter replaced la ter when driving the vehicle into a country
in which use of a catalyti c converter is mandatory.
WARNING
In view of the high temperatures which may be produced in the catalytic
converter, one should always park a vehicle in such a way that the catalytic
converter cannot come into contact with easily flammable materials below the
vehicle - a risk of fire!
Never use additional underbody protection or corrosion-protection agents
for the exhaust pipes, catalytic converters or heat shields. Such substances
might ignite when driving - risk of fire!Caution
On vehicles fitted with a catalytic converte r, never let the fuel tank run completely
empty. An irregular fuel supply can result in poor ignition or misfiring. Unburnt fuel
may get into the exhaust system and damage the cata lytic converter.
Filling the tank even only once with leaded petrol will result in the catalytic
converter being destroyed.
If you detect misfir ing, a drop in performance or irregular engine running when
driving, reduce your speed immediately and have the vehicle inspected by the nearest
specialist garage. The symptoms described ma y be caused by a fault in the ignition
system. Unburnt fuel may get into the exhaust system and damage the catalytic
converter.For the sake of the environment
Even if the exhaust system is operating pr operly, a sulphur-like exhaust odour may be
produced under certain oper ating conditions of the engine. This depends on the
sulphur content of the fuel. It is often sufficient to refuel with unleaded premium-grade
petrol of a different brand or at a different filling station.Driving in an economical and environmentally
conscious mannerGeneral
Your personal style of driving is a major factor.Your fuel consumption, any pollution of the environmental and the wear-and-tear to
the engine, brakes and tyres, depend essentially on three factors:
your personal style of driving;
the conditions under which your vehicle is operated;
technical aspects.
You can easily improve your fuel economy by 10 - 15 percent by driving in an econom-
ical way with foresight. This section is intended to provide you with a number of tips on
how to protect the environment and at the same time save money.
The fuel consumption can naturally also be influenced by factors which are beyond the
driver's control. It is, for example, normal for the fuel consumption to increase in
winter and under worsened cond itions such as poor road conditions, towing a trailer,
etc.
The technical requirements for low fuel usage and economic efficiency of the vehicle
have already been built into the vehicle at the works. Special attention has been given
to minimising negative effects on the environment. It is necessary to take note of the
s16g.4.book Page 142 Wednesda y, February 10, 2010 3:53 PM
Page 149 of 231
Towing a trailer
148
Towing a trailerTo w i n g a t r a i l e rTechnical requirements
The towing device must satisfy certain technical requirements.Your vehicle is designed primarily for tr ansporting persons and luggage. It can,
however, also be used for towing a traile r - provided certain technical equipment is
fitted.
If your vehicle has been equipped with a towing device from Škoda Original Accesso-
ries, then the towing device satisfies all technical and legal requirements.
Your vehicle is fitted with a 13-pin power socket for the electrical connection between
the vehicle and trailer. If the tr ailer which you wish to tow has a 7-pin connector, you
can use a suitable adapter
13) from Škoda original accessories.
This work must be carried out in accordance with the manufacturer's specifications if
a towing device is retrofitted.
Specialist garages are familiar with details re lating to retrofitting a towing device and
for any necessary modifications to the cooling system.
WARNING
We recommend that you have the towing device from Škoda original accesso-
ries installed by a specialist garage. He is familiar with all the relevant details
relating to retrofitting such equipment. There is a risk of an accident if the
towing device is not properly fitted!General Maintenance
There are a number of points to pay attention to when towing a trailer.Trailer load
The permissible trailer load must on no account be exceeded. You can negotiate appropriately steeper inclin
es and descents if you do not make full
use of the permissible trailer load.
The trailer loads specified only apply for altitudes up to 1 000 metres above mean sea
level. On petrol engines without forced indu ction, the engine power output drops with
increasing height due to a lowering of air pr essure and thus the ability to climb, this
means that the trailer load must be reduced by 10% for every further increase of 1 000
metres in height above sea le vel. The towed weight is the weight of the (laden) vehicle
and the (laden) trailer together. One should ta ke this into account before driving up to
higher altitudes. Petrol engines with forced induction use an air pressure correction
method, so that their power output does not depend on the height above sea level.
The trailer and drawbar load information on the type plate of the towing device
are merely test data for the towing device The data relating to your vehicle, which
is often less than this test data, can be found in your vehicle registration docu-
ments.
Distribution of the load
Distribute the load in the trailer in such a way that any heavy items are located as close
as possible to the axle. Secure th e items to prevent them slipping.
Tyre pressure
Correct the tyre inflation pressure on yo ur vehicle for that of “fully laden”, page 173.
The inflation pressure of the tyres fitted to the trailer adjust in accordance with the
manufacturer's recommendation.
Exterior mirrors
You have to have additional ex terior mirrors fitted if you are not able to see the traffic
behind the trailer with the standard rear-view mirrors. Both exterior mirrors should be
attached to folding arms. Adjust the mirrors so that they provide you with an adequate
field of view to the rear.
Headlights
Before starting off with a hitched trailer, al so check the setting of the headlights. Alter
the setting as necessary with the aid of the headlight beam adjuster page 49.13)In some countries the adapter is supplied with the towing device.s16g.4.book Page 148 Wednesda y, February 10, 2010 3:53 PM