brake SKODA ROOMSTER 2013 1.G Owner's Guide
[x] Cancel search | Manufacturer: SKODA, Model Year: 2013, Model line: ROOMSTER, Model: SKODA ROOMSTER 2013 1.GPages: 219, PDF Size: 13.83 MB
Page 127 of 219
What influences the driving safety?First read and observe the introductory information and safety warn-ings
on page 123.
The driver is fully responsible for himself and his occupants. If your driving safety is effected, you place yourself and the oncoming traffic at risk.
The following guidelines must therefore be observed. › Do not become distracted from concentrating on the traffic situation, e.g. by
your passengers or mobile phone calls.
› Never drive when your driving ability is impaired, e.g. due to medication, alcohol
or drugs.
› Keep to the traffic regulations and the permissible speed limit.
› Always adjust the driving speed to the road, traffic and weather conditions.
› Take regular breaks on long journeys – at least every two hours.
Correct seated position
Introduction
This chapter contains information on the following subjects:
Correct seated position for the driver
125
Correct seated position for the front passenger
125
Correct seated position for the passengers in the rear seats
125
Examples of incorrect seated positions
125WARNINGGeneral information■The front seats and head restraints must be adjusted to match the body
size at all times and the seat belt must always be fastened properly to provide the most effective levels of protection to the passengers.■
If the occupant adopts an incorrect seated position, he is exposed to life-
threatening injuries, in case he is hit by a deployed airbag.
■
If the occupants on the rear seats are not sitting upright, the risk of injury is
increased due to incorrect routing of the seat belt.
■
The seat backrests must not be tilted too far back when driving, as this will
impair the function of the seat belts and of the airbag system – risk of injury!
WARNINGInformation for the driver■Always assume the correct seated position before setting off and do not
change this position while driving. Also advise your passengers to adopt the
correct seated position and not to change this position while the car is mov-
ing.■
Maintain a distance of at least 25 cm to the steering wheel. Not maintaining
this minimum distance will mean that the airbag system will not be able to
properly protect you - hazard!
■
When driving, hold the steering wheel with both hands firmly on the outer
edge in the 9 o'clock and 3 o'clock position. Never hold the steering wheel in
the 12 o'clock position or in any other way (e.g. in the middle or inner edge of
the steering wheel). In such cases, you could severely injure the arms, hands
and head when the driver airbag is deployed.
■
Ensure that there are no objects in the driver's footwell, as these may get
caught in the pedal apparatus when driving or braking. You would then no longer be able to operate the clutch, brake or acceleration pedals.
WARNINGInformation for the front seat passenger■Maintain a distance of at least 25 cm from the dash panel. Not maintaining
this minimum distance will mean that the airbag system will not be able to
properly protect you - there is a risk that you could be killed.■
Always keep your feet in the footwell when the car is being driven - never
place your feet on the instrument panel, out of the window or on the seats.
You will be exposed to increased risk of injury if it becomes necessary to apply
the brakes or in the event of an accident. You may suffer fatal injuries when
an airbag is deployed if you have adopted an incorrect seating position.
124Safety
Page 148 of 219
A vehicle must only be filled and topped up with the specified engine oil if it is
to be operated with a variable service interval.
If this engine oil is not available, the oil change is subject to a fixed service inter-
val. In this case, the vehicle must be changed to the fixed service interval.
Note
■
The corresponding motor oil specifications » page 163.■A specialist workshop is able to change the vehicle over from the variable serv-
ice interval to the fixed service interval, or from the fixed service interval to the variable service interval.
Fixed service intervals QI1 - QI4
First read and observe the introductory information given on page 144.
InspectionQI1 - QI4
First after 30,000 km or 2 years a)
, then every 30
000 km or every 1 year a)
.Every 15,000 km or every 1 year a)
(applies to Rus-
sia).
Oil change service
QI1Every 5000 km or every 1 year a)
.QI2Every 7500 km or every 1 year a)
.QI3Every 10,000 km or every 1 year a)
.QI4Every 15,000 km or every 1 year a)
.Brake fluid
change First change after 3 years, then every 2 years.a)
(Whichever comes first).
WARNINGThe brake fluid must always be changed after the first 3 years and then every
2 years. When the brake fluid becomes too old, vapour bubbles may form in
the brake system under heavy braking. The efficiency of the brakes could be
seriously affected – there is a risk of an accident.NoteThe engine oil change interval for operation using diesel fuels with a high sulphur
content will be every 7500 km. Please ask your specialist garage for information
on the countries where diesel fuel has a high sulphur content.
Variable service interval QI6
First read and observe the introductory information given on page 144.
The service intervals depend on how the vehicle is driven and the local conditions
in which the vehicle is used. For example, your vehicle is subjected to different
loads when driven over short distances than long distances. The service intervals
are also variable.
InspectionFirst after 30,000 km or 2 years a)
, then every 30 000 km or
every 1 year a)
.Oil change serviceAccording to the service interval display (at the latest after
30,000 km or every 2 years a)
).Brake fluid
changeFirst change after 3 years, then every 2 years.a)
(Whichever comes first).
WARNINGThe brake fluid must always be changed after the first 3 years and then every
2 years. When the brake fluid becomes too old, vapour bubbles may form in
the brake system under heavy braking. The efficiency of the brakes could be
seriously affected – there is a risk of an accident.
Information about the ŠKODA service
First read and observe the introductory information given on page 144.
There is an extensive servicing network of ŠKODA Service Partners at your dis-
posal to look after your vehicle.
145Car care
Page 156 of 219
■When removing snow or ice from windows and mirror lenses ensure that the
paintwork of the vehicle is not to damage.■
Do not clean the inside of the windows with sharp-edged objects or corrosive
and acidic cleaning agents – there is a risk of damaging the heating elements or
window aerial.
Headlight lenses
First read and observe the introductory information and safety warn-ings
on page 150.
Clean plastic front headlight lenses using clean, warm water and soap.
CAUTION
■ Never wipe headlights to dry.■Do not use any sharp objects to clean the plastic lenses, as this may damage
the protective paintwork and consequently cause cracks to form on the headlight lenses.■
Do not use any harsh cleaning products or chemical solvents to clean the head-
lights, as this could damage the headlight lenses.
Door lock cylinders
First read and observe the introductory information and safety warn-
ings
on page 150.
Specific products must be used for de-icing door lock cylinders.
CAUTION
When washing your vehicle, ensure as little water as possible gets into the lock-
ing cylinders.
Cavity protection
First read and observe the introductory information and safety warn-
ings
on page 150.
All the cavities of your vehicle which are at risk from corrosion are protected for life by a layer of protective wax applied in the factory.
This wax protection does not need to be inspected or re-applied.
If any small amount of wax flow out of the cavities at high temperatures, these
must be removed with a plastic scraper and the stains cleaned using a petroleum cleaner.WARNINGSafety regulations should be observed when using petroleum cleaner to re-
move wax – risk of fire!
Wheels
First read and observe the introductory information and safety warn-
ings
on page 150.
Wheel rims
Also thoroughly wash the wheel rims when washing the vehicle on a regular ba- sis.
Regularly remove salt and brake abrasion, otherwise the rim material will be cor-
roded.
Damage to the paint layer on the wheel rims must be touched up immediately.
Light alloy wheels
After washing thoroughly and treat the wheel rims with a protective product for
light alloy wheels. Products which cause abrasion must not be used to treat the
wheel rims.
CAUTION
Severe layers of dirt on the wheels can also result in wheel imbalance. This may
show itself in the form of a wheel vibration which is transmitted to the steering
wheel which, in certain circumstances, can cause premature wear of the steering.
This means it is necessary to remove the dirt.
153Car care
Page 163 of 219
WARNINGThe following instructions must be followed before starting work in the en-
gine compartment:■
Turn off the engine and withdraw the ignition key.
■
Firmly apply the handbrake.
■
If the vehicle is fitted with a manual gearbox, move the gearshift lever into
Neutral, or if the vehicle is fitted with an automatic gearbox, move the selec-
tor lever into position P.
■
Allow the engine to cool.
■
Never open the bonnet if you can see steam or coolant escaping from the
engine compartment – risk of scalding! Wait until no more steam or coolant is escaping.
WARNINGThe following instructions must be followed when working in the engine com-
partment.■
Keep children clear of the engine compartment.
■
Never touch the radiator fan while the engine is still warm. The fan might
suddenly start running!
■
Do not touch any hot engine parts – risk of burns!
■
The coolant additive and thus all of the coolant is harmful to your health.
■
Avoid contact with the coolant.
■
Coolant vapours are harmful to health.
■
Never open the end cover of the coolant expansion reservoir while the en-
gine is still warm. The cooling system is pressurized!
■
When opening the end cover of the coolant expansion reservoir, cover it
with a cloth to protect your face, hands and arms from hot steam or hot cool-
ant.
■
If any coolant splashes into your eyes, immediately rinse out your eyes with
clear water and contact a doctor as soon as possible.
■
Always store the coolant additive securely in its original container, and in
particular out of the reach of children – risk of poisoning!
■
Consult a doctor immediately if coolant is swallowed.
■
Do not leave any items (e.g. cleaning cloths or tools) in the engine compart-
ment.
■
Never spill fluids on the hot engine. Such fluids (e.g. the antifreeze con-
tained in the coolant) may ignite!
WARNINGThe following warning instructions must be observed at all times when work-
ing in the engine compartment while the engine is running.■
Pay particular attention to rotating engine parts (e.g. V-ribbed belt, genera-
tor, radiator fan) and the high-voltage ignition system – risk to life!
■
Never touch the electric wiring on the ignition system.
■
Avoid short circuits in the electrical system - particularly on the vehicle's
battery.
■
Always make sure that no jewellery, loose clothing or long hair can get
caught in rotating engine parts – risk to life! Always remove any jewellery, tie
back long hair and wear tight fitting clothing before completing any work.
WARNINGThe following warning instructions must be observed if work has to be carried
out on the fuel or electrical systems.■
Always disconnect the vehicle battery from the electrical system.
■
Do not smoke.
■
Never work near open flames.
■
Always have a functioning fire extinguisher nearby.
WARNING■ Read and observe the information and warning instructions on the fluid con-
tainers.■
Keep fluids in their original containers and keep securely out of the reach of
children!
■
If you intend to work underneath the vehicle, you must secure the vehicle
from rolling away and support it with suitable supporting blocks; the car jack
is not sufficient – risk of injury!
■
Never cover the engine with additional insulation material (e.g. with a cover)
– risk of fire!
■
The bonnet must always be properly closed when driving. Therefore, the
lock must always be checked after closing the bonnet in order to ensure that
it has engaged properly.
■
If you notice that the lock is not properly engaged while driving, stop the ve-
hicle immediately and close the bonnet – risk of accident!
160General Maintenance
Page 165 of 219
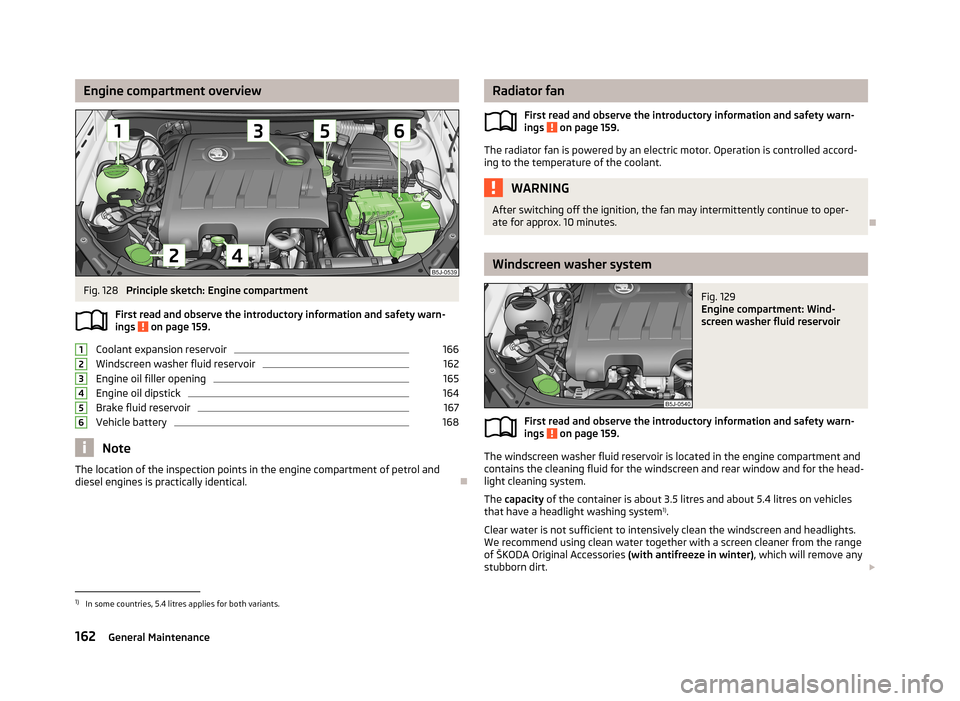
Engine compartment overviewFig. 128
Principle sketch: Engine compartment
First read and observe the introductory information and safety warn- ings
on page 159.
Coolant expansion reservoir
166
Windscreen washer fluid reservoir
162
Engine oil filler opening
165
Engine oil dipstick
164
Brake fluid reservoir
167
Vehicle battery
168
Note
The location of the inspection points in the engine compartment of petrol and
diesel engines is practically identical.
123456Radiator fan
First read and observe the introductory information and safety warn-
ings
on page 159.
The radiator fan is powered by an electric motor. Operation is controlled accord-
ing to the temperature of the coolant.
WARNINGAfter switching off the ignition, the fan may intermittently continue to oper-
ate for approx. 10 minutes.
Windscreen washer system
Fig. 129
Engine compartment: Wind-
screen washer fluid reservoir
First read and observe the introductory information and safety warn- ings on page 159.
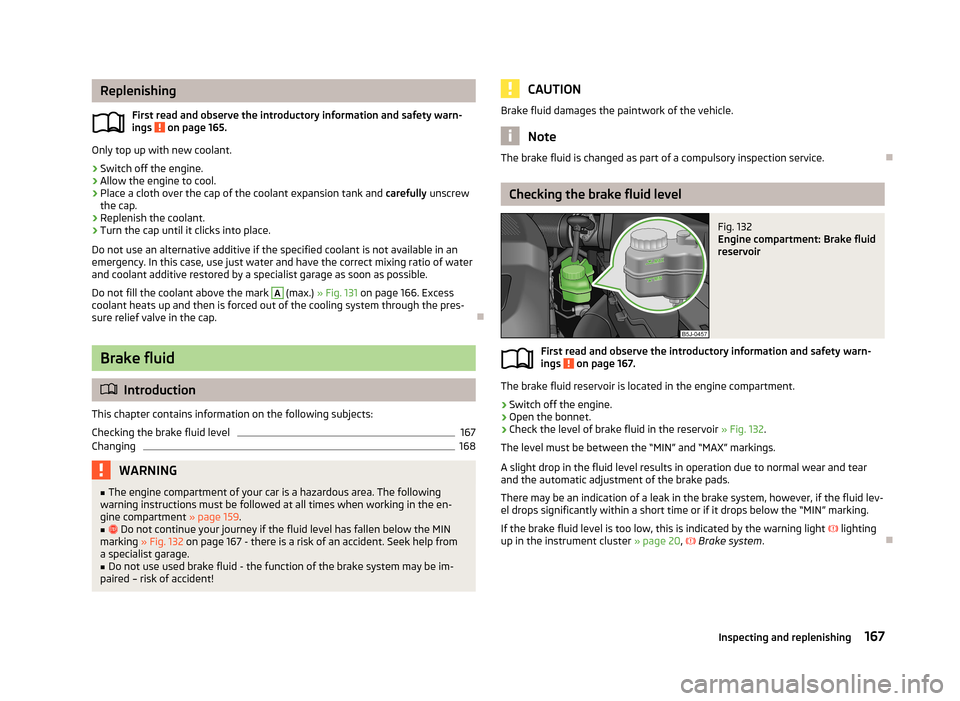
The windscreen washer fluid reservoir is located in the engine compartment and
contains the cleaning fluid for the windscreen and rear window and for the head- light cleaning system.
The capacity of the container is about 3.5 litres and about 5.4 litres on vehicles
that have a headlight washing system 1)
.
Clear water is not sufficient to intensively clean the windscreen and headlights. We recommend using clean water together with a screen cleaner from the range
of ŠKODA Original Accessories (with antifreeze in winter), which will remove any
stubborn dirt.
1)
In some countries, 5.4 litres applies for both variants.
162General Maintenance
Page 170 of 219
ReplenishingFirst read and observe the introductory information and safety warn-
ings
on page 165.
Only top up with new coolant.
›
Switch off the engine.
›
Allow the engine to cool.
›
Place a cloth over the cap of the coolant expansion tank and carefully unscrew
the cap.
›
Replenish the coolant.
›
Turn the cap until it clicks into place.
Do not use an alternative additive if the specified coolant is not available in an emergency. In this case, use just water and have the correct mixing ratio of waterand coolant additive restored by a specialist garage as soon as possible.
Do not fill the coolant above the mark
A
(max.) » Fig. 131 on page 166. Excess
coolant heats up and then is forced out of the cooling system through the pres-
sure relief valve in the cap.
Brake fluid
Introduction
This chapter contains information on the following subjects:
Checking the brake fluid level
167
Changing
168WARNING■ The engine compartment of your car is a hazardous area. The following
warning instructions must be followed at all times when working in the en-
gine compartment » page 159.■
Do not continue your journey if the fluid level has fallen below the MIN
marking » Fig. 132 on page 167 - there is a risk of an accident. Seek help from
a specialist garage.
■
Do not use used brake fluid - the function of the brake system may be im-
paired – risk of accident!
CAUTIONBrake fluid damages the paintwork of the vehicle.
Note
The brake fluid is changed as part of a compulsory inspection service.
Checking the brake fluid level
Fig. 132
Engine compartment: Brake fluid
reservoir
First read and observe the introductory information and safety warn-
ings on page 167.
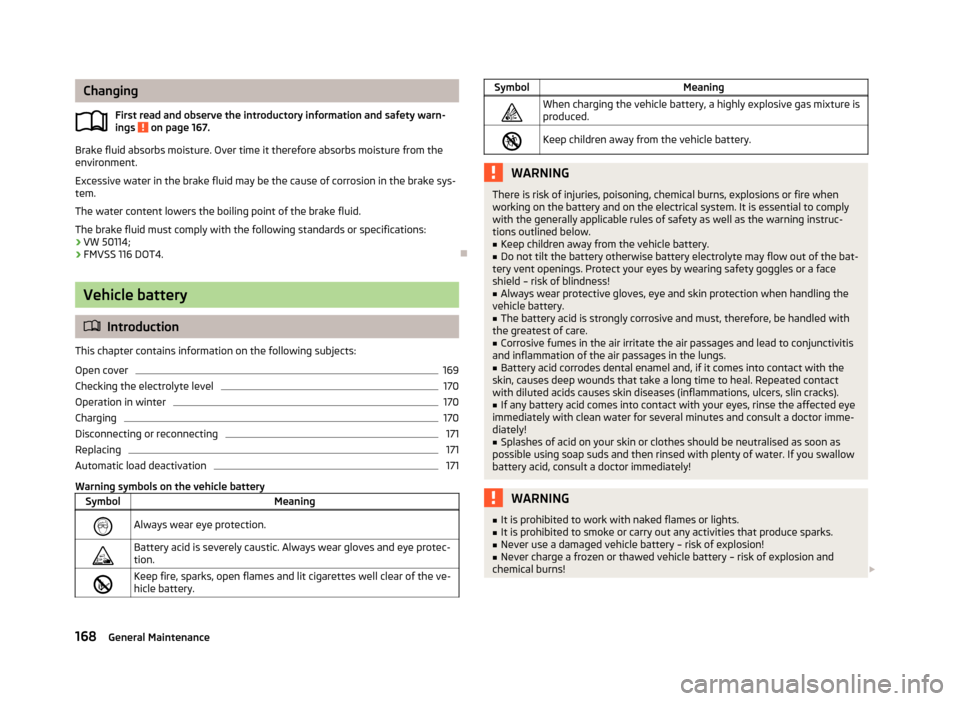
The brake fluid reservoir is located in the engine compartment.
›
Switch off the engine.
›
Open the bonnet.
›
Check the level of brake fluid in the reservoir » Fig. 132.
The level must be between the “MIN” and “MAX” markings.
A slight drop in the fluid level results in operation due to normal wear and tear and the automatic adjustment of the brake pads.
There may be an indication of a leak in the brake system, however, if the fluid lev-
el drops significantly within a short time or if it drops below the “MIN” marking.
If the brake fluid level is too low, this is indicated by the warning light
lighting
up in the instrument cluster » page 20,
Brake system .
167Inspecting and replenishing
Page 171 of 219
ChangingFirst read and observe the introductory information and safety warn-ings
on page 167.
Brake fluid absorbs moisture. Over time it therefore absorbs moisture from theenvironment.
Excessive water in the brake fluid may be the cause of corrosion in the brake sys-
tem.
The water content lowers the boiling point of the brake fluid.
The brake fluid must comply with the following standards or specifications: › VW 50114;
› FMVSS 116 DOT4.
Vehicle battery
Introduction
This chapter contains information on the following subjects:
Open cover
169
Checking the electrolyte level
170
Operation in winter
170
Charging
170
Disconnecting or reconnecting
171
Replacing
171
Automatic load deactivation
171
Warning symbols on the vehicle battery
SymbolMeaningAlways wear eye protection.Battery acid is severely caustic. Always wear gloves and eye protec- tion.Keep fire, sparks, open flames and lit cigarettes well clear of the ve-
hicle battery.SymbolMeaningWhen charging the vehicle battery, a highly explosive gas mixture is produced.Keep children away from the vehicle battery.WARNINGThere is risk of injuries, poisoning, chemical burns, explosions or fire when
working on the battery and on the electrical system. It is essential to comply
with the generally applicable rules of safety as well as the warning instruc-
tions outlined below.■
Keep children away from the vehicle battery.
■
Do not tilt the battery otherwise battery electrolyte may flow out of the bat-
tery vent openings. Protect your eyes by wearing safety goggles or a face
shield – risk of blindness!
■
Always wear protective gloves, eye and skin protection when handling the
vehicle battery.
■
The battery acid is strongly corrosive and must, therefore, be handled with
the greatest of care.
■
Corrosive fumes in the air irritate the air passages and lead to conjunctivitis
and inflammation of the air passages in the lungs.
■
Battery acid corrodes dental enamel and, if it comes into contact with the
skin, causes deep wounds that take a long time to heal. Repeated contact
with diluted acids causes skin diseases (inflammations, ulcers, slin cracks).
■
If any battery acid comes into contact with your eyes, rinse the affected eye
immediately with clean water for several minutes and consult a doctor imme-
diately!
■
Splashes of acid on your skin or clothes should be neutralised as soon as
possible using soap suds and then rinsed with plenty of water. If you swallow
battery acid, consult a doctor immediately!
WARNING■ It is prohibited to work with naked flames or lights.■It is prohibited to smoke or carry out any activities that produce sparks.■
Never use a damaged vehicle battery – risk of explosion!
■
Never charge a frozen or thawed vehicle battery – risk of explosion and
chemical burns!
168General Maintenance
Page 179 of 219
WARNING■When the warning light illuminates, immediately reduce the speed and
avoid sudden steering and brake manoeuvres. Stop the vehicle as soon as
possible and inspect the tyres and their inflation pressure.■
Under certain circumstances (e.g. a racy style of driving, wintry or unpaved
roads), the warning light may be delayed or does not light up at all.
CAUTION
■
The tyre control display does therefore not replace the regular tyre inflation
pressure control, as the system cannot detect an even loss of pressure.■
The system cannot warn in case of very rapid loss of tyre pressure, e.g. in the
event of a sudden puncture. In this case carefully bring the vehicle to a standstill without sudden steering movements or sharp braking.
■
The basic setting must be repeated every 10,000 km or once a year to ensure
proper functioning of the tyre pressure monitor.
Spare wheel
Fig. 138
Boot: Spare wheel
First read and observe the introductory information and safety warn-
ings on page 172.
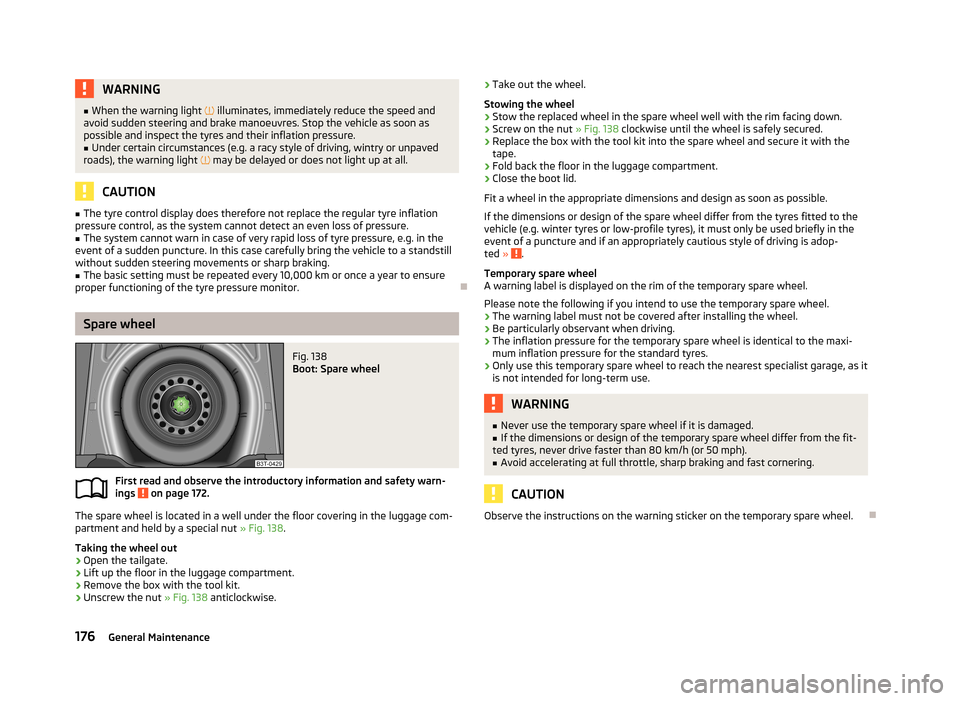
The spare wheel is located in a well under the floor covering in the luggage com-
partment and held by a special nut » Fig. 138.
Taking the wheel out
›
Open the tailgate.
›
Lift up the floor in the luggage compartment.
›
Remove the box with the tool kit.
›
Unscrew the nut » Fig. 138 anticlockwise.
›Take out the wheel.
Stowing the wheel›
Stow the replaced wheel in the spare wheel well with the rim facing down.
›
Screw on the nut » Fig. 138 clockwise until the wheel is safely secured.
›
Replace the box with the tool kit into the spare wheel and secure it with the
tape.
›
Fold back the floor in the luggage compartment.
›
Close the boot lid.
Fit a wheel in the appropriate dimensions and design as soon as possible.
If the dimensions or design of the spare wheel differ from the tyres fitted to the
vehicle (e.g. winter tyres or low-profile tyres), it must only be used briefly in the
event of a puncture and if an appropriately cautious style of driving is adop-
ted »
.
Temporary spare wheel
A warning label is displayed on the rim of the temporary spare wheel.
Please note the following if you intend to use the temporary spare wheel. › The warning label must not be covered after installing the wheel.
› Be particularly observant when driving.
› The inflation pressure for the temporary spare wheel is identical to the maxi-
mum inflation pressure for the standard tyres.
› Only use this temporary spare wheel to reach the nearest specialist garage, as it
is not intended for long-term use.
WARNING■ Never use the temporary spare wheel if it is damaged.■If the dimensions or design of the temporary spare wheel differ from the fit-
ted tyres, never drive faster than 80 km/h (or 50 mph).■
Avoid accelerating at full throttle, sharp braking and fast cornering.
CAUTION
Observe the instructions on the warning sticker on the temporary spare wheel.
176General Maintenance
Page 180 of 219
Full wheel trimFirst read and observe the introductory information and safety warn-
ings
on page 172.
Pulling off
›
Hook the clamp found in the vehicle tool kit into the reinforced edge of the wheel trim.
›
Push the wheel wrench through the clamp, support on the tyre and pull off the
wheel trim.
Fitting
›
Press the wheel trim onto the wheel rim at the designated valve opening.
›
Then press the trim into the wheel rim until its entire circumference locks cor- rectly in place.
CAUTION
■ Only apply hand pressure, do not hit the full wheel trim! Avoid heavy impacts
when the trim has not yet been inserted into the wheel rim. This could cause
damage to the guide and centring elements of the trim.■
Make sure that the anti-theft wheel bolt is fitted in the bore near the
valve » page 183 , Securing wheels against theft .
■
If wheel trims are retrofitted it must be ensured that an adequate flow of air is
assured to cool the brake system.
Wheel bolts
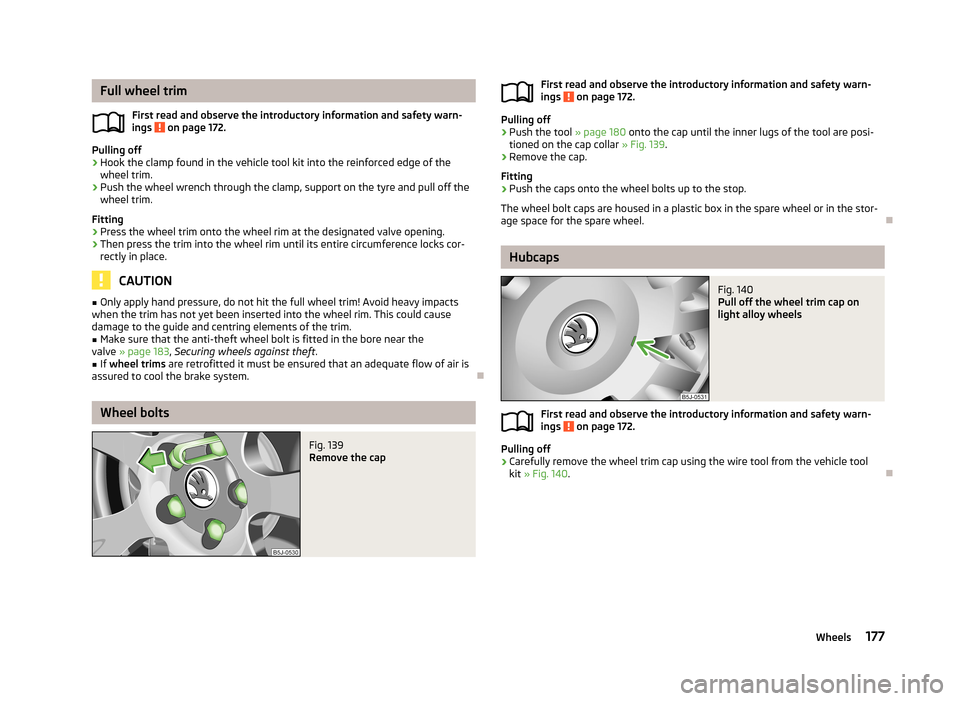
Fig. 139
Remove the capFirst read and observe the introductory information and safety warn-
ings on page 172.
Pulling off
›
Push the tool » page 180 onto the cap until the inner lugs of the tool are posi-
tioned on the cap collar » Fig. 139.
›
Remove the cap.
Fitting
›
Push the caps onto the wheel bolts up to the stop.
The wheel bolt caps are housed in a plastic box in the spare wheel or in the stor-
age space for the spare wheel.
Hubcaps
Fig. 140
Pull off the wheel trim cap on
light alloy wheels
First read and observe the introductory information and safety warn-
ings on page 172.
Pulling off
›
Carefully remove the wheel trim cap using the wire tool from the vehicle tool
kit » Fig. 140 .
177Wheels
Page 184 of 219
WARNINGObserve the following instructions for lifting the vehicle.■If the wheel has to be changed on a slope, first of all block the opposite
wheel with a stone or similar object to prevent the vehicle from unexpectedly
rolling away.■
Secure the base plate of the lifting jack with suitable means to prevent pos-
sible moving. A soft and slippery ground under the base plate may move the lifting jack, causing the vehicle to fall down. It is therefore always necessary to
place the lifting jack on a solid surface or use a wide and stable base. Use a non-slip base (e.g. a rubber foot mat) if the surface is smooth, such as cobbled
stones, tiled floor, etc.
■
Only attach the lifting jack to the attachment points provided for this pur-
pose.
■
Always raise the vehicle with the doors closed.
■
Never position any body parts, such as arms or legs under the vehicle, while
the vehicle is raised with a lifting jack.
■
Never start the engine when the vehicle is raised – risk of injury.
CAUTION
■ The tightening torque specified for the wheel bolts for steel and light alloy
wheels is 120 Nm.■
The anti-theft wheel bolt or the adapter can be damaged if the wheel bolts are
tightened too much.
Note
■ The anti-theft wheel bolt set and adapter can be purchased from a ŠKODA Part-
ner.■
The national legal requirements must be observed when changing a wheel.
Preliminary work
First read and observe the introductory information and safety warn-ings
on page 180.
Always change a wheel on a level surface as far as possible.
The following steps must be carried out before actually changing the wheel:
› Have
all the occupants get out. The passengers should not stand on the road
(instead they should remain behind a crash barrier, for instance) while the wheel is being changed.›
Switch off the engine.
›
Move the gearshift lever into Neutral or move the selector lever for the auto-
matic gearbox into position P.
›
Apply the handbrake firmly.
›
Uncouple a trailer.
›
Remove the vehicle tool kit » page 180 and the spare wheel » page 176 , Spare
wheel from the boot.
Changing a wheel
First read and observe the introductory information and safety warn-
ings
on page 180.
›
Remove the full wheel trim » page 177 or caps » page 177 .
›
In the case of light alloy wheel rims remove the wheel trim cap » page 177.
›
First of all slacken the anti-theft wheel bolt and then the other wheel
bolts » page 182 .
›
Jack up the vehicle until the wheel that needs changing is clear of the
ground » page 183 .
›
Unscrew the wheel bolts and place them on a clean surface (cloth, paper, etc.).
›
Remove the wheel carefully.
›
Attach the spare wheel and slightly screw on the wheel bolts.
›
Lower the vehicle.
›
Tighten the opposite wheel bolts alternately (cross-wise) with the wheel
wrench. Tighten the anti-theft wheel bolt last » page 182.
›
Reinstall the wheel trim/wheel trim cap or the caps.
Note
■
All bolts must be clean and must turn easily.■Under no circumstances grease or oil the wheel bolts!■
When fitting unidirectional tyres, ensure that the direction of rotation is cor-
rect » page 172 .
181Emergency equipment and self-help