stop start SKODA ROOMSTER 2014 1.G User Guide
[x] Cancel search | Manufacturer: SKODA, Model Year: 2014, Model line: ROOMSTER, Model: SKODA ROOMSTER 2014 1.GPages: 204, PDF Size: 14.15 MB
Page 105 of 204
Bluetooth
The following menu items can be selected from the Bluetooth menu item.
■ User - Overview of the stored users
■ New user - Search for new mobile phones in reception range
■ Visibility - Switches on the visibility of the phone for other devices
■ Media Player
■ Active device
■ Paired devices
■ Find
■ Phone name - option to change the name of the phone (default SKODA_BT)
Settings
The following menu items can be selected from the Settings menu item.
■ Phone book
■ Update 1)
■ List
■ Surname
■ Name
■ Ring tone
Back
Return in the Start menu of the telephone.
Voice control
Introduction
This chapter contains information on the following subjects:
Dialogue
102
Voice commands
103
Dialogue
The period of time during which the system is ready to receive voice com-
mands and to carry them out is called a dialogue. The system gives audible
feedback and guides you if necessary through the relevant functions.
Optimum understanding of the voice commands depends on several factors.
› Speak with a normal tone of voice without intonation and excessive pauses.
› Avoid a bad pronunciation.
› Close the doors, windows and sliding roof, to reduce or stop disturbing exte-
rior noise.
› It is recommended to speak louder at higher speeds, so that the tone of your
voice is louder than the increased surrounding noise.
› During the dialogue, limit additional noise in the vehicle, e.g. passengers talk-
ing at the same time.
› Do not speak, if the system makes an announcement.
The microphone for voice control is inserted in the moulded headliner and di-
rected to the driver and front passenger. Therefore the driver and the front
passenger can operate the equipment.
Entering a phone number
The telephone number can be entered as a continuous series of individually
spoken digits (the whole number at once) or in the form of digital blocks (sepa-
rated by short pauses). After each order of digits (separation through brief
voice pause) all of the digits detected up to now are repeated by the system.
The digits 0 - 9, symbols +,
, #
are permitted. The system detects no continu-
ous digit combinations such as twenty-three, but only individually spoken dig-
its (two, three).
Switching on voice control
› Press the
button on the adapter
» Fig. 105 on page 100 briefly.
› Press the
1
button on the multifunction steering wheel briefly
» page 99,
Operating the phone on the multifunction steering wheel .
Switching off voice control
If the system is currently playing a message, the message that is currently be-
ing played will have to be stopped as follows:
› Press the
button on the adapter briefly.
› Press the
1
button on the multifunction steering wheel briefly.
If the system is expecting a voice command, you can end the dialogue yourself
as follows.
› With the
CANCEL voice command.
› Press the
button on the adapter.
› Press the
1
button on the multifunction steering wheel briefly.
1)
On vehicles fitted with the Amundsen+ navigation system, this function can be accessed via the naviga-
tion system menu; refer to the » Operating instructions for the Amundsen+ navigation system .
102Operation
Page 109 of 204
Driving
Starting-off and Driving
Starting and stopping the engine
Introduction
This chapter contains information on the following subjects:
Electronic immobilizer
107
Ignition lock
107
Engine
107
Switching off the engine
107
The engine can only be started using a correctly coded original key.
The engine running noises may louder at first be louder for a short time after starting the cold engine. This is quite normal and is not an operating problem.
WARNING■ When driving, the ignition key must always be in the position 2 » Fig. 107
on page 107 (ignition switched on) without the engine running. This posi-
tion is indicated by the warning lights coming on. If this is not the case, this
could result in unexpected locking of the steering wheel – risk of accident!■
Only pull the ignition key from the ignition lock when the vehicle has
come to a complete stop (by applying the handbrake). Otherwise, the steer- ing could be blocked – risk of accident!
■
Never leave the key in the vehicle when you exit the vehicle. Unauthor-
ized persons, such as children, for example, could lock the car, turn on the
ignition or start the engine - there is a danger of injury and accidents!
■
Never leave the vehicle unattended with the engine running - there is
risk of accident, damage or theft!
■
Never switch off the engine before the vehicle is stationary – risk of acci-
dent!
WARNING■ Never (e.g. in garages) run the engine in a closed place - there is the dan-
ger of poisoning and death!■
Do not leave any items (e.g. cleaning cloths or tools) in the engine com-
partment. This presents a fire hazard and the risk of engine damage.
■
Never cover the engine with additional insulation material (e.g. with a
cover) – risk of fire!
CAUTION
■ The starter must only be operated when the engine is not running and the
vehicle is at a standstill. The starter or engine can be damaged if the starter is
activated when the engine is running 3
» Fig. 107 on page 107 .
■
If the engine does not start up after a second attempt, the fuse for the fuel
pump may have a fault. Check the fuse and replace if necessary » page 175, or
seek assistance from a specialist garage.
■
Let go of the ignition key as soon as the engine starts otherwise the starter
could be damaged.
■
Do not tow start the engine – there is a risk of damaging the engine and the
catalytic converter. The battery from another vehicle can be used as a jump-
start aid » page 172 , Jump-starting .
CAUTION
■
Avoid high engine revolutions, full throttle and high engine loads before the
engine has reached its operating temperature – risk of damaging the engine!■
Do not switch the engine off immediately at the end of your journey after the
engine has been operated over a prolonged period at high loads but leave it to
run at an idling speed for about 1 minute. This prevents any possible accumula-
tion of heat when the engine is switched off.
For the sake of the environment
Do not warm up the engine while the vehicle is stationary. If possible, start
your journey as soon as the engine has started. Through this the engine rea-
ches its operating temperature more rapidly and the pollutant emissions are
lower.
Note
After switching off the ignition, the radiator fan can intermittently continue to
operate for approx. 10 minutes.106Driving
Page 110 of 204
Electronic immobilizerRead and observe
and on page 106 first.
An electronic chip is integrated in the head of the key. The immobiliser is deac-
tivated with the aid of this chip when the key is inserted in the ignition lock.
The electronic immobiliser is automatically activated when the ignition key is
withdrawn from the lock.
The engine will not start if a non-authorized ignition key is used.
The MAXI DOT display shows the following: Immobilizer active.
Ignition lock
Fig. 107
Positions of the vehicle key in
the ignition lock
Read and observe and on page 106 first.
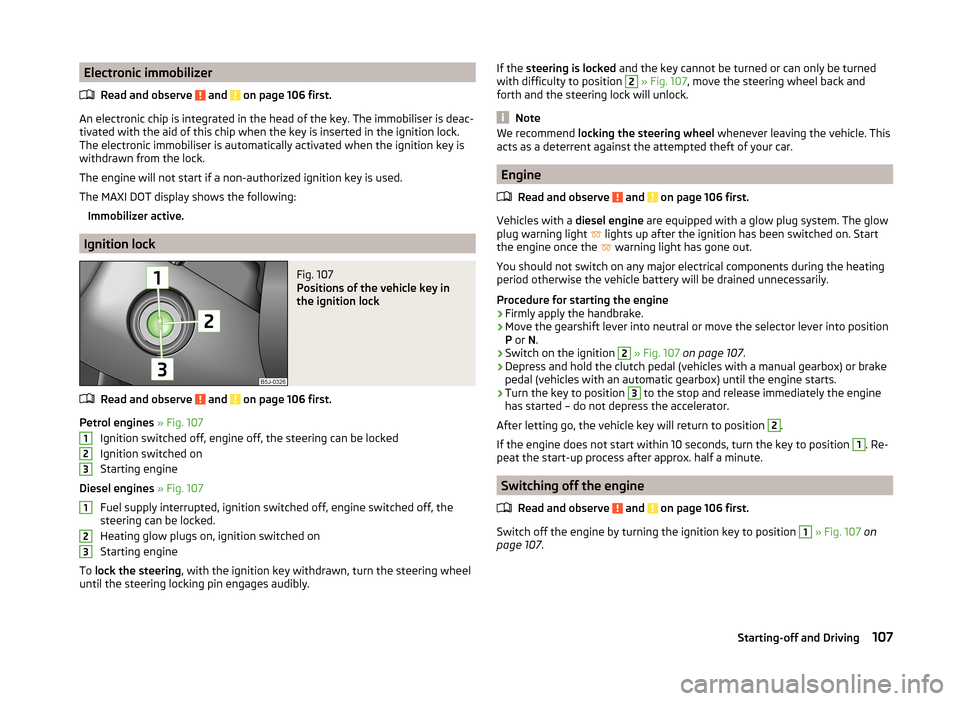
Petrol engines » Fig. 107
Ignition switched off, engine off, the steering can be locked
Ignition switched on
Starting engine
Diesel engines » Fig. 107
Fuel supply interrupted, ignition switched off, engine switched off, the
steering can be locked.
Heating glow plugs on, ignition switched on
Starting engine
To lock the steering , with the ignition key withdrawn, turn the steering wheel
until the steering locking pin engages audibly.
123123If the steering is locked and the key cannot be turned or can only be turned
with difficulty to position 2 » Fig. 107 , move the steering wheel back and
forth and the steering lock will unlock.
Note
We recommend locking the steering wheel whenever leaving the vehicle. This
acts as a deterrent against the attempted theft of your car.
Engine
Read and observe
and on page 106 first.
Vehicles with a diesel engine are equipped with a glow plug system. The glow
plug warning light lights up after the ignition has been switched on. Start
the engine once the warning light has gone out.
You should not switch on any major electrical components during the heating
period otherwise the vehicle battery will be drained unnecessarily.
Procedure for starting the engine
›
Firmly apply the handbrake.
›
Move the gearshift lever into neutral or move the selector lever into position
P or N.
›
Switch on the ignition
2
» Fig. 107 on page 107 .
›
Depress and hold the clutch pedal (vehicles with a manual gearbox) or brake
pedal (vehicles with an automatic gearbox) until the engine starts.
›
Turn the key to position
3
to the stop and release immediately the engine
has started – do not depress the accelerator.
After letting go, the vehicle key will return to position
2
.
If the engine does not start within 10 seconds, turn the key to position
1
. Re-
peat the start-up process after approx. half a minute.
Switching off the engine
Read and observe
and on page 106 first.
Switch off the engine by turning the ignition key to position
1
» Fig. 107 on
page 107 .
107Starting-off and Driving
Page 111 of 204
Brakes
Introduction
This chapter contains information on the following subjects:
Information on braking
108
Handbrake
109WARNING■ Greater physical effort is required for braking when the engine is switch-
ed off – risk of accident!■
The clutch pedal must be depressed when braking on a vehicle with man-
ual transmission, when the vehicle is in gear and at low revs. Otherwise,
the function of the brake booster may be impaired – risk of accident!
■
If a front spoiler, full wheel trim, etc. is mounted retrospectively, it must
be ensured that the air supply to the front wheel brakes is not reduced.
The front brakes may overheat, which can have a negative impact on the
functioning of the braking system – there is a risk of an accident.
■
When leaving the vehicle, never leave persons who might, for example,
release the handbrake or take the vehicle out of gear unattended in the ve-
hicle. The vehicle could then start to move – risk of accident!
CAUTION
■ Observe the recommendations on the new brake pads » page 113.■Never let the brakes slip with light pressure on the pedal if braking is not
necessary. This causes the brakes to overheat and can also result in a longer
braking distance and excessive wear.
Information on braking
Read and observe
and on page 108 first.
If the brakes are applied in full and the control unit for the braking system con-
siders the situation to be dangerous for the following traffic, the brake light
flashes automatically.
After the speed was reduced below around 10 km/h or the vehicle was stop-
ped, the brake light stops flashing and the hazard warning light system
switches on. The hazard warning light system is switched off automatically af- ter accelerating or driving off again.
Before travelling a long distance down a steep gradient, reduce speed and
shift into the next lowest gear. As a result, the braking effect of the engine will
be used, reducing the load on the brakes. Any additional braking should be
completed intermittently, not continuously.
Wear-and-tear
The wear of the brake pads is dependent on the operating conditions and driv- ing style.
The brake pads wear more quickly if a lot of journeys are completed in towns
and over short distances or if a very sporty style of driving is adopted.
Under these severe conditions , the thickness of the brake pads must also be
checked by a specialist garage between services.
Wet roads or road salt
The performance of the brakes can be delayed as the brake discs and brake
pads may be moist or have a coating of ice or layer of salt on them in winter.
The brakes are cleaned and dried by applying the brakes several times.
Corrosion
Corrosion on the brake discs and dirt on the bake pads occur if the vehicle has been parked for a long period and if you do not make much use of the braking
system. The brakes are cleaned and dried by applying the brakes several times.
Faults in the brake surface
If it is found that the braking distance has suddenly become longer and that
the brake pedal can be depressed further, the brake system may be faulty.
Visit a specialist garage immediately and adjust your style of driving appropri-
ately as you will not know the exact extent of the damage.
Low brake fluid level
An insufficient level of brake fluid may result in problems in the brake system.
The level of the brake fluid is monitored electronically » page 40,
Brake sys-
tem .
Brake booster
The brake booster increases the pressure generated with the brake pedal. The
brake booster only operates when the engine is running.108Driving
Page 113 of 204
In the driver's footwell, only a footmat, which is attached to the two corre-
sponding attachment points, may be used.
Only use footmats from the range of ŠKODA Original Accessories, which are fit-
ted to two attachment points.WARNINGNo objects are allowed in the driver's footwell – risk of obstruction or limi-
tation in operating the pedals!
Automatic transmission
Introduction
This chapter contains information on the following subjects:
Modes and use of selector lever
110
Manual shifting (Tiptronic)
111
Starting-off and driving
112
Malfunction
112
Selector lever-emergency unlocking
112WARNING■ Do not depress the accelerator if the forward driving mode is changed
when the vehicle is halted and the engine is running – there is a risk of an
accident.■
Never shift the selector lever to R or P modes when driving – there is a
risk of an accident.
■
The vehicle must be held on the brake pedal in D, S or R modes if the ve-
hicle is halted and the engine is running. Even when the engine is idling,
power transmission is never completely interrupted – the vehicle will creep.
CAUTION■ If the selector lever is shifted to N while the vehicle is being driven you must
lift off the accelerator pedal and you will need to wait until the engine has
reached its idling speed before shifting the selector lever to a forward driving
mode again.■
At temperatures below -10 °C, the engine can only be started in selector lev-
er position P.
■
Never try to hold the vehicle using the accelerator pedal when stopping on a
hill – this may lead to transmission damage.
Note
After the ignition is switched off, the ignition key can only be withdrawn if the
selector lever is in position P1)
.
Modes and use of selector lever
Fig. 110
Selector lever /MAXI DOT display: Selector lever positions
Read and observe
and on page 110 first.
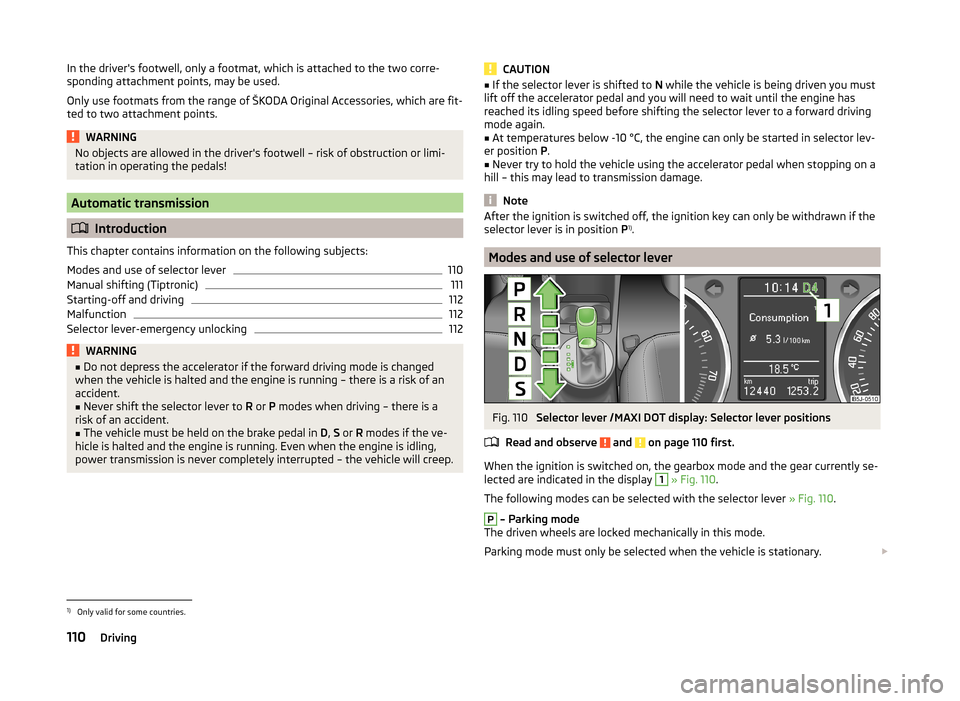
When the ignition is switched on, the gearbox mode and the gear currently se- lected are indicated in the display
1
» Fig. 110 .
The following modes can be selected with the selector lever » Fig. 110.
P
– Parking mode
The driven wheels are locked mechanically in this mode.
Parking mode must only be selected when the vehicle is stationary.
1)
Only valid for some countries.
110Driving
Page 115 of 204
Starting-off and drivingRead and observe
and on page 110 first.
Starting off
›
Start the engine.
›
Firmly depress and hold the brake pedal.
›
Press and hold the shiftlock button on the selector lever grip.
›
Move the selector lever into the desired position » page 110 and then release
the lock button.
›
Release the brake pedal and accelerate.
Stop
›
Fully depress and hold the brake pedal and bring the vehicle to a stop.
›
Keep holding the brake pedal until driving is resumed.
The selector lever position N does not have to be selected when stopping for a
short time, such as at a cross roads.
Parking
›
Fully depress and hold the brake pedal and bring the vehicle to a stop.
›
Firmly apply the handbrake.
›
Press and hold the shiftlock button on the selector lever grip.
›
Move the selector lever into the position P and then release the locking but-
ton.
Kickdown
The kickdown function allows you to achieve maximum acceleration by your vehicle while driving.
When the accelerator pedal is fully depressed, the kickdown function is activa-
ted in any forward driving mode.
The gearbox shifts down one or more gears depending on the vehicle speed
and engine speed, and the vehicle accelerates.
The gearbox does not shift up into the highest gear until the engine has
reached its maximum revolutions for this gear range.
WARNINGRapid acceleration, particularly on slippery roads, can lead to loss of control
of the vehicle – there is a risk of an accident.Malfunction
Read and observe
and on page 110 first.
Emergency programme
The transmission switches to the emergency programme if there is a fault in
the automatic gearbox system.
Indications of an activated emergency programme include the following:
› Only certain gears are selected.
› Reverse gear
R cannot be used.
› Shifting gears in Tiptronic mode is not possible.
Gearbox overheating
The gearbox may, for example, become too hot due to frequent repeated
starting or stop-and-go traffic. Overheating is indicated by the warning
light » page 38 ,
Clutches of the automatic DSG gearbox are too hot
.
Note
Visit a specialist workshop if the gearbox has switched to the emergency pro-
gramme.
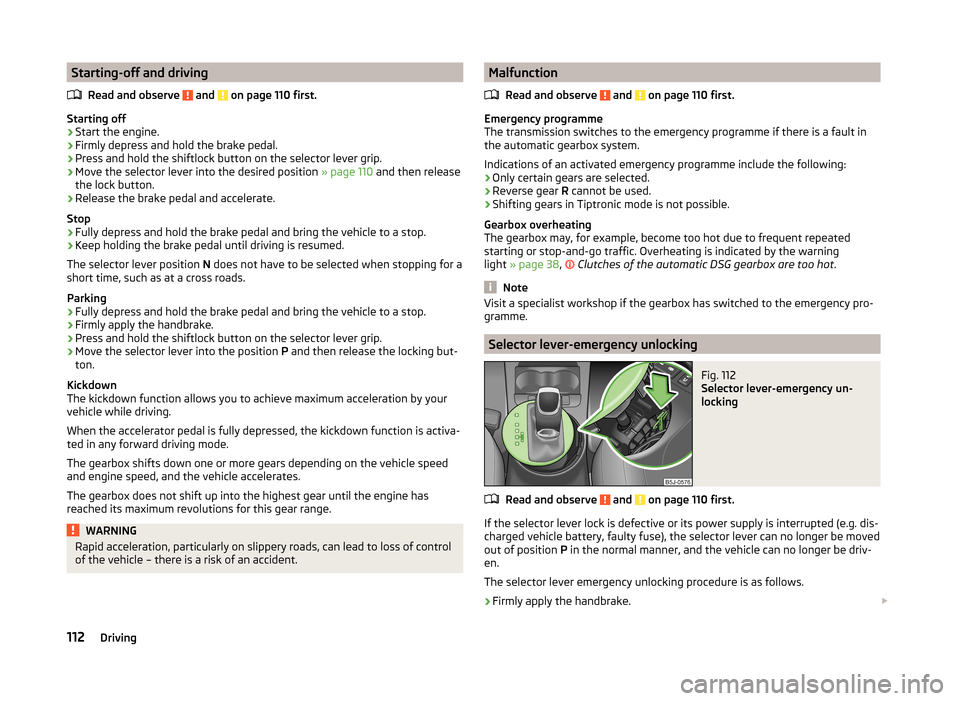
Selector lever-emergency unlocking
Fig. 112
Selector lever-emergency un-
locking
Read and observe and on page 110 first.
If the selector lever lock is defective or its power supply is interrupted (e.g. dis-
charged vehicle battery, faulty fuse), the selector lever can no longer be moved
out of position P in the normal manner, and the vehicle can no longer be driv-
en.
The selector lever emergency unlocking procedure is as follows.
›
Firmly apply the handbrake.
112Driving
Page 118 of 204
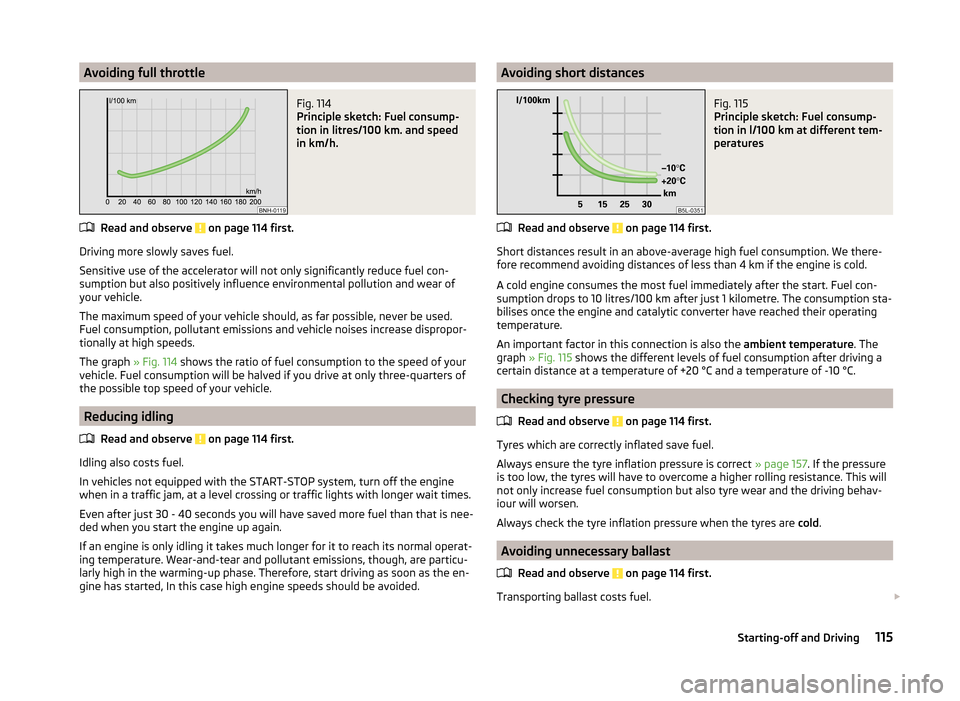
Avoiding full throttleFig. 114
Principle sketch: Fuel consump-
tion in litres/100 km. and speed
in km/h.
Read and observe on page 114 first.
Driving more slowly saves fuel.
Sensitive use of the accelerator will not only significantly reduce fuel con-
sumption but also positively influence environmental pollution and wear of
your vehicle.
The maximum speed of your vehicle should, as far possible, never be used.
Fuel consumption, pollutant emissions and vehicle noises increase dispropor-
tionally at high speeds.
The graph » Fig. 114 shows the ratio of fuel consumption to the speed of your
vehicle. Fuel consumption will be halved if you drive at only three-quarters of
the possible top speed of your vehicle.
Reducing idling
Read and observe
on page 114 first.
Idling also costs fuel.
In vehicles not equipped with the START-STOP system, turn off the engine when in a traffic jam, at a level crossing or traffic lights with longer wait times.
Even after just 30 - 40 seconds you will have saved more fuel than that is nee-
ded when you start the engine up again.
If an engine is only idling it takes much longer for it to reach its normal operat-
ing temperature. Wear-and-tear and pollutant emissions, though, are particu-
larly high in the warming-up phase. Therefore, start driving as soon as the en-
gine has started, In this case high engine speeds should be avoided.
Avoiding short distancesFig. 115
Principle sketch: Fuel consump-
tion in l/100 km at different tem-
peratures
Read and observe on page 114 first.
Short distances result in an above-average high fuel consumption. We there- fore recommend avoiding distances of less than 4 km if the engine is cold.
A cold engine consumes the most fuel immediately after the start. Fuel con-
sumption drops to 10 litres/100 km after just 1 kilometre. The consumption sta-
bilises once the engine and catalytic converter have reached their operating
temperature.
An important factor in this connection is also the ambient temperature. The
graph » Fig. 115 shows the different levels of fuel consumption after driving a
certain distance at a temperature of +20 °C and a temperature of -10 °C.
Checking tyre pressure
Read and observe
on page 114 first.
Tyres which are correctly inflated save fuel.
Always ensure the tyre inflation pressure is correct » page 157. If the pressure
is too low, the tyres will have to overcome a higher rolling resistance. This will
not only increase fuel consumption but also tyre wear and the driving behav-
iour will worsen.
Always check the tyre inflation pressure when the tyres are cold.
Avoiding unnecessary ballast
Read and observe
on page 114 first.
Transporting ballast costs fuel.
115Starting-off and Driving
Page 120 of 204
Trade-in and recycling of old cars
ŠKODA meets the requirements of the brand and its products with regard to
protecting the environment and the preserving resources. All new ŠKODAvehi-
cles can be recycled by up to 95 % and can always 1)
be returned free of charge.
In a lot of countries sufficient trade-in networks have been created, where you
can trade-in your vehicle. After you trade-in your vehicle, you will receive a
confirmation stating the recycling in accordance with environmental regula-
tions.
Note
You can find more detailed information about the trade-in and recycling of old
cars from a specialist garage.
Avoiding damage to your vehicle
Introduction
This chapter contains information on the following subjects:
General information
117
Driving through water on streets
117
General information
Pay attention to low-slung parts of the vehicle, such as the spoiler and ex-
haust, particularly in the following situations.
› When driving on poorly maintained roads and paths.
› When driving over kerbs.
› When driving on steep ramps, etc.
Particular attention is required for vehicles with sport suspension and when
the vehicle is fully laden.
Driving through water on streetsFig. 116
Maximum permissible water lev-
el when driving through water
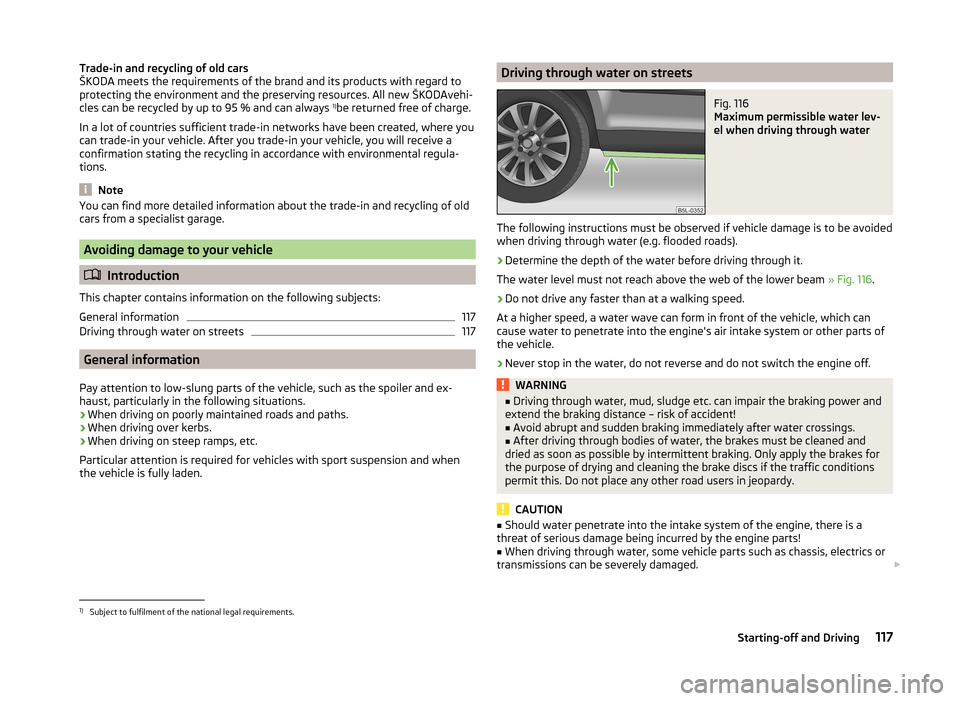
The following instructions must be observed if vehicle damage is to be avoided when driving through water (e.g. flooded roads).
›
Determine the depth of the water before driving through it.
The water level must not reach above the web of the lower beam » Fig. 116.
›
Do not drive any faster than at a walking speed.
At a higher speed, a water wave can form in front of the vehicle, which can
cause water to penetrate into the engine's air intake system or other parts of
the vehicle.
›
Never stop in the water, do not reverse and do not switch the engine off.
WARNING■ Driving through water, mud, sludge etc. can impair the braking power and
extend the braking distance – risk of accident!■
Avoid abrupt and sudden braking immediately after water crossings.
■
After driving through bodies of water, the brakes must be cleaned and
dried as soon as possible by intermittent braking. Only apply the brakes for
the purpose of drying and cleaning the brake discs if the traffic conditions
permit this. Do not place any other road users in jeopardy.
CAUTION
■ Should water penetrate into the intake system of the engine, there is a
threat of serious damage being incurred by the engine parts!■
When driving through water, some vehicle parts such as chassis, electrics or
transmissions can be severely damaged.
1)
Subject to fulfilment of the national legal requirements.
117Starting-off and Driving
Page 126 of 204
›The speed will decrease continuously, if the rocker button is pressed and
held in the SET position. Release the rocker button once the desired speed is
reached. The set speed is then stored in the memory.›
If the rocker button is released at a speed below around 25 km/h, the speed
is not stored and the memory is erased. The speed must then be stored
again by pressing rocker button
B
to the SET position after increasing the
speed of the vehicle to more than around 25 km/h.
The speed can also be reduced by depressing the brake pedal, which tempora- rily deactivates the system.
Switching off temporarily
Read and observe
and on page 122 first.
The cruise control system can be temporarily switched off by pushing switch
A
» Fig. 119 on page 122 to the spring-loaded CANCEL position or by depress-
ing the brake or clutch pedal.
The set speed remains stored in the memory.
Briefly push rocker button
B
to the RES position to resume the set speed af-
ter the clutch or brake pedal is released.
Switching off completely
Read and observe
and on page 122 first.
›
Press switch
A
» Fig. 119 on page 122 to the right to the OFF position.
START-STOP
Introduction
This chapter contains information on the following subjects:
Operating conditions for the system
123
Operation
124
System related automatic start-up
124
Manually deactivating/activating the system
124
Information messages
124The START-STOP system (hereinafter referred to as the system) saves fuel and
reduces polluting emissions and CO 2 emissions by turning the engine off, e.g.
when stopping at traffic lights, and starting the engine again when moving off.WARNING■ Never let the vehicle roll with the engine switched off.■The brake servo unit and power steering only operate if the engine is run-
ning.
Operating conditions for the system
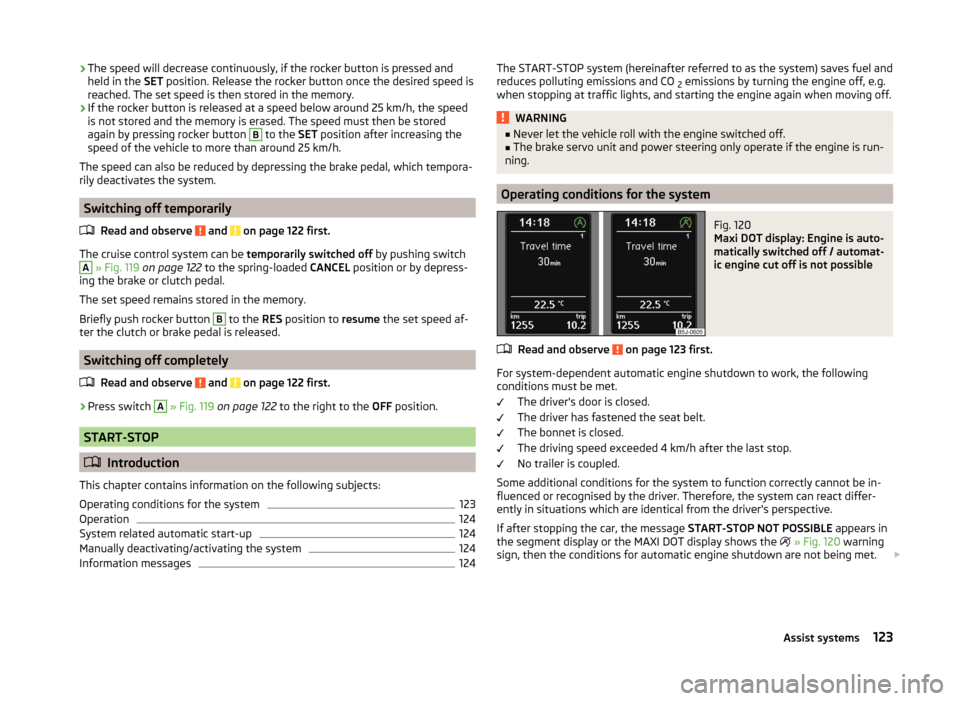
Fig. 120
Maxi DOT display: Engine is auto-
matically switched off / automat-
ic engine cut off is not possible
Read and observe on page 123 first.
For system-dependent automatic engine shutdown to work, the following
conditions must be met.
The driver's door is closed.
The driver has fastened the seat belt.
The bonnet is closed.
The driving speed exceeded 4 km/h after the last stop.
No trailer is coupled.
Some additional conditions for the system to function correctly cannot be in-
fluenced or recognised by the driver. Therefore, the system can react differ-
ently in situations which are identical from the driver's perspective.
If after stopping the car, the message START-STOP NOT POSSIBLE appears in
the segment display or the MAXI DOT display shows the
» Fig. 120 warning
sign, then the conditions for automatic engine shutdown are not being met.
123Assist systems
Page 127 of 204
Running the engine is essential for the following reasons, for example.
› The engine temperature for the proper function of the system has not yet
been reached.
› The charge state of the vehicle battery is too low.
› The current consumption is too high.
› High air-conditioning or heating capacity (high fan speed, big difference be-
tween the desired and actual interior temperature).
Note
■ If the vehicle remains outdoors for a long time in minus temperatures or in
direct sunlight, it can take several hours until the internal temperature of the
vehicle battery reaches a suitable temperature for proper operation of the
START STOP system.■
If the driver's seat belt is removed for more than approx. 30 seconds or the
driver's door is opened during stop mode, the engine will have to be started
manually.
■
After the manual engine start, the automatic engine shutdown can take
place only when a minimum distance required for the system function has
been covered.
Operation
Read and observe
on page 123 first.
In compliance with the operating conditions, automatic engine shutdown / au-
tomatic engine start takes place as described.
Automatic engine shutdown
›
Stop the vehicle.
›
Shift the gear lever to Neutral.
›
Release the clutch pedal.
Automatic engine shutdown takes place, segment display shows START-STOP
ACTIVE or the MAXI DOT display shows the warning sign
» Fig. 120 on
page 123 .
Automatic engine start
›
Depress the clutch pedal.
The automatic start procedure takes place again.
System related automatic start-up
Read and observe
on page 123 first.
When the engine is off, the system can automatically start the engine beforethe desired journey continues. Some possible reasons for this are:
› The vehicle has begun to roll, e.g. on a slope.
› The brake pedal has been actuated several times.
› The current consumption is too high.
Manually deactivating/activating the system
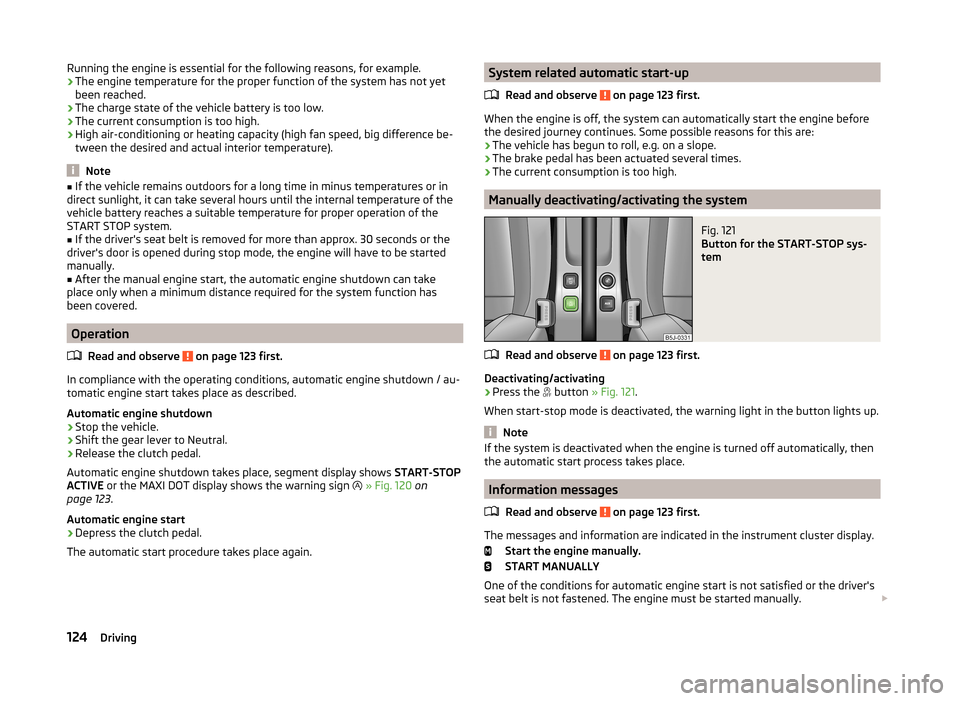
Fig. 121
Button for the START-STOP sys-
tem
Read and observe on page 123 first.
Deactivating/activating
›
Press the button
» Fig. 121 .
When start-stop mode is deactivated, the warning light in the button lights up.
Note
If the system is deactivated when the engine is turned off automatically, then
the automatic start process takes place.
Information messages
Read and observe
on page 123 first.
The messages and information are indicated in the instrument cluster display. Start the engine manually.
START MANUALLY
One of the conditions for automatic engine start is not satisfied or the driver's seat belt is not fastened. The engine must be started manually.
124Driving