key battery SKODA SUPERB 2003 1.G / (B5/3U) User Guide
[x] Cancel search | Manufacturer: SKODA, Model Year: 2003, Model line: SUPERB, Model: SKODA SUPERB 2003 1.G / (B5/3U)Pages: 259
Page 118 of 259
Starting-off and Driving117
Using the systemSafetyDriving TipsGeneral MaintenanceBreakdown assistanceTechnical Data
You should not switch on any major electrical components during
the heating period otherwise the ve
hicle battery will be drained
unnecessarily.
•You should start the engine immediately after the glow plug warning
light has gone out.
•The glow plug warning light will come on for about one second if the
engine is at a normal operating temperature or if the outside temperature
is above +5°C. This means that you can start the engine right away.
•Interrupt the attempt at starting after 10 seconds if the engine does not
start right awayand wait for about 30 seconds before repeating the
attempt.
•It is possible that the fuse on the diesel preglow system is defect if the
engine still does not start ⇒page 241.
•Contact the nearest Škoda dealer to obtain professional assistance.
Starting the engine after the fuel tank has run dry
It may take longer than normal to start the engine after refuelling if the fuel
tank has run completely dry - up to one minute. This is because the fuel
system must first of all be filled while the attempting to start the engine.
Switching the engine off
– Turn the ignition key into position ⇒page 114.
Caution
you should not switch the engine off right away at the end of your journey
after the engine has been operated for a lengthy period at high loads but
should be allowed it to run at idling speed for about 2 minutes. This
prevents any accumulation of heat when the engine is switched off.
Note
•The radiator fan may continue running for a further 10 minutes or so
after the engine and the ignition have been switched off. The coolant fan
may, however, also switch on again after some time if the coolant temper-
ature rises because of an accumulation of heat in the engine or if the
engine is warm and the engine compartment is additionally heated by
strong sunlight.
•This is why particular care is required when carrying out any work in
the engine compartment ⇒page 203.
A1
Page 134 of 259
Communicating and Navigating133
Using the systemSafetyDriving TipsGeneral MaintenanceBreakdown assistanceTechnical Data
Initialisation
– Withdraw the ignition key.
– First insert the adapter without the mobile phone into the
mount in the direction of arrow ⇒page 132, fig. 117
until the adapter is touching the stop. Press the adapter
slightly in the direction of arrow until it locks into position.
– Plug the adapter cable into the mobile phone socket. The socket is located on the mobile phone mount below.
– Switch on the ignition.
– Wait approximately 20 seconds, switch off the ignition and pull the ignition key out of the ignition lock.
– Insert the mobile phone into the adapter (as specified in manufacturer's instructions) and switch on the ignition.
Removing the mobile phone and adapter
– Press the button and remove the mobile telephone.
An initialisation must be carried out:
•after the first connection of the adapter
•after reconnecting the battery
•after pulling out the adapter cable from the power socket for the mobile
phone
This enables you to make full use of the advantages of a normal carphone
(“handsfree system” using a microphone integrated in the vehicle, optimal
transmission of signals using an external aerial etc.). The battery of the
mobile phone is also constantly charged. Please contact your Škoda dealer If there are any points which are not
clear.
Please also refer to the additional instructions
⇒page 135.
ABA1
A2
AA
AC
Page 135 of 259
Communicating and Navigating
134
Telephone pre-installation at the front or rear*
(GSM III)
Initialisation of the adapter
– Withdraw the ignition key.
– Insert the adapter into the mount (the mobile phone
must not be inserted in the adapter).
– Plug the adapter cable into the mobile phone socket.
– Switch on the ignition.
– Wait approximately 20 seconds, switch off the ignition and pull the ignition key out of the ignition lock.
– Insert the mobile phone into the adapter (as specified in manufacturer's instructions) and switch on the ignition.
An initialisation must be carried out:
•after the first connection of the adapter
•after reconnecting the battery
•after pulling out the adapter cable from the power socket for the mobile
phone
This enables you to make full use of the advantages of a normal carphone
(“handsfree system” using a microphone integrated in the vehicle, optimal
transmission of signals using an external aerial etc.). The battery of the
mobile phone is also constantly charged.
A telephone mount is factory-fitted for the front mobile phone and for the
rear mobile phone. The front telephone mount is located on the front
center console ⇒fig. 118 , the rear on the rear center console ⇒fig. 119 .
Adapter (Cullmann) and mobile phone are not factory-fitted by Škoda
Auto.
Please also refer to the additional instructions ⇒page 135.
Fig. 118 Universal tele-
phone connection at
the front
Fig. 119 Universal tele-
phone connection at
the rear
AAAB
Page 204 of 259
Inspecting and Replenishing203
Using the systemSafetyDriving TipsGeneral MaintenanceBreakdown assistanceTechnical Data
The bonnet is held in the opened position by a pressurized gas spring.
Caution
•Never open the bonnet using the handle - danger of causing damage.
•Before opening the bonnet, ensure that the arms of the windscreen
wipers are correctly in place against the windscreen. Otherwise, there is
a risk of damage to the paintwork.
Working in the en gine compartment
Particular care is required when carrying out any work in
the engine compartment!
There is a risk of injuries, scalding , accidents and fire when working
in the engine compartment, e.g. inspecting and replenishing oil and
other fluids. For this reason, it is essential to comply with the
warning instructions st ated below and with the general applicable
rules of safety. The engine compartment of your car is a hazardous
area ⇒ .
WARNING
•Never open the bonnet if you see that steam or coolant is
flowing out of the engine compartmen t - risk of scalding! Wait long
enough until the steam or coolant has stopped escaping.
•For safety reasons, the bonnet must always be properly closed
when driving. One should therefore check that the lock has in fact
engaged properly after closing the bonnet.
•Stop your vehicle immediately wh ile driving if you notice that
the lock is not properly engaged and close the bonnet properly -
risk of an accident!
WARNING
•Switch off the engine and pull out the ignition key.
•Apply the handbrake firmly.
•If your vehicle is fitted with a manual gearbox, move the gear-
shift lever into Neutral, or if it is fitted with automatic gearbox,
move the selector lever into position P.
•Allow the engine to cool down.
•Keep children clear of the engine compartment.
•Never spill oil and other fluids over the hot engine. Such fluids
(e.g. the antifreeze contained in the coolant) may ignite!
•Avoid short circuits in the electrical system - particularly on the
battery.
•Never place your hand into the radiator fan as long as the
engine is still warm. The fan might suddenly start running!
•Never open the cap of the coolant expansion bottle as long as
the engine is still warm. The cooling system is pressurized!
•Cover over the cap of the coolant expansion reservoir with a
large cloth when opening it as protection for your face, hands and
arms from hot steam or hot coolant.
•In cases where it be necessary to carry out inspection work
when the engine is running there is an additional risk from rotating
parts (e.g. the V-ribbed belt, alternator, radiator fan) and from the
high-voltage ignition system.
•Please also comply with the warning instructions stated below
when carrying out any essential work on the fuel system or on the
electrical system:
−Always separate the car battery from the electrical system.
− Do not smoke.
− Never carry out any work close to naked flames.
Page 217 of 259
Inspecting and Replenishing
216
Removing and installing the battery
– Please also refer to the notes when working on the battery ⇒page 212.
– Switched off all electrical components and remove the ignition key.
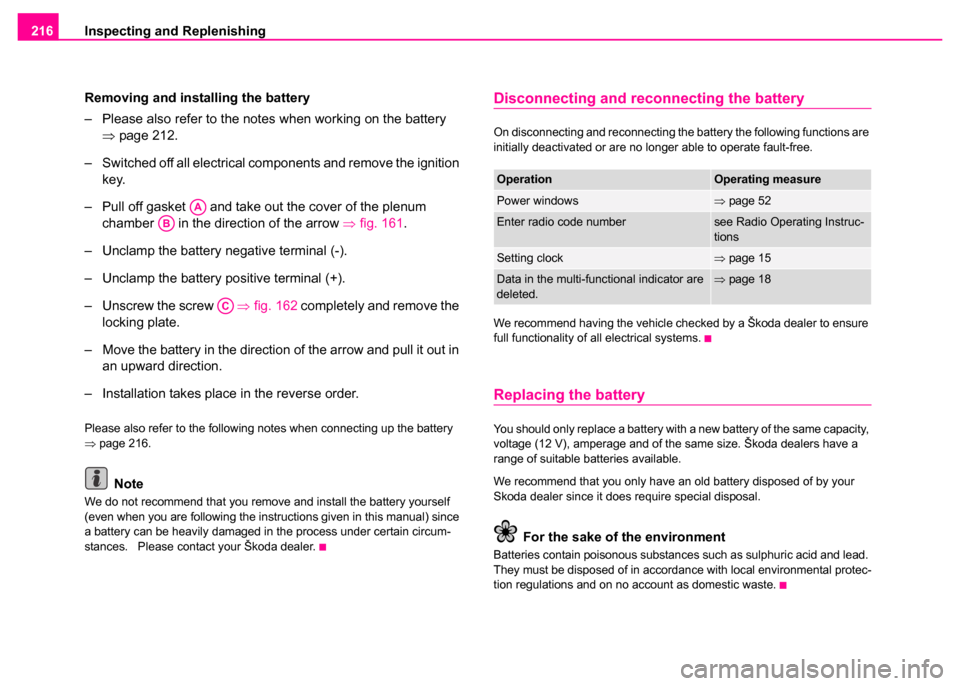
– Pull off gasket and take out the cover of the plenum chamber in the direction of the arrow ⇒fig. 161 .
– Unclamp the battery negative terminal (-).
– Unclamp the battery positive terminal (+).
– Unscrew the screw ⇒fig. 162 completely and remove the
locking plate.
– Move the battery in the direction of the arrow and pull it out in an upward direction.
– Installation takes place in the reverse order.
Please also refer to the following notes when connecting up the battery
⇒ page 216.
Note
We do not recommend that you remove and install the battery yourself
(even when you are following the instructions given in this manual) since
a battery can be heavily damaged in the process under certain circum-
stances. Please contact your Škoda dealer.
Disconnecting and reconnecting the battery
On disconnecting and reconnecting the battery the following functions are
initially deactivated or are no longer able to operate fault-free.
We recommend having the vehicle checked by a Škoda dealer to ensure
full functionality of all electrical systems.
Replacing the battery
You should only replace a battery with a new battery of the same capacity,
voltage (12 V), amperage and of the same size. Škoda dealers have a
range of suitable batteries available.
We recommend that you only have an old battery disposed of by your
Skoda dealer since it does require special disposal.
For the sake of the environment
Batteries contain poisonous substances such as sulphuric acid and lead.
They must be disposed of in accordance with local environmental protec-
tion regulations and on no account as domestic waste.
AA
AB
AC
OperationOperating measure
Power windows⇒page 52
Enter radio code numbersee Radio Operating Instruc-
tions
Setting clock⇒page 15
Data in the multi-functional indicator are
deleted.⇒page 18
Page 255 of 259
Index
254
Multifunction steering wheel . . . . . . . . . . . . 130
Operating cruise control system . . . . . . 130
Operation of radio . . . . . . . . . . . . . . . . . 131
Multi-functional indicator . . . . . . . . . . . . . . . . 18
N
Natural leather . . . . . . . . . . . . . . . . . . . . . . 194
Navigation system . . . . . . . . . . . . . . . . 27, 135
O
Oil . . . . . . . . . . . . . . . . . . . . . . . . . . . . . . . . 205 Warning light . . . . . . . . . . . . . . . . . . . . . . 32
Onboard computer . . . . . . . . . . . . . . . . . . . . 18
Open door Warning light . . . . . . . . . . . . . . . . . . . . . . 33
Opening a single door . . . . . . . . . . . . . . . . . . 43
Operation in winter Biodiesel . . . . . . . . . . . . . . . . . . . . . . . . 199
De-icing windows . . . . . . . . . . . . . . . . . 192
Snow chains . . . . . . . . . . . . . . . . . . . . . 225
The battery . . . . . . . . . . . . . . . . . . . . . . 214
Tyres . . . . . . . . . . . . . . . . . . . . . . . . . . . 224
Overview of the engine compartment . . . . . 204
P
Paint . . . . . . . . . . . . . . . . . . . . . . . . . . . . . . 192
Paint damage . . . . . . . . . . . . . . . . . . . . . . . 192
Parking aid . . . . . . . . . . . . . . . . . . . . . . . . . 119
Parking light . . . . . . . . . . . . . . . . . . . . . . . . . 59 Parking lights . . . . . . . . . . . . . . . . . . . . . . . . 56
Pedals . . . . . . . . . . . . . . . . . . . . . . . . . . . . . . 78
Petrol . . . . . . . . . . . . . . . . . . . . . . . . . . . . . . 198
Polishing . . . . . . . . . . . . . . . . . . . . . . . . . . . 191
Power socket . . . . . . . . . . . . . . . . . . . . . 93, 94
Power steering . . . . . . . . . . . . . . . . . . . . . . 174
Power windows
Central locking system . . . . . . . . . . . . . . 51
Operational problems . . . . . . . . . . . . . . . 52
Switch on the driver's door . . . . . . . . . . . 49
Switches in front passenger door and in rear doors . . . . . . . . . . . . . . . . . . . . . . . . . . . 51
R
Rear fog light . . . . . . . . . . . . . . . . . . . . . . . . . 57
Warning light . . . . . . . . . . . . . . . . . . . . . . 31
Rear window heater . . . . . . . . . . . . . . . . . . . 62
Rear-view mirror Exterior mirrors . . . . . . . . . . . . . . . . . . . . 67
Interior rear-view mirror . . . . . . . . . . . . . . 66
Recirculated air mode Heating and ventilation . . . . . . . . . . . . . 105
Refuelling . . . . . . . . . . . . . . . . . . . . . . . . . . 200 Emergency release of fuel filler flap . . . 201
Remote control . . . . . . . . . . . . . . . . . . . . . . . 46 Synchronisation . . . . . . . . . . . . . . . . . . . . 47
Replacing fuses . . . . . . . . . . . . . . . . . . . . . 241
Roof aerial . . . . . . . . . . . . . . . . . . . . . . . . . . 190
Running in the car . . . . . . . . . . . . . . . . . . . . 176
S
Safety instructions Engine compartment . . . . . . . . . . . . . . . 203
Safety wheel bolts . . . . . . . . . . . . . . . . . . . . 235
Saving energy . . . . . . . . . . . . . . . . . . . . . . . 179
Seat belt height adjuster . . . . . . . . . . . . . . . 142
Seat belt warning light . . . . . . . . . . . . . . . . . 141
Seat belts . . . . . . . . . . . . . . . . . . . . . . 138, 143 Belt tensioners . . . . . . . . . . . . . . . . . . . . 143
Blocking . . . . . . . . . . . . . . . . . . . . . . . . . 143
Cleaning . . . . . . . . . . . . . . . . . . . . . . . . . 196
Fasten . . . . . . . . . . . . . . . . . . . . . . . . . . 141
Height adjustment . . . . . . . . . . . . . . . . . 142
Safety instructions . . . . . . . . . . . . . . . . . 140
taking off . . . . . . . . . . . . . . . . . . . . . . . . 142
Warning light . . . . . . . . . . . . . . . . . . . . . . 36
Seat heaters . . . . . . . . . . . . . . . . . . . . . . . . . 77
Service Interval Display . . . . . . . . . . . . . . . . . 17
Service key . . . . . . . . . . . . . . . . . . . . . . . . . . 37
Setting temperature The air conditioning system . . . . . . . . . . 103
Setting the clock . . . . . . . . . . . . . . . . . . . . . . 15
Shifting gears . . . . . . . . . . . . . . . . . . . . . . . 118
Ski bag . . . . . . . . . . . . . . . . . . . . . . . . . . . . . 81
Sliding/tilting roof . . . . . . . . . . . . . . . . . . . . . . 52
Snow chains . . . . . . . . . . . . . . . . . . . . . . . . 225
Spare wheel . . . . . . . . . . . . . . . . . . . . . . . . 229
Speedometer . . . . . . . . . . . . . . . . . . . . . . . . . 16