technical data SKODA SUPERB 2003 1.G / (B5/3U) User Guide
[x] Cancel search | Manufacturer: SKODA, Model Year: 2003, Model line: SUPERB, Model: SKODA SUPERB 2003 1.G / (B5/3U)Pages: 259
Page 26 of 259
Instruments and Indicator/Warning Lights25
Using the systemSafetyDriving TipsGeneral MaintenanceBreakdown assistanceTechnical Data
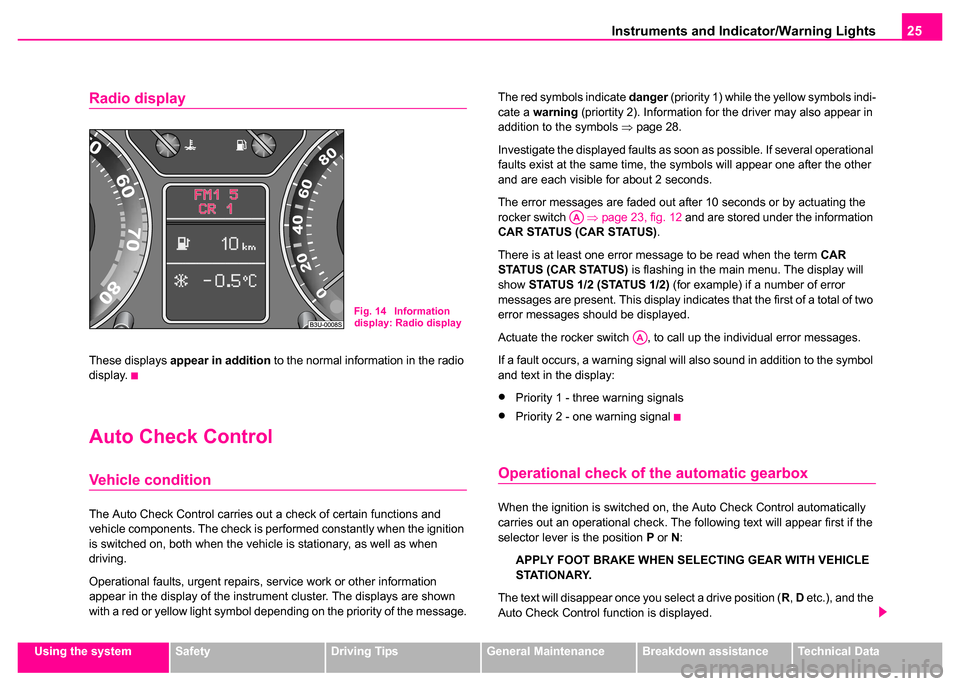
Radio display
These displays appear in addition to the normal information in the radio
display.
Auto Check Control
Vehicle condition
The Auto Check Control carries out a check of certain functions and
vehicle components. The check is performed constantly when the ignition
is switched on, both when the vehicle is stationary, as well as when
driving.
Operational faults, urgent repairs, service work or other information
appear in the display of the instrument cluster. The displays are shown
with a red or yellow light symbol depending on the priority of the message. The red symbols indicate
danger (priority 1) while the yellow symbols indi-
cate a warning (priortity 2). Information for the driver may also appear in
addition to the symbols ⇒page 28.
Investigate the displayed faults as soon as possible. If several operational
faults exist at the same time, the symbols will appear one after the other
and are each visible for about 2 seconds.
The error messages are faded out after 10 seconds or by actuating the
rocker switch ⇒page 23, fig. 12 and are stored under the information
CAR STATUS (CAR STATUS) .
There is at least one error message to be read when the term CAR
STATUS (CAR STATUS) is flashing in the main menu. The display will
show STATUS 1/2 (STATUS 1/2) (for example) if a number of error
messages are present. This display indicates that the first of a total of two
error messages should be displayed.
Actuate the rocker switch , to call up the individual error messages.
If a fault occurs, a warning signal will also sound in addition to the symbol
and text in the display:
•Priority 1 - three warning signals
•Priority 2 - one warning signal
Operational check of the automatic gearbox
When the ignition is switched on, the Auto Check Control automatically
carries out an operational check. The following text will appear first if the
selector lever is the position P or N :
APPLY FOOT BRAKE WHEN SELECTING GEAR WITH VEHICLE
STATIONARY.
The text will disappear once you select a drive position ( R, D etc.), and the
Auto Check Control function is displayed.
Fig. 14 Information
display: Radio display
AA
AA
Page 28 of 259
Instruments and Indicator/Warning Lights27
Using the systemSafetyDriving TipsGeneral MaintenanceBreakdown assistanceTechnical Data
One
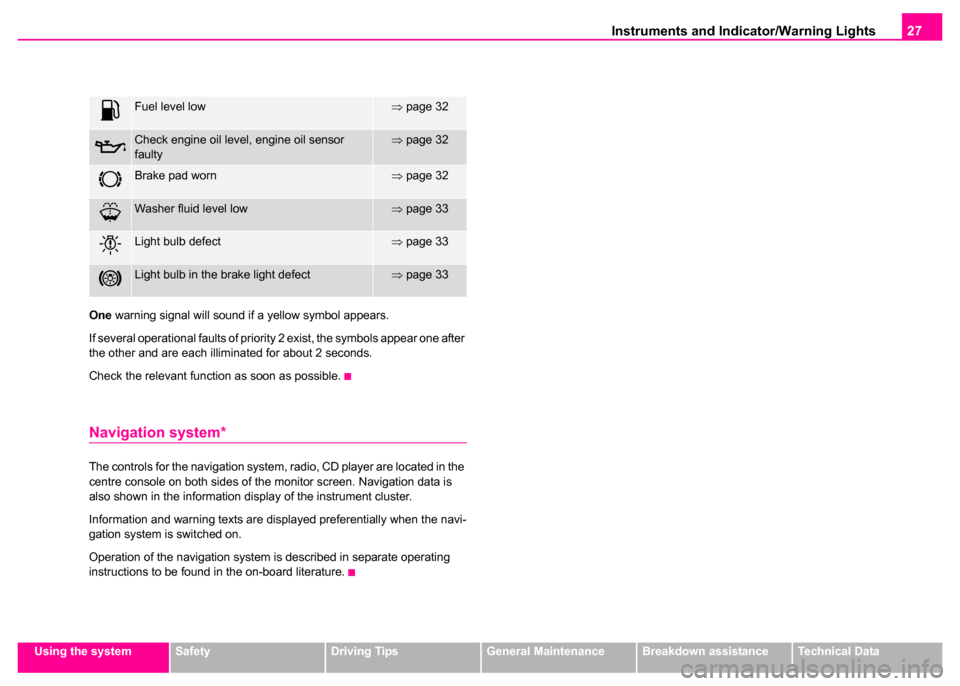
warning signal will sound if a yellow symbol appears.
If several operational faults of priority 2 exist, the symbols appear one after
the other and are each illiminated for about 2 seconds.
Check the relevant function as soon as possible.
Navigation system*
The controls for the navigation system, radio, CD player are located in the
centre console on both sides of the monitor screen. Navigation data is
also shown in the information display of the instrument cluster.
Information and warning texts are displayed preferentially when the navi-
gation system is switched on.
Operation of the navigation system is described in separate operating
instructions to be found in the on-board literature.
Fuel level low⇒ page 32
Check engine oil level, engine oil sensor
faulty⇒page 32
Brake pad worn⇒page 32
Washer fluid level low⇒page 33
Light bulb defect⇒page 33
Light bulb in the brake light defect⇒page 33
Page 30 of 259
Instruments and Indicator/Warning Lights29
Using the systemSafetyDriving TipsGeneral MaintenanceBreakdown assistanceTechnical Data
Note
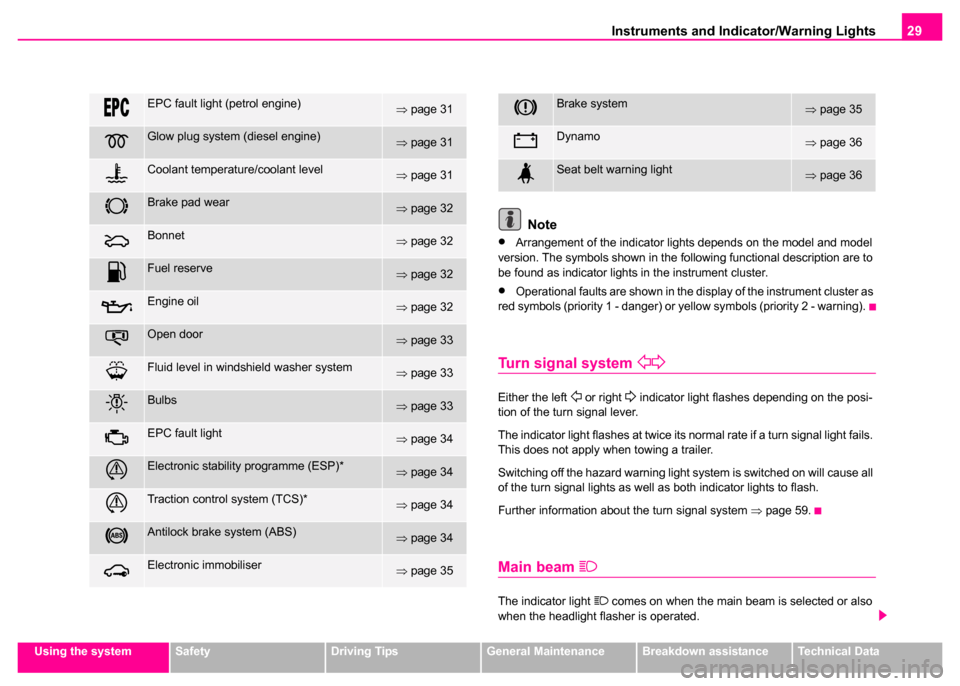
•Arrangement of the indicator lights depends on the model and model
version. The symbols shown in the following functional description are to
be found as indicator lights in the instrument cluster.
•Operational faults are shown in the display of the instrument cluster as
red symbols (priority 1 - danger) or yellow symbols (priority 2 - warning).
Turn signal system
Either the left or right indicator light flashes depending on the posi-
tion of the turn signal lever.
The indicator light flashes at twice its normal rate if a turn signal light fails.
This does not apply when towing a trailer.
Switching off the hazard warning light system is switched on will cause all
of the turn signal lights as well as both indicator lights to flash.
Further information about the turn signal system ⇒page 59.
Main beam
The indicator light comes on when the main beam is selected or also
when the headlight flasher is operated.
EPC fault light (petrol engine)⇒ page 31
Glow plug system (diesel engine)⇒page 31
Coolant temperature/coolant level⇒page 31
Brake pad wear⇒page 32
Bonnet⇒page 32
Fuel reserve⇒page 32
Engine oil⇒page 32
Open door⇒page 33
Fluid level in windshield washer system⇒page 33
Bulbs⇒page 33
EPC fault light⇒page 34
Electronic stability programme (ESP)*⇒page 34
Traction control system (TCS)*⇒page 34
Antilock brake system (ABS)⇒page 34
Electronic immobiliser⇒page 35
Brake system⇒page 35
Dynamo⇒page 36
Seat belt warning light⇒page 36
Page 32 of 259
Instruments and Indicator/Warning Lights31
Using the systemSafetyDriving TipsGeneral MaintenanceBreakdown assistanceTechnical Data
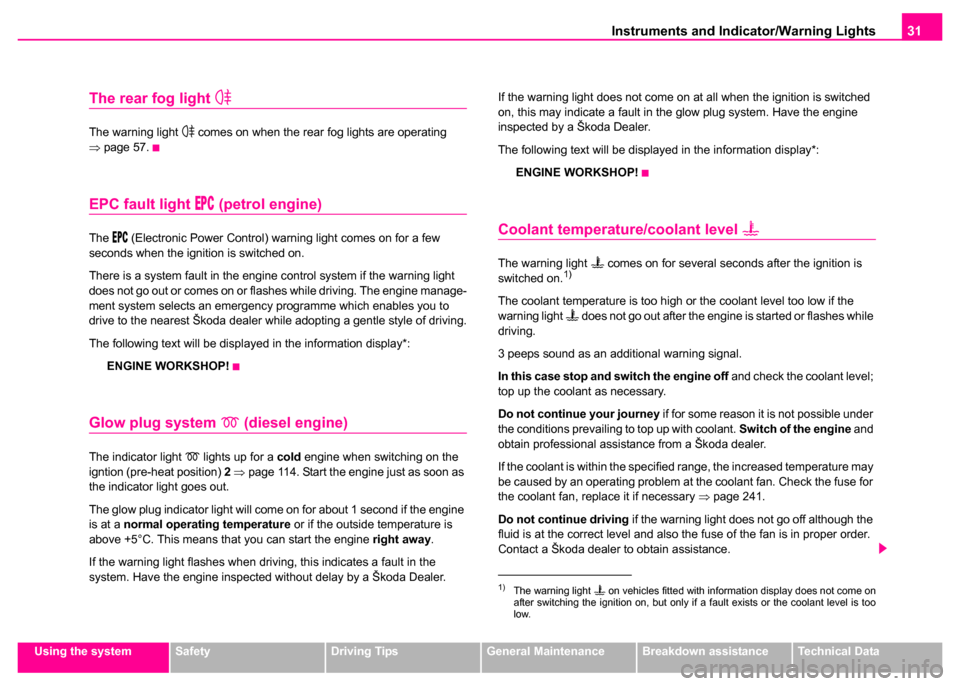
The rear fog light
The warning light comes on when the rear fog lights are operating
⇒ page 57.
EPC fault light (petrol engine)
The (Electronic Power Control) warning light comes on for a few
seconds when the ignition is switched on.
There is a system fault in the engine control system if the warning light
does not go out or comes on or flashes while driving. The engine manage-
ment system selects an emergency programme which enables you to
drive to the nearest Škoda dealer while adopting a gentle style of driving.
The following text will be displayed in the information display*:
ENGINE WORKSHOP!
Glow plug system (diesel engine)
The indicator light lights up for a cold engine when switching on the
igntion (pre-heat position) 2 ⇒ page 114. Start the engine just as soon as
the indicator light goes out.
The glow plug indicator light will come on for about 1 second if the engine
is at a normal operating temperature or if the outside temperature is
above +5°C. This means that you can start the engine right away.
If the warning light flashes when driving, this indicates a fault in the
system. Have the engine inspected without delay by a Škoda Dealer. If the warning light does not come on at all when the ignition is switched
on, this may indicate a fault in the glow plug system. Have the engine
inspected by a Škoda Dealer.
The following text will be displayed in the information display*:
ENGINE WORKSHOP!
Coolant temperature/coolant level
The warning light comes on for several seconds after the ignition is
switched on.1)
The coolant temperature is too high or the coolant level too low if the
warning light does not go out after the engine is started or flashes while
driving.
3 peeps sound as an additional warning signal.
In this case stop and switch the engine off and check the coolant level;
top up the coolant as necessary.
Do not continue your journey if for some reason it is not possible under
the conditions prevailing to top up with coolant. Switch of the engine and
obtain professional assistance from a Škoda dealer.
If the coolant is within the specified range, the increased temperature may
be caused by an operating problem at the coolant fan. Check the fuse for
the coolant fan, replace it if necessary ⇒page 241.
Do not continue driving if the warning light does not go off although the
fluid is at the correct level and also the fuse of the fan is in proper order.
Contact a Škoda dealer to obtain assistance.
1)The warning light on vehicles fitted with information display does not come on
after switching the ignition on, but only if a fault exists or the coolant level is too
low.
Page 34 of 259
Instruments and Indicator/Warning Lights33
Using the systemSafetyDriving TipsGeneral MaintenanceBreakdown assistanceTechnical Data
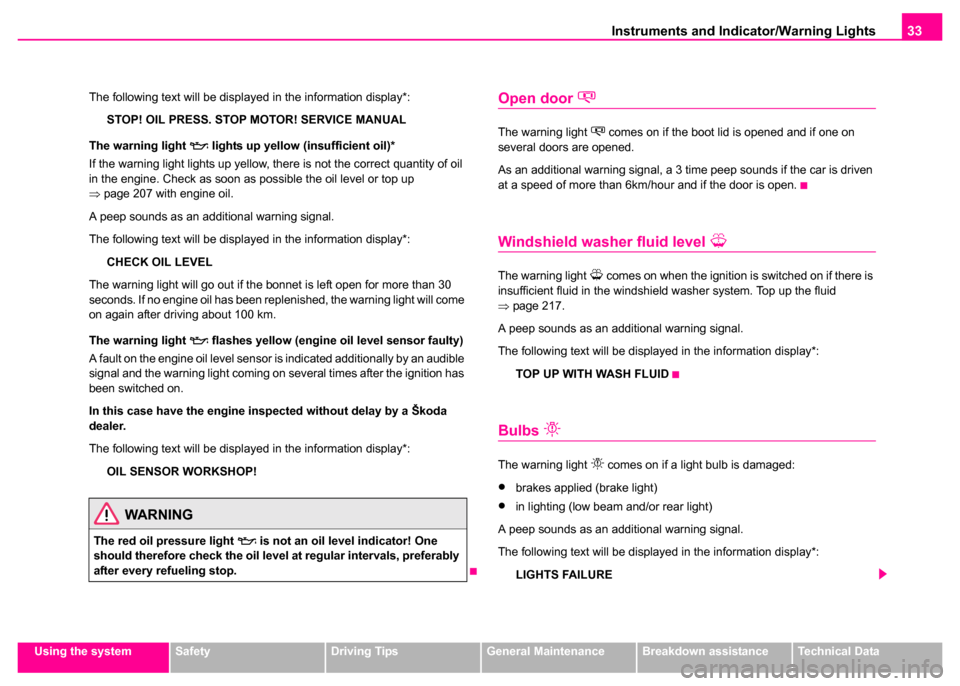
The following text will be displayed in the information display*:
STOP! OIL PRESS. STOP MOTOR! SERVICE MANUAL
The warning light
lights up yellow (insufficient oil)*
If the warning light lights up yellow, there is not the correct quantity of oil
in the engine. Check as soon as possible the oil level or top up
⇒ page 207 with engine oil.
A peep sounds as an additional warning signal.
The following text will be displayed in the information display*:
CHECK OIL LEVEL
The warning light will go out if the bonnet is left open for more than 30
seconds. If no engine oil has been replenished, the warning light will come
on again after driving about 100 km.
The warning light
flashes yellow (engine oil level sensor faulty)
A fault on the engine oil level sensor is indicated additionally by an audible
signal and the warning light coming on several times after the ignition has
been switched on.
In this case have the engine inspected without delay by a Škoda
dealer.
The following text will be displayed in the information display*:
OIL SENSOR WORKSHOP!
Open door
The warning light comes on if the boot lid is opened and if one on
several doors are opened.
As an additional warning signal, a 3 time peep sounds if the car is driven
at a speed of more than 6km/hour and if the door is open.
Windshield washer fluid level
The warning light comes on when the ignition is switched on if there is
insufficient fluid in the windshield washer system. Top up the fluid
⇒ page 217.
A peep sounds as an additional warning signal.
The following text will be displayed in the information display*:
TOP UP WITH WASH FLUID
Bulbs
The warning light comes on if a light bulb is damaged:
•brakes applied (brake light)
•in lighting (low beam and/or rear light)
A peep sounds as an additional warning signal.
The following text will be displayed in the information display*:
LIGHTS FAILUREWARNING
The red oil pressure light is not an oil level indicator! One
should therefore check the oil level at regular intervals, preferably
after every refueling stop.
Page 36 of 259
Instruments and Indicator/Warning Lights35
Using the systemSafetyDriving TipsGeneral MaintenanceBreakdown assistanceTechnical Data
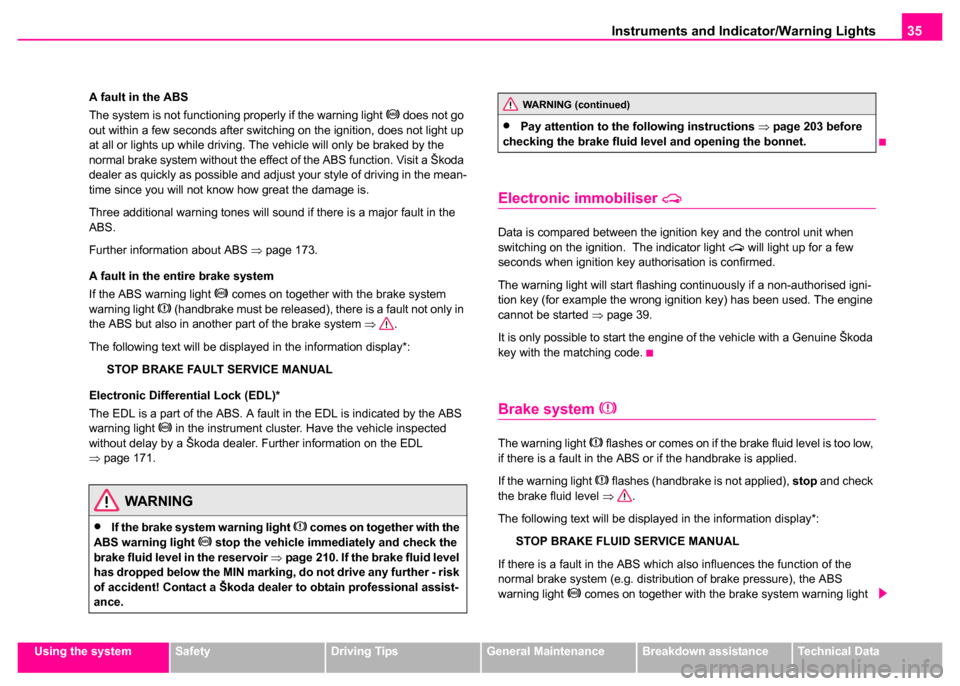
A fault in the ABS
The system is not functioning properly if the warning light
does not go
out within a few seconds after switching on the ignition, does not light up
at all or lights up while driving. The vehicle will only be braked by the
normal brake system without the effect of the ABS function. Visit a Škoda
dealer as quickly as possible and adjust your style of driving in the mean-
time since you will not know how great the damage is.
Three additional warning tones will sound if there is a major fault in the
ABS.
Further information about ABS ⇒page 173.
A fault in the entire brake system
If the ABS warning light
comes on together with the brake system
warning light (handbrake must be released), there is a fault not only in
the ABS but also in another part of the brake system ⇒.
The following text will be displayed in the information display*: STOP BRAKE FAULT SERVICE MANUAL
Electronic Differential Lock (EDL)*
The EDL is a part of the ABS. A fault in the EDL is indicated by the ABS
warning light
in the instrument cluster. Have the vehicle inspected
without delay by a Škoda dealer. Further information on the EDL
⇒ page 171.
Electronic immobiliser
Data is compared between the ignition key and the control unit when
switching on the ignition. The indicator light will light up for a few
seconds when ignition key authorisation is confirmed.
The warning light will start flashing continuously if a non-authorised igni-
tion key (for example the wrong ignition key) has been used. The engine
cannot be started ⇒page 39.
It is only possible to start the engine of the vehicle with a Genuine Škoda
key with the matching code.
Brake system
The warning light flashes or comes on if the brake fluid level is too low,
if there is a fault in the ABS or if the handbrake is applied.
If the warning light
flashes (handbrake is not applied), stop and check
the brake fluid level ⇒.
The following text will be displayed in the information display*: STOP BRAKE FLUID SERVICE MANUAL
If there is a fault in the ABS which also influences the function of the
normal brake system (e.g. distribution of brake pressure), the ABS
warning light
comes on together with the brake system warning light
WARNING
•If the brake system warning light comes on together with the
ABS warning light stop the vehicle immediately and check the
brake fluid level in the reservoir ⇒ page 210. If the brake fluid level
has dropped below the MIN marking, do not drive any further - risk
of accident! Contact a Škoda dealer to obtain professional assist-
ance.
WARNING (continued)
•Pay attention to the following instructions ⇒page 203 before
checking the brake fluid level and opening the bonnet.
Page 38 of 259
Unlocking and locking37
Using the systemSafetyDriving TipsGeneral MaintenanceBreakdown assistanceTechnical Data
Unlocking and locking
Keys
Description
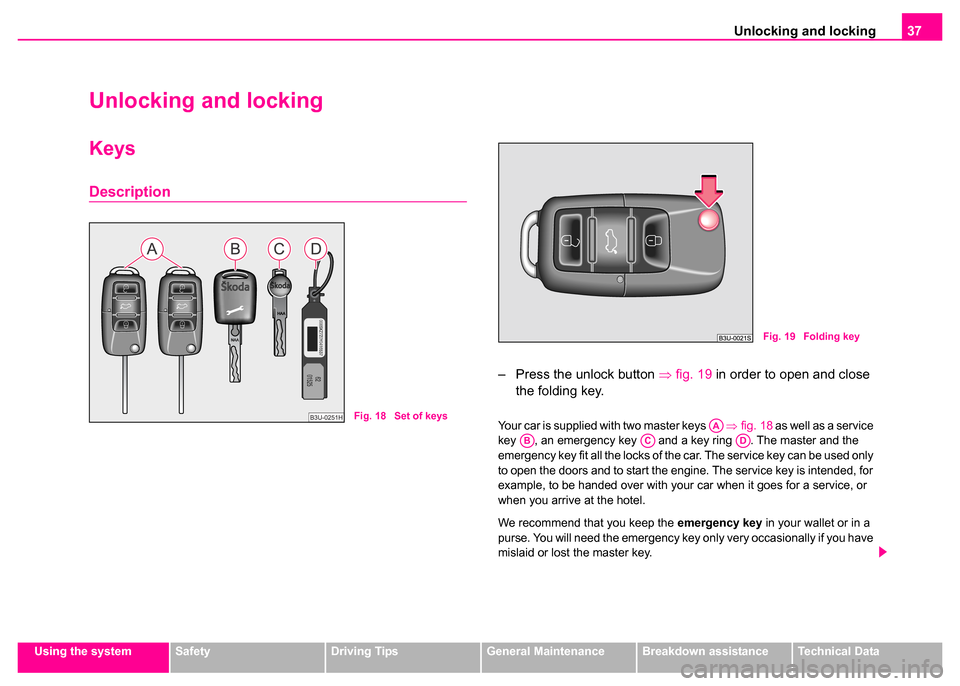
– Press the unlock button ⇒fig. 19 in order to open and close
the folding key.
Your car is supplied with two master keys ⇒fig. 18 as well as a service
key , an emergency key and a key ring . The master and the
emergency key fit all the locks of the car. The service key can be used only
to open the doors and to start the engine. The service key is intended, for
example, to be handed over with your car when it goes for a service, or
when you arrive at the hotel.
We recommend that you keep the emergency key in your wallet or in a
purse. You will need the emergency key only very occasionally if you have
mislaid or lost the master key.Fig. 18 Set of keys
Fig. 19 Folding key
AAABACAD
Page 40 of 259
Unlocking and locking39
Using the systemSafetyDriving TipsGeneral MaintenanceBreakdown assistanceTechnical Data
should, however, proceed as follows if you wish to replace the
battery yourself:
– Fold open the key.
– Use a screwdriver to carefully lever off the front part of the key
⇒ page 38, fig. 20 from the transmitter housing .
– Take off the cover of the transmitter housing ⇒page 38,
fig. 21 in direction of arrow.
– Take the used battery out of the housing cover.
– Insert the new battery. Ensure that the “+” symbol on the battery is facing downwards. The correct polarity is also
shown on the cover of the transmitter housing.
– Insert cover with battery in place at the rear of the transmitter housing and press both parts together.
– Insert the transmitter housing into the front part of the key so that the two parts lock into each other.
For the sake of the environment
Dispose of an old battery in accordance with environmental regulations.
Note
•The replacement battery must have the same specification as the orig-
inal battery.
•If it is still not be possible to unlock or lock the vehicle with the remote
control even after replacing the battery this means that the system has to
be synchronised ⇒page 47.
Electronic immobiliser
The electronic immobiliser prevents the vehicle being
operated by an unauthorised person.
An electronic chip is integrated in the head of the key. The immobiliser is
deactivated with the aid of this chip when the key is inserted in the ignition
lock. The electronic immobiliser is automatically activated when you with-
draw the ignition key from the lock.
Note
It is only possible to start the engine of your car with a Genuine Škoda key
with the matching code ⇒page 35.
Central locking system
Description
Unlocking or locking the vehicle causes all doors to be unlocked or locked
at the same time by the central locking system. The boot lid is unlocked
when opening. It can be opened by pressing the hand grip above the
licence plate.
The car can be unlocked and locked either with the remote control
⇒ page 46 or with the key inserted at the driver door ⇒page 41.
It is also possible to open and close the windows by means of the central
locking system ⇒page 51. The electric sliding/tilting roof* can only be
closed by the central locking system.
AAAB
Page 42 of 259
Unlocking and locking41
Using the systemSafetyDriving TipsGeneral MaintenanceBreakdown assistanceTechnical Data
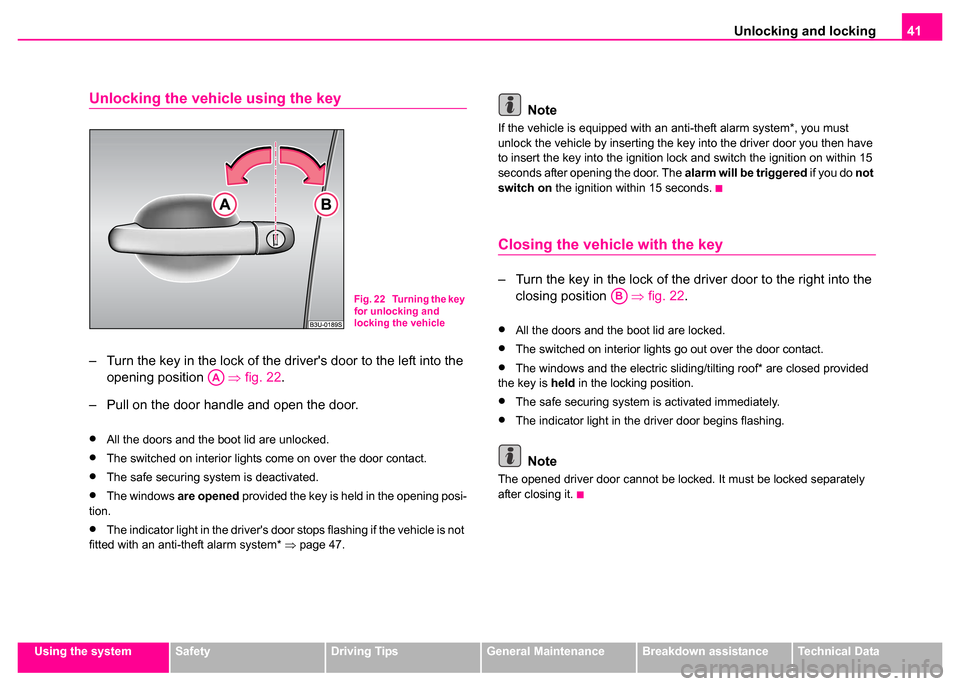
Unlocking the vehicle using the key
– Turn the key in the lock of the driver's door to the left into the
opening position ⇒fig. 22 .
– Pull on the door handle and open the door.
•All the doors and the boot lid are unlocked.
•The switched on interior lights come on over the door contact.
•The safe securing system is deactivated.
•The windows are opened provided the key is held in the opening posi-
tion.
•The indicator light in the driver's door stops flashing if the vehicle is not
fitted with an anti-theft alarm system* ⇒ page 47.
Note
If the vehicle is equipped with an anti-theft alarm system*, you must
unlock the vehicle by inserting the key into the driver door you then have
to insert the key into the ignition lock and switch the ignition on within 15
seconds after opening the door. The alarm will be triggered if you do not
switch on the ignition within 15 seconds.
Closing the vehicle with the key
– Turn the key in the lock of the driver door to the right into the
closing position ⇒fig. 22.
•All the doors and the boot lid are locked.
•The switched on interior lights go out over the door contact.
•The windows and the electric sliding/tilting roof* are closed provided
the key is held in the locking position.
•The safe securing system is activated immediately.
•The indicator light in the driver door begins flashing.
Note
The opened driver door cannot be locked. It must be locked separately
after closing it.
Fig. 22 Turning the key
for unlocking and
locking the vehicle
AA
AB
Page 44 of 259
Unlocking and locking43
Using the systemSafetyDriving TipsGeneral MaintenanceBreakdown assistanceTechnical Data
to avoid inadvertently being locked out of the vehicle. You then have to
lock a door separately after closing it.
•In the event of an accident in which the airbags are deployed, the
locked doors are automatically unlocked from the inside in order to enable
rescuers to gain access to the vehicle.
Note
The door opening lever and the button for the central locking system do
not operate if the safe securing system is activated.
Opening a single door
The single door opening function makes it possible to
unlock only the driver door. The rest of the vehicle remains
locked.
Unlocking only driver door
– Turn the key once in opening direction or press the unlock
button of the remote control once. Unlocking all doors and the boot lid
– Turn the key
twice in opening direction within 5 seconds or
press the unlock button of the remote control twice within 5
seconds.
Also if only the driver door is unlocked, the anti-theft protection and the
anti-theft alarm system* are immediately deactivated.
Note
The single door opening function can be first activated by recoding the
control unit of the central locking system. this work is carried out by a
Škoda dealer.
WARNING
The central locking system also operates if the ignition is switched
off. All the doors and the boot lid are locked. Children should never
be left unattended in the vehicle since it is difficult to provide
assistance from the outside when the doors are locked. Locked
doors make it difficult for rescuers to get into the vehicle in an
emergency - hazard!