service SKODA SUPERB 2003 1.G / (B5/3U) Owner's Guide
[x] Cancel search | Manufacturer: SKODA, Model Year: 2003, Model line: SUPERB, Model: SKODA SUPERB 2003 1.G / (B5/3U)Pages: 259
Page 206 of 259
Inspecting and Replenishing205
Using the systemSafetyDriving TipsGeneral MaintenanceBreakdown assistanceTechnical Data
Note
The location of the inspection points in the engine compartment of petrol
and diesel engines is practically identical.
Engine oil
Engine oil specifications
The grade of engine oil should be selected in accordance
with precise specifications.
The engine of your vehicle has been factory-filled with a high-grade oil
which you can use throughout the year - except in extreme climatic
regions.
You can mix various oils together with each other when refilling with oil.
This does not, however, apply for models with flexible service intervals
(QG1).
Engine oils are, of course, undergoing continuous further development.
Thus the information stated in this Owner's Manual is only correct at the
time of publication.
Škoda dealers are constantly informed by Škoda Auto about current
changes. This why you should always have engine oil changed by your
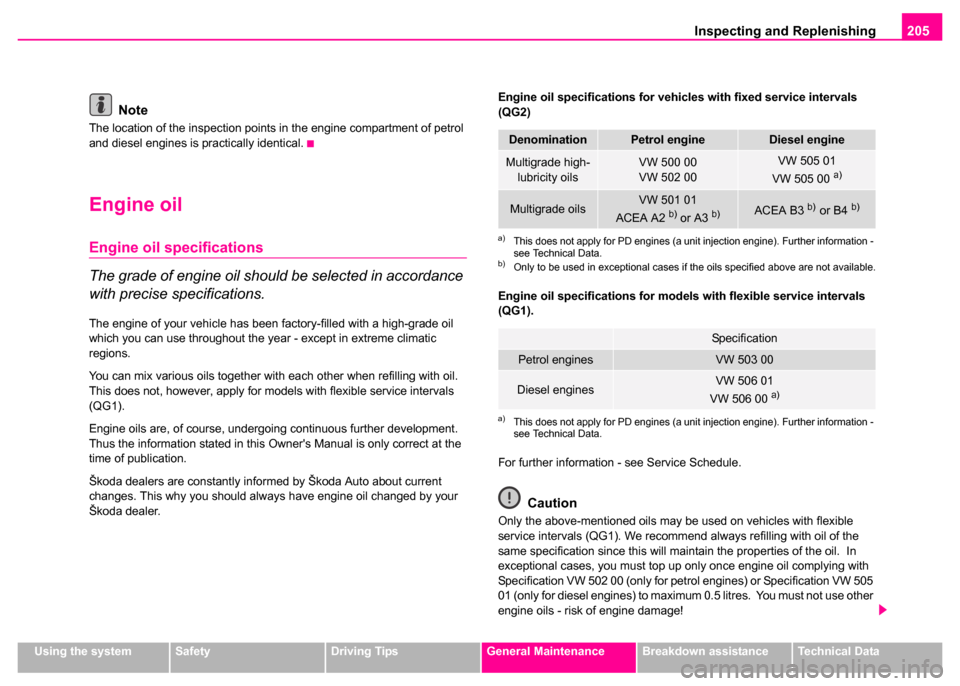
Škoda dealer. Engine oil specifications for vehicles with fixed service intervals
(QG2)
Engine oil specifications for models with flexible service intervals
(QG1).
For further information - see Service Schedule.
Caution
Only the above-mentioned oils may be used on vehicles with flexible
service intervals (QG1). We recommend always refilling with oil of the
same specification since this will maintain the properties of the oil. In
exceptional cases, you must top up only once engine oil complying with
Specification VW 502 00 (only for petrol engines) or Specification VW 505
01 (only for diesel engines) to maximum 0.5 litres. You must not use other
engine oils - risk of engine damage!
DenominationPetrol engineDiesel engine
Multigrade high-
lubricity oilsVW 500 00
VW 502 00VW 505 01
VW 505 00 a)
a)This does not apply for PD engines (a unit injection engine). Further information -
see Technical Data.
Multigrade oilsVW 501 01
ACEA A2 b) or A3 b)
b)Only to be used in exceptional cases if the oils specified above are not available.
ACEA B3 b) or B4 b)
Specification
Petrol enginesVW 503 00
Diesel enginesVW 506 01
VW 506 00 a)
a)This does not apply for PD engines (a unit injection engine). Further information -
see Technical Data.
Page 207 of 259
Inspecting and Replenishing
206
Note
•We recommend using a preservative from the range of accessories
offered by your Skoda dealer.
•For further information - see Service Schedule.
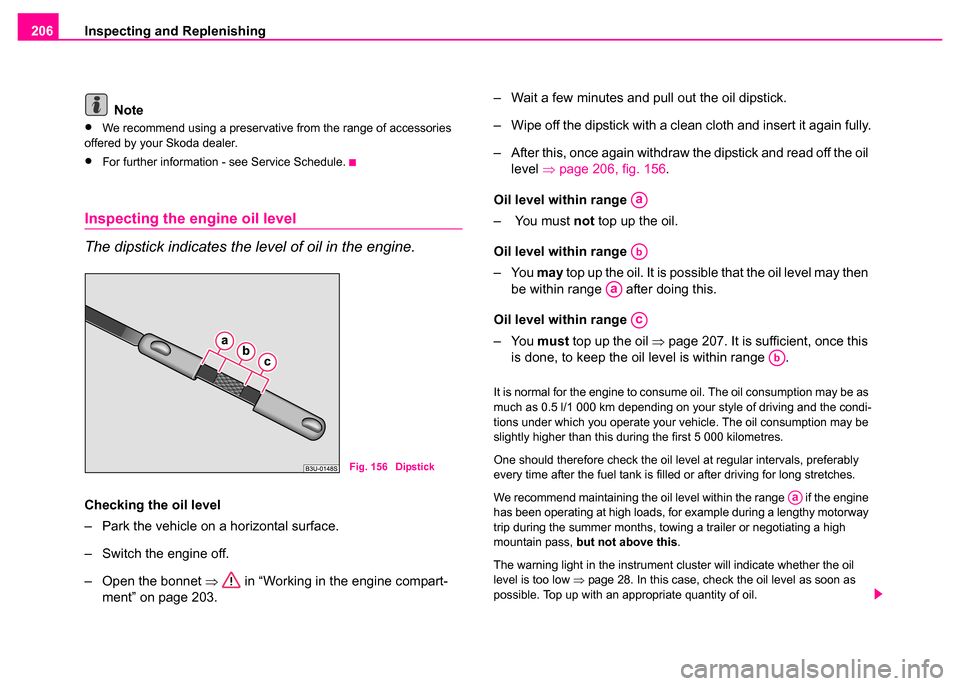
Inspecting the engine oil level
The dipstick indicates the level of oil in the engine.
Checking the oil level
– Park the vehicle on a horizontal surface.
– Switch the engine off.
– Open the bonnet ⇒ in “Working in the engine compart-
ment” on page 203. – Wait a few minutes and pull out the oil dipstick.
– Wipe off the dipstick with a clean cloth and insert it again fully.
– After this, once again withdraw the dipstick and read off the oil
level ⇒page 206, fig. 156 .
Oil level within range
– You must not top up the oil.
Oil level within range
–You may top up the oil. It is possible that the oil level may then
be within range after doing this.
Oil level within range
–You must top up the oil ⇒page 207. It is sufficient, once this
is done, to keep the oil level is within range .
It is normal for the engine to consume oil. The oil consumption may be as
much as 0.5 l/1 000 km depending on your style of driving and the condi-
tions under which you operate your vehicle. The oil consumption may be
slightly higher than this during the first 5 000 kilometres.
One should therefore check the oil level at regular intervals, preferably
every time after the fuel tank is filled or after driving for long stretches.
We recommend maintaining the oil level within the range if the engine
has been operating at high loads, for example during a lengthy motorway
trip during the summer months, towing a trailer or negotiating a high
mountain pass, but not above this .
The warning light in the instrument cluster will indicate whether the oil
level is too low ⇒page 28. In this case, check the oil level as soon as
possible. Top up with an appropriate quantity of oil.
Fig. 156 Dipstick
Aa
Ab
Aa
Ac
Ab
Aa
Page 208 of 259
Inspecting and Replenishing207
Using the systemSafetyDriving TipsGeneral MaintenanceBreakdown assistanceTechnical Data
Caution
The oil level must on no account extend beyond the range . Danger of
damaging the catalytic converter.
Replenishing engine oil
– Unscrew the cap of the engine oil filler opening.
– Pour in a suitable grade of oil in portions of 0.5 litres
⇒page 205, “Engine oil specifications”.
– Inspect the oil level ⇒page 206.
– Carefully screw on the cap of the filler opening and push the dipstick in fully.
Do not continue your journey if for some reason it is not possible under
the conditions prevailing to top up with oil. Switch of the engine and
obtain professional assistance from a Škoda dealer.
The location of the engine oil filler opening is shown in the illustration of
the engine compartment ⇒page 204.
For the sake of the environment
The oil level must on no account be above the range ⇒page 206,
fig. 156 . Oil will otherwise be drawn in through the crankcase ventilation and may pass through the exhaust system to atmosphere. The oil may
combust in the catalytic converter and damage it.
Changing engine oil
The engine oil must be changed at the intervals stated in the Service
Schedule or according to the service interval indicator
⇒page 17.
Caution
You must not pour any additives into the engine oil - risk of engine
damage!
For the sake of the environment
•You must on no account pour oil into the ground or into the sewage
system.
•In view of the problems involved in properly disposing of old oil, the
material, equipment and the knowledge required for such work, we recom-
mend that you have the oil and oil filter change carried out by your Škoda
dealer.
WARNING
Avoid dripping oil onto hot parts of the engine when topping up will
oil - a risk of fire!
Aa
Aa
WARNING
Store old oil in a safe place out of the reach of children and unau-
thorized persons until you dispose of it properly.
Page 212 of 259
Inspecting and Replenishing211
Using the systemSafetyDriving TipsGeneral MaintenanceBreakdown assistanceTechnical Data
– Open the bonnet ⇒ in “Working in the engine compart-
ment” on page 203.
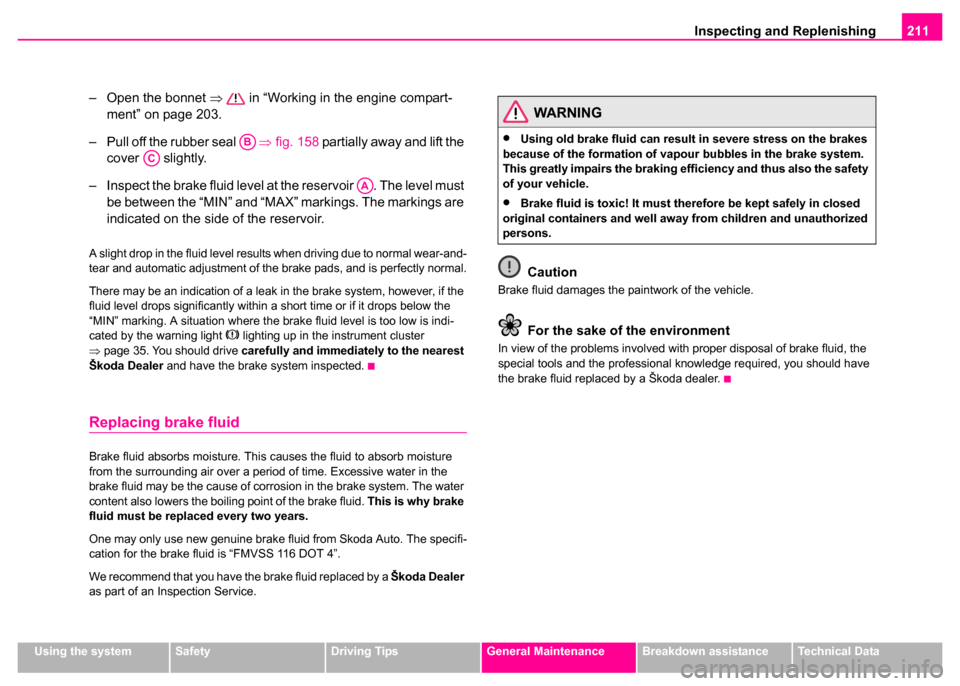
– Pull off the rubber seal ⇒fig. 158 partially away and lift the
cover slightly.
– Inspect the brake fluid level at the reservoir . The level must be between the “MIN” and “MAX” markings. The markings are
indicated on the side of the reservoir.
A slight drop in the fluid level results when driving due to normal wear-and-
tear and automatic adjustment of the brake pads, and is perfectly normal.
There may be an indication of a leak in the brake system, however, if the
fluid level drops significantly within a short time or if it drops below the
“MIN” marking. A situation where the brake fluid level is too low is indi-
cated by the warning light
lighting up in the instrument cluster
⇒ page 35. You should drive carefully and immediately to the nearest
Škoda Dealer and have the brake system inspected.
Replacing brake fluid
Brake fluid absorbs moisture. This causes the fluid to absorb moisture
from the surrounding air over a period of time. Excessive water in the
brake fluid may be the cause of corrosion in the brake system. The water
content also lowers the boiling point of the brake fluid. This is why brake
fluid must be replaced every two years.
One may only use new genuine brake fluid from Skoda Auto. The specifi-
cation for the brake fluid is “FMVSS 116 DOT 4”.
We recommend that you have the brake fluid replaced by a Škoda Dealer
as part of an Inspection Service.
Caution
Brake fluid damages the paintwork of the vehicle.
For the sake of the environment
In view of the problems involved with proper disposal of brake fluid, the
special tools and the professional knowledge required, you should have
the brake fluid replaced by a Škoda dealer.
AB
AC
AA
WARNING
•Using old brake fluid can result in severe stress on the brakes
because of the formation of vapour bubbles in the brake system.
This greatly impairs the braking efficiency and thus also the safety
of your vehicle.
•Brake fluid is toxic! It must therefore be kept safely in closed
original containers and well away from children and unauthorized
persons.
Page 215 of 259
Inspecting and Replenishing
214
Caution
If the vehicle has not been driven for more than 4 weeks, the battery will
discharge gradually as a result from electrical components such as the
control units which were not switched off. You can prevent the discharging
of the battery by disconnecting the negative terminal or charging the
battery constantly with a very low charging current. Please also refer to
the notes when working on the battery ⇒page 212, “Working on the
battery”.
Inspecting the electrolyte level
The battery is practically maintenance-free under normal operating
conditions. We do, however, recommend that you have the electrolyte
level inspected from time to time by a Škoda dealer when outside temper-
atures are high or when driving on long trips. You should also check the
electrolyte level ⇒page 214 each time the battery is charged.
The battery acid level will also be checked as part of the Inspection
Service.
Caution
Do not expose the battery to direct sunlight for lengthy periods in order to
protect it from UV rays.
Operation in winter
The battery has to provide greater amounts of electricity during the winter.
It also has only part of the initial power output at low temperatures that it
has at normal temperatures. A discharged battery may already freeze at temperatures just below
0°C.
We therefore recommend that you have the battery checked by a Škoda
dealer before the start of the winter, and recharged if necessary.
Note
If the vehicle is not going to be driven for a period of some weeks when
there is very severe frost one should remove
⇒page 215 the battery and
store it in a place which is protected from frost. This prevents the battery
from freezing up and thereby being destroyed.
Charging the battery
A properly charged battery is essential for reliably starting
the engine.
– Read the warning notes ⇒ in “Working on the battery” on
page 212 and ⇒.
– Switch the ignition and all electrical components off.
– Only for “quick-charging”: disconnect both battery cables (first of all “negative”, then “positive”) .
– Carefully attach the terminal clamps of the charger to the battery terminals (red = “positive”, black = “negative”).
– You can now plug the mains cable of the charger into the power socket and switch on the charger.
– When charging is completed: switch the charger off and unplug the mains cable from the power socket.
Page 218 of 259
Inspecting and Replenishing217
Using the systemSafetyDriving TipsGeneral MaintenanceBreakdown assistanceTechnical Data
Windscreen Wiper and Washer System
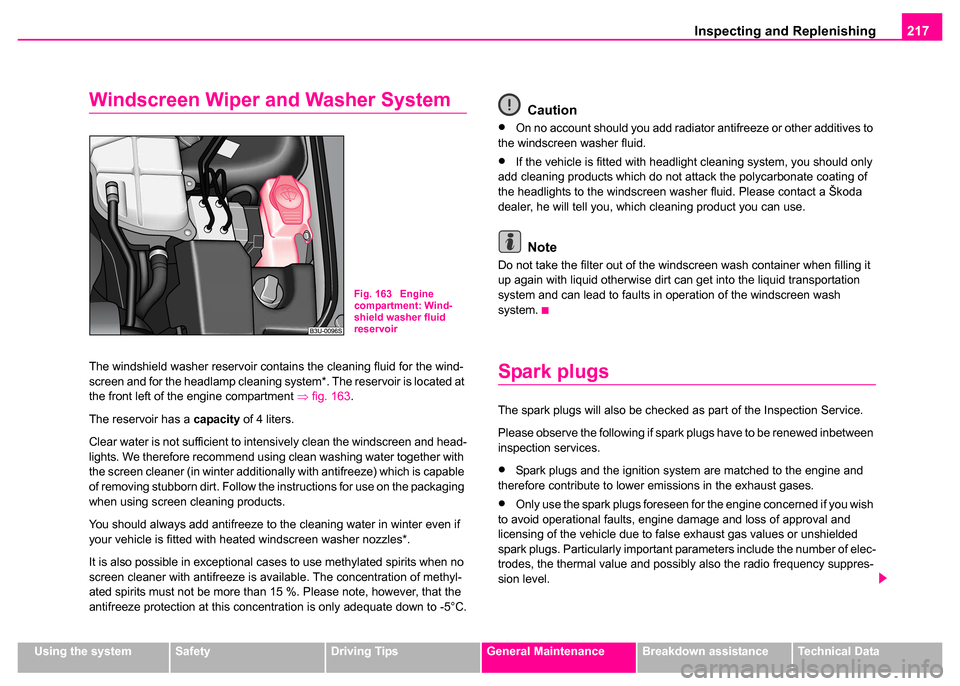
The windshield washer reservoir contains the cleaning fluid for the wind-
screen and for the headlamp cleaning system*. The reservoir is located at
the front left of the engine compartment ⇒fig. 163 .
The reservoir has a capacity of 4 liters.
Clear water is not sufficient to intensively clean the windscreen and head-
lights. We therefore recommend using clean washing water together with
the screen cleaner (in winter additionally with antifreeze) which is capable
of removing stubborn dirt. Follow the instructions for use on the packaging
when using screen cleaning products.
You should always add antifreeze to the cleaning water in winter even if
your vehicle is fitted with heated windscreen washer nozzles*.
It is also possible in exceptional cases to use methylated spirits when no
screen cleaner with antifreeze is available. The concentration of methyl-
ated spirits must not be more than 15 %. Please note, however, that the
antifreeze protection at this concentration is only adequate down to -5°C.
Caution
•On no account should you add radiator antifreeze or other additives to
the windscreen washer fluid.
•If the vehicle is fitted with headlight cleaning system, you should only
add cleaning products which do not attack the polycarbonate coating of
the headlights to the windscreen washer fluid. Please contact a Škoda
dealer, he will tell you, which cleaning product you can use.
Note
Do not take the filter out of the windscreen wash container when filling it
up again with liquid otherwise dirt can get into the liquid transportation
system and can lead to faults in operation of the windscreen wash
system.
Spark plugs
The spark plugs will also be checked as part of the Inspection Service.
Please observe the following if spark plugs have to be renewed inbetween
inspection services.
•Spark plugs and the ignition system are matched to the engine and
therefore contribute to lower emissions in the exhaust gases.
•Only use the spark plugs foreseen for the engine concerned if you wish
to avoid operational faults, engine damage and loss of approval and
licensing of the vehicle due to false exhaust gas values or unshielded
spark plugs. Particularly important parameters include the number of elec-
trodes, the thermal value and possibly also the radio frequency suppres-
sion level.
Fig. 163 Engine
compartment: Wind-
shield washer fluid
reservoir
Page 219 of 259
Inspecting and Replenishing
218
Spark plugs are constantly being further developed. It is therefore advis-
able to just obtain spark plugs from Skoda dealers since they are informed
about latest developments.
V-ribbed belts
The V-ribbed is one of the most highly loaded components on a vehicle.
This is why there are high demands on quality made on the V-ribbed belt.
It not sufficient when replacing the V-ribbed belt to choose just any one of
the same size. One should only use the V-ribbed belt foreseen for use
on that vehicle for safety reason.
V-ribbed belts are constantly being further developed. It is therefore advis-
able to just obtain them from Skoda dealers since they are informed about
latest developments.
The dust and pollen filter*
The dust and pollen filter for the heating and ventilation system is located
in the heater. The filter is replaced according to directions given in the
Service Plan. The filter should be replaced even earlier when the air flow
is reduced significantly.
Changing of the filter is undertaken by a Skoda dealer as part of the
inspection service.
Page 230 of 259
Breakdown assistance229
Using the systemSafetyDriving TipsGeneral MaintenanceBreakdown assistanceTechnical Data
Spare wheel
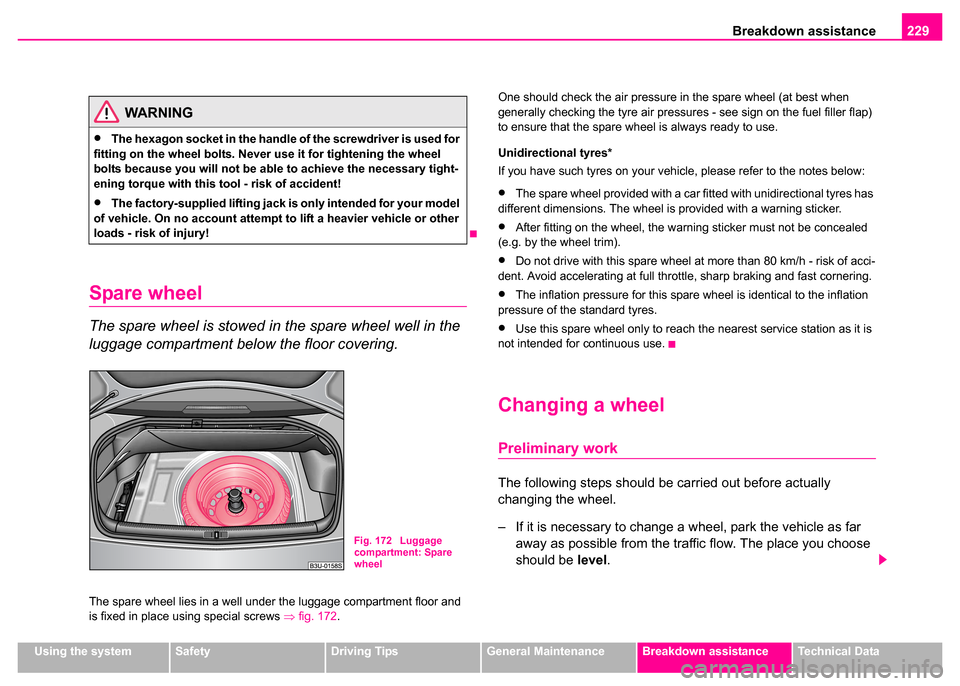
The spare wheel is stowed in the spare wheel well in the
luggage compartment below the floor covering.
The spare wheel lies in a well under the luggage compartment floor and
is fixed in place using special screws ⇒fig. 172 . One should check the air pressure in the spare wheel (at best when
generally checking the tyre air pressures - see sign on the fuel filler flap)
to ensure that the spare wheel is always ready to use.
Unidirectional tyres*
If you have such tyres on your vehicle, please refer to the notes below:
•The spare wheel provided with a car fitted with unidirectional tyres has
different dimensions. The wheel is provided with a warning sticker.
•After fitting on the wheel, the warning sticker must not be concealed
(e.g. by the wheel trim).
•Do not drive with this spare wheel at more than 80 km/h - risk of acci-
dent. Avoid accelerating at full throttle, sharp braking and fast cornering.
•The inflation pressure for this spare wheel is identical to the inflation
pressure of the standard tyres.
•Use this spare wheel only to reach the nearest service station as it is
not intended for continuous use.
Changing a wheel
Preliminary work
The following steps should be carried out before actually
changing the wheel.
– If it is necessary to change a wheel, park the vehicle as far away as possible from the traffic flow. The place you choose
should be level.
WARNING
•The hexagon socket in the handle of the screwdriver is used for
fitting on the wheel bolts. Neve r use it for tightening the wheel
bolts because you will not be able to achieve the necessary tight-
ening torque with this tool - risk of accident!
•The factory-supplied lifting jack is only intended for your model
of vehicle. On no account attempt to lift a heavier vehicle or other
loads - risk of injury!
Fig. 172 Luggage
compartment: Spare
wheel
Page 240 of 259

Breakdown assistance239
Using the systemSafetyDriving TipsGeneral MaintenanceBreakdown assistanceTechnical Data
Towing eye
The front towing eye is welded on behind the bumper on the right.
– Carefully pull the protective grille ⇒fig. 181 off in the right-
hand area of the bumper.
Rear towing eye
The rear towing eye is welded on below the rear bumper on the right.
Tow-starting a vehicle
If the engine does not start, we generally do not recommend to
tow-start your vehicle. One should attempt to start the engine using jump start cables
⇒page 236 or call on the services of the
SERVICE mobile.
If your vehicle has to be towed:
– Engage 2nd or 3rd gear with the vehicle stationary.
– Depress the clutch pedal fully and keep it depressed.
– Switch on the ignition.
– Wait until both vehicles are moving then release the clutch pedal slowly.
– Depress the clutch pedal fully when the engine fires and take the vehicle out of gear.
For technical reasons it is not possible to tow-start a car fitted with an
automatic gearbox .
Caution
Vehicles which are fitted with a catalytic converter should not be tow-
started over a distance of more than 50 metres. Unburnt fuel may get into
the catalytic converter and damage it.
Fig. 181 Front
bumper: Protective
grille for the towing eye
WARNING
There is high risk of having an accident when tow-starting a
vehicle, when for example the towed vehicle runs into the towing
vehicle.
Page 250 of 259
General249
Using the systemSafetyDriving TipsGeneral MaintenanceBreakdown assistanceTechnical Data
Technical Data
General
Vehicle identification data
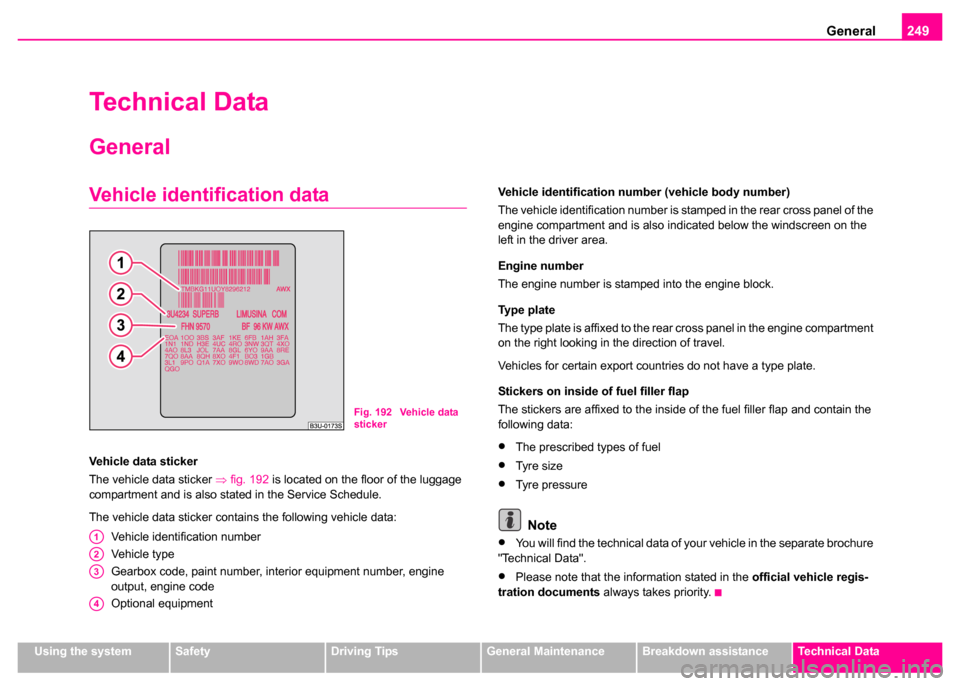
Vehicle data sticker
The vehicle data sticker ⇒fig. 192 is located on the floor of the luggage
compartment and is also stated in the Service Schedule.
The vehicle data sticker contains the following vehicle data:
Vehicle identification number
Vehicle type
Gearbox code, paint number, interior equipment number, engine
output, engine code
Optional equipment Vehicle identification number (vehicle body number)
The vehicle identification number is stamped in the rear cross panel of the
engine compartment and is also indicated below the windscreen on the
left in the driver area.
Engine number
The engine number is stamped into the engine block.
Ty p e p l a t e
The type plate is affixed to the rear cross panel in the engine compartment
on the right looking in the direction of travel.
Vehicles for certain export countries do not have a type plate.
Stickers on inside of fuel filler flap
The stickers are affixed to the inside of the fuel filler flap and contain the
following data:•The prescribed types of fuel
•Tyre size
•Tyre pressure
Note
•You will find the technical data of your vehicle in the separate brochure
"Technical Data".
•Please note that the information stated in the official vehicle regis-
tration documents always takes priority.
Fig. 192 Vehicle data
sticker
A1
A2
A3
A4