sensor SKODA SUPERB 2003 1.G / (B5/3U) Owner's Manual
[x] Cancel search | Manufacturer: SKODA, Model Year: 2003, Model line: SUPERB, Model: SKODA SUPERB 2003 1.G / (B5/3U)Pages: 259
Page 28 of 259
Instruments and Indicator/Warning Lights27
Using the systemSafetyDriving TipsGeneral MaintenanceBreakdown assistanceTechnical Data
One
warning signal will sound if a yellow symbol appears.
If several operational faults of priority 2 exist, the symbols appear one after
the other and are each illiminated for about 2 seconds.
Check the relevant function as soon as possible.
Navigation system*
The controls for the navigation system, radio, CD player are located in the
centre console on both sides of the monitor screen. Navigation data is
also shown in the information display of the instrument cluster.
Information and warning texts are displayed preferentially when the navi-
gation system is switched on.
Operation of the navigation system is described in separate operating
instructions to be found in the on-board literature.
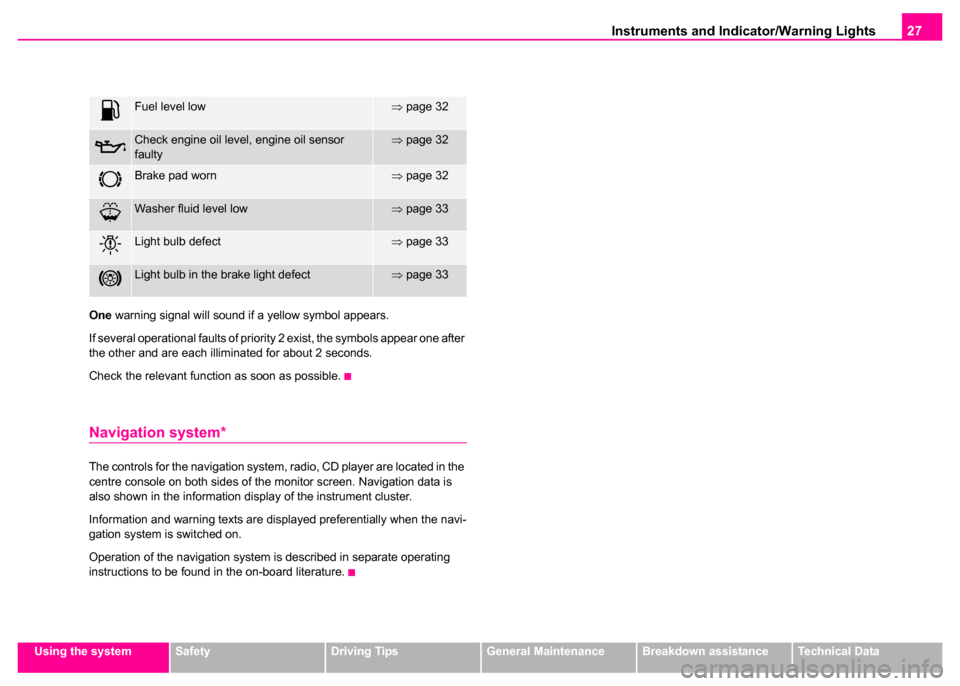
Fuel level low⇒ page 32
Check engine oil level, engine oil sensor
faulty⇒page 32
Brake pad worn⇒page 32
Washer fluid level low⇒page 33
Light bulb defect⇒page 33
Light bulb in the brake light defect⇒page 33
Page 34 of 259
Instruments and Indicator/Warning Lights33
Using the systemSafetyDriving TipsGeneral MaintenanceBreakdown assistanceTechnical Data
The following text will be displayed in the information display*:
STOP! OIL PRESS. STOP MOTOR! SERVICE MANUAL
The warning light
lights up yellow (insufficient oil)*
If the warning light lights up yellow, there is not the correct quantity of oil
in the engine. Check as soon as possible the oil level or top up
⇒ page 207 with engine oil.
A peep sounds as an additional warning signal.
The following text will be displayed in the information display*:
CHECK OIL LEVEL
The warning light will go out if the bonnet is left open for more than 30
seconds. If no engine oil has been replenished, the warning light will come
on again after driving about 100 km.
The warning light
flashes yellow (engine oil level sensor faulty)
A fault on the engine oil level sensor is indicated additionally by an audible
signal and the warning light coming on several times after the ignition has
been switched on.
In this case have the engine inspected without delay by a Škoda
dealer.
The following text will be displayed in the information display*:
OIL SENSOR WORKSHOP!
Open door
The warning light comes on if the boot lid is opened and if one on
several doors are opened.
As an additional warning signal, a 3 time peep sounds if the car is driven
at a speed of more than 6km/hour and if the door is open.
Windshield washer fluid level
The warning light comes on when the ignition is switched on if there is
insufficient fluid in the windshield washer system. Top up the fluid
⇒ page 217.
A peep sounds as an additional warning signal.
The following text will be displayed in the information display*:
TOP UP WITH WASH FLUID
Bulbs
The warning light comes on if a light bulb is damaged:
•brakes applied (brake light)
•in lighting (low beam and/or rear light)
A peep sounds as an additional warning signal.
The following text will be displayed in the information display*:
LIGHTS FAILUREWARNING
The red oil pressure light is not an oil level indicator! One
should therefore check the oil level at regular intervals, preferably
after every refueling stop.
Page 41 of 259
Unlocking and locking
40
Safe securing
The central locking system is equipped with a safe securing system.
Locking the vehicle from the outside causes the door locks to be automat-
ically blocked. It is not possible to pull out the locking buttons. The indi-
cator light in the driver's door flashes. It is not possible to open the doors
with the door handle either from the inside or from the outside. This acts
as an effective deterrent for attempts to break into your vehicle.
•You can deactivate the safe securing system. This is done by locking
the vehicle with the key or radio-operated key twice within 2 seconds.
•Deactivating the safe securing system means that the warning light
next to the securing knob in the driver's door will not flash. This is not the
case, however, for an activated anti-theft alarm system since the indicator
light is showing that the system is active ⇒page 47.
•The safe securing system is again activated the next time the vehicle
is unlocked and locked again.
The doors can be opened from the inside if the vehicle is locked and the
safe securing system is deactivated:
•The door is unlocked by actuating the door-opening lever.
•The door opens upon actuating the door-opening lever again.
Automatic locking*
All the doors and the boot lid are locked automatically once the car
reaches a speed of about 15 km/h.
If the ignition key is withdrawn, the car is then automatically unlocked
again. In addition, it is possible for the driver to unlock the car by pressing
the central locking button
or by pulling the door opening lever.
If you wish, your Škoda Dealer can convert the central locking system of
your car to the automatic locking mode.
Note
•After unlocking the vehicle see, if the securing knobs are located on all
doors at the bottom.
•The vehicle is unlocked automatically if an airbag is deployed.
•Should the central locking system not operate properly, you can lock
and unlock the front doors and the boot lid with the key. Emergency
unlocking of fuel filler flap ⇒page 201.
•It is not possible for you to activate the safe securing system and the
anti-theft alarm system* if the central locking system fails.
•The anti-theft alarm system is also armed when the car is closed
without activating the safe securing system. In this case, always switch off
the interior monitoring sensor* ⇒page 49 first of all to avoid an alarm
being triggered unintentionally.
WARNING
If the vehicle is locked from the outside and the safe securing
system is activated, there must not be any person and animals in
the vehicle as it is then not possible to open either a door or a
window from the inside. The locked doors make it more difficult for
rescuers to get into the vehicle in an emergency - hazard!
Page 62 of 259
Lights and Visibility61
Using the systemSafetyDriving TipsGeneral MaintenanceBreakdown assistanceTechnical Data
Switching the interior light on
– Press the switch on the symbol
.
Switching the interior light off
– Press the switch on the symbol O.
Front reading lights
– Press on one of the switches ⇒page 60, fig. 40 in order to
switch the right or left reading light on or off.
Lighting of storage compar tment on the front passenger
side
– Open the flap of the storage compartment on the front passenger side, the lighting of the storage compartment
switches on automatically and switches off when the flap is
closed.
If the interior lighting is fitted with a delayed-off control*, the lighting of the
interior of the car remains on for a few seconds after the doors are closed.
The interior light comes on as soon as you unlock the car or open a door
or when the ignition key has been removed. The light goes out again
about 30 seconds after all the doors have been closed. The interior
lighting is switched off when you lock the car or switch the ignition on. This
only applies when the switch for the corresponding interior lights is
standing n the door contact setting.
The interior lighting goes off after about 60 minutes when a door has been
left open in order to avoid discharging the battery of the vehicle.
Two LEDs are integrated in the interior lighting, which illuminates the shift
lever and the middle of the dash panel. They are switched on automati-
cally when switching on the parking light.
Rear interior lighting
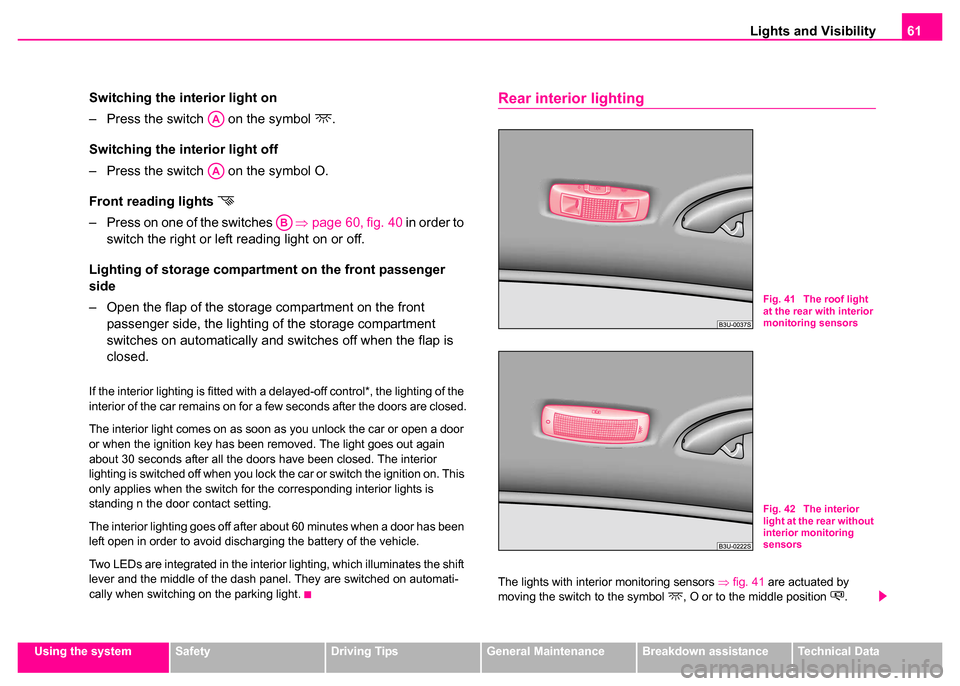
The lights with interior monitoring sensors ⇒fig. 41 are actuated by
moving the switch to the symbol , O or to the middle position .
AA
AA
AB
Fig. 41 The roof light
at the rear with interior
monitoring sensors
Fig. 42 The interior
light at the rear without
interior monitoring
sensors
Page 63 of 259
Lights and Visibility
62
The lights without interior monitoring sensors ⇒ page 61, fig. 42 are actu-
ated by pressing the glass on the symbol O or by switching to the
middle position .
The functions are the same as for the interior lighting at the front of the car
⇒ page 60.
Luggage compartment light
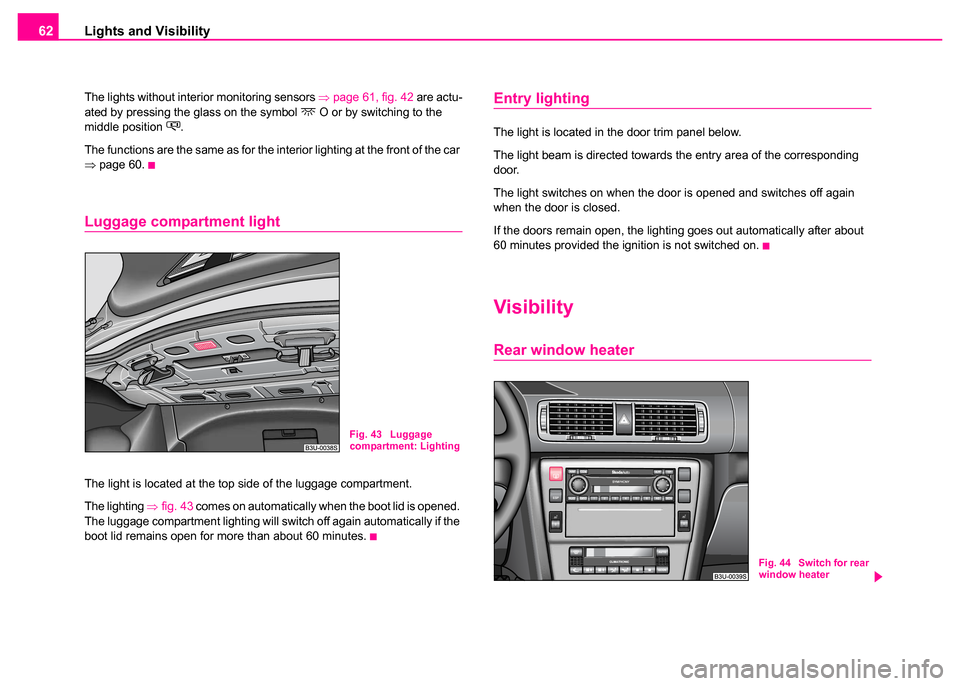
The light is located at the top side of the luggage compartment.
The lighting ⇒ fig. 43 comes on automatically when the boot lid is opened.
The luggage compartment lighting will switch off again automatically if the
boot lid remains open for more than about 60 minutes.
Entry lighting
The light is located in the door trim panel below.
The light beam is directed towards the entry area of the corresponding
door.
The light switches on when the door is opened and switches off again
when the door is closed.
If the doors remain open, the lighting goes out automatically after about
60 minutes provided the ignition is not switched on.
Visibility
Rear window heater
Fig. 43 Luggage
compartment: Lighting
Fig. 44 Switch for rear
window heater
Page 65 of 259
Lights and Visibility
64
Rolling up
–Hold the sun screen in such a way that it can roll up slowly and
without damage into the housing.
The windscreen wiper and washing
system
Windscreen wipers
You can operate the windscreen wipers and automatic
wipe/wash using the windscreen wiper lever.
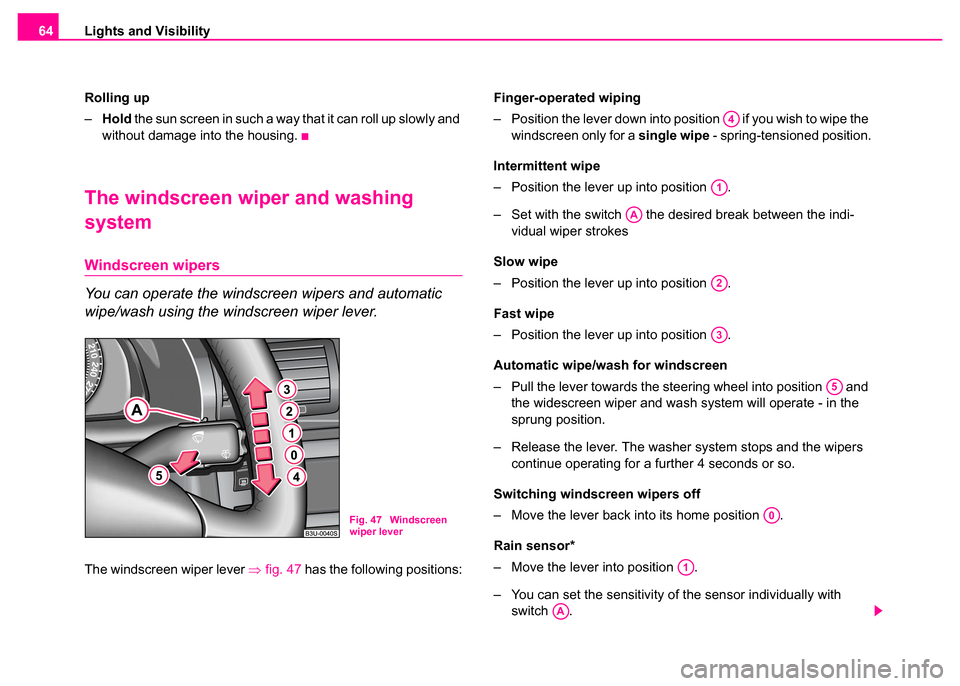
The windscreen wiper lever ⇒fig. 47 has the following positions: Finger-operated wiping
– Position the lever down into position if you wish to wipe the
windscreen only for a single wipe - spring-tensioned position.
Intermittent wipe
– Position the lever up into position .
– Set with the switch the desired break between the indi- vidual wiper strokes
Slow wipe
– Position the lever up into position .
Fast wipe
– Position the lever up into position .
Automatic wipe/wash for windscreen
– Pull the lever towards the steering wheel into position and the widescreen wiper and wash system will operate - in the
sprung position.
– Release the lever. The washer system stops and the wipers continue operating for a further 4 seconds or so.
Switching windscreen wipers off
– Move the lever back into its home position .
Rain sensor*
– Move the lever into position .
– You can set the sensitivity of the sensor individually with switch .
Fig. 47 Windscreen
wiper lever
A4
A1
AA
A2
A3
A5
A0
A1
AA
Page 66 of 259
Lights and Visibility65
Using the systemSafetyDriving TipsGeneral MaintenanceBreakdown assistanceTechnical Data
– If you have switched the ignition off and on again, you must
then once again activate the sensor by moving the lever into
home position , and then back into position .
The windscreen wipers and the windscreen washer system only operate
if the ignition is switched on.
The windscreen washer nozzles are heated* when the ignition is switched
on.
The rain sensor* automatically regulates the break between the individual
wiper strokes depending on the intensity of the rain.
Caution
In frosty weather, please first of all check whether the windscreen wiper
blades are not frozen to the windscreen before switching them on.
Switching on windscreen wipers when the blades are frozen to the wind-
screen may result in damage both to the blades and the motor of the wind-
screen wipers!
Headlight cleaning system*
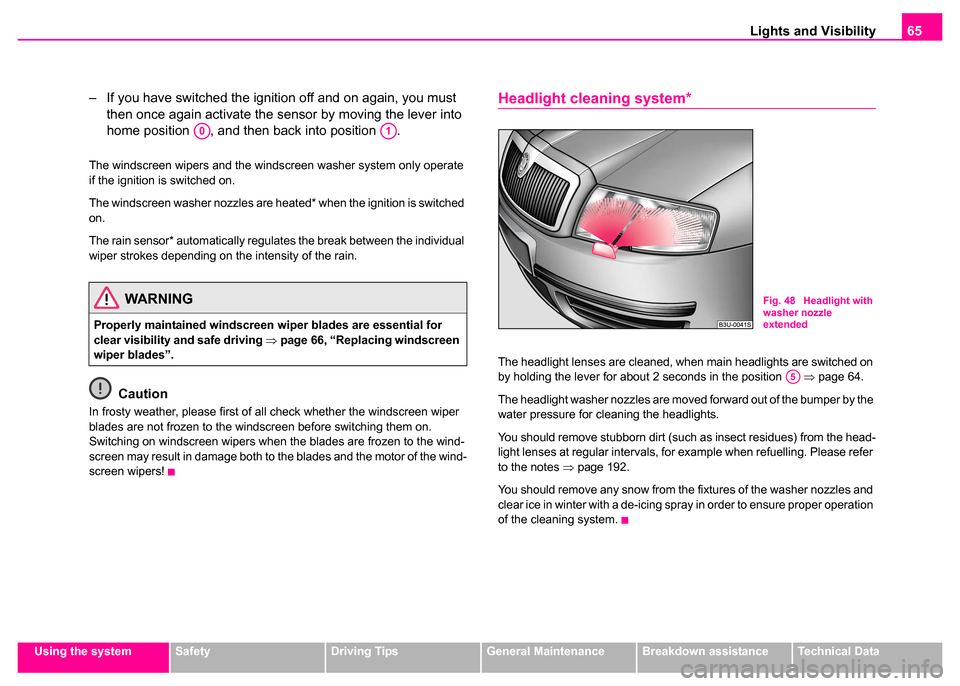
The headlight lenses are cleaned, when main headlights are switched on
by holding the lever for about 2 seconds in the position ⇒page 64.
The headlight washer nozzles are moved forward out of the bumper by the
water pressure for cleaning the headlights.
You should remove stubborn dirt (such as insect residues) from the head-
light lenses at regular intervals, for example when refuelling. Please refer
to the notes ⇒page 192.
You should remove any snow from the fixtures of the washer nozzles and
clear ice in winter with a de-icing spray in order to ensure proper operation
of the cleaning system.
WARNING
Properly maintained windscreen wiper blades are essential for
clear visibility and safe driving ⇒page 66, “Replacing windscreen
wiper blades”.
A0A1
Fig. 48 Headlight with
washer nozzle
extended
A5
Page 110 of 259
Heating and air conditioning system 109
Using the systemSafetyDriving TipsGeneral MaintenanceBreakdown assistanceTechnical Data
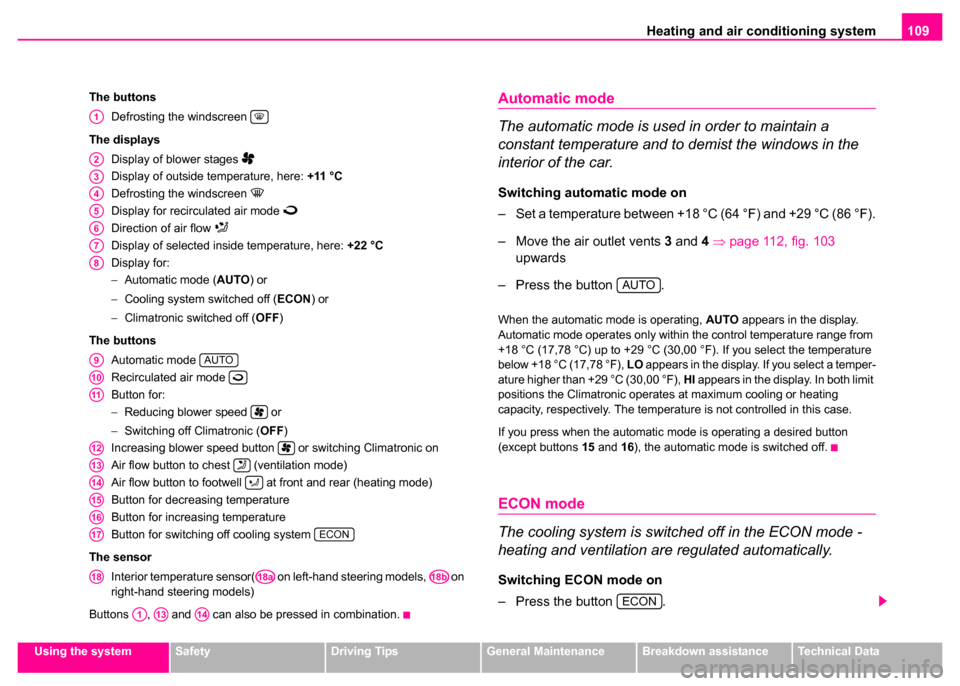
The buttons
Defrosting the windscreen
The displays Display of blower stages
Display of outside temperature, here: +11 °C
Defrosting the windscreen
Display for recirculated air mode
Direction of air flow
Display of selected inside temperature, here: +22 °C
Display for:
− Automatic mode ( AUTO) or
− Cooling system switched off ( ECON) or
− Climatronic switched off ( OFF)
The buttons Automatic mode
Recirculated air mode
Button for:
−Reducing blower speed or
− Switching off Climatronic ( OFF)
Increasing blower speed button or switching Climatronic on
Air flow button to chest (ventilation mode)
Air flow button to footwell at front and rear (heating mode)
Button for decreasing temperature
Button for increasing temperature
Button for switching off cooling system
The sensor Interior temperature sensor( on left-hand steering models, on
right-hand steering models)
Buttons , and can also be pressed in combination.
Automatic mode
The automatic mode is used in order to maintain a
constant temperature and to demist the windows in the
interior of the car.
Switching automatic mode on
– Set a temperature between +18 °C (64 °F) and +29 °C (86 °F).
– Move the air outlet vents 3 and 4 ⇒ page 112, fig. 103
upwards
– Press the button .
When the automatic mode is operating, AUTO appears in the display.
Automatic mode operates only within the control temperature range from
+18 °C (17,78 °C) up to +29 °C (30,00 °F). If you select the temperature
below +18 °C (17,78 °F), LO appears in the display. If you select a temper-
ature higher than +29 °C (30,00 °F), HI appears in the display. In both limit
positions the Climatronic operates at maximum cooling or heating
capacity, respectively. The temperature is not controlled in this case.
If you press when the automatic mode is operating a desired button
(except buttons 15 and 16), the automatic mode is switched off.
ECON mode
The cooling system is switched off in the ECON mode -
heating and ventilation are regulated automatically.
Switching ECON mode on
– Press the button .
A1
A2
A3
A4
A5
A6
A7
A8
A9AUTO
A10
A11
A12
A13
A14
A15
A16
A17ECON
A18A18aA18b
A1A13A14
AUTO
ECON
Page 120 of 259

Starting-off and Driving119
Using the systemSafetyDriving TipsGeneral MaintenanceBreakdown assistanceTechnical Data
Applying the handbrake
– Pull the handbrake lever up fully.
Releasing the handbrake
– Pull the handbrake lever up slightly and at the same time
press in the locking button ⇒page 118, fig. 109 .
– Hold the button pressed and push the handbrake lever down fully ⇒ .
The handbrake warning light lights up when the handbrake is applied,
provided the ignition is on.
A warning signal (buzzer) sounds and the following text appears in the
display* if you have inadvertently driven off with the handbrake applied:
"Handbrake on"
The handbrake warning is activated if you drive at a speed of more than 5
km/h for more than 3 seconds.
Caution
After the car has come to a stop, always first of all apply the handbrake
firmly before then additionally engaging a gear (manual gearbox) or
moving the selector lever into position P (automatic gearbox).
Parking aid*
The parking aid provides a warning of obstacles behind
the vehicle.
The audible parking aid at the rear determines the distance to an obstacle
behind the car with the aid of ultrasound sensors. The sensors are inte-
grated in the rear bumper.
The parking aid is activated automatically when reverse gear is engaged
and the ignition is turned on. This is confirmed by a brief signal.
The clearance warning begins at a distance of about 160 cm from the
obstacle. The interval between the warning signals becomes shorter as
the clearance is reduced.
A continuous tone sounds from a clearance of just 30 cm - danger area.
You should not reverse any further after this signal sounds.
WARNING
•Please note that the handbrake must be fully released. A hand-
brake which is only partially released can result in the rear brakes
overheating which will have a negative effect on the operation of
the brake system - risk of accident!
•Never leave children unattended in the vehicle. The children
might, for example, release the ha ndbrake or take the vehicle out
of gear. The vehicle might then move off - risk of accident!WARNING
•The parking aid is not a substitute for the driver paying proper
attention. It is always the driver's responsibility to take care when
parking the vehicle or carrying out similar manoeuvres.
Page 121 of 259
Starting-off and Driving
120
Note
•The parking aid does not operate if you are towing a trailer (applies to
models which feature a factory-fitted towing device*).
•A system fault is indicated if a warning signal sounds for about 5
seconds after switching the ignition on and engaging reverse gear and
there is no obstacle close to your vehicle. Have the fault rectified by a
Škoda dealer.
•The sensors must be kept clean and free of ice to enable the parking
aid to operate properly.
Cruise control system (CCS)*
Introduction
The cruise control system makes it possible for the driver to maintain a
constant speed of his choosing from a speed of 30 km/h (20 mph) or
higher. This, of course, is only possible within the range which is permitted
by the power output and braking power of the engine. Using the cruise
control system - particularly on long journeys - makes it possible for you
to rest your “accelerator foot”.
Caution
Models fitted with a manual gearbox: Always depress the clutch pedal if
you switch on the cruise control system when the gearbox is in Neutral.
The engine will rev up and may even be damaged under certain circum-
stances.
Note
•The cruise control system is not able to maintain a constant speed
when driving on steep downhill sections. The weight of the vehicle
increases the speed at which it travels. One should shift down in good time
to a lower gear or slow the vehicle down by applying the foot brake.
•It is not possible on vehicles fitted with an automatic gearbox to switch
on the cruise control system if the selector lever is in the position P, N , R
or 2.
WARNING (continued)
•You should therefore satisfy yourself, before reversing, that
there is no small obstacle, such as a rock, thin post, trailer drawbar
etc., behind your vehicle. Such an obstacle might not be within the
range detected by the sensors.WARNING
For safety reasons the cruise control system must not be used in
dense traffic or on difficult road surfaces (such as road chips, or
slippery roads) - risk of accident!