turn signal SKODA SUPERB 2005 1.G / (B5/3U) DX Navigation System Manual
[x] Cancel search | Manufacturer: SKODA, Model Year: 2005, Model line: SUPERB, Model: SKODA SUPERB 2005 1.G / (B5/3U)Pages: 75, PDF Size: 3.09 MB
Page 7 of 75

RADIO NAVIGATION SYSTEM6
INTRODUCTION
The Radio Navigation System MFD (Multi
Function Display) provides you with easy
operation of the convenient radio and
navigation features in your vehicle. The system
can also be equipped with an original 6-disc
CD changer, a Digital Sound Package, a
package for dynamic navigation and a TV/
video module.
Navigation
The navigation system is your “intelligent pas-
senger”. With its help, you can travel from your
current location to any selected destination
quickly, easily and safely without having to use
a lot of complicated roadmaps. In cities and
towns unfamiliar to you, for example, you can
drive directly the nearest petrol station. On the
road, you can enter a point for a stopover to
eat at a restaurant or visit a tourist attraction.
The system uses the data stored on the
navigation CD to calculate the route to the
selected destination. During route guidance,
different display modes provide you with
information on your current vehicle position,
turning recommendations (direction and
distance to the turning point) and the remaining
travelling time to your destination.How does navigation work?
Satellite data is used to determine the vehi-
cle’s current position. The route travelled is
measured by the ABS sensor system. The gy-
roscope (rotating angle sensor) determines the
current driving direction. This information is fed
into the navigation system and compared to
the map information stored there.
Outside of built-up areas, this type of locating
might fail to determine the vehicle’s exact po-
sition. In this case, satellites are used for lo-
cating. This type of locating is known as the
Global Positioning System (GPS).
Important information
Operating the radio navigation
system while driving
The demands of today’s road traffic require the
full concentration of road users at all times.
In addition to entertainment, the extensive and
sophisticated features of this system also of-
fer a wide range of information to help you
reach your selected destination safely and
easily.
Nevertheless, you should never operate
the radio navigation system with its
many different features unless traffic
conditions permit.
The different volume settings should be select-
ed so that acoustic signals from the outside,
e.g. police or fire brigade sirens, can be heard
at all times.
Page 14 of 75

RADIO NAVIGATION SYSTEM13
AUDIO
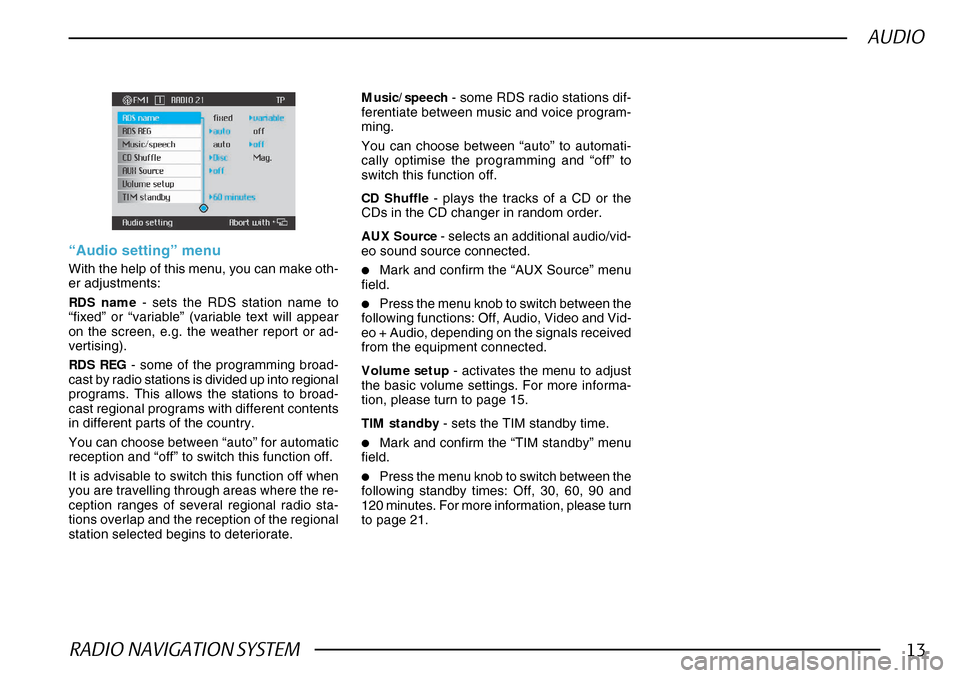
CD Shuffle - plays the tracks of a CD or the
CDs in the CD changer in random order.
AUX Source - selects an additional audio/vid-
eo sound source connected.
•Mark and confirm the “AUX Source” menu
field.
•Press the menu knob to switch between the
following functions: Off, Audio, Video and Vid-
eo + Audio, depending on the signals received
from the equipment connected.
Volume setup - activates the menu to adjust
the basic volume settings. For more informa-
tion, please turn to page 15.
TIM standby - sets the TIM standby time.
•Mark and confirm the “TIM standby” menu
field.
•Press the menu knob to switch between the
following standby times: Off, 30, 60, 90 and
120 minutes. For more information, please turn
to page 21.
“Audio setting” menu
With the help of this menu, you can make oth-
er adjustments:
RDS name - sets the RDS station name to
“fixed” or “variable” (variable text will appear
on the screen, e.g. the weather report or ad-
vertising).
RDS REG - some of the programming broad-
cast by radio stations is divided up into regional
programs. This allows the stations to broad-
cast regional programs with different contents
in different parts of the country.
You can choose between “auto” for automatic
reception and “off” to switch this function off.
It is advisable to switch this function off when
you are travelling through areas where the re-
ception ranges of several regional radio sta-
tions overlap and the reception of the regional
station selected begins to deteriorate. Music/speech
- some RDS radio stations dif-
ferentiate between music and voice program-
ming.
You can choose between “auto” to automati-
cally optimise the programming and “off” to
switch this function off.
Page 64 of 75

RADIO NAVIGATION SYSTEM63
NAVIGATION
The hours will appear in white lettering.
•Turn the menu knob to enter the current
time.
•Press the menu knob to confirm the time
you have entered.
Night display
You can select whether you want to switch the
display to night display manually by pressing
the display button
88 88
8 or automatically when the
car headlights are switched on.
•Mark the “Illumination” menu field in the
“Settings” menu.
Press the menu knob repeatedly to switch be-
tween the “auto” and “manual” switching
modes.
The display selected will be marked by a blue
triangle and blue lettering.
Note
You can always switch the display manually,
even if the automatic function has been
activated. GPS viewer
GPS (Global Positioning System) is a naviga-
tion system that was developed by the
Pentagon. It currently consists of 25 satellites
that orbit the Earth at an altitude of 21,000 km.
If the system is able to pick up signals from at
least 3 of the satellites, it will be able to
determine the vehicle’s current location.
•Mark and confirm the “GPS viewer” menu
field in the “Settings” menu.
The information display that appears will indi-
cate:
– the number of satellites available
– the number of satellites whose signals are
within reception range
– the current geographical location of the ve-
hicle.
Note
If the system is not able to pick up signals from
at least 3 satellites, the following message will
appear: “Geographic location cannot current-
ly be determined”. Anti-theft coding is an electronic system that
prevents unauthorised persons from using the
equipment after it has been disconnected from
its power source.
Each time that
–
the system is disconnected from the vehi-
cle power supply
– the battery is disconnected
– the electric fuse for the radio blows
the following message will appear in the dis-
play: “SAFE”. You will not be able to switch on
the system until you have entered the correct
code.
This code number can be found along with
the series number in the back of the operat-
ing instructions on the “Equipment card”.
Make sure that you remove the “Equipment
card” and keep it in a safe place. Never leave
the card inside the vehicle. This makes the
equipment useless to thieves!
Anti-theft coding
Page 68 of 75

RADIO NAVIGATION SYSTEM67
TV
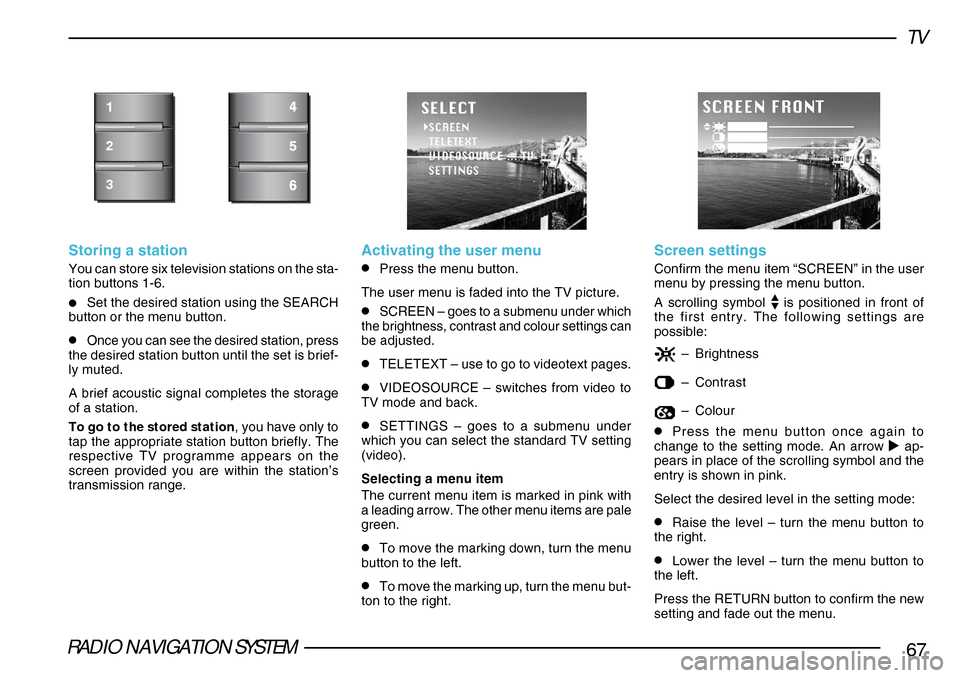
Storing a station
You can store six television stations on the sta-
tion buttons 1-6.
•Set the desired station using the SEARCH
button or the menu button.
•Once you can see the desired station, press
the desired station button until the set is brief-
ly muted.
A brief acoustic signal completes the storage
of a station.
To go to the stored station , you have only to
tap the appropriate station button briefly. The
respective TV programme appears on the
screen provided you are within the station’s
transmission range.
1
2
3
Activating the user menu
•Press the menu button.
The user menu is faded into the TV picture.
•SCREEN – goes to a submenu under which
the brightness, contrast and colour settings can
be adjusted.
•TELETEXT – use to go to videotext pages.
•VIDEOSOURCE – switches from video to
TV mode and back.
•SETTINGS – goes to a submenu under
which you can select the standard TV setting
(video).
Selecting a menu item
The current menu item is marked in pink with
a leading arrow. The other menu items are pale
green.
•To move the marking down, turn the menu
button to the left.
•To move the marking up, turn the menu but-
ton to the right.
Screen settings
Confirm the menu item “SCREEN” in the user
menu by pressing the menu button.
A scrolling symbol
is positioned in front of
the first entry. The following settings are
possible:
– Brightness
–Contrast
–Colour
•Press the menu button once again to
change to the setting mode. An arrow ap-
pears in place of the scrolling symbol and the
entry is shown in pink.
Select the desired level in the setting mode:
•Raise the level – turn the menu button to
the right.
•Lower the level – turn the menu button to
the left.
Press the RETURN button to confirm the new
setting and fade out the menu.