window SKODA SUPERB 2005 1.G / (B5/3U) DX Navigation System Manual
[x] Cancel search | Manufacturer: SKODA, Model Year: 2005, Model line: SUPERB, Model: SKODA SUPERB 2005 1.G / (B5/3U)Pages: 75, PDF Size: 3.09 MB
Page 42 of 75

RADIO NAVIGATION SYSTEM41
NAVIGATION
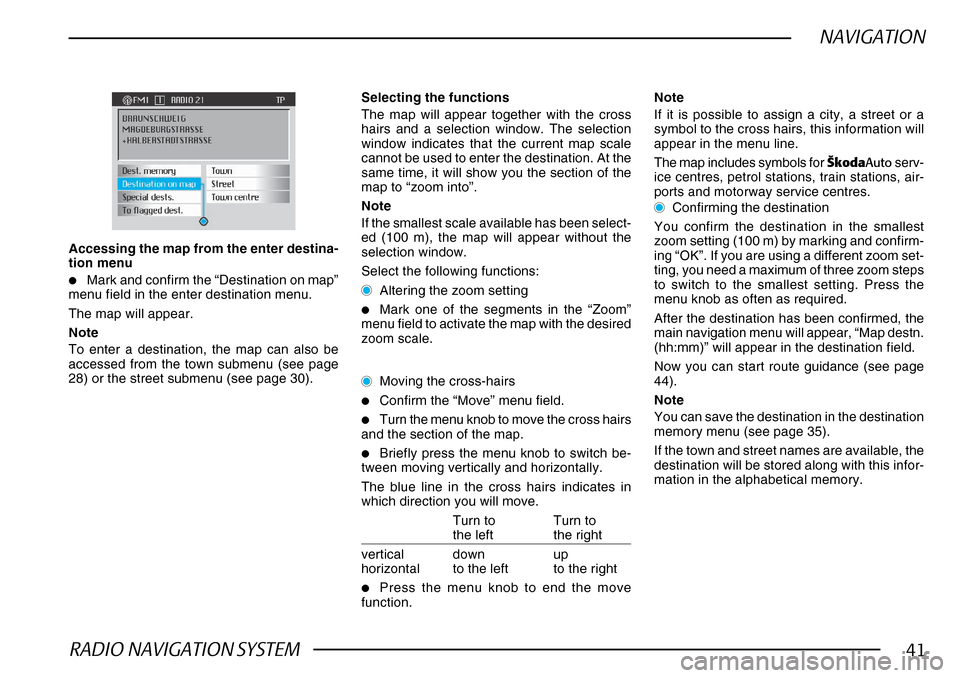
Accessing the map from the enter destina-
tion menu
•Mark and confirm the “Destination on map”
menu field in the enter destination menu.
The map will appear.
Note
To enter a destination, the map can also be
accessed from the town submenu (see page
28) or the street submenu (see page 30).
Selecting the functions
The map will appear together with the cross
hairs and a selection window. The selection
window indicates that the current map scale
cannot be used to enter the destination. At the
same time, it will show you the section of the
map to “zoom into”.
Note
If the smallest scale available has been select-
ed (100 m), the map will appear without the
selection window.
Select the following functions:
Altering the zoom setting
•Mark one of the segments in the “Zoom”
menu field to activate the map with the desired
zoom scale.
Moving the cross-hairs
•Confirm the “Move” menu field.
•Turn the menu knob to move the cross hairs
and the section of the map.
•Briefly press the menu knob to switch be-
tween moving vertically and horizontally.
The blue line in the cross hairs indicates in
which direction you will move.
Turn to Turn to
the left the right
vertical down up
horizontal to the left to the right
•Press the menu knob to end the move
function. Note
If it is possible to assign a city, a street or a
symbol to the cross hairs, this information will
appear in the menu line.
The map includes symbols for
·kodaAuto serv-
ice centres, petrol stations, train stations, air-
ports and motorway service centres.
Confirming the destination
You confirm the destination in the smallest
zoom setting (100 m) by marking and confirm-
ing “OK”. If you are using a different zoom set-
ting, you need a maximum of three zoom steps
to switch to the smallest setting. Press the
menu knob as often as required.
After the destination has been confirmed, the
main navigation menu will appear, “Map destn.
(hh:mm)” will appear in the destination field.
Now you can start route guidance (see page
44).
Note
You can save the destination in the destination
memory menu (see page 35).
If the town and street names are available, the
destination will be stored along with this infor-
mation in the alphabetical memory.
Page 71 of 75

RADIO NAVIGATION SYSTEM70
APPENDIX
Guarantee, exchange, care of the antenna, registration
Guara ntee
The same guarantee conditions apply for this
system as for the new vehicle.
Note
The guarantee will not cover any damages in-
curred due to incorrect handling or incorrect
repairs. The system must also show no signs
of outer damage.
Exch ange service
Once the guarantee period has expired, a de-
fective system can be exchanged for an over-
hauled, good-as-new system with a guarantee
on replacement parts at a reasonable price.
However, the system to be replaced must be
free of any damage to the housing and any
attempts at repair by unauthorised persons.
Note
For guarantee or replacement service, it will
be necessary to produce the equipment card
with the code number and the serial number
to the ·koda Auto service centre!
Care of the antenn a
The antenna has been optimally matched to
the radio navigation system and installed at the
point where good reception is possible with the
least amount of interference.
For vehicles with window antennas, protection
from damage and complete freedom for wear
and tear are other advantages.
Registering the ·kodaAuto MFD
R adio Navig ation System
Under certain conditions, it will be necessary
to register the system because it is equipped
with a radio.
In the Federal Republic of Germany, for ex-
ample:
it is necessary to register the system with the
GEZ (agency collecting fees for public radio
services in Germany) if it is used in company-
owned vehicles.
C are tips for CD-ROMs
If a CD-ROM becomes dirty, never clean it us-
ing a circular motion but always from its centre
to its outer edge using a soft lint-free cloth. If it
is very dirty, we recommend you wash the CD-
ROM using standard washing-up liquid. Again,
when washing the CD-ROM, never clean it us-
ing a circular motion but wipe it from its centre
to its outer edge and leave it to dry.
We also recommend that you handle both the
under and upper sides of the CD-ROM with
care, since the structure of the CD-ROM is
such that the information layer is located di-
rectly beneath the printed layer (i.e. label side).
Some comments regarding questions on read-
Some comments regarding questions on read- Some comments regarding questions on read-
Some comments regarding questions on read-
Some comments regarding questions on read-
ing quality:
ing quality: ing quality:
ing quality:
ing quality:
A dirty or damaged CD-ROM can lead to diffi-
culties when reading the CD-ROM. The seve-
rity of the reading error depends on the amount
of dirt present and the severity of the physical
damage. Severe scratches cause "read errors
(data errors)", which lead to the CD-ROM jum-
ping or getting stuck during playback. All CD-
ROMs must be handled with care and always
stored in a protective case.