low beam SKODA SUPERB 2007 1.G / (B5/3U) Owner's Manual
[x] Cancel search | Manufacturer: SKODA, Model Year: 2007, Model line: SUPERB, Model: SKODA SUPERB 2007 1.G / (B5/3U)Pages: 259, PDF Size: 14.71 MB
Page 24 of 259
Instruments and Indicator/Warning Lights23
Using the systemSafetyDriving TipsGeneral MaintenanceBreakdown assistanceTechnical Data
WARNING
•If you do not pay attention to the warning lights coming on and the corre-
sponding descriptions and warning notes, this may result in severe body
injuries or major vehicle damage.
•The engine compartment of your car is a hazardous area. There is a risk
of injuries, scalding, accidents and fire when working in the engine
compartment, e.g. inspecting and replenis hing oil and other fluids. It is also
essential to observe all warnings ⇒page 185.
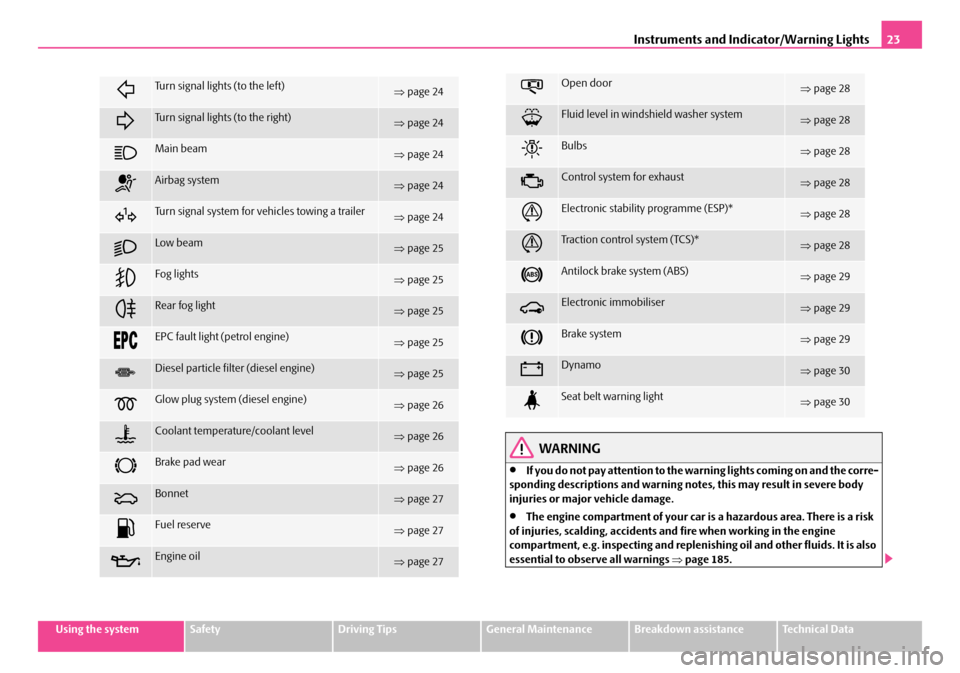
Turn signal lights (to the left)⇒ page 24
Turn signal lights (to the right)⇒page 24
Main beam⇒page 24
Airbag system⇒page 24
Turn signal system for vehicles towing a trailer⇒page 24
Low beam⇒page 25
Fog lights⇒page 25
Rear fog light⇒page 25
EPC fault light (petrol engine)⇒page 25
Diesel particle filter (diesel engine)⇒page 25
Glow plug system (diesel engine)⇒page 26
Coolant temperature/coolant level⇒page 26
Brake pad wear⇒page 26
Bonnet⇒page 27
Fuel reserve⇒page 27
Engine oil⇒page 27
Open door⇒page 28
Fluid level in windshield washer system⇒page 28
Bulbs⇒page 28
Control system for exhaust⇒page 28
Electronic stability programme (ESP)*⇒page 28
Tra c t i o n c o n t r o l s y s t e m ( TC S ) *⇒page 28
Antilock brake system (ABS)⇒page 29
Electronic immobiliser⇒page 29
Brake system⇒page 29
Dynamo⇒page 30
Seat belt warning light⇒page 30
NKO B5 20.book Page 23 Friday, March 2, 2007 1:46 PM
Page 25 of 259
Instruments and Indicator/Warning Lights
24
Note
•Arrangement of the indicator lights de pends on the model and model version.
The symbols shown in the following functional description are to be found as indi-
cator lights in the instrument cluster.
•Operational faults are shown in the disp lay of the instrument cluster as red
symbols (priority 1 - danger) or yell ow symbols (priority 2 - warning).
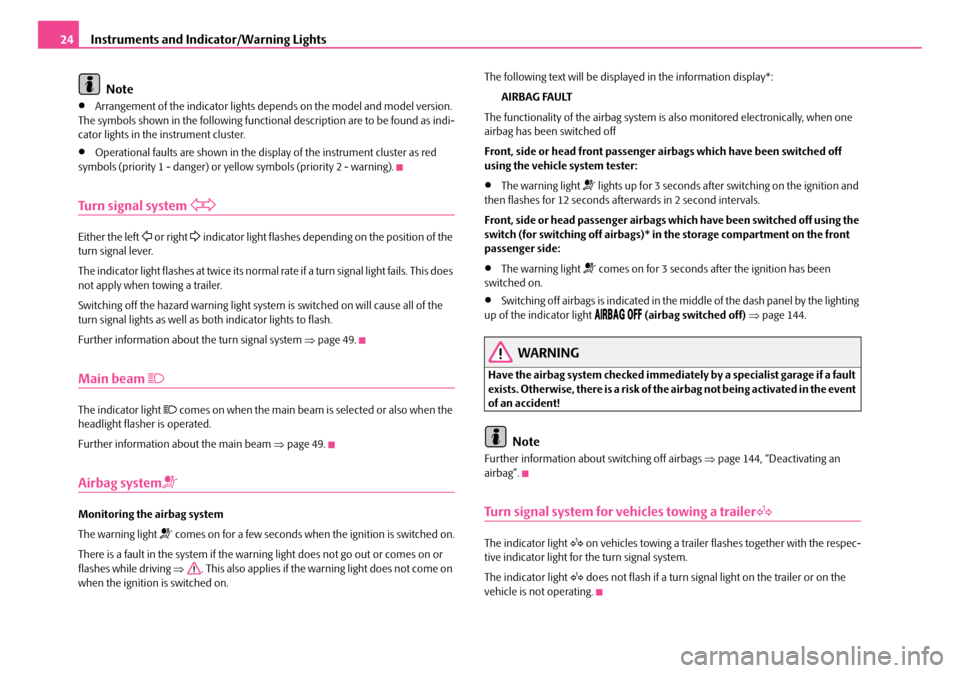
Turn signal system
Either the left or right indicator light flashes depending on the position of the
turn signal lever.
The indicator light flashes at twice its normal rate if a turn signal light fails. This does
not apply when towing a trailer.
Switching off the hazard warning light system is switched on will cause all of the
turn signal lights as well as both indicator lights to flash.
Further information about the turn signal system ⇒page 49.
Main beam
The indicator light comes on when the main beam is selected or also when the
headlight flasher is operated.
Further information about the main beam ⇒page 49.
Airbag system
Monitoring the airbag system
The warning light
comes on for a few seconds when the ignition is switched on.
There is a fault in the system if the warn ing light does not go out or comes on or
flashes while driving ⇒. This also applies if the warning light does not come on
when the ignition is switched on. The following text will be displayed in the information display*:
AIRBAG FAULT
The functionality of the airbag system is also monitored electronically, when one
airbag has been switched off
Front, side or head front passenger airbags which have been switched off
using the vehicle system tester:
•The warning light lights up for 3 seconds after switching on the ignition and
then flashes for 12 seconds afterwards in 2 second intervals.
Front, side or head passenger airbags which have been switched off using the
switch (for switching off airbags)* in the storage compartment on the front
passenger side:
•The warning light comes on for 3 seconds after the ignition has been
switched on.
•Switching off airbags is indicated in the middle of the dash panel by the lighting
up of the indicator light (airbag switched off) ⇒ page 144.
WARNING
Have the airbag system ch ecked immediately by a specialist garage if a fault
exists. Otherwise, there is a risk of th e airbag not being activated in the event
of an accident!
Note
Further information about switching off airbags ⇒page 144, “Deactivating an
airbag”.
Turn signal system for vehicles towing a trailer
The indicator light on vehicles towing a trailer flashes together with the respec-
tive indicator light for the turn signal system.
The indicator light
does not flash if a turn signal light on the trailer or on the
vehicle is not operating.
NKO B5 20.book Page 24 Friday, March 2, 2007 1:46 PM
Page 26 of 259
Instruments and Indicator/Warning Lights25
Using the systemSafetyDriving TipsGeneral MaintenanceBreakdown assistanceTechnical Data
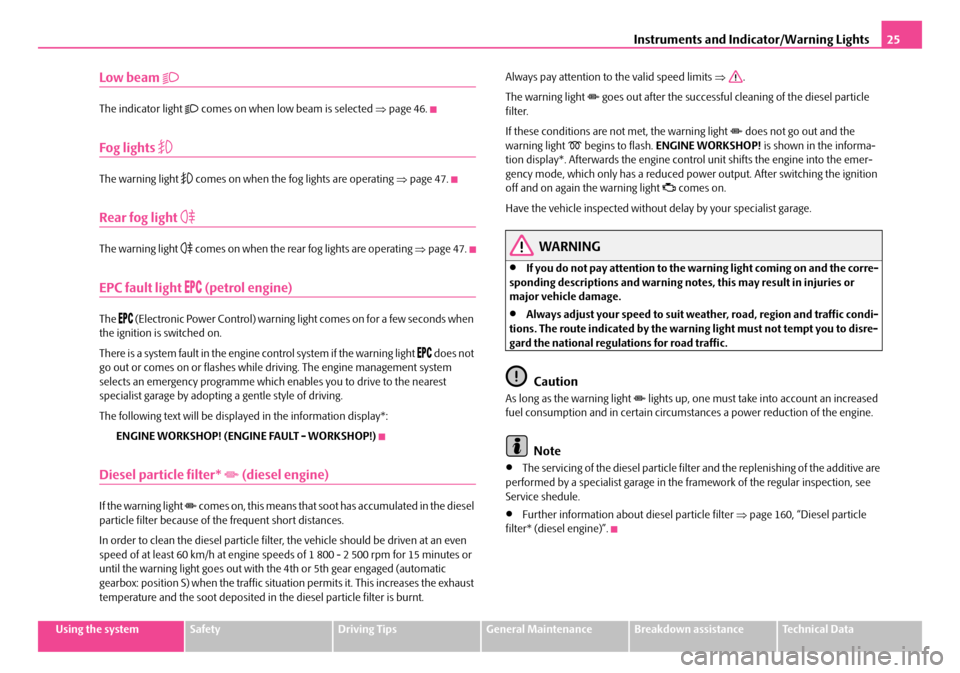
Low beam
The indicator light comes on when low beam is selected ⇒page 46.
Fog lights
The warning light comes on when the fog lights are operating ⇒page 47.
Rear fog light
The warning light comes on when the rear fog lights are operating ⇒page 47.
EPC fault light (petrol engine)
The (Electronic Power Control) warning li ght comes on for a few seconds when
the ignition is switched on.
There is a system fault in the engine control system if the warning light
does not
go out or comes on or flashes while driving. The engine management system
selects an emergency programme which enables you to drive to the nearest
specialist garage by adopting a gentle style of driving.
The following text will be displayed in the information display*:
ENGINE WORKSHOP! (ENGINE FAULT - WORKSHOP!)
Diesel particle filter* (diesel engine)
If the warning light comes on, this means that soot has accumulated in the diesel
particle filter because of the frequent short distances.
In order to clean the diesel particle filter, the vehicle should be driven at an even
speed of at least 60 km/h at engine speeds of 1 800 - 2 500 rpm for 15 minutes or
until the warning light goes out with th e 4th or 5th gear engaged (automatic
gearbox: position S) when the traffic situation permits it. This increases the exhaust
temperature and the soot deposited in the diesel particle filter is burnt. Always pay attention to the valid speed limits
⇒.
The warning light
goes out after the successful cl eaning of the diesel particle
filter.
If these conditions are not met, the warning light
does not go out and the
warning light begins to flash. ENGINE WORKSHOP! is shown in the informa-
tion display*. Afterwards the engine control unit shifts the engine into the emer-
gency mode, which only has a reduced power output. After switching the ignition
off and on again the warning light
comes on.
Have the vehicle inspected without delay by your specialist garage.
WARNING
•If you do not pay attention to the wa rning light coming on and the corre-
sponding descriptions and warning notes, this may result in injuries or
major vehicle damage.
•Always adjust your speed to suit weather, road, region and traffic condi-
tions. The route indicated by the warning light must not tempt you to disre-
gard the national regulations for road traffic.
Caution
As long as the warning light lights up, one must take into account an increased
fuel consumption and in certain circumst ances a power reduction of the engine.
Note
•The servicing of the diesel particle filter and the replenishing of the additive are
performed by a specialist garage in the framework of the regular inspection, see
Service shedule.
•Further information about diesel particle filter ⇒page 160, “Diesel particle
filter* (diesel engine)”.
NKO B5 20.book Page 25 Friday, March 2, 2007 1:46 PM
Page 29 of 259
Instruments and Indicator/Warning Lights
28
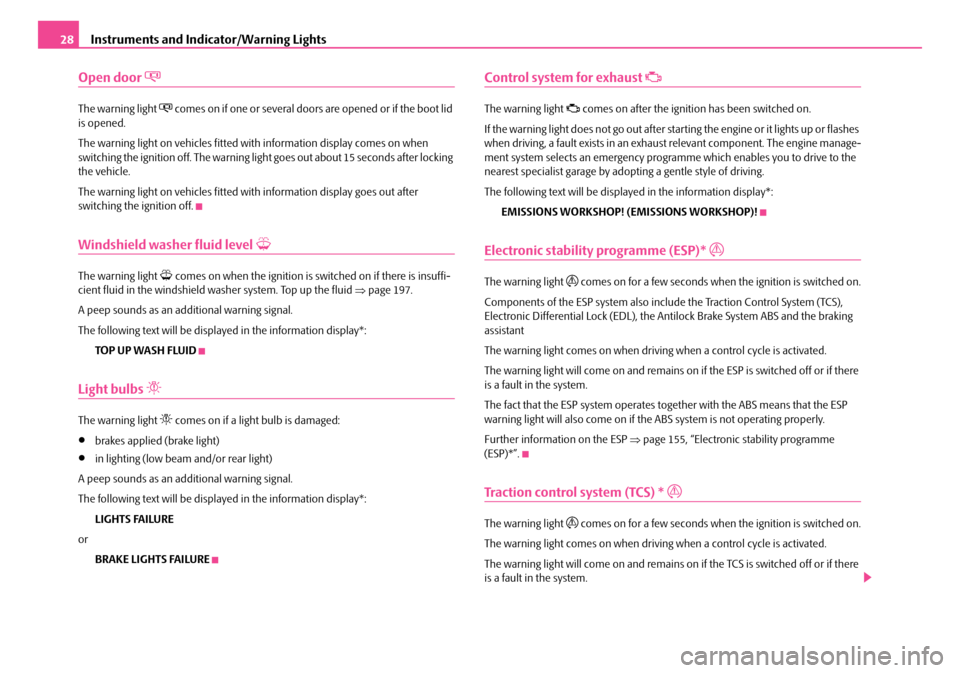
Open door
The warning light comes on if one or several doors are opened or if the boot lid
is opened.
The warning light on vehicles fitted wi th information display comes on when
switching the ignition off. The warning li ght goes out about 15 seconds after locking
the vehicle.
The warning light on vehicles fitted wi th information display goes out after
switching the ignition off.
Windshield washer fluid level
The warning light comes on when the ignition is switched on if there is insuffi-
cient fluid in the windshield washer system. Top up the fluid ⇒page 197.
A peep sounds as an additional warning signal.
The following text will be displayed in the information display*: TOP UP WASH FLUID
Light bulbs
The warning light comes on if a light bulb is damaged:
•brakes applied (brake light)
•in lighting (low beam and/or rear light)
A peep sounds as an additional warning signal.
The following text will be displayed in the information display*:
LIGHTS FAILURE
or BRAKE LIGHTS FAILURE
Control system for exhaust
The warning light comes on after the ignition has been switched on.
If the warning light does not go out after star ting the engine or it lights up or flashes
when driving, a fault exists in an exhaus t relevant component. The engine manage-
ment system selects an emergency programme which enables you to drive to the
nearest specialist garage by adopting a gentle style of driving.
The following text will be displayed in the information display*:
EMISSIONS WORKSHOP! (EMISSIONS WORKSHOP)!
Electronic stability programme (ESP)*
The warning light comes on for a few seconds when the ignition is switched on.
Components of the ESP system also include the Traction Control System (TCS),
Electronic Differential Lock (EDL), the Antilock Brake System ABS and the braking
assistant
The warning light comes on when drivin g when a control cycle is activated.
The warning light will come on and remains on if the ESP is switched off or if there
is a fault in the system.
The fact that the ESP system operates together with the ABS means that the ESP
warning light will also come on if the ABS system is not operating properly.
Further information on the ESP ⇒page 155, “Electronic stability programme
(ESP)*”.
Traction control system (TCS) *
The warning light comes on for a few seconds when the ignition is switched on.
The warning light comes on when drivin g when a control cycle is activated.
The warning light will come on and remains on if the TCS is switched off or if there
is a fault in the system.
NKO B5 20.book Page 28 Friday, March 2, 2007 1:46 PM
Page 47 of 259
Lights and Visibility
46
Lights and Visibility
Lights
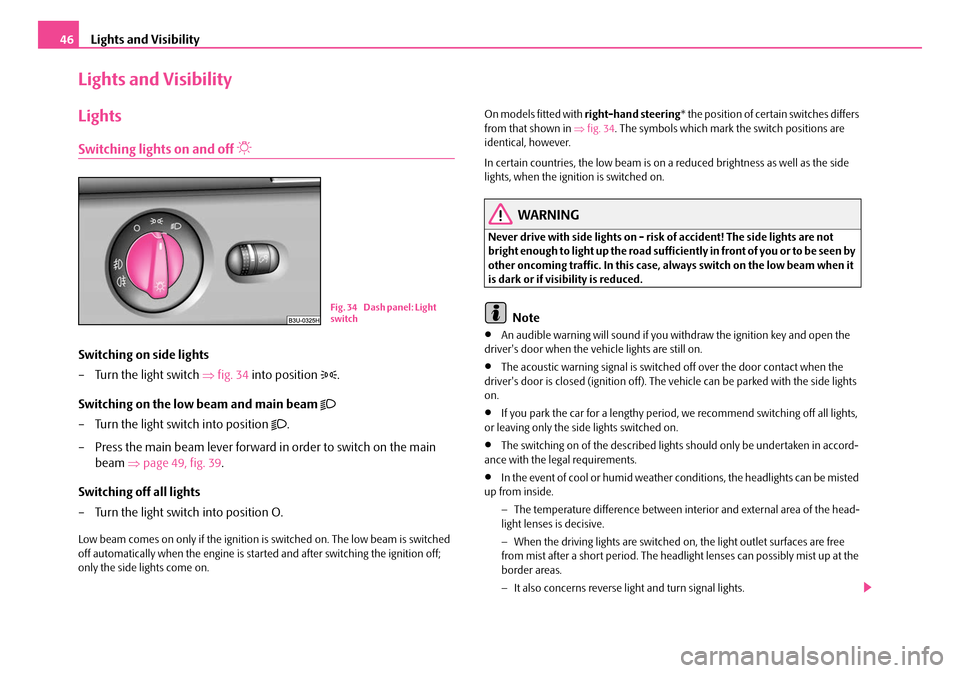
Switching lights on and off
Switching on side lights
– Turn the light switch ⇒fig. 34 into position
.
Switching on the low beam and main beam
– Turn the light switch into position .
– Press the main beam lever forward in order to switch on the main beam ⇒page 49, fig. 39.
Switching off all lights
– Turn the light switch into position O.
Low beam comes on only if the ignition is switched on. The low beam is switched
off automatically when the engine is star ted and after switching the ignition off;
only the side lights come on. On models fitted with
right-hand steering* the position of certain switches differs
from that shown in ⇒fig. 34 . The symbols which mark the switch positions are
identical, however.
In certain countries, the low beam is on a reduced brightness as well as the side
lights, when the ignition is switched on.
WARNING
Never drive with side lights on - risk of accident! The side lights are not
bright enough to light up the road sufficiently in front of you or to be seen by
other oncoming traffic. In this case, always switch on the low beam when it
is dark or if visibility is reduced.
Note
•An audible warning will sound if you withdraw the ignition key and open the
driver's door when the vehicle lights are still on.
•The acoustic warning signal is switched off over the door contact when the
driver's door is closed (ignition off). The vehicle can be parked with the side lights
on.
•If you park the car for a lengthy period, we recommend switching off all lights,
or leaving only the side lights switched on.
•The switching on of the described lights should only be undertaken in accord-
ance with the legal requirements.
•In the event of cool or humid weather conditions, the headligh ts can be misted
up from inside.
−The temperature difference between interior and external area of the head-
light lenses is decisive.
− When the driving lights are switched on, the light outlet surfaces are free
from mist after a short period. The headli ght lenses can possibly mist up at the
border areas.
− It also concerns reverse light and turn signal lights.
B1Z-0042HB1Z-0042HFi g. 3 4 D ash pan el: Lig ht
switch
NKO B5 20.book Page 46 Friday, March 2, 2007 1:46 PM
Page 49 of 259
Lights and Visibility
48
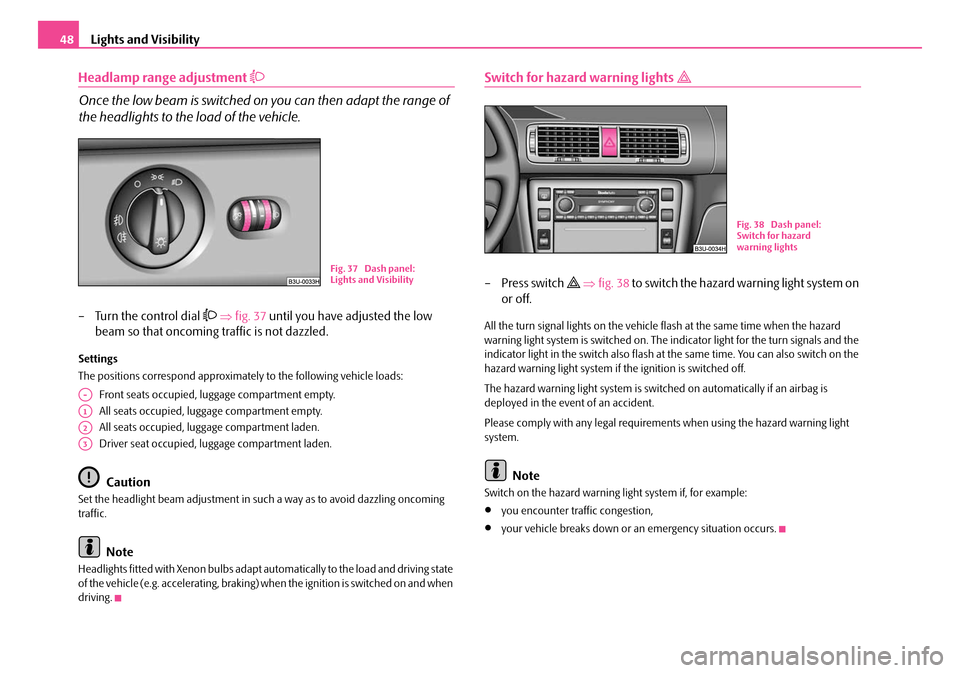
Headlamp range adjustment
Once the low beam is switched on you can then adapt the range of
the headlights to the load of the vehicle.
– Turn the control dial ⇒ fig. 37 until you have adjusted the low
beam so that oncoming traffic is not dazzled.
Settings
The positions correspond approximately to the following vehicle loads:
Front seats occupied, lu ggage compartment empty.
All seats occupied, luggage compartment empty.
All seats occupied, luggage compartment laden.
Driver seat occupied, luggage compartment laden.
Caution
Set the headlight beam adjustment in su ch a way as to avoid dazzling oncoming
traffic.
Note
Headlights fitted with Xenon bulbs adapt au tomatically to the load and driving state
of the vehicle (e.g. accelerating, braking) wh e n th e i g n i t i o n i s s w i t c h e d o n a n d w h e n
driving.
Switch for hazard warning lights
–Press switch ⇒ fig. 38 to switch the hazard warning light system on
or off.
All the turn signal lights on the vehicle flash at the same time when the hazard
warning light system is switched on. The indicator light for the turn signals and the
indicator light in the switch also flash at the same time. You can also switch on the
hazard warning light system if the ignition is switched off.
The hazard warning light system is switch ed on automatically if an airbag is
deployed in the event of an accident.
Please comply with any legal requirements when using the hazard warning light
system.
Note
Switch on the hazard warning light system if, for example:
•you encounter traffic congestion,
•your vehicle breaks down or an emergency situation occurs.
Fig. 37 Dash panel:
Lights and Visibility
A-
A1
A2
A3
Fig. 38 Dash panel:
Switch for hazard
warning lights
NKO B5 20.book Page 48 Friday, March 2, 2007 1:46 PM
Page 50 of 259
Lights and Visibility49
Using the systemSafetyDriving TipsGeneral MaintenanceBreakdown assistanceTechnical Data
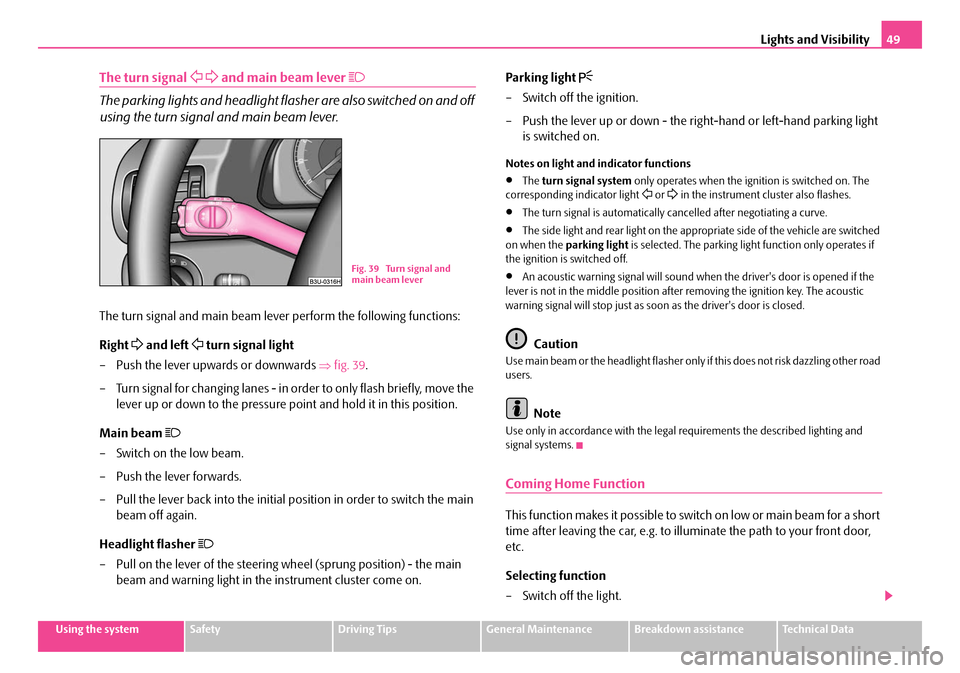
The turn signal and main beam lever
The parking lights and headlight flas her are also switched on and off
using the turn signal and main beam lever.
The turn signal and main beam lever perform the following functions:
Right
and left turn signal light
– Push the lever upwards or downwards ⇒fig. 39 .
– Turn signal for changing lanes - in or der to only flash briefly, move the
lever up or down to the pressure po int and hold it in this position.
Main beam
– Switch on the low beam.
– Push the lever forwards.
– Pull the lever back into the initial position in order to switch the main beam off again.
Headlight flasher
– Pull on the lever of the steering wheel (sprung position) - the main beam and warning light in the instrument cluster come on. Parking light
– Switch off the ignition.
– Push the lever up or down - the right-hand or left-hand parking light
is switched on.
Notes on light and indicator functions
•The turn signal system only operates when the ignition is switched on. The
corresponding indicator light or in the instrument cluster also flashes.
•The turn signal is automatically cancelled after negotiating a curve.
•The side light and rear light on the appropriate side of the vehicle are switched
on when the parking light is selected. The parking light function only operates if
the ignition is switched off.
•An acoustic warning signal will sound when the driver's door is opened if the
lever is not in the middle position after removing the ignition key. The acoustic
warning signal will stop just as soon as the driver's door is closed.
Caution
Use main beam or the headlight flasher only if this does not risk dazzling other road
users.
Note
Use only in accordance with the legal requirements the described lighting and
signal systems.
Coming Home Function
This function makes it possible to switch on low or main beam for a short
time after leaving the car, e.g. to illuminate the path to your front door,
etc.
Selecting function
– Switch off the light.
Fig. 39 Turn signal and
main beam lever
NKO B5 20.book Page 49 Friday, March 2, 2007 1:46 PM
Page 51 of 259
Lights and Visibility
50
– Switch off the ignition.
– Flash one time with the headlights.
– Open the door, the low beam lights up.
If you shift the lever into the main be am position, the main beam lights up.
If the door remains open, the ligh t remains on for about 3 minutes.
If the door is closed, the light remains on for about 30 seconds.
Interior lighting
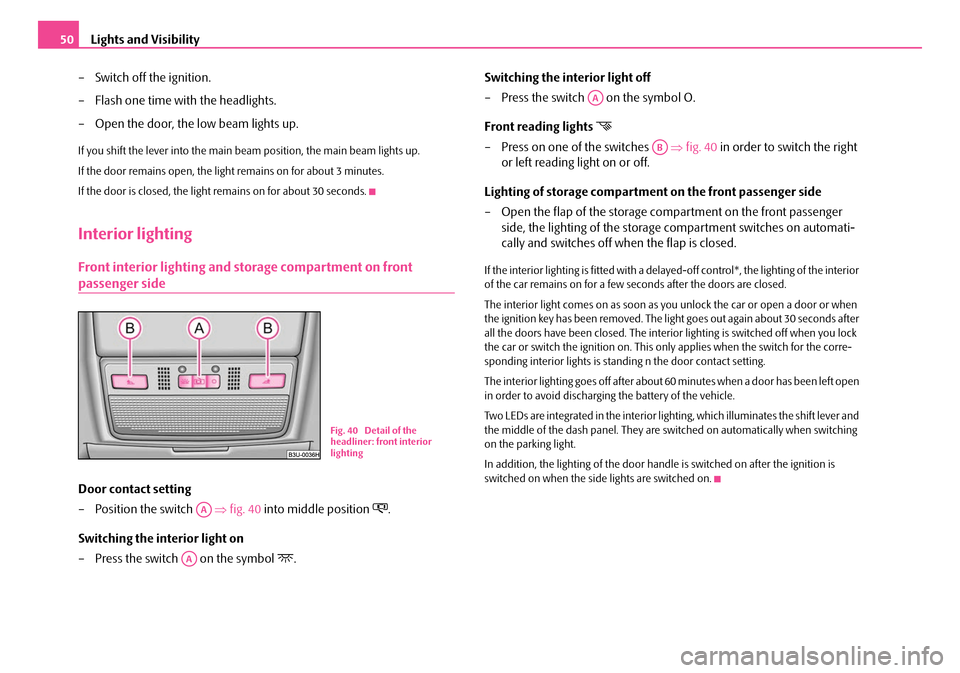
Front interior lighting and storage compartment on front
passenger side
Door contact setting
– Position the switch ⇒ fig. 40 into middle position
.
Switching the interior light on
– Press the switch on the symbol
. Switching the interior light off
– Press the switch on the symbol O.
Front reading lights
– Press on one of the switches
⇒fig. 40 in order to switch the right
or left reading light on or off.
Lighting of storage compartme nt on the front passenger side
– Open the flap of the storage compartment on the front passenger side, the lighting of the storage compartment switches on automati-
cally and switches off when the flap is closed.
If the interior lighting is fitted with a dela yed-off control*, the lighting of the interior
of the car remains on for a few seconds after the doors are closed.
The interior light comes on as soon as yo u unlock the car or open a door or when
the ignition key has been removed. The light goes out again about 30 seconds after
all the doors have been closed. The interior lighting is switched off when you lock
the car or switch the ignition on. This on ly applies when the switch for the corre-
sponding interior lights is standing n the door contact setting.
The interior lighting goes off after about 60 minutes when a door has been left open
in order to avoid discharging the battery of the vehicle.
Two LEDs are integrated in the interior li ghting, which illuminates the shift lever and
the middle of the dash panel. They are switched on automatically when switching
on the parking light.
In addition, the lighting of the door handle is switched on after the ignition is
switched on when the side lights are switched on.
B1Z-0042HB1Z-0042H
Fig. 40 Detail of the
headliner: front interior
lighting
AA
AA
AA
AB
NKO B5 20.book Page 50 Friday, March 2, 2007 1:46 PM
Page 52 of 259
Lights and Visibility51
Using the systemSafetyDriving TipsGeneral MaintenanceBreakdown assistanceTechnical Data
Rear interior lighting
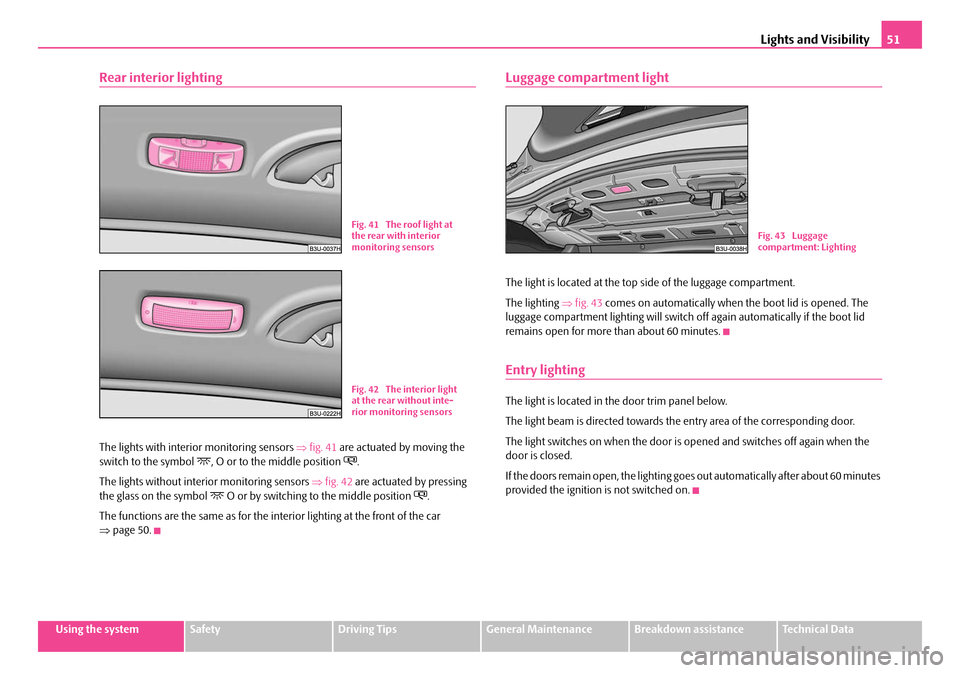
The lights with interior monitoring sensors ⇒fig. 41 are actuated by moving the
switch to the symbol , O or to the middle position .
The lights without interior monitoring sensors ⇒fig. 42 are actuated by pressing
the glass on the symbol
O or by switching to the middle position .
The functions are the same as for the inte rior lighting at the front of the car
⇒ page 50.
Luggage compartment light
The light is located at the top side of the luggage compartment.
The lighting ⇒fig. 43 comes on automatically when the boot lid is opened. The
luggage compartment lighting will switch off again automatically if the boot lid
remains open for more than about 60 minutes.
Entry lighting
The light is located in th e door trim panel below.
The light beam is directed towards the entry area of the corresponding door.
The light switches on when the door is opened and switches off again when the
door is closed.
If the doors remain open, the lighting go es out automatically after about 60 minutes
provided the ignition is not switched on.
Fig. 41 The roof light at
the rear with interior
monitoring sensors
B1Z-0042HB1Z-0042H
Fig. 42 The interior light
at the rear without inte-
rior monitoring sensors
Fig. 43 Luggage
compartment: Lighting
NKO B5 20.book Page 51 Friday, March 2, 2007 1:46 PM
Page 56 of 259
Lights and Visibility55
Using the systemSafetyDriving TipsGeneral MaintenanceBreakdown assistanceTechnical Data
Headlight cleaning system*
The headlight lenses are clea ned, when low beam or main beam are switched on
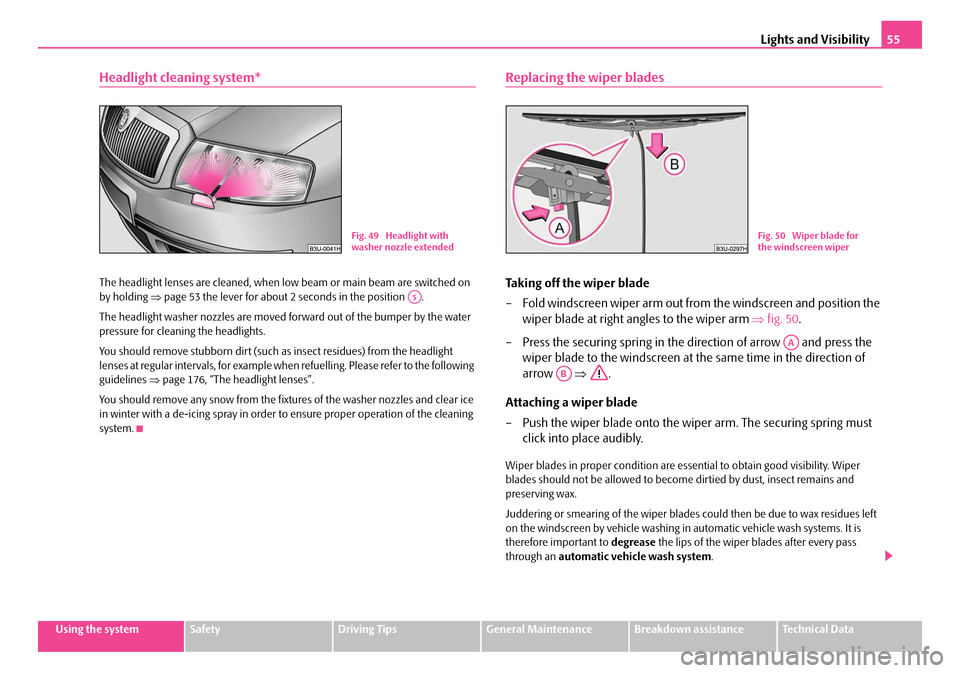
by holding ⇒page 53 the lever for about 2 seconds in the position .
The headlight washer nozzles are moved forward out of the bumper by the water
pressure for cleaning the headlights.
You should remove stubborn dirt (such as insect residues) from the headlight
lenses at regular intervals, for example when refuelling. Please refer to the following
guidelines ⇒page 176, “The headlight lenses”.
You should remove any snow from the fixt ures of the washer nozzles and clear ice
in winter with a de-icing spray in order to ensure proper operation of the cleaning
system.
Replacing the wiper blades
Taking off the wiper blade
– Fold windscreen wiper arm out from the windscreen and position the
wiper blade at right angles to the wiper arm ⇒fig. 50 .
– Press the securing spring in the direction of arrow and press the wiper blade to the windscreen at the same time in the direction of
arrow ⇒.
Attaching a wiper blade
– Push the wiper blade onto the wiper arm. The securing spring must click into place audibly.
Wiper blades in proper condition are esse ntial to obtain good visibility. Wiper
blades should not be allowed to become dirtied by dust, insect remains and
preserving wax.
Juddering or smearing of the wiper blades could then be due to wax residues left
on the windscreen by vehicle washing in automatic vehicle wash systems. It is
therefore important to degrease the lips of the wiper blades after every pass
through an automatic vehicle wash system .
Fig. 49 Headlight with
washer nozzle extended
A5
Fig. 50 Wiper blade for
the windscreen wiper
AA
AB
NKO B5 20.book Page 55 Friday, March 2, 2007 1:46 PM