warning light SKODA SUPERB 2007 1.G / (B5/3U) Owner's Guide
[x] Cancel search | Manufacturer: SKODA, Model Year: 2007, Model line: SUPERB, Model: SKODA SUPERB 2007 1.G / (B5/3U)Pages: 259, PDF Size: 14.71 MB
Page 28 of 259
Instruments and Indicator/Warning Lights27
Using the systemSafetyDriving TipsGeneral MaintenanceBreakdown assistanceTechnical Data
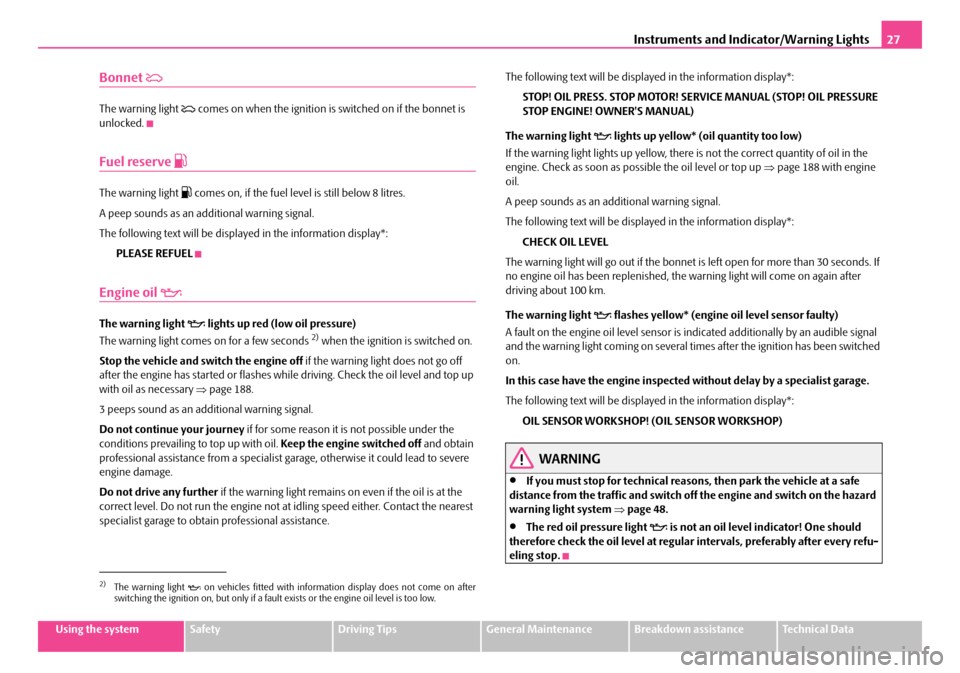
Bonnet
The warning light comes on when the ignition is switched on if the bonnet is
unlocked.
Fuel reserve
The warning light comes on, if the fuel level is still below 8 litres.
A peep sounds as an addi tional warning signal.
The following text will be displayed in the information display*: PLEASE REFUEL
Engine oil
The warning light lights up red (low oil pressure)
The warning light comes on for a few seconds 2) when the ignition is switched on.
Stop the vehicle and switch the engine off if the warning light does not go off
after the engine has started or flashes while driving. Check the oil level and top up
with oil as necessary ⇒page 188.
3 peeps sound as an additional warning signal.
Do not continue your journey if for some reason it is not possible under the
conditions prevailing to top up with oil. Keep the engine switched off and obtain
professional assistance from a specialist garage, otherwise it could lead to severe
engine damage.
Do not drive any further if the warning light remains on even if the oil is at the
correct level. Do not run the engine not at idling speed either. Contact the nearest
specialist garage to obtain professional assistance. The following text will be displayed in the information display*:
STOP! OIL PRESS. STOP MOTOR! SERVICE MANUAL (STOP! OIL PRESSURE
STOP ENGINE! OWNER'S MANUAL)
The warning light
lights up yellow* (oil quantity too low)
If the warning light lights up yellow, there is not the correct quantity of oil in the
engine. Check as soon as possible the oil level or top up ⇒ page 188 with engine
oil.
A peep sounds as an ad ditional warning signal.
The following text will be displayed in the information display*: CHECK OIL LEVEL
The warning light will go out if the bonnet is left open for more than 30 seconds. If
no engine oil has been replenished, the warning light will come on again after
driving about 100 km.
The warning light
flashes yellow* (engine oil level sensor faulty)
A fault on the engine oil level sensor is in dicated additionally by an audible signal
and the warning light coming on several ti mes after the ignition has been switched
on.
In this case have the engine inspecte d without delay by a specialist garage.
The following text will be displayed in the information display*: OIL SENSOR WORKSHOP! (OIL SENSOR WORKSHOP)
WARNING
•If you must stop for technical reasons, then park the vehicle at a safe
distance from the traffic and switch off the engine and switch on the hazard
warning light system ⇒ page 48.
•The red oil pressure light is not an oil level indicator! One should
therefore check the oil level at regular intervals, preferably after every refu-
eling stop.
2)The warning light on vehicles fitted with information display does not come on after
switching the ignition on, but only if a fault exists or the engine oil level is too low.
NKO B5 20.book Page 27 Friday, March 2, 2007 1:46 PM
Page 29 of 259
Instruments and Indicator/Warning Lights
28
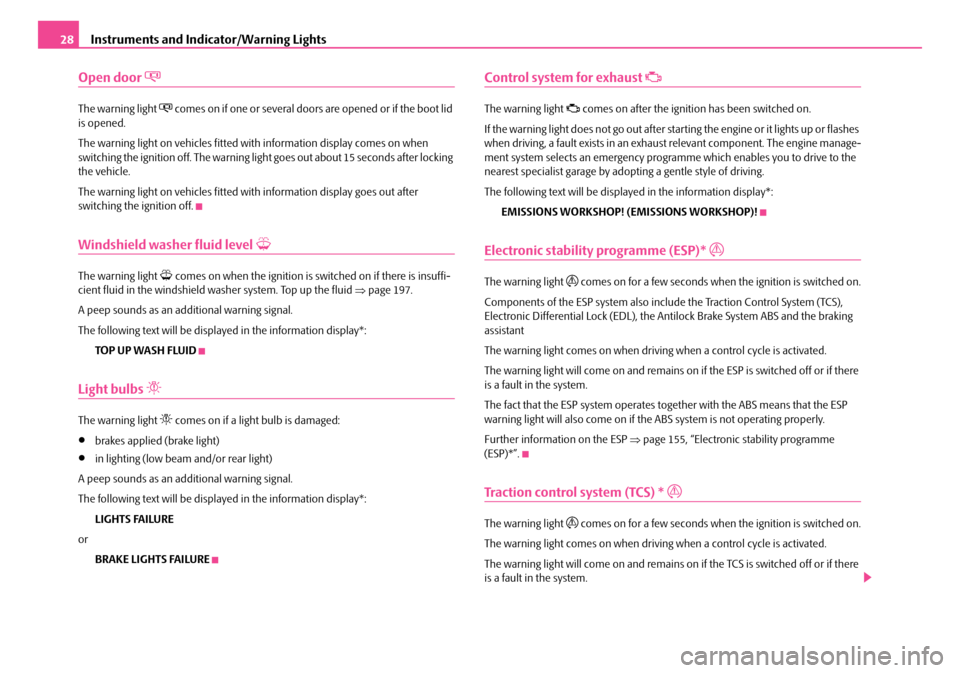
Open door
The warning light comes on if one or several doors are opened or if the boot lid
is opened.
The warning light on vehicles fitted wi th information display comes on when
switching the ignition off. The warning li ght goes out about 15 seconds after locking
the vehicle.
The warning light on vehicles fitted wi th information display goes out after
switching the ignition off.
Windshield washer fluid level
The warning light comes on when the ignition is switched on if there is insuffi-
cient fluid in the windshield washer system. Top up the fluid ⇒page 197.
A peep sounds as an additional warning signal.
The following text will be displayed in the information display*: TOP UP WASH FLUID
Light bulbs
The warning light comes on if a light bulb is damaged:
•brakes applied (brake light)
•in lighting (low beam and/or rear light)
A peep sounds as an additional warning signal.
The following text will be displayed in the information display*:
LIGHTS FAILURE
or BRAKE LIGHTS FAILURE
Control system for exhaust
The warning light comes on after the ignition has been switched on.
If the warning light does not go out after star ting the engine or it lights up or flashes
when driving, a fault exists in an exhaus t relevant component. The engine manage-
ment system selects an emergency programme which enables you to drive to the
nearest specialist garage by adopting a gentle style of driving.
The following text will be displayed in the information display*:
EMISSIONS WORKSHOP! (EMISSIONS WORKSHOP)!
Electronic stability programme (ESP)*
The warning light comes on for a few seconds when the ignition is switched on.
Components of the ESP system also include the Traction Control System (TCS),
Electronic Differential Lock (EDL), the Antilock Brake System ABS and the braking
assistant
The warning light comes on when drivin g when a control cycle is activated.
The warning light will come on and remains on if the ESP is switched off or if there
is a fault in the system.
The fact that the ESP system operates together with the ABS means that the ESP
warning light will also come on if the ABS system is not operating properly.
Further information on the ESP ⇒page 155, “Electronic stability programme
(ESP)*”.
Traction control system (TCS) *
The warning light comes on for a few seconds when the ignition is switched on.
The warning light comes on when drivin g when a control cycle is activated.
The warning light will come on and remains on if the TCS is switched off or if there
is a fault in the system.
NKO B5 20.book Page 28 Friday, March 2, 2007 1:46 PM
Page 30 of 259
Instruments and Indicator/Warning Lights29
Using the systemSafetyDriving TipsGeneral MaintenanceBreakdown assistanceTechnical Data
The fact that the TCS system operates together with the ABS means that the TCS
warning light will also come on if the
ABS system is not operating properly.
Further information about the TCS ⇒page 156, “Traction control system (TCS)*”.
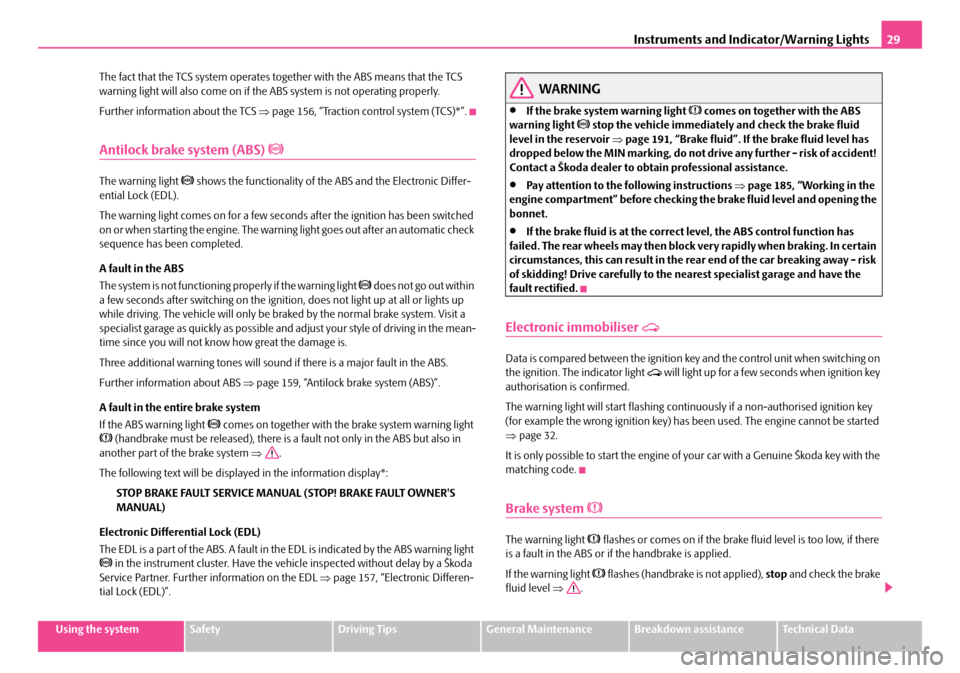
Antilock brake system (ABS)
The warning light shows the functionality of the ABS and the Electronic Differ-
ential Lock (EDL).
The warning light comes on for a few seconds after the ignition has been switched
on or when starting the engine. The warning light goes out after an automatic check
sequence has been completed.
A fault in the ABS
The system is not functioning properly if the warning light
does not go out within
a few seconds after switching on the ignition , does not light up at all or lights up
while driving. The vehicle will only be br aked by the normal brake system. Visit a
specialist garage as quickly as possible and adjust your style of driving in the mean-
time since you will not know how great the damage is.
Three additional warning tones will sound if there is a major fault in the ABS.
Further information about ABS ⇒page 159, “Antilock brake system (ABS)”.
A fault in the entire brake system
If the ABS warning light
comes on together with the brake system warning light (handbrake must be released), there is a fault not only in the ABS but also in
another part of the brake system ⇒.
The following text will be displayed in the information display*: STOP BRAKE FAULT SERVICE MANUAL (STOP! BRAKE FAULT OWNER'S
MANUAL)
Electronic Differential Lock (EDL)
The EDL is a part of the ABS. A fault in the EDL is indicated by the ABS warning light
in the instrument cluster. Have the ve hicle inspected without delay by a Škoda
Service Partner. Further information on the EDL ⇒page 157, “Electronic Differen-
tial Lock (EDL)”.
WARNING
•If the brake system warning light comes on together with the ABS
warning light stop the vehicle immediately and check the brake fluid
level in the reservoir ⇒page 191, “Brake fluid”. If the brake fluid level has
dropped below the MIN marking, do not drive any further - risk of accident!
Contact a Škoda dealer to obta in professional assistance.
•Pay attention to the following instructions ⇒ page 185, “Working in the
engine compartment” before checking the brake fluid level and opening the
bonnet.
•If the brake fluid is at the correct level, the ABS control function has
failed. The rear wheels may then block very rapidly when braking. In certain
circumstances, this can result in the rear end of the car breaking away - risk
of skidding! Drive carefully to the nearest specialist garage and have the
fault rectified.
Electronic immobiliser
Data is compared between the ignition ke y and the control unit when switching on
the ignition. The indicator light will light up for a few seconds when ignition key
authorisation is confirmed.
The warning light will start flashing conti nuously if a non-authorised ignition key
(for example the wrong ignition key) has been used. The engine cannot be started
⇒ page 32.
It is only possible to start the engine of your car with a Genuine Škoda key with the
matching code.
Brake system
The warning light flashes or comes on if the brake fluid level is too low, if there
is a fault in the ABS or if the handbrake is applied.
If the warning light
flashes (handbrake is not applied), stop and check the brake
fluid level ⇒ .
NKO B5 20.book Page 29 Friday, March 2, 2007 1:46 PM
Page 31 of 259
Instruments and Indicator/Warning Lights
30
The following text will be displayed in the information display*:
STOP BRAKE FLUID SERVICE MANUAL
If there is a fault in the ABS which also influences the function of the normal brake
system (e.g. distribution of brake pressure), the ABS warning light
comes on
together with the brake system warning light . Be aware that not only the ABS but
also another part of th brake system is defective ⇒.
3 peeps sound as an additional warning signal.
One should get used to high pedal forces, long braking distances and long free play
of the brake pedal when driving to the next specialist garage.
The following text will be displayed in the information display*: STOP BRAKE FAULT SERVICE MANUAL (STOP! BRAKE FAULT OWNER'S
MANUAL)
For further information on the brake system ⇒page 158, “Brakes”.
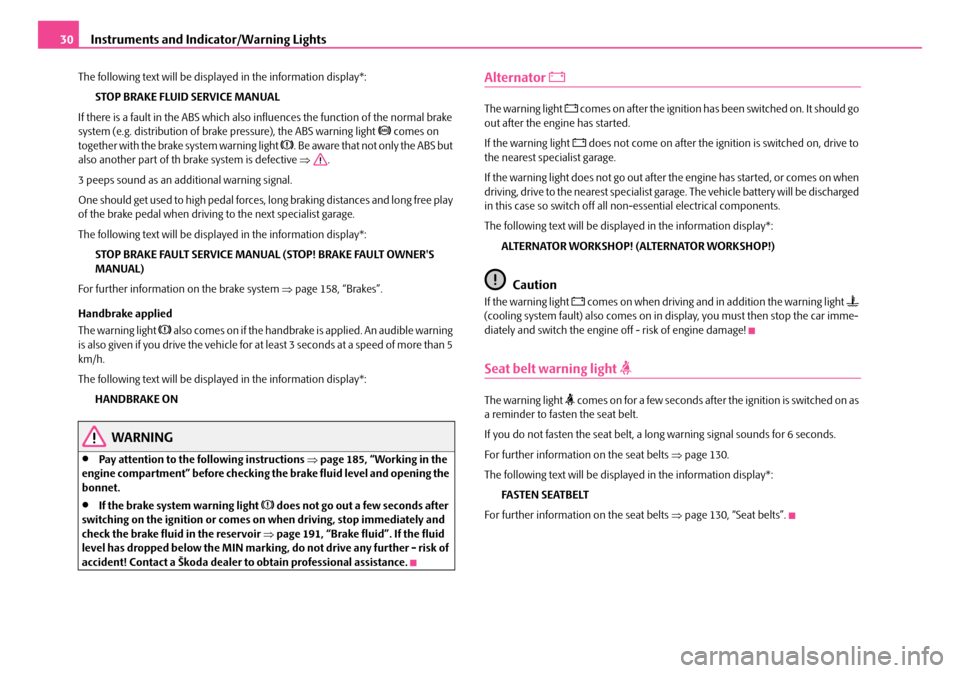
Handbrake applied
The warning light
also comes on if the handbrake is applied. An audible warning
is also given if you drive the vehicle for at least 3 seconds at a speed of more than 5
km/h.
The following text will be displayed in the information display*:
HANDBRAKE ON
WARNING
•Pay attention to the following instructions ⇒page 185, “Working in the
engine compartment” before checking the brake fluid level and opening the
bonnet.
•If the brake system warning light does not go out a few seconds after
switching on the ignition or comes on when driving, stop immediately and
check the brake fluid in the reservoir ⇒page 191, “Brake fluid”. If the fluid
level has dropped below the MIN marking, do not drive any further - risk of
accident! Contact a Škoda dealer to obtain professional assistance.
Alternator
The warning light comes on after the ignition has been switched on. It should go
out after the engine has started.
If the warning light
does not come on after the ignition is switched on, drive to
the nearest specialist garage.
If the warning light does not go out after the engine has started, or comes on when
driving, drive to the nearest specialist garage. The vehicle battery will be discharged
in this case so switch off all non-essential electrical components.
The following text will be displayed in the information display*:
ALTERNATOR WORKSHOP! (ALTERNATOR WORKSHOP!)
Caution
If the warning light comes on when driving and in addition the warning light
(cooling system fault) also comes on in display, you must then stop the car imme-
diately and switch the engine off - risk of engine damage!
Seat belt warning light
The warning light comes on for a few seconds after the ignition is switched on as
a reminder to fasten the seat belt.
If you do not fasten the seat belt, a long warning signal sounds for 6 seconds.
For further information on the seat belts ⇒page 130.
The following text will be displayed in the information display*: FASTEN SEATBELT
For further information on the seat belts ⇒page 130, “Seat belts”.
NKO B5 20.book Page 30 Friday, March 2, 2007 1:46 PM
Page 35 of 259
Unlocking and locking
34
If you wish, your Škoda Service Partner ca n convert the central locking system of
your car to the automatic locking mode.
WARNING
Locking the doors prevents involuntary opening in an exceptional situation
(an accident). Locked doors prevent unwanted entry into the vehicle from
outside, for example at road crossings. Locked doors do, however, make it
more difficult for rescuers to get into the vehicle in an emergency - danger to
life!
Note
•After unlocking the vehicle see, if the se curing knobs are located on all doors at
the bottom.
•In the event of an accident in which the airbags are deployed, the locked doors
are automatically unlocked in order to enable rescuers to gain access to the vehicle.
•Should the central locking system not operate properly, you can lock and unlock
the front doors and the boot lid with the key. Emergency unlocking of fuel filler flap
⇒ page 183.
Safe securing
The central locking system is equipped with a safe securing system. Locking the
vehicle from the outside causes the door lock s to be automatically blocked. It is not
possible to pull out the locking buttons. The indicator light in the driver's door
flashes. It is not possible to open the d oors with the door handle either from the
inside or from the outside. This acts as an effective deterrent for attempts to break
into your vehicle.
You can deactivate the safe securing system. This is done by locking the vehicle with
the key or radio-operated key twice within 2 seconds.
Deactivating the safe securing system means that the warning light next to the
securing knob in the driver's door will not fl ash. This is not the case, however, for an
activated anti-theft alarm system* since the indicator light is showing that the
system is active ⇒page 39. The safe securing system is again activated the next time the vehicle is unlocked and
locked again.
The doors can be opened from the inside
if the vehicle is locked and the safe
securing system is deactivated:
•The door is unlocked by actuating the door-opening lever.
•The door opens upon actuating the door-opening lever again.
WARNING
If the vehicle is locked from the outsid e and the safe securing system is acti-
vated, there must not be any person and animals in the vehicle as it is then
not possible to open either a door or a window from the inside. The locked
doors make it more difficult for rescuers to get into the vehicle in an emer-
gency - hazard!
Note
The anti-theft alarm system is also armed when the car is closed without activating
the safe securing system. In this case, always switch off the interior monitoring
sensor* ⇒page 40 first of all to avoid an alarm being triggered unintentionally.
Unlocking the vehicle using the key
B1Z-0042HB1Z-0042H
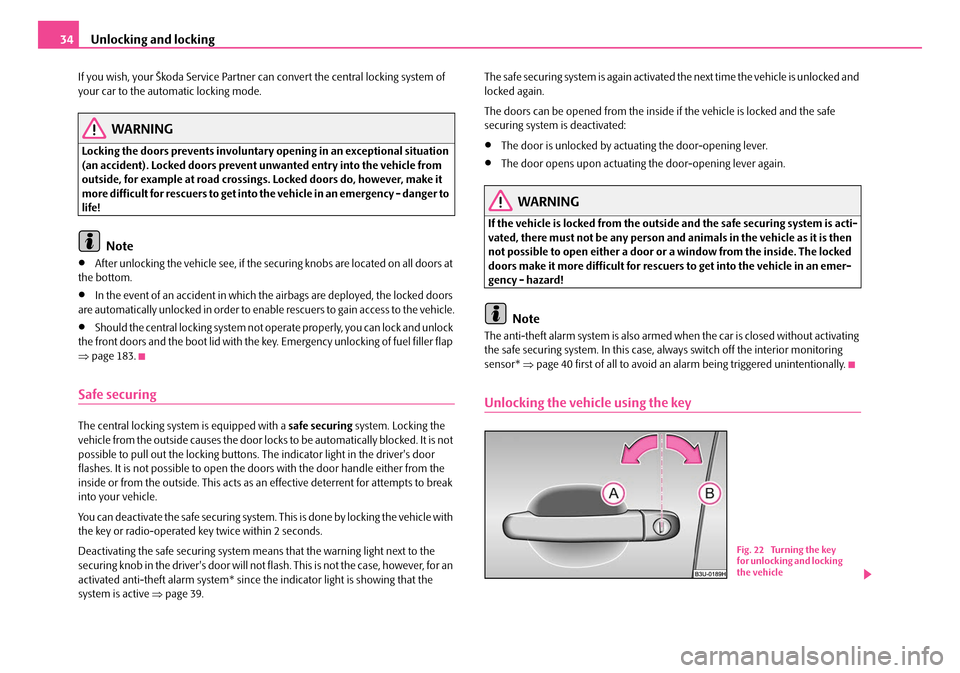
Fig. 22 Turning the key
for unlocking and locking
the vehicle
NKO B5 20.book Page 34 Friday, March 2, 2007 1:46 PM
Page 37 of 259
Unlocking and locking
36
Locking all doors and the boot lid
– Press button ⇒page 35, fig. 23 .
Unlocking all doors and the boot lid
– Press button ⇒page 35, fig. 23 . If the boot lid has been set to the
permanent locking mode, it is then not unlocked ⇒page 37 when the
button is pressed.
Unlocking fuel filler flap
– Pull the switch ⇒page 35, fig. 24 .
Unlocking the boot lid
– Pull the switch ⇒page 35, fig. 24 .
Blocking boot lid remote release button
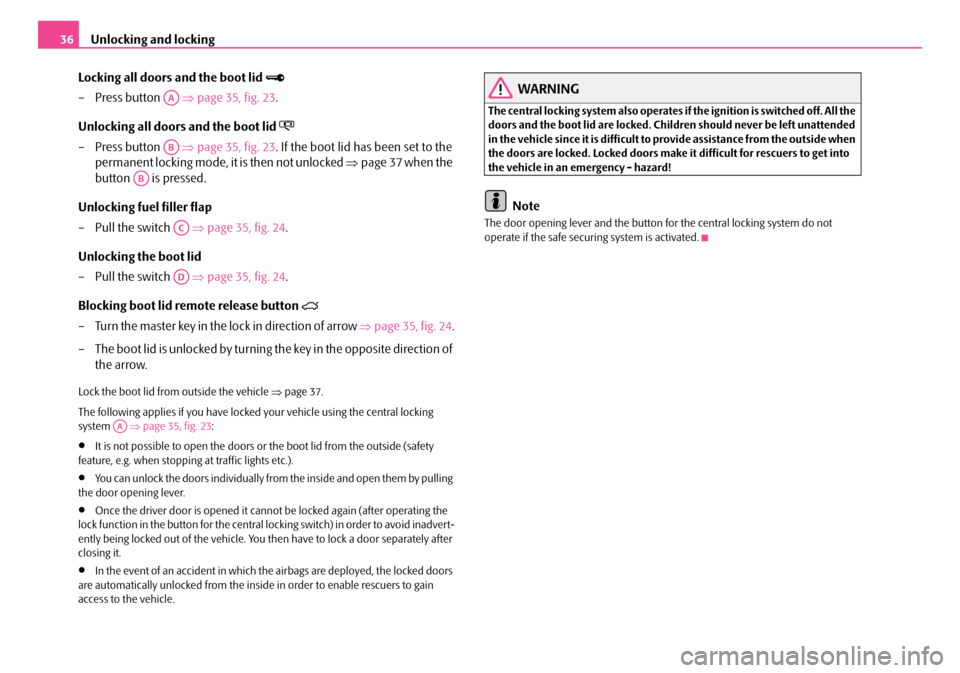
– Turn the master key in the lock in direction of arrow ⇒page 35, fig. 24 .
– The boot lid is unlocked by turning the key in the opposite direction of the arrow.
Lock the boot lid from outside the vehicle ⇒ page 37.
The following applies if you have locked your vehicle using the central locking
system ⇒page 35, fig. 23 :
•It is not possible to open the doors or the boot lid from the outside (safety
feature, e.g. when stopping at traffic lights etc.).
•You can unlock the doors individually from the inside and open them by pulling
the door opening lever.
•Once the driver door is opened it cannot be locked again (after operating the
lock function in the button for the central locking switch) in order to avoid inadvert-
ently being locked out of the vehicle. You th en have to lock a door separately after
closing it.
•In the event of an accident in which the airbags are deployed, the locked doors
are automatically unlocked from the inside in order to enable rescuers to gain
access to the vehicle.
WARNING
The central locking system al so operates if the ignition is switched off. All the
doors and the boot lid are locked. Children should never be left unattended
in the vehicle since it is difficult to provide assistance from the outside when
the doors are locked. Locked doors make it difficult for rescuers to get into
the vehicle in an emergency - hazard!
Note
The door opening lever and the button for the central locking system do not
operate if the safe securing system is activated.
AA
AB
AB
AC
AD
AA
NKO B5 20.book Page 36 Friday, March 2, 2007 1:46 PM
Page 38 of 259
Unlocking and locking37
Using the systemSafetyDriving TipsGeneral MaintenanceBreakdown assistanceTechnical Data
Boot lid
Open boot lid
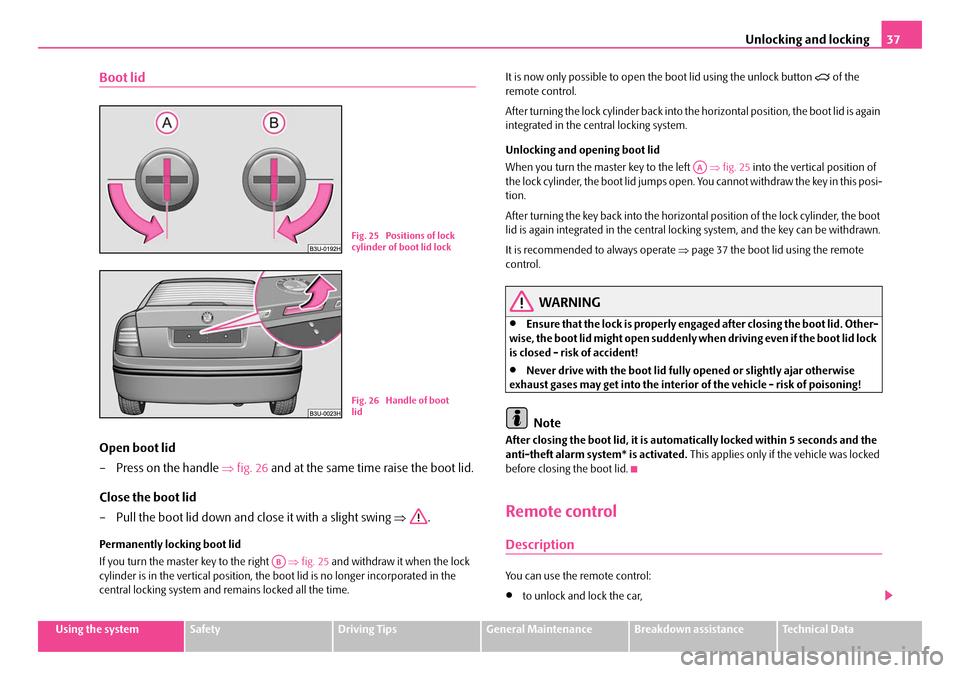
– Press on the handle ⇒fig. 26 and at the same time raise the boot lid.
Close the boot lid
– Pull the boot lid down and close it with a slight swing ⇒.
Permanently locking boot lid
If you turn the master key to the right ⇒fig. 25 and withdraw it when the lock
cylinder is in the vertical position, the boot lid is no longer incorporated in the
central locking system and remains locked all the time. It is now only possible to open the boot lid using the unlock button
of the
remote control.
After turning the lock cylinder back into the horizontal position, the boot lid is again
integrated in the central locking system.
Unlocking and opening boot lid
When you turn the master key to the left ⇒fig. 25 into the vertical position of
the lock cylinder, the boot lid jumps open. You cannot withdraw the key in this posi-
tion.
After turning the key back into the horizontal position of the lock cylinder, the boot
lid is again integrated in the central locking system, and the key can be withdrawn.
It is recommended to always operate ⇒page 37 the boot lid using the remote
control.
WARNING
•Ensure that the lock is properly engaged after closing the boot lid. Other-
wise, the boot lid might open suddenly wh en driving even if the boot lid lock
is closed - risk of accident!
•Never drive with the boot lid fully opened or slightly ajar otherwise
exhaust gases may get into the interior of the vehicle - risk of poisoning!
Note
After closing the boot lid, it is automatically locked within 5 seconds and the
anti-theft alarm system* is activated. This applies only if the vehicle was locked
before closing the boot lid.
Remote control
Description
You can use the remote control:
•to unlock and lock the car,
B1Z-0042HB1Z-0042HFig. 25 Positions of lock
cylinder of boot lid lock
B1Z-0042HB1Z-0042HFig. 26 Handle of boot
lid
AB
AA
NKO B5 20.book Page 37 Friday, March 2, 2007 1:46 PM
Page 42 of 259
Unlocking and locking41
Using the systemSafetyDriving TipsGeneral MaintenanceBreakdown assistanceTechnical Data
Opening a window
– A window is opened by pres sing lightly on the respective butto n in the
door. The process stops when one releases the button.
– Pressing of the button in the driver 's door down to the stop will cause
the window to be opened completely, automatically. Renewed
pressing of the button causes the window to stop immediately.
Closing a window
– A window is closed through pulling lightly on the respective button in
the door. The closing process stop s when one releases the button.
– Pulling of the button in the driver 's door to the stop will cause the
window to be closed completey, automatically. Renewed pulling of
the button causes the window to stop immediately.
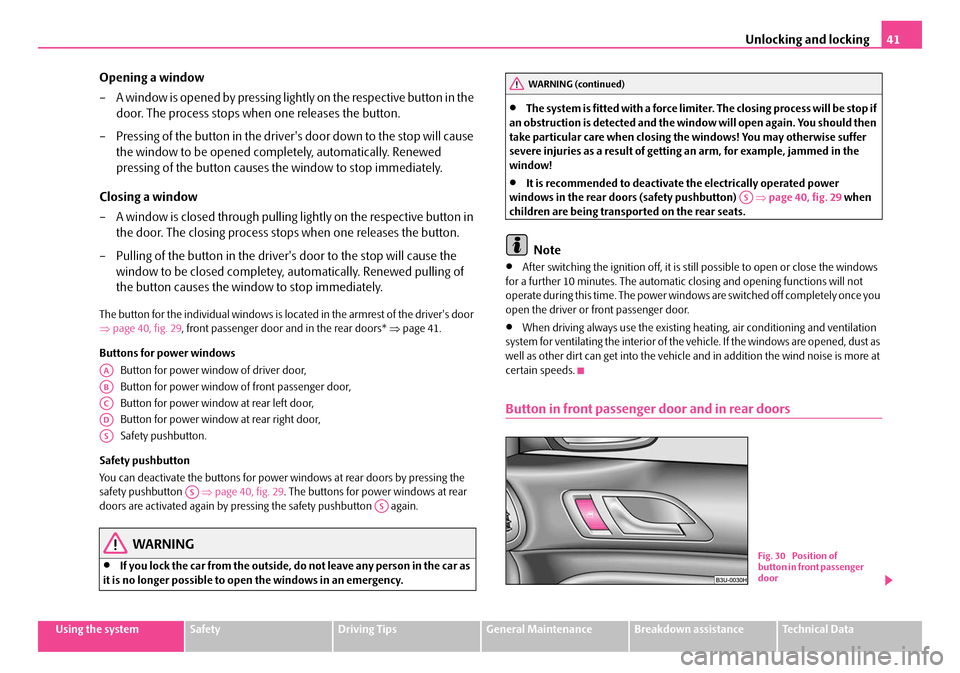
The button for the individual windows is located in the armrest of the driver's door
⇒ page 40, fig. 29 , front passenger door and in the rear doors* ⇒page 41.
Buttons for power windows Button for power window of driver door,
Button for power window of front passenger door,
Button for power window at rear left door,
Button for power window at rear right door,
Safety pushbutton.
Safety pushbutton
You can deactivate the buttons for power windows at rear doors by pressing the
safety pushbutton ⇒page 40, fig. 29 . The buttons for power windows at rear
doors are activated again by pressing the safety pushbutton again.
WARNING
•If you lock the car from the outside, do not leave any person in the car as
it is no longer possible to op en the windows in an emergency.
•The system is fitted with a force limiter. The closin g process will be stop if
an obstruction is detected and the window will open again. You should then
take particular care when closing the windows! You may otherwise suffer
severe injuries as a result of getting an arm, for example, jammed in the
window!
•It is recommended to deactivate the electrically operated power
windows in the rear doors (safety pushbutton) ⇒page 40, fig. 29 when
children are being transported on the rear seats.
Note
•After switching the ignition off, it is still possible to open or close the windows
for a further 10 minutes. The automatic closing and opening functions will not
operate during this time. The power windows are switched off completely once you
open the driver or front passenger door.
•When driving always use the existing he ating, air conditioning and ventilation
system for ventilating the interior of the vehicle. If the windows are opened, dust as
well as other dirt can get into the vehicle an d in addition the wind noise is more at
certain speeds.
Button in front passenger door and in rear doors
AA
AB
AC
AD
AS
ASAS
WARNING (continued)
AS
Fig. 30 Position of
button in front passenger
door
NKO B5 20.book Page 41 Friday, March 2, 2007 1:46 PM
Page 47 of 259
Lights and Visibility
46
Lights and Visibility
Lights
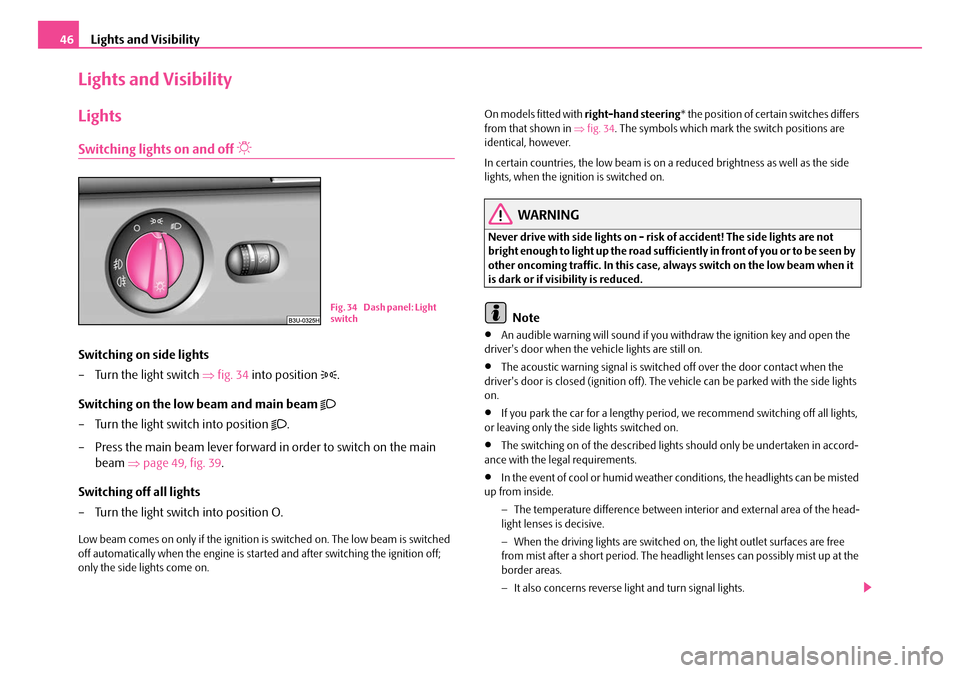
Switching lights on and off
Switching on side lights
– Turn the light switch ⇒fig. 34 into position
.
Switching on the low beam and main beam
– Turn the light switch into position .
– Press the main beam lever forward in order to switch on the main beam ⇒page 49, fig. 39.
Switching off all lights
– Turn the light switch into position O.
Low beam comes on only if the ignition is switched on. The low beam is switched
off automatically when the engine is star ted and after switching the ignition off;
only the side lights come on. On models fitted with
right-hand steering* the position of certain switches differs
from that shown in ⇒fig. 34 . The symbols which mark the switch positions are
identical, however.
In certain countries, the low beam is on a reduced brightness as well as the side
lights, when the ignition is switched on.
WARNING
Never drive with side lights on - risk of accident! The side lights are not
bright enough to light up the road sufficiently in front of you or to be seen by
other oncoming traffic. In this case, always switch on the low beam when it
is dark or if visibility is reduced.
Note
•An audible warning will sound if you withdraw the ignition key and open the
driver's door when the vehicle lights are still on.
•The acoustic warning signal is switched off over the door contact when the
driver's door is closed (ignition off). The vehicle can be parked with the side lights
on.
•If you park the car for a lengthy period, we recommend switching off all lights,
or leaving only the side lights switched on.
•The switching on of the described lights should only be undertaken in accord-
ance with the legal requirements.
•In the event of cool or humid weather conditions, the headligh ts can be misted
up from inside.
−The temperature difference between interior and external area of the head-
light lenses is decisive.
− When the driving lights are switched on, the light outlet surfaces are free
from mist after a short period. The headli ght lenses can possibly mist up at the
border areas.
− It also concerns reverse light and turn signal lights.
B1Z-0042HB1Z-0042HFi g. 3 4 D ash pan el: Lig ht
switch
NKO B5 20.book Page 46 Friday, March 2, 2007 1:46 PM
Page 48 of 259
Lights and Visibility47
Using the systemSafetyDriving TipsGeneral MaintenanceBreakdown assistanceTechnical Data
−
This mist has no influence on th e life of the lighting system.
Fog lights
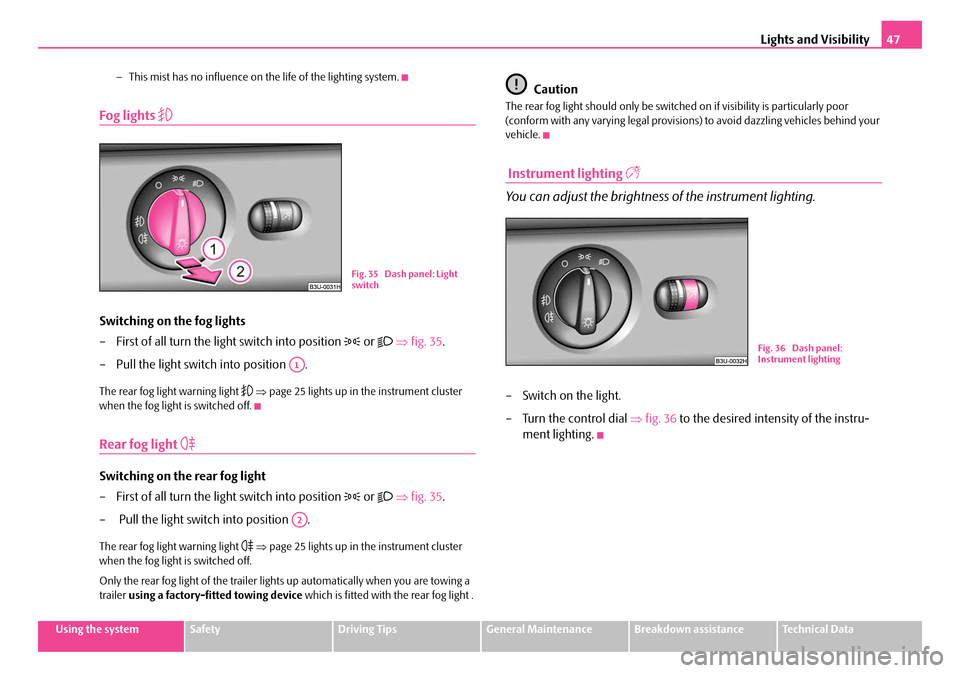
Switching on the fog lights
– First of all turn the light switch into position
or ⇒ fig. 35 .
– Pull the light switch into position .
The rear fog light warning light ⇒ page 25 lights up in the instrument cluster
when the fog light is switched off.
Rear fog light
Switching on the rear fog light
– First of all turn the light switch into position
or ⇒ fig. 35 .
– Pull the light switch into position .
The rear fog light warning light ⇒ page 25 lights up in the instrument cluster
when the fog light is switched off.
Only the rear fog light of the trailer lights up automatically when you are towing a
trailer using a factory-fitted towing device which is fitted with the rear fog light .
Caution
The rear fog light should only be switched on if visibility is particularly poor
(conform with any varying legal provisions) to avoid dazzling vehicles behind your
vehicle.
Instrument lighting
You can adjust the brightness of the instrument lighting.
– Switch on the light.
– Turn the control dial ⇒fig. 36 to the desired intensity of the instru-
ment lighting.
Fig. 35 Dash panel: Light
switch
A1
A2
Fig. 36 Dash panel:
Instrument lighting
NKO B5 20.book Page 47 Friday, March 2, 2007 1:46 PM