navigation SKODA SUPERB 2007 1.G / (B5/3U) Sat Compass Navigation System Manual
[x] Cancel search | Manufacturer: SKODA, Model Year: 2007, Model line: SUPERB, Model: SKODA SUPERB 2007 1.G / (B5/3U)Pages: 43, PDF Size: 2.92 MB
Page 25 of 43
Navigation
24
Note
•Scroll the list: by turning the menu knob first move the selection marking
onto the arrow and then beyond the first or last entry.
•If the selected street name exists several times in a town, then a sub-menu is
called up, from which the desired entry can be selected.
•In order to facilitate the search for long (consisting of several words) street
names, these can be stored in some versions with different writing - full text search.
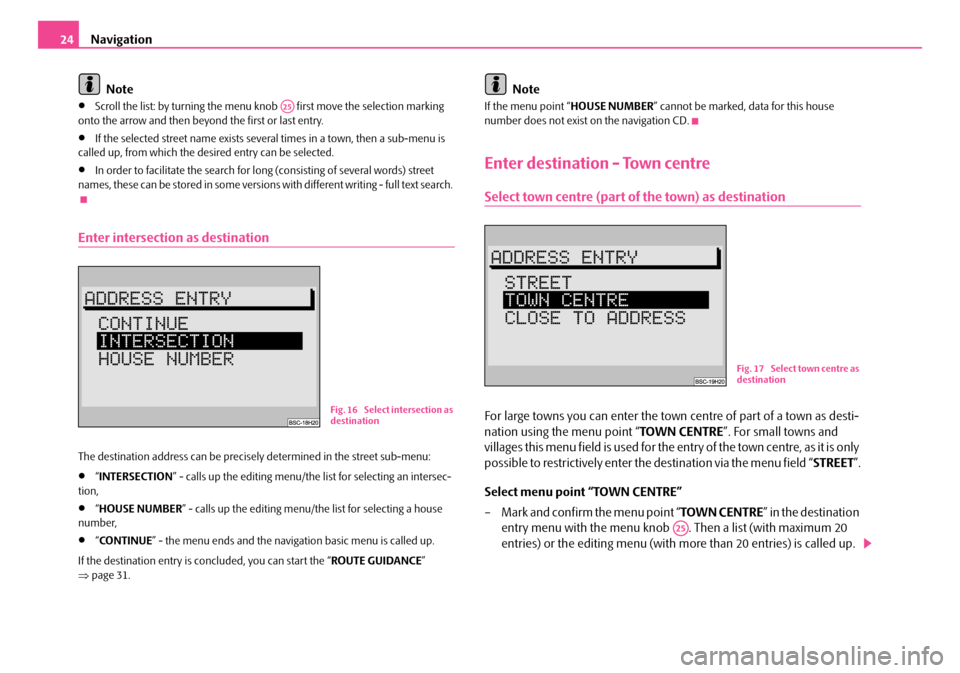
Enter intersection as destination
The destination address can be precisely determined in the street sub-menu:
•“ INTERSECTION ” - calls up the editing menu/the list for selecting an intersec-
tion,
•“ HOUSE NUMBER” - calls up the editing menu/the list for selecting a house
number,
•“ CO N T I N U E ” - the menu ends and the navigati on basic menu is called up.
If the destination entry is concluded, you can start the “ ROUTE GUIDANCE”
⇒ page 31.
Note
If the menu point “ HOUSE NUMBER” cannot be marked, data for this house
number does not exist on the navigation CD.
Enter destination - Town centre
Select town centre (part of the town) as destination
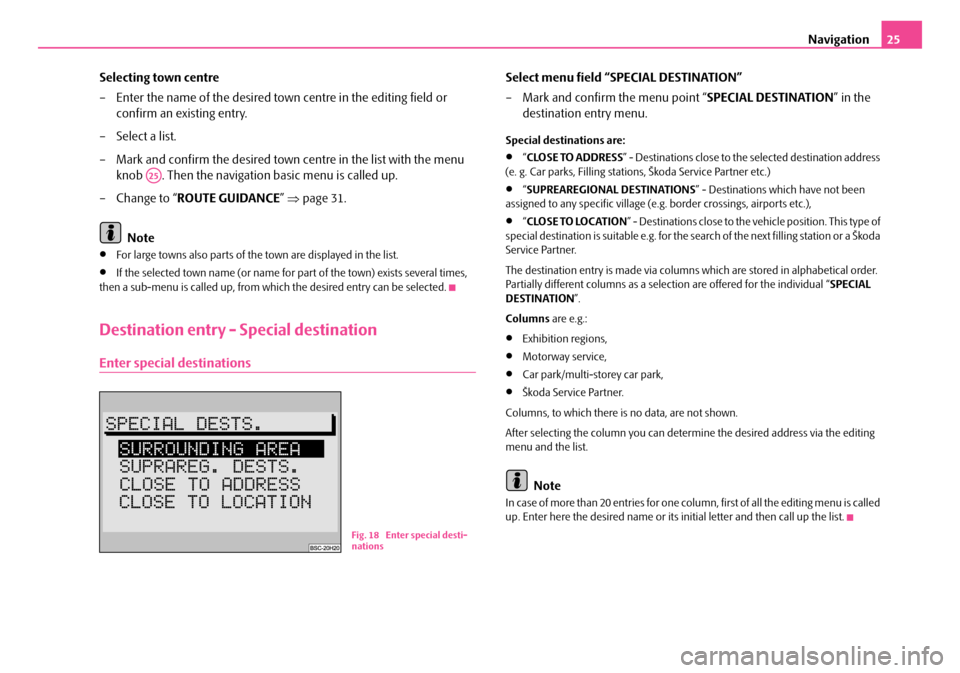
For large towns you can enter the town centre of part of a town as desti-
nation using the menu point “ TOWN CENTRE”. For small towns and
villages this menu field is used for the entry of the town centre, as it is only
possible to restrictively enter the destination via the menu field “ STREET”.
Select menu point “TOWN CENTRE”
– Mark and confirm the menu point “ TOWN CENTRE” in the destination
entry menu with the menu knob . Then a list (with maximum 20
entries) or the editing menu (with more than 20 entries) is called up.
A25
Fig. 16 Select intersection as
destination
Fig. 17 Select town centre as
destination
A25
s2ck.7.book Page 24 Friday, April 20, 2007 12:38 PM
Page 26 of 43
Navigation25
Selecting town centre
– Enter the name of the desired town centre in the editing field or confirm an existing entry.
– Select a list.
– Mark and confirm the desired town centre in the list with the menu knob . Then the navigation basic menu is called up.
– Change to “ ROUTE GUIDANCE ” ⇒ page 31.
Note
•For large towns also parts of the town are displayed in the list.
•If the selected town name (or name for part of the town) exists several times,
then a sub-menu is called up, from whic h the desired entry can be selected.
Destination entry - Special destination
Enter special destinations
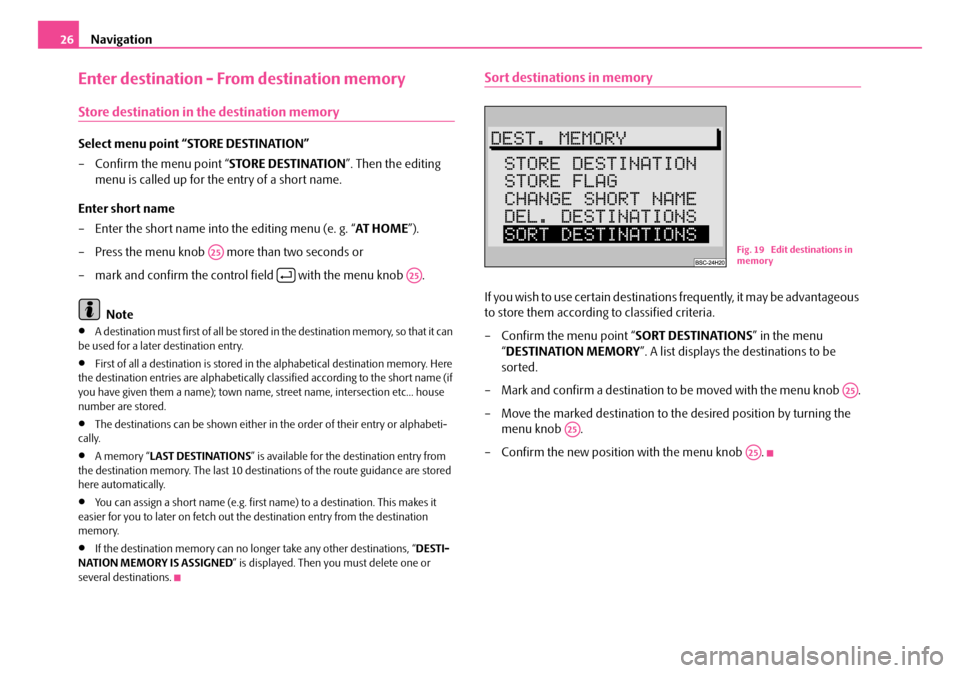
Select menu field “SPECIAL DESTINATION”
– Mark and confirm the menu point “SPECIAL DESTINATION” in the
destination entry menu.
Special destinations are:
•“ CLOSE TO ADDRESS ” - Destinations close to the selected destination address
(e. g. Car parks, Filling stations, Škoda Service Partner etc.)
•“ SUPREAREGIONAL DESTINATIONS” - Destinations which have not been
assigned to any specific village (e.g . border crossings, airports etc.),
•“CLOSE TO LOCATION ” - Destinations close to the ve hicle position. This type of
special destination is suitable e.g. for the search of the next filling station or a Škoda
Service Partner.
The destination entry is made via columns which are stored in alphabetical order.
Partially different columns as a selection are offered for the individual “ SPECIAL
DESTINATION ”.
Columns are e.g.:
•Exhibition regions,
•Motorway service,
•Car park/multi-storey car park,
•Škoda Service Partner.
Columns, to which there is no data, are not shown.
After selecting the column you can determine the desired address via the editing
menu and the list.
Note
In case of more than 20 entries for one column, first of all the editing menu is called
up. Enter here the desired name or its initial letter and then call up the list.
A25
Fig. 18 Enter special desti-
nations
s2ck.7.book Page 25 Friday, April 20, 2007 12:38 PM
Page 27 of 43
Navigation
26
Enter destination - From destination memory
Store destination in the destination memory
Select menu point “STORE DESTINATION”
– Confirm the menu point “ STORE DESTINATION”. Then the editing
menu is called up for the entry of a short name.
Enter short name
– Enter the short name into the editing menu (e. g. “ AT HOME”).
– Press the menu knob more than two seconds or
– mark and confirm the control field with the menu knob .
Note
•A destination must first of all be stored in the destination memory, so that it can
be used for a later destination entry.
•First of all a destination is stored in the alphabetical destination memory. Here
the destination entries are alphabetically classified according to the short name (if
you have given them a name); town name, street name, intersection etc... house
number are stored.
•The destinations can be shown either in the order of their entry or alphabeti-
cally.
•A memory “ LAST DESTINATIONS ” is available for the destination entry from
the destination memory. The last 10 destinations of the route guidance are stored
here automatically.
•You can assign a short name (e.g. first name) to a destination. This makes it
easier for you to later on fetch out th e destination entry from the destination
memory.
•If the destination memory can no lo nger take any other destinations, “DESTI-
NATION MEMORY IS ASSIGNED ” is displayed. Then you must delete one or
several destinations.
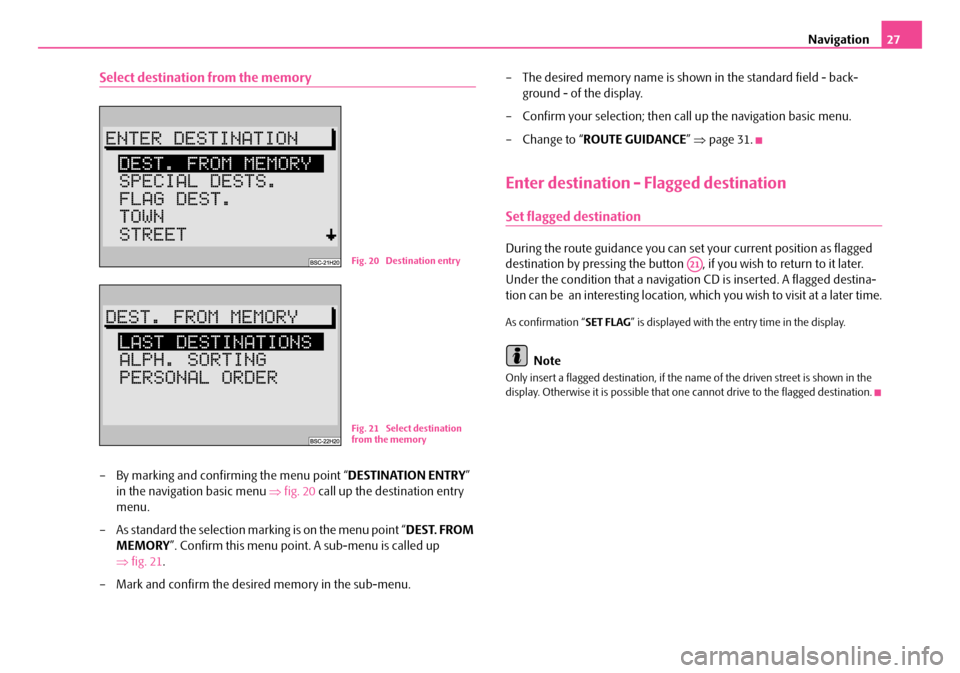
Sort destinations in memory
If you wish to use certain destinations frequently, it may be advantageous
to store them according to classified criteria.
– Confirm the menu point “ SORT DESTINATIONS” in the menu
“ DESTINATION MEMORY ”. A list displays the destinations to be
sorted.
– Mark and confirm a destination to be moved with the menu knob .
– Move the marked destination to the desired position by turning the menu knob .
– Confirm the new position with the menu knob .
A25
A25
Fig. 19 Edit destinations in
memory
A25
A25
A25
s2ck.7.book Page 26 Friday, April 20, 2007 12:38 PM
Page 28 of 43
Navigation27
Select destination from the memory
– By marking and confirming the menu point “ DESTINATION ENTRY”
in the navigation basic menu ⇒fig. 20 call up the destination entry
menu.
– As standard the selection marking is on the menu point “ DEST. FROM
MEMORY ”. Confirm this menu point. A sub-menu is called up
⇒ fig. 21 .
– Mark and confirm the desired memory in the sub-menu. – The desired memory name is shown in the standard field - back-
ground - of the display.
– Confirm your selection; then call up the navigation basic menu.
– Change to “ ROUTE GUIDANCE ” ⇒ page 31.
Enter destination - Flagged destination
Set flagged destination
During the route guidance you can se t your current position as flagged
destination by pressing the button , if you wish to return to it later.
Under the condition that a navigation CD is inserted. A flagged destina-
tion can be an interesting location, wh ich you wish to visit at a later time.
As confirmation “SET FLAG” is displayed with the entry time in the display.
Note
Only insert a flagged destination, if the name of the driven street is shown in the
display. Otherwise it is possible that one cannot drive to the flagged destination.
Fig. 20 Destination entry
Fig. 21 Select destination
from the memory
A21
s2ck.7.book Page 27 Friday, April 20, 2007 12:38 PM
Page 29 of 43
Navigation
28
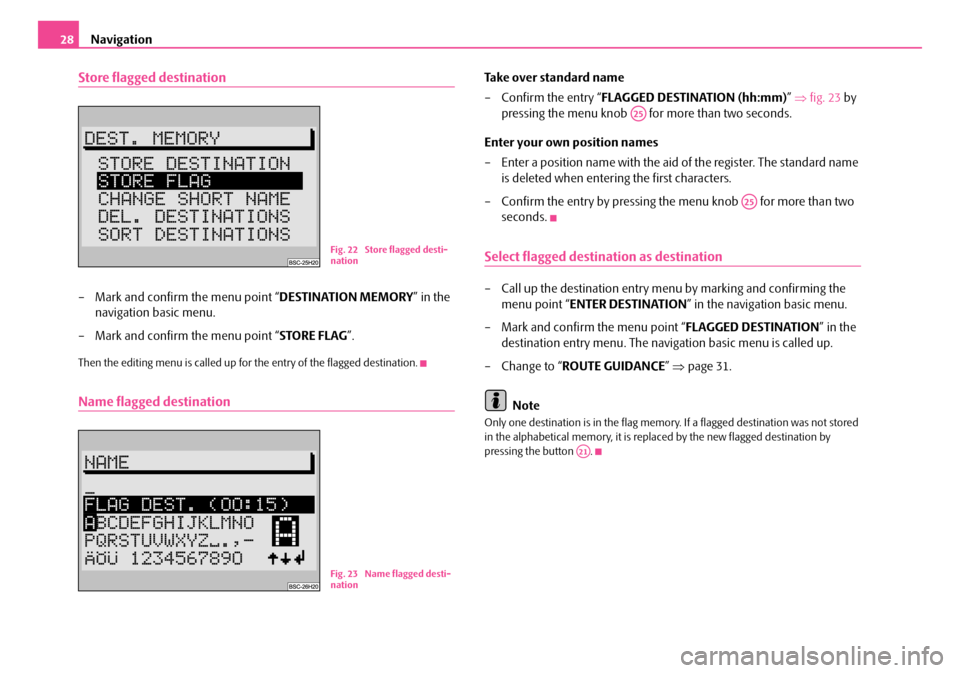
Store flagged destination
– Mark and confirm the menu point “ DESTINATION MEMORY” in the
navigation basic menu.
– Mark and confirm the menu point “ STORE FLAG”.
Then the editing menu is called up for the entry of the flagged destination.
Name flagged destination
Take over standard name
– Confirm the entry “ FLAGGED DESTINATION (hh:mm) ” ⇒ fig. 23 by
pressing the menu knob for more than two seconds.
Enter your own position names
– Enter a position name with the aid of the register. The standard name is deleted when entering the first characters.
– Confirm the entry by pressing the menu knob for more than two seconds.
Select flagged destination as destination
– Call up the destination entry me nu by marking and confirming the
menu point “ENTER DESTINATION ” in the navigation basic menu.
– Mark and confirm the menu point “ FLAGGED DESTINATION” in the
destination entry menu. The navi gation basic menu is called up.
– Change to “ ROUTE GUIDANCE ” ⇒ page 31.
Note
Only one destination is in the flag memory. If a flagged destination was not stored
in the alphabetical memory, it is repl aced by the new flagged destination by
pressing the button .
Fig. 22 Store flagged desti-
nation
Fig. 23 Name flagged desti-
nation
A25
A25
A21
s2ck.7.book Page 28 Friday, April 20, 2007 12:38 PM
Page 30 of 43
Navigation29
Route options
Plan route
After entry of a destination you can plan the route in the navigation
basic menu.
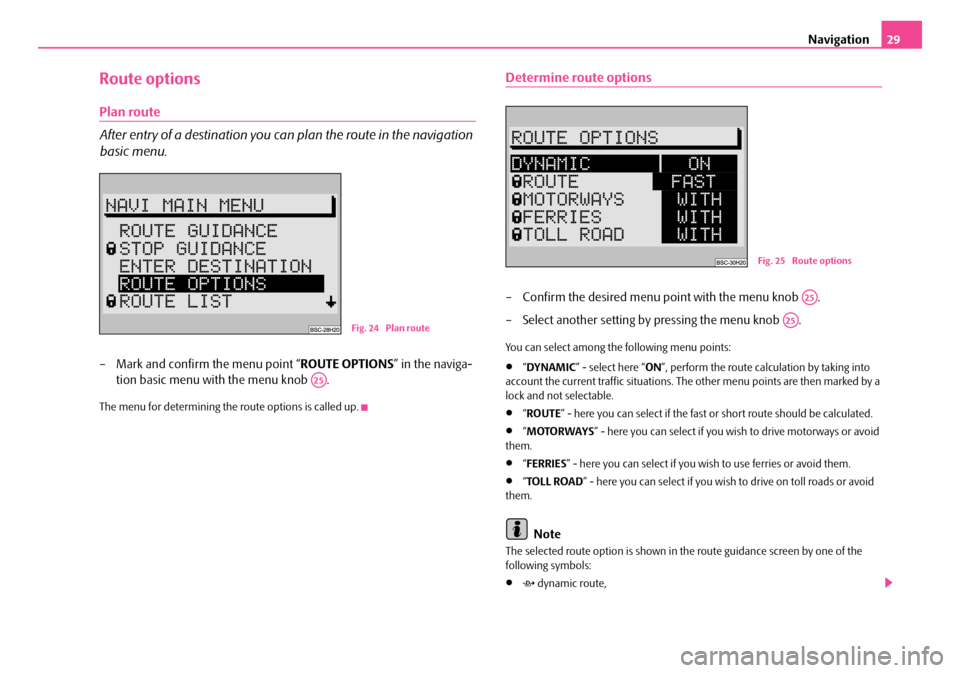
– Mark and confirm the menu point “ ROUTE OPTIONS” in the naviga-
tion basic menu with the menu knob .
The menu for determining the route options is called up.
Determine route options
– Confirm the desired menu point with the menu knob .
– Select another setting by pressing the menu knob .
You can select among the following menu points:
•“ DYNAMIC ” - select here “ ON”, perform the route calculation by taking into
account the current traffic situations. The other menu points are then marked by a
lock and not selectable.
•“ ROUTE ” - here you can select if the fast or short route should be calculated.
•“MOTORWAYS ” - here you can select if you wi sh to drive motorways or avoid
them.
•“ FERRIES ” - here you can select if you wi sh to use ferries or avoid them.
•“TOLL ROAD ” - here you can select if you wish to drive on toll roads or avoid
them.
Note
The selected route option is shown in th e route guidance screen by one of the
following symbols:
• dynamic route,
Fig. 24 Plan route
A25
Fig. 25 Route options
A25
A25
s2ck.7.book Page 29 Friday, April 20, 2007 12:38 PM
Page 31 of 43
Navigation
30
• fast route,
• short route.
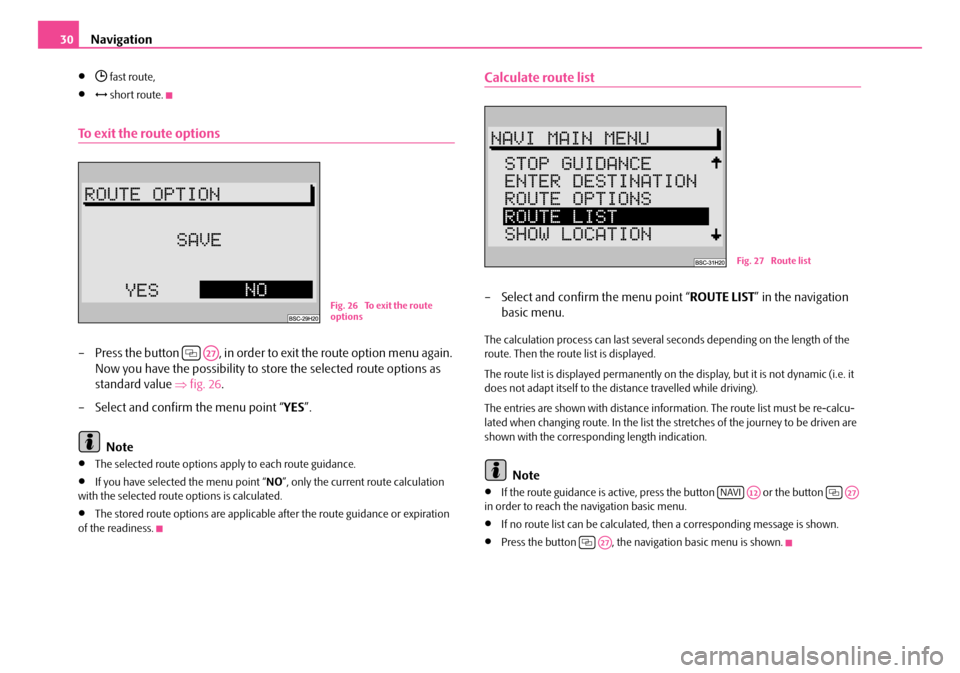
To exit the route options
– Press the button , in order to exit the route option menu again.
Now you have the possibility to st ore the selected route options as
standard value ⇒fig. 26 .
– Select and confirm the menu point “ YES”.
Note
•The selected route options apply to each route guidance.
•If you have selected the menu point “ NO”, only the current route calculation
with the selected route options is calculated.
•The stored route options are applicable after the route guidance or expiration
of the readiness.
Calculate route list
– Select and confirm the menu point “ ROUTE LIST” in the navigation
basic menu.
The calculation process can last several seconds depending on the length of the
route. Then the route list is displayed.
The route list is displayed permanently on the display, but it is not dynamic (i.e. it
does not adapt itself to the distance travelled while driving).
The entries are shown with distance information. The route list must be re-calcu-
lated when changing route. In the list the stretches of the journey to be driven are
shown with the correspond ing length indication.
Note
•If the route guidance is active, press the button or the button
in order to reach the navigation basic menu.
•If no route list can be calculated, then a corresponding message is shown.
•Press the button , the naviga tion basic menu is shown.
Fig. 26 To exit the route
options
A27
Fig. 27 Route list
NAVIA12A27
A27
s2ck.7.book Page 30 Friday, April 20, 2007 12:38 PM
Page 32 of 43
Navigation31
Route guidance
Begin guidance
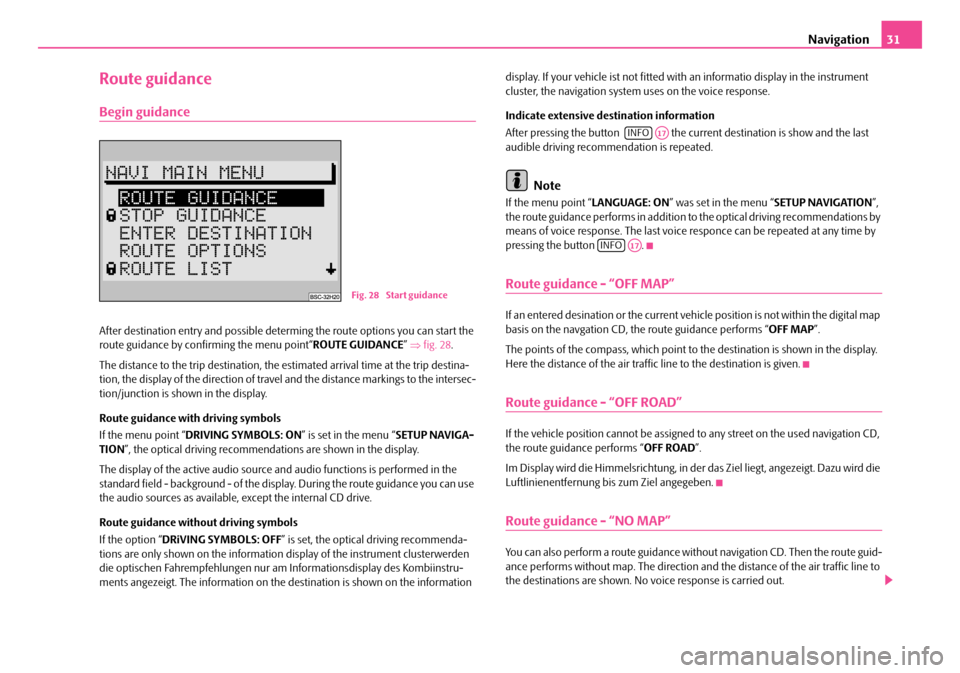
After destination entry and possible determing the route options you can start the
route guidance by confirming the menu point“ ROUTE GUIDANCE” ⇒ fig. 28 .
The distance to the trip destination, the estimated arrival time at the trip destina-
tion, the display of the direction of travel and the distance markings to the intersec-
tion/junction is shown in the display.
Route guidance with driving symbols
If the menu point “ DRIVING SYMBOLS: ON ” is set in the menu “SETUP NAVIGA-
TION ”, the optical driving recommendations are shown in the display.
The display of the active audio source and audio functions is performed in the
standard field - background - of the displa y. During the route guidance you can use
the audio sources as available, except the internal CD drive.
Route guidance without driving symbols
If the option “ DRiVING SYMBOLS: OFF” is set, the optical driving recommenda-
tions are only shown on the information display of the instrument clusterwerden
die optischen Fahrempfehl ungen nur am Informations display des Kombiinstru-
ments angezeigt. The information on the destination is shown on the information display. If your vehicle ist not fitted with an informatio display in the instrument
cluster, the navigation system uses on the voice response.
Indicate extensive destination information
After pressing the button the curr
ent destination is show and the last
audible driving recommendation is repeated.
Note
If the menu point “ LANGUAGE: ON” was set in the menu “ SETUP NAVIGATION”,
the route guidance performs in addition to the optical driving recommendations by
means of voice response. The last voice responce can be repeated at any time by
pressing the button .
Route guidance - “OFF MAP”
If an entered desination or the current vehicle position is not within the digital map
basis on the navgation CD, th e route guidance performs “OFF MAP”.
The points of the compass, which point to the destination is shown in the display.
Here the distance of the air traffi c line to the destination is given.
Route guidance - “OFF ROAD”
If the vehicle position cannot be assigned to any street on the used navigation CD,
the route guidance performs “ OFF ROAD”.
Im Display wird die Himmelsrichtung, in der das Ziel liegt, angezeigt. Dazu wird die
Luftlinienentfernung bis zum Ziel angegeben.
Route guidance - “NO MAP”
You can also perform a route guidance with out navigation CD. Then the route guid-
ance performs without map. The direction an d the distance of the air traffic line to
the destinations are shown. No voice response is carried out.
Fig. 28 Start guidance
INFOA17
INFOA17
s2ck.7.book Page 31 Friday, April 20, 2007 12:38 PM
Page 33 of 43
Navigation
32
This function is intended for large motoway drives, whereby as a rule less informa-
tion is required from the navigation system.
You will reach the “ NO MAP” route guidance, by removing the navigation CD from
the navigation system during the route guidance. After re-inserting the navigation
CD, the route guidance continues if the route guidance was previously active.
Note
•For technical reasons this can last several minutes, until the route guidance
continues audibly and with driving symbols after re-inserting the navigation CD.
This time is necessary in order to cl early determine the current location.
•In narrowly built-ip areas with dense road network this can lead to error
locating until the navigation system has clea rly and properly orientated itself. Insert
the navigation CD, if possib le, once again on the motorway, in order to accelerate
the orientation process.
Reached your destination
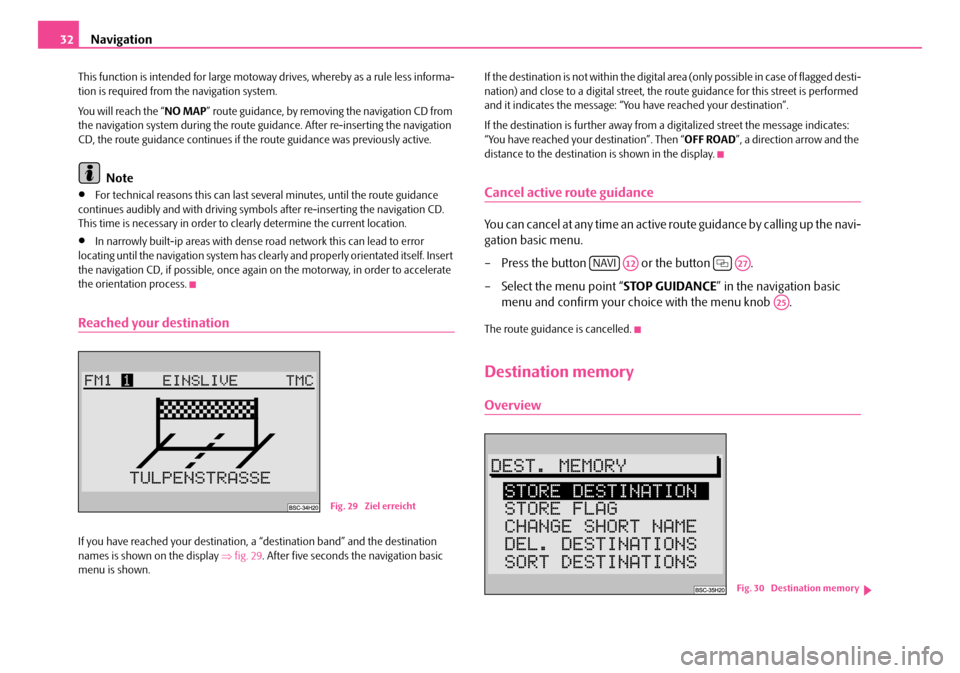
If you have reached your destination, a “destination band” and the destination
names is shown on the display ⇒fig. 29 . After five seconds the navigation basic
menu is shown. If the destination is not within the digital area (only possible in case of flagged desti-
nation) and close to a digital street, the ro
ute guidance for this street is performed
and it indicates the message: “You have reached your destination”.
If the destination is further away from a digitalized street the message indicates:
“You have reached your destination”. Then “ OFF ROAD”, a direction arrow and the
distance to the destination is shown in the display.
Cancel active route guidance
You can cancel at any time an active route guidance by calling up the navi-
gation basic menu.
– Press the button or the button .
– Select the menu point “ STOP GUIDANCE” in the navigation basic
menu and confirm your choice with the menu knob .
The route guidance is cancelled.
Destination memory
Overview
Fig. 29 Ziel erreicht
NAVIA12A27
A25
Fig. 30 Destination memory
s2ck.7.book Page 32 Friday, April 20, 2007 12:38 PM
Page 34 of 43
Navigation33
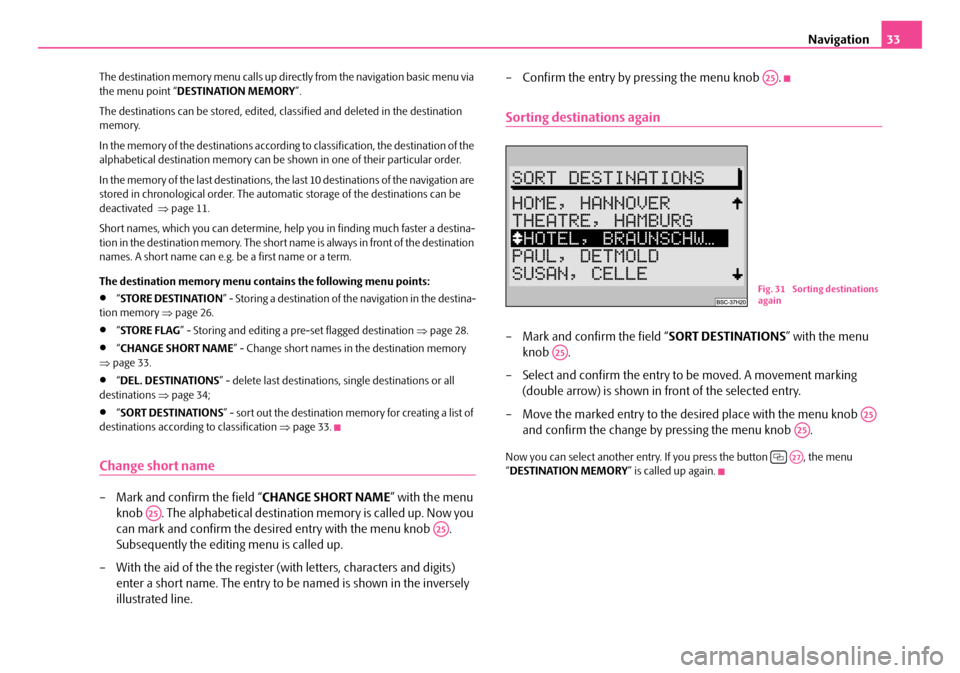
The destination memory menu calls up direct ly from the navigation basic menu via
the menu point “ DESTINATION MEMORY ”.
The destinations can be stored, edited, classified and deleted in the destination
memory.
In the memory of the destinations according to classification, the destination of the
alphabetical destination memory can be shown in one of their particular order.
In the memory of the last destinations, the last 10 destinations of the navigation are
stored in chronological order. The automa tic storage of the destinations can be
deactivated ⇒page 11.
Short names, which you can de termine, help you in finding much faster a destina-
tion in the destination memory. The short na me is always in front of the destination
names. A short name can e.g. be a first name or a term.
The destination memory menu contains the following menu points:
•“ STORE DESTINATION ” - Storing a destination of the navigation in the destina-
tion memory ⇒page 26.
•“STORE FLAG ” - Storing and editing a pre-set flagged destination ⇒page 28.
•“CHANGE SHORT NAME ” - Change short names in the destination memory
⇒ page 33.
•“DEL. DESTINATIONS ” - delete last destinations, single destinations or all
destinations ⇒page 34;
•“SORT DESTINATIONS ” - sort out the destination memory for creating a list of
destinations according to classification ⇒page 33.
Change short name
– Mark and confirm the field “ CHANGE SHORT NAME” with the menu
knob . The alphabetical destination memory is called up. Now you
can mark and confirm the desire d entry with the menu knob .
Subsequently the editing menu is called up.
– With the aid of the the register (with letters, characters and digits) enter a short name. The entry to be named is shown in the inversely
illustrated line. – Confirm the entry by pressing the menu knob .
Sorting destinations again
– Mark and confirm the field “
SORT DESTINATIONS” with the menu
knob .
– Select and confirm the entry to be moved. A movement marking
(double arrow) is shown in front of the selected entry.
– Move the marked entry to the desired place with the menu knob and confirm the change by pressing the menu knob .
Now you can select another entry. If you press the button , the menu
“ DESTINATION MEMORY ” is called up again.
A25
A25
A25
Fig. 31 Sorting destinations
again
A25
A25
A25
A27
s2ck.7.book Page 33 Friday, April 20, 2007 12:38 PM