air condition SKODA SUPERB 2009 2.G / (B6/3T) Columbus Navigation System Manual
[x] Cancel search | Manufacturer: SKODA, Model Year: 2009, Model line: SUPERB, Model: SKODA SUPERB 2009 2.G / (B6/3T)Pages: 71, PDF Size: 3.65 MB
Page 13 of 71

Range selector key SETUP
11
Range selector key SETUPMain menu set-ups (Setup)– Press the range selector key to open the main menu
Setup
.
Overview of the set-up menus
- When in the radio mode, carry out set-ups for the function of the arrow keys,
for the displayed memory keys, the preset list and the TMC traffic reports
⇒page 11,
“Setup radio”.
- Determine the set-ups for the play and display of MP3 data and activate or
deactivate the external audio sources
⇒page 12.
- Update the phone book in the unit, dele
te all call lists and modify the assign-
ment of the shortcut keys.
⇒page 12.
- Change the system set-ups such as voice response, time display of the air
conditioning system*, return to the original set-ups and delete set-ups if necessary ⇒ page 15.
- Adjust the brightness of the touch-screen, day/night design of the map
display and select/deselect the confirmation tone for the key stroke
⇒page 13.
- Carry out set-ups for the map display and select symbols for the display in the
map
⇒page 14, “Setup Map”. - Determine the set-ups for receiving driving recommendations, define or
change an address to a home address and
start a virtual demonstration drive with a
manually set starting point
⇒page 14.
- Select preferred TMC station, ad
just filter for TMC announcements
and activate/deactivate traffic reports
⇒page 15, “Setup traffic programme”.
- setting the dialogue style, the help display and deleting the voice
recordings.
- Carry out set-ups for voice response with an inserted Video-DVD and adjust
the aspect ratio of the touch-screen. It is
also possible to adjust the audio video
standard when operating an external media source
⇒page 15, “Setup Video” as well
as carrying out the set-ups for the TV operation.
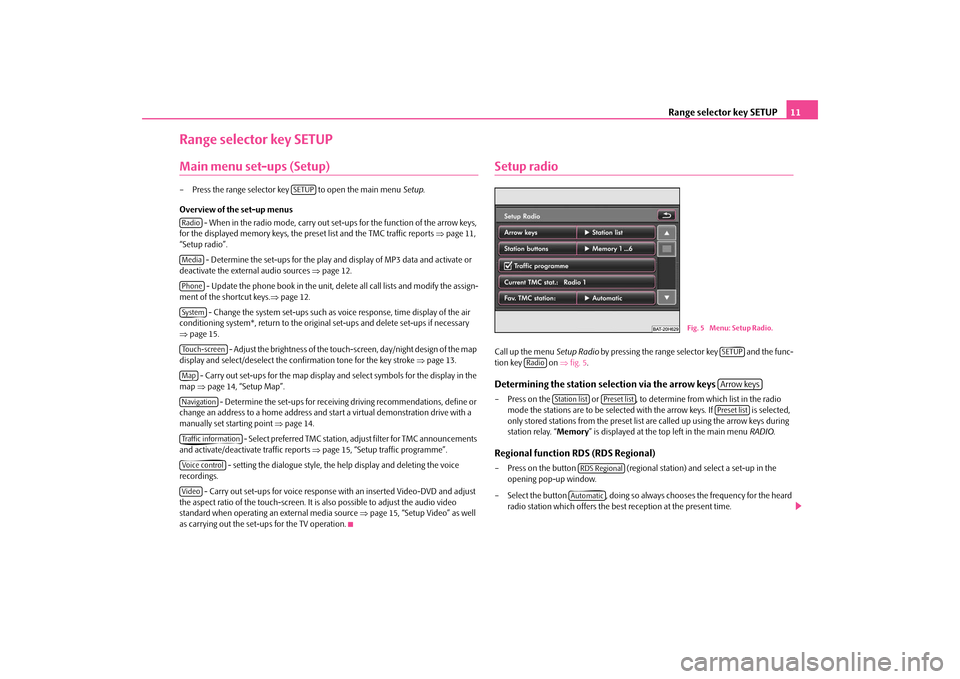
Setup radioCall up the menu
Setup Radio
by pressing the range selector key and the func-
tion key on
⇒fig. 5
.
Determining the station selection via the arrow keys – Press on the or , to determine from which list in the radio
mode the stations are to be selected
with the arrow keys. If is selected,
only stored stations from the preset list
are called up using the arrow keys during
station relay. “
Memory
” is displayed at the top left in the main menu
RADIO
.
Regional function RDS (RDS Regional)– Press on the button (regional station) and select a set-up in the
opening pop-up window.
– Select the button , doing so always chooses the frequency for the heard
radio station which offers the best reception at the present time.
SETUP
RadioMediaPhoneSystemTouch-screenMapNavigationTraffic informationVoice controlVideo
Fig. 5 Menu: Setup Radio.
SETUP
Radio
Arrow keys
Station list
Preset list
Preset list
RDS RegionalAutomatic
s32k.a.book Page 11 Friday, September 18, 2009 1:54 PM
Page 28 of 71

Range selector key MEDIA
26– External audio sources, which are
connected to the MEDIA-IN socket,
can
be oper-
ated via the radio
⇒page 21.
It is possible to play back external audio
sources via the loudspea
kers of the radio in
the vehicle. You can select another audio source on the ra
dio at any time. As long as the external
audio source is not switched off, it remains always active in the background. Please refer to the Owner's manual of the respective manufacturer for the operation of the external audio source. If a MEDIA-IN socket is additionally
installed, the button is displayed
instead of the function key in the
Audio menu
. Please note that an audio source
connected to the AUX-IN socket can only be
replayed, if there is currently no data
carrier connected to the MDI input. Use the standard jack plug 3.5 mm for the AUX-IN socket. If the external audio source does not have this jack plug, you must use an adapter. Adjust the play function volume of the external audio source The play function volume of the external
audio source can be changed via the volume
control on the radio. Depending on the connected audio source, the output volume on the external audio source can be changed. You can also change the input sensitivity of the external audio source, in order for the play function volume of the external audio
source to adapt to other audio sources or
to avoid distortions of the play function volume. Adapter A special adapter is required to connect audio sources via the input MDI. We recommend that you purchase an adap
ter for connecting the USB devices, the
devices with Mini USB output or an iPod, at a Škoda Service Partner. Conditions for proper connection•
Only USB devices with the spec
ification 2.0 can be connected.
•
The version of the file allocation table FA
T (File Allocation Tabl
e) of the connected
device must be FAT16 (< 2 GB) or FAT32 (> 2 GB).
•
In order to replay from a unit with a hard
disk (HDD) which includes a large data
volume, it can lead to a time delay when reading in the overview of the music data.•
In order to replay from a unit, which includ
es a complicated folder structure, it can
lead to a time delay when reading
in the overview of the music data.
•
The folder structure in the connected unit
must not exceed a depth of 8 levels. One
folder must not contain more than 1000°data.•
A USB extension cable or USB distributor
(HUB) must not be used to connect the
unit.
WARNING
•
On no account place an external audio source on the dash panel. You could
make sudden manoeuvres in the passen
ger compartment and injure the occu-
pants.•
On no account place an ex
ternal audio source close to the airbags. You could
be thrown back in the passenger comp
artment by the airbags being deployed
and injure the occupants.•
You must not hold the external audio
source in the hand or on the knees
while driving. You could make sudden
manoeuvres in the passenger compart-
ment and injure the occupants.•
Always guide the connection cable of
the external audio source in such a
way that is does not re
strict you when driving.
Caution
The AUX-IN socket must only be used for audio sources!
Note
•
The external audio source, which is connected via AUX-IN, can only be used if no
unit is connected via MD
I at the same time.
•
If an external audio source is connecte
d via AUX-IN, which is equipped with an
adapter for external power supply, it can occur
that the audio signal is interrupted. This
depends on the quality of the adapter which is used.•
The loudspeakers in the vehicle are matched to a power output of the radio of
30°W.
MEDIA-IN
AUX
s32k.a.book Page 26 Friday, September 18, 2009 1:54 PM