technical data SKODA SUPERB 2009 2.G / (B6/3T) User Guide
[x] Cancel search | Manufacturer: SKODA, Model Year: 2009, Model line: SUPERB, Model: SKODA SUPERB 2009 2.G / (B6/3T)Pages: 294, PDF Size: 21.33 MB
Page 22 of 294
Instruments and Indicator/Warning Lights
21
Using the system
Safety
Driving Tips
General Maintenance
Breakdown assistance
Technical Data
Caution
We recommend that you do not reset the
Service Interval Disp
lay yourself other-
wise this can result in the service interval display being incorrectly set, which may also result in problems with operation of your vehicle.
Note
•
Never reset the display between service intervals otherwise this may result in
incorrect readouts.•
information is retained in the Service Interval Display also after the battery of
the vehicle is disconnected.•
If the instrument cluster is exchanged af
ter a repair, the correct values must be
entered in the counter for the Service Interval Display. This work is carried out by a specialist garage.•
The data displayed is the same after resetting the display with flexible service
intervals (QG1) using the reset button as that for a vehicle with fixed service inter- vals (QG2). We therefore recommend having
the Service Interval Display reset only
by an authorised Škoda Service Partner who is familiar with the procedure for reset-ting the display with a vehicle system tester.•
Please refer to the brochure Service sc
hedule for extensive information about
the service intervals.Digital clockThe time is set with the buttons and
⇒page 17, fig. 17
.
Select the display which you wish to chan
ge with the button and carry out the
change with the button . On vehicles which are fitted out with the information display*, it is possible to set the time in the menu
Time
⇒page 30.
WARNING
The clock should not be adjusted while driving for safety reasons but only when the vehicle is stationary!Multi-functional indicator (onboard computer)*IntroductionThe multi-functional indicator appears in the display
⇒page 22, fig. 20
or in the
information display
⇒page 26 depending on the equipment fitted to your vehicle.
The multi-functional indicator offers
you a range of useful information.
On vehicles which are fitted out with inform
ation display*, it is possible to switch
off the display of some information.
Caution
Pull out the ignition key while having contact with the display (for example when cleaning) in order to
prevent any damage.
A3
A7
A3
A7
The outside temperature
⇒page 24
Driving time
⇒page 24
Current fuel consumption
⇒page 24
Average fuel consumption
⇒page 24
Range
⇒page 25
Distance driven
⇒page 25
Average speed
⇒page 25
Current speed*
⇒page 25
Warning against excessive speeds*
⇒page 25
s2dk.1.book Page 21 Wednesday, April 8, 2009 12:23 PM
Page 24 of 294
Instruments and Indicator/Warning Lights
23
Using the system
Safety
Driving Tips
General Maintenance
Breakdown assistance
Technical Data
Selecting the memory – Short-term pressing of the button
allows to select the desired
memory.
Selecting the functions – Press the top or bottom rocker switch for longer than 0.5 seconds.
In this way, call up in sequence th
e individual functions of the multi-
functional indicator.
Setting function to zero – Select the memory you want. – Press button for more than 1 second.The following readouts of the selected me
mory will be set to zero by button :
•
average fuel consumption,
•
distance driven,
•
average speed,
•
Driving time.
You can only operate the multi-functional
indicator when the ignition is switched
on. After the ignition is switched on, the fu
nction displayed is the one which you last
selected before switching off the ignition. On vehicles fitted with the multifunction
steering wheel*, the buttons and
have been replaced with the rotary control on the multifunction steering wheel ⇒ fig. 22
.
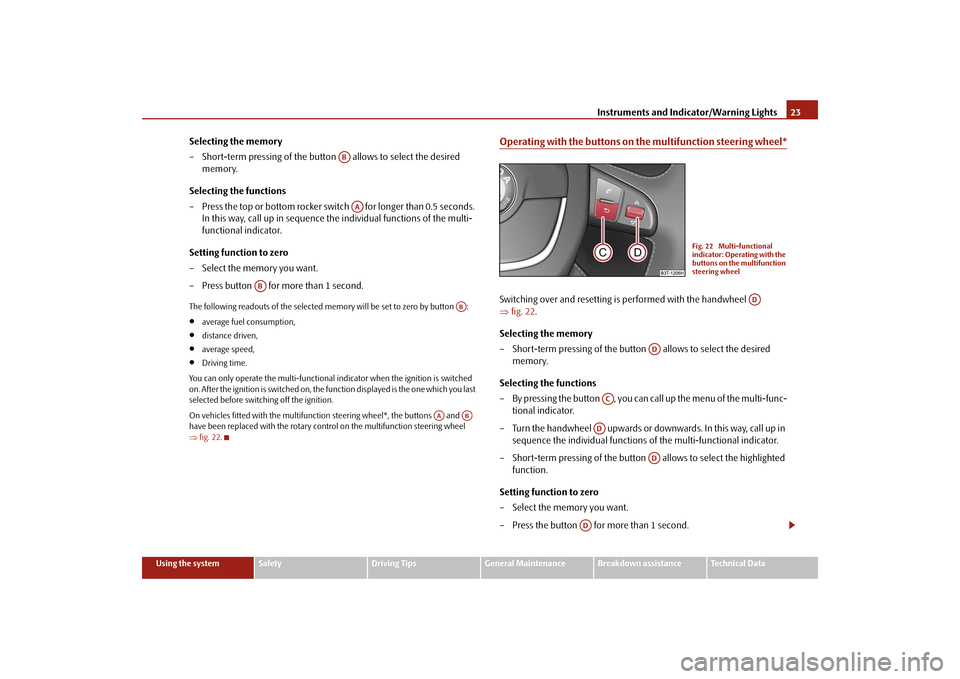
Operating with the buttons on the multifunction steering wheel*Switching over and resetting is performed with the handwheel ⇒
fig. 22
.
Selecting the memory – Short-term pressing of the button allows to select the desired
memory.
Selecting the functions – By pressing the button , you can call up the menu of the multi-func-
tional indicator.
– Turn the handwheel upwards or down
wards. In this way, call up in
sequence the individual functions
of the multi-functional indicator.
– Short-term pressing of the button allows to select the highlighted
function.
Setting function to zero – Select the memory you want. – Press the button for more than 1 second.
ABAA
AB
AB
AA
AB
Fig. 22 Multi-functional indicator: Operating with the buttons on the multifunction steering wheel
AD
AD
AC
AD
AD
AD
s2dk.1.book Page 23 Wednesday, April 8, 2009 12:23 PM
Page 26 of 294
Instruments and Indicator/Warning Lights
25
Using the system
Safety
Driving Tips
General Maintenance
Breakdown assistance
Technical Data
on the windshield wiper lever
⇒page 22, fig. 21
or with the handwheel on
the multifunction steering wheel*
⇒page 23, fig. 22
. A zero appears in the display
for the first 100 m you drive after erasing the memory. The indicated value will be updated every 5 seconds while you are driving.
Note
The amount of fuel consumed will not be indicated.RangeThe estimated range in kilometres is shown on the display. It indicates the distance you can still drive with your vehicle based on the present level of fuel in the tank for the same style of driving. The readout is shown in steps of 10 km. After lighting up of the indicator light for the fuel reserve the display is shown in steps of 5 km. The fuel consumption for the last 50 km is
taken as a basis for calculating the range.
If you drive in a more economical manner
from this moment on, the range will be
increased accordingly. If the memory is set to zero (after disconnecting the battery), the fuel consumption of 10 ltr./100 km is calculated for the range; afterwards the value is adapted accord- ingly to the style of driving.Distance drivenThe distance driven since the memory was last erased appears in the display ⇒ page 22. If you wish to measure the dist
ance driven of a particular time, you
must set the memory to zero at this moment in time by pressing the button on the windshield wiper lever
⇒page 22, fig. 21
or the handwheel on the multi-
function stee
ring wheel*
⇒page 23, fig. 22
.
The maximum distance indicated in both switch positions is 9 999 km. The indicator is set back to null if this period is exceeded.
Average speedThe average speed since the memory was last erased is shown in the display in km/hour
⇒page 22. If you wish to determine the average vehicle speed over a
certain period of time you must set the memory to zero at the start of the measure-ment using the button on
the windshield wiper lever
⇒page 22, fig. 21
or with
the handwheel on the multifunction steering wheel*
⇒page 23, fig. 22
.
A zero appears in the display for the first 100 m you drive after erasing the memory.The indicated value will be updated every 5 seconds while you are driving.Current speed*The current speed which is identical to the display of the speedometer, is indicated on the display
⇒page 17, fig. 17
.
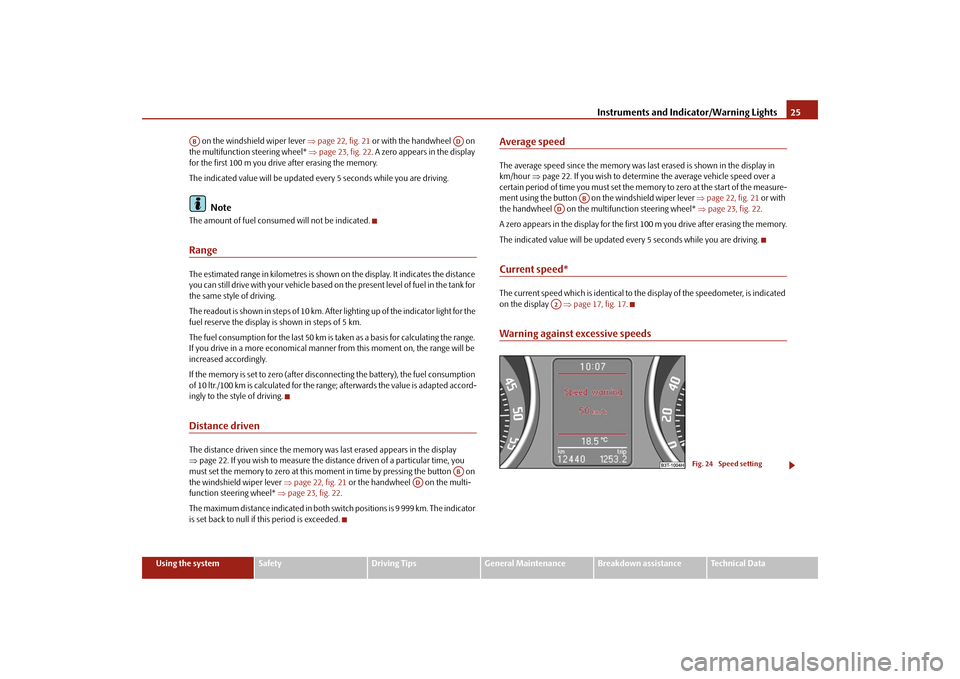
Warning against excessive speeds
AB
ADAB
AD
AB
ADA2
Fig. 24 Speed setting
s2dk.1.book Page 25 Wednesday, April 8, 2009 12:23 PM
Page 28 of 294
Instruments and Indicator/Warning Lights
27
Using the system
Safety
Driving Tips
General Maintenance
Breakdown assistance
Technical Data
Caution
Pull out the ignition key while having cont
act with the display (for example when
cleaning) in order to prevent any damage.Main menu
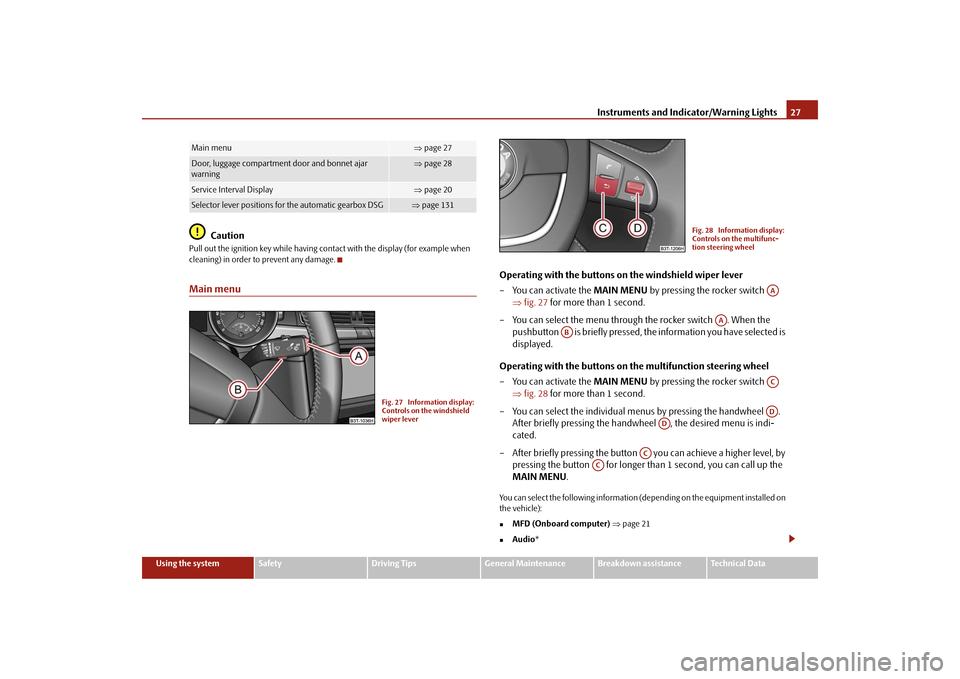
Operating with the buttons on the windshield wiper lever – You can activate the
MAIN MENU
by pressing the rocker switch
⇒
fig. 27
for more than 1 second.
– You can select the menu through the rocker switch . When the
pushbutton is briefly pressed, th
e information you have selected is
displayed.
Operating with the buttons on
the multifunction steering wheel
– You can activate the
MAIN MENU
by pressing the rocker switch
⇒
fig. 28
for more than 1 second.
– You can select the individual me
nus by pressing the handwheel .
After briefly pressing the handwh
eel , the desired menu is indi-
cated.
– After briefly pressing the button
you can achieve a higher level, by
pressing the button for longer than 1 second, you can call up the MAIN MENU
.
You can select the following information (d
epending on the equipment installed on
the vehicle):�„
MFD (Onboard computer)
⇒page 21
�„
Audio
*
Main menu
⇒page 27
Door, luggage compartment door and bonnet ajar warning
⇒ page 28
Service Interval Display
⇒page 20
Selector lever positions for the automatic gearbox DSG
⇒page 131
Fig. 27 Information display: Controls on the windshield wiper lever
Fig. 28 Information display: Controls on the multifunc-tion steering wheel
AA
AA
AB
ACAD
AD
AC
AC
s2dk.1.book Page 27 Wednesday, April 8, 2009 12:23 PM
Page 30 of 294
Instruments and Indicator/Warning Lights
29
Using the system
Safety
Driving Tips
General Maintenance
Breakdown assistance
Technical Data
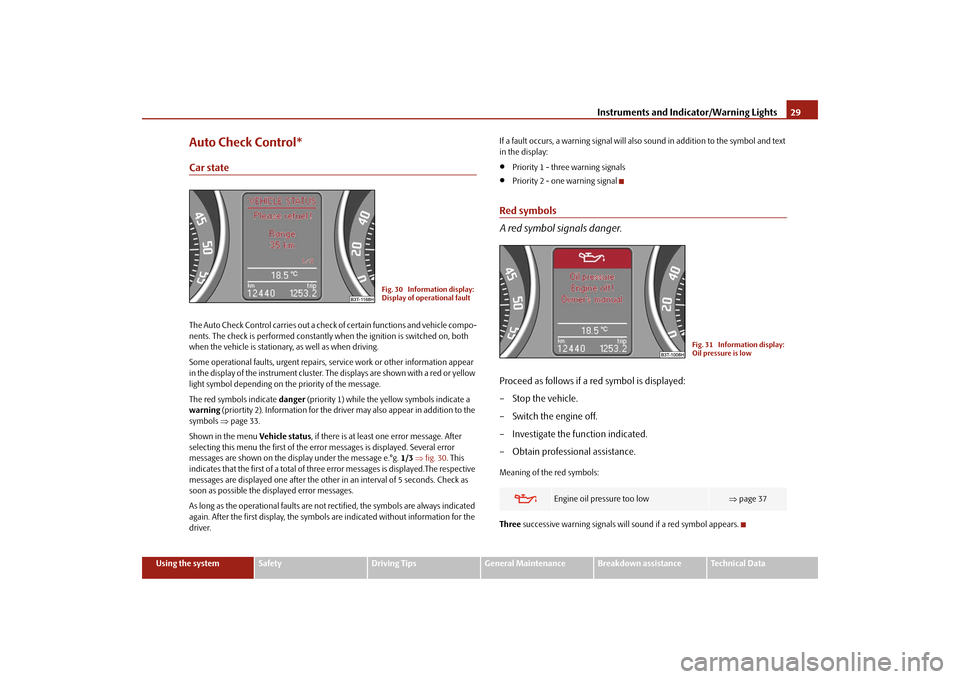
Auto Check Control*Car stateThe Auto Check Control carries out a check of certain functions and vehicle compo- nents. The check is performed constantly
when the ignition is switched on, both
when the vehicle is stationary, as well as when driving. Some operational faults, urgent repairs, service work or other information appear in the display of the instrument cluster. The displays are shown with a red or yellow light symbol depending on the priority of the message. The red symbols indicate
danger
(priority 1) while the yellow symbols indicate a
warning
(priortity 2). Information for the driver
may also appear in addition to the
symbols
⇒page 33.
Shown in the menu
Vehicle status
, if there is at least one error message. After
selecting this menu the first of the error messages is displayed. Several error messages are shown on the display under the message e.°g.
1/3
⇒fig. 30
. This
indicates that the first of a total of three error messages is displayed.The respective messages are displayed one after the other in an interval of 5 seconds. Check as soon as possible the displayed error messages. As long as the operational faults are not rectified, the symbols are always indicated again. After the first display, the symbols are indicated without information for the driver.
If a fault occurs, a warning signal will also sound in addition to the symbol and text in the display:•
Priority 1 - three warning signals
•
Priority 2 - one warning signal
Red symbols A red symbol signals danger.Proceed as follows if a red symbol is displayed: – Stop the vehicle. – Switch the engine off. – Investigate the function indicated.– Obtain professional assistance.Meaning of the red symbols: Three
successive warning signals will sound if a red symbol appears.
Fig. 30 Information display: Display of operational fault
Engine oil pressure too low
⇒ page 37
Fig. 31 Information display: Oil pressure is low
s2dk.1.book Page 29 Wednesday, April 8, 2009 12:23 PM
Page 32 of 294
Instruments and Indicator/Warning Lights
31
Using the system
Safety
Driving Tips
General Maintenance
Breakdown assistance
Technical Data
After selecting the menu point
Back
you will reach one level higher in the menu.
Displays of the MFA Here you can switch off or on certain di
splays of the multi-functional indicator.
Comfort* You can set the following functions (depen
ding on the equipment installed on the
vehicle):
Lights and Visibility Here you can set how long the light should
stay on for the function Coming/Leaving
Home and the intensity of the footwell li
ghting. Furthermore you can here switch
on or off the function daylight drivin
g lights and convenience turn signal.
After selecting the menu point
Fa c t o r y s e t t i n g
the factory setting is established
again. Time Here you can set the time, the time format (12 or 24 hour indicator) and the time change summer/winter time. Winter tyres Here you can set at which speed a warning signal should sound. This function is used for e.g winter tyres with the pe
rmissible maximum speed less than the
maximum speed of the vehicle. When exceeding the speed, the following is displayed on the information display*:
Snow tyres max. speed ... km/h (Winter tyres maximum ... km/h)
Language Here you can set in which language the
warning and information texts should be
displayed. Measures Here you can set the units for temperat
ure, consumption and distance driven.
Assistant Here you can adjust the tones of the acoustic signals of the parking aid*. Second speed Here you can switch on the display of the second speed in mph or in km/h
2).
Tra v e l m o d e Here you can activate / deactivate the mode “tourist light”. This mode makes it possible to drive in countries with opposing traffic system, driving on the left/right,
Rain closing
On vehicles with rain sensor
you can switch on or off the
function for automatic closing of the windows and the sliding/tilting roof in case of
rain and locked vehicle. If it
is not raining and the function is set, the windows including the sliding/tilting roof are closed automatically after approx. 12 hours.
Door open
Here you can switch on or off the functions for opening a single door and
automatic closing.
ATA con fi rm
Here you can set if a signal
tone should sound addition-
ally when activating or deactivating the anti-theft alarm system .
Window op.
Here you can set the convenience mode only for the driver window or for all the windows.
Mirror down
Here you can switch on or off the function for mirror lowering on the front passenger side when engaging the reverse gear.
Mirror adjust.
Here you can switch on or off the function for left and right exterior mirror adjustment simultaneously.
Fa cto r y s e tt ing
After selecting this menu the convenience setting is reset to factory setting. The following is displayed in the information display: Fa cto r y se tt ing fo r
convenience is set
2)Valid for countries where the values are indicated in British measuring units.
s2dk.1.book Page 31 Wednesday, April 8, 2009 12:23 PM
Page 34 of 294
Instruments and Indicator/Warning Lights
33
Using the system
Safety
Driving Tips
General Maintenance
Breakdown assistance
Technical Data
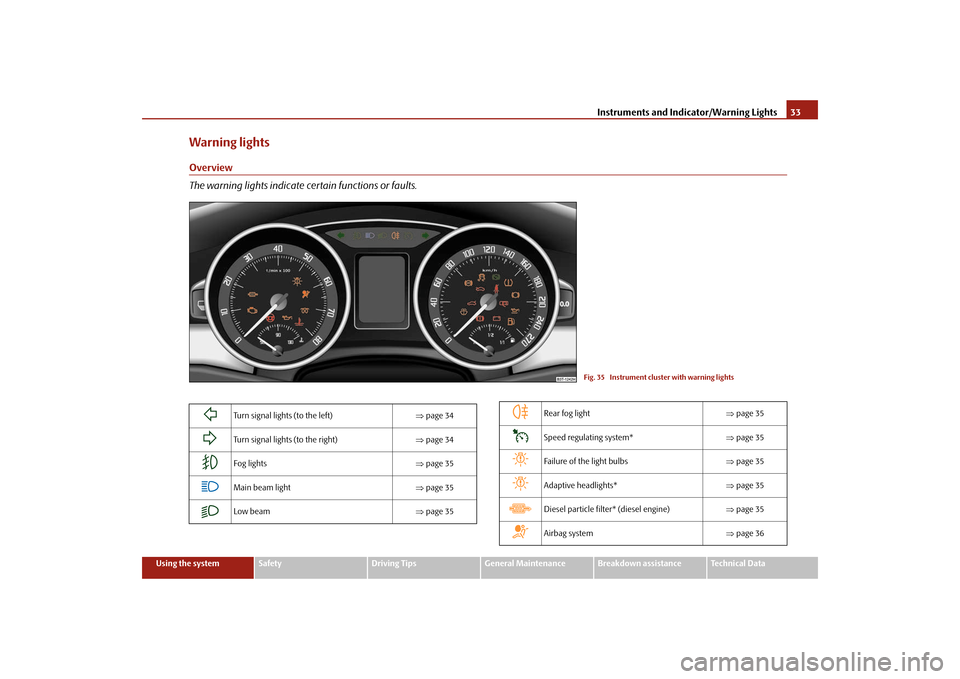
Warning lightsOverview The warning lights indicate certain functions or faults.
Fig. 35 Instrument cluster with warning lights
Turn signal lights (to the left)
⇒page 34
Turn signal lights (to the right)
⇒page 34
Fog lights
⇒page 35
Main beam light
⇒page 35
Low beam
⇒page 35
Rear fog light
⇒page 35
Speed regulating system*
⇒page 35
Failure of the light bulbs
⇒page 35
Adaptive headlights*
⇒page 35
Diesel particle filter* (diesel engine)
⇒page 35
Airbag system
⇒page 36
s2dk.1.book Page 33 Wednesday, April 8, 2009 12:23 PM
Page 36 of 294
Instruments and Indicator/Warning Lights
35
Using the system
Safety
Driving Tips
General Maintenance
Breakdown assistance
Technical Data
Switching off the hazard warning light system is switched on will cause all of the turn signal lights as well as
both indicator lights to flash.
Further information about
the turn signal system
⇒page 67.
Fog lights
The warning light
comes on when the fog lights are operating
⇒page 64.
Main beam
The indicator light
comes on when the main beam is selected or also when the
headlight flasher is operated. Further information about the main beam
⇒page 67.
Low beam
The warning light
comes on when low beam is selected
⇒page 60.
Rear fog light
The warning light
comes on when the rear fog lights are operating
⇒page 65.
Cruise control system*
The warning light
lights up, when operating the speed regulating system.
Failure of the light bulbs
The warning light
comes on if a light bulb is damaged:
•
up to 2 seconds after the ignition is switched on,
•
when switching on the defective light bulb.
The following text e.g will be displayed in the information display*:
Check front right dipped beam!
The rear side lights and the licence plate
lighting require several light bulbs. The
indicator light
only lights up if all light bulbs
of the licence plate lighting or the
parking light (in one rear light unit) are defe
ctive. Check regularly the function of the
light bulbs.Adaptive headlights*
If the warning light
flashes for 1 minute while driving or after switching on the
ignition and a warning signal sounds, a fault of the adaptive headlights is confirmed. Further information
⇒page 63.
Diesel particle filter*
(diesel engine)
If the warning light
comes on, this means that soot has accumulated in the
diesel particle filter because of the frequent short distances. In order to clean the diesel particle filter,
the vehicle should be driven at an even
speed of at least 60 km/h at engine speeds of 1 800 - 2 500 rpm for at least 15 minutes or until the warning light goes out with the 4th or 5th gear engaged (auto-matic gearbox: position S) when the traffi
c situation permits it. This increases the
exhaust temperature and the soot deposited in the diesel particle filter is burnt. Always pay attention to the valid speed limits
⇒
.
The warning light
goes out after the successful cleaning of the diesel particle
filter. If the filter is not properly cleaned, the warning light
does not go out and the
warning light
begins to flash. In the in
formation display* appears
Diesel-
particle Owner's manual
. Afterwards the engine control unit shifts the engine into
the emergency mode, which only has a re
duced power output. After switching the
ignition off and on again the warning light
comes on.
s2dk.1.book Page 35 Wednesday, April 8, 2009 12:23 PM
Page 38 of 294
Instruments and Indicator/Warning Lights
37
Using the system
Safety
Driving Tips
General Maintenance
Breakdown assistance
Technical Data
•
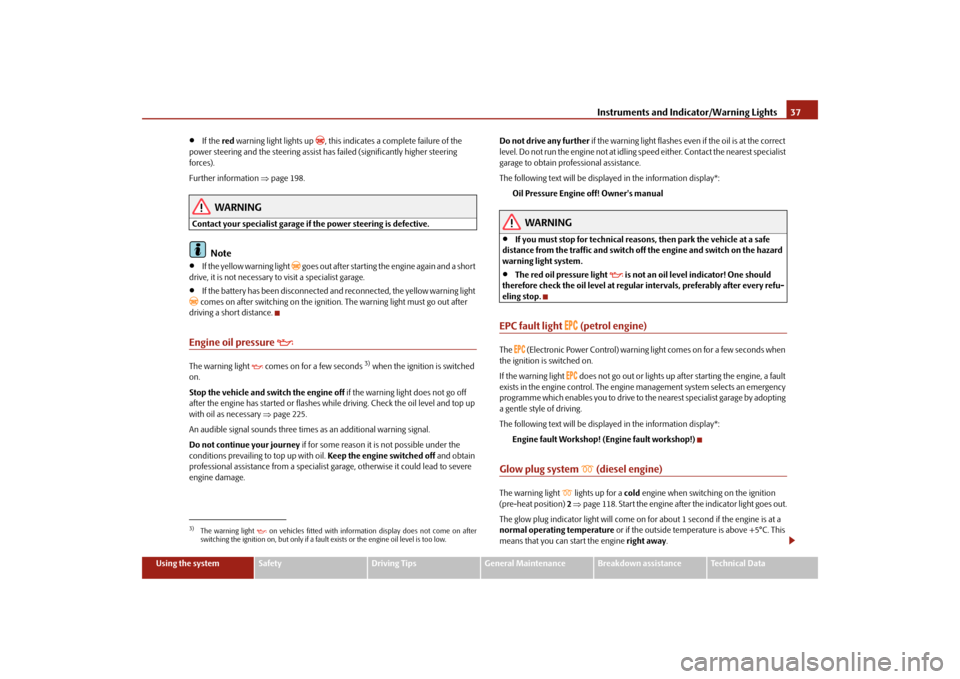
If the
red
warning light lights up
, this indicates a complete failure of the
power steering and the steering assist has failed (significantly higher steering forces). Further information
⇒page 198.
WARNING
Contact your specialist garage if
the power steering is defective.
Note
•
If the yellow warning light
goes out after starting the engine again and a short
drive, it is not necessary to visit a specialist garage.•
If the battery has been disconnected
and reconnected, the yellow warning light
comes on after switching on the ignition. The warning light must go out after driving a short distance.Engine oil pressure
The warning light
comes on for a few seconds
3) when the ignition is switched
on. Stop the vehicle and switch the engine off
if the warning light does not go off
after the engine has started or flashes while driving. Check the oil level and top up with oil as necessary
⇒page 225.
An audible signal sounds three times as an additional warning signal.Do not continue your journey
if for some reason it is not possible under the
conditions prevailing to top up with oil.
Keep the engine switched off
and obtain
professional assistance from a specialist garage, otherwise it could lead to severe engine damage.
Do not drive any further
if the warning light flashes even if the oil is at the correct
level. Do not run the engine not at idling
speed either. Contact the nearest specialist
garage to obtain professional assistance. The following text will be displayed in the information display*:
Oil Pressure Engine off! Owner's manual
WARNING
•
If you must stop for technical reasons, then park the vehicle at a safe
distance from the traffic and switch off the engine and switch on the hazard warning light system.•
The red oil pressure light
is not an oil level indicator! One should
therefore check the oil level at regular intervals, preferably after every refu- eling stop.EPC fault light
(petrol engine)
The
(Electronic Power Control) warning light comes on for a few seconds when
the ignition is switched on. If the warning light
does not go out or lights up
after starting the engine, a fault
exists in the engine control. The engine management system selects an emergency programme which enables you to drive to the nearest specialist garage by adopting a gentle style of driving. The following text will be displayed in the information display*:
Engine fault Workshop! (Engine fault workshop!)
Glow plug system
(diesel engine)
The warning light
lights up for a
cold
engine when switching on the ignition
(pre-heat position)
2 ⇒page 118. Start the engine after the indicator light goes out.
The glow plug indicator light will come on
for about 1 second if the engine is at a
normal operating temperature
or if the outside temperature is above +5°C. This
means that you can start the engine
right away
.
3)The warning light
on vehicles fitted with information display does not come on after
switching the ignition on, but only if a fault exists or the engine oil level is too low.
s2dk.1.book Page 37 Wednesday, April 8, 2009 12:23 PM
Page 40 of 294
Instruments and Indicator/Warning Lights
39
Using the system
Safety
Driving Tips
General Maintenance
Breakdown assistance
Technical Data
Note
If the battery has been disconnected
and reconnected, the warning light
comes
on after switching on the ignition. The warn
ing light must go out after driving a short
distance.Electronic stability programme (ESP)*
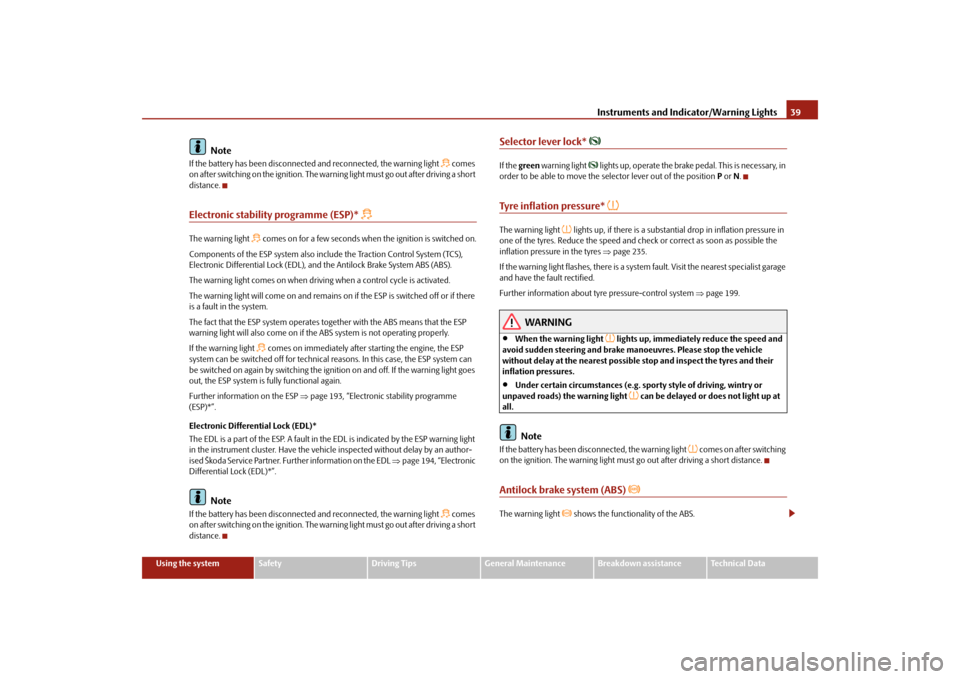
The warning light
comes on for a few seconds when the ignition is switched on.
Components of the ESP system also include the Traction Control System (TCS), Electronic Differential Lock (EDL), an
d the Antilock Brake System ABS (ABS).
The warning light comes on when drivin
g when a control cycle is activated.
The warning light will come on and remains on if the ESP is switched off or if there is a fault in the system. The fact that the ESP system operates together with the ABS means that the ESP warning light will also come on if the
ABS system is not operating properly.
If the warning light
comes on immediately after starting the engine, the ESP
system can be switched off for technical
reasons. In this case, the ESP system can
be switched on again by switching the ignition on and off. If the warning light goes out, the ESP system is fully functional again. Further information on the ESP
⇒page 193, “Electronic stability programme
(ESP)*”. Electronic Differential Lock (EDL)* The EDL is a part of the ESP. A fault in the EDL is indicated by the ESP warning light in the instrument cluster. Have the vehicle inspected without delay by an author- ised Škoda Service Partner. Further information on the EDL
⇒page 194, “Electronic
Differential Lock (EDL)*”.
Note
If the battery has been disconnected
and reconnected, the warning light
comes
on after switching on the ignition. The warn
ing light must go out after driving a short
distance.
Selector lever lock*
If the
green
warning light
lights up, operate the brake pedal. This is necessary, in
order to be able to move the selector lever out of the position
P or N.
Tyre inflation pressure*
The warning light
lights up, if there is a substantial drop in inflation pressure in
one of the tyres. Reduce the speed and check or correct as soon as possible the inflation pressure in the tyres
⇒page 235.
If the warning light flashes, there is a system fault. Visit the nearest specialist garage and have the fault rectified. Further information about tyre pressure-control system
⇒page 199.
WARNING
•
When the warning light
lights up, immediately reduce the speed and
avoid sudden steering and brake mano
euvres. Please stop the vehicle
without delay at the nearest possible stop and inspect the tyres and their inflation pressures.•
Under certain circumstances (e.g. sporty style of driving, wintry or
unpaved roads) the warning light
can be delayed or does not light up at
all.
Note
If the battery has been disconnected, the warning light
comes on after switching
on the ignition. The warning light must go out after driving a short distance.Antilock brake system (ABS)
The warning light
shows the functionality of the ABS.
s2dk.1.book Page 39 Wednesday, April 8, 2009 12:23 PM