ECO mode SKODA SUPERB 2009 2.G / (B6/3T) Owner's Manual
[x] Cancel search | Manufacturer: SKODA, Model Year: 2009, Model line: SUPERB, Model: SKODA SUPERB 2009 2.G / (B6/3T)Pages: 294, PDF Size: 21.33 MB
Page 2 of 294
IntroductionYou have opted for a Škoda - our sincere thanks for your confidence in us.
Your new Škoda offers you a vehicle featuring the most modern engineering and a wide range of equipment which
you will undoubtedly wish to use to the full during your daily motoring. That is why, we recommend that you read
this Owner's Manual attentively to enable you to become familiar with your car and all that it offers as quickly as
possible.
Please do not hesitate to contact your specialist garage or importer should you have any further questions or any
problems regarding your vehicle which may arise. He will be ready at any time to receive your questions, sugges-
tions and criticisms.
National legal provisions, which deviate from the information contained in these operating instructions, take prec-
edence over the information contained in the operating instructions.
We wish you much pleasure with your Škoda and pleasant motoring at all times.
Yo u r Škoda Auto
s2dk.1.book Page 1 Wednesday, April 8, 2009 12:23 PM
Page 3 of 294
Introduction 2
On-board literature
The on-board literature for your vehicle consists of this “Owner's
Manual” as well as a “Service schedule” and a “Help on the road”. There
can also be a variety of other additional operating manuals and instruc-
tions on-board (e.g. an operating manual for the radio) depending on the
vehicle model and equipment.
If one of the publications listed above is missing, please contact an
authorised Škoda dealer immediately, where one will be glad to assist you
in such matters.
One should note that the details given in the vehicle's papers always
take precedence over those in the Owner's Manual.
Owner's Manual
This Owner's Manual describes the current scope of equipment.
Certain items of equipment listed are only installed later on and only
envisaged for particular markets. The illustrations can differ in minor
details from your vehicle; they are only intended for general information.
In addition to information regarding all the controls and equipment, the
Owner's Manual also contains important information regarding care and
operation for your safety and also to retain the value of your vehicle. To
provide you with valuable tips and aids. You will learn how you can
operate your vehicle safely, economically and in an environmentally
conscious way.
For safety reasons, please also pay attention to the information on
accessories, modifications and replacement of parts ⇒page 241.
The other chapters of the Owner's Manual are also important, however,
for proper treatment of your car - in addition to regular care and mainte-
nance - helps to retain its value and in many cases is also one of the
conditions for possible warranty claims.The Service schedule
contains:
•
Vehicle data,
•
Service intervals,
•
Overview of the service work,
•
Service proof,
•
Confirmation of mobility warranty (only valid in certain countries)
•
important information on the warranty.
The confirmations of the carried out service work are one of the condi-
tions for possible warranty claims.
Please always present the Service schedule when you take your car to an
authorised Škoda Service Partner.
If the Service schedule is missing or worn, please contact your authorised
Škoda Service Partner, where your car is serviced regularly. You will
receive a duplicate, in which the previously carried out service work are
confirmed.
Help on the road
contains the most important telephone numbers in individual countries
as well as the addresses and telephone numbers of Škoda importers.
s2dk.1.book Page 2 Wednesday, April 8, 2009 12:23 PM
Page 18 of 294
Instruments and Indicator/Warning Lights
17
Using the system
Safety
Driving Tips
General Maintenance
Breakdown assistance
Technical Data
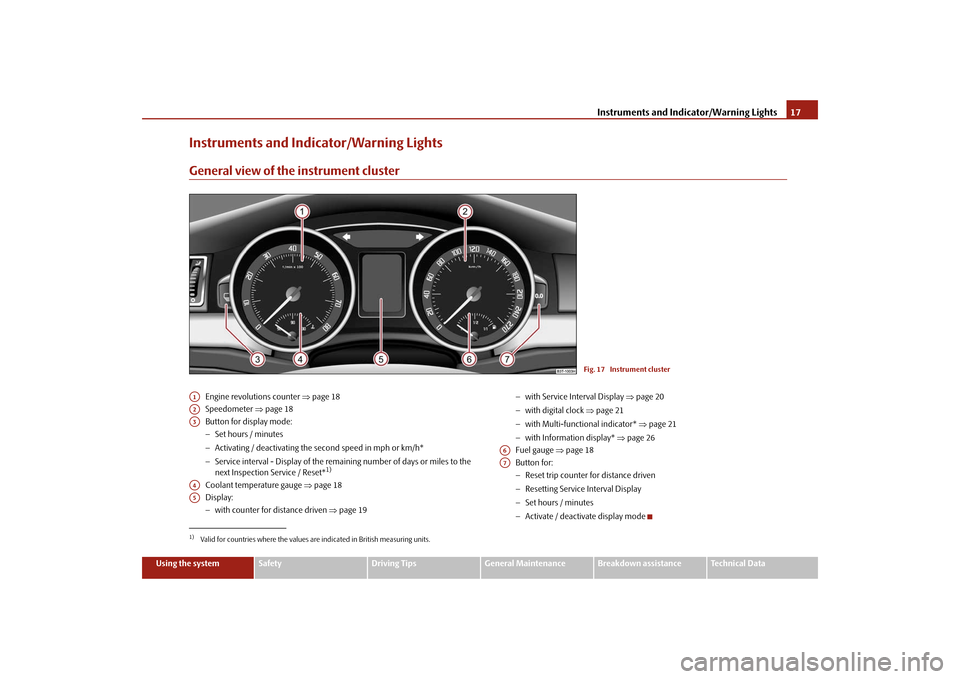
Instruments and Indicator/Warning LightsGeneral view of the instrument cluster
Engine revolutions counter
⇒page 18
Speedometer
⇒page 18
Button for display mode: − Set hours / minutes − Activating / deactivating the
second speed in mph or km/h*
− Service interval - Display of the remaining number of days or miles to the next Inspection Service / Reset*
1)
Coolant temperature gauge
⇒page 18
Display:− with counter for distance driven
⇒page 19
− with Service Interval Display
⇒page 20
− with digital clock
⇒page 21
− with Multi-functional indicator*
⇒page 21
− with Information display*
⇒page 26
Fuel gauge
⇒page 18
Button for: − Reset trip counter for distance driven − Resetting Service Interval Display − Set hours / minutes − Activate / deactivate display mode
Fig. 17 Instrument cluster
1)Valid for countries where the values are indicated in British measuring units.A1A2A3A4A5
A6A7
s2dk.1.book Page 17 Wednesday, April 8, 2009 12:23 PM
Page 32 of 294
Instruments and Indicator/Warning Lights
31
Using the system
Safety
Driving Tips
General Maintenance
Breakdown assistance
Technical Data
After selecting the menu point
Back
you will reach one level higher in the menu.
Displays of the MFA Here you can switch off or on certain di
splays of the multi-functional indicator.
Comfort* You can set the following functions (depen
ding on the equipment installed on the
vehicle):
Lights and Visibility Here you can set how long the light should
stay on for the function Coming/Leaving
Home and the intensity of the footwell li
ghting. Furthermore you can here switch
on or off the function daylight drivin
g lights and convenience turn signal.
After selecting the menu point
Fa c t o r y s e t t i n g
the factory setting is established
again. Time Here you can set the time, the time format (12 or 24 hour indicator) and the time change summer/winter time. Winter tyres Here you can set at which speed a warning signal should sound. This function is used for e.g winter tyres with the pe
rmissible maximum speed less than the
maximum speed of the vehicle. When exceeding the speed, the following is displayed on the information display*:
Snow tyres max. speed ... km/h (Winter tyres maximum ... km/h)
Language Here you can set in which language the
warning and information texts should be
displayed. Measures Here you can set the units for temperat
ure, consumption and distance driven.
Assistant Here you can adjust the tones of the acoustic signals of the parking aid*. Second speed Here you can switch on the display of the second speed in mph or in km/h
2).
Tra v e l m o d e Here you can activate / deactivate the mode “tourist light”. This mode makes it possible to drive in countries with opposing traffic system, driving on the left/right,
Rain closing
On vehicles with rain sensor
you can switch on or off the
function for automatic closing of the windows and the sliding/tilting roof in case of
rain and locked vehicle. If it
is not raining and the function is set, the windows including the sliding/tilting roof are closed automatically after approx. 12 hours.
Door open
Here you can switch on or off the functions for opening a single door and
automatic closing.
ATA con fi rm
Here you can set if a signal
tone should sound addition-
ally when activating or deactivating the anti-theft alarm system .
Window op.
Here you can set the convenience mode only for the driver window or for all the windows.
Mirror down
Here you can switch on or off the function for mirror lowering on the front passenger side when engaging the reverse gear.
Mirror adjust.
Here you can switch on or off the function for left and right exterior mirror adjustment simultaneously.
Fa cto r y s e tt ing
After selecting this menu the convenience setting is reset to factory setting. The following is displayed in the information display: Fa cto r y se tt ing fo r
convenience is set
2)Valid for countries where the values are indicated in British measuring units.
s2dk.1.book Page 31 Wednesday, April 8, 2009 12:23 PM
Page 36 of 294
Instruments and Indicator/Warning Lights
35
Using the system
Safety
Driving Tips
General Maintenance
Breakdown assistance
Technical Data
Switching off the hazard warning light system is switched on will cause all of the turn signal lights as well as
both indicator lights to flash.
Further information about
the turn signal system
⇒page 67.
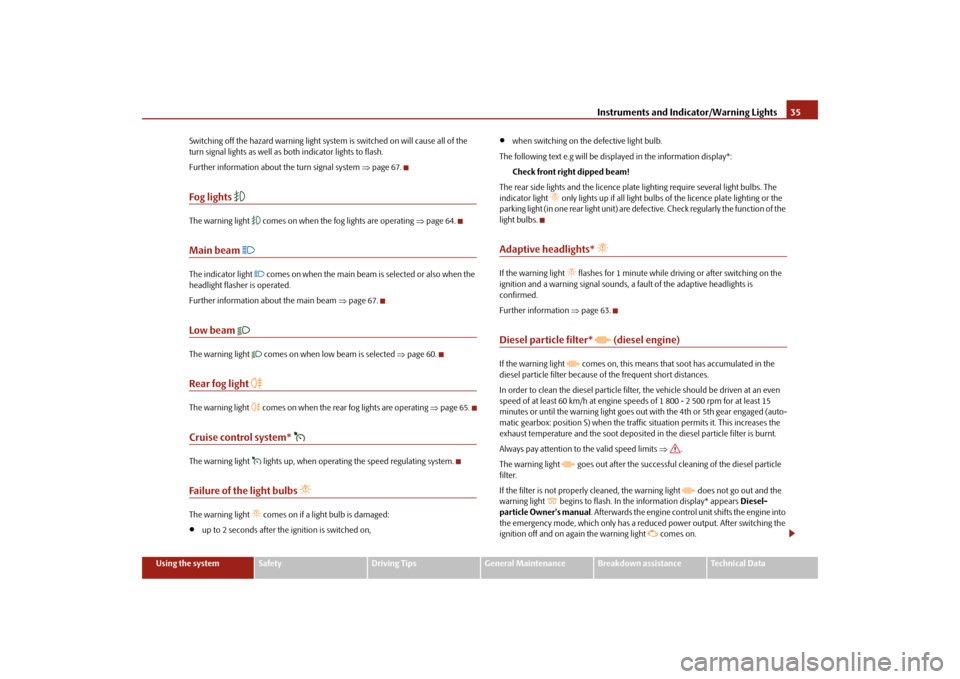
Fog lights
The warning light
comes on when the fog lights are operating
⇒page 64.
Main beam
The indicator light
comes on when the main beam is selected or also when the
headlight flasher is operated. Further information about the main beam
⇒page 67.
Low beam
The warning light
comes on when low beam is selected
⇒page 60.
Rear fog light
The warning light
comes on when the rear fog lights are operating
⇒page 65.
Cruise control system*
The warning light
lights up, when operating the speed regulating system.
Failure of the light bulbs
The warning light
comes on if a light bulb is damaged:
•
up to 2 seconds after the ignition is switched on,
•
when switching on the defective light bulb.
The following text e.g will be displayed in the information display*:
Check front right dipped beam!
The rear side lights and the licence plate
lighting require several light bulbs. The
indicator light
only lights up if all light bulbs
of the licence plate lighting or the
parking light (in one rear light unit) are defe
ctive. Check regularly the function of the
light bulbs.Adaptive headlights*
If the warning light
flashes for 1 minute while driving or after switching on the
ignition and a warning signal sounds, a fault of the adaptive headlights is confirmed. Further information
⇒page 63.
Diesel particle filter*
(diesel engine)
If the warning light
comes on, this means that soot has accumulated in the
diesel particle filter because of the frequent short distances. In order to clean the diesel particle filter,
the vehicle should be driven at an even
speed of at least 60 km/h at engine speeds of 1 800 - 2 500 rpm for at least 15 minutes or until the warning light goes out with the 4th or 5th gear engaged (auto-matic gearbox: position S) when the traffi
c situation permits it. This increases the
exhaust temperature and the soot deposited in the diesel particle filter is burnt. Always pay attention to the valid speed limits
⇒
.
The warning light
goes out after the successful cleaning of the diesel particle
filter. If the filter is not properly cleaned, the warning light
does not go out and the
warning light
begins to flash. In the in
formation display* appears
Diesel-
particle Owner's manual
. Afterwards the engine control unit shifts the engine into
the emergency mode, which only has a re
duced power output. After switching the
ignition off and on again the warning light
comes on.
s2dk.1.book Page 35 Wednesday, April 8, 2009 12:23 PM
Page 61 of 294

Lights and Visibility
60
Lights and VisibilityLightsSwitching lights on and off
Switching on side lights – Turn the light switch into position
.
Switching on the low beam and main beam – Switch on the ignition. – Turn the light switch into position
.
– Press the main beam lever forward in order to switch on the main
beam
⇒
page 67, fig. 61
.
Switching off lights (except daylight driving lights) – Turn the light switch into position°0.When the parking lights are switched on, the symbol
next to the light switch is
illuminated.
Low beam comes on only if the ignition is
switched on. After switching off the igni-
tion, the low beam is switched off automati
cally and only the side lights come on.
On models fitted with
right-hand steering
the position of certain switches differs
from that shown in
⇒fig. 55
. The symbols which mark the switch positions are
identical, however.
WARNING
Never drive with side lights on - risk of accident! The side lights are not bright enough to light up the road sufficiently in front of you or to be seen by other oncoming traffic. In this case, always switch on the low beam when it is dark or if visibility is poor.
Note
•
An audible warning will sound if you withdraw the ignition key and open the
driver's door when the vehicle lights are still on.•
The acoustic warning signal is switched off over the door contact when the
driver's door is closed (ignition off). The
vehicle can be parked with the side lights
on.•
If the car is parked for a lengthy period
, we recommend switching off all lights,
or leaving only the parking lights switched on.•
The switching on of the described lights
should only be undertaken in accord-
ance with the legal requirements.•
If a fault occurs in the light switch, the low beam comes on automatically
•
In the event of cool or humid weather co
nditions, the headligh
ts can be misted
up from inside.
− The temperature difference between interior and external area of the head- light lenses is decisive. − When the driving lights are switched on, the light outlet surfaces are free from mist after a short period. The headli
ght lenses can possib
ly mist up at the
border areas.
Fig. 55 Dash panel: Light switch
s2dk.1.book Page 60 Wednesday, April 8, 2009 12:23 PM
Page 64 of 294

Lights and Visibility
63
Using the system
Safety
Driving Tips
General Maintenance
Breakdown assistance
Technical Data
•
You can change the illumination period
for the Coming Home Function by
means of the information display*.Leaving Home FunctionThis function makes it possible to switch on the lights when approaching the vehicle. Switching on Leaving Home Function – Unlock the vehicle with the radio remote control - the lights come on.Depending on equipment fitted the function Leaving Home switches on the following lights:•
Parking lights,
•
Low beam,
•
Entry lighting in the exterior mirrors,
•
Licence plate light.
Leaving Home Function The function Leaving Home is controlled wi
th the light sensor in the mount of the
interior rear mirror. If the light intensity is higher than the set value of the light sensor, the Leaving Home Function is not
switched on after unlocking the vehicle
with the radio remote control. After unlocking the vehicle with the radio remote control, the lights come on for 30 seconds. The Leaving Home Function is also switched off after the ignition is switched on and after locking the vehicle. If no door is opened within
30 seconds, the lights go out and the vehicle is locked
automatically.
Note
•
If the Leaving Home Function is switch
ed on constantly, the battery will be
heavily discharged particular
ly in short-haul traffic.
•
The switching on of the described lights
should only be und
ertaken in accord-
ance with the legal requirements.•
You can change the illumination period
for the Leaving Home Function by
means of the information display*.Adaptive headlights (AHL)*Switch on Adaptive headlights (AHL)* – Turn the light switch
⇒
page 61, fig. 56
into position
.
The outer illumination switches on if:•
the light sensor recognizes the low light intensity,
•
no reverse gear is engaged,
•
the operation “tourist light” is not switched on.
The light sensor switches on the full ou
ter illumination at low light intensity.
System AHL* makes it possible to change
the length and width of illumination of
the headlight. The length and width of i
llumination changes automatically in rela-
tion to the vehicle speed and the use of the windscreen wiper. System AHL* operates in the following modes. Mode out of town The mode “out of town” is a basic mode. The dispersion of the cone of light in front of the vehicle is similar to the low beam. The mode is active if none of the following modes are active. Mode rain In the mode “rain” the dispersion of the cone of light in front of the vehicle is wider and the width of illumination is shorter,
so that during bad weather (rain) the
dazzling of the oncoming drivers can be reduced. The mode is activated at speeds of 15 - 70 km/h and if the windscreen wi
pers continuously operate for a period of
time longer than 2 minutes. The mode
is deactivated when dropping below or
exceeding the set speed limit or if the windscreen wipers have been switched off for a period of time longer than 8 minutes.
s2dk.1.book Page 63 Wednesday, April 8, 2009 12:23 PM
Page 97 of 294
Seats and Stowage
96
WARNING
•
Please do not place anything on top of the dash panel. Such objects
might slide or fall down when driving
(when accelerating or cornering) and
may distract you from concentrating on the traffic situation - risk of acci-dent!•
Ensure that when driving no objects from the centre console of from
other storage possibilities may get into
the footwell of the driver. You would
then no longer be able to apply the br
akes, operate the clut
ch or accelerator
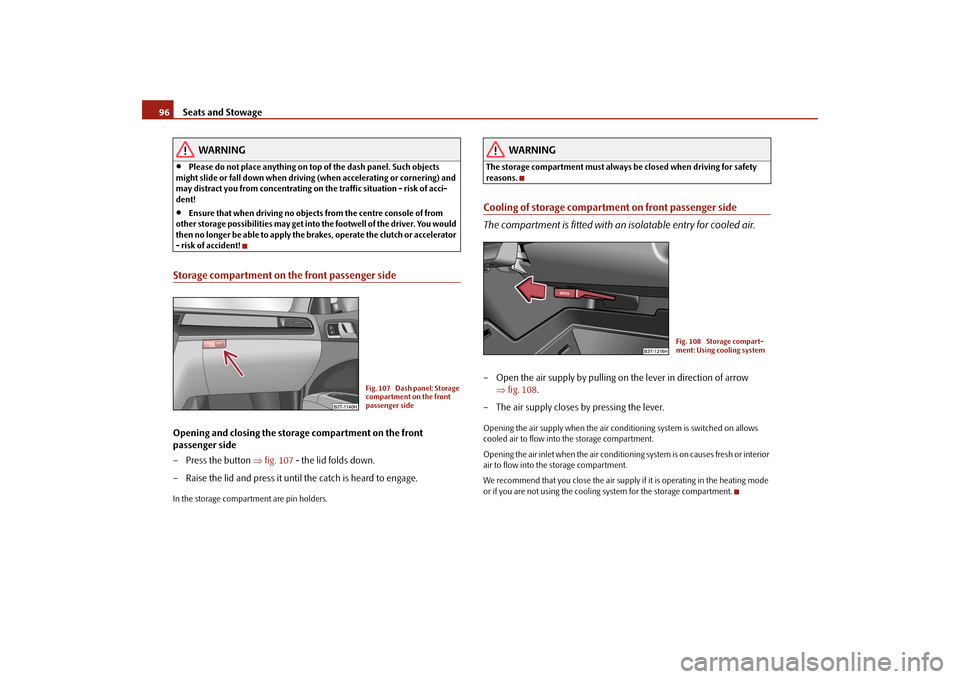
- risk of accident!Storage compartment on the front passenger sideOpening and closing the storage compartment on the front passenger side – Press the button
⇒
fig. 107
- the lid folds down.
– Raise the lid and press it until the catch is heard to engage.In the storage compartment are pin holders.
WARNING
The storage compartment mu
st always be closed when driving for safety
reasons.Cooling of storage compartment on front passenger side The compartment is fitted with an isolatable entry for cooled air.– Open the air supply by pulling on the lever in direction of arrow
⇒
fig. 108
.
– The air supply closes by pressing the lever.Opening the air supply when the air conditioning system is switched on allows cooled air to flow into the storage compartment. Opening the air inlet when the air conditioning system is on causes fresh or interior air to flow into the storage compartment. We recommend that you close the air supply
if it is operating in the heating mode
or if you are not using the cooling system for the storage compartment.
Fig. 107 Dash panel: Storage compartment on the front passenger side
Fig. 108 Storage compart-ment: Using cooling system
s2dk.1.book Page 96 Wednesday, April 8, 2009 12:23 PM
Page 105 of 294
Air conditioning system
104
Air conditioning systemIntroductionDescription and informationIf the cooling system is switched on, the temperature and air humidity drops in the vehicle. The wellbeing of the occupants of
the car is enhanced as a result of this
particularly at high outside temperatures and a high air humidity. The system prevents the windows misting up during the cold season of the year. The heating effect is dependent upon th
e coolant temperature, thus full heat
output only occurs when the engine
has reached its operating temperature.
It is possible to briefly activate recirc
ulated air mode in order to enhance the
cooling effect - Climatic
⇒page 108, Climatronic
⇒page 111.
The air inlet in front of the windscreen must be free of ice, snow or leaves in order to ensure that the heating and cooling systems operate properly. After switching on the cooling
Condensation
from the evaporator of the air condi-
tioning may drip down and form a puddle
below the vehicle. This is quite normal
and not an indication of a leak!
WARNING
•
For your own safety and that of other road users, ensure that all the
windows are free of ice, snow and mistin
g. Please familiarize yourself about
how to correctly operate th
e heating and ventilation systems, how to demist
and defrost the windows, as well as with the cooling mode.•
You should not leave recirculated air mode on over a longer period of
time, as “stale” air may result in fatigue in the driver and occupants, divert your attention and also cause the windows to mist up. The risk of having an accident increases. Switch recirculated air mode off as soon as the windows begin misting up.
Note
•
The used air streams out through the air removal openings in the luggage
compartment.•
If the cooling system has not been switched on for a lengthy period, odours may
be produced at the evaporator because of
deposits. Switch the cooling system on
at least once a month for approximately 5 mi
nutes at the highest blower stage - also
during the cold season of the year - in order to avoid such odours. Also open a window for a short time.•
We recommend that you do not smoke in the vehicle when the recirculating air
mode is operating since the smoke which is drawn at the evaporator from the inte-rior of the vehicle forms deposits in the
evaporator of the air conditioning system.
This produces a permanent odour when th
e air conditioning system is operating
which can only be eliminated through co
nsiderable effort and expense (replace-
ment of compressor).•
Please refer to the information regarding the recirculated air mode for Climatic
⇒ page 108 or for Climatronic
⇒page 111.
Using the air conditioning system economicallyThe compressor on the air co
nditioning system uses po
wer from the engine when
in cooling mode which will effect the fuel consumption. It recommended to open the windows or the doors of a vehicle for which the inte- rior has been strongly heated through the ef
fect of direct sunlight in order to allow
the heated air to escape. The cooling system should not be switched on while travelling when the window is open. The desired interior temperature can also be achieved without switching in the cooling system just by switching to fresh air mode.
s2dk.1.book Page 104 Wednesday, April 8, 2009 12:23 PM
Page 106 of 294
Air conditioning system
105
Using the system
Safety
Driving Tips
General Maintenance
Breakdown assistance
Technical Data
For the sake of the environment
When you economize on fuel, you
also reduce pollutant emissions.
Operational problemsIf the cooling system does not operate at outside temperatures higher than +5 °C, there is a problem in the system. The reasons for this may be:•
The fuse on the air conditioning system
has blown. Check the fuse, replace it if
necessary
⇒page 256.
•
The cooling system has switched off automatically for a short time because the
coolant temperature of the engine is too hot
⇒page 18.
If you are not able to rectify the operat
ional problem yourself, or if the cooling
capacity decreases, switch the cooling sy
stem off. Contact a specialist garage.
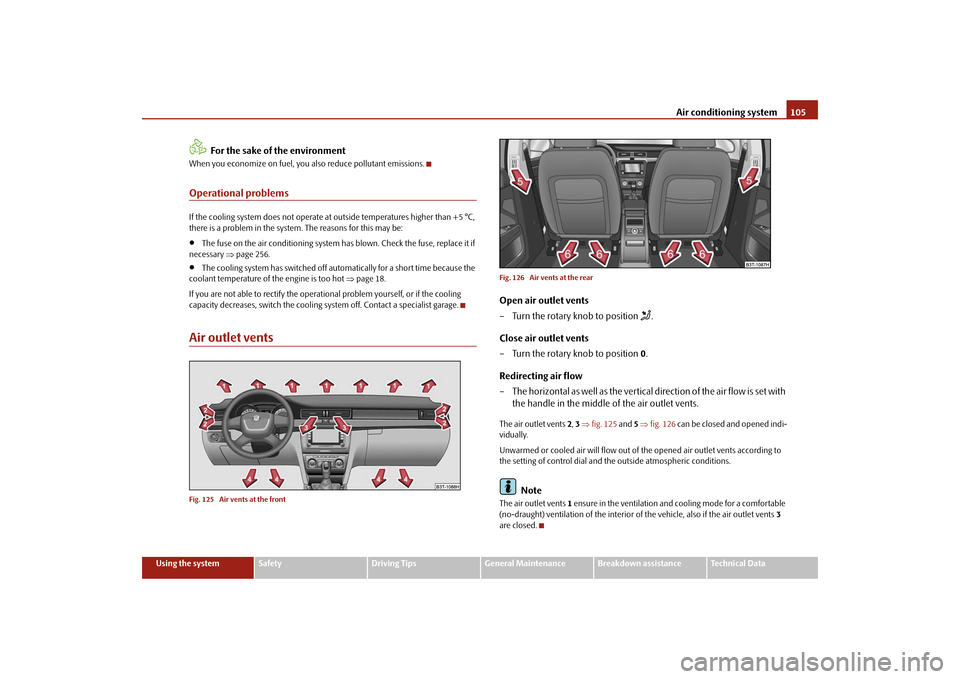
Air outlet ventsFig. 125 Air vents at the front
Fig. 126 Air vents at the rearOpen air outlet vents – Turn the rotary knob to position
.
Close air outlet vents – Turn the rotary knob to position
0.
Redirecting air flow – The horizontal as well as the vertical direction of the air flow is set with
the handle in the middle of the air outlet vents.
The air outlet vents
2, 3 ⇒fig. 125
and
5 ⇒fig. 126
can be closed and opened indi-
vidually. Unwarmed or cooled air will flow out of the opened air outlet vents according to the setting of control dial and the outside atmospheric conditions.
Note
The air outlet vents
1 ensure in the ventilation and cooling mode for a comfortable
(no-draught) ventilation of the interior of
the vehicle, also if the air outlet vents
3
are closed.
s2dk.1.book Page 105 Wednesday, April 8, 2009 12:23 PM