ECO mode SKODA SUPERB 2009 2.G / (B6/3T) Swing Car Radio Manual
[x] Cancel search | Manufacturer: SKODA, Model Year: 2009, Model line: SUPERB, Model: SKODA SUPERB 2009 2.G / (B6/3T)Pages: 15, PDF Size: 0.7 MB
Page 4 of 15

General information
2General informationEquipment overview
Control button − Switching radio on and off − Volume control (rotate) Menu control button - to call up the menu
of the parameter setting for radio or
CD player Button to activate the play function of audio sources Button to activate the radio modeButtons − fast station finding in radio mode − Select the track in the CD mode, fast forward/backward search in the CD mode Button − Display of radio text information − Display of additional information of MP3-CDs Button for adjusting the soundButton automatically stores the station Button to activate the reception of traffic reports CD caseCD - eject button Station keys − store and select the RDS station − CD selection − Enter code
Explanation of symbols * items of equipment which are marked in such a way are only installed as standard on certain models or are su
pplied as special equipment.
End of a section.
The section is continued on the next page.
Note
This Owner's Manual describes the range of fu
nctions at the time of going to press.
The illustrations can differ in minor
details from the version of your unit.
Important informationWarrantyThe equipment warranty terms and conditions also apply for new vehicles. After the expiration of the warranty, a piec
e of equipment in need of repair will be
replaced with a reconditioned, original item with spare part warranty. It is, however, a precondition that the housing has
not been damaged and no unauthorised
attempts have been made
to carry out repairs.
Note
Damage within the meaning of the warranty must not be the result of improper handling of the system or from unprofession
al repair attempts. It is also essential
that there is no external damage.Device operationThe unit should only be used, if the traffic situation permits it. The volume settings must be selected in
such a way that audible signals from the
outside, e.g. a Martins horn from utility
vehicles (police cars,
ambulances and fire
brigade), can be heard at all times.
A1A2A3
MEDIA
A4
RADIO
A5
A6
INFO
A7
A8
AS
A9
TP
A10A11A12sag.9.book Page 2 Wednesday, March 11, 2009 3:20 PM
Page 7 of 15

General information
5
REG Certain programs of the broadcasting companies are divided into regional programs at specific times. That is why in
individual regions the regional programs
of a station can broadcast different contents. First of all the unit attempts to set only alternative frequencies of the selected station. If the quality is however so low, that there is a risk of a “program loss”, the unit also accepts “related” frequencies.•
FIX
- the receiver switches to a regional “related” station, if the reception of the
current station could be interrupted;•
AUTO
- the receiver can access the re
gional “related” station unlimited.
BT-AUDIO* Enables a wireless transfer of MP3 da
ta from the telephone preinstallation.
Radio modeWaveband switch-over– Press the button for a
long period of time.
Your radio is equipped with FM and AM wavebands. They are divided in 6 memory levels, i.e. 3 levels for the FM waveband and 3 levels for the AM waveband. There are each 6 memory spaces available on these levels. Activation of the FM waveband The FM waveband is activated when pressing the station key
FM
. By briefly
pressing the button , you can select between the memory levels FM1, FM2 and FM3. Activation of the AM waveband The AM waveband is activated wh
en pressing the station key
AM
. By briefly
pressing the button , you can select between the memory levels AM1, AM2 and AM3.
The process of searching for and storing the radio stationsManual search – Search the frequency of the desire
d radio station by turning the menu
control button .
Store station – After selecting the radio station, hold the station key , on which it
should be stored until it briefly switches to mute and a brief signal sounds.
Automatic station finding with storing the radio stations – Press the button . An automatic station finding is started during
which the 6 stations with the strongest signal in the memory level FMAS and/or AMAS are stored.
When storing the radio stations on the station keys is finished, you can call up the desired radio station by pressing a station key .
Note
The stored radio stations of the curren
t waveband are updated and stored once
again in the memory level FMAS and/or AM
AS by repetitively pressing the button
.
Function SCANThe stations of a waveband
can be played briefly one after the other (for
ten seconds). – Press the menu control button , the radio searches automatically all
available stations of the current waveband.
– In order to call up the original radio station, press the station key
CANCEL
.
RADIO
A12
RADIO
A12
RADIO
A2
A12
AS
A12A12
AS
A2
A12
sag.9.book Page 5 Wednesday, March 11, 2009 3:20 PM
Page 9 of 15

CD player
7
CD playerUsing the systemInserting the CD– Press the button , in order to select the audio source:
CD
(internal CD drive),
CDC
(external CD changer),
AUX
(external input)
and
BT-AUDIO
(wireless transfer of MP3 data from the telephone
preinstallation).
– Carefully insert a CD into the CD case until it is automatically
drawn in. The play function begins automatically.
Operating the CD playerSelect track – Briefly press the rocker switch
or during the play function of
the CD or turn the menu control button , in order to select the previous and/or the next title.
– Press the button or longer for
fast replay of the track (reverse
or forward). The play function is continued after releasing the button.
Function SCAN – Briefly press the menu control button , in order to scroll through
the CD. The first 10 seconds of each title are played.
– In order to call up the original replayed title, press the station key
CANCEL
.
– End the automatic finding
by pressing the button
OK
. The already
replayed title remains selected.
– If you wish to select another title, press the button
SKIP
.
End the play function of the CD – In order to end the play function of
the CD and to activate the radio,
press the button .
Ejecting CD – Press the button , the Cd is ejected.
Note
•
If the ejected CD is not removed, it is drawn in again for safety reasons.
•
If the radio is functioning in the TP mode before changing to the CD mode, the
play function of the CD is interrupted duri
ng the traffic reports and the unit switches
over to the radio mode. After the traffic reports have ended, the unit switches back once again to the CD mode.Play function of MP3 dataDisplay of additional information – Press the button , the additional
information for the current title
is displayed on the display.
– You can select the additional information with the station buttons ,
which is displayed on the display.
Selective functions in CD modeDuring the CD play function the followin
g functions are displayed on the display:
RPT Selection of the mode for repeating the title.•
OFF
- Play function in continuous order;
MEDIA
A10
A2
A2
A12
A12A12
RADIOA11INFO
A12
sag.9.book Page 7 Wednesday, March 11, 2009 3:20 PM
Page 11 of 15

CD player
9
Formation of condensation When it is cold and after rain showers, moisture can deposit in the CD drive (condensation). This can effect the CD ju
mp or impair the play function. In such
cases wait until the moisture has dissipated. Notes for the care of the CDs If a CD is soiled, please never clean the CD
in the direction of a circle but rather from
inside to outside with a soft lint-free cloth. In case of severe layers of dir t we recom- mend to clean the CD with a commercially available CD cleaner. Also in this case do not clean the CD in the direction of a circ
le but rather from inside to outside and
then let it dry off. Overheating protection If the temperature in the unit exceeds 85°C, the play function of the CD is ended for safety reasons.
Caution
•
Never use liquids such as gasoline, paint thinner or disk cleaner, otherwise the
surface of the CD could get damaged!•
Never expose the CD to direct sun rays!
•
Please never write or affix the CD!Note
Dirt or damage of a CD can lead to diffic
ulties when “reading” the information. The
difficulty in reading the error depends on th
e dirt or on the severity of the mechan-
ical damage. Severe scratches cause reading errors which can make the CD jump or “ get stuck
”. All CDs must be treated carefully an
d always be stored in a protective
case.
External sources*Input AUX-IN – Activate the AUX-IN input by pressing the button and by
subsequently pressing the function key .
– The input for external audio sources AUX-IN is located under the
armrest of the front seats.
– External audio sources, which are connected to the AUX-IN input,
cannot
be operated via the radio.
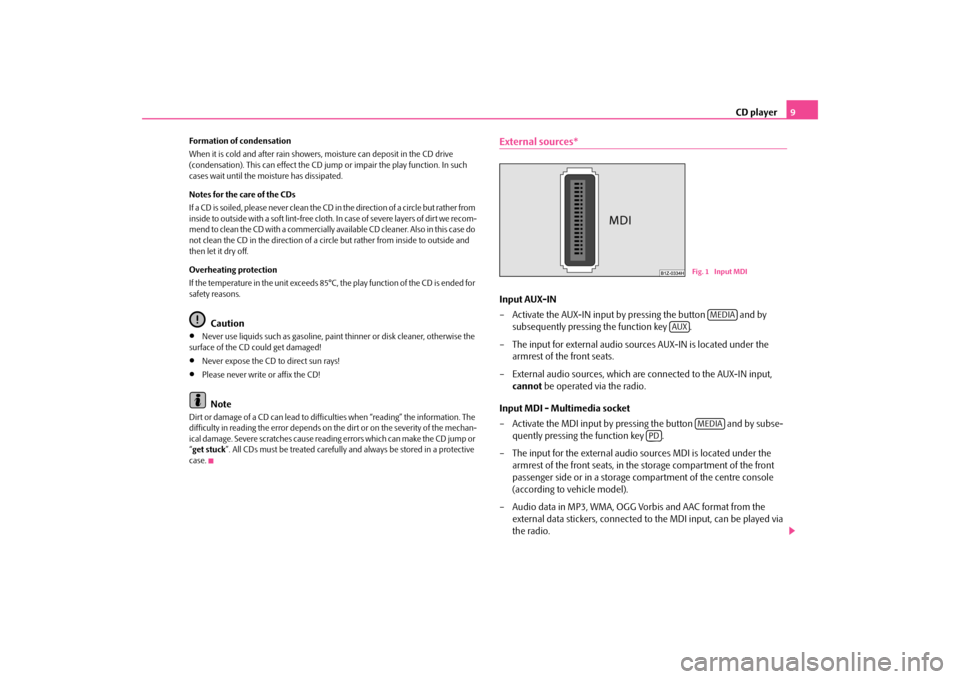
Input MDI - Multimedia socket – Activate the MDI input by pressing the button and by subse-
quently pressing the function key .
– The input for the external audio sources MDI is located under the
armrest of the front seats, in th
e storage compartm
ent of the front
passenger side or in a storage compartment of the centre console (according to vehicle model).
– Audio data in MP3, WMA, OGG Vorbis and AAC format from the
external data stickers, connected to the MDI input, can be played via the radio.
Fig. 1 Input MDI
MEDIA
AUX
MEDIA
PD
sag.9.book Page 9 Wednesday, March 11, 2009 3:20 PM