SKODA SUPERB 2009 Owner´s Manual
Manufacturer: SKODA, Model Year: 2009, Model line: SUPERB, Model: SKODA SUPERB 2009Pages: 252, PDF Size: 16.33 MB
Page 161 of 252
The parking aid is part of the park assist system, therefore the information
and safety guidelines » page 156 , Parking aid must also be read and ob-
served.WARNING■ The system only serves as an assistance and does not relieve the driver
of the responsibility for the vehicle operation.■
During the parking process, the system automatically performs rapid
steering movements. While it is doing so, do not place your hands between
the steering wheel spokes – risk of injury!
■
During a parking manoeuvre on loose or slippery surfaces (gravel, snow,
ice, etc.) you may stray from the calculated road because of the surface
conditions. Therefore we suggest that you do not use the system in such
situations.
■
External noise sources may affect the signals of the system sensors. Un-
der adverse conditions, this may cause objects or people to not be recog-
nised by the system.
CAUTION
■ If other vehicles are parked behind the kerb or on it, the system can also
guide your vehicle beyond the kerb or onto it. Ensure that the wheels or the
wheel rims of your vehicle are not damaged and if necessary intervene in time.■
Under certain circumstances, surfaces or structures of certain objects such
as wire mesh fences or powder snow cannot be recognised by the system.
■
Under adverse weather conditions (heavy rain, water vapour, very low or
high temperatures etc.), the system function may be limited - “incorrect recog-
nition of obstacle”.
CAUTION
The correct evaluation of the parking space and the parking procedure de-
pends on the circumference of the wheels on the vehicle.■
The system only works correctly if the vehicle is fitted with the wheel size
approved by the manufacturer.
■
Do without the use of the system if snow chains or a spare wheel is moun-
ted.
■
If wheels other than those approved by the manufacturer are mounted, the
resulting position of the vehicle in the parking space can differ slightly. This
can be avoided by readjusting the system at a specialist garage.
Note
We recommend performing the parking at a safe speed to about 5 km / h.Functioning
Read and observe
and on page 158 first.
Basic system operations
› The measurement and evaluation of the size of parking spaces when driving.
› The determination of the correct position of the vehicle for parking.
› The calculation of the line on which the vehicle drives backwards into the
parking space or forwards from the parking space.
› Automatic rotation of the front wheels during the parking.
The display of the instrument cluster (hereinafter only in the display) informa- tion and system messages are displayed.
When the system is activated, the warning light illuminates
» Fig. 149 on
page 158 -
.
The traction control system (ASR) must always be switched on when parking.
Finding a parking space
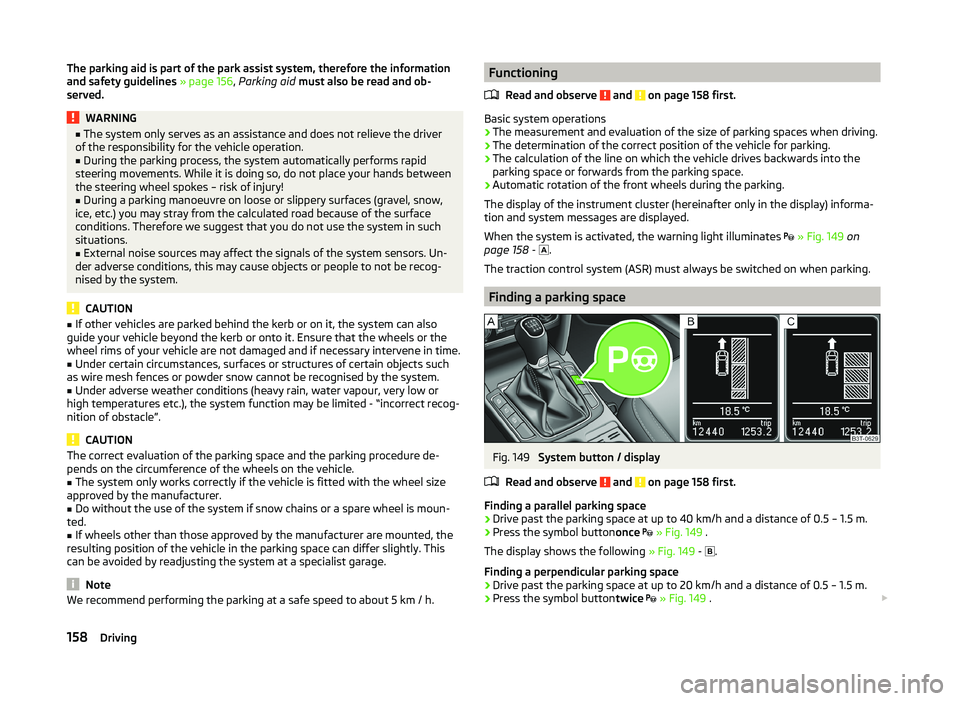
Fig. 149
System button / display
Read and observe
and on page 158 first.
Finding a parallel parking space
›
Drive past the parking space at up to 40 km/h and a distance of 0.5 – 1.5 m.
›
Press the symbol button once
» Fig. 149 .
The display shows the following » Fig. 149 -
.
Finding a perpendicular parking space
›
Drive past the parking space at up to 20 km/h and a distance of 0.5 – 1.5 m.
›
Press the symbol button twice
» Fig. 149 .
158Driving
Page 162 of 252
The display shows the following » Fig. 149 - .
The search area for the parking space on the driver's side is automatically indi- cated on the display.
Activate the turn signal on the driver's side if you wish to park on this side of
the road. In the display the search area for the parking space is indicated on
the driver's side.
If suitable parking space is found, its parameters are stored until another suit-
able parking space has been found or until a distance of 10 m had been driven
after finding the parking space.
If the driver changes the parking mode while searching for a parking space, the
symbol button must be pressed again.
Note
If the symbol
(km / h) is shown in the display , the vehicle speed should be
reduced below 40 km / hr (parallel parking) or below 20 km / hr (Transverse
parking) .
Parking
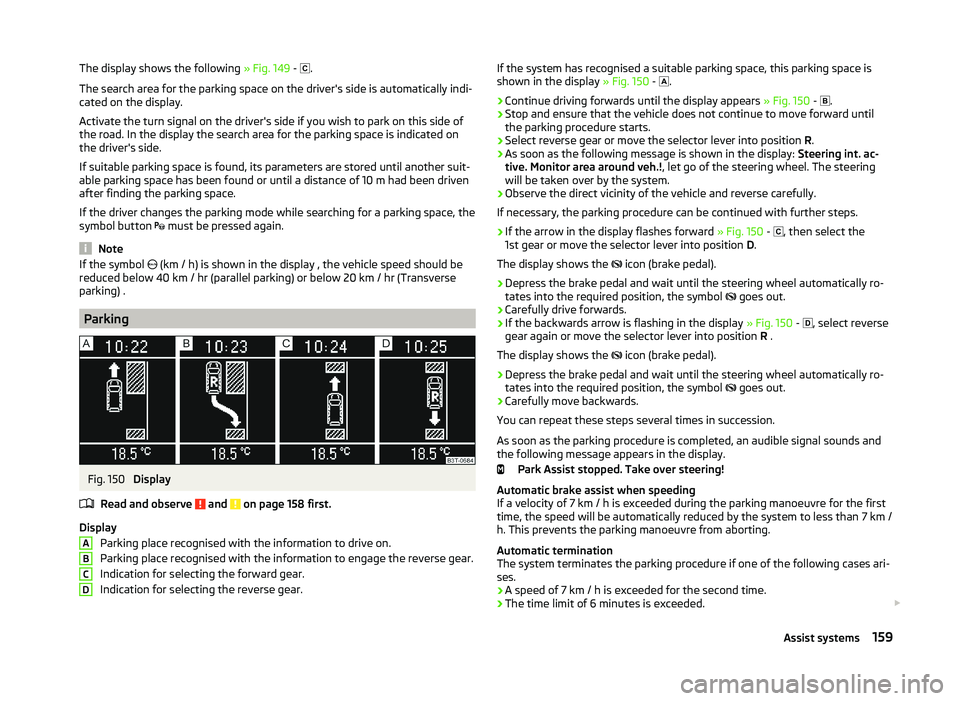
Fig. 150
Display
Read and observe
and on page 158 first.
Display Parking place recognised with the information to drive on.
Parking place recognised with the information to engage the reverse gear.
Indication for selecting the forward gear.
Indication for selecting the reverse gear.
ABCDIf the system has recognised a suitable parking space, this parking space is
shown in the display » Fig. 150 - .›
Continue driving forwards until the display appears » Fig. 150 -
.
›
Stop and ensure that the vehicle does not continue to move forward until
the parking procedure starts.
›
Select reverse gear or move the selector lever into position R.
›
As soon as the following message is shown in the display: Steering int. ac-
tive. Monitor area around veh.! , let go of the steering wheel. The steering
will be taken over by the system.
›
Observe the direct vicinity of the vehicle and reverse carefully.
If necessary, the parking procedure can be continued with further steps.
›
If the arrow in the display flashes forward » Fig. 150 -
, then select the
1st gear or move the selector lever into position D.
The display shows the icon (brake pedal).
›
Depress the brake pedal and wait until the steering wheel automatically ro-
tates into the required position, the symbol goes out.
›
Carefully drive forwards.
›
If the backwards arrow is flashing in the display
» Fig. 150 -
, select reverse
gear again or move the selector lever into position R .
The display shows the icon (brake pedal).
›
Depress the brake pedal and wait until the steering wheel automatically ro-
tates into the required position, the symbol goes out.
›
Carefully move backwards.
You can repeat these steps several times in succession.
As soon as the parking procedure is completed, an audible signal sounds and
the following message appears in the display.
Park Assist stopped. Take over steering!
Automatic brake assist when speeding
If a velocity of 7 km / h is exceeded during the parking manoeuvre for the first time, the speed will be automatically reduced by the system to less than 7 km /
h. This prevents the parking manoeuvre from aborting.
Automatic termination
The system terminates the parking procedure if one of the following cases ari-
ses.
› A speed of 7 km / h is exceeded for the second time.
› The time limit of 6 minutes is exceeded.
159Assist systems
Page 163 of 252

›The system key is pressed.
› The ASR system is turned off.
› There is a driver intervention in the automatic steering operation (wheel
stop).
› When there is a system fault (system temporarily not available).
› There is an automatic emergency braking.
If any of the above events occurs, the following message is dis-
played » page 160 .
Departing from a parallel parking space
Read and observe
and on page 158 first.
Manoeuvring out
›
Press the symbol button once
» Fig. 149 on page 158 .
›
Activate the turn signal for side of the vehicle where the parking space is out
of which you wish to manoeuvre.
›
Select reverse gear or move the selector lever into position R.
›
As soon as the following message is shown in the display: Steering int. ac-
tive. Monitor area around veh.! , let go of the steering wheel. The steering
will be taken over by the system.
›
Observe the direct vicinity of the vehicle and reverse carefully.
›
Follow the system instructions shown in the display.
As soon as the parking procedure is completed, an audible signal sounds and
the following message appears in the information display:
Take over steering and continue driving
Automatic termination
The system terminates the manoeuvring procedure if one of the following ca-
ses arises.
› The system key is pressed.
› The ASR system is turned off.
› There is a driver intervention in the automatic steering operation (wheel
stop).
› When there is a system fault (system temporarily not available).
› There is an automatic emergency braking.
If any of the above events occurs, the following message is dis-
played » page 160 .
Automatic emergency braking
Read and observe
and on page 158 first.
If the system detects a risk of collision during parking, automatic emergency
braking takes place to prevent a collision.
The parking is terminated by the emergency braking.
CAUTION
If the parking is aborted due to the speed exceeding 7 km / h for the second
speed, then the automatic emergency braking is not triggered by the system!
Information messages
Read and observe
and on page 158 first.
Park Assist: Speed too high.
If a speed of 50 km / h is exceeded while searching for a parking space, the
system with the key symbol is must be reactivated.
Speed too high. Take over steering!
The parking is terminated if the speed exceeds 7 km / hr. Driver steering intervention: Take over steering!
The parking procedure is terminated due to a driver steering intervention. Park Assist stopped. ASR deactivated.
The parking procedure cannot be carried out because the ASR system is deac-
tivated. Activate the ASR.
ASR deactivated. Take over steering!
The parking procedure was ended because ASR was deactivated during the parking procedure.
Trailer: Park Assist stopped.
The parking procedure cannot be carried out because a trailer is hitched. Time limit exceeded. Take over steering!
The parking procedure was ended because the time limit of 6 minutes was
passed.
Park Assist currently not available.
160Driving
Page 164 of 252
The system cannot be activated because a fault exists on the vehicle. Seek
help from a specialist garage.
Park Assist stopped. System not available right now.
The parking procedure was ended because a fault exists on the vehicle. Seek
help from a specialist garage.
Park Assist faulty. Workshop!
The parking procedure is not possible because a fault exists in the system.
Seek help from a specialist garage.
ASR intervention. Take over steering!
The parking procedure is terminated by an ASR intervention. PARK ASSIST Turn on turn signal and select reverse gear
The prerequisites for manoeuvring out of a parking space using the system
have been met. Switch on the turn signals and shift into reverse.
Automatic space departure not possible. Space too small.
The manoeuvring procedure using the system is not possible. The parking gap
is too small.
Park Assist: Brake interv. Speed too high.
The speed was too high during the parking and was automatically reduced.
Cruise Control System
Introduction
This chapter contains information on the following subjects:
Activating/deactivating
161
Storing and maintaining speed
162
Changing the stored speed
162
Switching off temporarily
162
The Cruise Control System (CCS) maintains a set speed, more than 25 km/h,
without you having to actuate the accelerator pedal.
This is only possible within the range which is permitted by the power output and braking power of the engine.
The warning light in the instrument cluster illuminates when the cruise con-
trol system is switched on.
WARNING■ For safety reasons, the cruise control system must not be used in dense
traffic or on unfavourable road surfaces (such as icy roads, slippery roads,
loose gravel) – there is a risk of an accident.■
The saved speed may only be resumed if it is not too high for the current
traffic conditions.
■
Always deactivate the cruise control system after use to prevent the sys-
tem being switched on unintentionally.
CAUTION
■ The cruise control system is not able to maintain a constant speed when
driving in areas with steeper gradients. The weight of the vehicle increases the
speed at which it travels. In such cases, select a lower gear or slow the vehicle
using the footbrake.■
The cruise control system cannot be activated when first gear or reverse
gear is selected (vehicles with manual transmission).
■
The cruise control system cannot be activated when the selector lever is in
positions P, N or R (vehicles with automatic transmission).
■
The Cruise Control System may automatically switch off when some brake
assist systems (e.g. ESC) intervene, when the speed exceeds maximum permis-
sible engine speed, or a similar event takes place.
Activating/deactivating
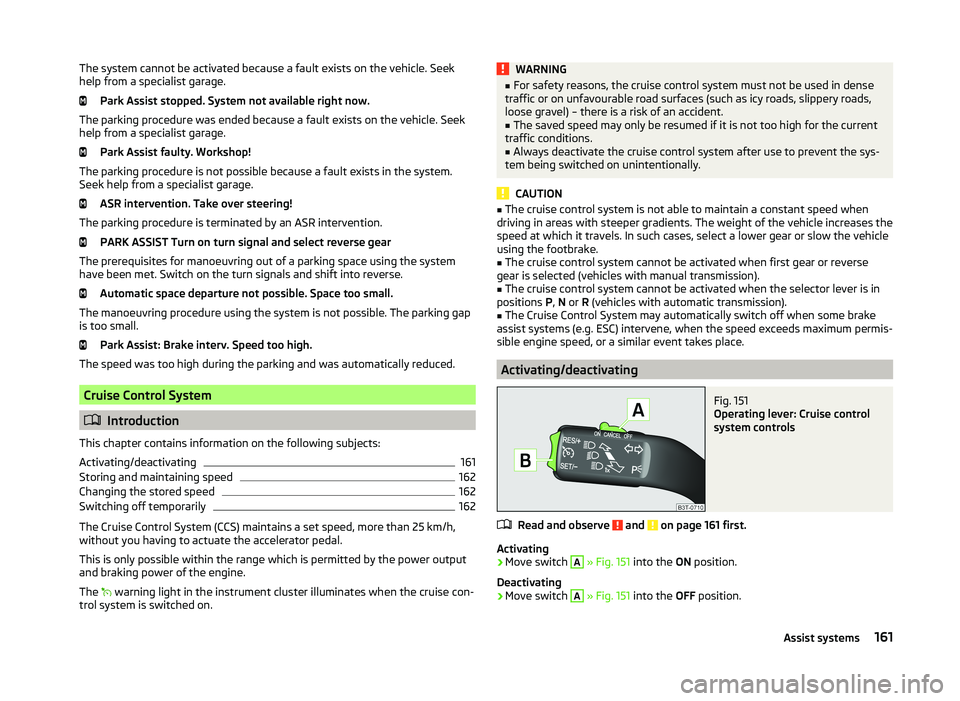
Fig. 151
Operating lever: Cruise control
system controls
Read and observe and on page 161 first.
Activating
›
Move switch
A
» Fig. 151 into the ON position.
Deactivating
›
Move switch
A
» Fig. 151 into the OFF position.
161Assist systems
Page 165 of 252
Storing and maintaining speedRead and observe
and on page 161 first.
›
Activate the cruise control system » page 161.
›
Drive at the desired speed.
›
Push the rocker button
B
into the SET/- » Fig. 151 on page 161 position.
After you have released the rocker button
B
from the SET/- position, the
speed you have just stored is kept constant without having to depress the ac-
celerator.
Changing the stored speed
Read and observe
and on page 161 first.
Increasing the speed with the rocker button
B›
Push the rocker button
B
into the RES/+ » Fig. 151 on page 161 position.
If the rocker button is held in the RES/+ position, the speed will increase con-
tinuously. Release the rocker button once the desired speed is reached. The
set speed is then stored in the memory.
Decreasing the speed using the rocker button
B
The stored speed can be reduced by pushing the rocker switch
B
into the
SET/- » Fig. 151 on page 161 position.
If the rocker button is pressed and held in the SET/- position, the speed will
decrease continuously. Release the rocker button once the desired speed is
reached. The set speed is then stored in the memory.
If the rocker button is released at a speed of less than approx. 25 km/h, the
speed is not stored and the memory is erased. Once the speed of the vehicle
has increased to more than approx. 25 km/h, the speed must then be stored
again by pushing the rocker button
B
into the SET/- position.
Increasing the speed with the accelerator
›
Depress the accelerator pedal.
Releasing the accelerator pedal will cause the speed to drop again to the set
speed.
Decreasing the speed with the brake pedal
The speed can also be reduced by depressing the brake pedal, which tempora-
rily deactivates the system » page 162.
Switching off temporarily
Read and observe
and on page 161 first.
The cruise control system can be temporarily deactivated by pushing the
switch
A
» Fig. 151 on page 161 into the spring-mounted CANCEL position or
by depressing the brake or clutch pedal.
The set speed remains stored in the memory.
Briefly push the rocker button
B
into the RES/+ position in order to resume
the stored speed after the clutch or brake pedal is released.
START STOP
Introduction
This chapter contains information on the following subjects:
Operating conditions for the system
163
Operation in vehicles with manual gearbox
163
Operation in vehicles with automatic gearbox
163
System related automatic start-up
164
Manually deactivating/activating the system
164
Information messages
164
The START STOP system (hereinafter referred to as the system) saves fuel and
reduces polluting emissions and CO 2 emissions by turning the engine off, e.g.
when stopping at traffic lights, and starting the engine again when moving off.
WARNING■ Never let the vehicle roll with the engine switched off.■The brake servo unit and power steering only operate if the engine is run-
ning.162Driving
Page 166 of 252
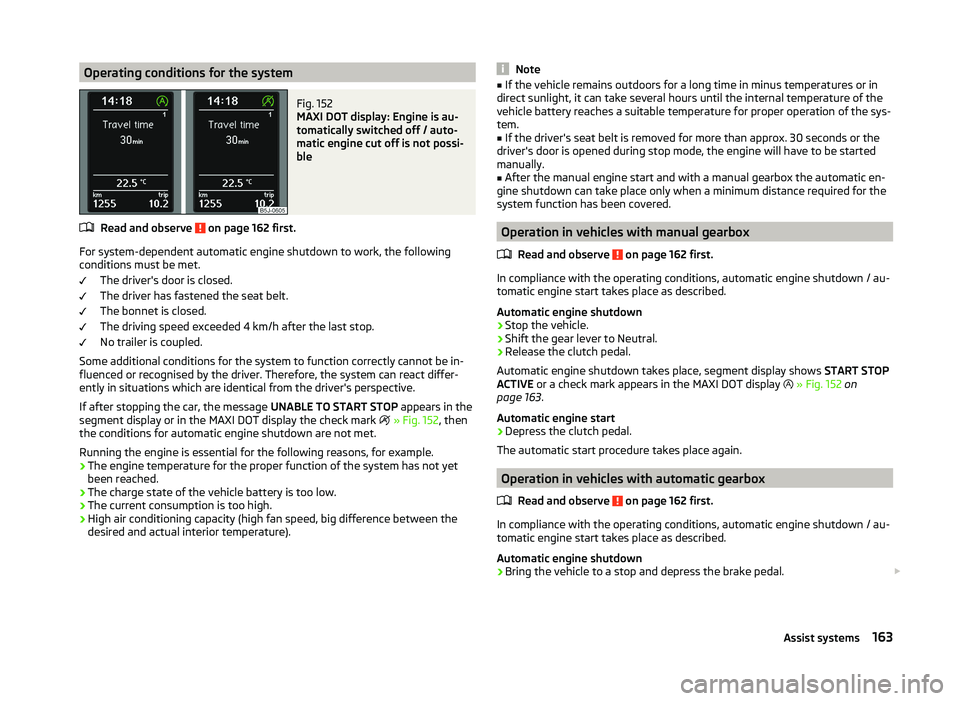
Operating conditions for the systemFig. 152
MAXI DOT display: Engine is au-
tomatically switched off / auto-
matic engine cut off is not possi-
ble
Read and observe on page 162 first.
For system-dependent automatic engine shutdown to work, the following
conditions must be met.
The driver's door is closed.
The driver has fastened the seat belt.
The bonnet is closed.
The driving speed exceeded 4 km/h after the last stop.
No trailer is coupled.
Some additional conditions for the system to function correctly cannot be in-
fluenced or recognised by the driver. Therefore, the system can react differ-
ently in situations which are identical from the driver's perspective.
If after stopping the car, the message UNABLE TO START STOP appears in the
segment display or in the MAXI DOT display the check mark
» Fig. 152 , then
the conditions for automatic engine shutdown are not met.
Running the engine is essential for the following reasons, for example.
› The engine temperature for the proper function of the system has not yet
been reached.
› The charge state of the vehicle battery is too low.
› The current consumption is too high.
› High air conditioning capacity (high fan speed, big difference between the
desired and actual interior temperature).
Note■ If the vehicle remains outdoors for a long time in minus temperatures or in
direct sunlight, it can take several hours until the internal temperature of the
vehicle battery reaches a suitable temperature for proper operation of the sys-
tem.■
If the driver's seat belt is removed for more than approx. 30 seconds or the
driver's door is opened during stop mode, the engine will have to be started
manually.
■
After the manual engine start and with a manual gearbox the automatic en-
gine shutdown can take place only when a minimum distance required for the
system function has been covered.
Operation in vehicles with manual gearbox
Read and observe
on page 162 first.
In compliance with the operating conditions, automatic engine shutdown / au-
tomatic engine start takes place as described.
Automatic engine shutdown
›
Stop the vehicle.
›
Shift the gear lever to Neutral.
›
Release the clutch pedal.
Automatic engine shutdown takes place, segment display shows START STOP
ACTIVE or a check mark appears in the MAXI DOT display
» Fig. 152 on
page 163 .
Automatic engine start
›
Depress the clutch pedal.
The automatic start procedure takes place again.
Operation in vehicles with automatic gearbox
Read and observe
on page 162 first.
In compliance with the operating conditions, automatic engine shutdown / au-
tomatic engine start takes place as described.
Automatic engine shutdown
›
Bring the vehicle to a stop and depress the brake pedal.
163Assist systems
Page 167 of 252
Automatic engine shutdown takes place, segment display shows START STOP
ACTIVE or a check mark appears in the MAXI DOT display » Fig. 152 on
page 163 .
Automatic engine start›
Release the brake pedal.
The automatic start procedure takes place again.
Further information on automatic transmission
The automatic engine shut down takes place when the selector lever is in po-
sitions P, D , S and N and in Tiptronic mode.
When the selector lever is in position P, the engine remains shut down even
after you release the brake pedal. The engine starts automatically by pressing
the gas pedal or by moving the selector lever into a different mode and releas-
ing the brake pedal.
If the engine is off due to the automatic and the selector lever is put to the R
position, then the automatic start-up of the engine.
If the gear selector is moved from position R to the position D, S or N, the vehi-
cle must reach a speed of more than 10 km / h before the automatic engine
shutdown starts.
There is no automatic engine shutdown when the system detects a vehicle
moving due to a large steering angle.
No automatic engine shutdown takes place when the vehicle is moving at low
speed (e.g. during a traffic jam or when turning) and remains stationary after
pressing the brake pedal lightly. Automatic engine shutdown takes place if you
press the brake pedal down with more force.
System related automatic start-up
Read and observe
on page 162 first.
When the engine is off, the system can automatically start the engine beforethe desired journey continues. Some possible reasons for this are:
› The vehicle has begun to roll, e.g. on a slope.
› The brake pedal has been actuated several times.
› The current consumption is too high.
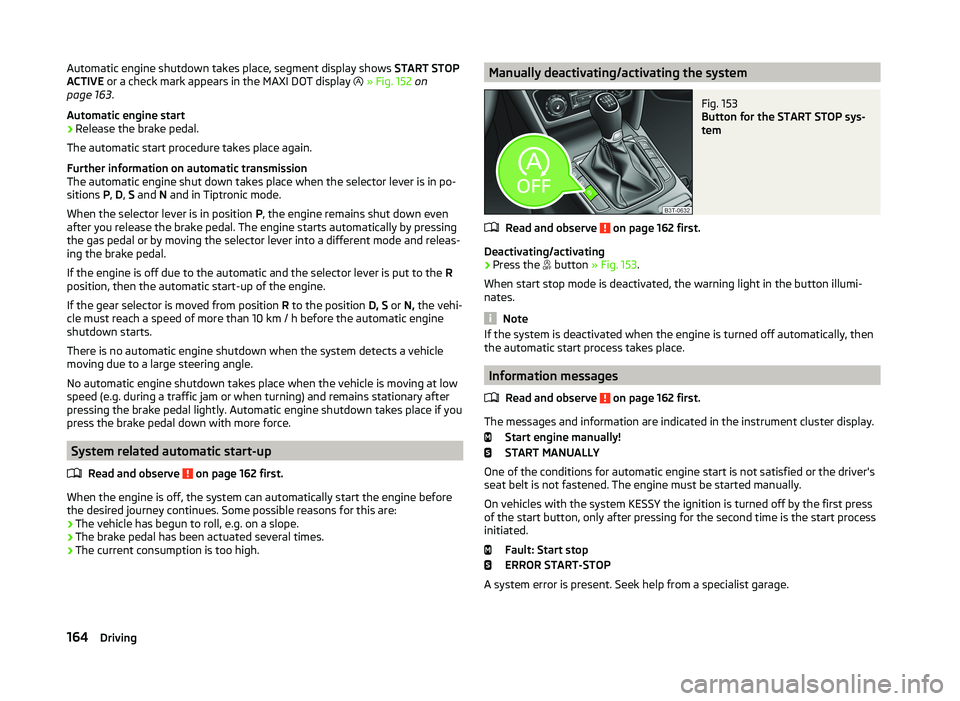
Manually deactivating/activating the systemFig. 153
Button for the START STOP sys-
tem
Read and observe on page 162 first.
Deactivating/activating
›
Press the button
» Fig. 153 .
When start stop mode is deactivated, the warning light in the button illumi-
nates.
Note
If the system is deactivated when the engine is turned off automatically, then
the automatic start process takes place.
Information messages
Read and observe
on page 162 first.
The messages and information are indicated in the instrument cluster display. Start engine manually!
START MANUALLY
One of the conditions for automatic engine start is not satisfied or the driver's
seat belt is not fastened. The engine must be started manually.
On vehicles with the system KESSY the ignition is turned off by the first press
of the start button, only after pressing for the second time is the start process
initiated.
Fault: Start stop
ERROR START-STOP
A system error is present. Seek help from a specialist garage.
164Driving
Page 168 of 252
Fatigue detection (break recommendation)
Introduction
This chapter contains information on the following subjects:
Function
165
Information messages
165WARNING■ For the driving ability is always the driver's responsibility. Never drive if
you feel tired.■
The system may not detect all cases where a break is needed.
■
Therefore, take regular, sufficient breaks during long trips.
■
There will be no system warning during the so-called micro-sleep.
Note
■ In some situations, the system may evaluate the driving incorrectly and thus
mistakenly recommend a break (e.g. sporty driving, adverse weather condi-
tions or poor road conditions).■
The fatigue detection system is designed primarily for motorway driving.
Function
Read and observe
on page 165 first.
The fatigue detection system advises the driver on the basis of information
about the steering behaviour, to take a break from driving. The system recom-
mends a break at speeds of 65-200 km/h.
After the ignition has been switched on, the system evaluates the steering be-
haviour for 15 minutes. This baseline analysis is constantly compared with the
current steering behaviour.
If the system detects deviations from normal steering behaviour due to possi-
ble fatigue of the driver, it recommends taking a break from driving.
The system deletes the stored baseline analysis if one of the following con-
ditions is met.
› The vehicle is stopped and the ignition switched off.
› The vehicle is stopped, the seat belt removed and the driver's door opened.
› The vehicle is stopped for more than 15 minutes.
If none of these conditions are met or if the driving style is not changed, the
system recommends a driving break again after 15 minutes.
Activation/deactivation
The system can be activated/deactivated via the MAXI DOT display in the As-
sistants menu option » page 47.
Information messages
Read and observe
on page 165 first.
In MAXI DOT display the icon appears for a few seconds and the following
message.
Fatigue detected. Take a break!
An audible signal is also emitted.
Tyre pressure monitoring
Introduction
This chapter contains information on the following subjects:
Save tyre pressure values
166
The tyre pressure monitoring function (hereinafter referred to only as a sys-
tem) monitors the tyre pressure while driving.
If the rolling circumference of a wheel is changed, the warning light in the
instrument cluster illuminates and an audible signal sounds.
Information on the procedure for the notification of change of tyre inflation
pressure » page 40 .
The system can only function properly if the tyres have the prescribed inflation
pressure and this pressure values are stored in the system.
WARNING■ Having the correct tyre inflation pressure is always the driver's responsi-
bility. Tyre pressure should be checked regularly » page 198.■
The system cannot warn in case of very rapid loss of tyre pressure, e.g. in
the event of a sudden puncture.
165Assist systems
Page 169 of 252
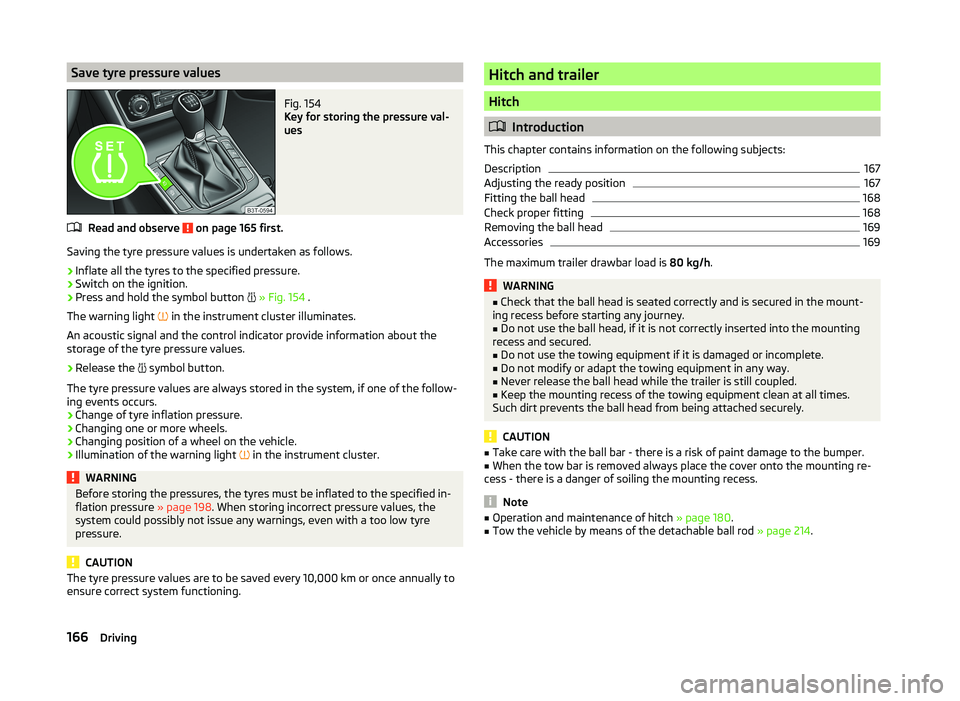
Save tyre pressure valuesFig. 154
Key for storing the pressure val-
ues
Read and observe on page 165 first.
Saving the tyre pressure values is undertaken as follows.
›
Inflate all the tyres to the specified pressure.
›
Switch on the ignition.
›
Press and hold the symbol button
» Fig. 154 .
The warning light in the instrument cluster illuminates.
An acoustic signal and the control indicator provide information about the
storage of the tyre pressure values.
›
Release the symbol button.
The tyre pressure values are always stored in the system, if one of the follow-
ing events occurs.
› Change of tyre inflation pressure.
› Changing one or more wheels.
› Changing position of a wheel on the vehicle.
› Illumination of the warning light
in the instrument cluster.
WARNINGBefore storing the pressures, the tyres must be inflated to the specified in-
flation pressure » page 198. When storing incorrect pressure values, the
system could possibly not issue any warnings, even with a too low tyre
pressure.
CAUTION
The tyre pressure values are to be saved every 10,000 km or once annually to
ensure correct system functioning.Hitch and trailer
Hitch
Introduction
This chapter contains information on the following subjects:
Description
167
Adjusting the ready position
167
Fitting the ball head
168
Check proper fitting
168
Removing the ball head
169
Accessories
169
The maximum trailer drawbar load is 80 kg/h.
WARNING■
Check that the ball head is seated correctly and is secured in the mount-
ing recess before starting any journey.■
Do not use the ball head, if it is not correctly inserted into the mounting
recess and secured.
■
Do not use the towing equipment if it is damaged or incomplete.
■
Do not modify or adapt the towing equipment in any way.
■
Never release the ball head while the trailer is still coupled.
■
Keep the mounting recess of the towing equipment clean at all times.
Such dirt prevents the ball head from being attached securely.
CAUTION
■ Take care with the ball bar - there is a risk of paint damage to the bumper.■When the tow bar is removed always place the cover onto the mounting re-
cess - there is a danger of soiling the mounting recess.
Note
■ Operation and maintenance of hitch » page 180.■Tow the vehicle by means of the detachable ball rod » page 214.166Driving
Page 170 of 252

DescriptionFig. 155
Carrier for the towing device / tow bar
Read and observe
and on page 166 first.
The ball head can be removed and is kept in the spare wheel well or in a com-
partment for the spare wheel in the luggage compartment.
Support for the towing device and tow bar » Fig. 155
13-pin power socket
Safety eyelet
Mounting recess
Cap
Dust cap
Ball head
Operating lever
Lock cap
Release pin
Key
locking ball
Note
If you lose the key, please get in touch with a specialist garage.1234567891011Adjusting the ready positionFig. 156
Setting the ready position/ready position
Read and observe
and on page 166 first.
The coupling ball bar must be set prior to installation in the standby position.
If this is not in the ready position, then this must be set to the standby posi-
tion as follows.
›
Grip the ball head below the protective cap
2
.
›
Remove the cap from the lock.
›
Insert the key into the lock, so that its green marking is pointing upwards.
›
Turn key
1
in direction of the arrow, so that the red marking is facing up-
wards » Fig. 156 .
›
Press the release pin
3
as far as the stop in the direction of the arrow and
at the same time push the lever
4
downwards as far as it will go in the di-
rection of the arrow.
The operating lever remains locked in this position.
CAUTION
In the ready position, the key cannot be removed nor turned to a different po-
sition.167Hitch and trailer