ESP SKODA SUPERB 2010 2.G / (B6/3T) User Guide
[x] Cancel search | Manufacturer: SKODA, Model Year: 2010, Model line: SUPERB, Model: SKODA SUPERB 2010 2.G / (B6/3T)Pages: 287, PDF Size: 16.59 MB
Page 55 of 287

Unlocking and locking
54
You must try to close the window once agai n within 10 seconds after the window has
gone down twice, even if the obstacle was not yet removed, the closing process is
stopped. During this time it is not poss ible to automatically close the window. The
force limiter is still switched on.
The force limiter is only switched off, if you attempt to close the window within the next
10 seconds - the window closes now with full strength!
If you wait longer than 10 seconds, the force limiter is switched on again.
WARNING
You should take particular care when closing the windows! You may otherwise
suffer severe injuries as a result of getting an arm, for example, jammed in the
window!Window convenience operationYou can open and close the electrically po wered windows as follows when unlocking
and locking the vehicle (only close the slid ing/tilting roof or the panoramic sliding
roof):
Opening a window
by holding the pressed unlock button on the remote control,
by holding the pressed top part of the butt on for the central locking system in the
driver door,
Closing a window
by holding the pressed lock button on the remote control,
by holding the pressed bottom part of the button for the central locking system in
the driver door,
by holding the key in the driver 's lock in the lock position page 43,
on the KESSY* system, by covering the sensor page 40, fig. 26 .
You can interrupt the opening or closing operation of the windows immediately by
releasing the key or the lock button.
WARNING
The system is fitted with a force limiter page 53. If there is an obstacle, the
closing process is stopped and the window goes down by several centimeters.
You should then take particular care when closing the windows! You may
otherwise suffer severe injuries as a re sult of getting an arm, for example,
jammed in the window!
Note
The convenience opening of the windows with the aid of the key in the driver's lock is
only possible within 45 seconds after deac tivating or activating the alarm system.Operational faultsElectrically operated power windows do not operate
If the battery has been disconnected and then reconnected while the window was
opened, the electrically operated power windows do not operate. The system must be
activated. Proceed as follows in order to re-establish the function:
Switch on the ignition.
you can close the window by pulling th e respective switch on the top edge
release the switch
you must pull the respective switch again in upward direction for approx. 3
seconds.
Operation in winter
Ice accumulating on the surface of the wi ndows during the winter may result in a
greater resistance when closing the windows and the window may stop and go down
several centimetres.
It is necessary to put the force limiter out of operation in order to close the window
page 53, “Force limiter of the power windows”.
WARNING
The system is fitted with a force limiter page 53. If there is an obstacle, the
closing process is stopped and the window goes down by several centimeters.
A2
s3fg.2.book Page 54 Friday, April 30, 2010 12:17 PM
Page 63 of 287
Lights and Visibility
62
Rain lights
If you move the windshield wiper lever in the position slow wipe for more than 5
seconds, the side lights and low beam are automatically switched on. The light is
switched off when the windshield wiper lever is no longer than 4 minutes in the posi-
tion for slow or intermittent wipe.
If you switch on the windscreen wipe in th e operation rain sensor* for longer than 10
seconds or in the operation permanent wipe (position 2 or 3) page 73 switching on
for longer than 15 seconds, the side lights and low beam are switched on automati-
cally. The light switches off if the windscreen wipe is in operation rain sensor* for more
than 4 minutes or is not switched on in the operation permanent wipe.
WARNING
The automatic light control only operat es as a support. The driver is not
released from his responsibility to inspect the light and if necessary to switch on
the light depending on the light conditions. The light sensor cannot detect for
example rain or snow. For these conditions we recommend to switch on the low
beam
!
Note
Do not affix any stickers in front of the light sensor, so that you do not impair its
function or put it out of operation.
The same principles as for using the automa tic light control also apply to the light
which is switched on manually page 60.
Coming Home FunctionThe function makes it possible to switch on the lights in the darkness for a short time
after leaving the vehicle.Switching on Coming Home Function– The light switch is in the position automatic driving lamp control
and the low
beam illuminates.
– Switch off the ignition.
– After opening the driver's door, the function Coming Home is switched on. – Close all the doors and the boot lid and lo
ck the vehicle. After a short time, switch
all lights off.
Depending on equipment fitted the function Coming Home switches on the following
lights:
Parking lights,
Low beam,
Entry lighting in the exterior mirrors,
Licence plate light.
Coming Home Function
The lights go out 10 seconds after cl osing all the doors and the boot lid.
If a door or the boot lid re mains open, the lights go out 60 seconds after switching off
the ignition.
On vehicles fitted with automatic driving la mp control you can also switch the light
switch in the position
. The function Coming Home is controlled with the light
sensor in the mount of the interior rear mirror. If the light intensity is higher than the
set value of the light sensor, the Coming Home Function is not switched on after
switching off the ignition.
Note
If the Coming Home Function is switched on constantly, the battery will be heavily
discharged particularly in short-haul traffic.
The switching on of the described lights should only be undertaken in accordance
with the legal requirements.
You can change the illumination period for the Coming Home Function by means
of the information display*.
Leaving Home FunctionThis function makes it possible to switch on the lights when approaching the vehicle.
s3fg.2.book Page 62 Friday, April 30, 2010 12:17 PM
Page 65 of 287
Lights and Visibility
64
Mode motorway
In the mode “motorway” the dispersion of the co ne of light is so widespread, that it illu-
minates also the left (and right)
7) lane of the motorway, so that the driver can react in
time to an obstacle or any other danger. The mode is activated stepwise as of a speed
of 90 km/h. It gains its greatest effectiveness at speeds above 120 km/h.
Tourist light
This mode makes it possible to drive in countries with opposing traffic system, driving
on the left/right, without dazzling the oncoming vehicles. When the mode “tourist
light” is active, the above mentioned modes and the side to side swivel of the headlight
is deactivated.
The mode “tourist light” is activated / deac tivated via the information display* in the
menu:
SETUP
Tr a v e l m o d e
Off
On
Cornering lights
The cornering lights are used to illuminate the curves by means of the cone of light
swiveling together with the front headlight with Xenon lights*. This function is active
when the speed of the car increases to more than 10km/h.
The swiveling function of the headlights ca n be switched off / on via the menu point
Assistants in the main menu of the information display* page 23.WARNING
If the cornering ligh ts are defective, the headlights are automatically lowered to
the emergency position, whic h prevents a possible dazzling of oncoming traffic.
Thus the illuminated length of the road is shortened. Drive carefully and have
the car inspected immediatel y by a specialist garage.
Note
The AHL system* complements the functions of the fog lights with the function
“CORNER” page 64 and the function of the dy namic headlamp beam adjustment*.
The System AHL* is solely delivered with Bi-Xenon gas discharge bulbs for low
beam and main beam lights.
Fog lights
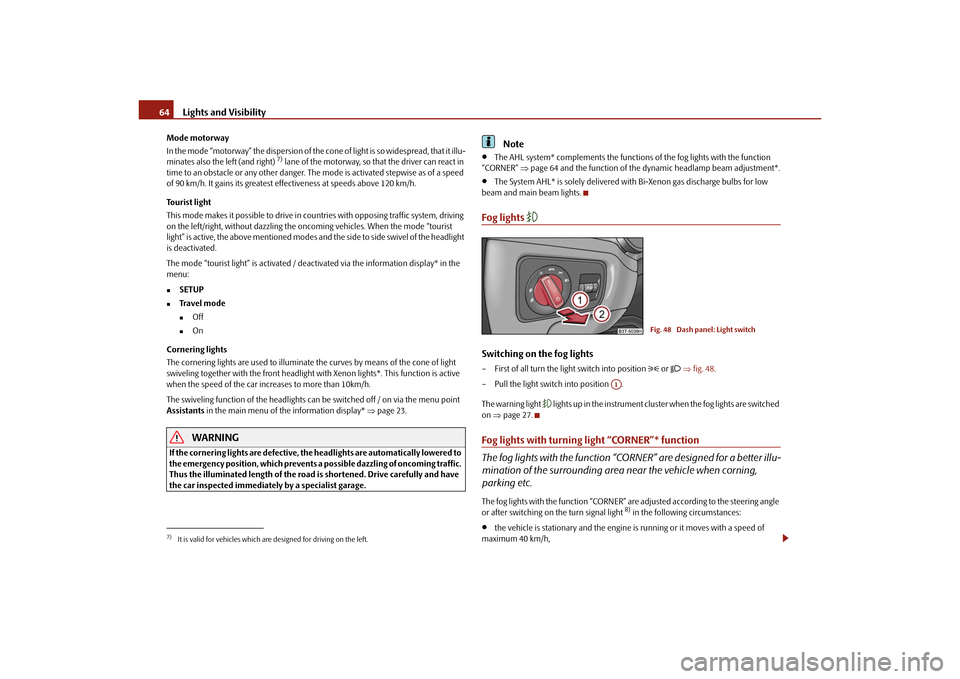
Switching on the fog lights– First of all turn the light switch into position
or fig. 48 .
– Pull the light switch into position .
The warning light
lights up in the instrument cluste r when the fog lights are switched
on page 27.
Fog lights with turning light “CORNER”* function
The fog lights with the function “CORNER” are designed for a better illu-
mination of the surrounding area near the vehicle when corning,
parking etc.The fog lights with the function “CORNER” ar e adjusted according to the steering angle
or after switching on the turn signal light
8) in the following circumstances:
the vehicle is stationary and the engine is running or it moves with a speed of
maximum 40 km/h,
7)It is valid for vehicles which are designed for driving on the left.
Fig. 48 Dash panel: Light switch
A1
s3fg.2.book Page 64 Friday, April 30, 2010 12:17 PM
Page 67 of 287
Lights and Visibility
66
– Turn the control dial page 65, fig. 50 until you have adjusted the low beam so
that oncoming traffic is not dazzled.
Settings
The positions correspond approximately to the following vehicle loads:
Front seats occupied, luggage compartment empty.
All seats occupied, luggage compartment empty.
All seats occupied, luggage compartment laden.
Driver seat occupied, lu ggage compartment laden.
Caution
Set the headlight beam adjustment in such a way as to avoid dazzling oncoming traffic.
Note
The Bi-Xenon bulbs* adapt automatically to the load and driving state of the vehicle
(e.g. speed, accelerating, braking) when the ig nition is switched on and when driving.
Vehicles which are not equipped with Bi-Xenon bulbs* do not have a manual headlight
range adjustment control.Switch for hazard warning lights
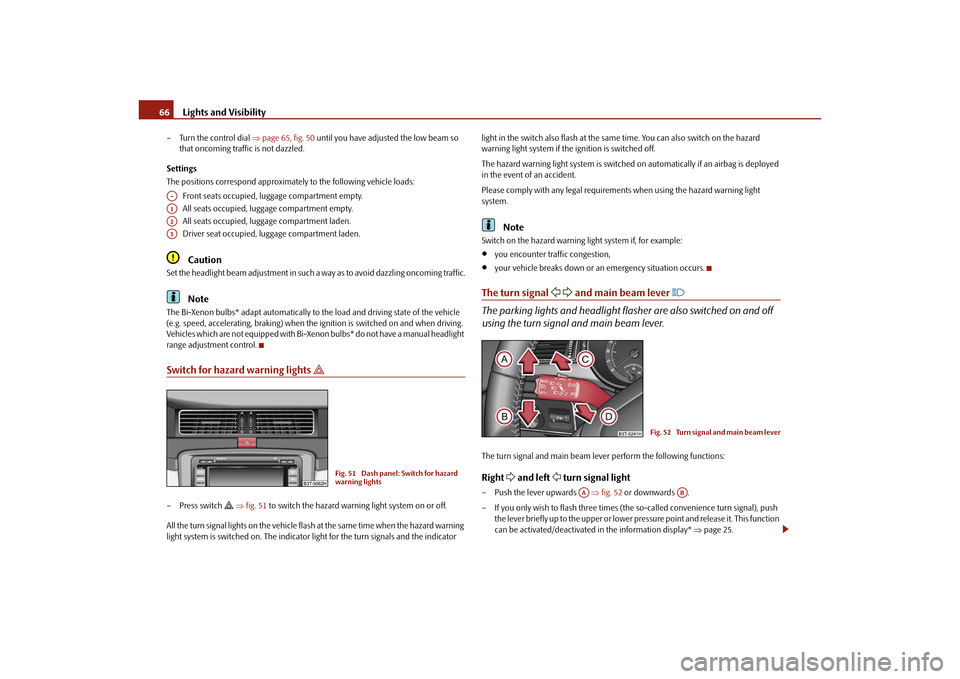
– Press switch
fig. 51 to switch the hazard warning light system on or off.
All the turn signal lights on the vehicle flas h at the same time when the hazard warning
light system is switched on. The indicator light for the turn signals and the indicator light in the switch also flash at the same time. You can also switch on the hazard
warning light system if the ignition is switched off.
The hazard warning light system is switched
on automatically if an airbag is deployed
in the event of an accident.
Please comply with any legal requirements when using the hazard warning light
system.
Note
Switch on the hazard warning light system if, for example:
you encounter traffic congestion,
your vehicle breaks down or an emergency situation occurs.
The turn signal
and main beam lever
The parking lights and headlight flasher are also switched on and off
using the turn signal and main beam lever.The turn signal and main beam le ver perform the following functions:Right
and left
turn signal light
– Push the lever upwards fig. 52 or downwards .
– If you only wish to flash three times (the so-called convenience turn signal), push
the lever briefly up to the upper or lower pr essure point and release it. This function
can be activated/deactivated in the information display* page 25.
A-A1A2A3
Fig. 51 Dash panel: Switch for hazard
warning lights
Fig. 52 Turn signal and main beam lever
AA
AB
s3fg.2.book Page 66 Friday, April 30, 2010 12:17 PM
Page 69 of 287
Lights and Visibility
68
Lighting of storage compartment on the front passenger side
– When opening the flap of the storage comp artment on the front passenger side the
lighting in the storage compartment comes on.
– The light switches on automatically when the parking light is switched on and goes
out when the flap is closed.
The interior light comes on as soon as you unlock the car or open a door or when the
ignition key has been removed. The light go es out again about 30 seconds after all the
doors have been closed. The interior lighting is switched off when you lock the car or
switch the ignition on. This only applies when the switch for the corresponding interior
lights is standing n the door contact setting.
The interior lighting goes off after about 10 minutes when a door has been left open in
order to avoid discharging the battery of the vehicle.
If the switch is in the position
(permanent lights), the interior lighting goes off at the
latest after 10 minutes in order to avoid discharging the battery of the vehicle.
Two diffuse lights* are integrated in the interior lighting, which illuminates the shift
lever and the middle of the dash panel. Th ey are switched on automatically when
switching on the parking light.
Furthermore, after switching on the ignition when the parking lights are switched on,
the door handle lighting* comes on.
Together with the front interior light, the rear interior light is simultaniously switched
on or off.
Note
We recommend having these bulbs re placed by a specialist garage.
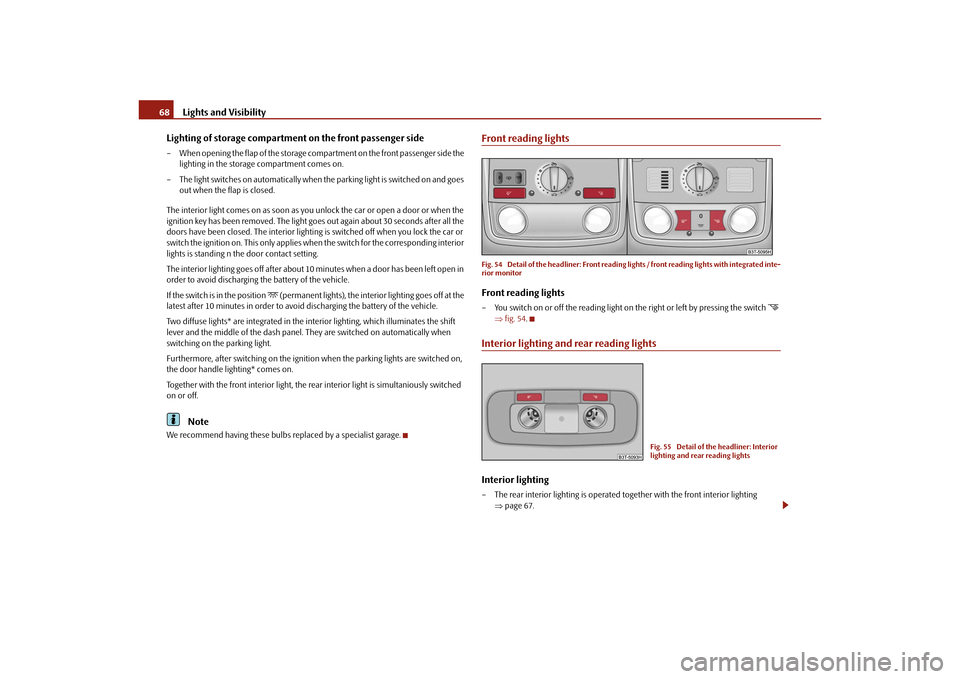
Front reading lightsFig. 54 Detail of the headliner: Front reading lights / front reading lights with integrated inte-
rior monitorFront reading lights– You switch on or off the reading light on the right or left by pressing the switch
fig. 54 .
Interior lighting and rear reading lightsInterior lighting– The rear interior lighting is operated together with the front interior lighting
page 67.
Fig. 55 Detail of the headliner: Interior
lighting and rear reading lights
s3fg.2.book Page 68 Friday, April 30, 2010 12:17 PM
Page 75 of 287
Lights and Visibility
74
Automatic wipe/wash for windscreen
– Pull the lever towards the steering wheel into sprung position , the wash system
sprays immediately, the windscreen wiper starts wiping a little later. The wash
system and the windscreen wiper operate simultaneously at a speed of more than
120 km/h.
– Release the lever. The windscreen wash system stops and the wiper continues for another 3 - 4 wiper strokes (depending on the period of spraying of the wind-
screen). At a speed of more than 2 km/h , the wiper wipes once again* 5 seconds
after the last wiper stroke in order to wipe the last drops from the windscreen. This
function can be activated/deacti vated by a specialist garage.Rain sensor*– Move the lever into position .
– You can set the sensitivity of the sensor individually with switch .Wiping the rear window pane* (Combi)– Push the lever away from the st eering wheel into position page 73, fig. 63,
the widescreen wiper will operate every 6 seconds.Automatic wipe/wash for the rear window pane* (Combi)– Press the lever from the steering wheel forward into the sprung position , the wash system sprays immediately, the windscreen wiper starts wiping a little later.
As long as you hold the lever in this position, the wiper operates as well as the wash
system.
– Letting go of the lever will cause the windscreen wash system to stop and the wiper to continue for another 2 - 3 wiper strokes (depending on the period of spraying of
the windscreen). The lever will stay in position after releasing it.Switching windscreen wipers off– Move the lever back into its home position .
After the windscreen wiper switches off each time or the ignition switches off for the
third time, the position of the windscreen wiper changes, this counteracts an early
fatigue of the wiper rubbers. The windscreen wipers and the wash system on
ly operate if the ignition is switched on
and the bonnet is closed.
The rear window wiper operates only if the boot lid is closed.
If the intermittent wipe is switched on, the intervals are also controlled depending on
speed.
The rain sensor* automatically regulates the break between the individual wiper
strokes depending on the intensity of the rain.
The rear window will be wiped again if the front window wipers are on when reverse
gear is selected.
The windscreen washer nozzles are heated* when the ignition is switched on.
Top up with wash liquid page 226.
Winter position
If the windscreen wipers are in rest position, they cannot be folded out from the wind-
screen. For this reason we recommend adjust ing the windscreen wipers in winter so
that they can be folded out from the windscre en easily. You can set this rest position as
follows.
Switch on the windscreen wipers.
Switch off the ignition. The windscreen wipers remain in the position in which they
were when switching off the ignition.
You can also use the service position as a winter position.
WARNING
Properly maintained windscreen wiper blades are essential for clear visi-
bility and safe driving page 76.
Do not use the windscreen washer sy stem at low temperatures, without
heating the windscreen beforehand. Otherwise the window cleaner could
freeze on the windscreen and re strict the view to the front.
The rain sensor only operates as a su pport. The driver is not released from
the responsibility to set the function of the windscreen wipers manually
depending on the visibility conditions.
A5
A1
AA
A6
A7
A6
A0
s3fg.2.book Page 74 Friday, April 30, 2010 12:17 PM
Page 83 of 287
Seats and Stowage
82
The seat backrests must not be angled too far back when driving otherwise
this will affect proper operation of the se at belts and of the airbag system - risk
of injury!Note
If the movement of the seat is inadvertently interrupted during an adjustment, once
again press the switch in the appropriate di rection and continue with the adjustment
of the seat to the end.Storing settingStoring seat and exterior mirror settings for driving forward– Switch on the ignition.
– Adjust the seat page 81.
– Adjust both exterior mirrors page 77.
– Press button SET fig. 70 .
– Press one of the memory buttons within 10 seconds after pressing the button SET - an acknowledgement signal confirms that the seat setting is stored.Storing exterior mirror setting for reversing*– Switch on the ignition. – Turn the exterior mirror control to position
page 77.
– Engage the reverse gear.
– Move the right exterior mirror into the desired position page 77.
– Take the vehicle out of gear. The set position of the exterior mirror is stored.
Memory buttons
Memory for the seat offers the possibility to store the individual driver seat and
external mirror position. An individual posi tion can be allocated to each of the three
memory buttons fig. 70 , that is three in total. Af ter pressing the corresponding
memory button , the seat and the exterior mirror are automatically moved into the
positions which have been allocated to this button page 83.
Emergency Off
You can interrupt the setting operation at any time, if you operate any button of the
driver seat.
Note
For safety reasons, it is not possible to store this position if the inclination angle of
the seat backrest is more than 102 ° in relation to the seat cushion.
When storing settings with the memory buttons, we recommend that you begin
with the front button and assign a memory button to each additional driver.
Each new setting stored with the same button erases the previous setting.
Each time you store the seat and exterior mirror settings for driving forward you
also have to re-store the individual setting of the exterior mirror on the passenger side
for reversing.
Assigning the remote contro l key to the memory buttonsAssigning the remote control key to the memory buttonsAfter storing the settings of the seat and exterior mirrors, you have 10 seconds in order
to assign the radio remote control to the appropriate memory button.
– Withdraw the ignition key.
WARNING (continued)
Fig. 70 Driver seat: Memory buttons
and SET button
AA
AB
ABAB
s3fg.2.book Page 82 Friday, April 30, 2010 12:17 PM
Page 88 of 287
Seats and Stowage87
Using the system
Safety
Driving Tips
General Maintenance
Breakdown assistance
Technical Data
WARNING
If, as an occupant, you have a subdued pain and/or temp erature sensitivity, e.g.
through medication, paralysis or because of chronic illness (e.g. diabetes), we
recommend not to use the seat heating. Th is can lead to burns on the back, the
posterior and the legs which are difficult to heal. If the seat heating is used, we
recommend to make regular breaks in your journey when driving long
distances, so that in specific cases as mentioned above the body can recuperate
from the stress of the journey. Please consult your doctor, who can evaluate
your specific condition.
Caution
You should not kneel on the seats or otherwise apply pressure at specific points in
order to avoid damaging the heating elements of the seat heaters.
Do not use the seat heating if the seats are not occupied by persons or if objects
are fastened or stored on them, for example a child seat, a bag etc. A fault of the heating
elements in the seat heating can occur.
Do not clean the seats moist page 209.Note
The seat heating should only be switched on when the engine is running. This has
a significant effect of saving on the battery capacity.
If the on-board voltage drops, the seat heating is switched off automatically, in
order to provide sufficient electrical energy for the engine control.
PedalsConcerning a secure depressing of the peda l, you should use only footmats from the
Škoda genuine accessories.
Operation of the pedals must not be hindered!
WARNING
Greater pedal distances may be needed when there is a fault in the brake
system.
Do not place any footmats or other additional floor coverings in the area of
the pedals in order to ensure that all the pedals can be fully depressed and are
able to return unobstructed to their initial position - risk of accident!
There must be no objects on the floor which could roll under the pedals. You
would then no longer be able to apply the brakes, operate the clutch or acceler-
ator - risk of accident!
luggage compartmentLoading the luggage compartmentPlease observe the following in the interest of having good handling characteristics of
your vehicle:
– Distribute the items of luggage as evenly as possible.
– Place heavy objects as far forward as possible.
– Attach the items of luggage to the lashing eyes or the fixing net* page 88.
In the event of an accident, there is such a high kinetic energy which is produced by
small and light objects that they can cause severe injuries. The magnitude of the kinetic
energy depends on the speed at which the vehicle is travelling and on the weight of the
object. The speed at which the vehicle is trave lling is in this case the more significant
factor.
Example: In the event of a frontal collision at a speed of 50 km/h, an unsecured object
with a weight of 4.5 kg produces an en ergy, which corresponds to 20 times its own
weight. This means that it results in a weight of approx. 90 kg. You can imagine the inju-
ries that can occur, if this “bullet” is flying through the interior compartment and hits
an occupant.
WARNING
Stow the objects in the luggage compartment and attach them to the
lashing eyes.WARNING (continued)
s3fg.2.book Page 87 Friday, April 30, 2010 12:17 PM
Page 113 of 287
Air conditioning system
112
– When you again press the switch , the cooling system is switched off. The
warning light in the button goes out.Rear window heater– Press button . Further information page 71.Auxiliary heating (auxiliary heating)– Press the button in order to directly switch on/off the auxiliary heating
(auxiliary heating and ventil ation. Further information page 117.
The set temperature will be automatically maintained other than when the
control dial is on the extreme right or extreme left position:
Extreme right position - full heating,
Extreme left position - full cooling,
The blower should aways be on to prevent the windows from misting up.Note
The whole heat output will be needed to unfrost the windscreen and side windows.
No warm air will be fed to the footwell. Th is can lead to restriction of the heating
comfort.
The used air streams out through the air removal openings in the luggage compart-
ment.
If the cooling system has not been switched on for a lengthy period, odours may
be produced at the evaporator because of deposits. Switch the cooling system on at
least once a month for approximately 5 minutes at the highest blower stage - also
during the cold season of the year - in order to avoid such odours. Also open a window
for a short time.
Please refer to the information regarding recirculated air mode page 113.
Set ClimaticRecommended settings of Climatic contro ls for the respective operating modes:
AC
A2A3
s3fg.2.book Page 112 Friday, April 30, 2010 12:17 PM
Page 116 of 287
Air conditioning system115
Using the system
Safety
Driving Tips
General Maintenance
Breakdown assistance
Technical Data
Setting the blower speed
Depending on the vehicle equipment: Butto
n for direct switching on/off of auxil-
iary heating* page 117, or switching on/off of windscreen heater*
Switching on/off of the temperature setting in dual mode
Switching cooling on and off
Setting of the temperature for the right side.
Note
Below the top row of buttons is located the interior temperature sensor. Do not glue
or cover over the sensor, otherwise it could have an unfavourable effect on the
Climatronic.Automatic mode
The automatic mode is used in order to maintain a constant tempera-
ture and to demist the windows in the interior of the car.Switching automatic mode on– Set a temperature between +18 °C and +26 °C.
– Move the air outlet vents 2 and 3 page 110, fig. 119 , so that the air flow is
directed slightly upwards.
– Press the button . In the right or left top corner a warning light lights up, depending on which unit was last selected.
If the warning light in the top right corner of the button lights up, the
Climatronic operates in “HIGH” mode. The “HIGH” mode is the standard setting of the
Climatronic.
When pressing again the button , the Climatronic changes into the “LOW” mode
and the warning light in the top left corner lights up. The Climatronic uses only in this
mode the lower blower speed. However taking into account the noise level, this is
more comfortable, yet be aware that the effectiveness of the air conditioning system is
reduced particularly if the vehicle is fully occupied.
By pressing again the button , you change into the “HIGH” mode. The automatic mode is switched off by pres
sing the button for the air distribution or
increasing or decreasing the blower speed. The temperature is nevertheless
regulated.
switching cooling on and offswitching cooling on and off– Press the button . The warning light lights up in the button.
– When you again press the switch , the cooling system is switched off. The warning light in the button goes out. Only the function of the ventilation remains
active when no lower temperature than the outside temperature can be reached.Setting temperatureYou can separate the interior temperature for the left and right side separately.
– You can set the temperature for both sides after switching on the ignition with the control dial .
– If you wish to set the temperature for the right side, turn the control dial . The warning light in the button lights up, this indicates that differing tempera-
tures for the left and right side can be set.
If the warning light in the button ligh ts up, the temperature for both sides
cannot be set with the control dial . You can reinitiate this function by pressing the
button . The warning light in the button which indicates the possibility to set
differing temperatures for the left and right side, goes out.
You can set the interior temperature between +18°C and +26°C. The interior temper-
ature is regulated automatically within this range. If you chose a temperature lower
than +18°C, a blue symbol lights up at the start of the numerical scale. If you chose a
temperature higher than +26°C, a red symbol lights up at the end of the numerical
scale. In both limit positions the Climatro nic operates at maximum cooling or heating
capacity, respectively. The temperatur e is not controlled in this case.
Lengthy and uneven distribution of the air flow out of the vents (in particular at the leg
area) and large differences in temperature, for example when getting out of the vehicle,
can result in chills in sensitive persons.
A10
A11
A12
DUAL
A13
AC
A14
AUTO
AUTO
AUTOAUTO
AC
AC
A7
A14
DUALDUALA7
DUAL
s3fg.2.book Page 115 Friday, April 30, 2010 12:17 PM