turn signal bulb SKODA SUPERB 2010 2.G / (B6/3T) User Guide
[x] Cancel search | Manufacturer: SKODA, Model Year: 2010, Model line: SUPERB, Model: SKODA SUPERB 2010 2.G / (B6/3T)Pages: 287, PDF Size: 16.59 MB
Page 256 of 287

Fuses and light bulbs255
Using the system
Safety
Driving Tips
General Maintenance
Breakdown assistance
Technical Data
Change bulbs in the outer part of the rear light unit– To change a bulb, turn its fixture to the left up to the top and take it out.
– Change the bulb, insert again the fixture with the bulb into the housing and turn it
to the right up to the stop.Change bulbs in the inner part of the rear light unit– To change a bulb of the reversing light page 254, fig. 215 , pull the defective
bulb out of the fixture and insert a new one.
– To change the bulb of the rear fog light page 254, fig. 215 , turn the defective
bulb to the left up to the stop and take it out.
– Press a new light bulb into the socket and turn the light bulb to the right as far as
the stop.
Fitting position of the bulbs in the outer rear light unit page 254, fig. 215 - left.
- Turn signal lights
- Parking lights / Brake light
- Parking lights
Fitting position of the bulbs in the inner rear light unit page 254, fig. 215 - right.
- Reversing light
- Rear fog light
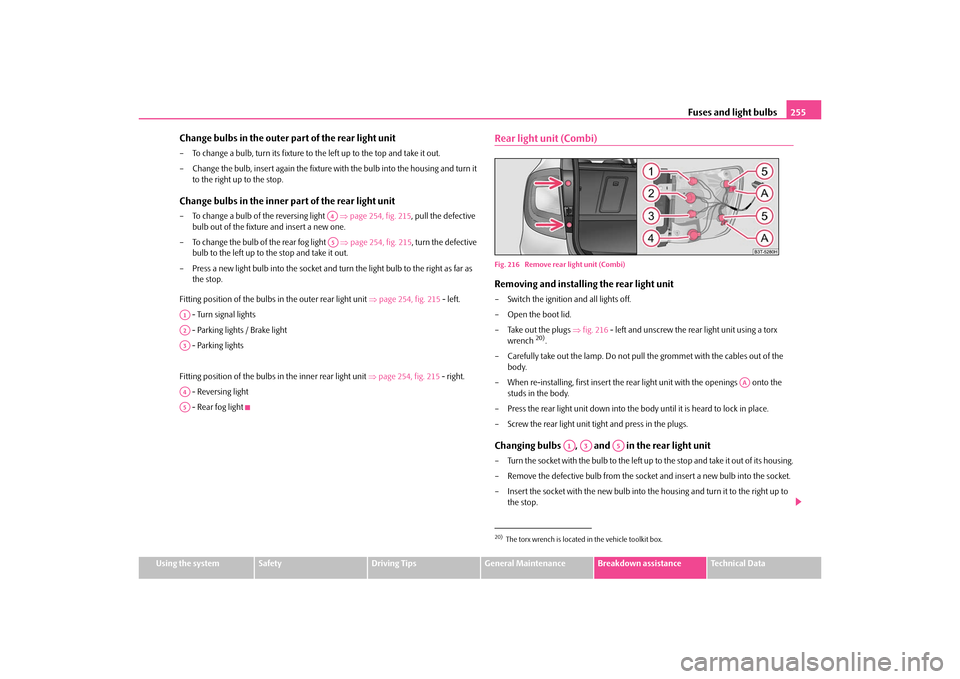
Rear light unit (Combi)Fig. 216 Remove rear light unit (Combi)Removing and installing the rear light unit– Switch the ignition and all lights off.
– Open the boot lid.
– Take out the plugs fig. 216 - left and unscrew the rear light unit using a torx
wrench
20).
– Carefully take out the lamp. Do not pull the grommet with the cables out of the
body.
– When re-installing, first insert the rear light unit with the openings onto the studs in the body.
– Press the rear light unit down into the body until it is heard to lock in place.
– Screw the rear light unit tight and press in the plugs.
Changing bulbs , and in the rear light unit– Turn the socket with the bulb to the left up to the stop and take it out of its housing.
– Remove the defective bulb from the socket and insert a new bulb into the socket.
– Insert the socket with the new bulb into the housing and turn it to the right up to the stop.
A4A5
A1A2A3A4A5
20)The torx wrench is located in the vehicle toolkit box.
AA
A1
A3
A5
s3fg.2.book Page 255 Friday, April 30, 2010 12:17 PM
Page 257 of 287

Fuses and light bulbs
256
Changing bulbs and in the rear light unit
– Turn the socket with the bulb to the left up to the stop and take it out of its housing.
– Press in the defective bulb, turn it to the left up to the stop and take it out.
– Insert a new bulb into the socket, press it in and turn the bulb to the right up to the
stop.
– Insert the socket with the new bulb into the housing and turn it to the right up to the stop.
Fitting position of the bulbs page 255, fig. 216.
- Parking lights / Reversing light
- Reversing light
- Turn signal lights
- Parking lights / Brake light
- Parking lights
Caution
When removing and installing the rear ligh t unit make sure not to damage the paint-
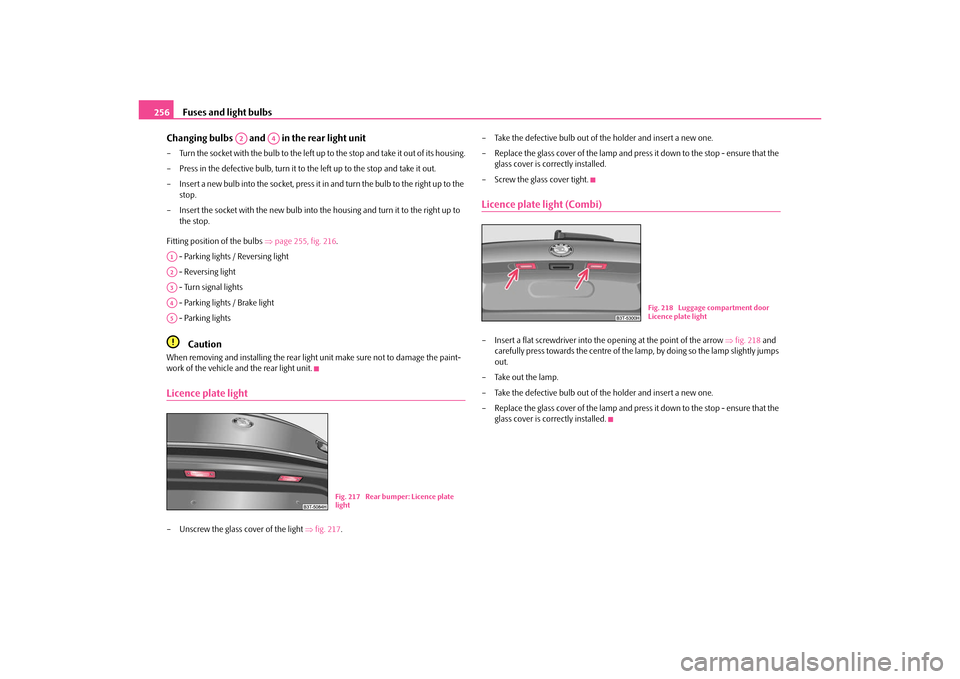
work of the vehicle and the rear light unit.Licence plate light– Unscrew the glass cover of the light fig. 217 . – Take the defective bulb out of the holder and insert a new one.
– Replace the glass cover of the lamp and press it down to the stop - ensure that the
glass cover is correctly installed.
– Screw the glass cover tight.
Licence plate light (Combi)– Insert a flat screwdriver into the opening at the point of the arrow fig. 218 and
carefully press towards the centre of the lamp, by doing so the lamp slightly jumps
out.
– Take out the lamp.
– Take the defective bulb out of the holder and insert a new one.
– Replace the glass cover of the lamp and press it down to the stop - ensure that the glass cover is correctly installed.
A2
A4
A1A2A3A4A5
Fig. 217 Rear bumper: Licence plate
light
Fig. 218 Luggage compartment door
Licence plate light
s3fg.2.book Page 256 Friday, April 30, 2010 12:17 PM